robnbill
-
Posts
841 -
Joined
-
Last visited
Content Type
Profiles
Forums
Gallery
Events
Everything posted by robnbill
-
 Here are the Navy plans for the masts. If you go to the Navy site, you not only find these but also lots of photos. Here is the link to the site. http://www.history.navy.mil/USSCTour/FileReference.html Fore Main and Mizzen Lower MAsts.pdf Forem Main, & Mizzen Topgallant Masts.pdf Foren Main, & Mizzen Topmasts.pdf
- 1,756 replies
-
- 2
-

-
- constitution
- constructo
- (and 1 more)
-
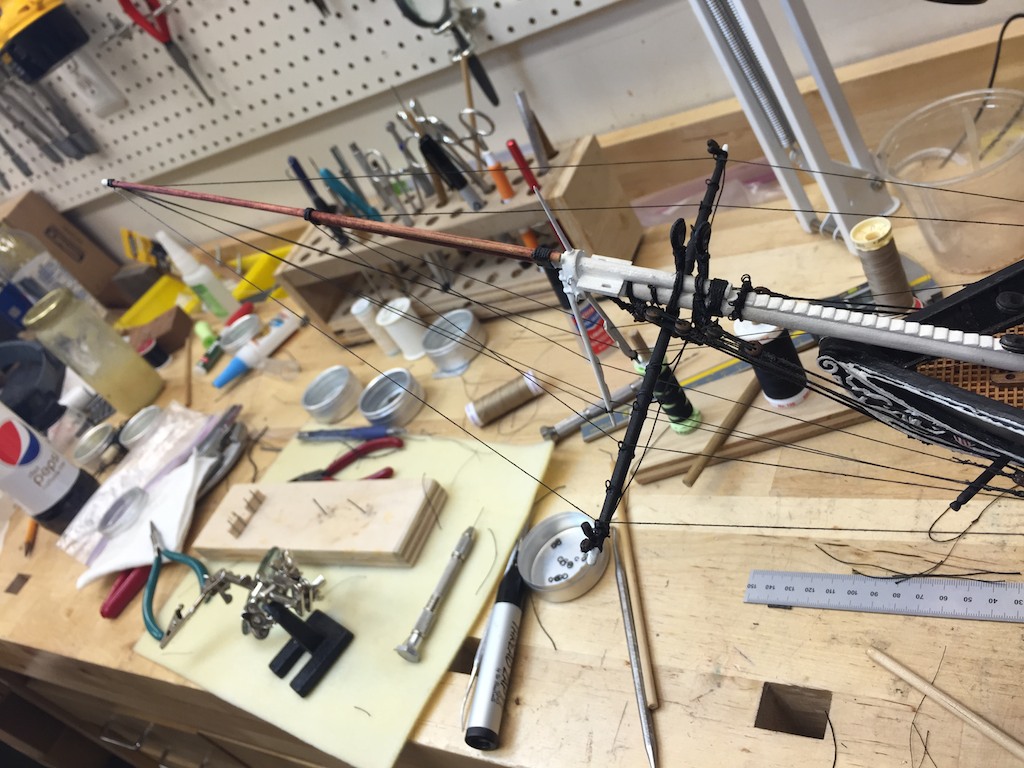
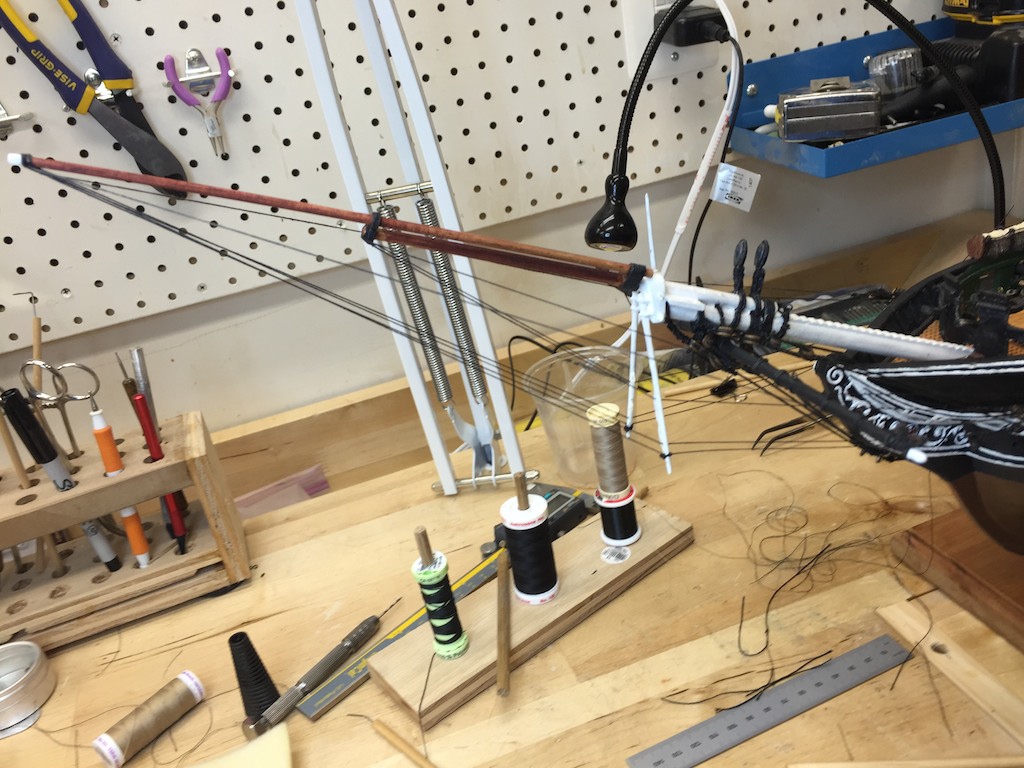
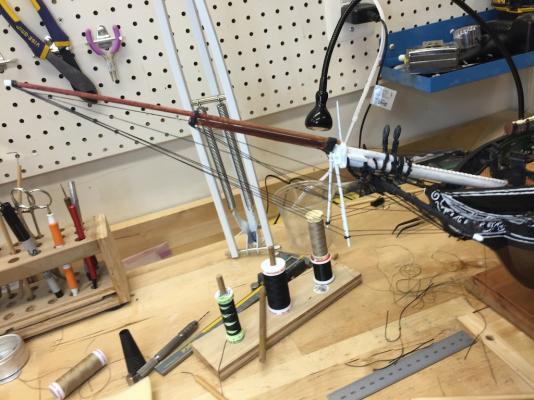
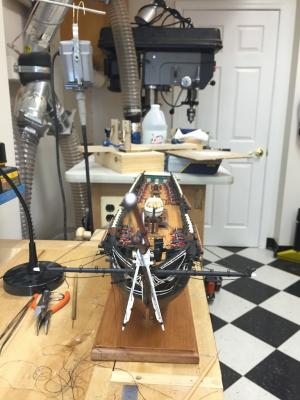
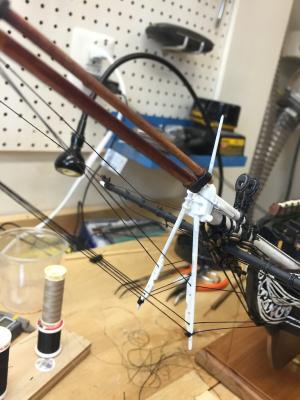
I was able to get more of the Bowsprit standing lines installed today. None of the lines are cinched and glued yet. I will wait until it has a chance to stretch out and have more of the rigging completed. Once I have installed as much standing rigging as I can without having the masts installed, I will move on to the Mizzen Mast and install it on the ship. Currently all the masts have their shrouds served and attached to the masts. Photos of the current build are below.

- 335 replies
-
- 9
-
-
- Constitution
- Mamoli
- (and 3 more)
-
I am convinced that once I finish the Connie, IF I could find all the parts that have fallen to the floor and disappeared, I could build her all over again.
- 1,756 replies
-
- 5
-
-
- constitution
- constructo
- (and 1 more)
-
Do you have a full size plan you can pull the dimensions off? That is what I did on a number of mine.
- 1,756 replies
-
- 2
-
-
- constitution
- constructo
- (and 1 more)
-
Thanks Mike i am glad as well for so many reasons. Not the least i can get back on her now.
- 335 replies
-
- 2
-
-
- Constitution
- Mamoli
- (and 3 more)
-
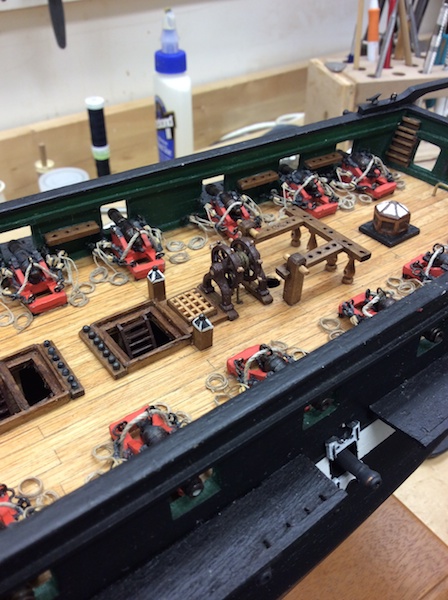
Most of mine came with the kit. However, there was not enough to fill all the racks. So after looking everywhere, I ended up buying chromium steel ball bearings off Amazon. I found if I heated them to glowing red, then they would take the blackening solution. I was looking for metal cannonballs since that is what I had already installed. I also needed some pretty small diameters since the Mamoli kit is 1:93. The cannonballs from Model Expo are plastic so they were out, even if the had the right sizes, which they did not.
- 1,756 replies
-
- 3
-
-
- constitution
- constructo
- (and 1 more)
-
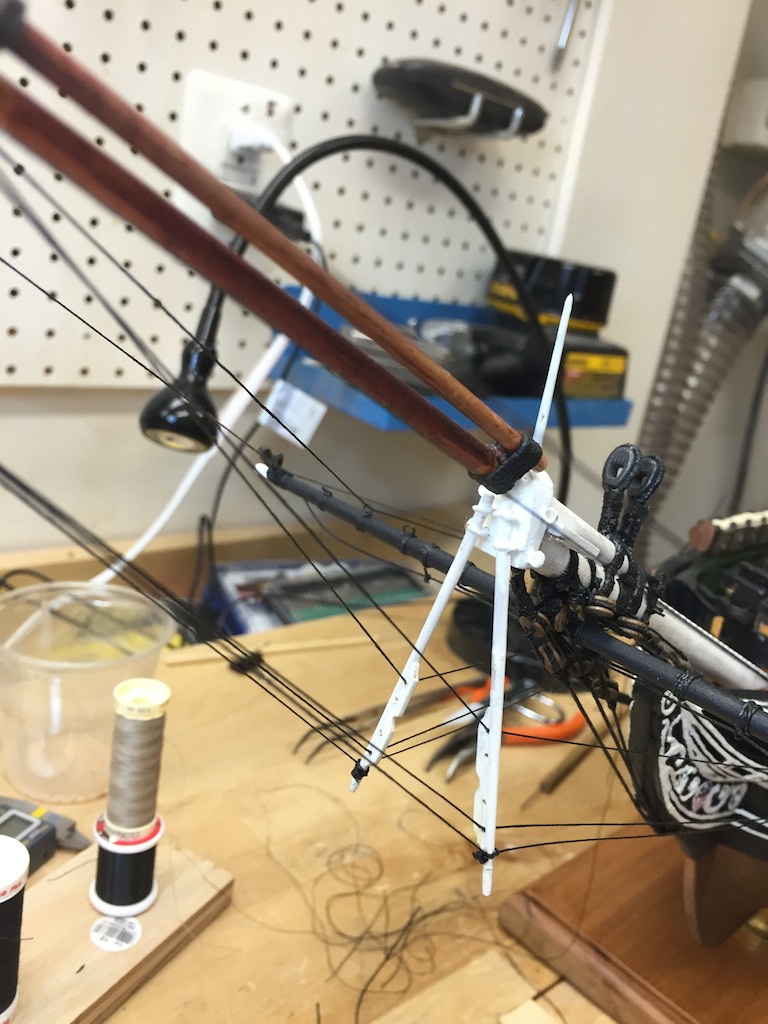
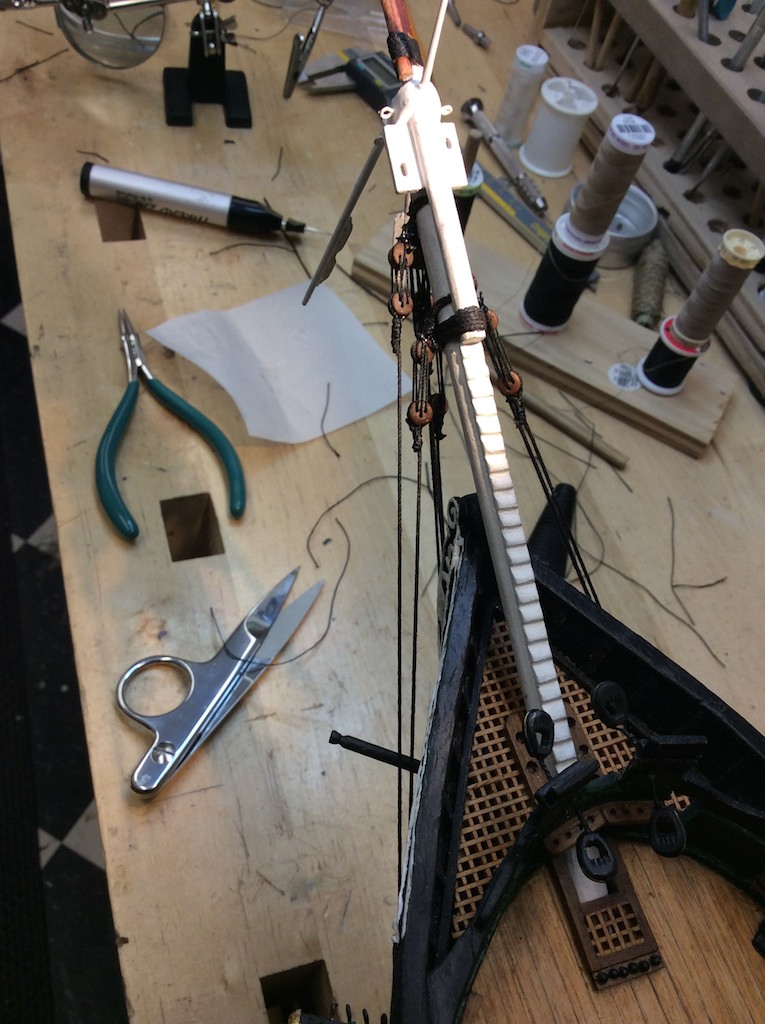
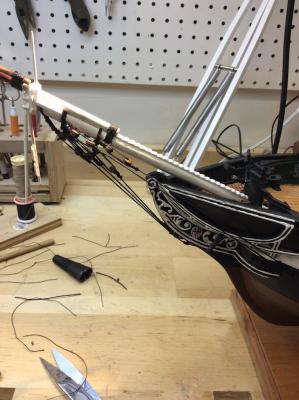
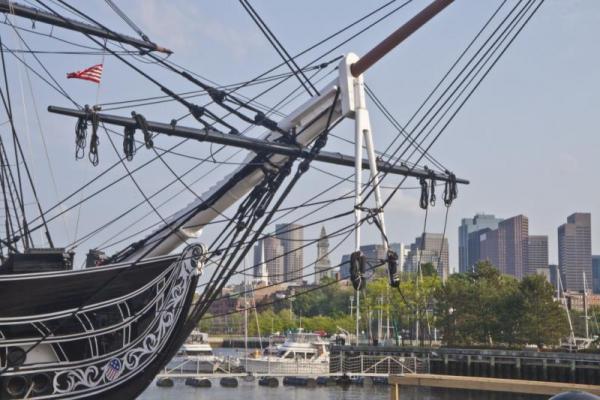
Well progress has been made on the Connie. She has a nose now - and a long one it is! I decided to follow the rigging as described in Vol 4 of TFFM. So I will start with the bow spirit, then move to the mizzen then work forward until the standing rigging is completed. I set the bowsprit into it's footing, then started on the lower standing rigging. Tomorrow, I will continue the bowsprit. I have photos below of the progress I made today.

- 335 replies
-
- 7
-
-
- Constitution
- Mamoli
- (and 3 more)
-
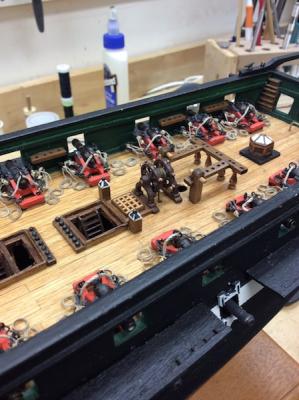
The Mamoli plans have the canon balls stored around the coamings. Nothing between the cannons. Probably due to all of the belaying racks. The rack is made by a strip with holes in it so the cannonballs can fit down into it slightly. You can see in the photo how some of mine are.
- 1,756 replies
-
- 3
-
-
- constitution
- constructo
- (and 1 more)
-
I know it has been a long time since I updated this build log. Well I am back to rigging. My surgery was a success and my arm is feeling much better now. I have spent a couple of weeks looking at and building various prototypes for replacing my current metal wheel with a wooden one using wood from the Connie. However, the wood has pretty wide rings and just isn't suitable for trying to carve something this small out of it. So I will plan on using it in the ships boats, and for the plaque/name plate once the case is done. I started work on the shrouds for the mizzen today. I served the lower shrouds (with the forward shroud being fully served. Tomorrow I will start rigging them to the mast.
- 335 replies
-
- 6
-
-
- Constitution
- Mamoli
- (and 3 more)
-
Not nit picking. I stand corrected. It was probably my mistake. I forget where i read the description. Thanks
-
Thanks. I have a few photos of the wheel but not this one. Good angle.
-
It is looking great. I am about ready to start working on my rigging again. I had a few side projects that had to be done first. Now you have me itching to get back on Connie!
- 1,756 replies
-
- 1
-
-
- constitution
- constructo
- (and 1 more)
-
The strips are for structural support. The primary purpose of the top is to handle the shrouds above and below. The supports take the stress in towards the mast. The secondary use for the platform is for sharpshooters.
- 1,756 replies
-
- 3
-
-
- constitution
- constructo
- (and 1 more)
-
I have been using DeltaCAD for awhile now and like it. It will not do 3d but it is good for ship's plans in 2d. I have done the Brig Eagle completely in DeltaCAD.
-
On the Connie they were called "Fighting Tops". Here is a link to more info. http://www.history.navy.mil/library/online/cft-nhhc.htm Your ship is looking great.
- 1,756 replies
-
- 2
-
-
- constitution
- constructo
- (and 1 more)
-
Have you looked at the AOS. While there are certainly detractors of this, it does have a belaying plan.
- 1,756 replies
-
- 1
-
-
- constitution
- constructo
- (and 1 more)
-
Well you two have shown me that even with as poor of reputation as Mamoli has with instructions, they beat yours - at least on rigging it sounds like. Mamoli does have fairly detailed diagrams on where the rigging goes. I can't attest to the accuracy of it yet, but ask me again in 6 months.
- 1,756 replies
-
- 2
-
-
- constitution
- constructo
- (and 1 more)
-
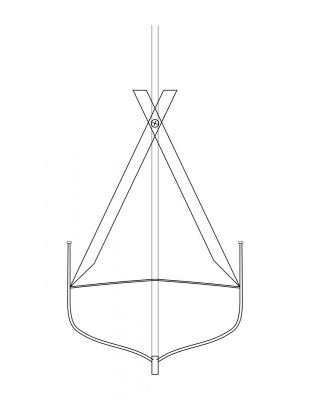
There is a pretty simple tool you can make for the side to side squareness. Take two wood strips and bolt them together an inch or so from one end. They should be loose enough they can open up like scissors. Cut the long ends to a point. Then you place the jig with the points down and to the inside sides of the deck behind the mast the rake it back so it rests in the V at the top. This ensures the mast is square to the sides. The rake, according to the Navy plan is about 2.5 degrees ion the fore mast, 3 degrees on the main, and almost 4 degrees on the mizzen. If you look on the Navy Sail Plan they give the rake at the bottom in inches per foot.
- 1,756 replies
-
- 8
-
-
- constitution
- constructo
- (and 1 more)
-
Here is what the Navy plans show for Mast Rake. I have also attached a PDF of the document because it is much easier to read. Constitution Sail Plan.pdf

- 1,756 replies
-
- 2
-
-
- constitution
- constructo
- (and 1 more)
-
The masts are perpendicular to the centerline, but are raked fore to aft.
- 1,756 replies
-
- 2
-
-
- constitution
- constructo
- (and 1 more)
-
I thought you might like to se this if you had not already.

- 1,756 replies
-
- 4
-
-
- constitution
- constructo
- (and 1 more)
-
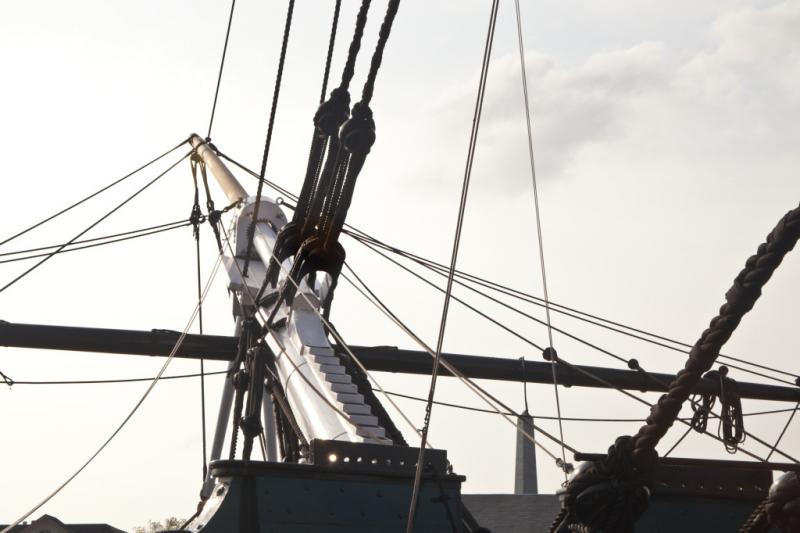
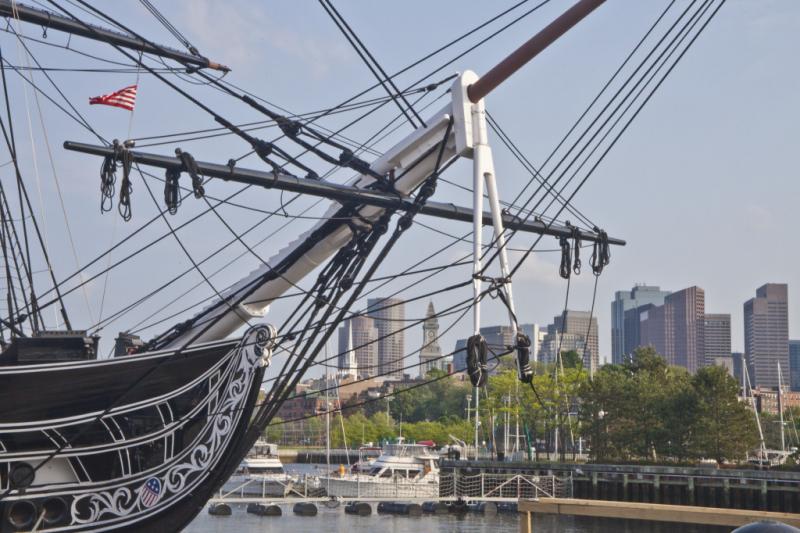
Interesting question. While I have see noter ships with sails attached to the spirit sail I can find no instance of the Connie with one. Her Sail Plan from the Navy site also has the spar but it is bare. George may be right in it being used for stiffening the rigging rather than actually having a sail attached. I would assume that even if it did have a sail, this one would be rarely used.
- 1,756 replies
-
- 2
-
-
- constitution
- constructo
- (and 1 more)
-
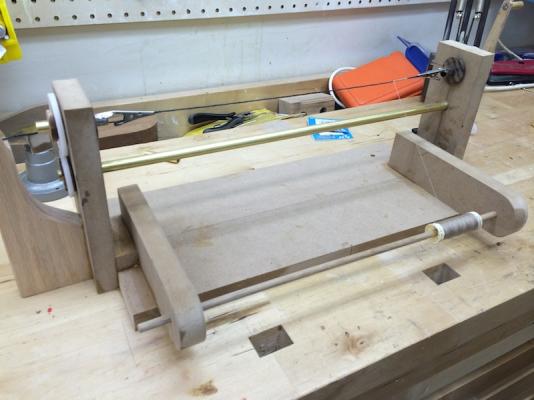
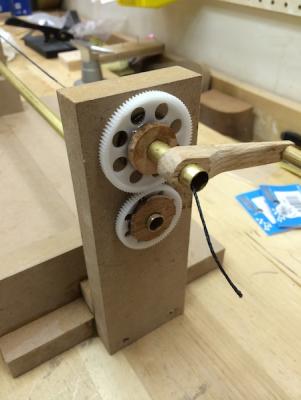
I picked up some gears at the local RC Hobby store ad built mine. The only thing I would do differently next time would be to reverse the gears.
-
I used it making my hammocks. Since they were still damp with the mixture when I placed them in the netting they adhered to the net as well. It not only stiffened the hammocks, but once the turpentine evaporated made them stiff enough to bind to the netting nicely. Initially I tried painting it onto the netting from the sides once the hammocks were done but found 1) I did not need it, and 2) it tended to span the openings of the netting like a bubble film. I took a small brush with straight turpentine and used the bristles to poke at the netting and the bubbles went away. However, just having the hammocks wet when they went in was plenty to prove effective. Anyway, that was my experience with it.
- 1,756 replies
-
- 2
-
-
- constitution
- constructo
- (and 1 more)
-
I used a knife to shred the the wax into a mason jar. Covered it with turpentine with a bit more to ensure it was covered enough. After an hour or so, I shook it and did it again a couple more times as well as the next day. What I ended up with was a pudding like mixture. Maybe start with less beeswax, and add more shavings until you get the consistency you are looking for.
- 1,756 replies
-
- 1
-
-
- constitution
- constructo
- (and 1 more)