
HOLIDAY DONATION DRIVE - SUPPORT MSW - DO YOUR PART TO KEEP THIS GREAT FORUM GOING! (Only 44 donations so far out of 49,000 members - C'mon guys!)
×

Chasseur
-
Posts
461 -
Joined
-
Last visited
Content Type
Profiles
Forums
Gallery
Events
Everything posted by Chasseur
-
 Very convincing Rob! Looks real* Your back yard looks like you live in the mountains. Nice backdrop. Jeff
- 1,208 replies
-
- 2
-

-
- great republic
- clipper
- (and 1 more)
-
Wow you rock Mark! Way too complicated for me I am afraid. Cool work just the same. Jeff
-
Interesting tutorial Rob. It looks like the guy must of soaked his cloth in some tea to get the nice used look to the color. For your paper sail will you use some pastels or chalk to get the same effect or do you have something special up your sleeve? Jeff
- 1,208 replies
-
- 3
-
-
- great republic
- clipper
- (and 1 more)
-
@ Rob .... go to page 7 of this build and you'll see what I finally came up with. The medium is modelling paste on carved/fitted wood and a gel combined with a dry brush paint technique. @ Piet... Young America is a beautiful ship. I look forward to your diorama at 1:3000 it will be very cool indeed. ... Jeff
-
Jond, Is your version of a sail loft a Man Cave? If it is you have one awesome Man Cave! Beautiful work and I absolutely love the color of the masts. Very convincing ... Jeff
-
Thank-you Gentleman for peeking in. @ Rob - Nice model a great find! Thanks for posting it's an encouragement to me. @ Michael - yes making the tools are not an option I am afraid but rewarding just the same* @ Patrick - All in due time and yes patience is the key here! Jeff
-
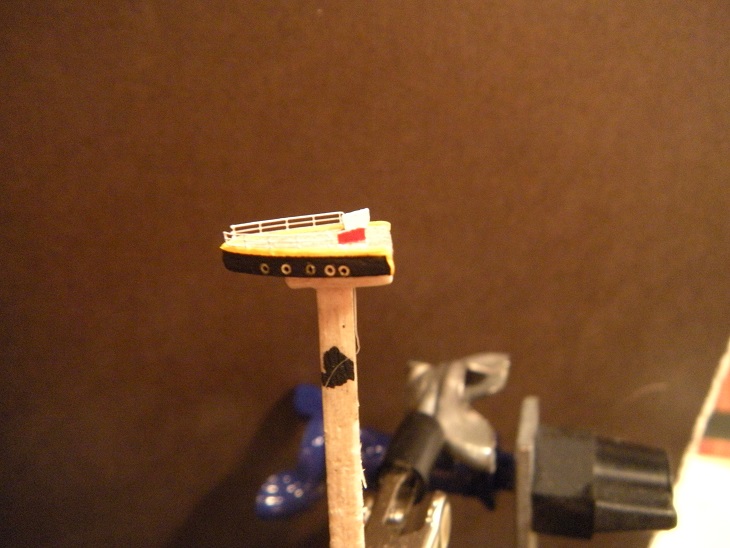
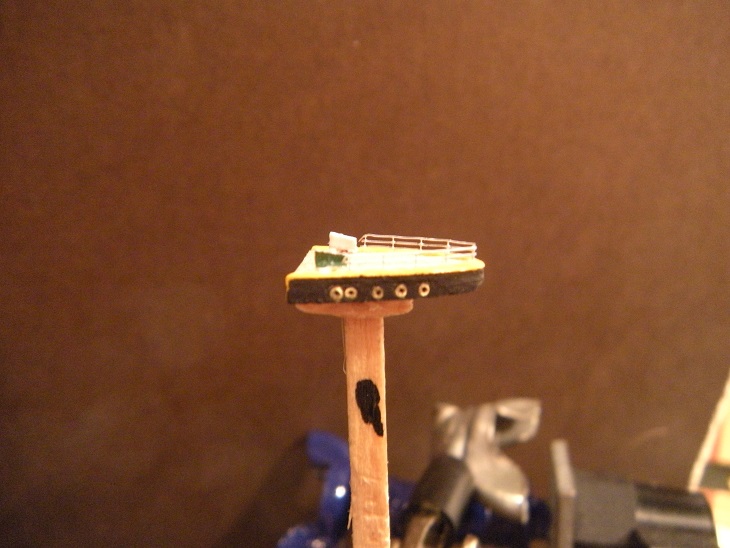
Today I spent a little time on the marker lights but focused more on test fitting the seas and test fitting the hull. I made a few decisions on moving forward. I decided to build the model “Ralph Preston style” so I can get more detail into the model regarding the running rigging etc. Each of the 5 masts will be inserted separately moving from stern to stem one at a time. This way I can reduce the amount of lines to mess with coming out of the bottle neck so each mast, yards, rigging etc. are in modules. I had to build a special insertion tool today to test fit the upper deck section of the hull to the lower part of hull as there are two parts to this hull build. Tool fits into hole where bowsprit goes. So there will be no folding masts utilizing the Hinkley hinge as most builders tend to do. The build will take longer however I am in no rush whatsoever. So that's it... Steady as she goes! Jeff
-
Looking really good Patrick. Kind of like show and tell with all of the sections. Very Cool! Jeff
-
Excellent Michael. Good old fashioned machine work. You gave the CNC boys a run for their money. Good PICs. Jeff
- 749 replies
-
- 4
-
-
- albertic
- ocean liner
- (and 2 more)
-
Michael, Thanks for posting the PDF. This information will help me drill some 0.2mm holes on the yard arms I need to drill .... later on for my build. You just solved my problem. Thank-you! Two thumbs Up* Jeff
- 749 replies
-
- 3
-
-
- albertic
- ocean liner
- (and 2 more)
-
Thanks Carl it's really not that bad. One thing though at this scale any imperfections really show up with the camera but as Rob W. says paint hides a multitude of sins. Jeff
-
Thanks Patrick and Michael for the kind comments. Wow 25 miles of wire,,, now that is one cache! Jeff
-
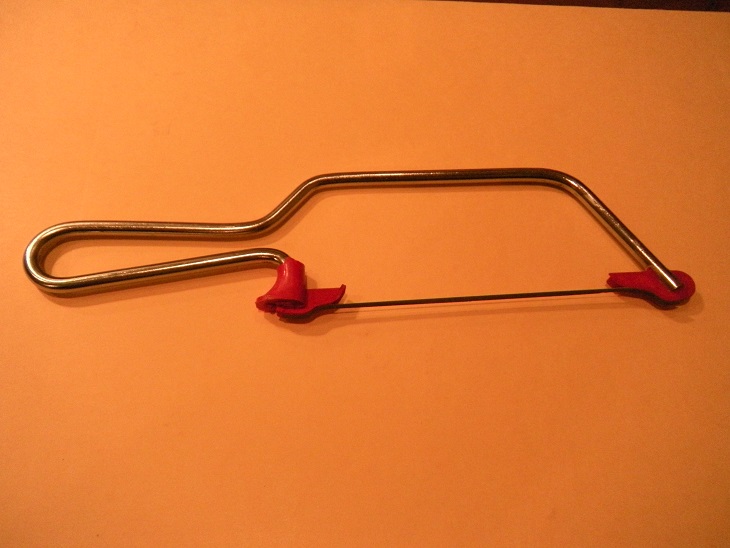
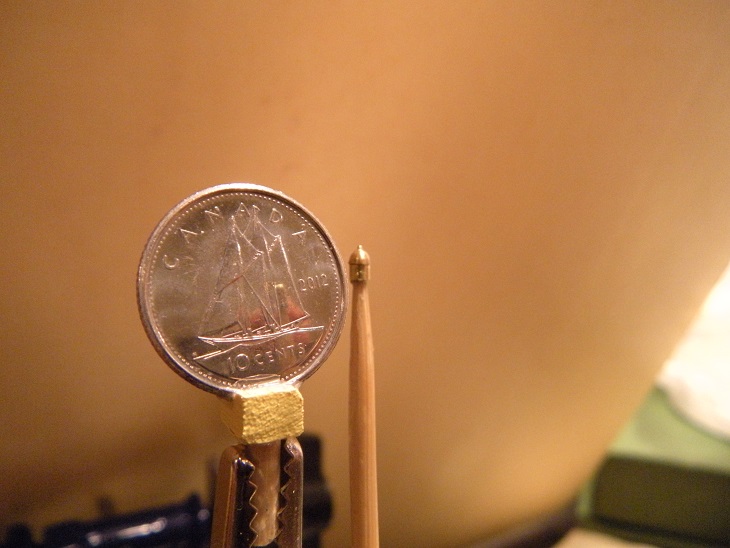
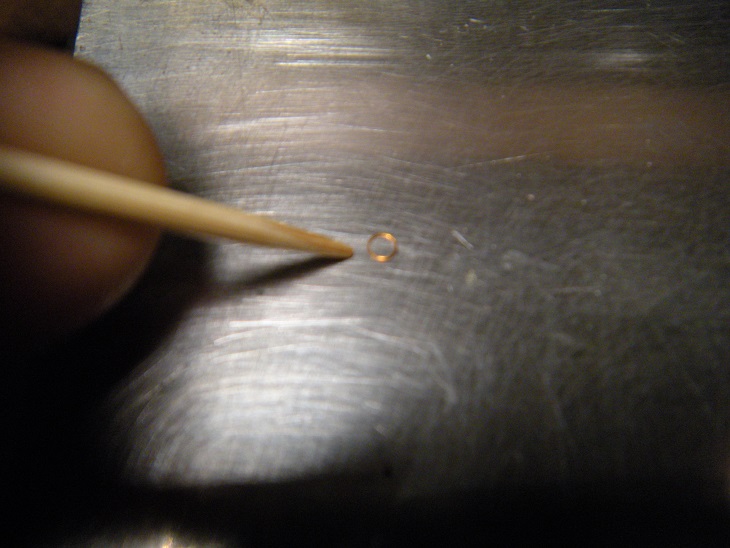
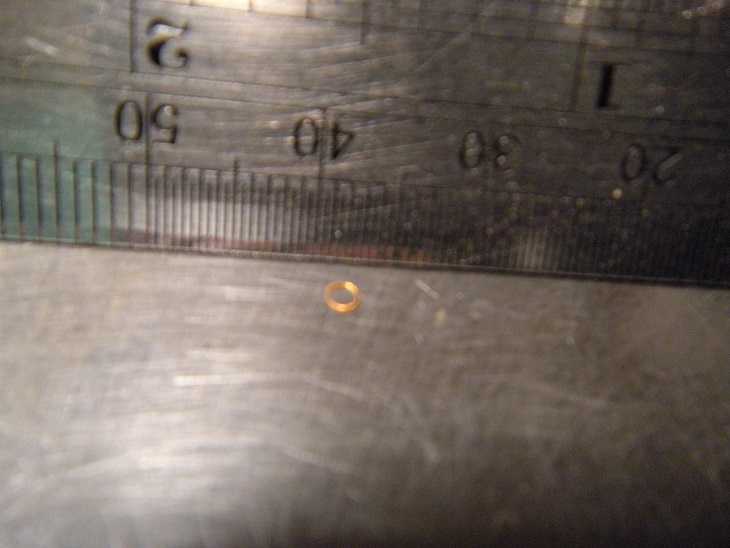
A brief update. I am onto detailing the forecastle area. The first photograph shows what I am trying to achieve end game. How much detail I stuff into this small area will be a treat. Fabrication of the two reflectors port and starboard are built and installed. I am now working on the clearance marker lights which are located right behind the reflectors. I also have the two chicken coups built as well. Picture shows one just behind the ladder from deck to castle. Next shot is of me turning the dome part of the marker light. 1.5mm brass here. Next two shots are port and starboard reflectors respectively. Next shot is a special tool I made for sanding and profiling the dome after I glued it to 1.5mm brass pipe. I had this old handle used for a hacksaw that I can't get a blade for so now it's a new tool. I used pipe to glue the dome onto as it has a hollow for the toothpick to stick into as a holder. Next shot is a dome glued onto the pipe. Also is a notch filed into the pipe to show where the glass cover is that protects the electric light inside the dome as on the real ship. Next two shots show the fabrication process of the lower ring being formed from soft wire Copper-Extra Fine W-C-XF. Last shot shows the wire glued into position. "GS Hypo Cement works wonders here." Dome glued to pipe and wire glued to lower part of dome. Notice the notch below the ring? That's it for now. Jeff


- 296 replies
-
- 13
-
-
Slick idea to use the Nuke Tape. The handyman's secret weapon as Red Green would say! Looking good Rob*
- 1,208 replies
-
- 3
-
-
- great republic
- clipper
- (and 1 more)
-
Hi Michael, You are correct. As an X welder/fabricator Acetylene has carbon black in it when it burns. Propane is super clean. When I was a fabricator/drilling rig builder a guy turned me on to using propane and O2 for flame cutting with a torch. It doesn't burn as hot as Acetylene but you get hardly any slag and a super clean cut. I am 100% convinced you are going to love your set up. If you purchase the proper tips for your shop cutting torch you can get rid of acetylene and switch over to propane and cut your costs by more than half. Your little torch would be right at home on my jewelers bench conversion. I know wishful thinking on my part. LOL PS I hope the PDF I sent you helps with your build! Jeff
- 749 replies
-
- 5
-
-
- albertic
- ocean liner
- (and 2 more)
-
Attached is a good article I found about silver soldering ... Jeff soldering notes.pdf
- 749 replies
-
- 4
-
-
- albertic
- ocean liner
- (and 2 more)
-
Michael, Just like Christmas all over again. Got to love it! Torch looks fantastic* Thanks for posting the pics. Jeff
- 749 replies
-
- 2
-
-
- albertic
- ocean liner
- (and 2 more)
-
The picture of the Gents sitting beside your model gives a person a true feeling of this scale. Very impressive!
-
Time to get out that Dremel and turn some masts!
- 1,208 replies
-
- 2
-
-
- great republic
- clipper
- (and 1 more)