
HOLIDAY DONATION DRIVE - SUPPORT MSW - DO YOUR PART TO KEEP THIS GREAT FORUM GOING! (Only 36 donations so far out of 49,000 members - C'mon guys!)
×

Chasseur
-
Posts
461 -
Joined
-
Last visited
Content Type
Profiles
Forums
Gallery
Events
Everything posted by Chasseur
-
 I use Artist's Loft Modelling paste Academic Level 1 Acrylic. This stuff is awesome! I buy it at Michael's. Comes in a 4.06 US fl oz/120 ml tube. You can sand it , drill it, fast drying and it's water based so clean up is a dream. Jeff
 -
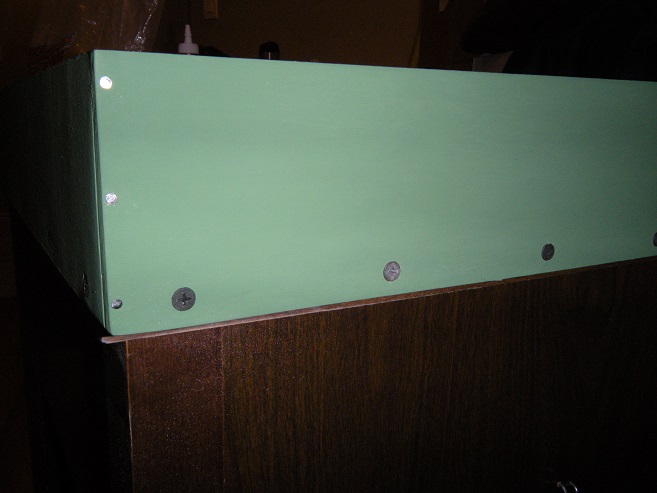
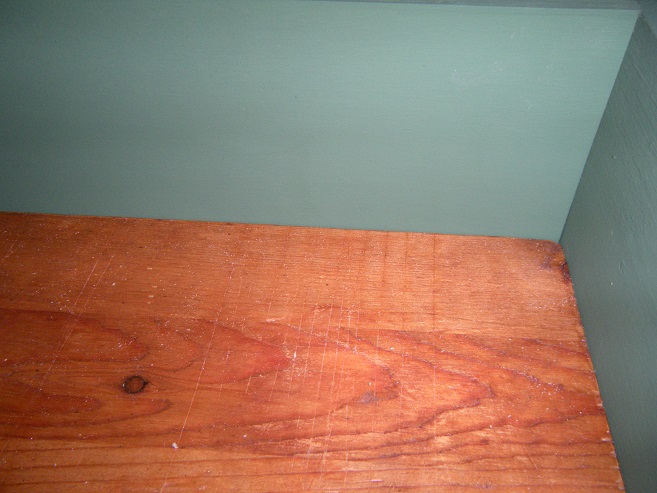
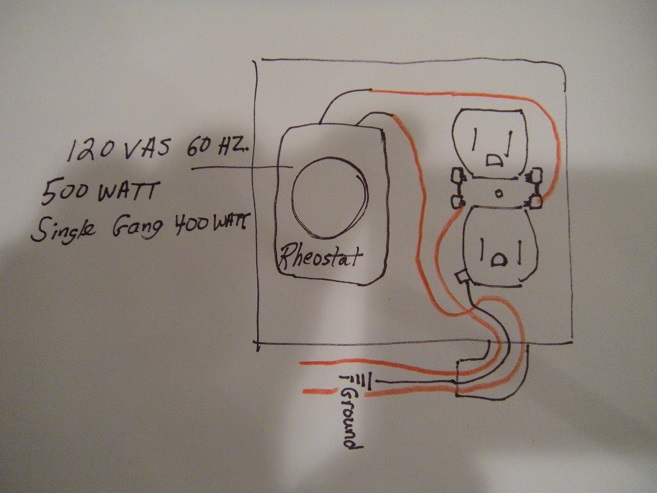
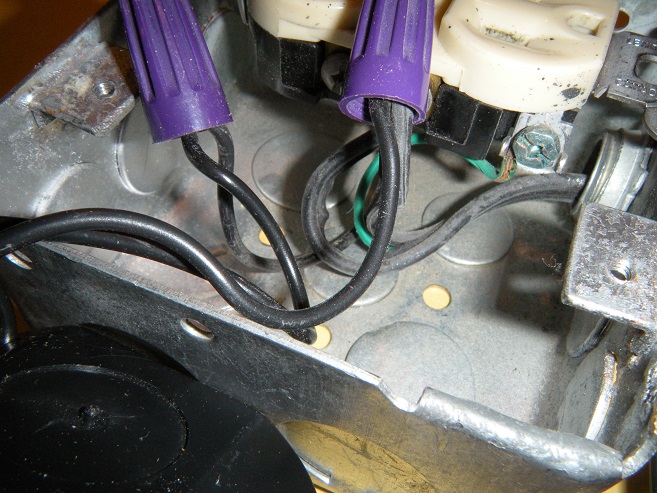
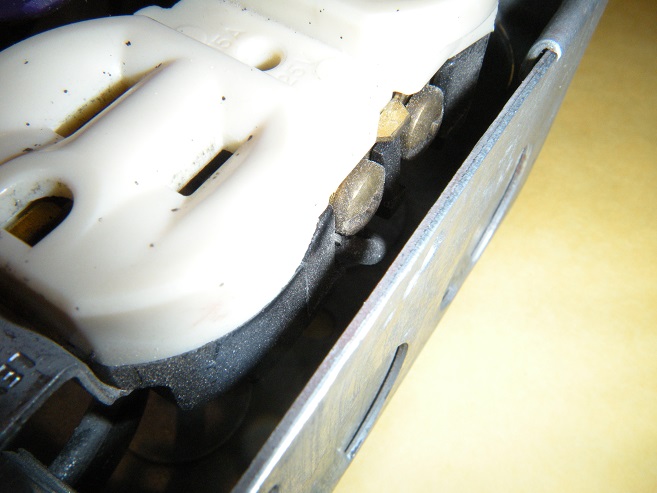
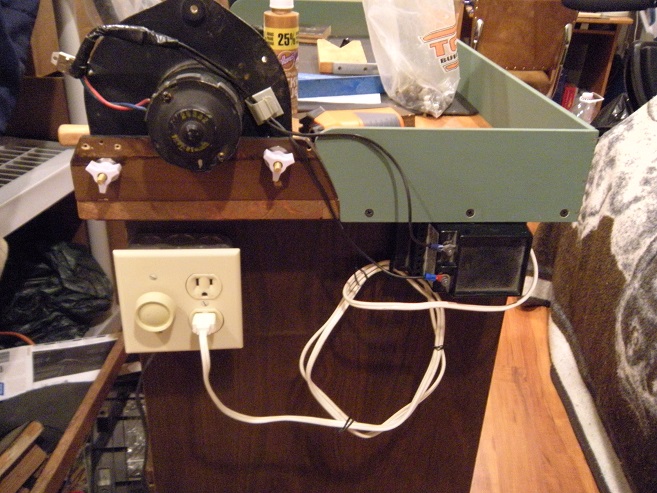
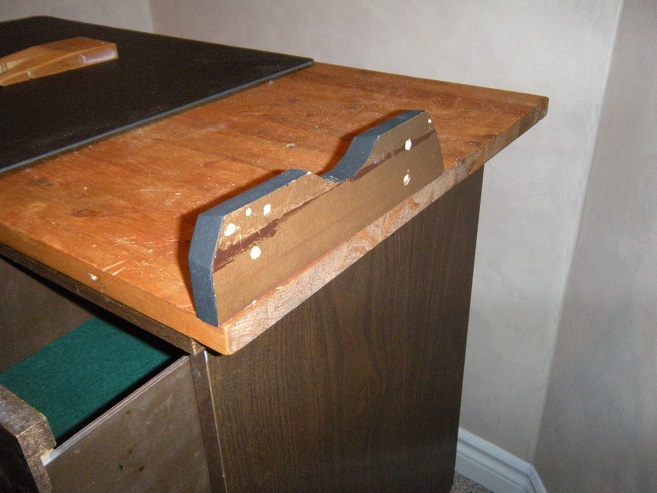
Back at it today. I got the skirting attached on three sides and my mini lathe mounted and wired. First two shots shows the skirting close up outside and inside. I reworked my power supply and added a rheostat into the equation so I can slow down the speed of the motor. The motor I have is a 12 volt heater motor out of an old Nissan King Cab. Next picture shows the way to wire one if you are so inclined. Next shot shows the internals and how it's wired. Next shot shows other side of the plug. You don't want to snip the brass gang between the plugs so if you have something else you want to run at a variable speed you can do it. Basically both plug ins are energized. Next shot shows the motor mounted. I still have to make a little leveling adjusting tool as I want the chuck perfectly level to the custom tail stock I am going to build. Last picture shows the set-up. Plug rheostat into a household power source. Turn it on and it powers my little step down transformer that converts 120 VAC into 12 volts to power the heater motor. The beauty of this set up is I can get variable speeds to turn different sizes of wood or piano wire. Remember I work at very small scales so this is a miniature lathe LOL. My Man Cave is an absolute disaster zone right now. I can't wait to get the bench done and put back where it belongs so I can clean up the cave! More to come ... Jeff

-
I like the idea of the thumb screws. Now that's creative thinking on your part! Jeff
- 749 replies
-
- 2
-

-
- albertic
- ocean liner
- (and 2 more)
-
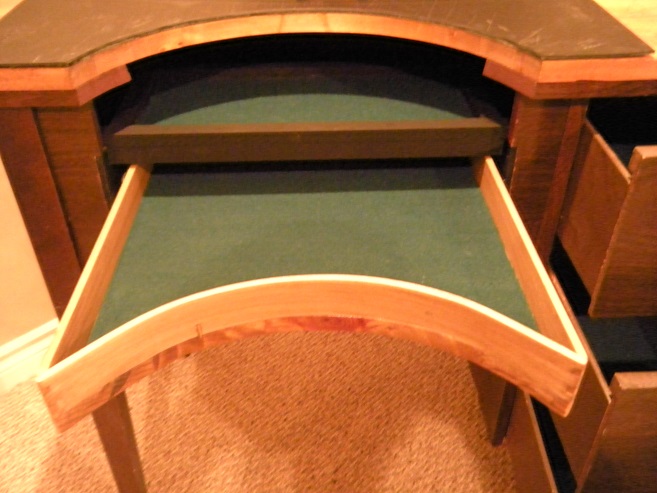
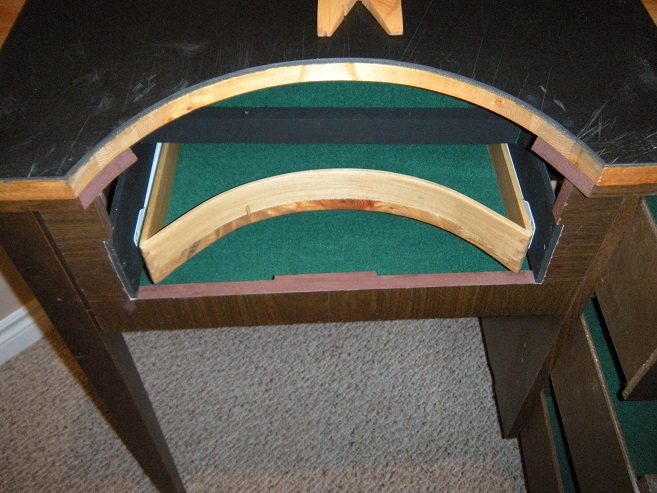
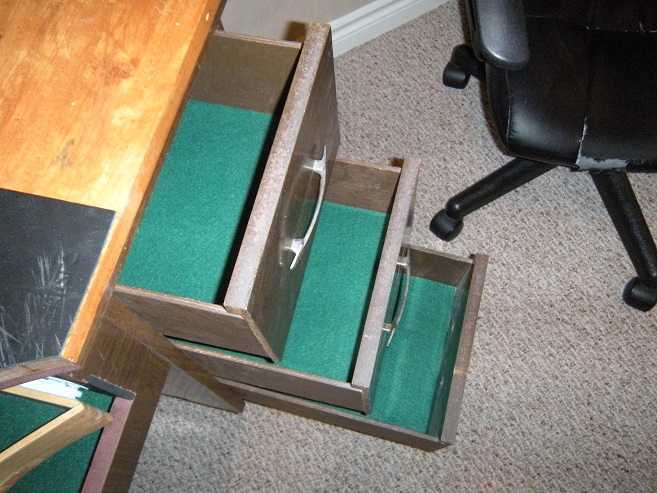
A bit of progress to report. First shot is the overall look of the bench. Drawers extended somewhat to show my intentions! Next few show some close ups. I can retract everything when not in use. One of the side draws had a broken bottom so an hour was spent pulling it apart and replacing the bottom piece of wood. All drawers relined with felt. Next shot shows me starting to mock up my mini lathe. This time I will install an adjustable tail-stock made from an old Dremel flex shaft. I am going to make a receiver for the bench pin just under the middle semicircle part to make it removable and can the C-clamp idea. I will skirt the sides and rear part on the top so tools don't fall off. More to come ... Jeff

- 296 replies
-
- 10
-
-
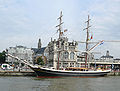
Kees that is one very cool picture. These vessels look like early day pilot boats. I love the Church in the background it looks like a bit of a fortress. The vessel on the right does the foremast fold back? Jeff
- 434 replies
-
- 1
-
-
- pelikaan
- beamtrawler
- (and 2 more)
-
Jond check out Young America Extreme Clipper page 103 here at MSW by EdT. His brass work is amazing and he has a great blackening technique which will help you achieve the effect you're looking for. Jeff
-
No worries Rob we're ship builders not photographers!
- 1,208 replies
-
- 2
-
-
- great republic
- clipper
- (and 1 more)
-
Sliding drawer completed, sliders on and top drawer lined with felt. Top on bench sanded down with two coats of Linseed oil. This felt I bought from Michael's is made from recycled plastic pop bottles so its a bit of a nuisance to cut, price was right though.There was a few war wounds on the top but hey that's character! I will line my side drawers with felt and inside the cavity as well. More to come ... Jeff
- 296 replies
-
- 15
-
-
Good progress and love the tool you made! Lines look straight and clean, well done* Nice.
- 749 replies
-
- 7
-
-
- albertic
- ocean liner
- (and 2 more)
-
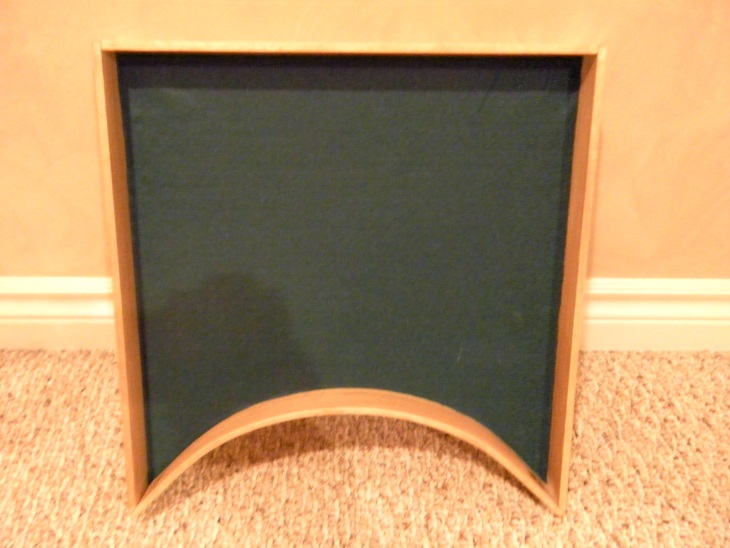
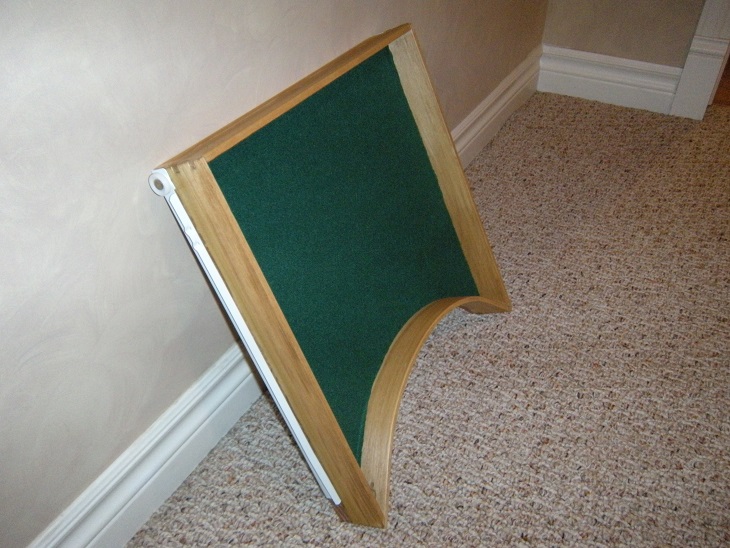
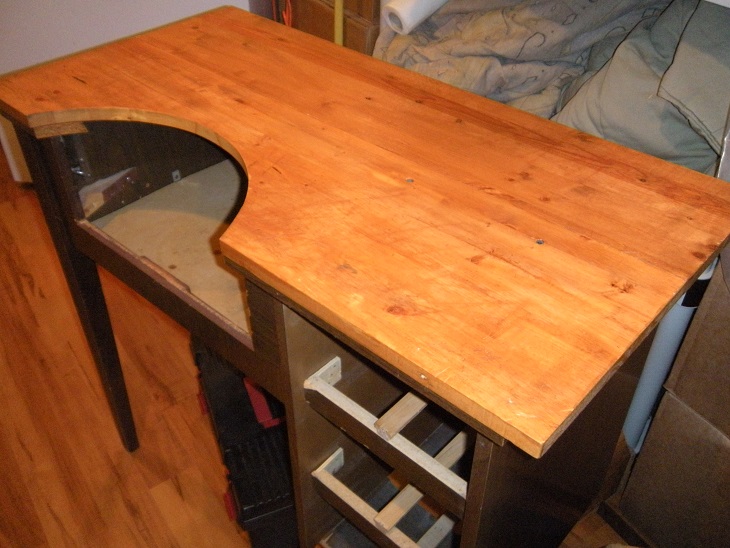
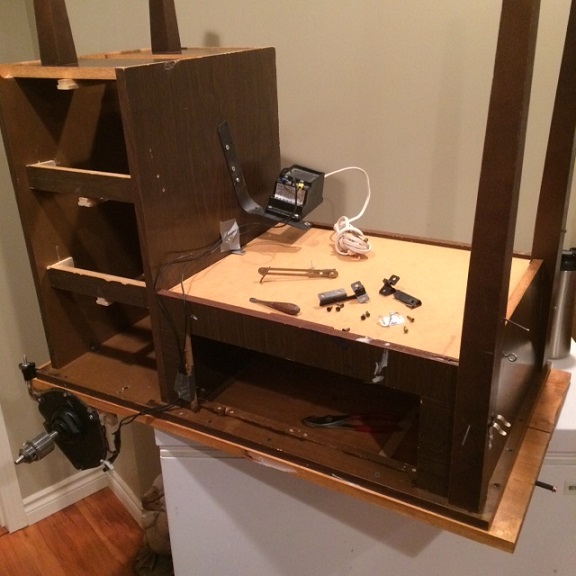
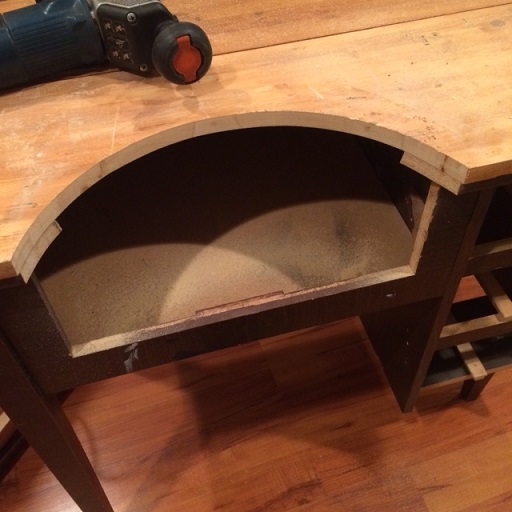
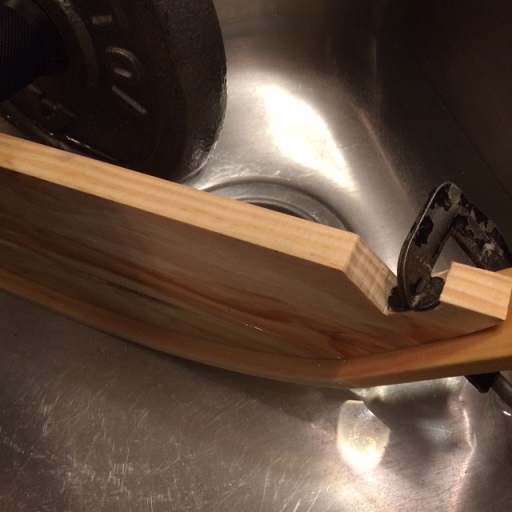
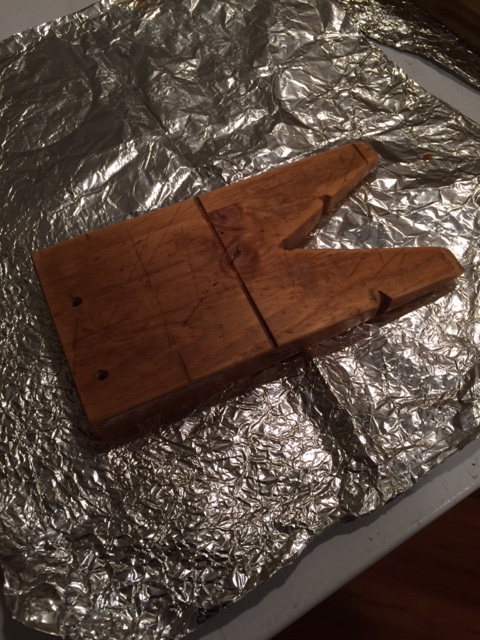
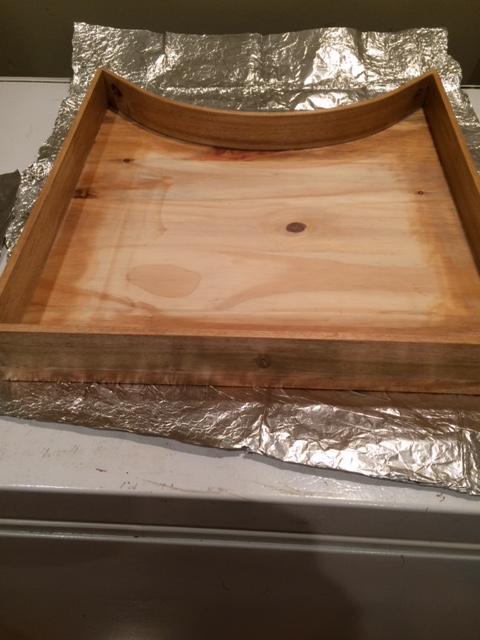
There once was a wood cutter who applied for a new job. The first day on the job he cut down 20 trees. The second day he cut down 10 trees and the third day he only fell 3. He went to his boss and said; I can’t understand it …each day I try harder and I cut down less trees! His boss replied… did you ever think to sharpen your axe? So it is with me. During my Lone Warrior build at 1:300 scale paper ship models; I found myself losing a lot of extremely small parts that would either fall off my bench, fly away when I sneezed, and… I am tired of crawling on my hands and knees looking for parts that are supposedly on the floor someplace. The answer … rebuild one of my work benches like the ones jewelers use and install a removable bench pin for filing/cutting/fabricating, a pull out (contoured) felt lined drawer to catch miniature parts that accidentally fall, and build a few organizers for tools that I use daily. Kees de Mol has been an inspiration for this project after seeing his restoration of his Man Cave. Before I proceed further on the Preussen this project must be completed before Christmas. I’ll post pictures here as I progress on this project. First picture is my bench flipped over as I remove my mini homemade lathe and transformer. Drawers on the side removed for now. I will remount my transformer in a better location once I figure out where and clean up the wiring. This bench was originally a sewing machine table where the sewing machine flipped inside of the table when not in use. Legs are solid Mahogany and the rest is covered with an Arborite counter top material to represent mahogany, so it has a little bit of class IMHO. You older gents will remember Arborite as it was really popular in the sixties/seventies. Now a day its clone is called Formica. Second picture is the top cut out in a semicircle. I am following the European example of a jeweler's bench where it allows you to get in closer to the bench pin and the drawer slides up to ones belly or in my case… my “One Pack.” Next 2 pictures are forming the curved piece for the drawer. I took the cut-out piece from the table top and used it for a template. The wood to be bent is ¼” hobby board from Home Depot. I soaked it in boiling hot water in the sink for ½ an hour and then used a bar bell while cooling to slowly bend it into position to clamp it. I let the piece dry slowly in the garage for 3 days and when I un-clamped it, it was almost perfectly shaped. The drawer goes in the cavity cut out and will be mounted on DIY sliders. Next is the bench pin I made. Pin is custom and has cut outs for the jewelers saw to cut flats, rounds, notch etc. One coat of stain to touch it up and the pin was cut from one of the cut out pieces. Last shot shows the drawer with one coat of stain applied. The Man Cave is a bit stinky right now as the stain is off gassing. I will apply a coat of Linseed oil to seal the drawer and pin and then the drawer gets lined with some green felt to catch parts if and when they fall. I thought about making a mount for the bench pin to slide into but I think I’ll go with some versatility and just use a C-clamp and clamp it where ever my heart desires at the time on the bench. I am really excited about this Christmas as I have 2 weeks vacation to go at it on the Preussen SIB and work towards getting her bottled! More to come … Jeff

- 296 replies
-
- 11
-
-
"Aye me Boys a riddle eye day"! Maybe a few dories fell over the side Jond ? LOL Beautiful workmanship*
-
Really love it. The passengers make the ship come alive! Well done Nils. She is coming together nicely. Jeff
- 2,625 replies
-
- 7
-
-
- kaiser wilhelm der grosse
- passenger steamer
- (and 1 more)
-
Nice Buck! Always better to give than receive* Good on you!
- 515 replies
-
- 4
-
-
- artesania latina
- whaleboat
- (and 1 more)
-
Good to see you back and one sweet Man Cave. You have encouraged me to do a clean up and reorganization.
- 434 replies
-
- 3
-
-
- pelikaan
- beamtrawler
- (and 2 more)
-
Awesome build and I never knew about cocobolo wood till now. I echo Michael's comment about the cutters "Smarter than the average Bear." Love it ... Jeff
- 515 replies
-
- 4
-
-
- artesania latina
- whaleboat
- (and 1 more)
-
Hi Michael, I remember viewing this model about 4-5 years ago at the Edmonton Library downtown. I was amazed at the workmanship of the modeller who built it. I just stumbled upon this post and I am aghast at what has transpired. However I am not totally surprised as a few years ago I had built a WW2 diorama for the library here in Sherwood Park to commemorate Rememberance Day. Long story short ... I found out from a staffer that some snotty nosed brats trashed my diorama. Apparently the parents were as belligerent as the brats they raised. I ended up giving the diorama to some kids down the street and the library bought me a nice book in leu. You are definitely the right man for this restoration. Also as a side note the 1/96 scale USS Constitution that I built for the library here in Sherwood Park still stands intact in its display case. If my ship should meet its demise I know where to send it. :-) Jeff
- 749 replies
-
- 7
-
-
- albertic
- ocean liner
- (and 2 more)
-
Rob an art form should never be rushed. All in good time I say!
- 1,208 replies
-
- 3
-
-
- great republic
- clipper
- (and 1 more)
-
@Michael yeah I have heard about Jelutong but never tried it. @ Jond that's cool that you lived in Edmonton for awhile as I was born and raised in Edmonton. However I have lived in Sherwood Park ( a quaint suburb outside of Edmonton) for the past 25 years. Maine sounds better though. I have always been landlocked my whole life. Too bad about the boom. Remember what Grandpa said ... measure thrice cut once! LOL
-
I am amazed at how clean the grain is on the Sitka. I might try carving some of this to see how it will work for SIB's. I must see if I can get some of this wood. The darker shade of Polyshade looks like a good match! Nice work to adapt and overcome on rigging up to turn the masts* Coming together nicely. Jeff
-
Really shaping up to be a very fine model with lots of detail. I love the figures on deck. Figures always tell a story and make the ship come alive! Well done Nils Jeff
- 2,625 replies
-
- 8
-
-
- kaiser wilhelm der grosse
- passenger steamer
- (and 1 more)