


TBlack
-
Posts
1,305 -
Joined
-
Last visited
Content Type
Profiles
Forums
Gallery
Events
Everything posted by TBlack
-
 Keith, I hope you’re right. I don’t mind.telling you, it was a bitch by virtue of my own clumsiness. Anyway, on to wrapping the lower shrouds with my new machine from Chuck!
- 341 replies
-
- 3
-

-
- Sophie
- Vanguard Models
- (and 1 more)
-
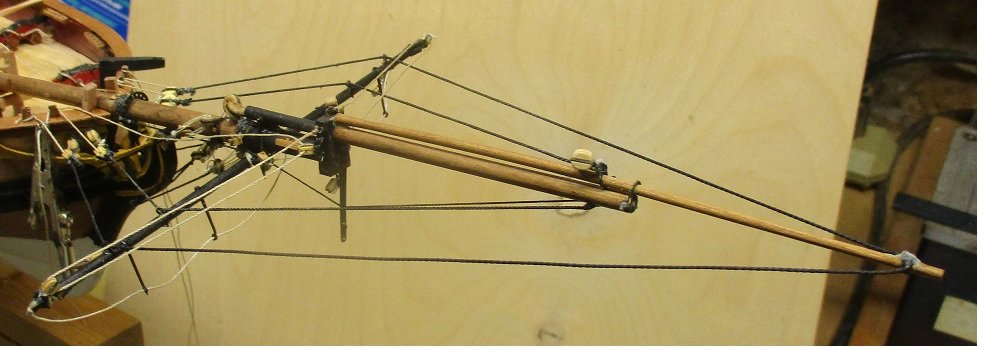
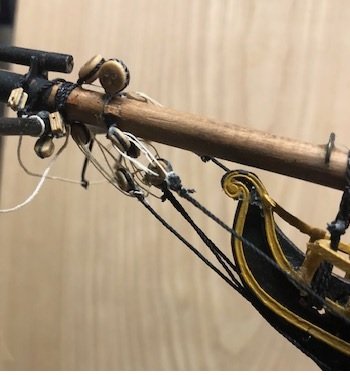
Finally finished the rigging to the bowsprit, just a couple of lines to make fast. I had some issues with the stay to the jibboom. The plans call for one, but I couldn't see in Lees or my other references that there is one on this ship. Nevertheless, I rigged it. Now (I'm following Delph's log on Speedy) I'm on to lower shrouds, and, fortunately, the lower masts are not on the ship yet which makes installation easier.
- 341 replies
-
- 8
-
-
- Sophie
- Vanguard Models
- (and 1 more)
-
I’m not sure what you’re pointing to, but isn’t that the rubbing strip you’ve been installing? Tom
-
The drawings pretty much limit the size of the boiler.
-
Well, you managed to do quite a lot in that hour or two. Most productive!
-
Phil, Thanks for your Navy background. You did finally make it to Yokosuka on that cruiser, and, having been a captain, you got to wear the star! Not bad! Tom
- 410 replies
-
- 3
-
-
- minesweeper
- Cape
- (and 1 more)
-
Phil, In that capacity and at that time, I assume there wasn’t much call for your services? Tom
- 410 replies
-
- 1
-
-
- minesweeper
- Cape
- (and 1 more)
-
Phil, It was an MSC. I can’t remember more than that to be helpful. She was out of Portsmouth, NH and I was doing a weekend reserve training. So what was your dep’t/job on the CLG-5?
- 410 replies
-
- 2
-
-
- minesweeper
- Cape
- (and 1 more)
-
I’ll follow along with you, Dr. PR. If only because I’m also a graduate of OCS (class of 68-05), but also because I once embarked on one of these coastal minesweepers. The amount of detail given is both a blessing and a bain. Now you have no excuse to provide the detail. Tom
- 410 replies
-
- 1
-
-
- minesweeper
- Cape
- (and 1 more)
-
I hate to change the subject, but did you need to curve the transom planks so much? It looks relatively flat.
-
My wife asks me that a lot. The answer is that the MSW folks and me will know. BTW, Keith, how did you manage to manufacture and put all those parts together? Tom
-
Fantastic!
-
Been awhile, but I've mounted the spritsail yard and the foremast yard. Tackling the bob stays (4). For some reason it was a real challenge. I think I had to do each one 2-3 times. Greg and David in their TTFM and Speedwell books suggest measuring the distance between the deadeye on the bowsprit and the eye on the hull to determine the length of the double stay. I found it easier to thread the deadeyes first and then rig the stay. In any event, that little stage is done.
- 341 replies
-
- 9
-
-
- Sophie
- Vanguard Models
- (and 1 more)
-
Just as BE has indicated plus the lines go through the euphroe block that you can see in the drawing. Hollowneck in his log on Camilla shows this in some detail. It's on page 6 entry #164. Take a look. Tom
-
Intro and interests, from a beginner
TBlack replied to Desert_Deckhand's topic in New member Introductions
Josh, let’s see, kids, job, doctoral program, sounds like you’ve got a full schedule. Anyway, welcome to our happy team. Good choice on a first model. Tom -
I don’t know how you think of these interesting topics, dear brother, but you have captured the attention of a number of us. I don’t suppose you’ve determined a scale yet. Also, I need to remind you that when you were in Alaska canning salmon, mom was really worried about you once again, displaying that you were the favorite son. Tom
-
So, Keith, you’re originally from Yorkshire, but now live down south in Sussex? A cultural shift?
-
Well, that’s a London style. I buy the regular Bombay; it’s cheaper. Yes, and a beautiful hull, too. Fun to watch you! Tom
-
Gin? Plymouth or London?
-
Nice tutorial on ratlines. Should be easier at a larger scale. How are your eyes holding up?
-
1876 Parcel van by michael mott
TBlack replied to michael mott's topic in Non-ship/categorised builds
It IS great work, but I'm focused on the huge inventory of stuff that you can bring to bear. I mean how many of us have a hex draw plate? Tom- 22 replies
-
- 10
-

-
