


usedtosail
-
Posts
2,421 -
Joined
-
Last visited
Content Type
Profiles
Forums
Gallery
Events
Everything posted by usedtosail
-
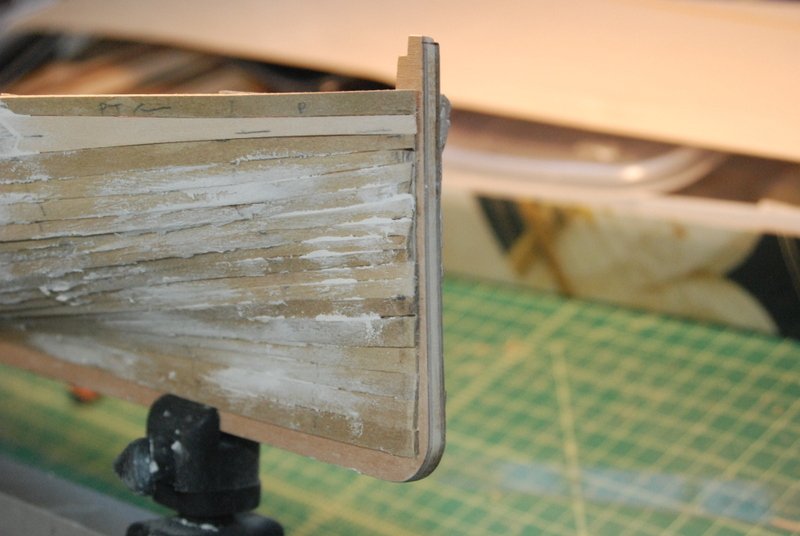
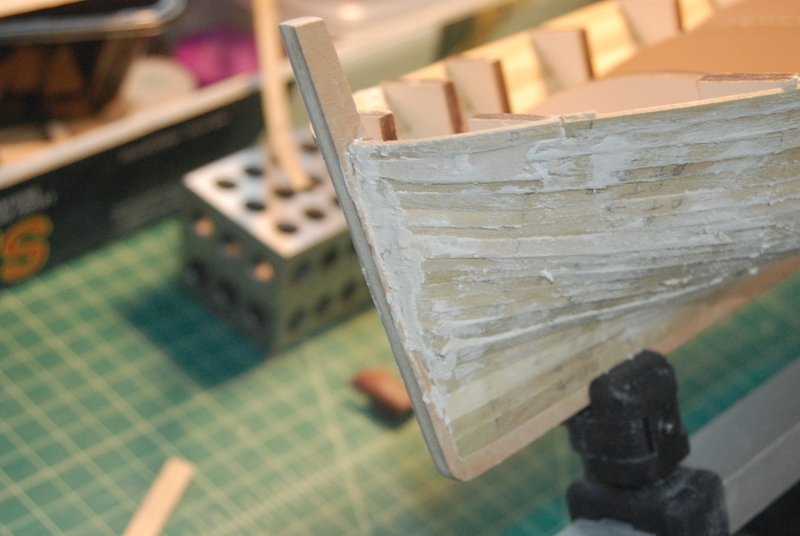
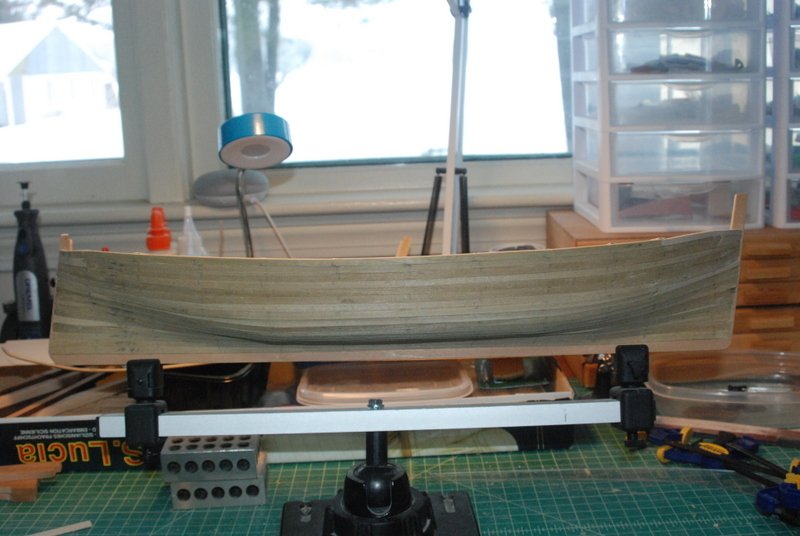
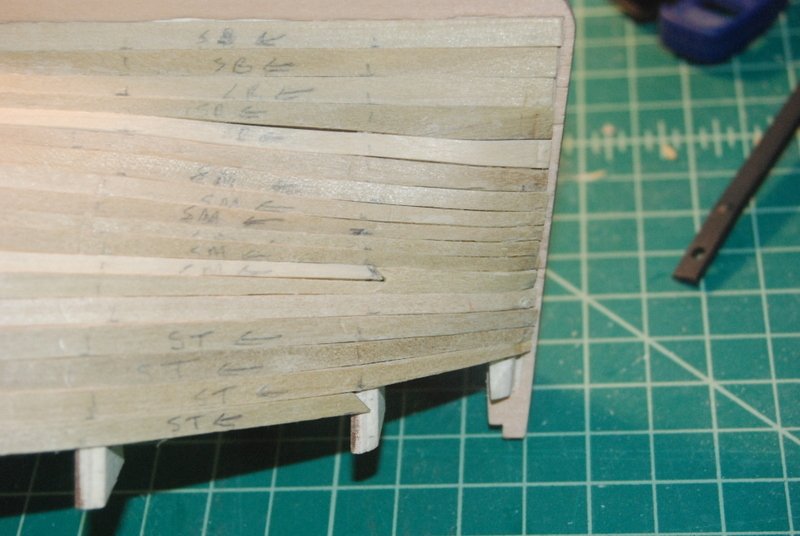
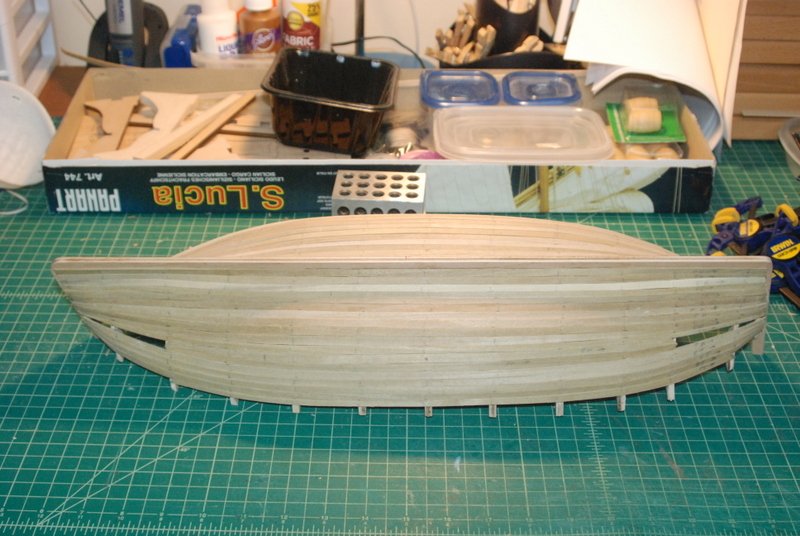
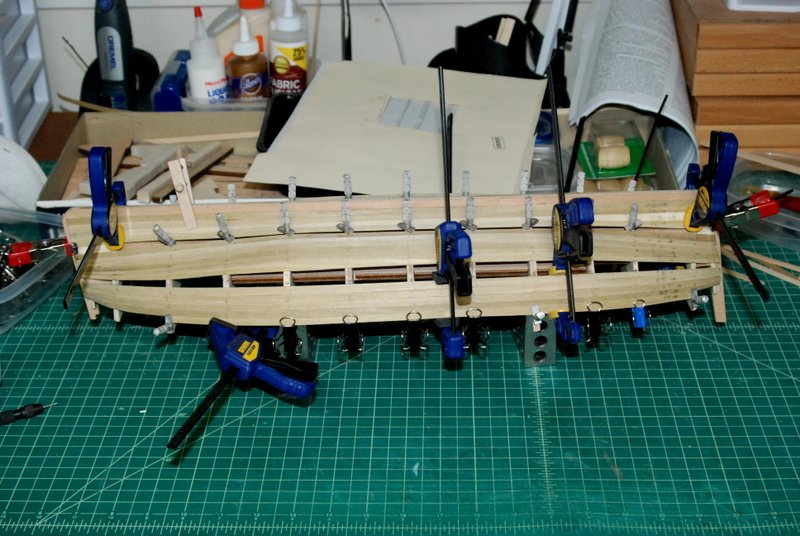
 Here is where it gets a bit ugly, as I can not for the life of me do a good planking job without clinker planks and gaps. So the first step is to add wood filler on those area that need it, which in my case is much of the hull. Here is another hack that I have been doing. Even though I cut a rabbet at the bow and stern posts, the first planking strips were too thick to be bent enough to fit into it completely, so I just got the ends close while planking, knowing I could use wood filler to get them to curve into the posts better than trying to bend them. So first I used a Dremel with a sanding disk to roughly sand down the plank ends. Then I filled in the gaps with the wood filler. Today I used a flat scraper to scrape down the filler along the posts but don't have a picture of that yet. Stay tuned and the next post will hopefully have a better looking hull as I continue to sand and scrape it down.
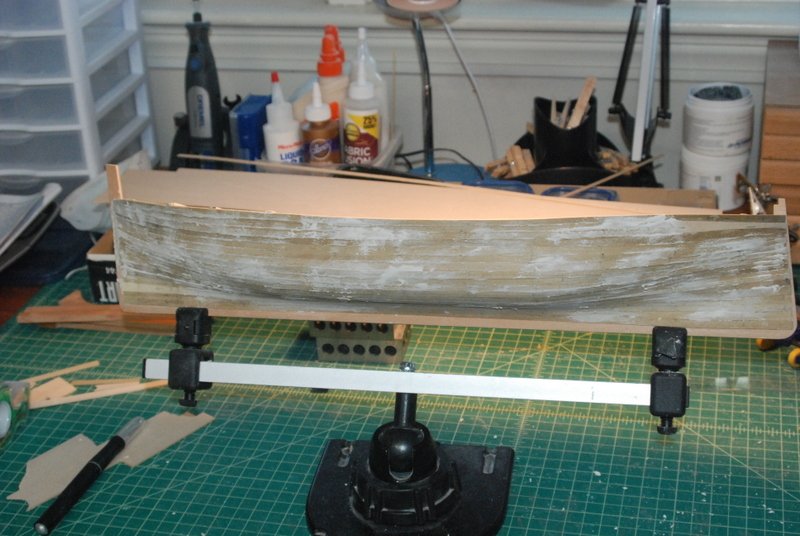

- 131 replies
-
- 3
-

-
- santa lucia
- panart
- (and 1 more)
-
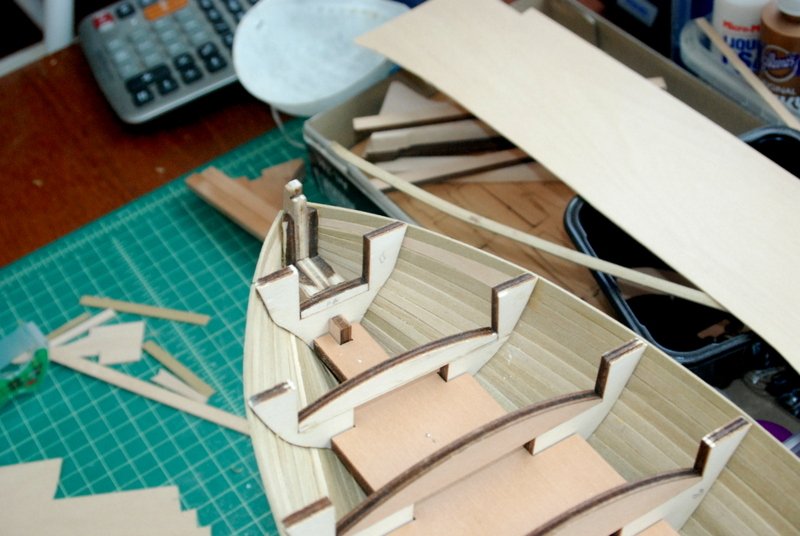
Welcome to all those that are now following along. I have spent the last week or so trying to get the last couple of planks right, especially at the bow. I wanted to make sure I had a nice curve from the first frame into the keel. I ended up removing that section a few times and finally was able to make a nice spieled piece that fit well after I curved it with a planking iron. Here are some pics of that process. And the results. So now the first planking is on and I am ready to start getting it smooth for the second planking, which I will show in the next post.
- 131 replies
-
- 6
-
-
- santa lucia
- panart
- (and 1 more)
-
Nice planking job K. It is coming along very well.
-
She is beautiful Dave. Try to keep the dust off her though.
- 742 replies
-
- 5
-
-
- constitution
- frigate
- (and 1 more)
-
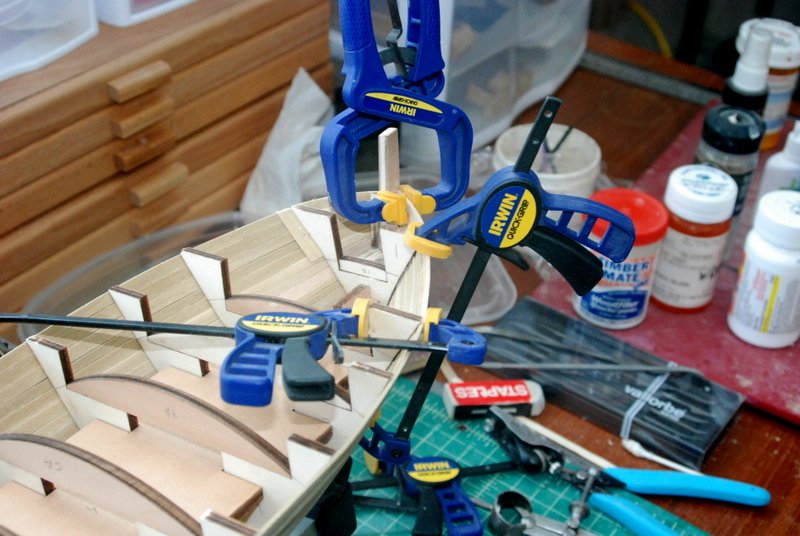
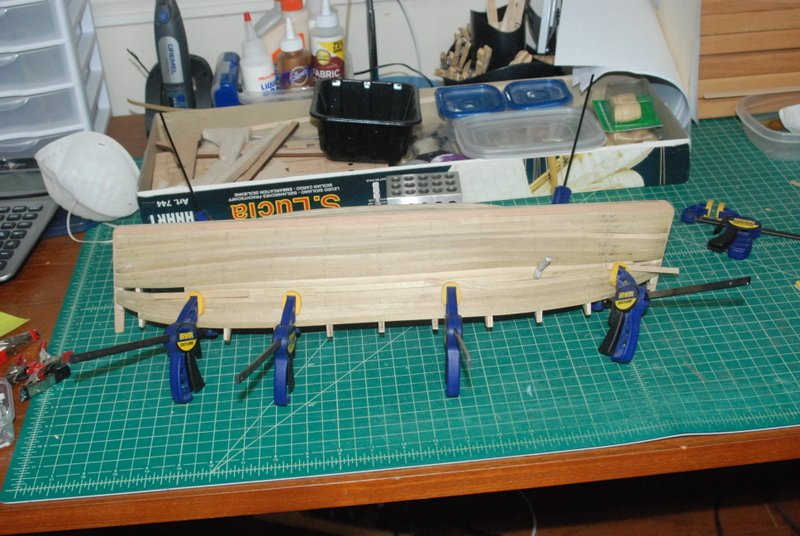
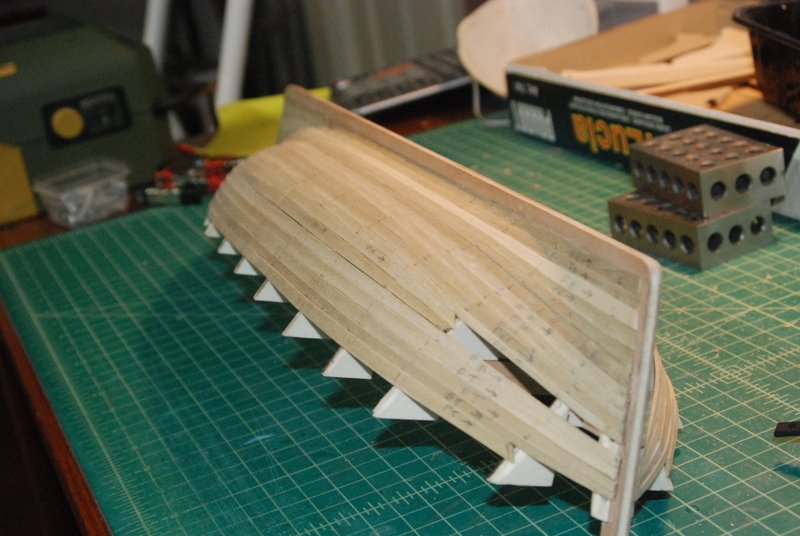
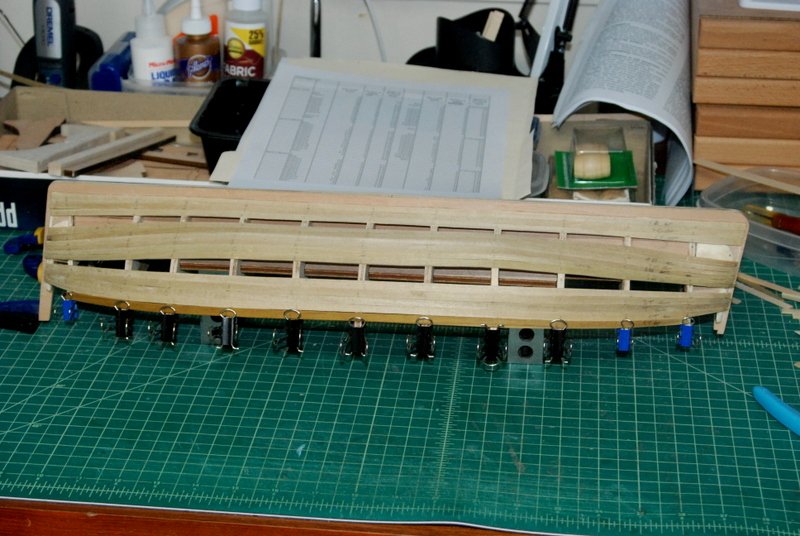
As promised here are the photos of the drop planks in place. (I have another photo but it doesn't want to upload). You can see I will be adding another drop plank at the top planks. You can also see a spot where the clamps I used forced a plank to bend in too far. I will add some filler there to fix it after the initial sanding of the first planking layer. Here I have soaked the next top plank and clamped it to the frames. I am using a keel clamp to hold the hull when it is right side up. I still have to put in the drop planks at the top and I also have to make and add two spieled planks at the bow, as a single plank all the way across at the very top can't be bent enough to fit right.

- 131 replies
-
- 7
-
-
- santa lucia
- panart
- (and 1 more)
-
Nice save on that tire. This is a beautiful job you have done.
-
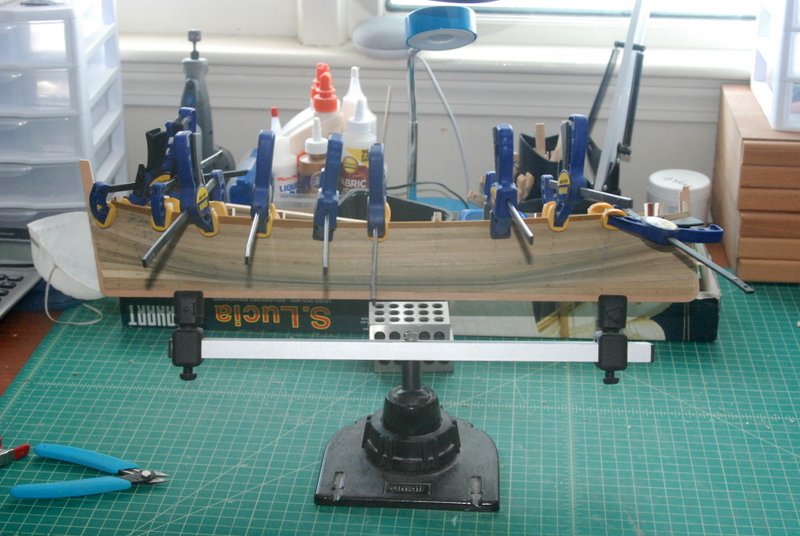
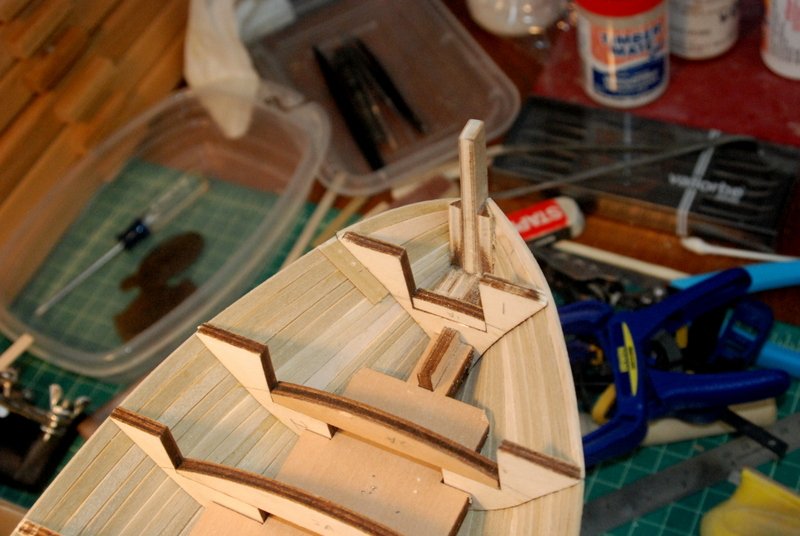
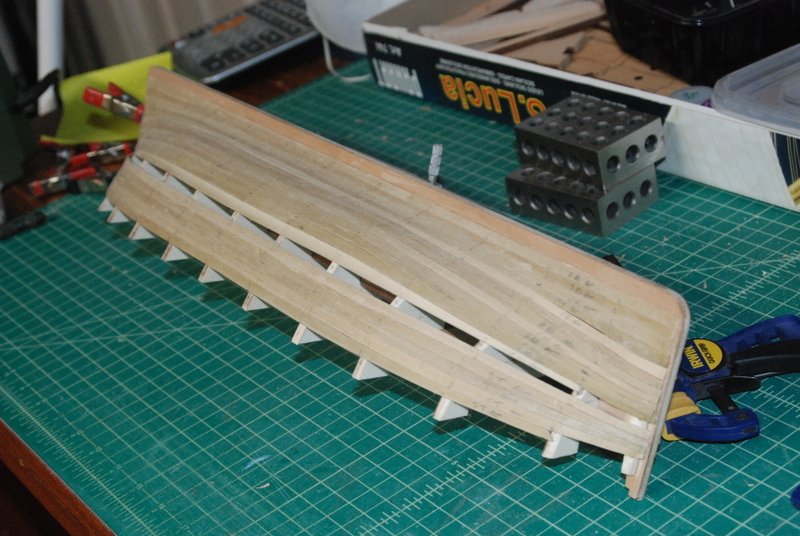
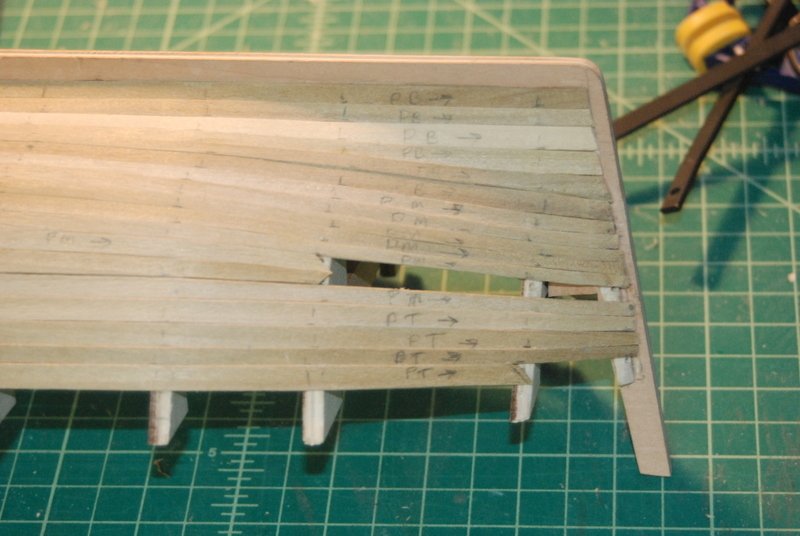
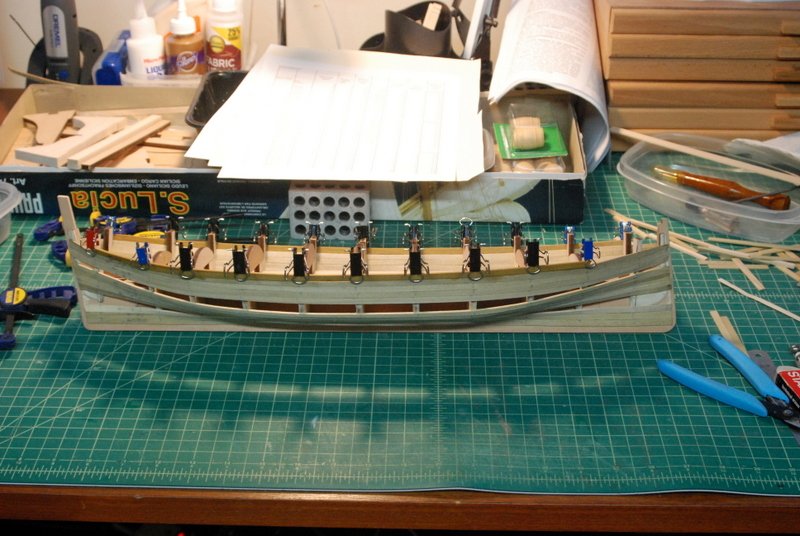
Thanks Fernando and for the likes. I am getting close to finishing the first planking. I have the bottom band done, which did not require any dropped or added planks. The middle band is almost done, but there are 4 drop planks to be added, one on each side at the bow and stern. Here you can see how I am doing the drop planks. I am finishing two planks on a frame with 45 degree angles, then filling the remaining gap with a single plank the goes to the bow or stern. Normally I would surround a single dropped plank with two full length planks, going from 3 planks to 2 planks, but to do that on this model the two planks would have to be made from very wide stock. Even with the method used here I had to make two of the single planks from wider stock than the 6mm wide planks supplied with the kit, but they are short pieces so I didn't need much. I have made those single planks and was able to soak them and clamp them to the hull to shape them. I though I might need to use heat with them after soaking because of their length, but that was not needed. I'll add pictures of the completed drop planks in a future post. As you can see I haven't done any scraping or sanding to the hull yet. Once I have the top planks glued on then I will be cleaning everything up in preparation for the second planking.
- 131 replies
-
- 4
-
-
- santa lucia
- panart
- (and 1 more)
-
Cutty Sark by NenadM
usedtosail replied to NenadM's topic in - Build logs for subjects built 1851 - 1900
Congratulations on getting your daughter onto her independent life. Both mine are on there own now and I am so proud, but still miss them a bunch.- 4,152 replies
-
- 4
-
-
- cutty sark
- tehnodidakta
- (and 1 more)
-
Thanks Popeye and the likes. Planking is coming along as I am down to just a few planks left in each band. I am going to drop a few planks near the stem and stern in the middle and top bands as the remaining gaps are pretty small there. As usual I am using a variety of different clamps, but as the gaps get smaller the choices get more limited.
- 131 replies
-
- 5
-
-
- santa lucia
- panart
- (and 1 more)
-
Those are nice details to add Jay.
-
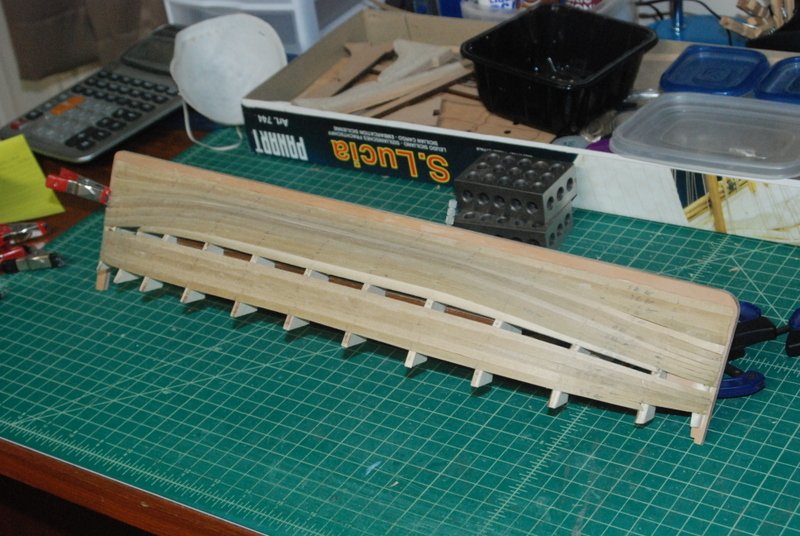
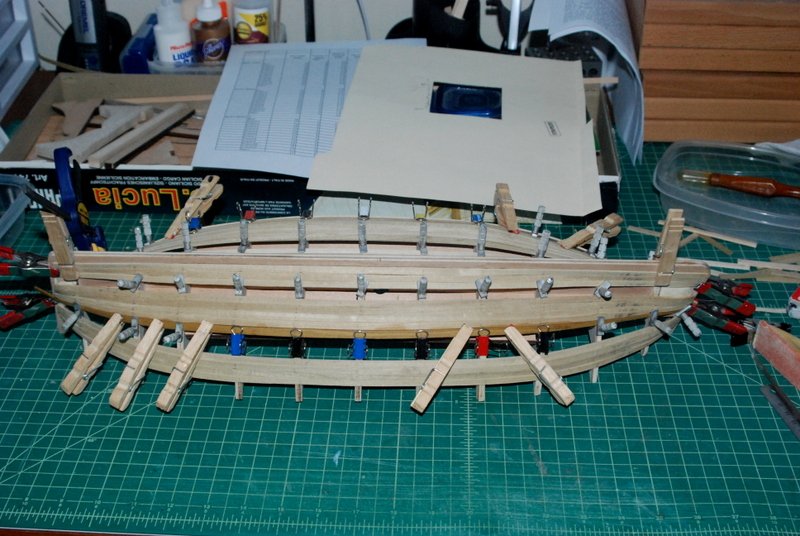
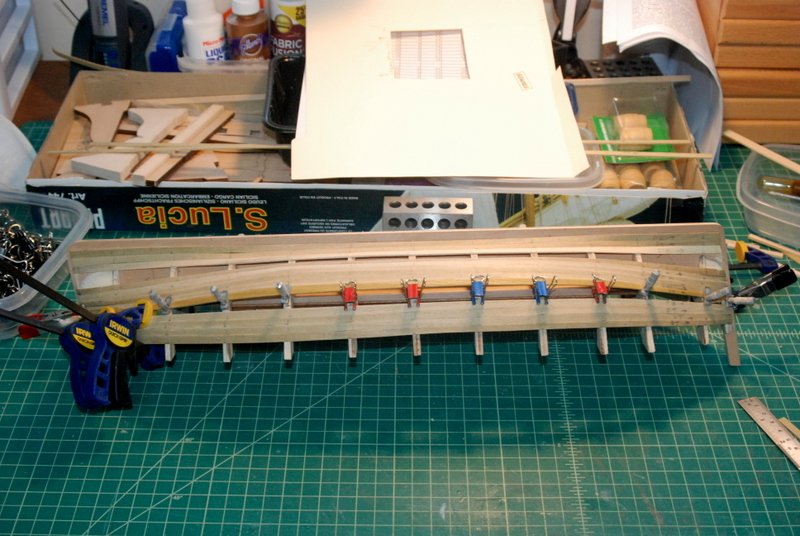
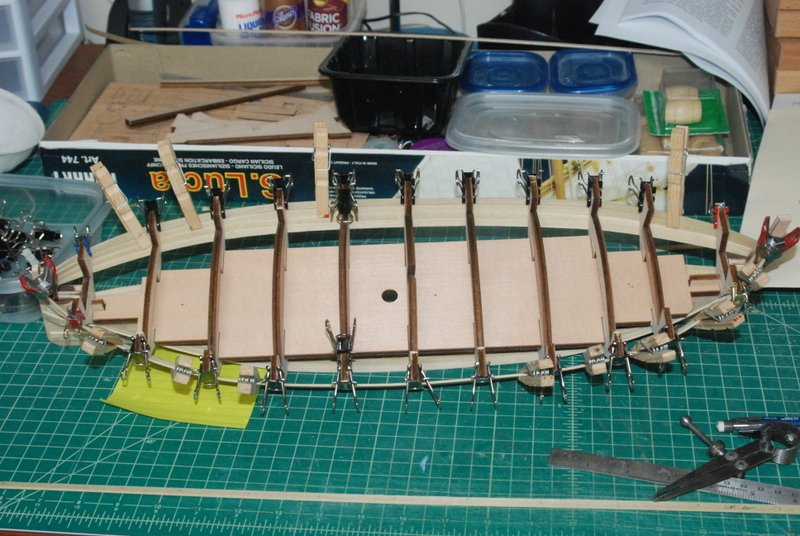
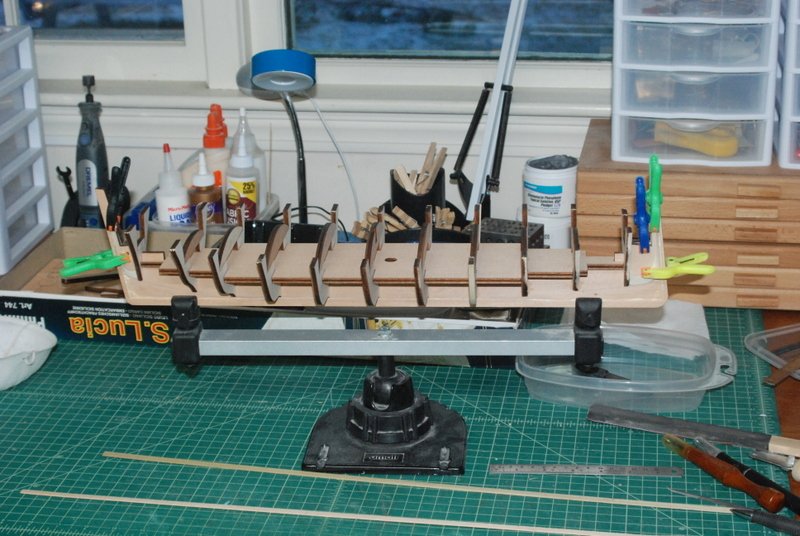
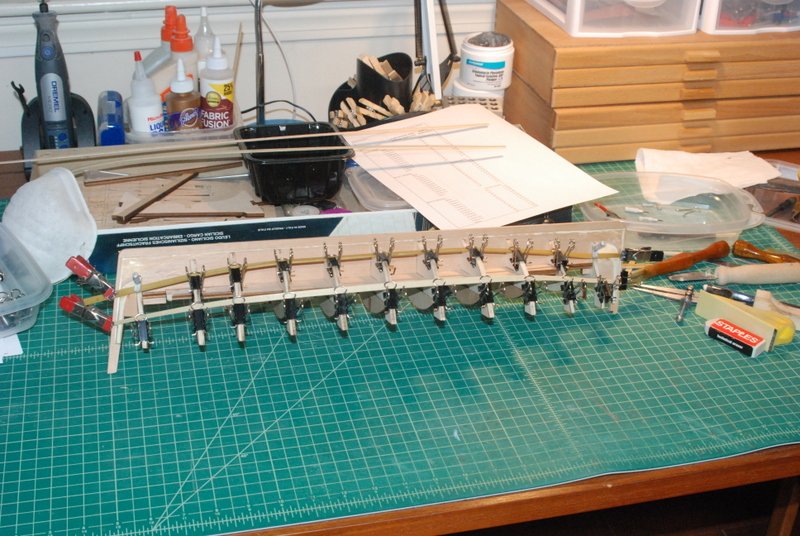
Thanks Anthony. I am just glad this model will have a second planking. This one is just the base. Here is a nice planking process picture. I have a plank in the middle band clamped after soaking to get it to shape, another in the bottom band drying after being glued to the keel and frames, and in the background there are two wood strips that have the frame positions marked on them ready to be trimmed for the top band. The supplied wood strips for the first planking are 1.5mm thick and 6 mm wide, and I have found that they only require soaking for a couple of hours and can be manipulated very well after that. I have not had to resort to any kind of heating for these strips. Those clothes pins between the frames reduce most of the clinkering since they clamp the wet plank to the previous one. For the top planks I have flipped the frame over so I can work from the top. You can start to see the shape of the hull coming out. Just more of the same for a while...

- 131 replies
-
- 5
-
-
- santa lucia
- panart
- (and 1 more)
-
Great job on that ladder Dave. A jig of some kind is an absolute must when building them.
- 742 replies
-
- 5
-
-
- constitution
- frigate
- (and 1 more)
-
Thanks Fernando, Popeye, and EJ. Fernando, I am a bit concerned about the planks that make up the outside of the bulwarks. Did you glue these to the parts of the frames that are to be cut away? I am leaning in that direction and then will clean then up inside when I remove those sections. I guess the second planking will help hold these together but just edge gluing them seems too flimsy to me.
- 131 replies
-
- 2
-
-
- santa lucia
- panart
- (and 1 more)
-
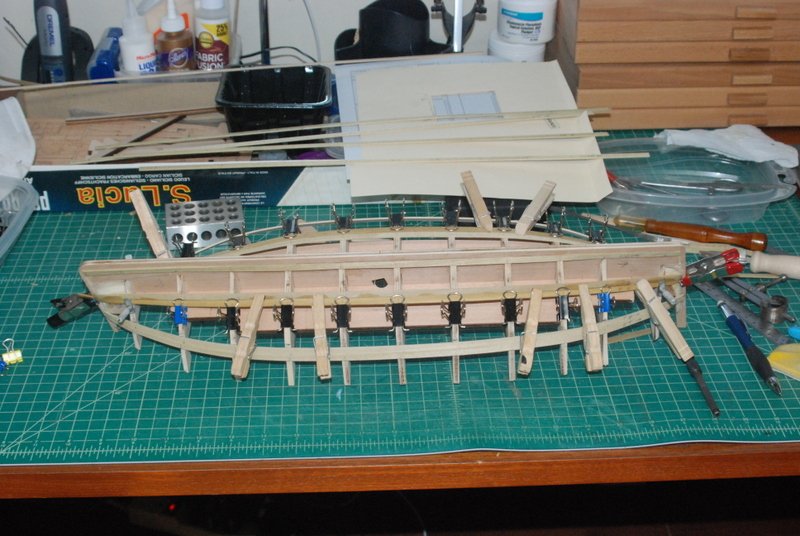
Planking continues with a few planks per day. I trim them to width given the distances between the two first planks, then soak them for a few hours and clamp them to the hull to dry overnight. I then glue them in place again planking them to the frames and to to planks already in place. Here are the two planks that define the three bands after gluing them on. Here the garboard strakes and the first of the top band planks are clamped on to dry after soaking. And here the second middle band planks on each side are being glued in place. While waiting for planks to dry, I measure and trim the next planks to be added. While this is a slow process, I am really trying to keep the amount of sanding after planking to a minimum so I am taking my time. So far so good.

- 131 replies
-
- 8
-
-
- santa lucia
- panart
- (and 1 more)
-
Ken, she looks great in that case. You family looks good too.
-
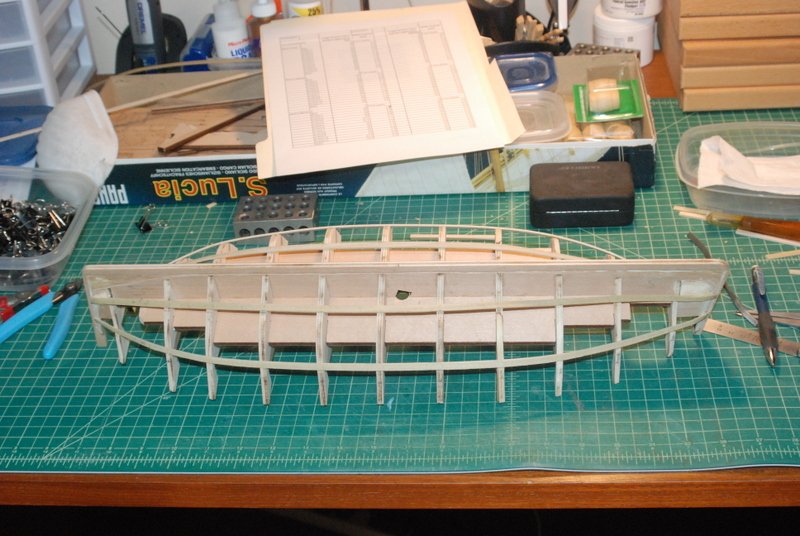
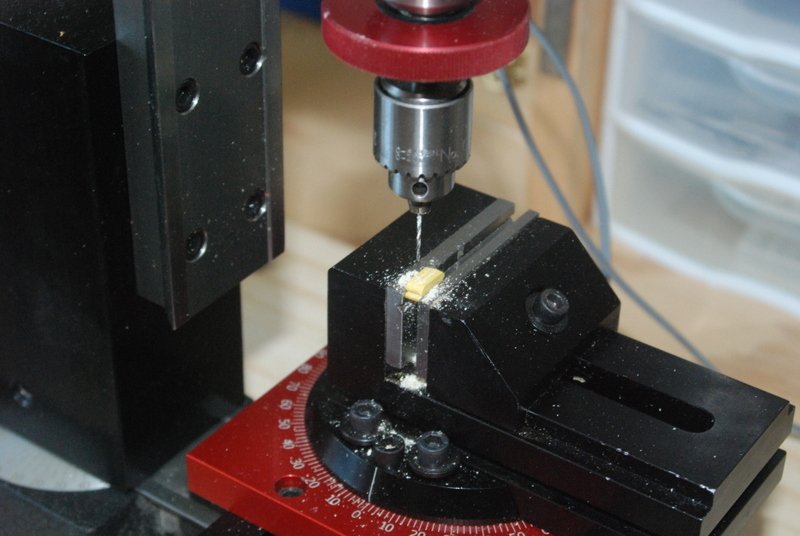
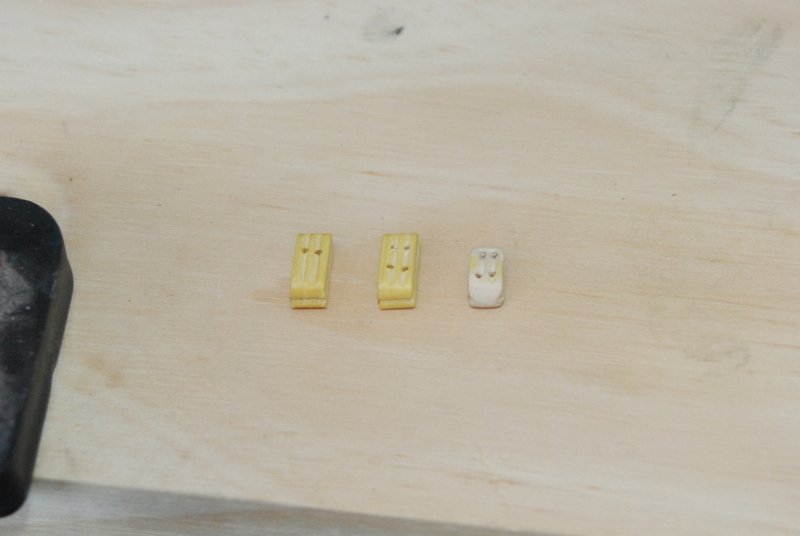
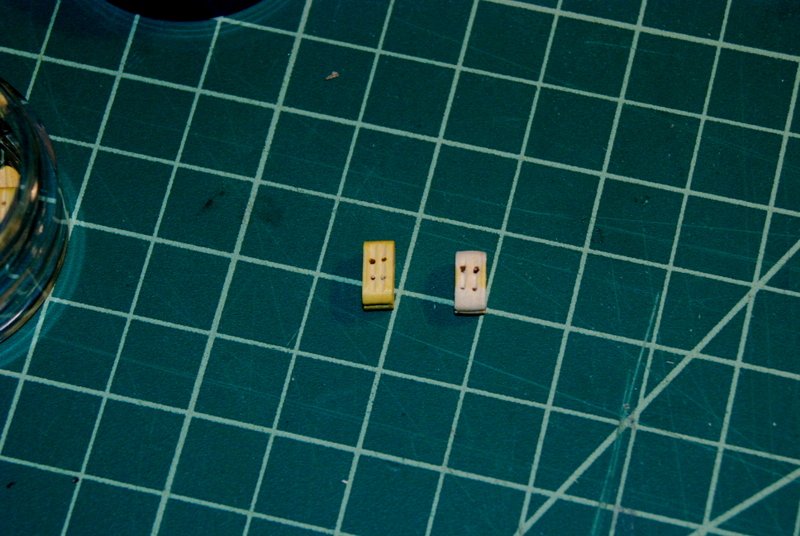
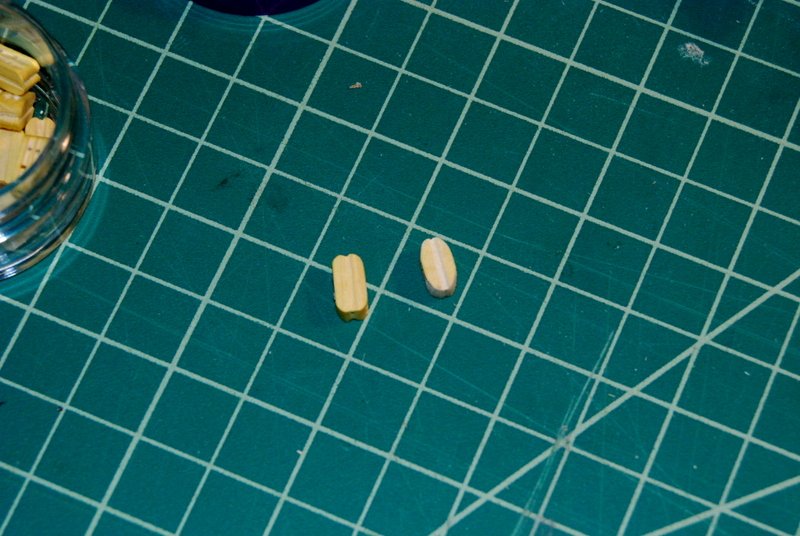
Thanks guys. Fernando the instructions are still very hard to follow. They include planking instructions which I found hilarious. Since the last update I have glued the end pieces in place after shaping them, then faired the frames. I used battens to set up three planking bands per side. I think I'll be OK with the middle and bottom bands but the top band will need some spilled (spelling?) planks to fit up to the tops of the bulwarks supports. I soaked some planks for the bottom and middle bands and clamped them to the frames to dry. In between the start of the planking I have started cleaning up the blocks supplied in the kit. They are all rather large (7 and 10mm) so they are easy to work with. I started by drilling second holes for each supplied hole so I could simulate the sieves. I used the mill with a starter bit to index from the old holes to the locations of the new holes, started the new holes, then finished them with a regular drill bit. This gave me very good results in the opposite sides of the blocks. I then used a pointed chisel to carve the simulated sieve between the two holes on each side. I sanded the blocks so they would be more of an oval shape. Once they are all shaped I will put them into the block tumbler to soften the edges a bit more. This first block I shaped too much but you can see the sequence I followed. Here are better shaped blocks. I still have a bunch to do but it helps fill the time while waiting for things to dry.
- 131 replies
-
- 4
-
-
- santa lucia
- panart
- (and 1 more)
-
I started bow first, bottom up - bowsprit, lower yards, topsail yards, etc. At each level I went fore, main, mizzen. I don't know if this is the best sequence but it worked for me. Have fun with the rigging. I had a blast.
- 742 replies
-
- 4
-
-
- constitution
- frigate
- (and 1 more)
-
Nice yards you got there Dave, including the one emerging from under the leaves. Happy New Year to you and your family.
- 742 replies
-
- 4
-
-
- constitution
- frigate
- (and 1 more)
-
Thanks Ken and Kirill. Ship, good luck with your build. I do hope you will be starting a build log here. Ken once you passed me your build log was very valuable to me.
- 1,354 replies
-
- 2
-
-
- constitution
- model shipways
- (and 1 more)
-
Glad everything went well Jay.
-
That's good news about the dentures. Now you can really enjoy all the holiday goodies.
-
Thanks. I am pretty sure I tapered that section but only slightly. I made the shoulder small enough to fit through the mat cap hole. It looks bigger on the plans I think but the difference is hard to see now
- 1,354 replies
-
- 2
-
-
- constitution
- model shipways
- (and 1 more)