usedtosail
-
Posts
2,421 -
Joined
-
Last visited
Content Type
Profiles
Forums
Gallery
Events
Everything posted by usedtosail
-
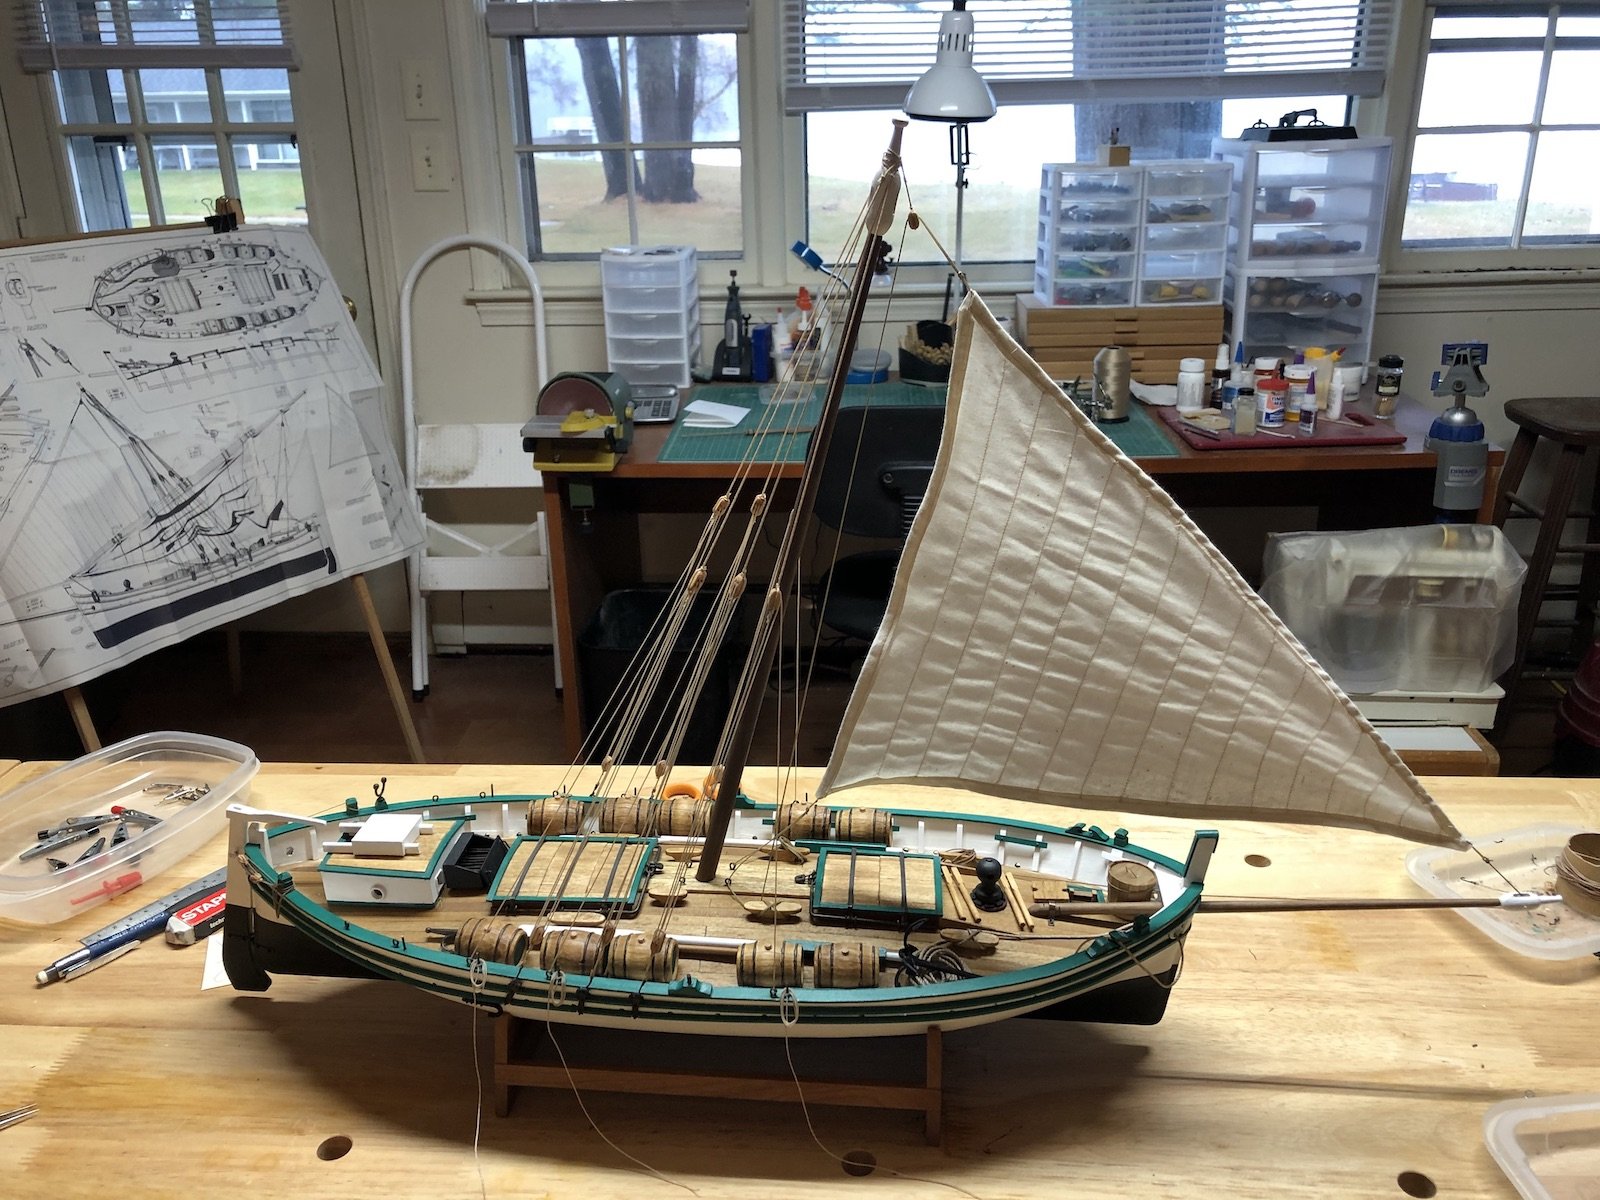
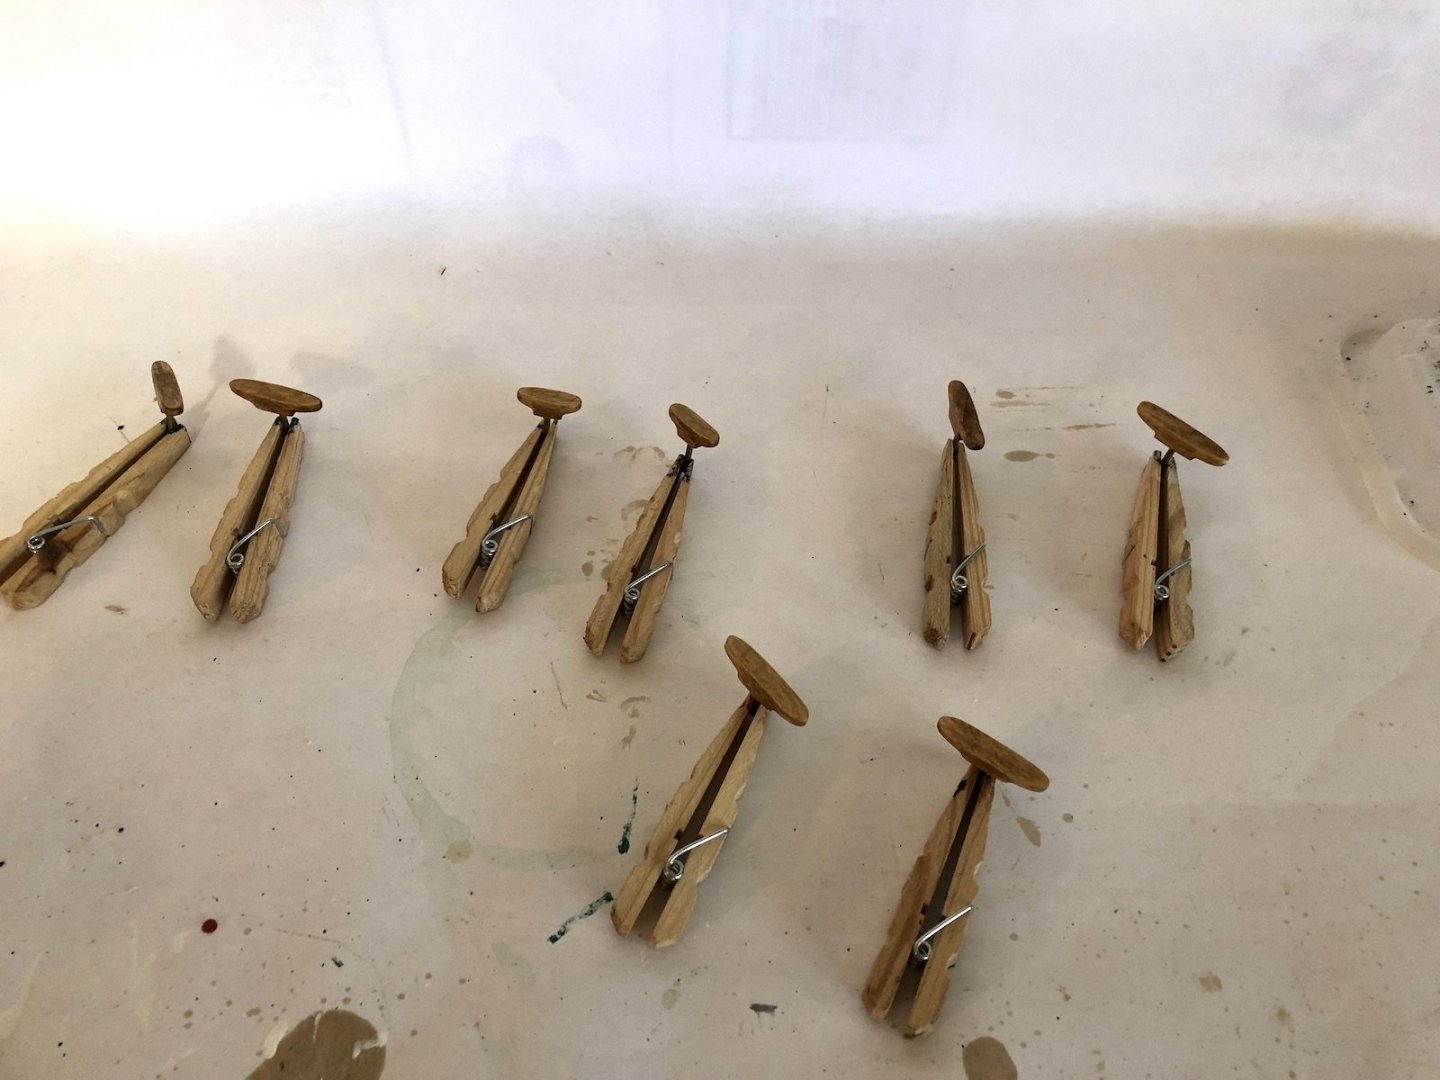
 Thanks Fernando. It makes sense to keep the tiller from flopping around. I am still not sure why blocks are needed except to make it easier to adjust the heading? I have finished installing the shrouds and the jib sail. I was able to loop the excess shroud lines around the belaying pins a few times and used some Dulcoat lacquer to hold them in place while I hung an alligator clip as a weight. When I removed the clips the coils stayed in place nicely, so I don't have to make separate rope coils for these. The jib lines all end at cleats on the deck, so after I tied these off to the cleats I brushed on some lacquer to hold them and later cut the lines at the cleats. I made separate rope coils for these and used them to cover the rope ends. You can see one of these coils on the port cleat in front of the mast. The other coils are still drying so not installed yet. I am also getting the yard ready for the main sail. I added the blocks to the yard and some of the sail furling lines. I have the main sail cut out and ready to sew the seams and seam lines so I should have that ready to go tomorrow.

- 131 replies
-
- 5
-

-
- santa lucia
- panart
- (and 1 more)
-
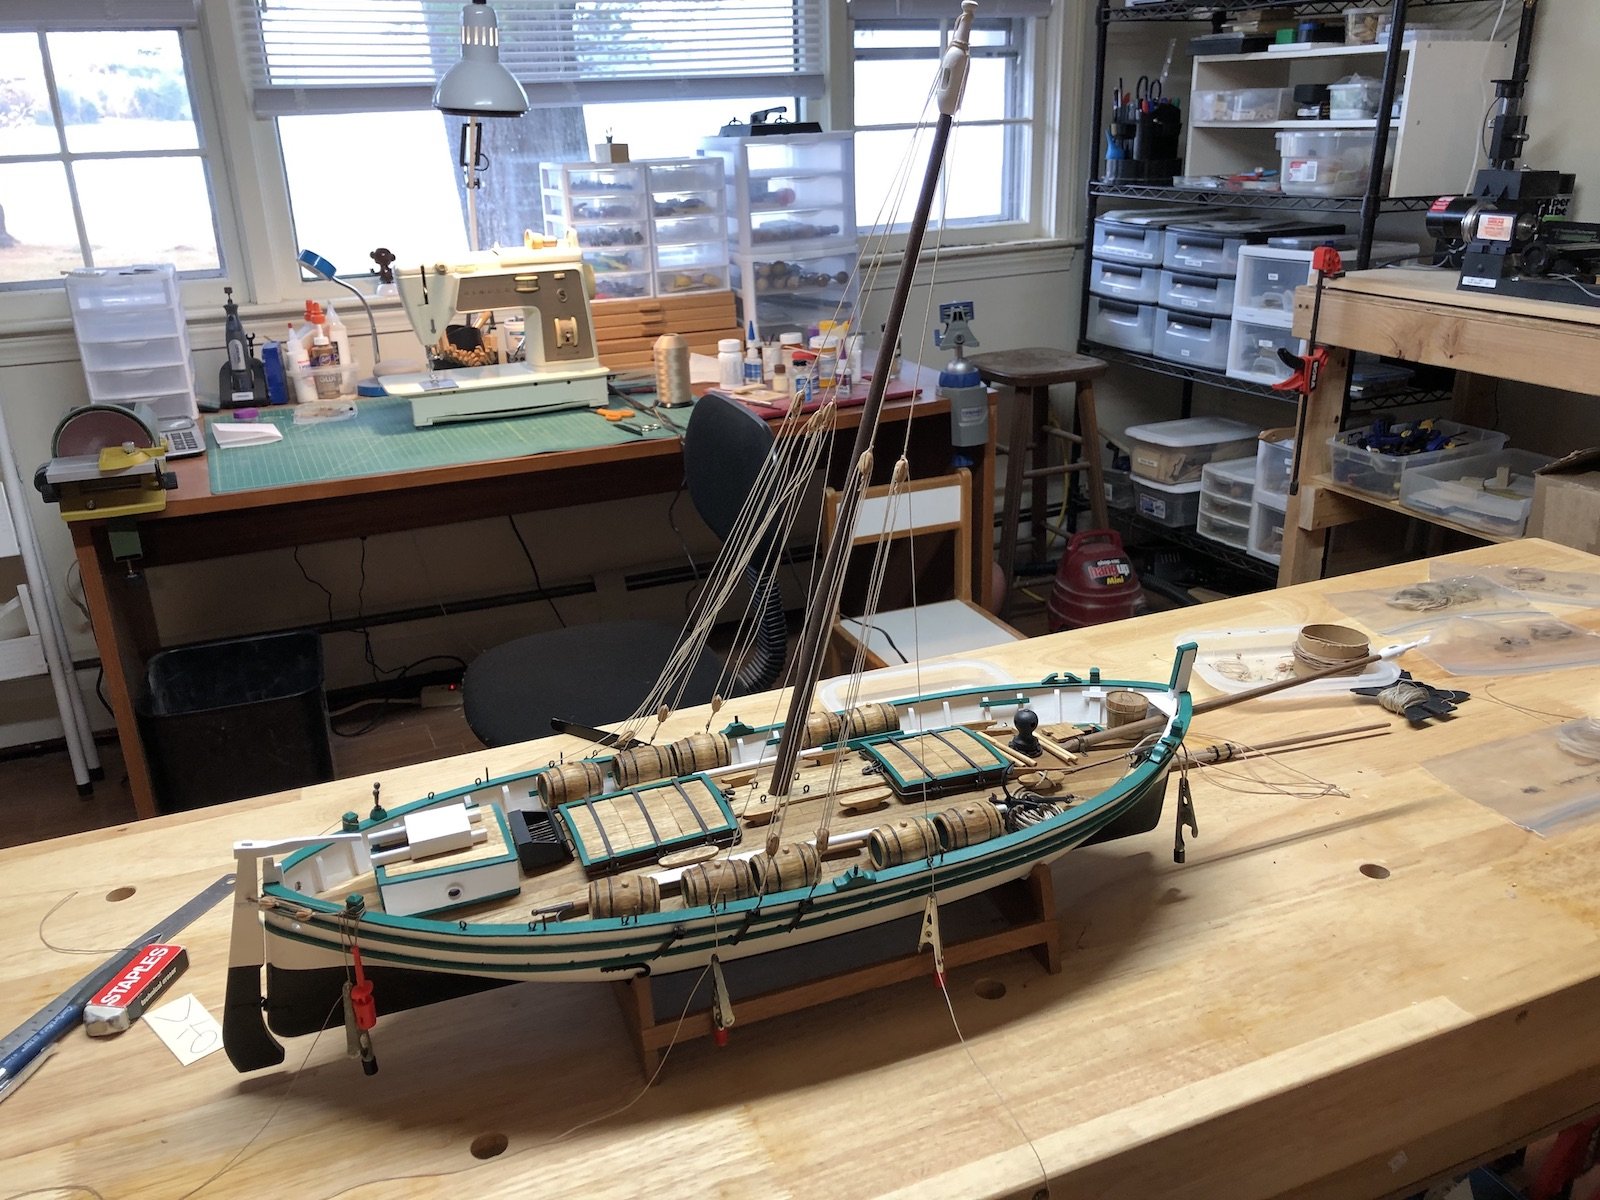
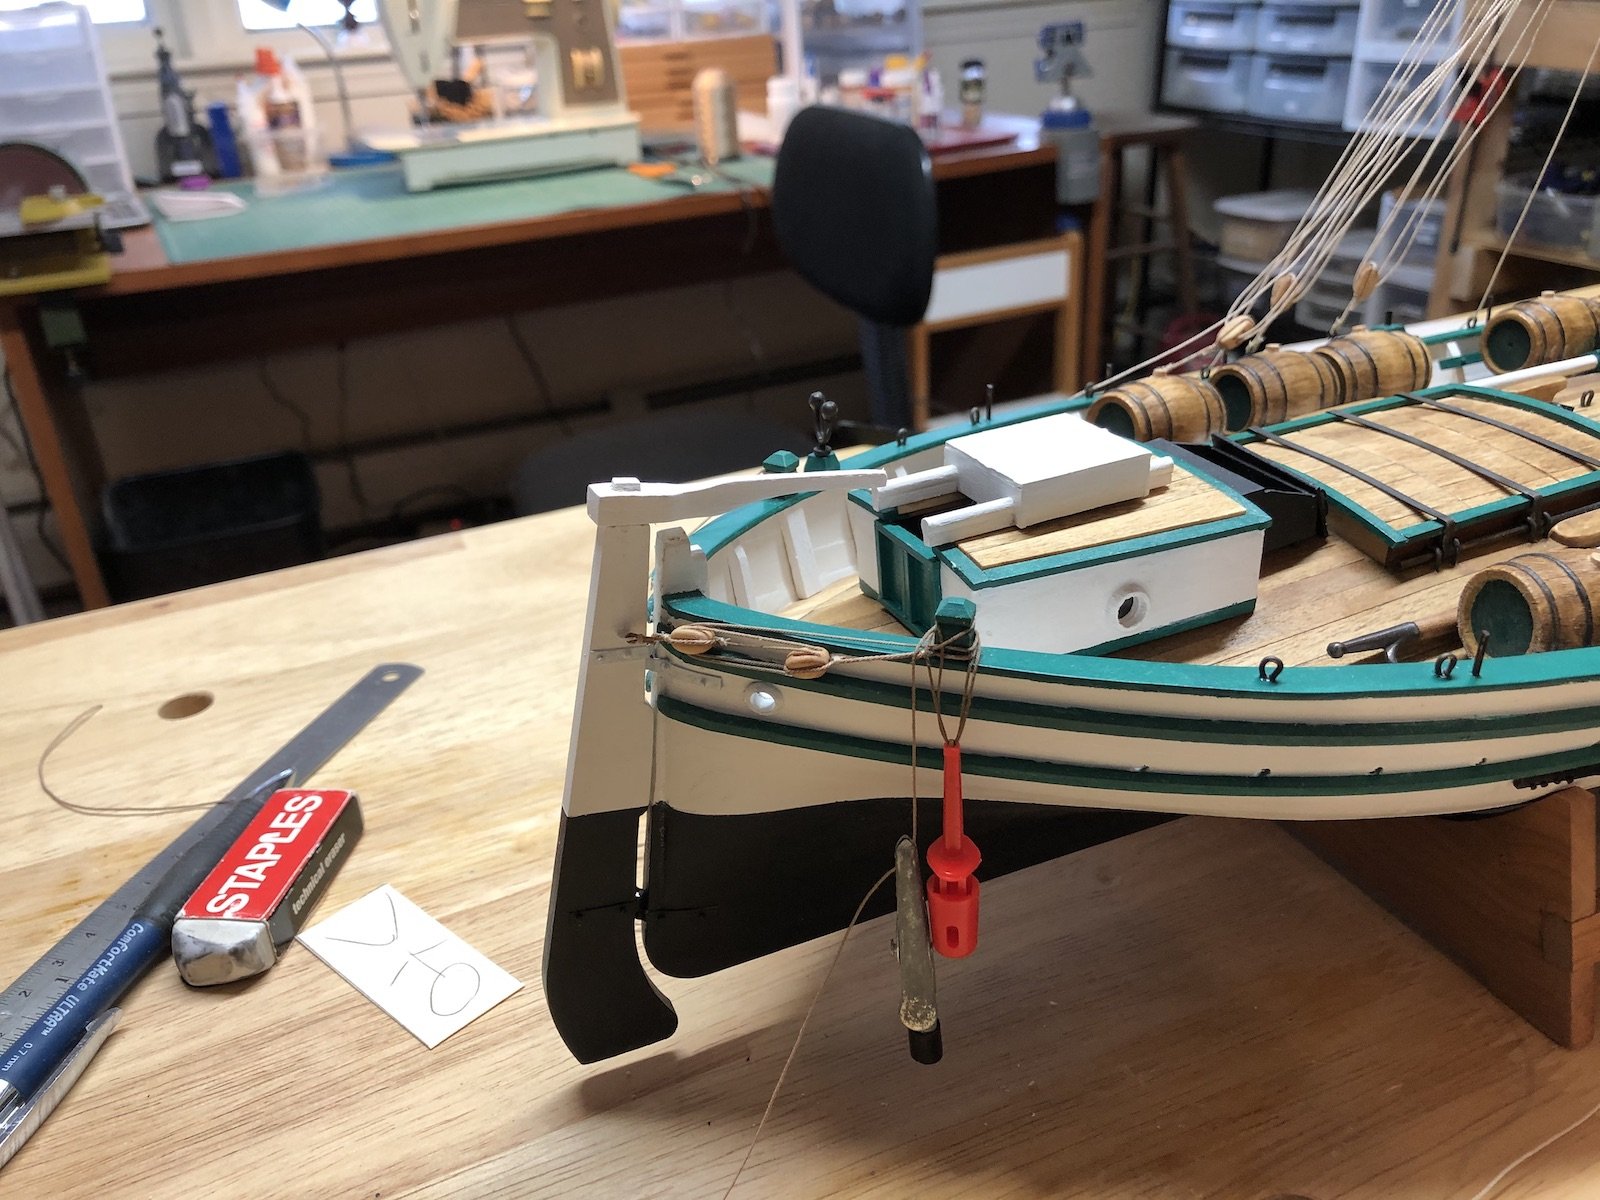
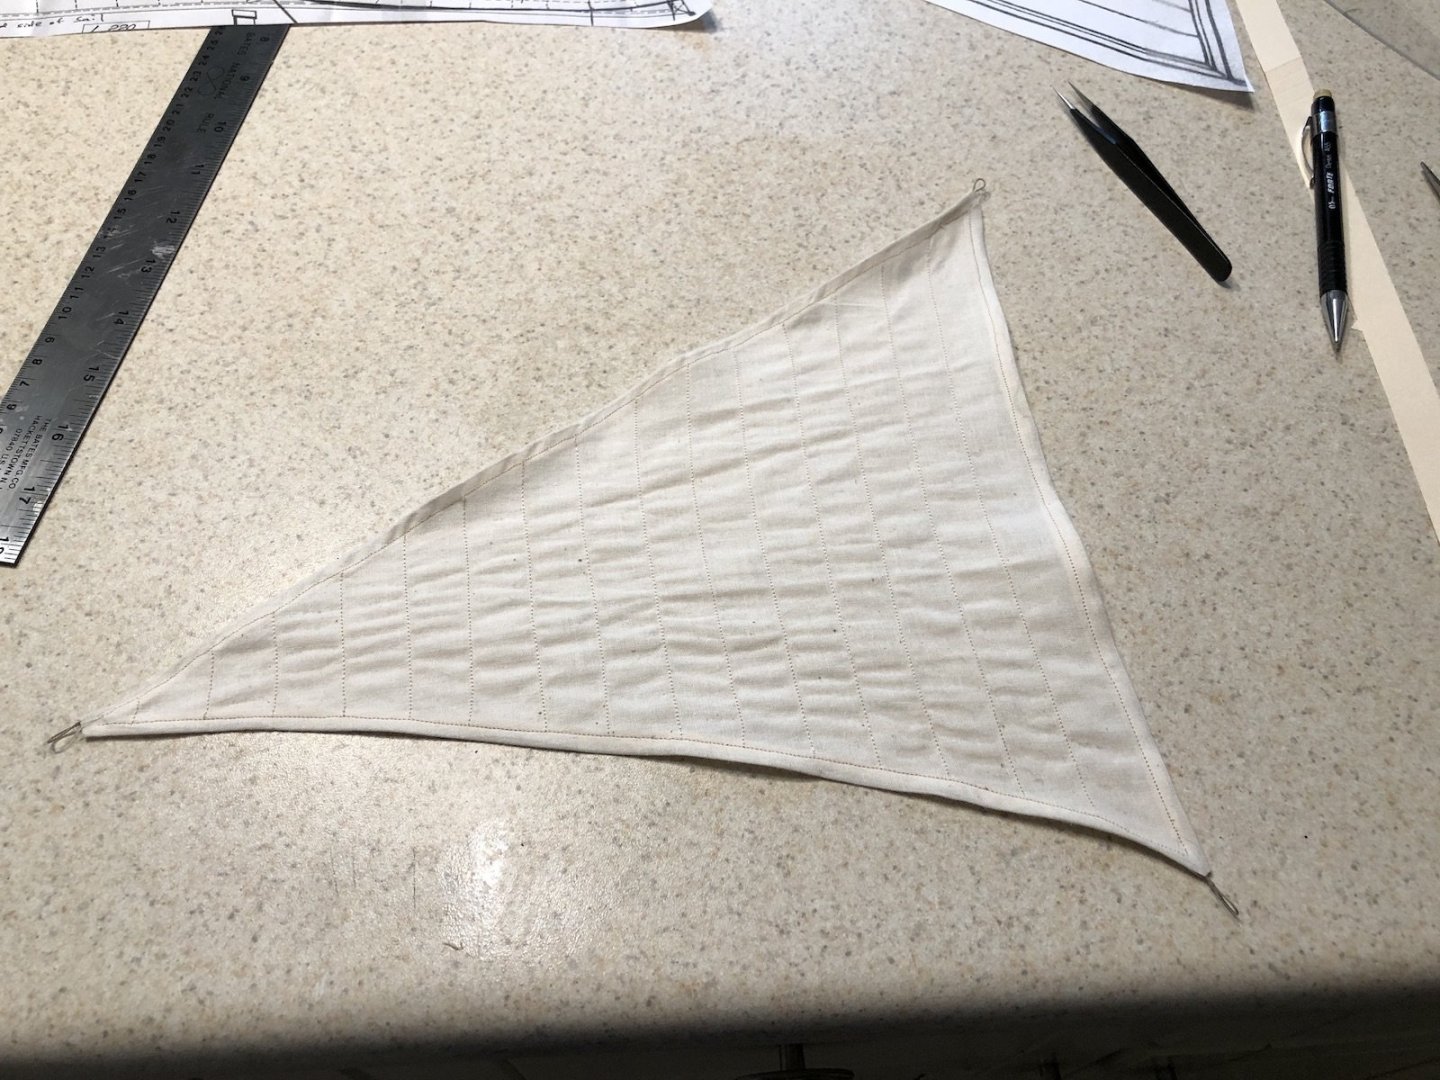
I sewed the seams on the jib sail today and was pleased with the result. I then drew light pencil lines on the back of the sail where the seams are using a piece of manila folder material that I cut to the width between seams. I then used the sewing machine to sew the seam lines. Here is the completed sail. I am really happy with it so now I will make the main sail the same way. I have also started rigging, first with the shrouds on the mast. I have the tackle lines rigged but not tightened yet. I also am in the process of remaking the single shroud on the starboard side because it was noticeably shorter than the rest. Here is another curious feature on this boat. There is a tackle on the starboard side of the rudder, and just a line on the port side. I am really not sure why a tackle is needed or what this rigging is supposed to accomplish. If anyone knows please let me know. Maybe it is just a way to hold the rudder without having to man the tiller?


- 131 replies
-
- 6
-
-
- santa lucia
- panart
- (and 1 more)
-
I experimented with sewing the sails using a sewing machine that my mother had back in the 60s. The thing works great after all these years and just needed a little cleaning. I even found the manual for it on the Singer web site. I am going to make the jib first and see how it comes out. I started by using the template to mark the sail on the fabric. I went around the marked line with anti fray solution and cut out the sail after it dried. I cut it out larger than the actual size and folded the edges to size, using a steam iron to hold the folds down. It worked pretty well. Next I will make the cringles on the bolt rope, then try sewing the seams with the bolt rope in them. If I don't like how they come out I will make a new one and glue the seams closed instead. But first my wife and I are going for a bike ride on this beautiful Fall afternoon.

- 131 replies
-
- 5
-
-
- santa lucia
- panart
- (and 1 more)
-
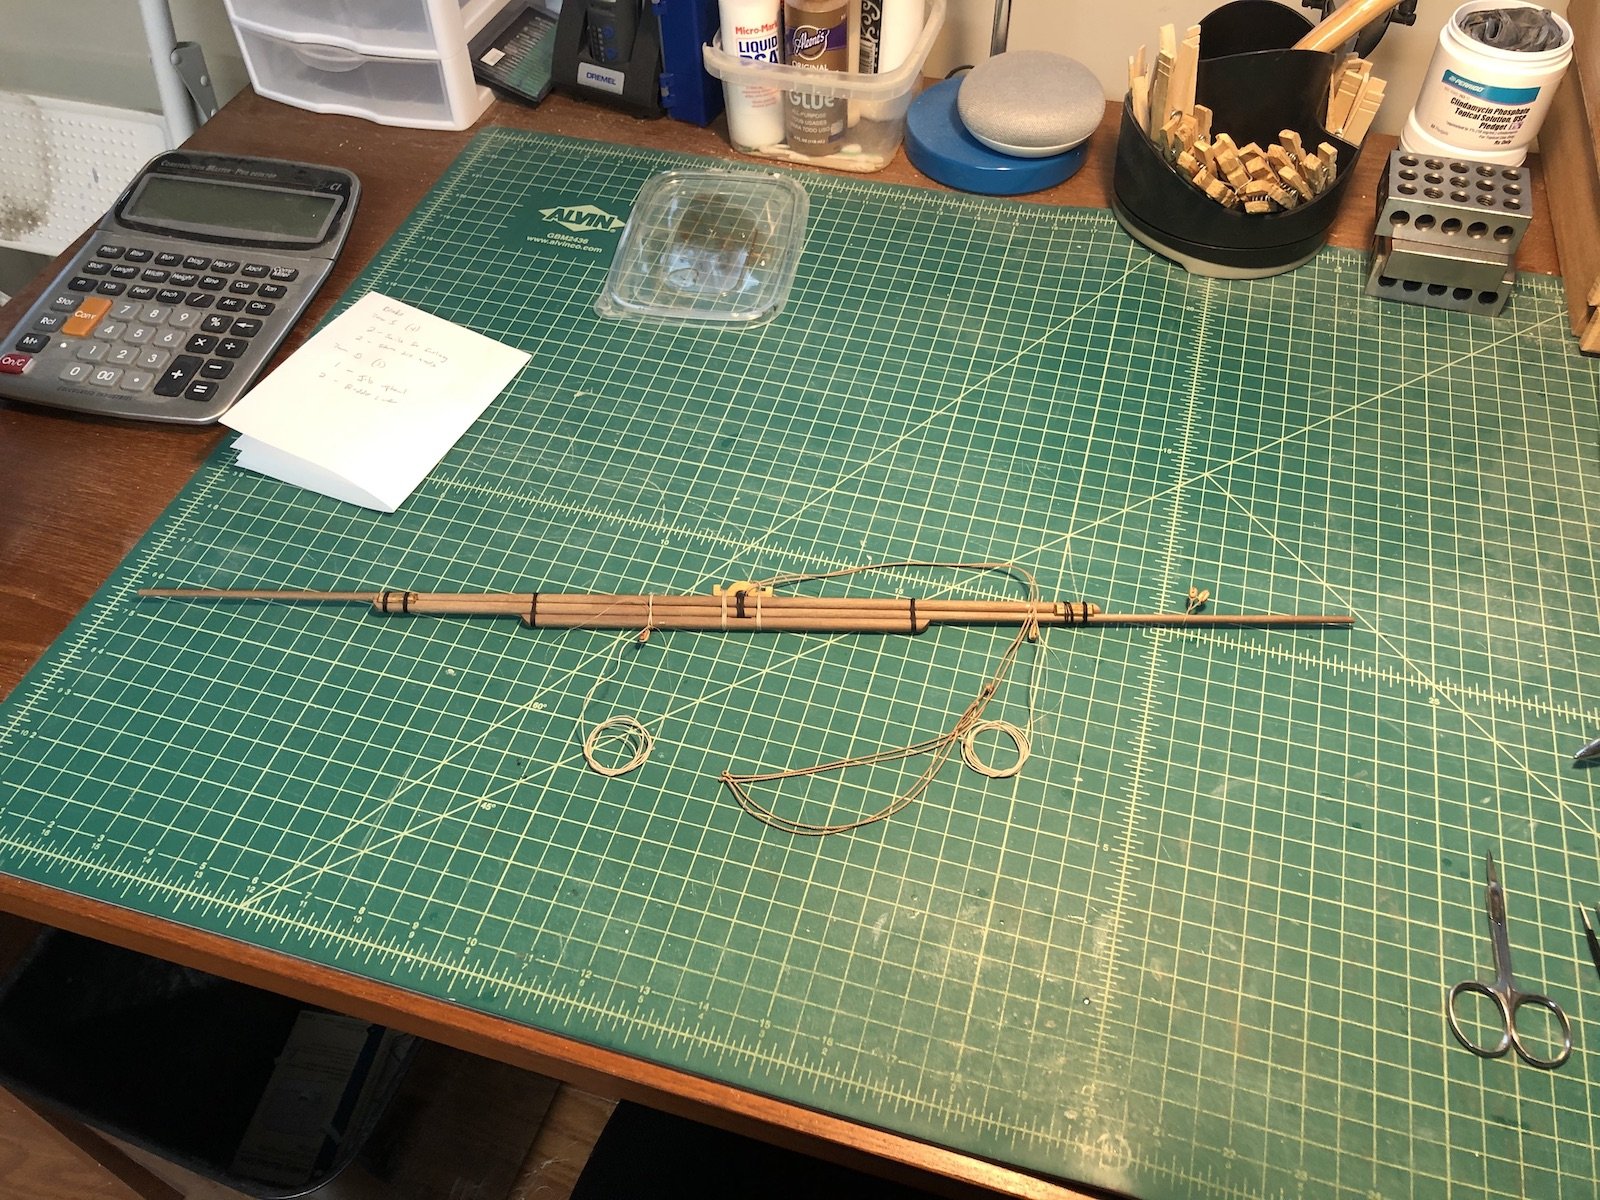
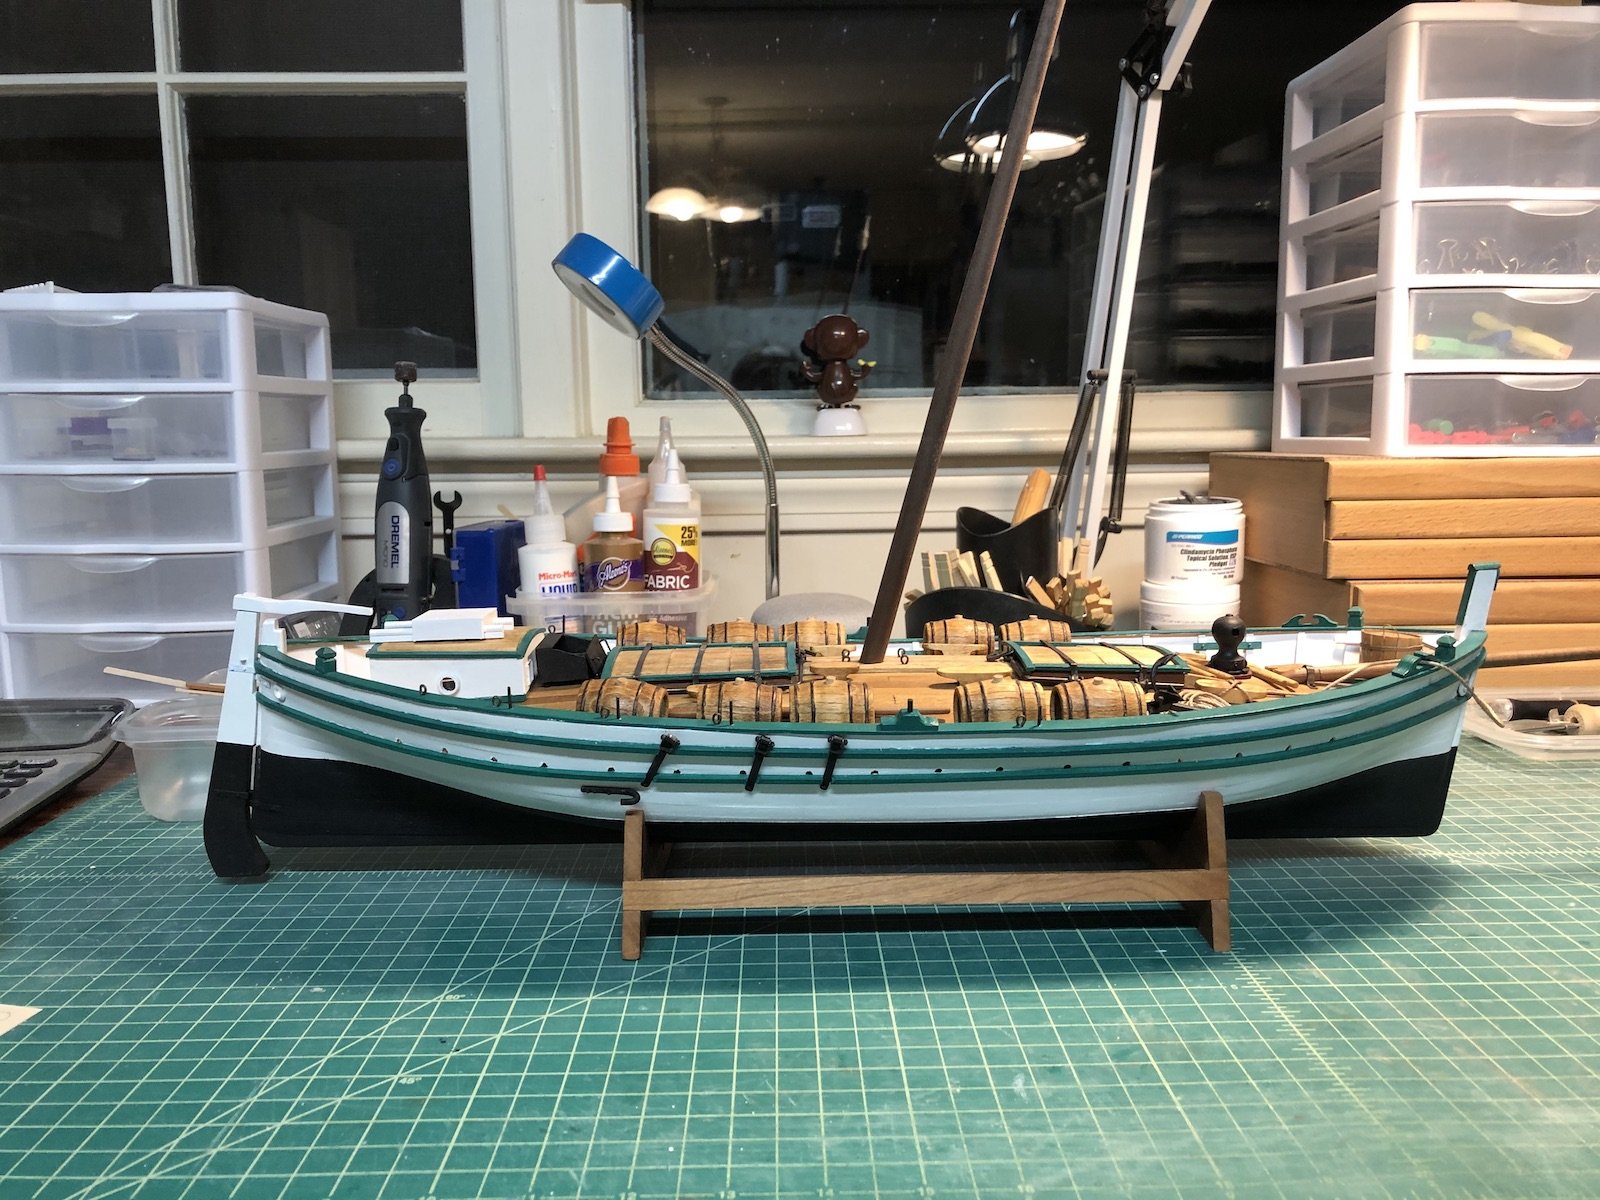
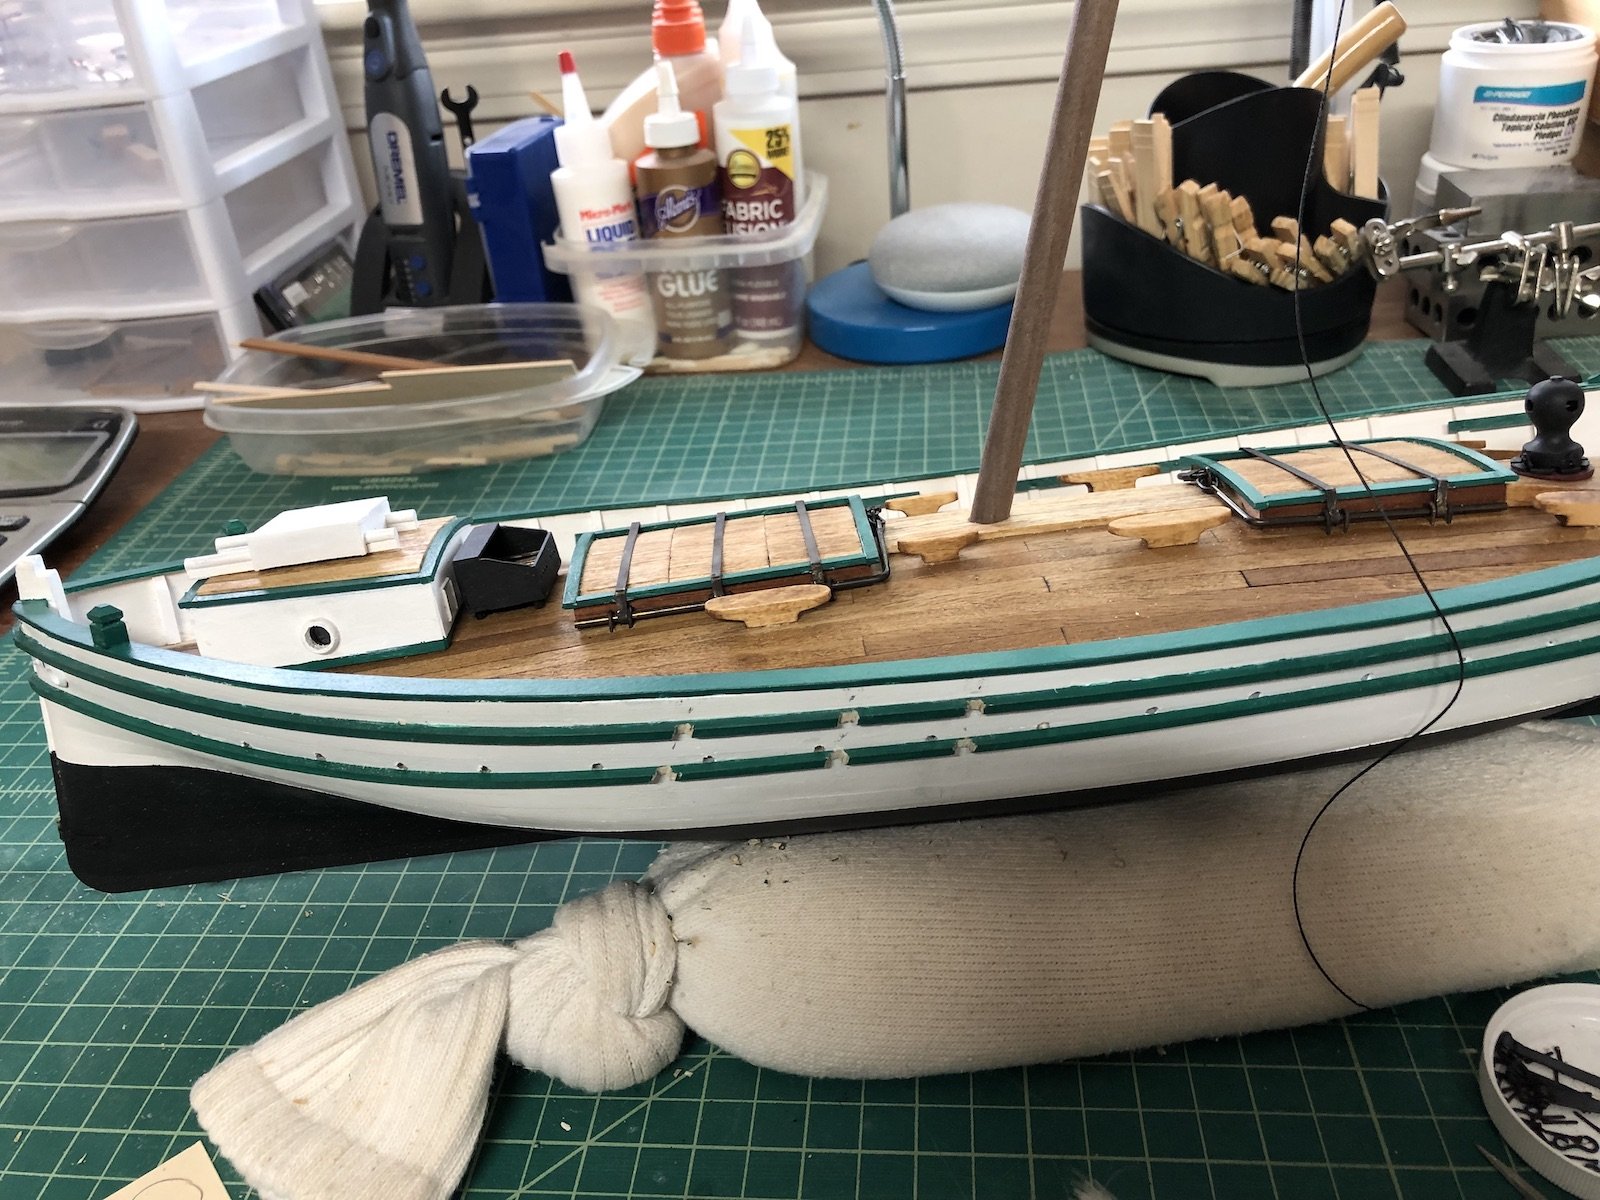
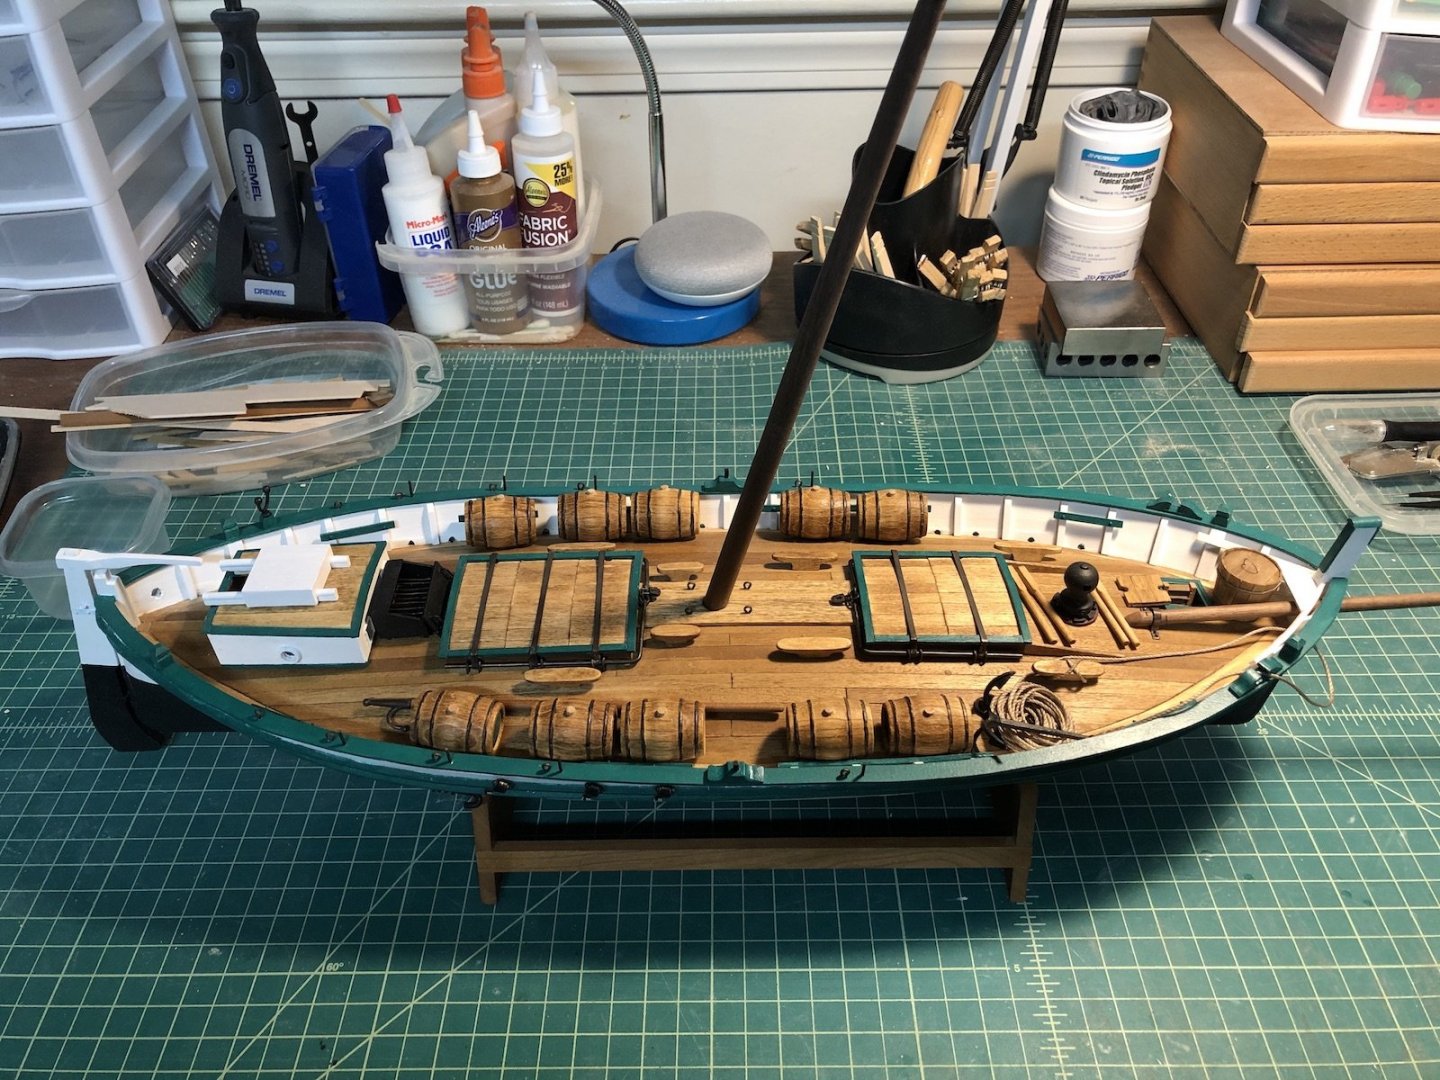
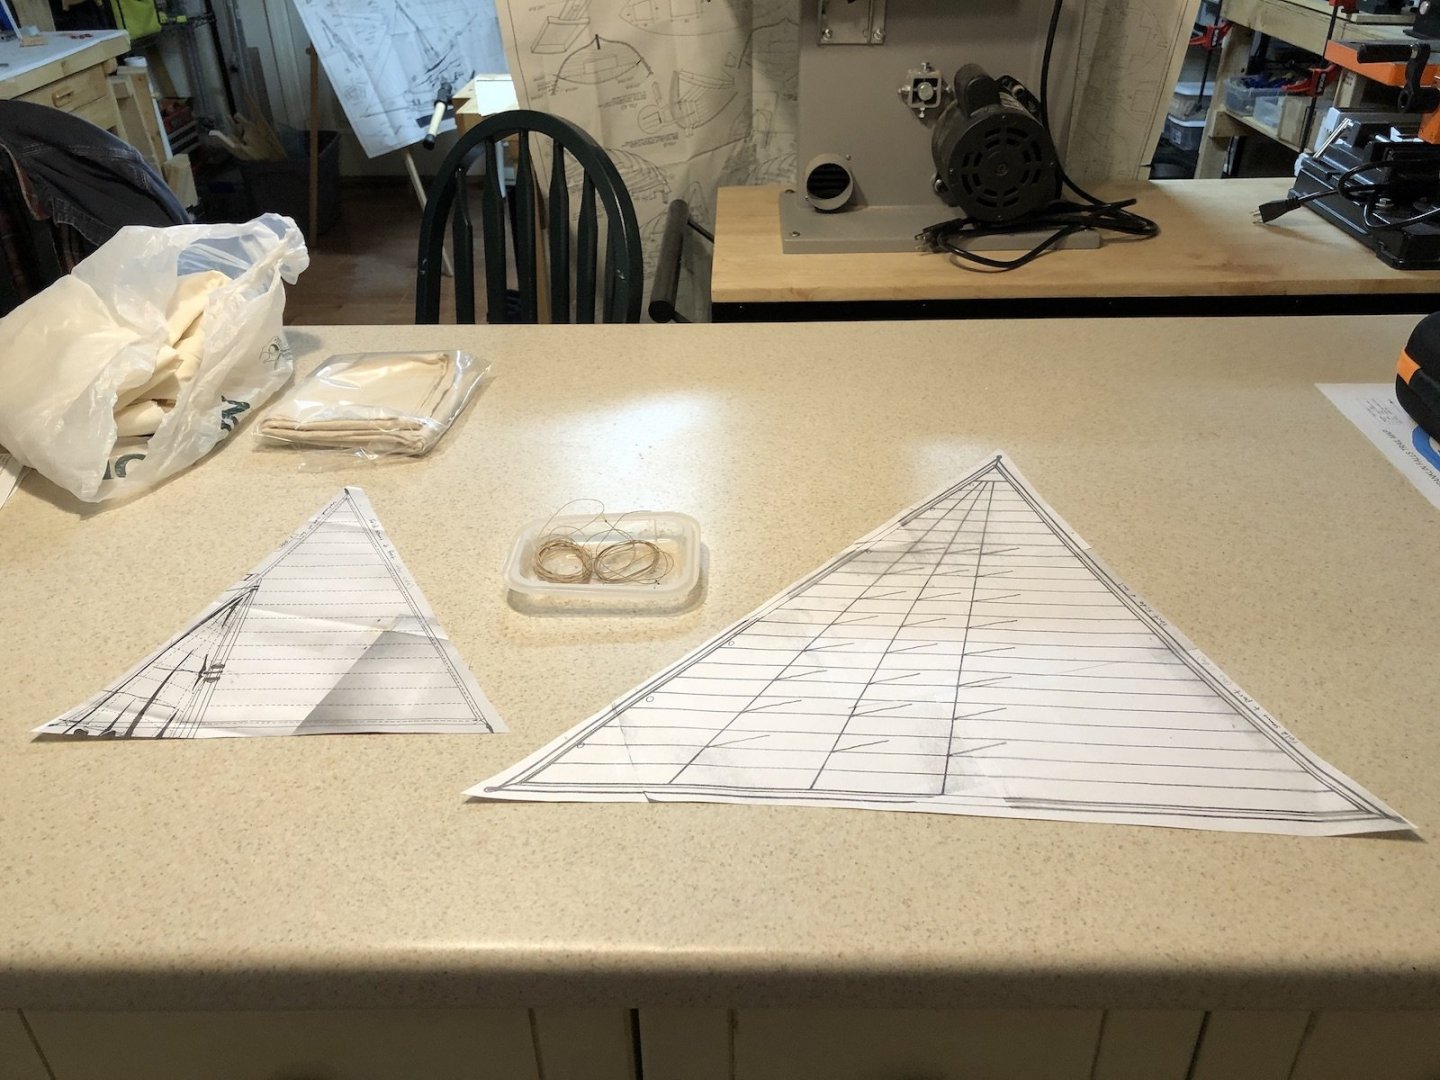
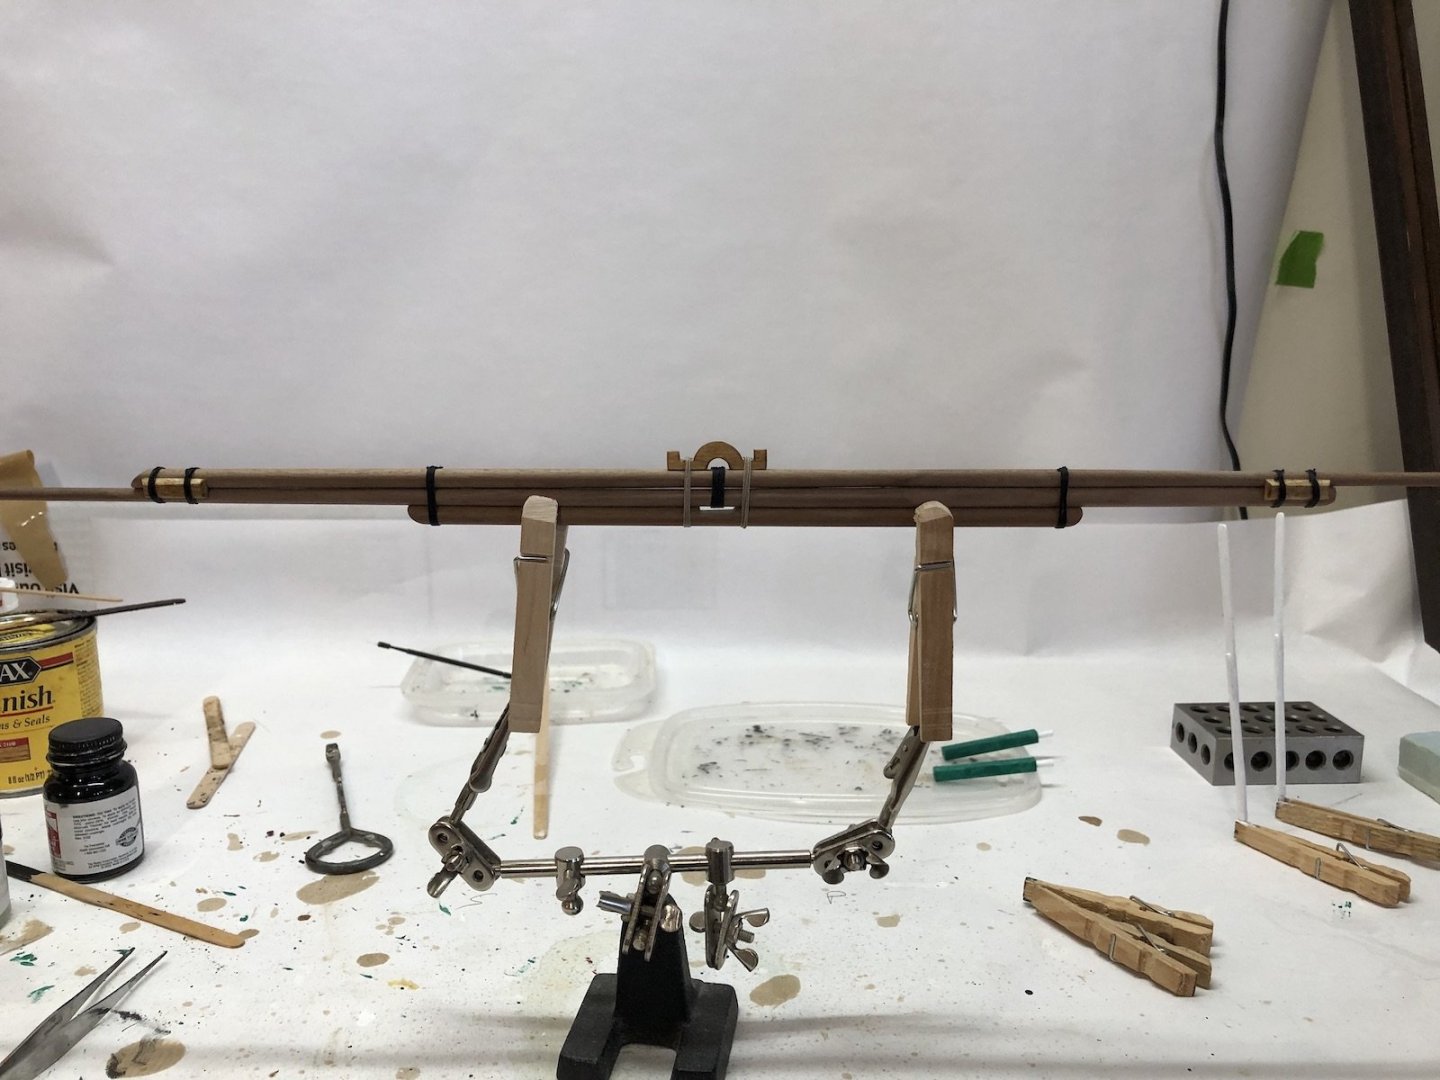
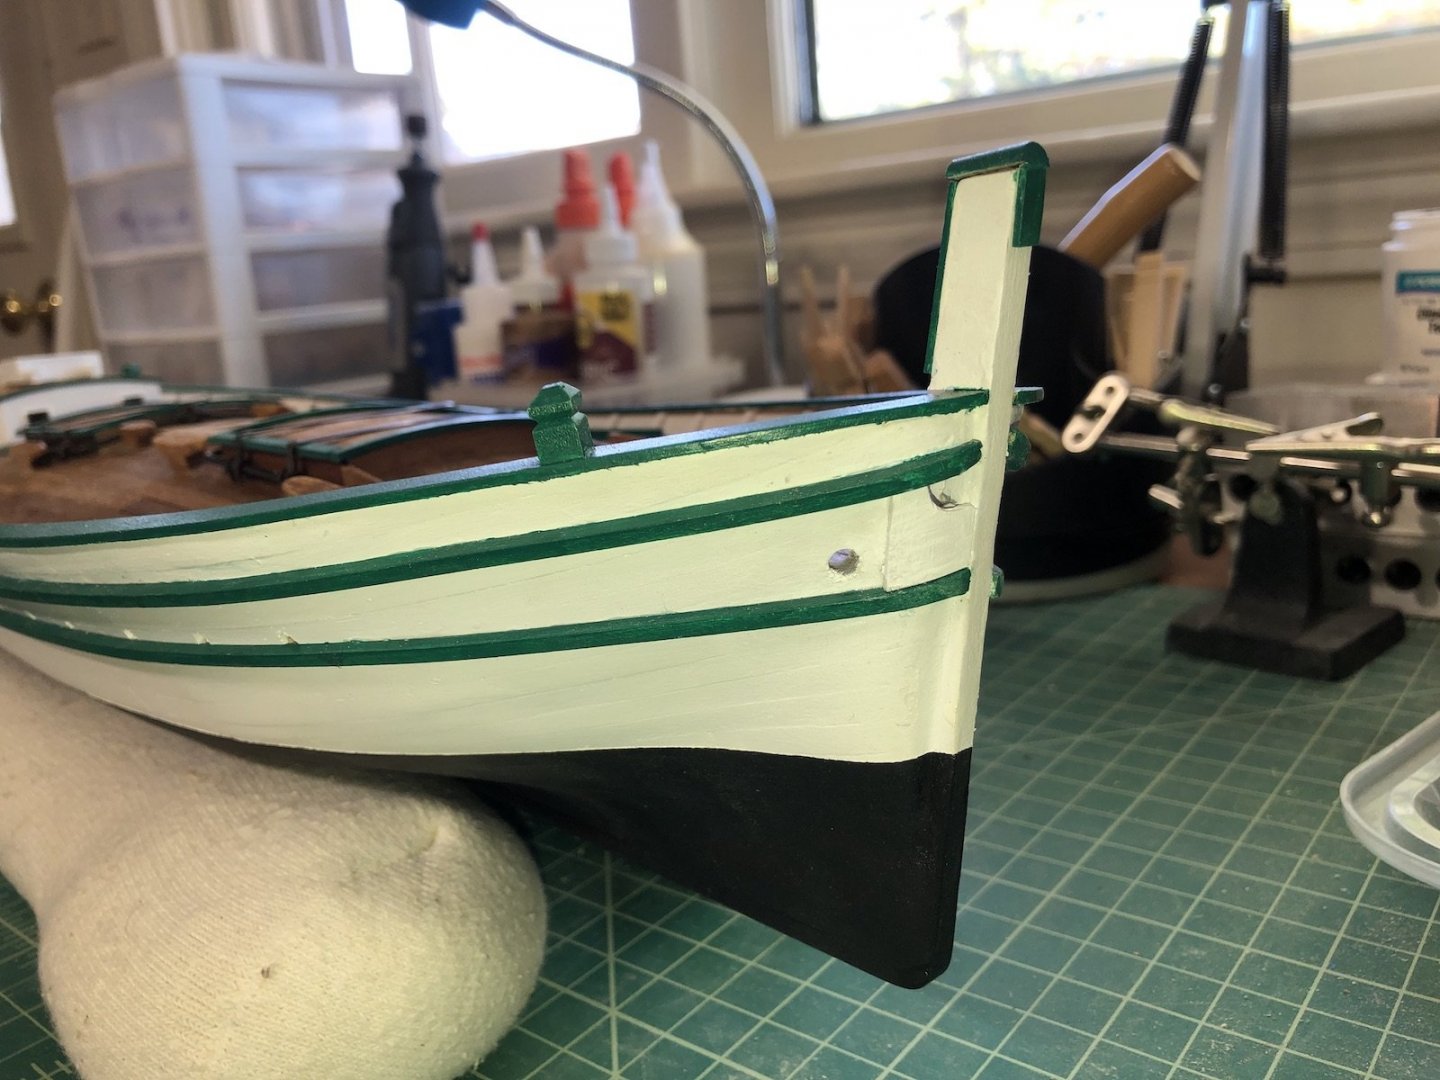
I finished the lanteen yard so it is ready for the sails. I remade the yolk piece because the kit supplied piece was about .5mm thick. This one is 2mm which is what the plans show. I fixed all the wrappings with Dulcote Lacquer. In the past I have used thin CA but I am trying the get away from it for fixing knots and the lacquer seems to work well so far. And it dries nice and clear. For the sails I have made two patterns from the plans. The jib is shown full size on the plans but the main sail is shown at 1:3 reduction, so I had to enlarge it on the photo copier and stitch the parts together. Not too hard to do since there are so many straight lines on the sail plans. I want to make the bolt rope out of one piece of line so I made a really long line on the rope walk for the main sail. In my new workshop I have a really long counter that I can run the rope walk on so I can make lengths about 6 feet now. Now I need to decide how to represent the panel lines on the sails. The instructions say not only to sew them but to make them very prominent, which goes against everything I have read about model sails. I will probably just draw them on the fabric like I have done in the past. I finished up the deck furniture except for the oars which I am still painting. I put the boat onto the cradle I built for it (no more socks to have to look at) and glued down the barrels, capstan bars, boat hook, grill cover, bucket, and hatch cover. I also glued the tiller to the rudder and hung the rudder on the gudgeons. I also added the eyebolts and belaying pins to the rails. I used a smaller diameter brass rod for the pins than the 2mm diameter pieces that came with the kit. They looked too thick in my opinion. So now its sail making and rigging. I have also started drawing up the plans for the case I will make for this model.

- 131 replies
-
- 7
-
-
- santa lucia
- panart
- (and 1 more)
-
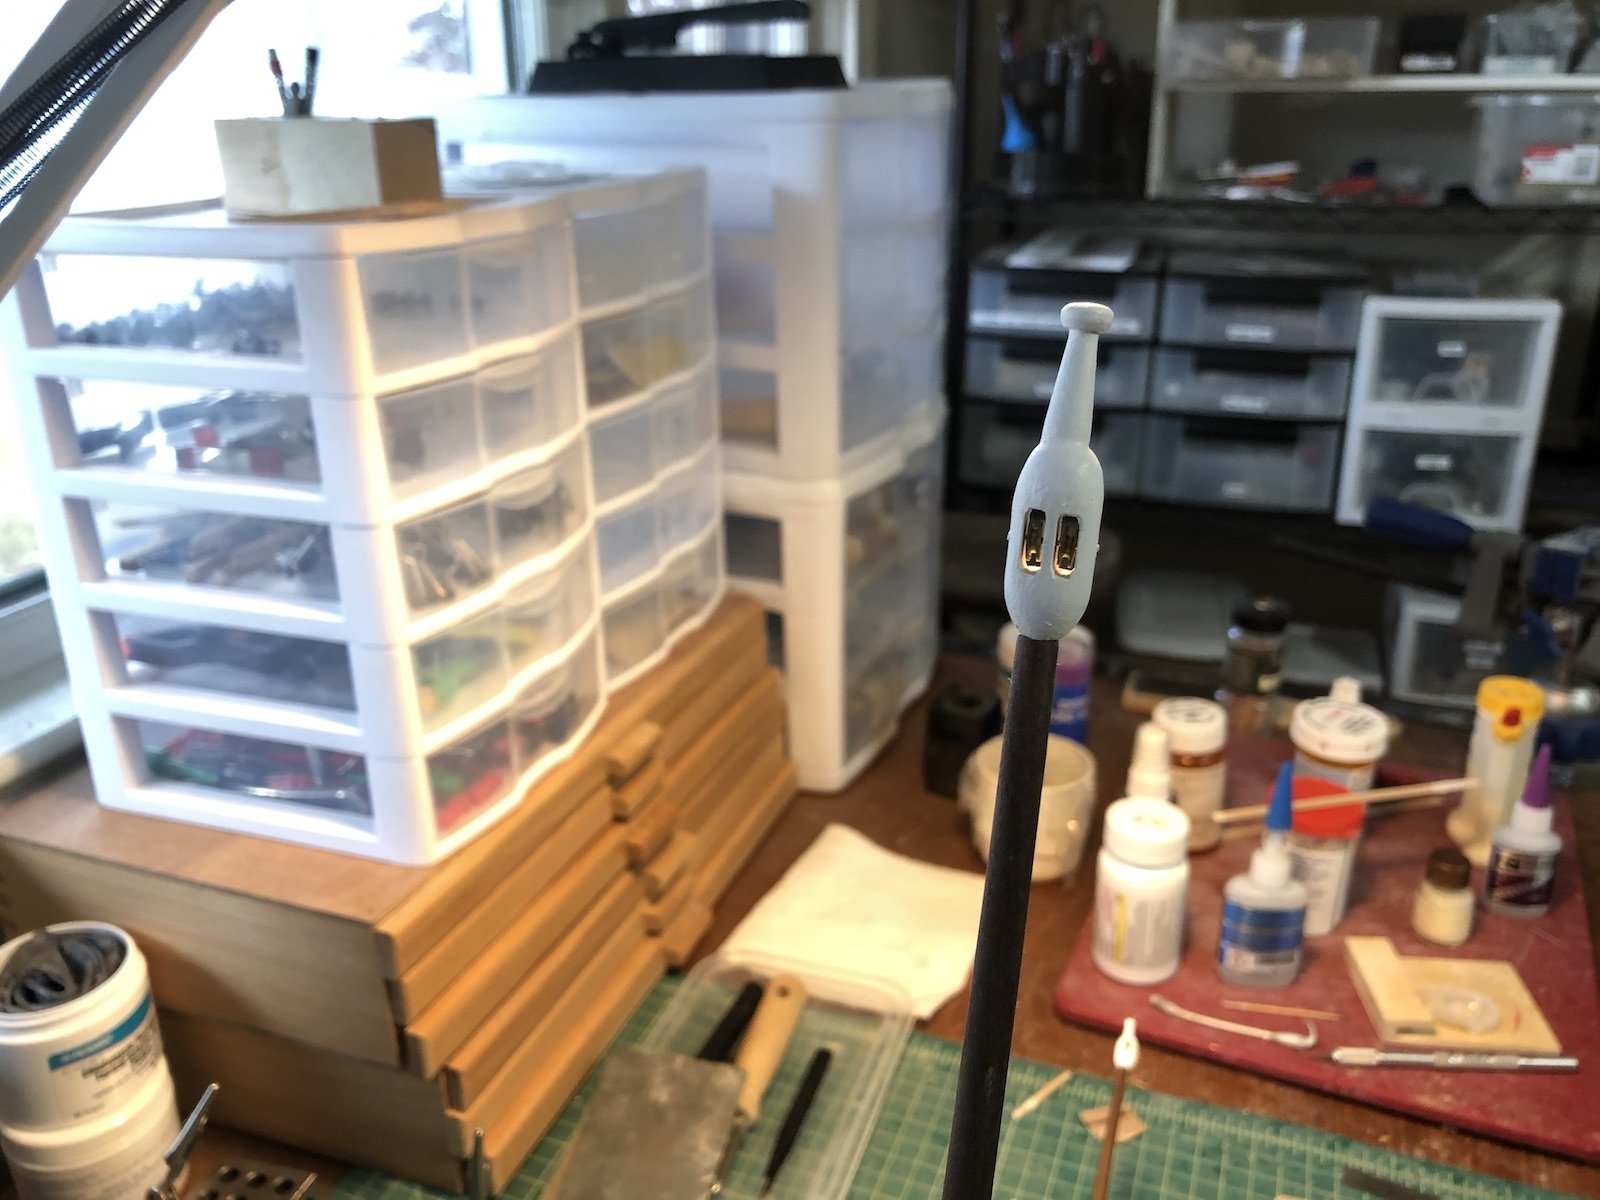
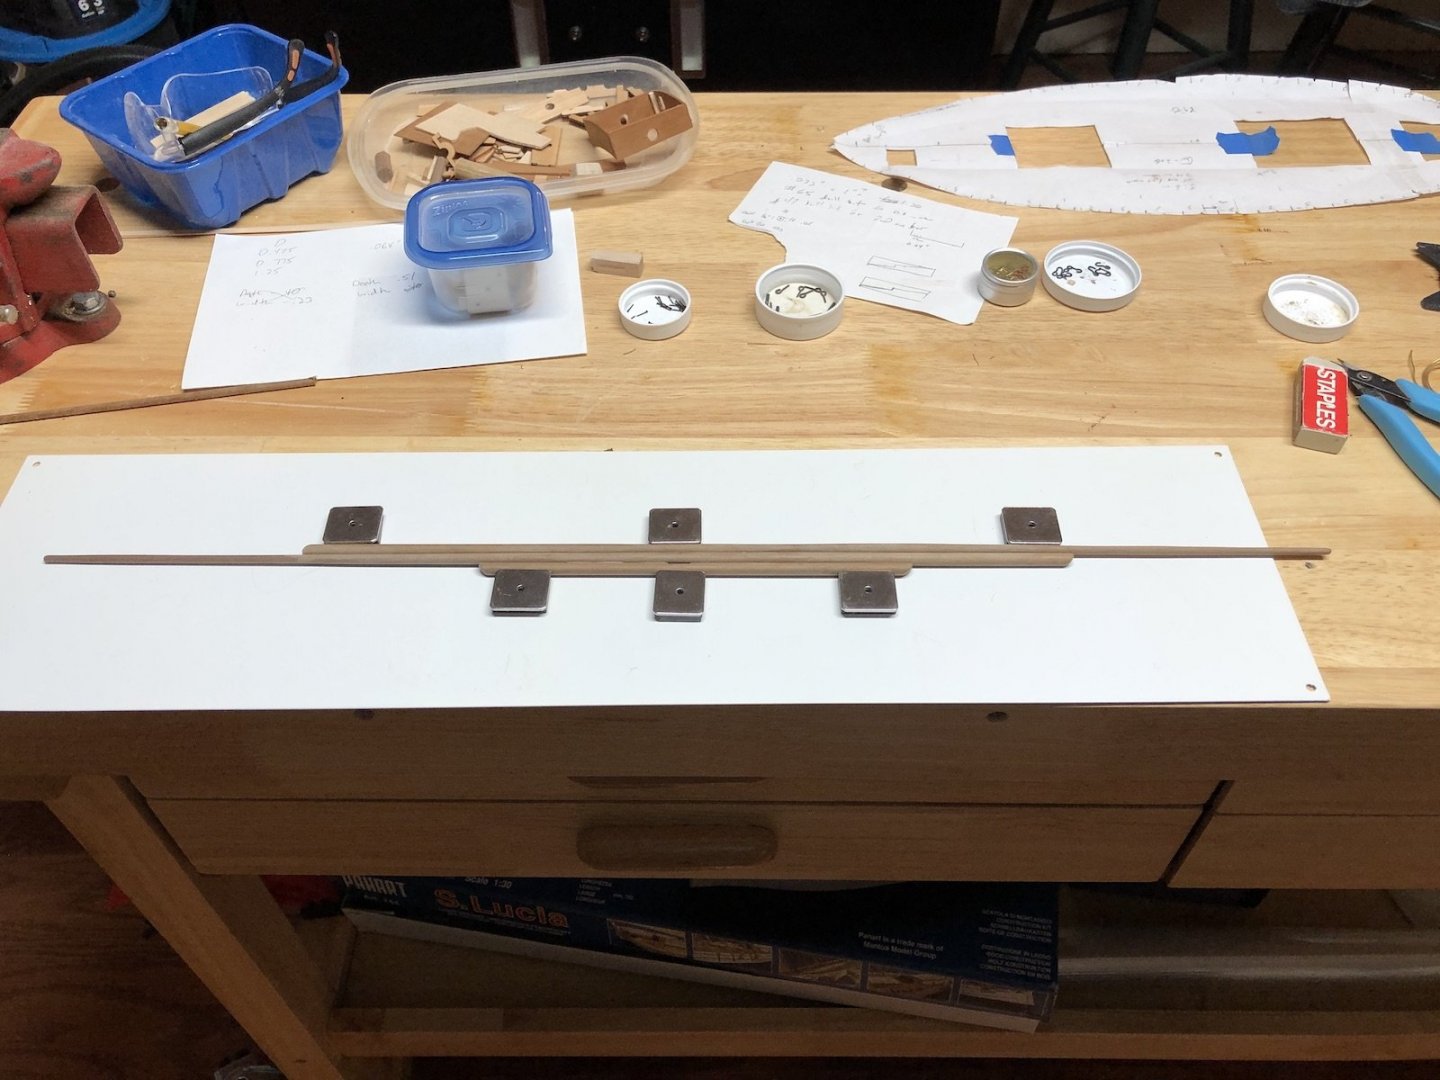
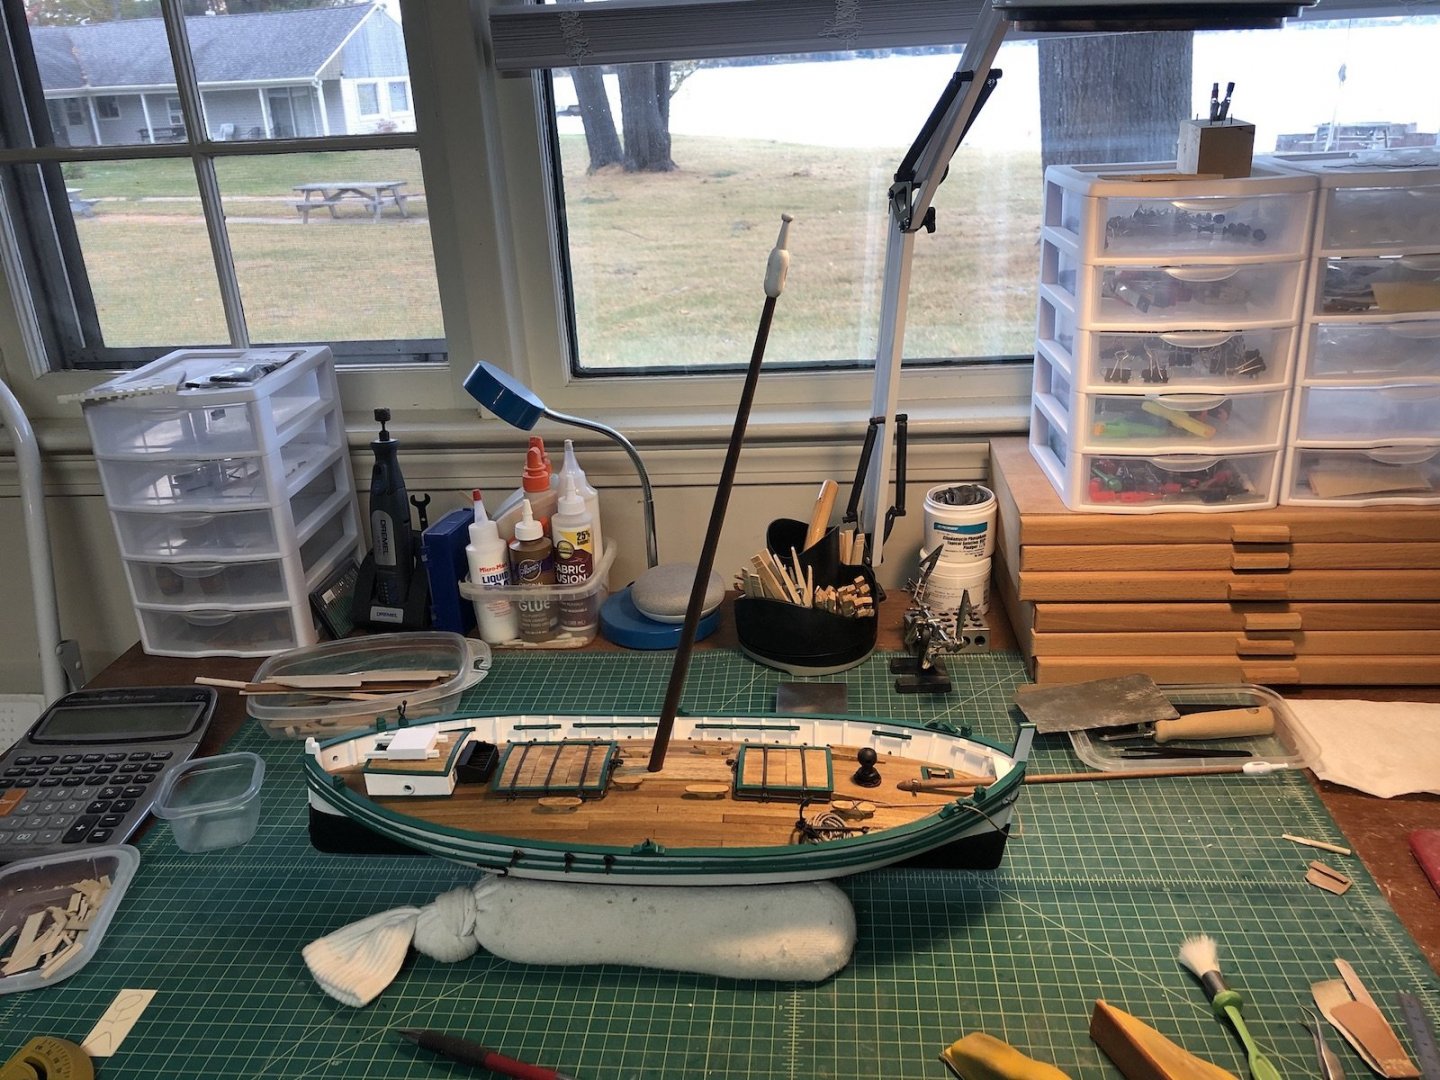
Thanks Fernando. I installed the mast and added the block and tip. It really rakes very much forward. In the second picture you should be able to see the brass sheaves in the block. I made the three dowel pieces of the lanteen yard and glued them together. I tried using wood clamps to hold them together but they kept rolling out of alignment so I used these magnets on a sheet of metal which held them nicely. There are other pieces that get attached to the yard which I will add when these dry. There are also wraps of line around these dowel pieces that I need to add too. In the mean time I have started making the two oars. Soon it will time to make the sails - the kit supplies material to make them but it is a bit thick so I may use some thinner cotton that I have left over from the Constitution build (the sails I never added).

- 131 replies
-
- 6
-
-
- santa lucia
- panart
- (and 1 more)
-
I know if you use Stay Brite solder it will blacken in the blackening solution. There was a resent discussion on MSW on blackening techniques especially after soldering.
-
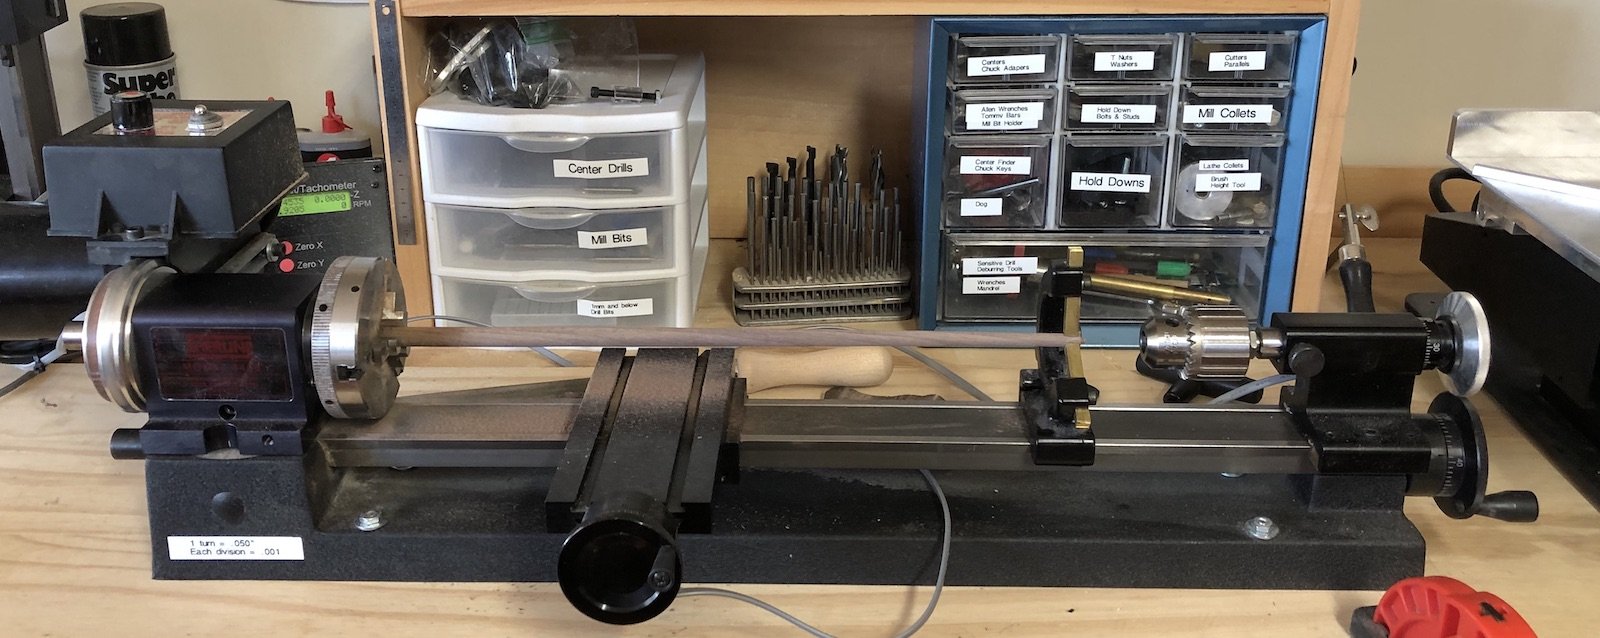
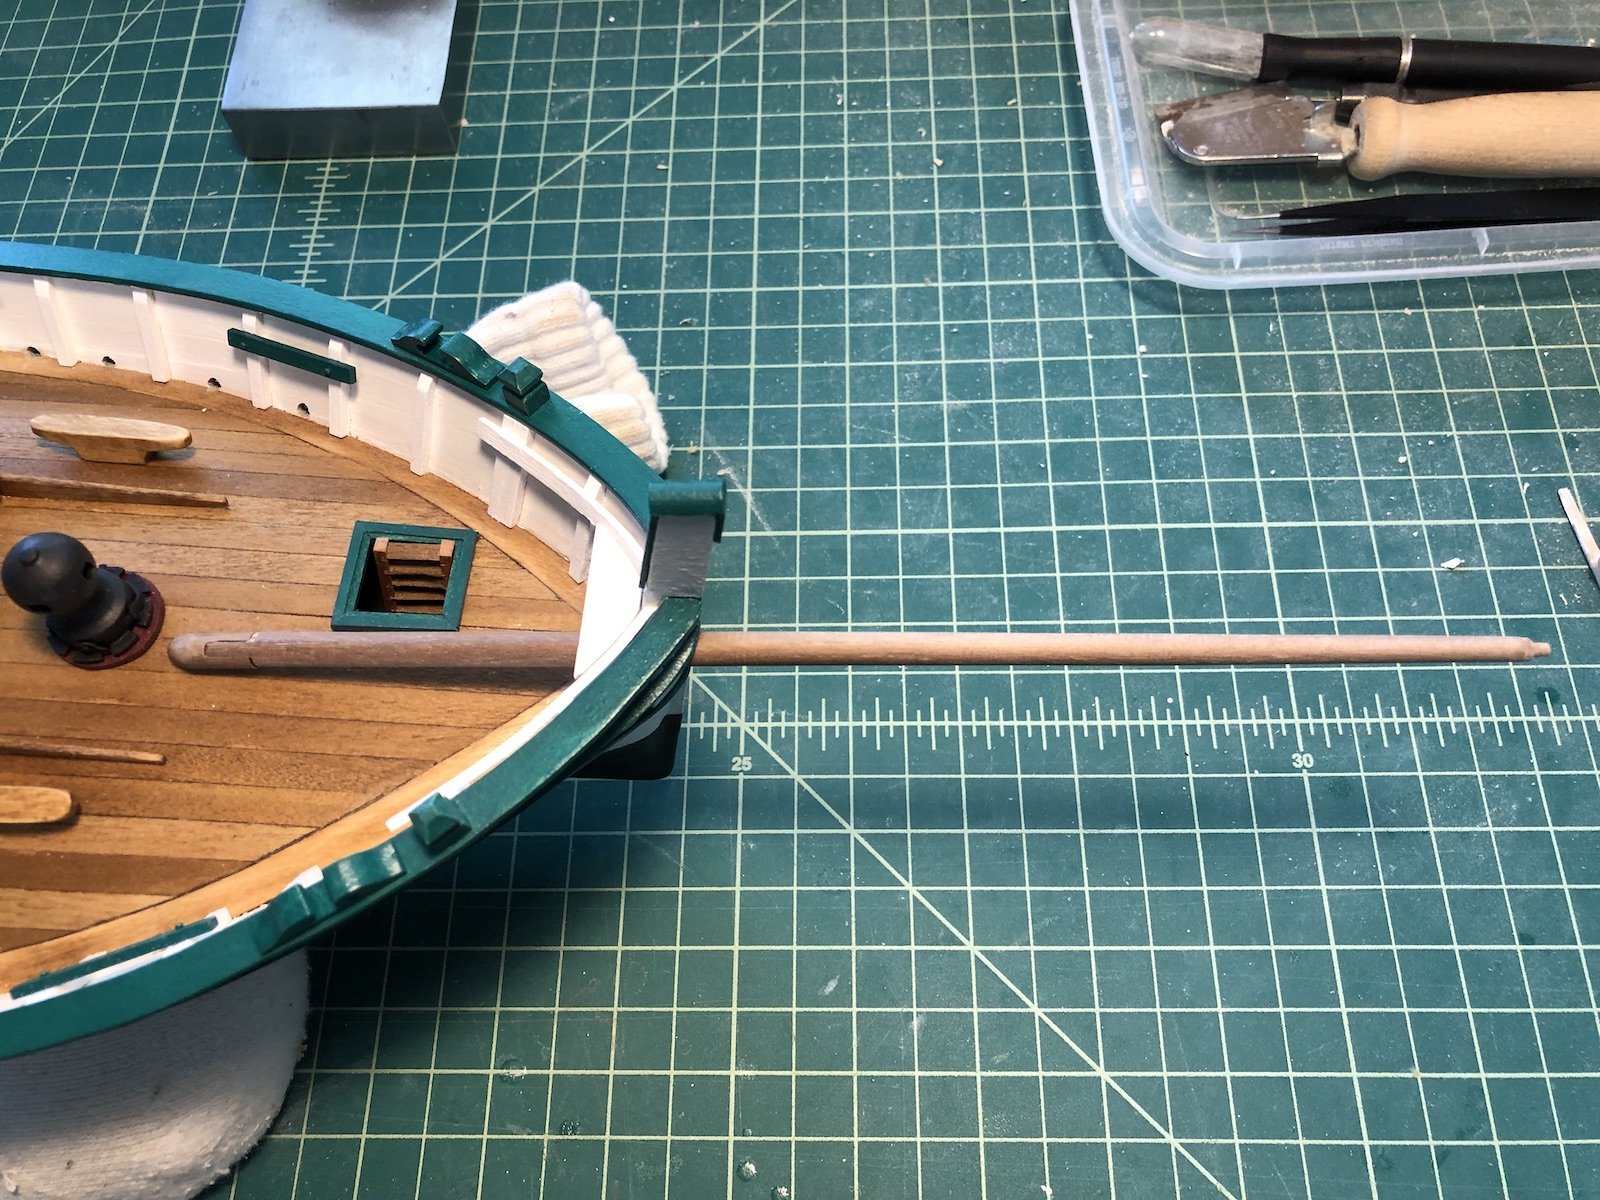
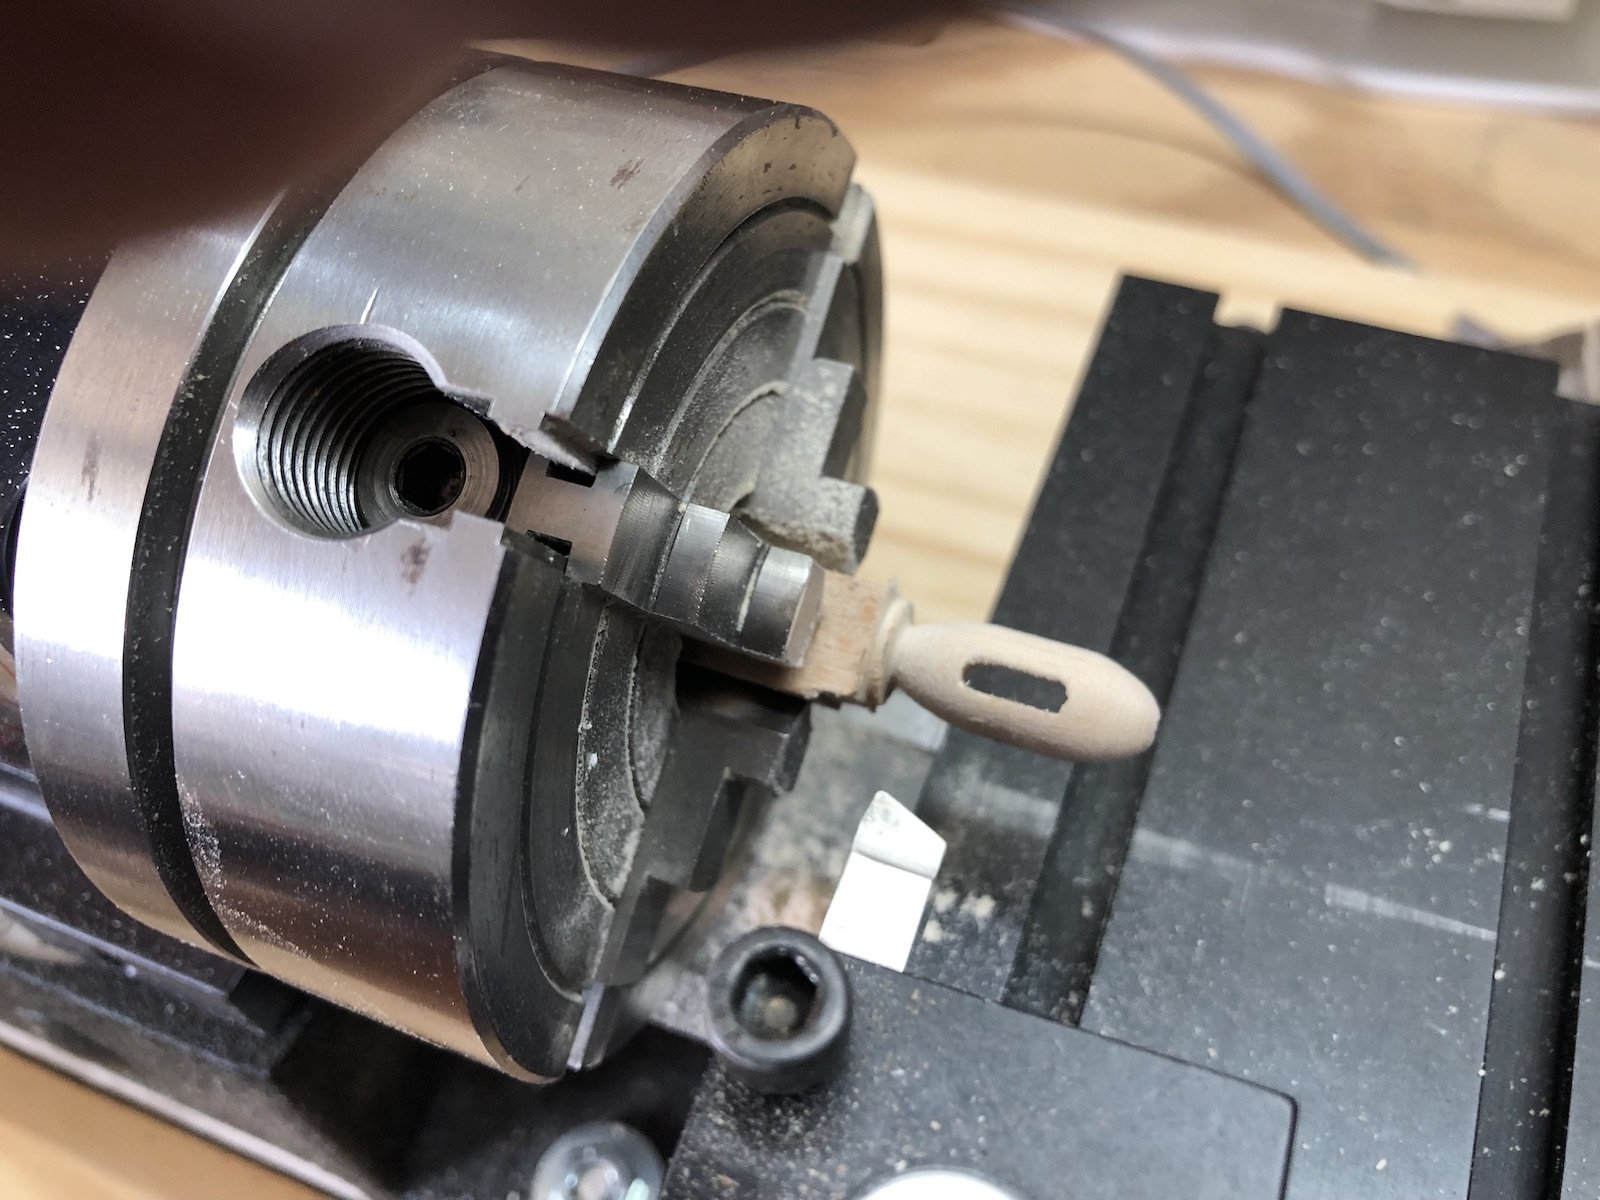
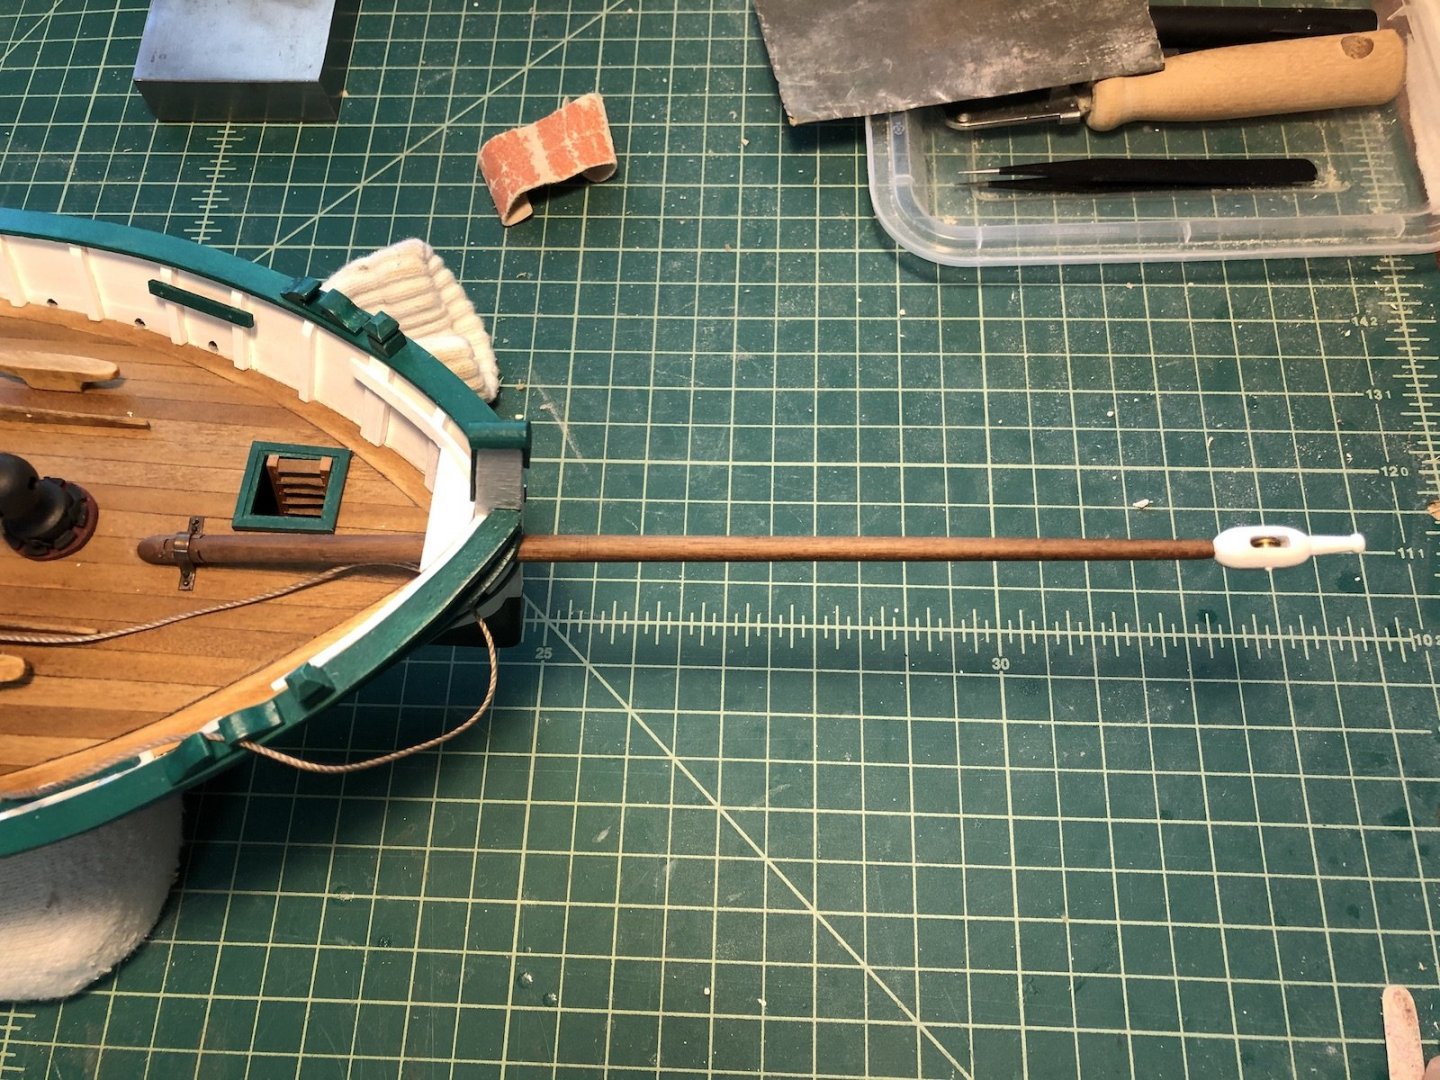
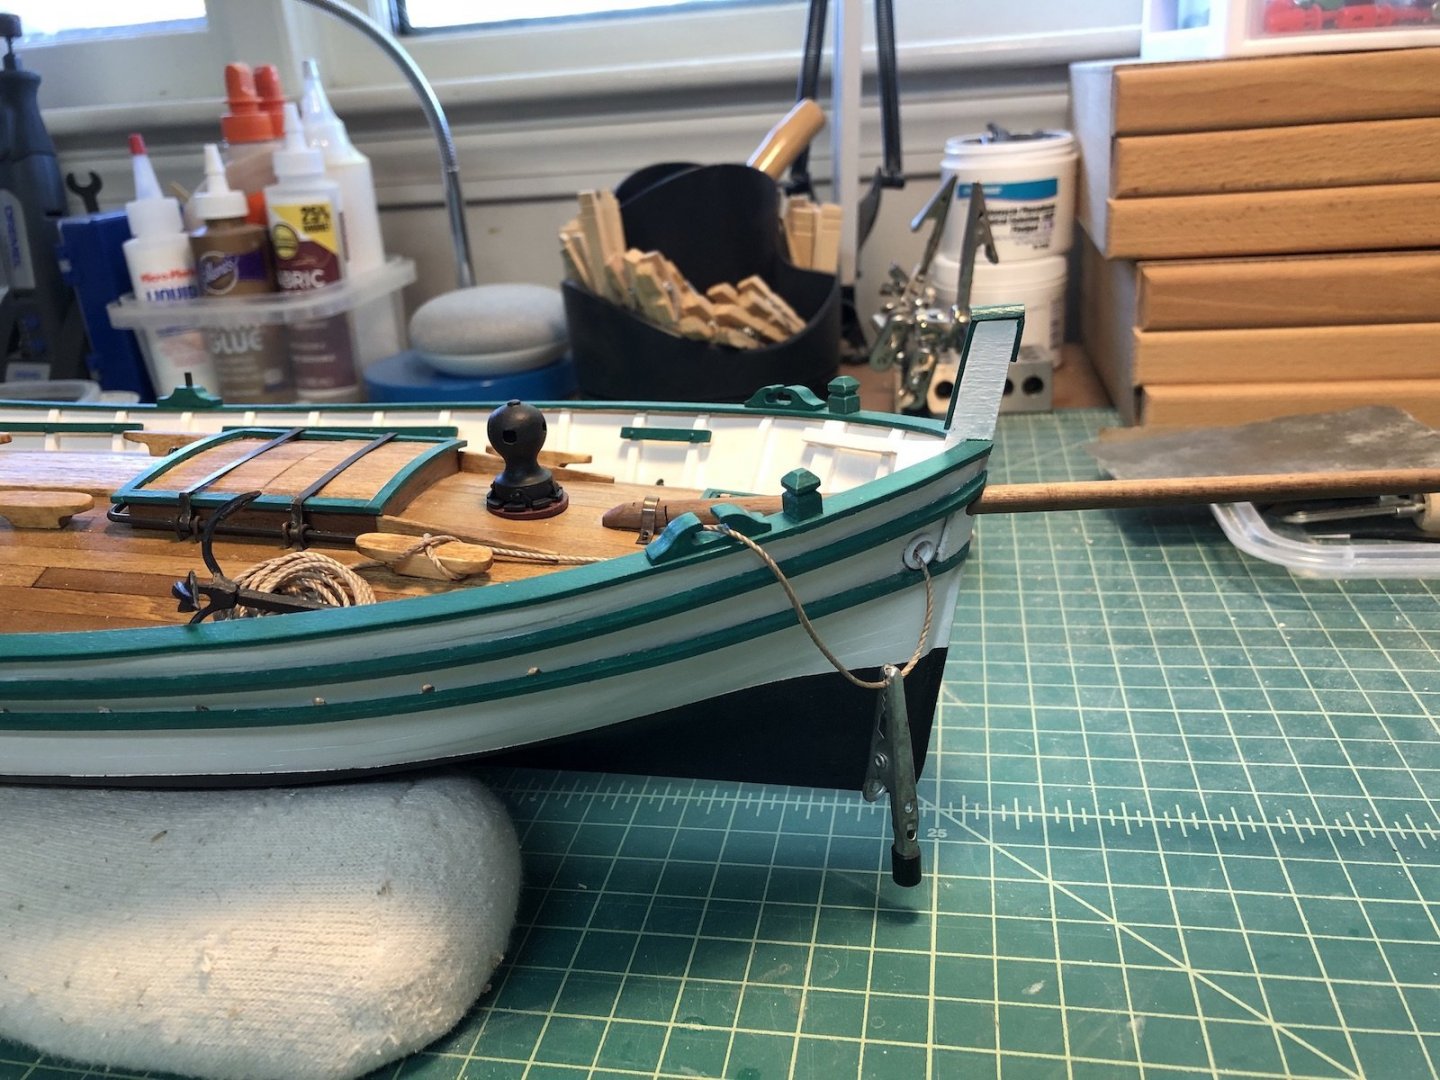
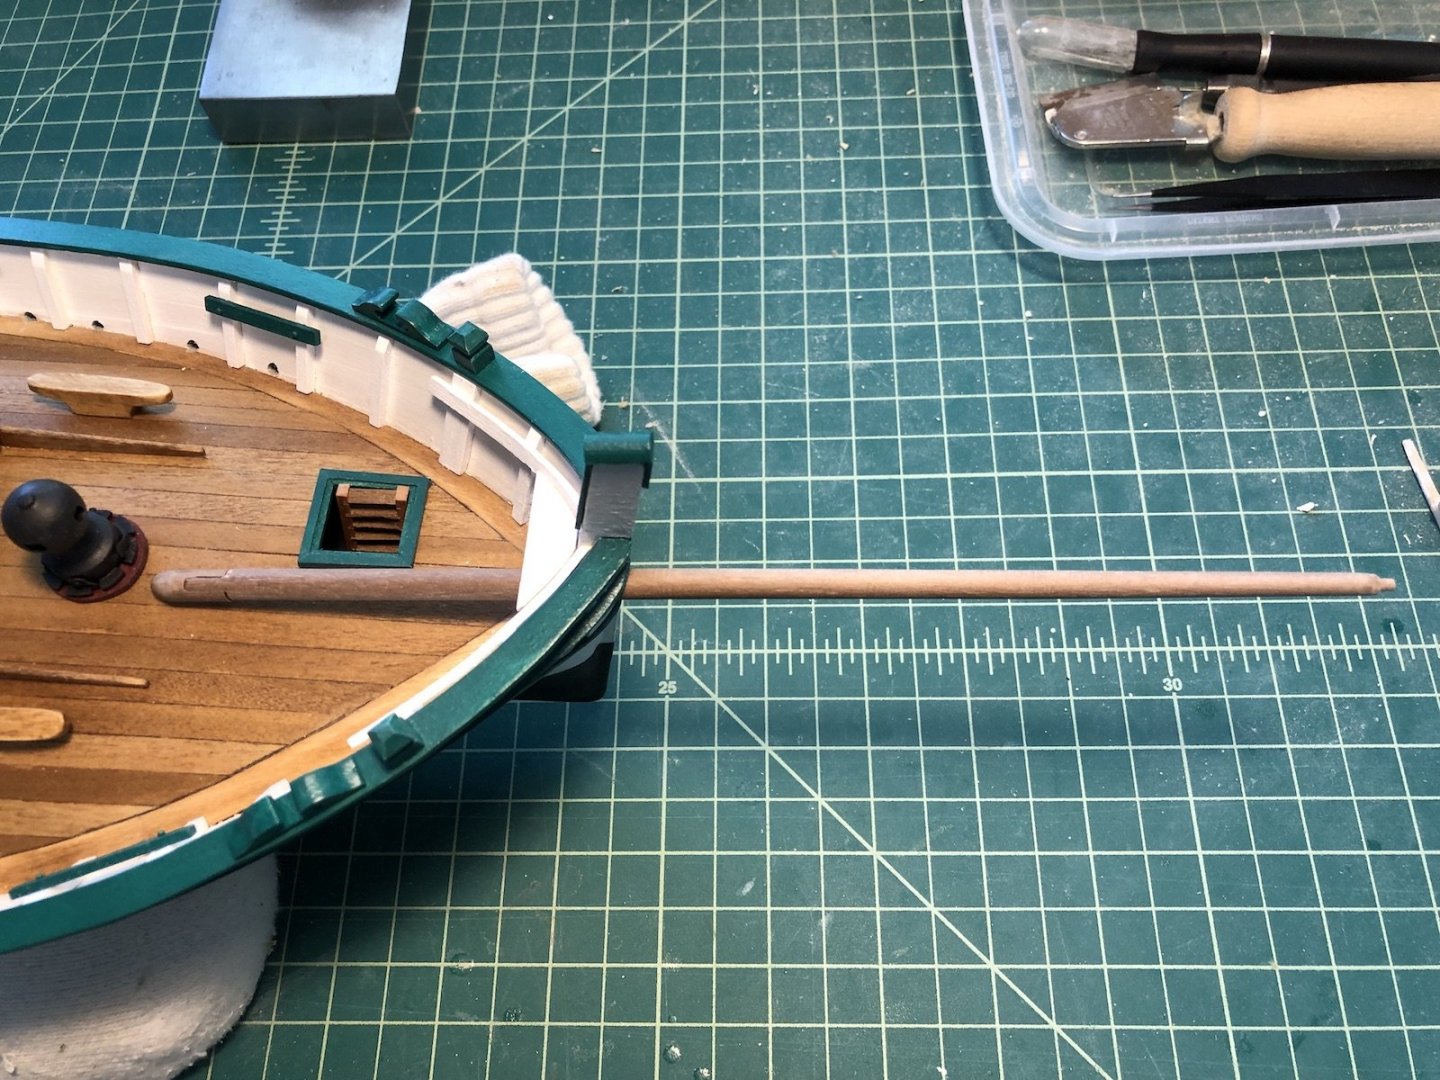
I finished up the bow sprit today and started the mast over the weekend. Here is the bow sprit installed with the brass strip that holds it down to the deck. You can also see the anchor and anchor line that I added. The anchor came from the kit but the line is extra I had from another kit. The supplied line looked more like twine than rope. I used some white glue and weights to get the line to hang a little more naturally. I used my lathe with a steady rest to hold the dowel while I tapered it. I gave the dowel a coat of wipe on poly and painted the block and tip white. I turned the tip from a chunk of boxwood earlier today. I am now working on the lanteen yard, which consists of 3 dowels tied together, with 2 of those tapered. These are rather long so I tapered them in sections using a sharp file instead of a cutting tool.

- 131 replies
-
- 5
-
-
- santa lucia
- panart
- (and 1 more)
-
Thanks Popeye. That's a good question. I am not familiar with these boats at all so I am just going by the plans.
- 131 replies
-
- 2
-
-
- santa lucia
- panart
- (and 1 more)
-
I attached the bulkhead hooks to the hull by gluing them and adding a couple of nails. I also made the other hooks on the hull that are used to pull the boats up on the beach. I tried using the supplied brass round stock for these but I could not get the bend to look right. I had some aluminum round stock that was about the same diameter so I used that instead. It bent much better and blackened nicely. I attached these with four nails each after milling the flats and drilling the holes on the mill.I cleaned up the two anchor pieces and am in the process of painting them black. I also started working on the bow sprit. I started by milling two flats on the end of a dowel, then milling a matching slot in another short piece of dowel. I rounded the end of that piece and flattened the bottom to sit flat on the deck. I then switched the mill to the lathe and tapered the bow sprit with a tenon on the thin end to attach the block. I am in the process of making the blocks for the bow sprit and mast. The bow sprit block has a single sheave and the mast block has two sheaves. I started with rectangular pieces for each of them and first milled the slots for the sheaves. I then turned the pieces 90 degrees and drilled the holes for the sheave axes. I put the mill back into the lathe configuration and used the cutting tool to round the corners off, then a file and sandpaper to round the outside end. For the inside end I used the angle of the cutting tool to roughly cut the taper, then I removed the piece from the chuck, cut the block off the blank and finished rounding the end by hand. I squared up the ends of the slots with a small square file. I am sure there are a lot of you guys that can make these with hand tools but I am very happy to have a mill/lathe to make them. I still need to paint these blocks, add the sheaves, and make the tip of the bow sprit to complete it.


- 131 replies
-
- 6
-
-
- santa lucia
- panart
- (and 1 more)
-
Blackening revisited
usedtosail replied to dvm27's topic in Metal Work, Soldering and Metal Fittings
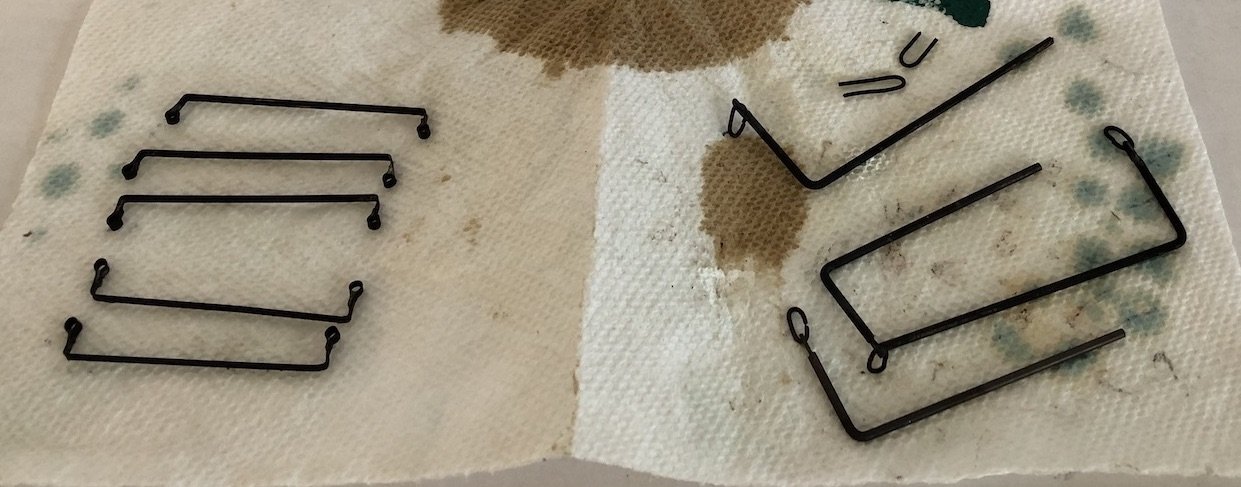
I was not happy with my blackening results, so bought some Sparex and tried this technique last night and I am extremely happy with the result. There was no solder on these parts but even so the finish is so much better than anything I have blackened before. The coating is very even and much more durable than just using the blackening solution without the Sparex pickling. Previously I was using white vinegar to clean the parts before blackening, but the Sparex, baking soda solution, acetone, blackening solution method worked so much better. It takes longer but the results are so good to make it worth it. Here are the parts just after blackening and rubbing with an old T-shirt. And here are some of them after some rough handling to fit them into place, cut the ends and drill holes for attachment. Very little damage to the coating, where as my old method would have needed much more touch up. I am even more sold now.
-
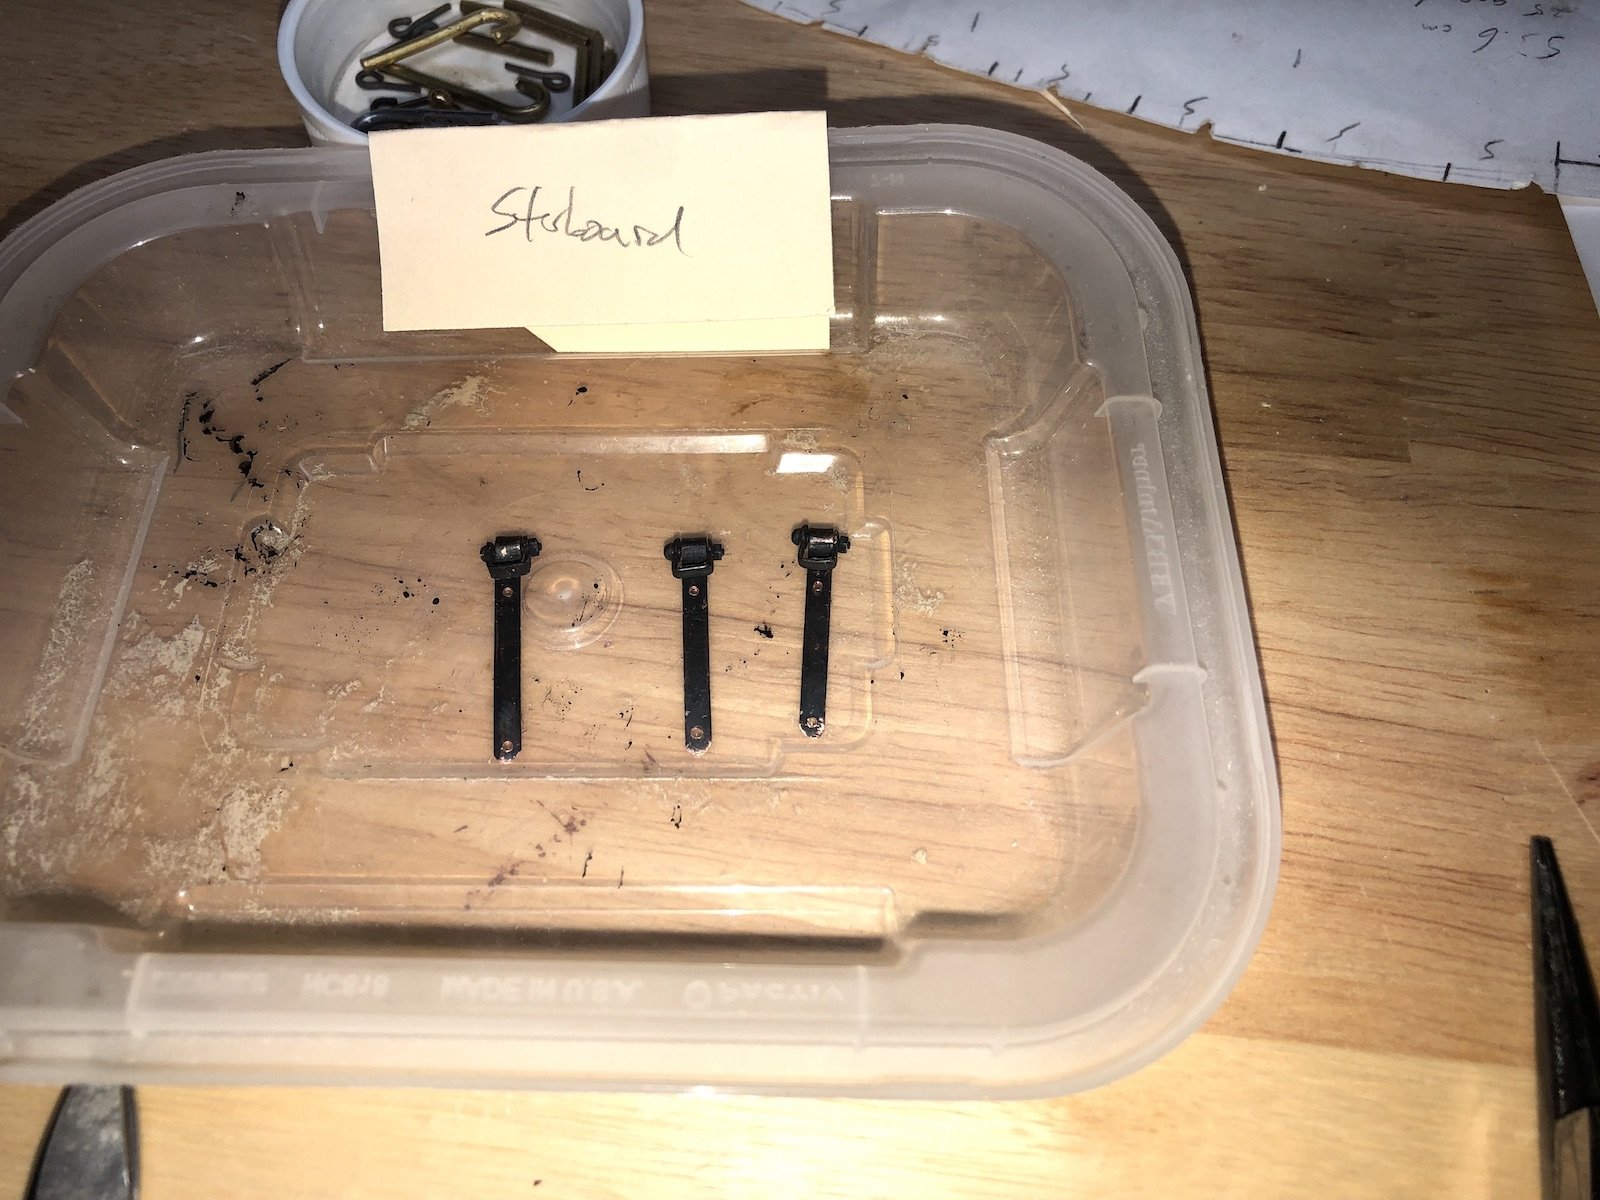
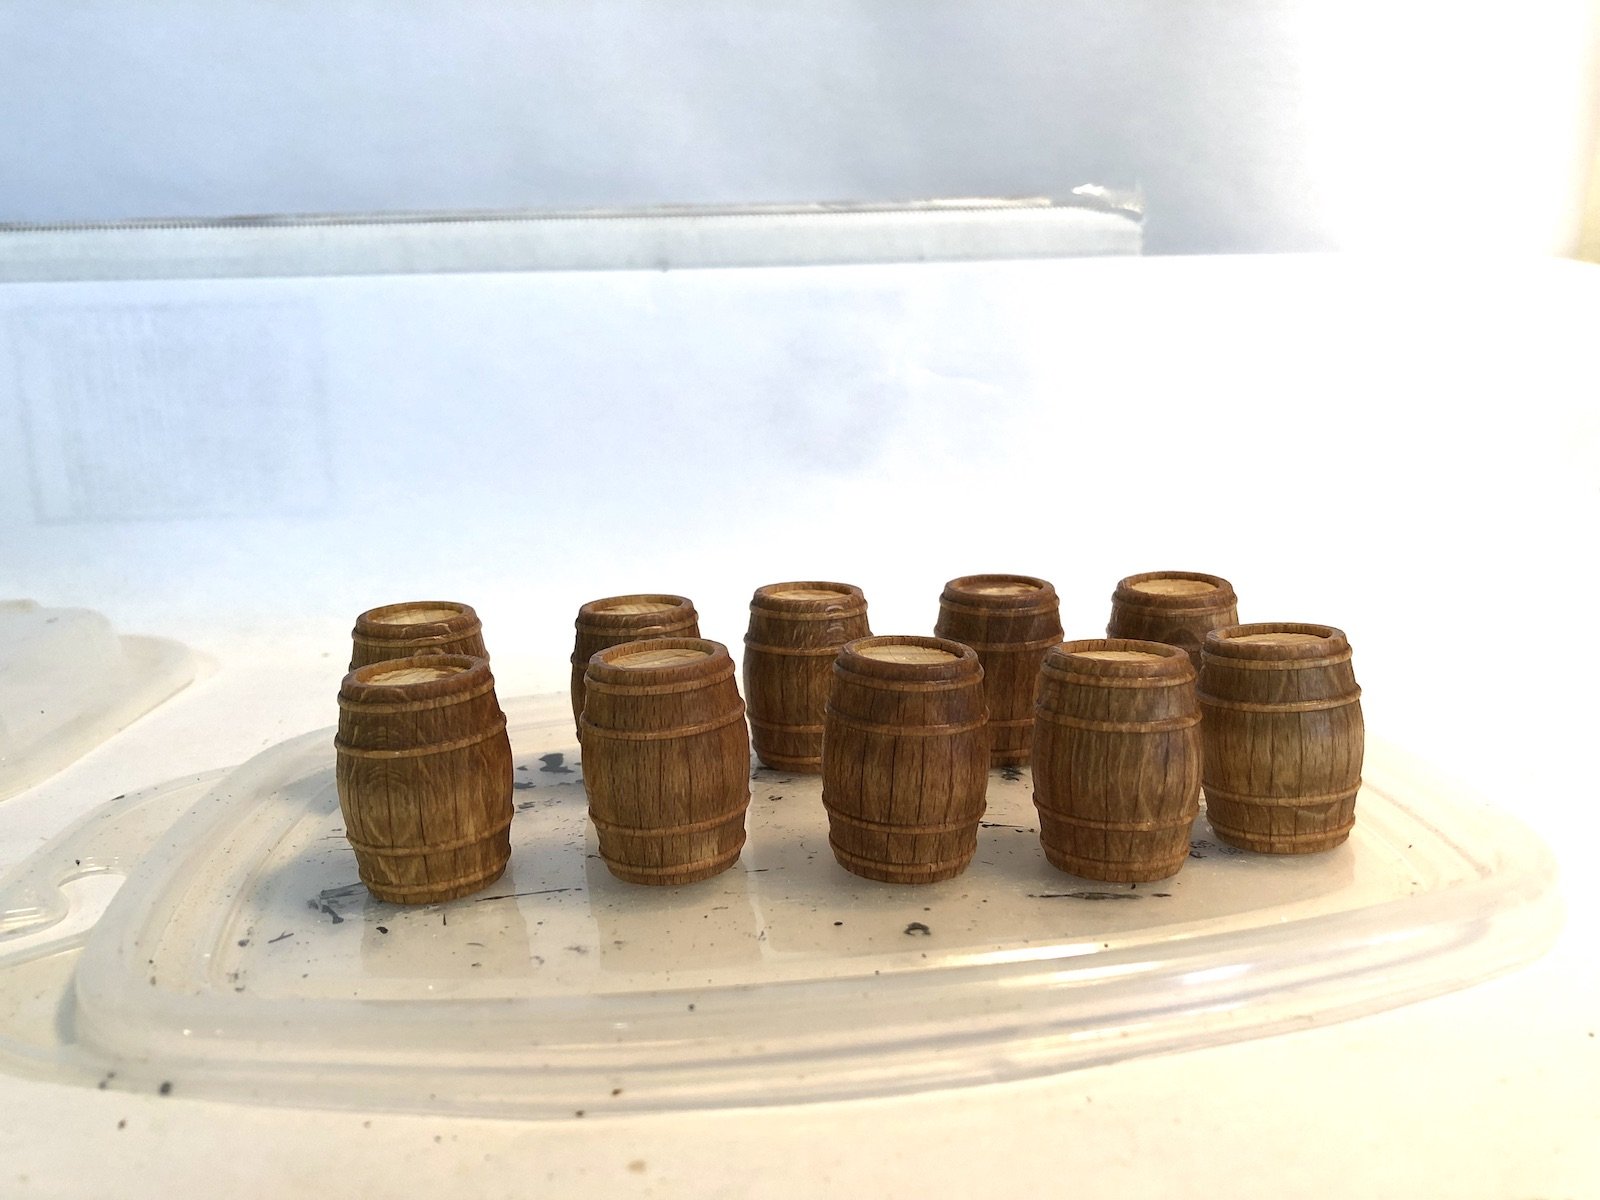
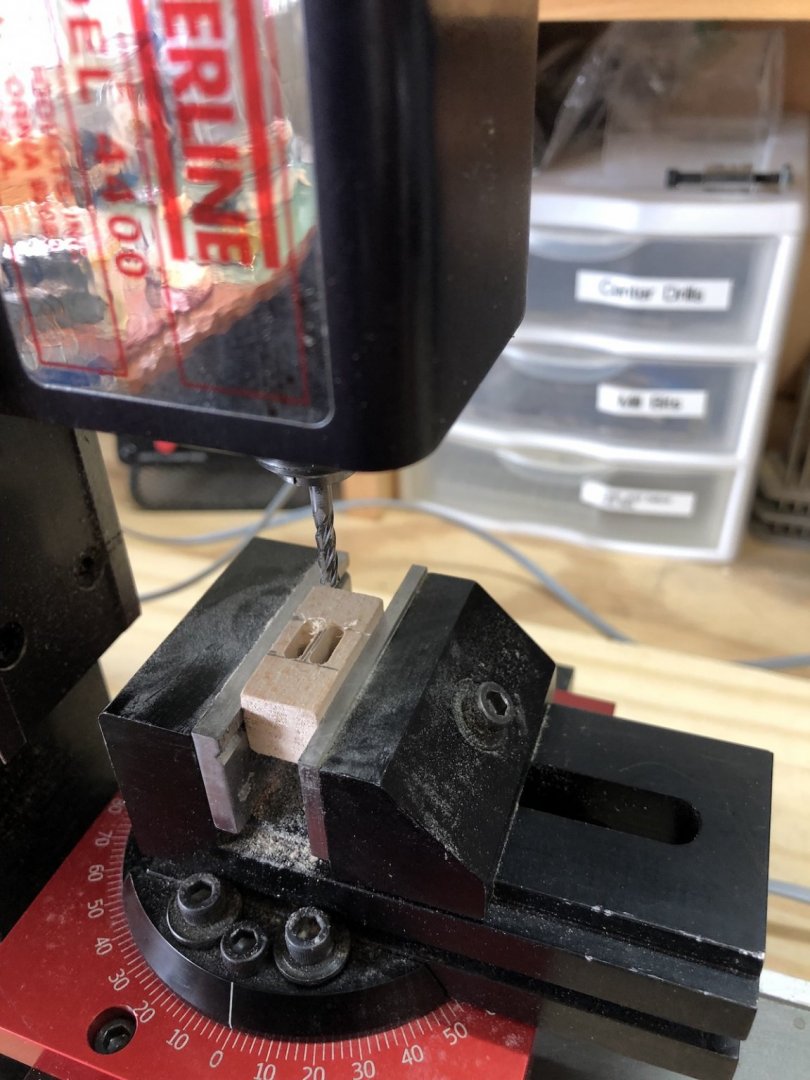
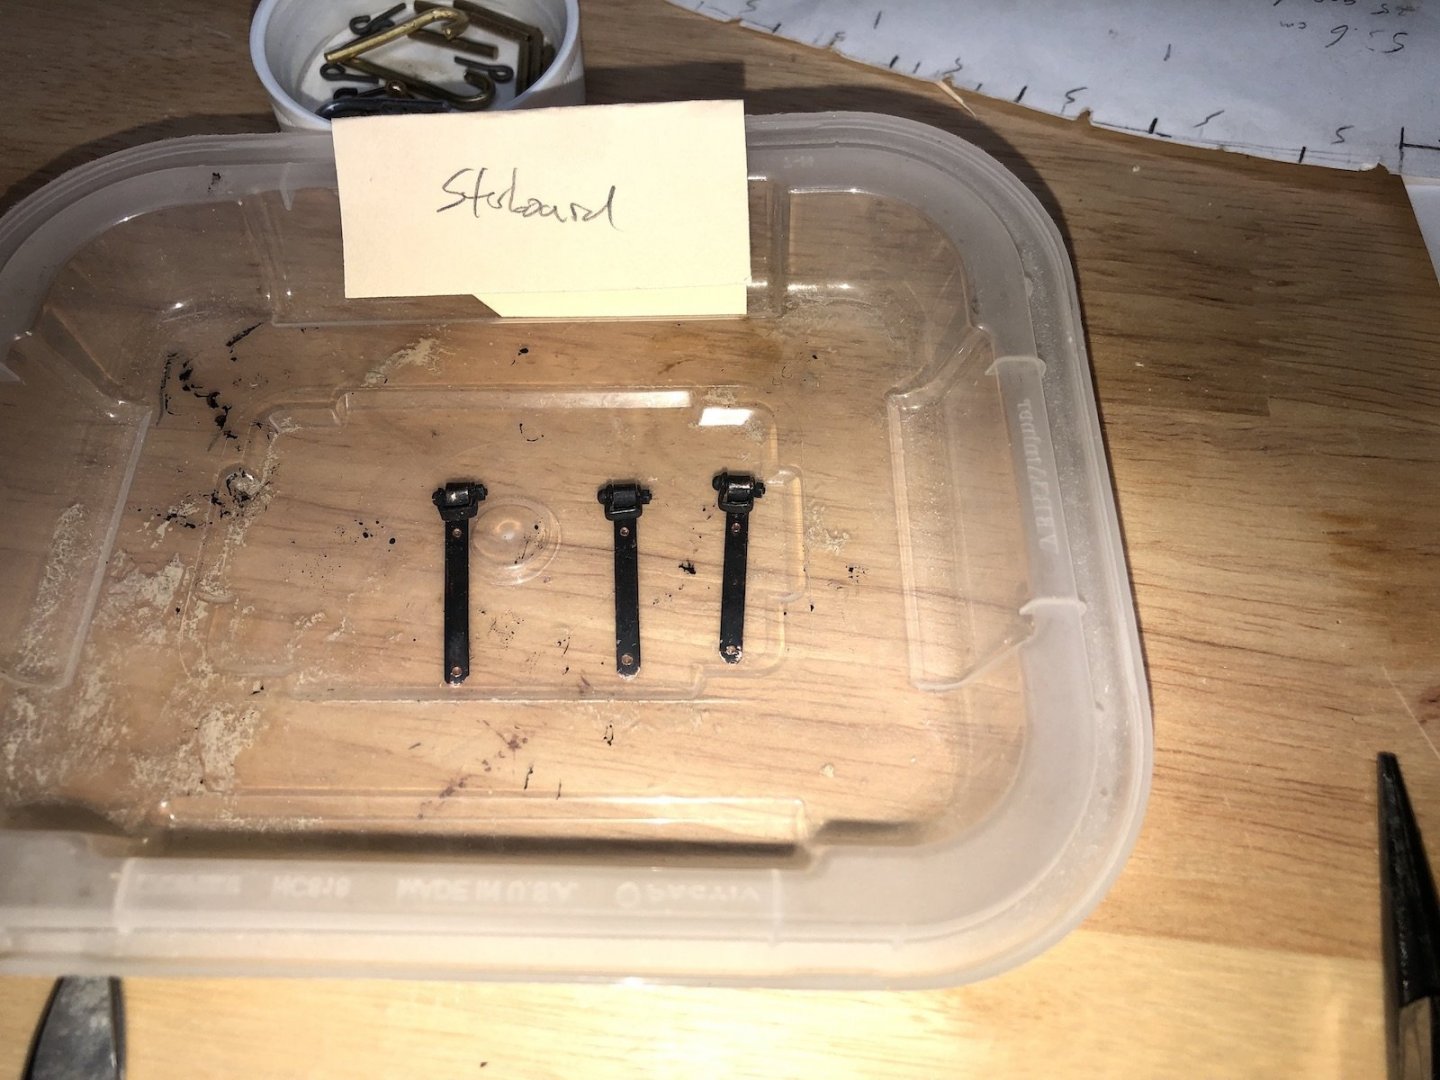
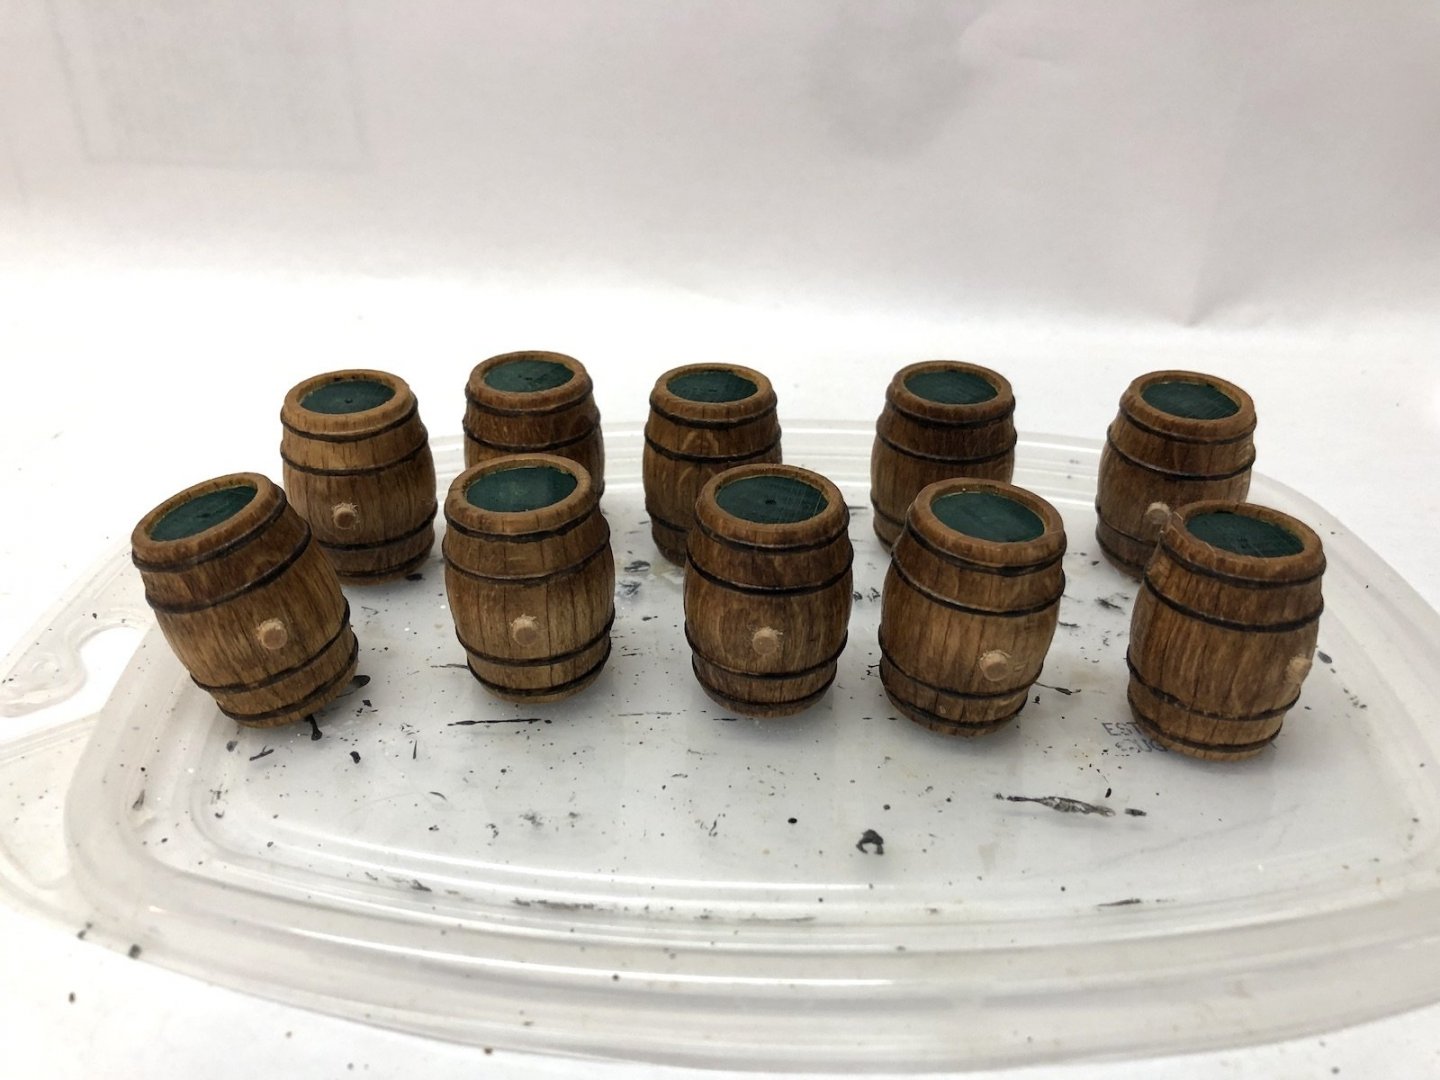
Thanks E.J. Here they are completed with the hoops painted black, then ends dark green, and the corks added. I painted the hoops freehand which probably shows. I did pick the best side of each barrel to put the cork, so that will be the side that shows. I have also made the bulkhead hooks as the plans call them, which to me are chain plates of a sort. They have a strap with a loop at the top that is attached to the hull and a bracket that fits over the loop. The shroud is then hooked to the bracket when the mast is rigged. I made the hooks for this too. The instructions say to use a nail to hold the bracket to the strap, but I found some very small screws and nuts that were the perfect fit, so I used them. There has been a discussion lately on MSW on a better blackening technique than I have been using which I really wanted to try. I bought some Sparex pickling powder which I mixed up last night and first soaked the metal parts in it, then rinsed in a baking soda solution, then acetone, then the blackening solution. I have to say these came out so much better than anything I have blackened in the past - the coating is very even looking and much more durable. It takes quite a bit longer but to me it is definitely worth it. Today I started to install these on the hull. I placed the dowel for the mast in the mast hole and tied a string near the top where the shrouds would start from. I used the string to mark the locations and angles of the bulkhead hooks on the outside of the hull. I then removed the trim in these locations on the starboard side using an X-Acto saw and knife and a square file. I then placed the hooks in the gaps and marked their lengths and the locations of the holes for the nails, and drilled the holes using the mill. I am going to touch up the green paint on the trim before installing the hooks. It was pretty scary having to cut the trim at this stage but I took my time and started with small cuts. Here are the starboard hooks after all that. The blackening is a little scratched up but so much less than if I had used my usual blackening. I am even more sold on the Sparex method now.


- 131 replies
-
- 5
-
-
- santa lucia
- panart
- (and 1 more)
-
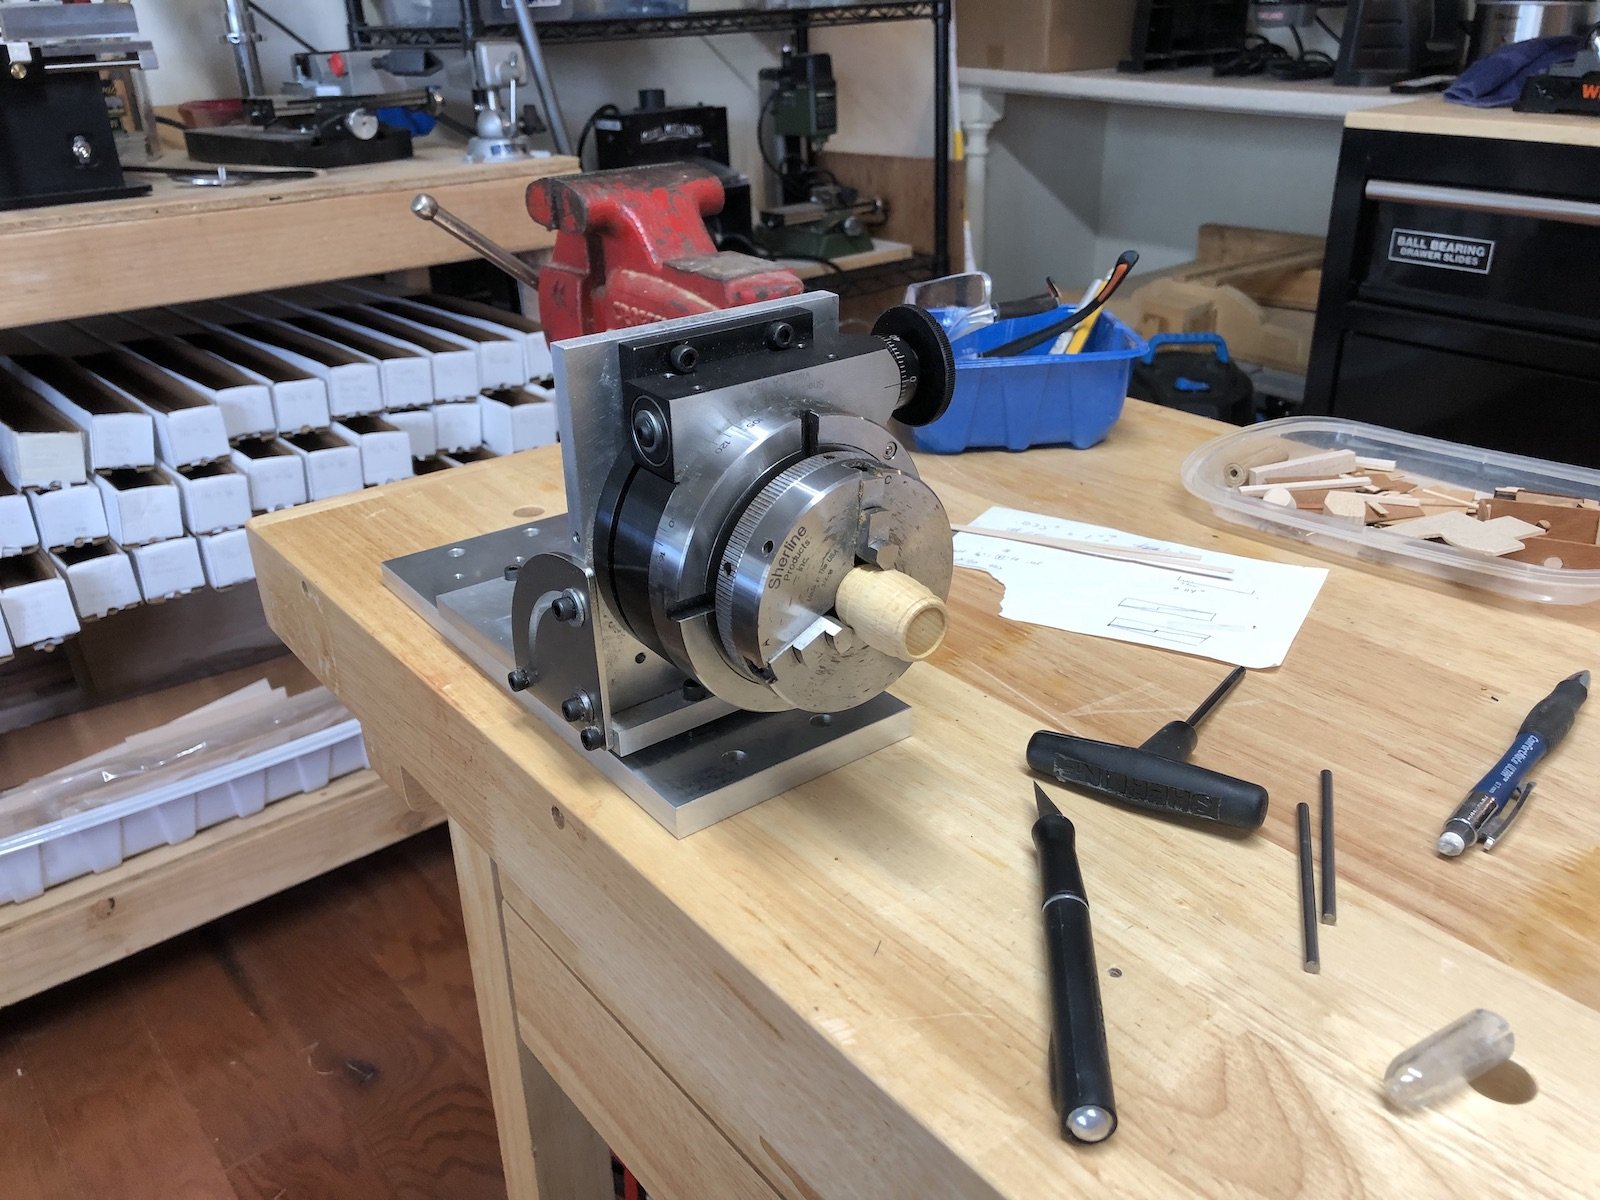
I started working on the barrels. These needed to be scored to simulate the slats, so I used the rotary table from the mill to hold the barrels as I scored the top, then turned it 20 degrees and scoring again. After I stained them this is what they look like. I now need to paint the bands black and the ends dark green.


- 131 replies
-
- 9
-
-
- santa lucia
- panart
- (and 1 more)
-
Great job. She is just beautiful.
-
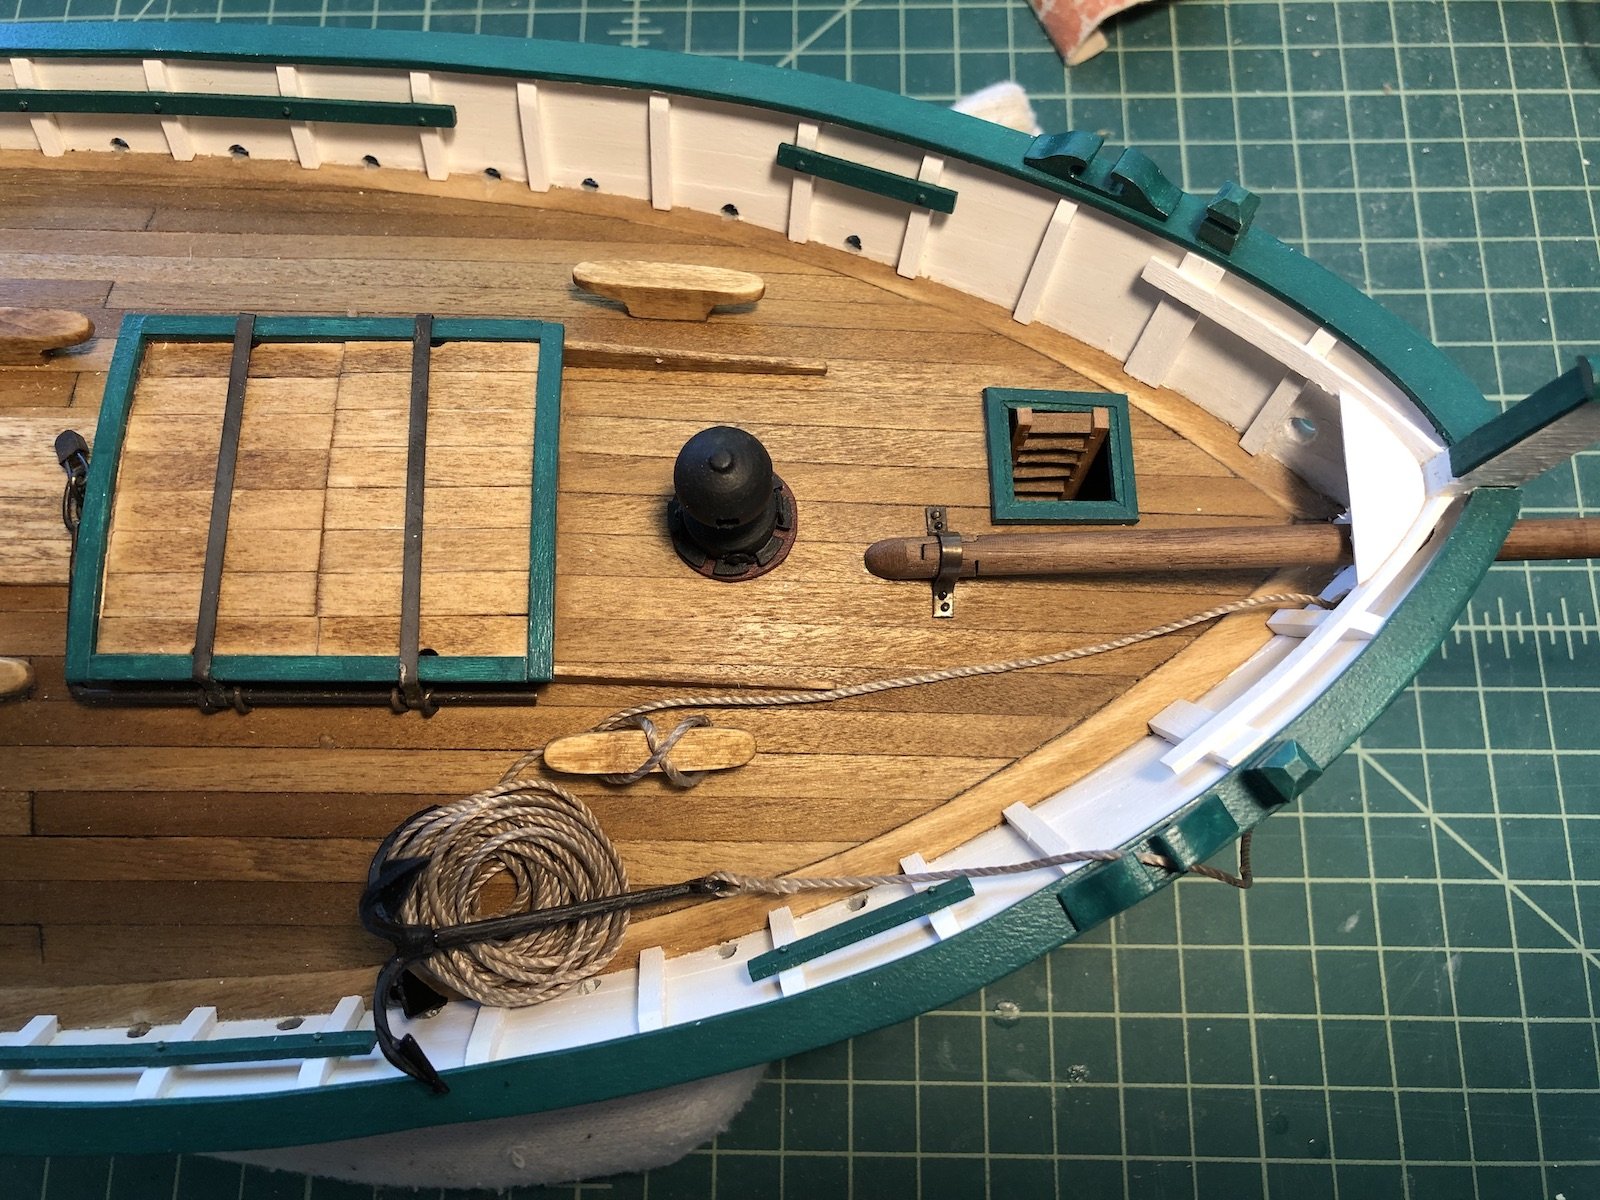
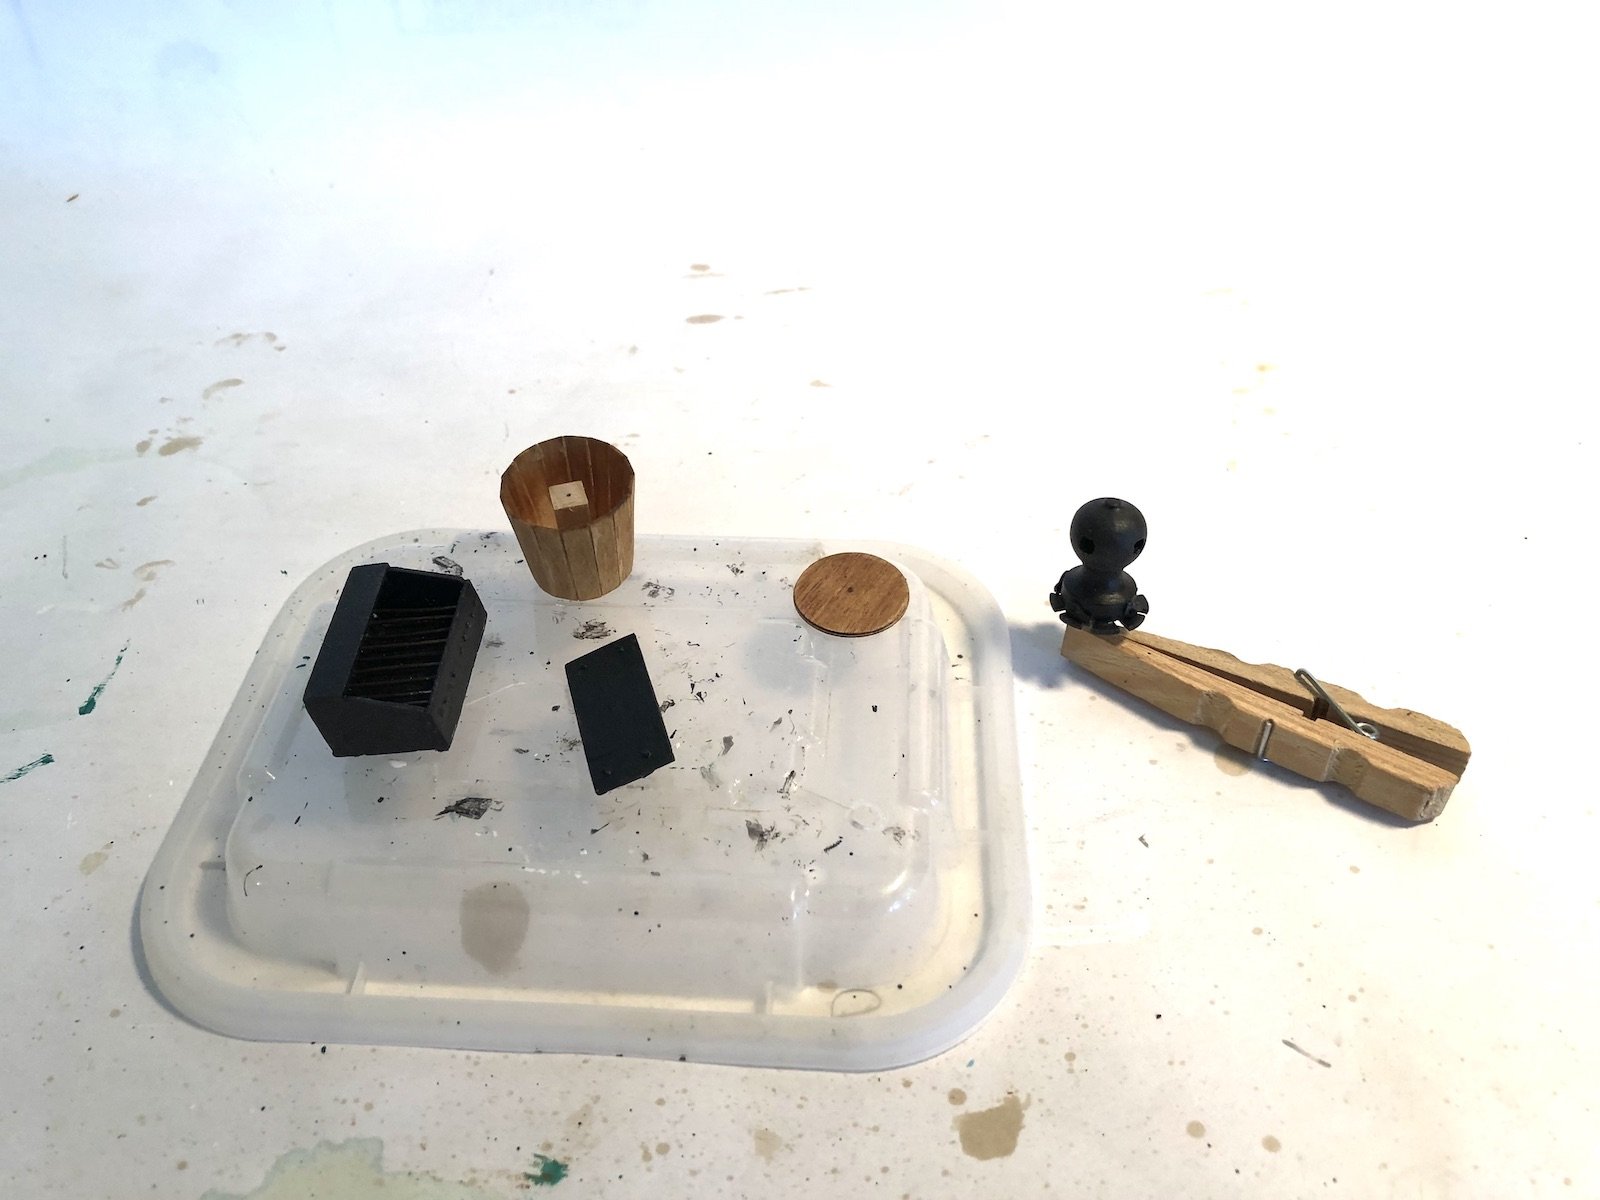
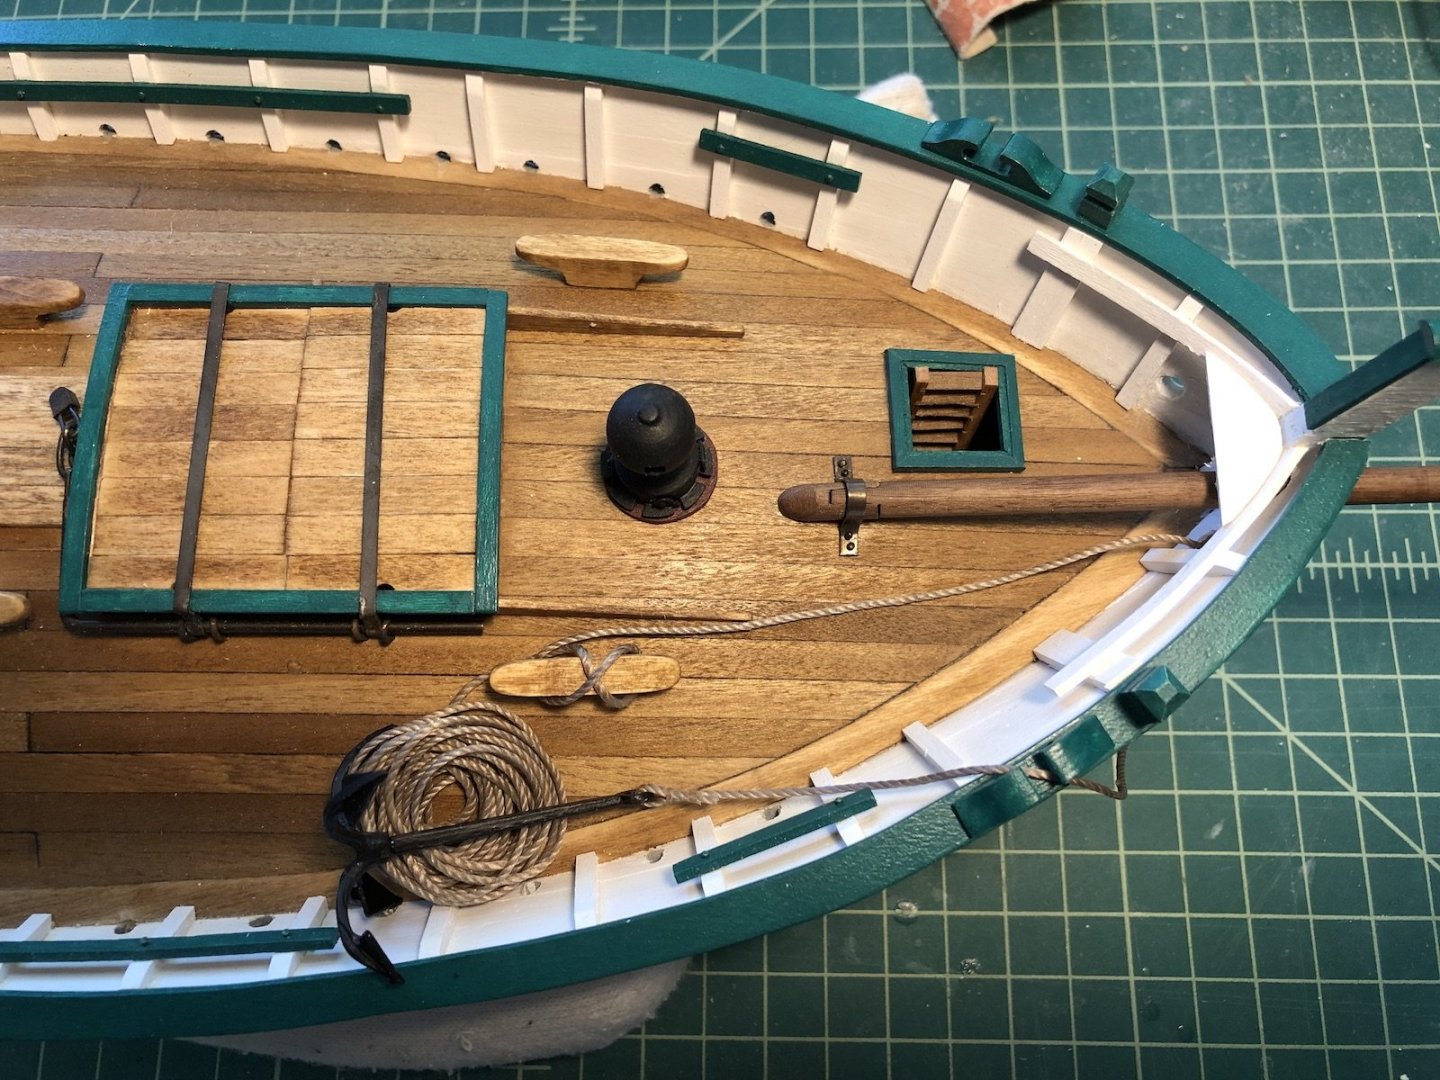
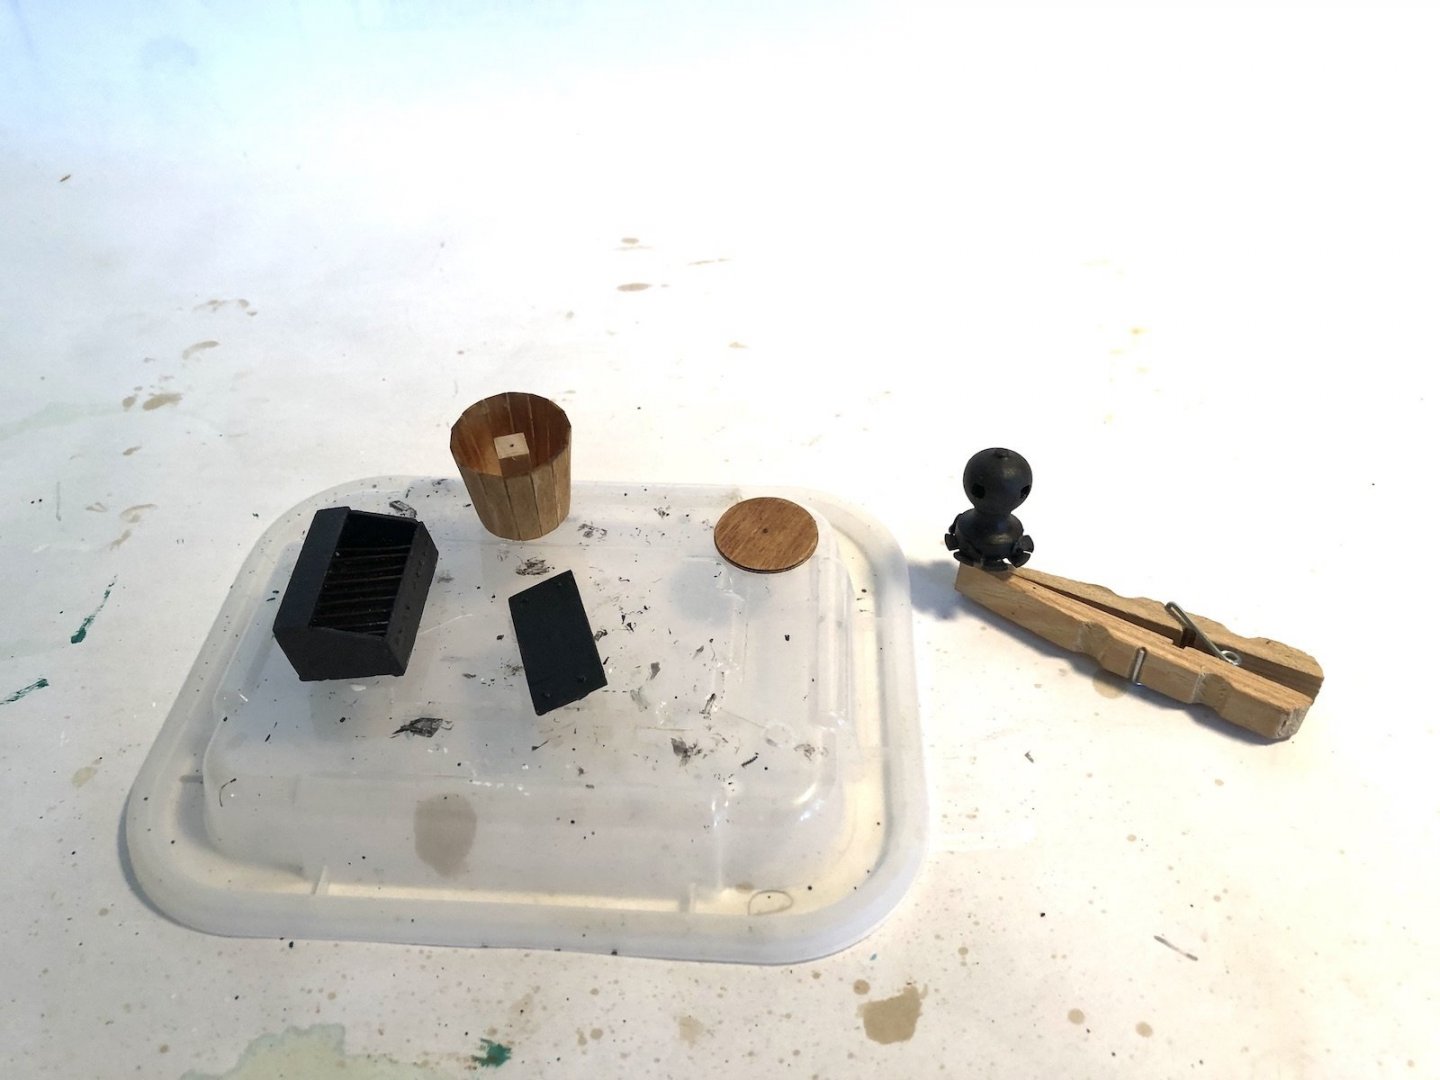
Some progress on the smaller deck items. I finished painting the stove and added blackened wire pieces for the grate. I added the pawls to the capstan, which are hard to see since everything is black. I also built the bucket as shown on the plans. The kit provided two disks that you attach to a strip of wood, then use thin planks around the disks. The plans show to use a mixture of rectangular and triangular planks, but I used some geometry to calculate the widths of the planks at the top and bottom of the bucket, then cut tapered planks to those dimensions. As per the plans, I waxed the top disk and just glued the planks to the bottom disk and each other. I sanded the planks and removed the top disk, which came out easily and will be used as a cover. I gave them a coat of oak stain and will add some wipe on poly when they dry. I also added the bowsprit support to the bow. This is just a piece of wood that goes around the hole for the bowsprit. I first made a template from some manila folder material. Since this area of the bow is curved, I thought I was going to have to carve this piece from a thicker piece of stock, but thanks to a tip from Popeye in an earlier post, I just cut this piece from a 1/16" basswood sheet with the grain running vertically, so the piece was very easy to bend around the bow. Thanks Popeye for the great tip! Its our 32nd wedding anniversary today so no more work in the shop today. Off to a new restaurant tonight that sounds very good. Have a nice weekend all.
- 131 replies
-
- 5
-
-
- santa lucia
- panart
- (and 1 more)
-
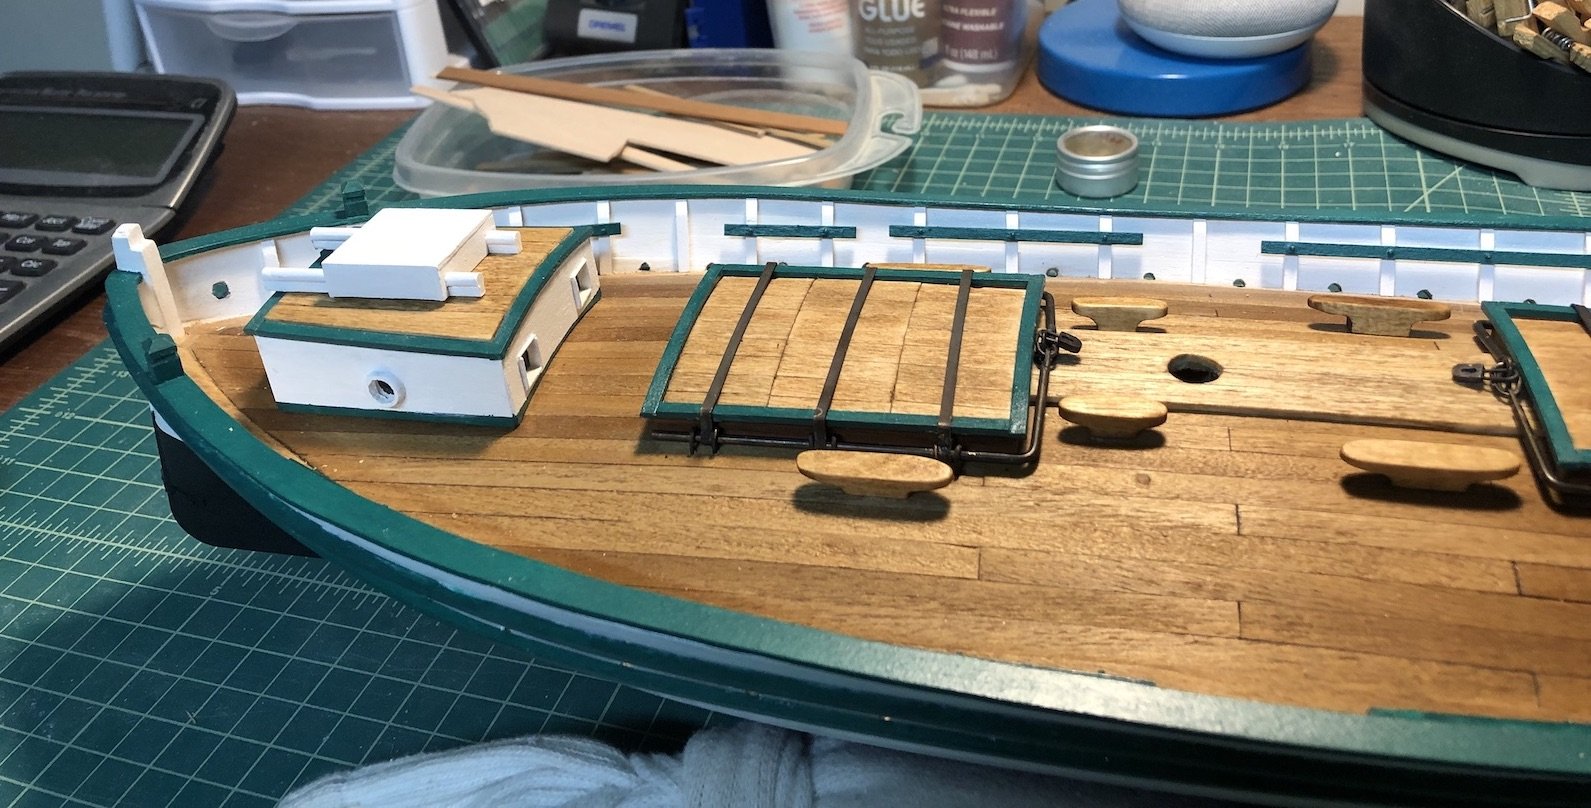
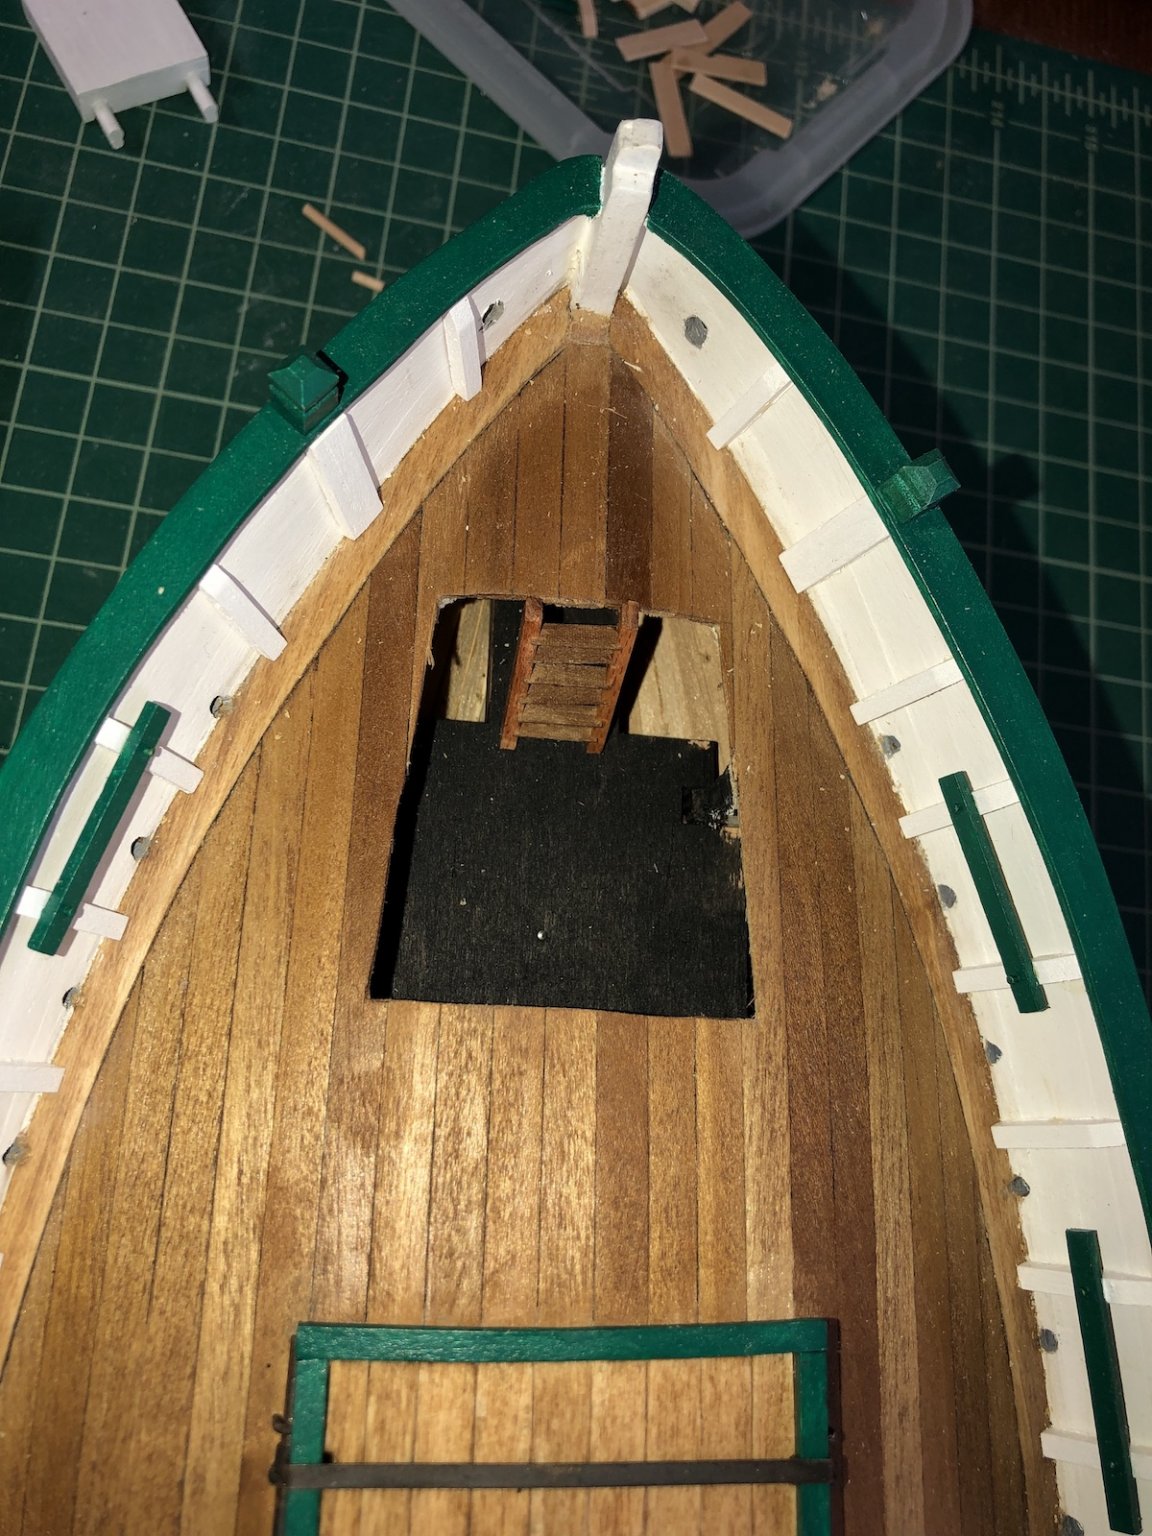
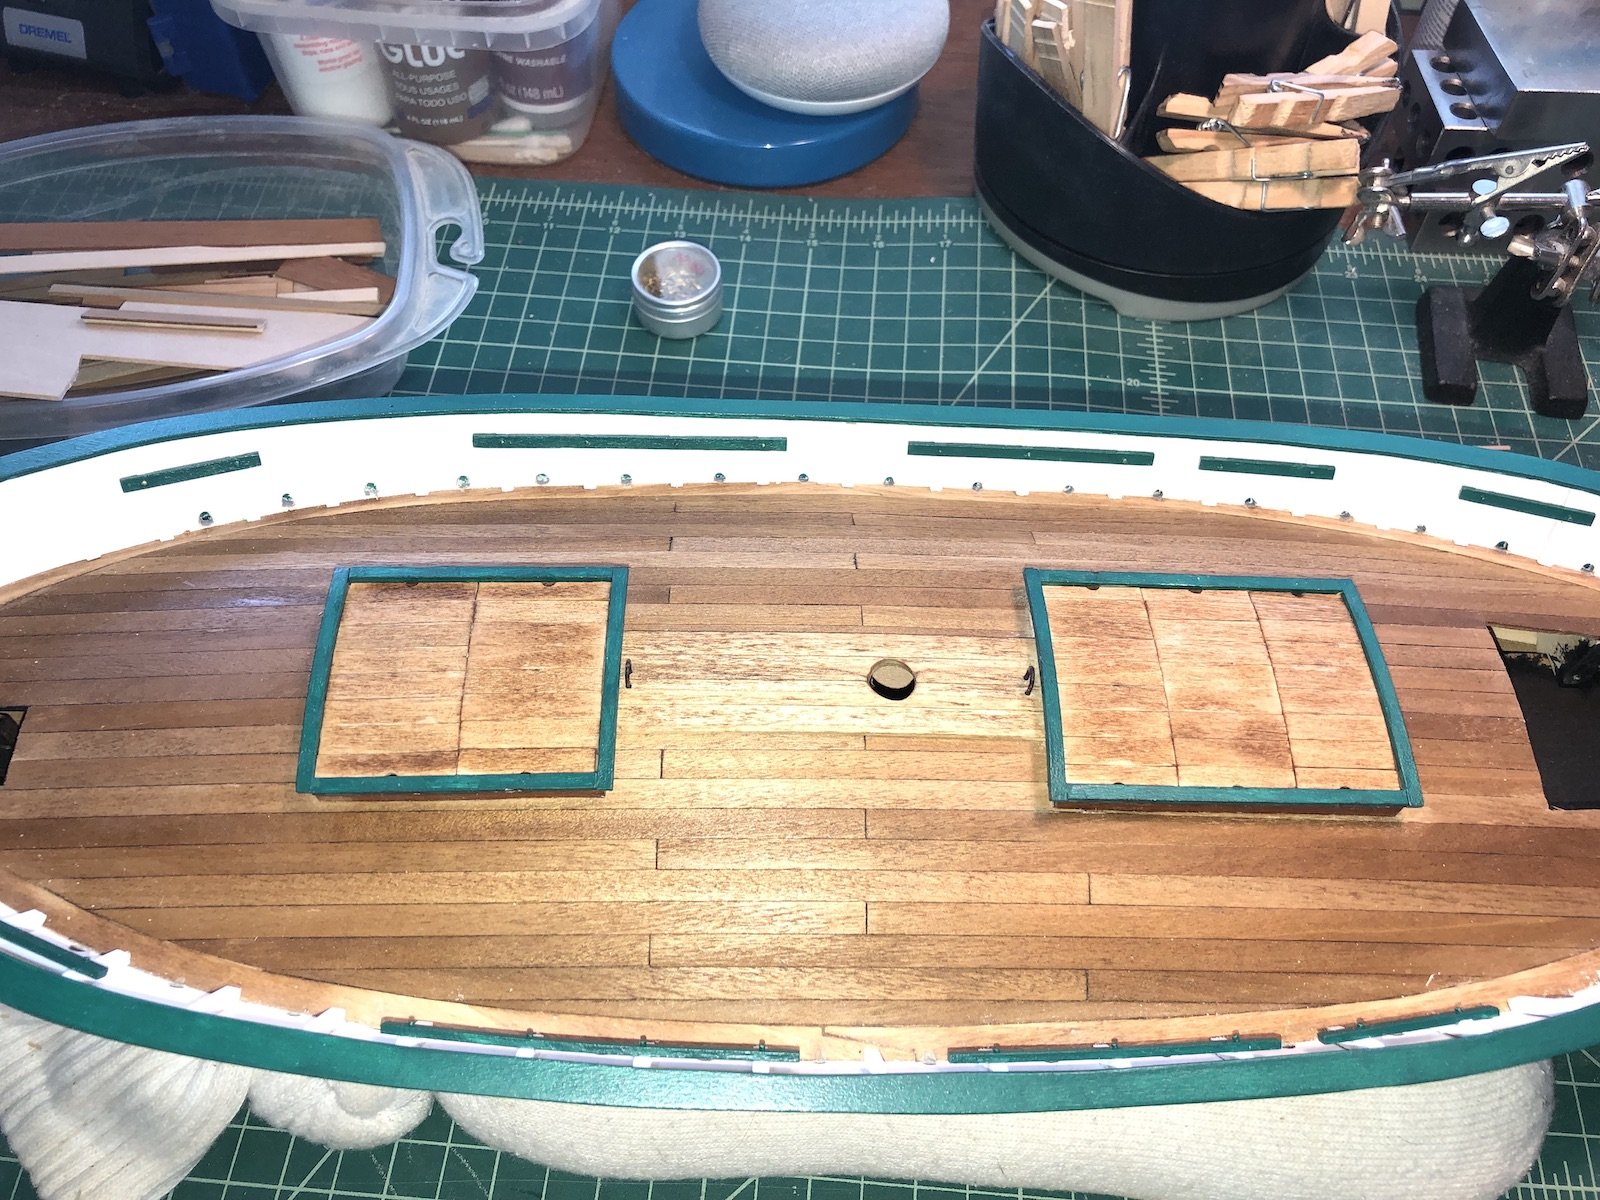
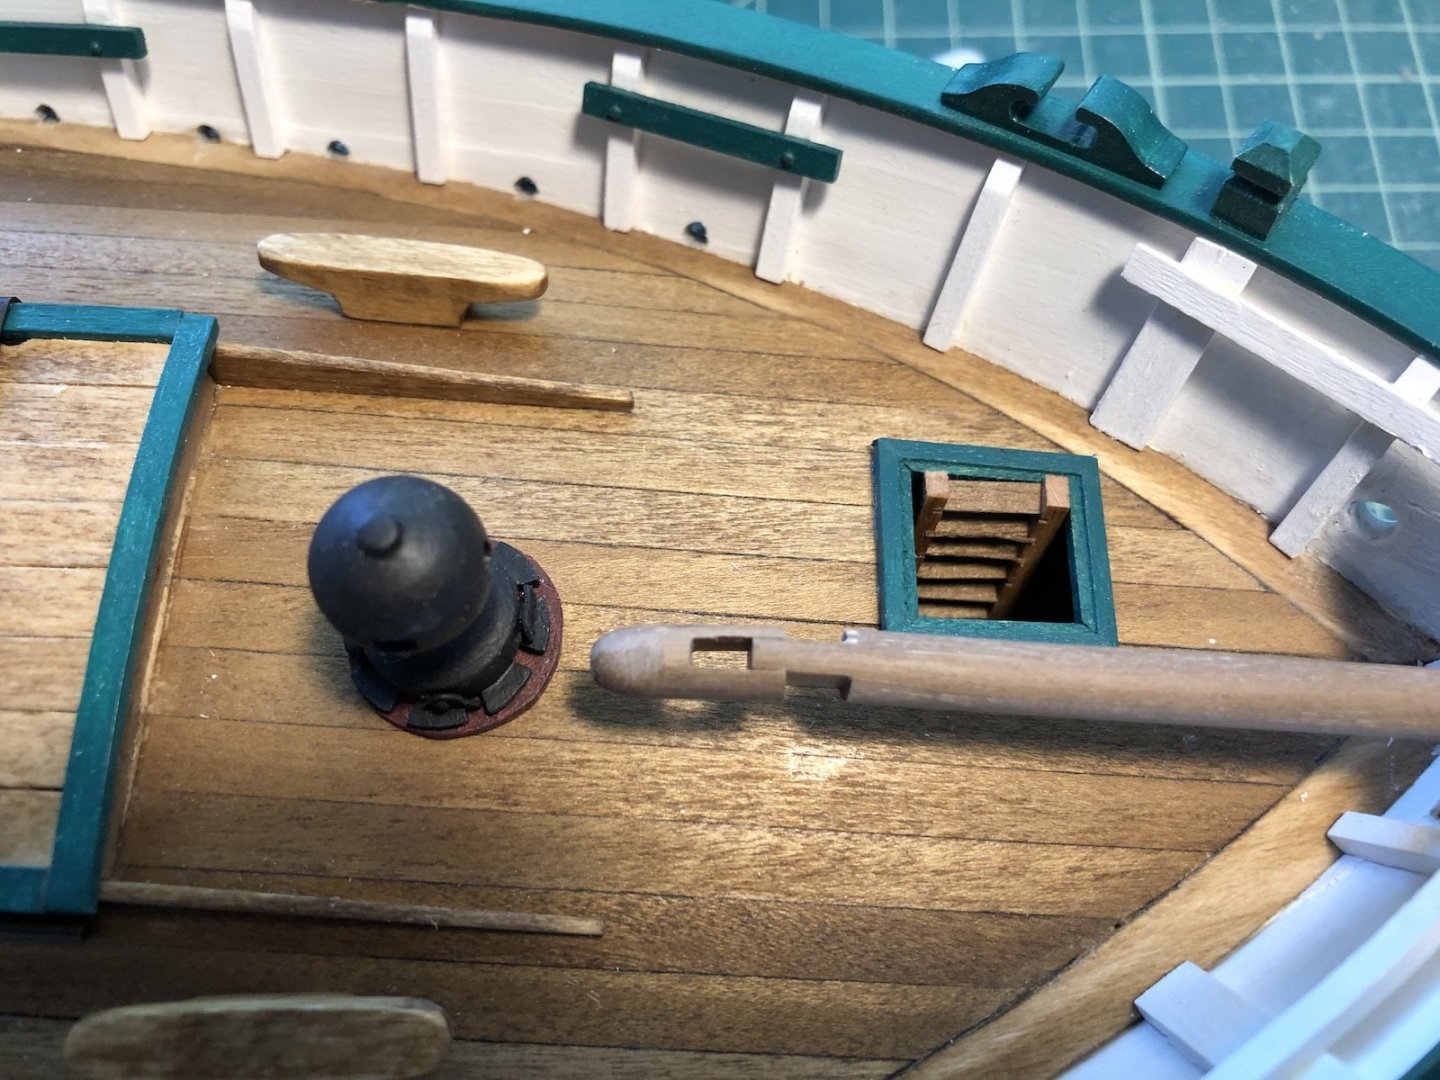
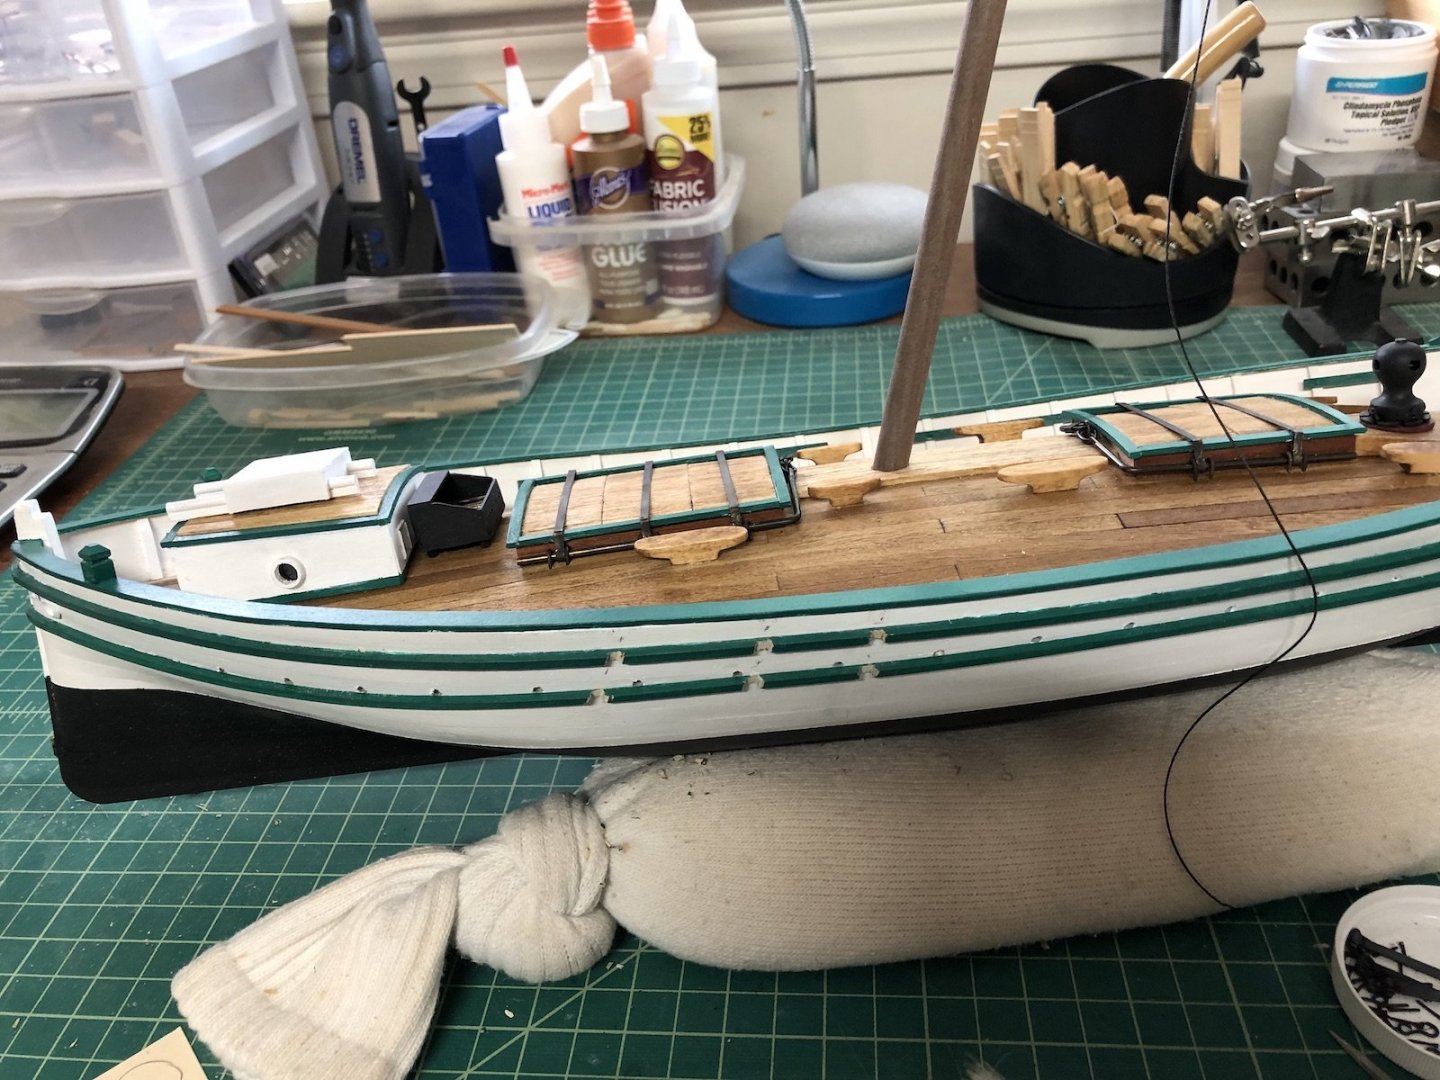
Thanks Popeye and EJ. I like adding those little extras if they come out well. I made the ladder for the inside the wheelhouse and glued it in after painting the area inside black. I will have the wheelhouse cover open slightly so this area will be visible. I finished adding the locking straps and bars to the other hatch and finally finished the wheelhouse. There was a lot of painting so it took a while. I also added the eight cleats to the deck. These are a bit more narrow now then they were when I took the picture in the last post, which are closer to the plans. You might notice a round plug in the deck. There are actually six of them. I learned the hard way that when working on a boat that looks very similar at both ends, make sure the boat and the plans are oriented the same way before drilling holes! I am currently working on the capstan and the cooking grill.


- 131 replies
-
- 6
-
-
- santa lucia
- panart
- (and 1 more)
-
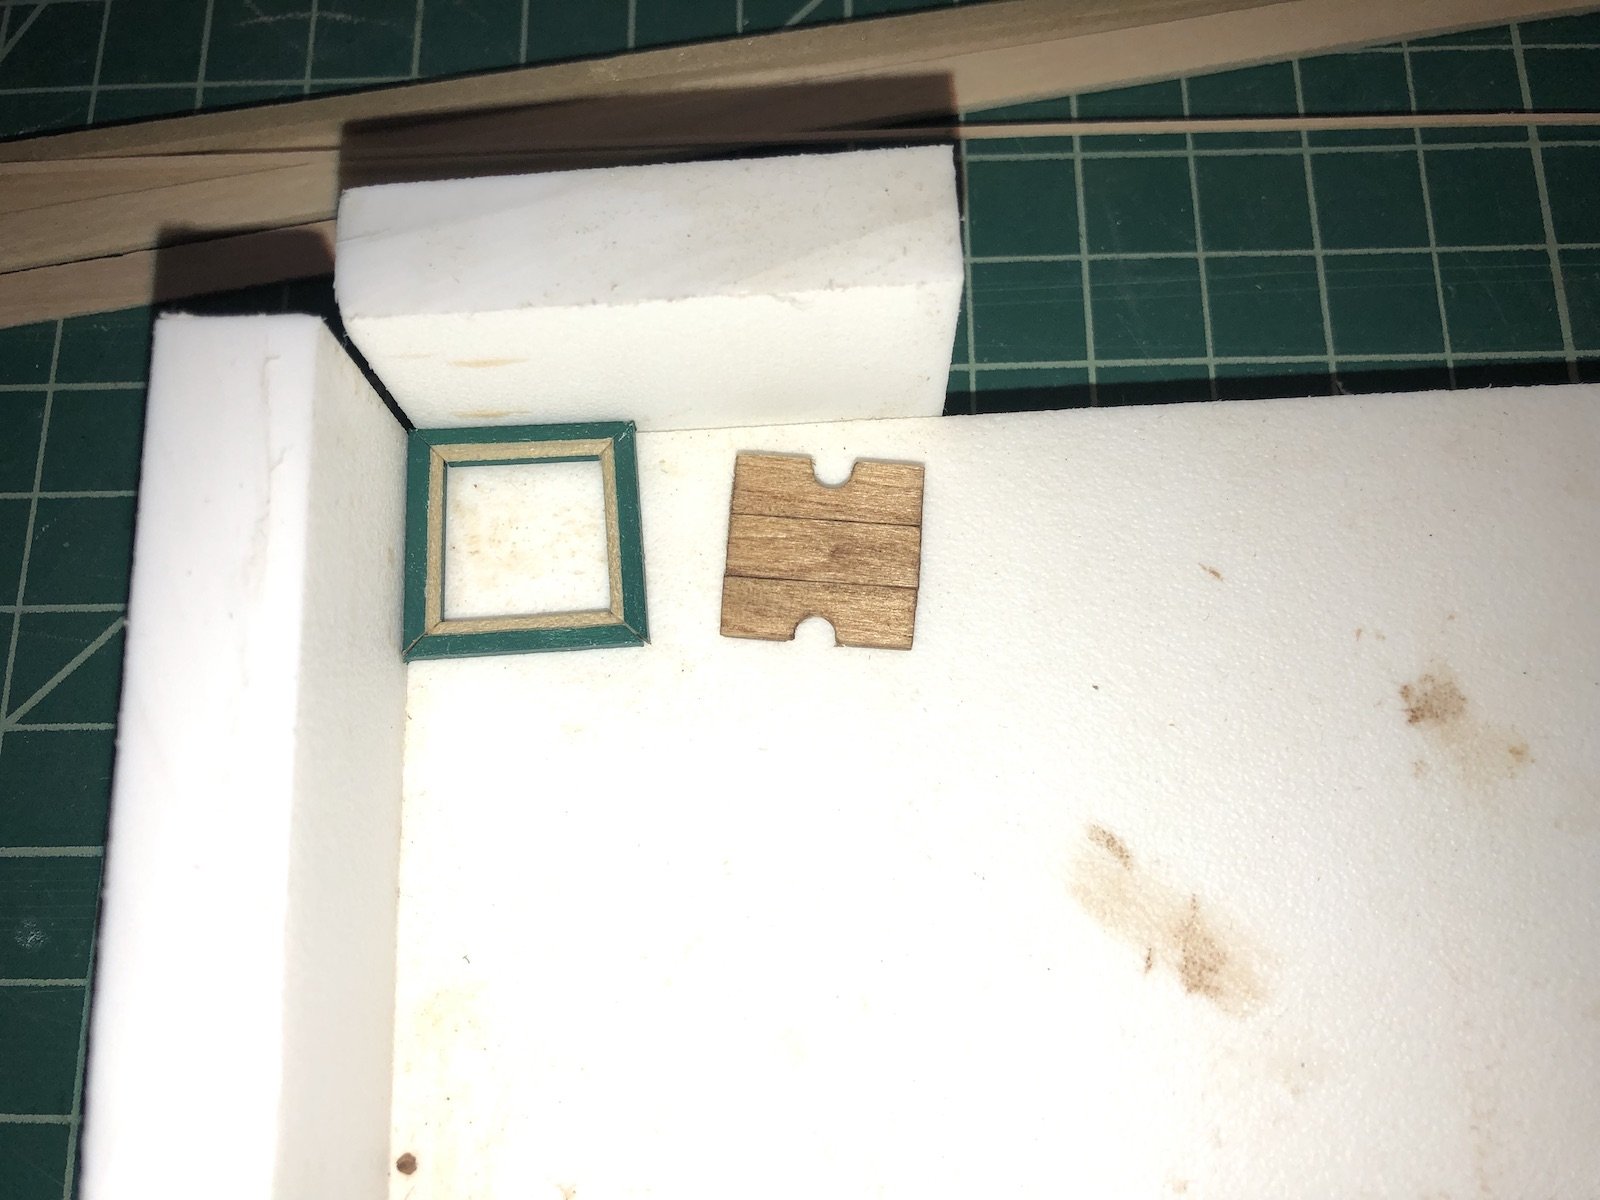
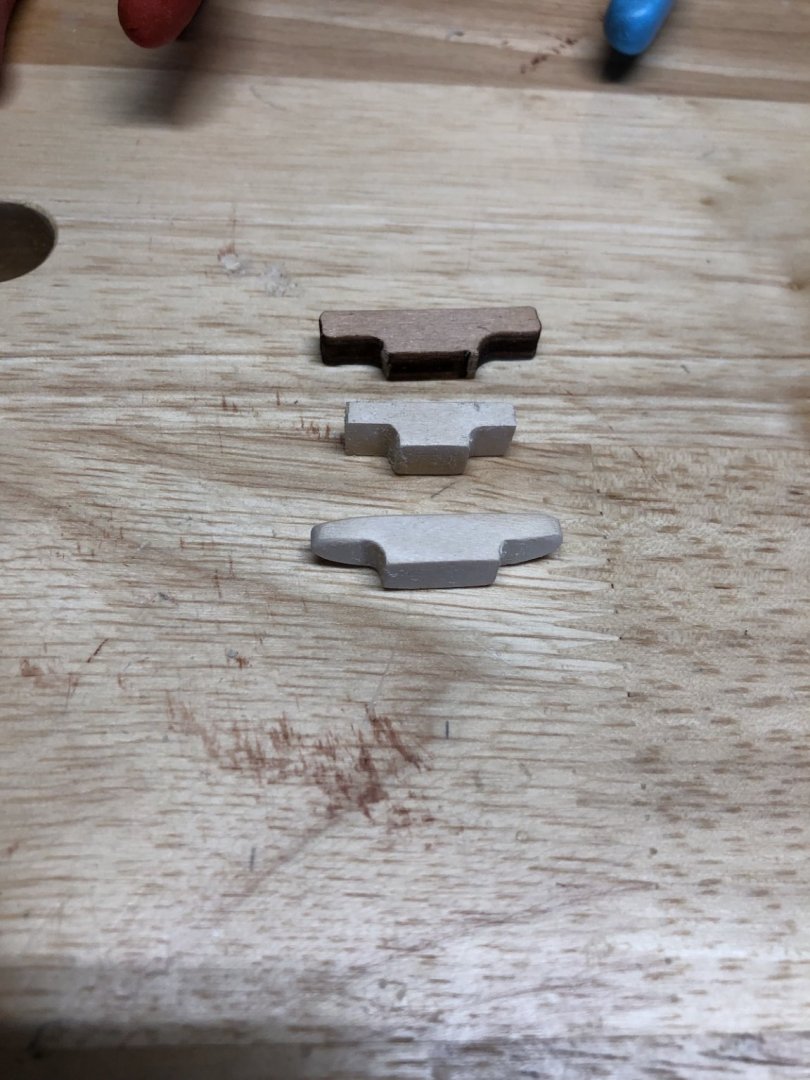
After a coupIe of coats of oak stain and one of wipe on poly on the hatch planks, I placed the locking bars on the forward hatch and added the hold down loops for them. Instead of drilling two holes for each loop, I cheated a bit and only drilling one hole on the outside of the bar for each loop. I then cut the inside of the loop shorter and placed the long end in the hole. This worked great and was much easier than trying to get both ends of the loop into two holes. After all the loops were added, I slid the loop for the lock through the hold down loop in the deck and glued the lock body to the lock loop. I did not like the look of the plywood cleats supplied with the kit, as I want to leave them natural not painted. I used some 1/4" square basswood and the mill to rough out new cleat blanks, then sanded them to final shape. The top cleat in this image is the supplied blank, the middle is what mine looked like after milling (this is one of the two shorter cleats), and the bottom one is after final sanding. I then added the 2mm brass pin to each one and gave them two coats of oak stain. I will give them a coat of wipe on poly when they dry.
- 131 replies
-
- 5
-
-
- santa lucia
- panart
- (and 1 more)
-
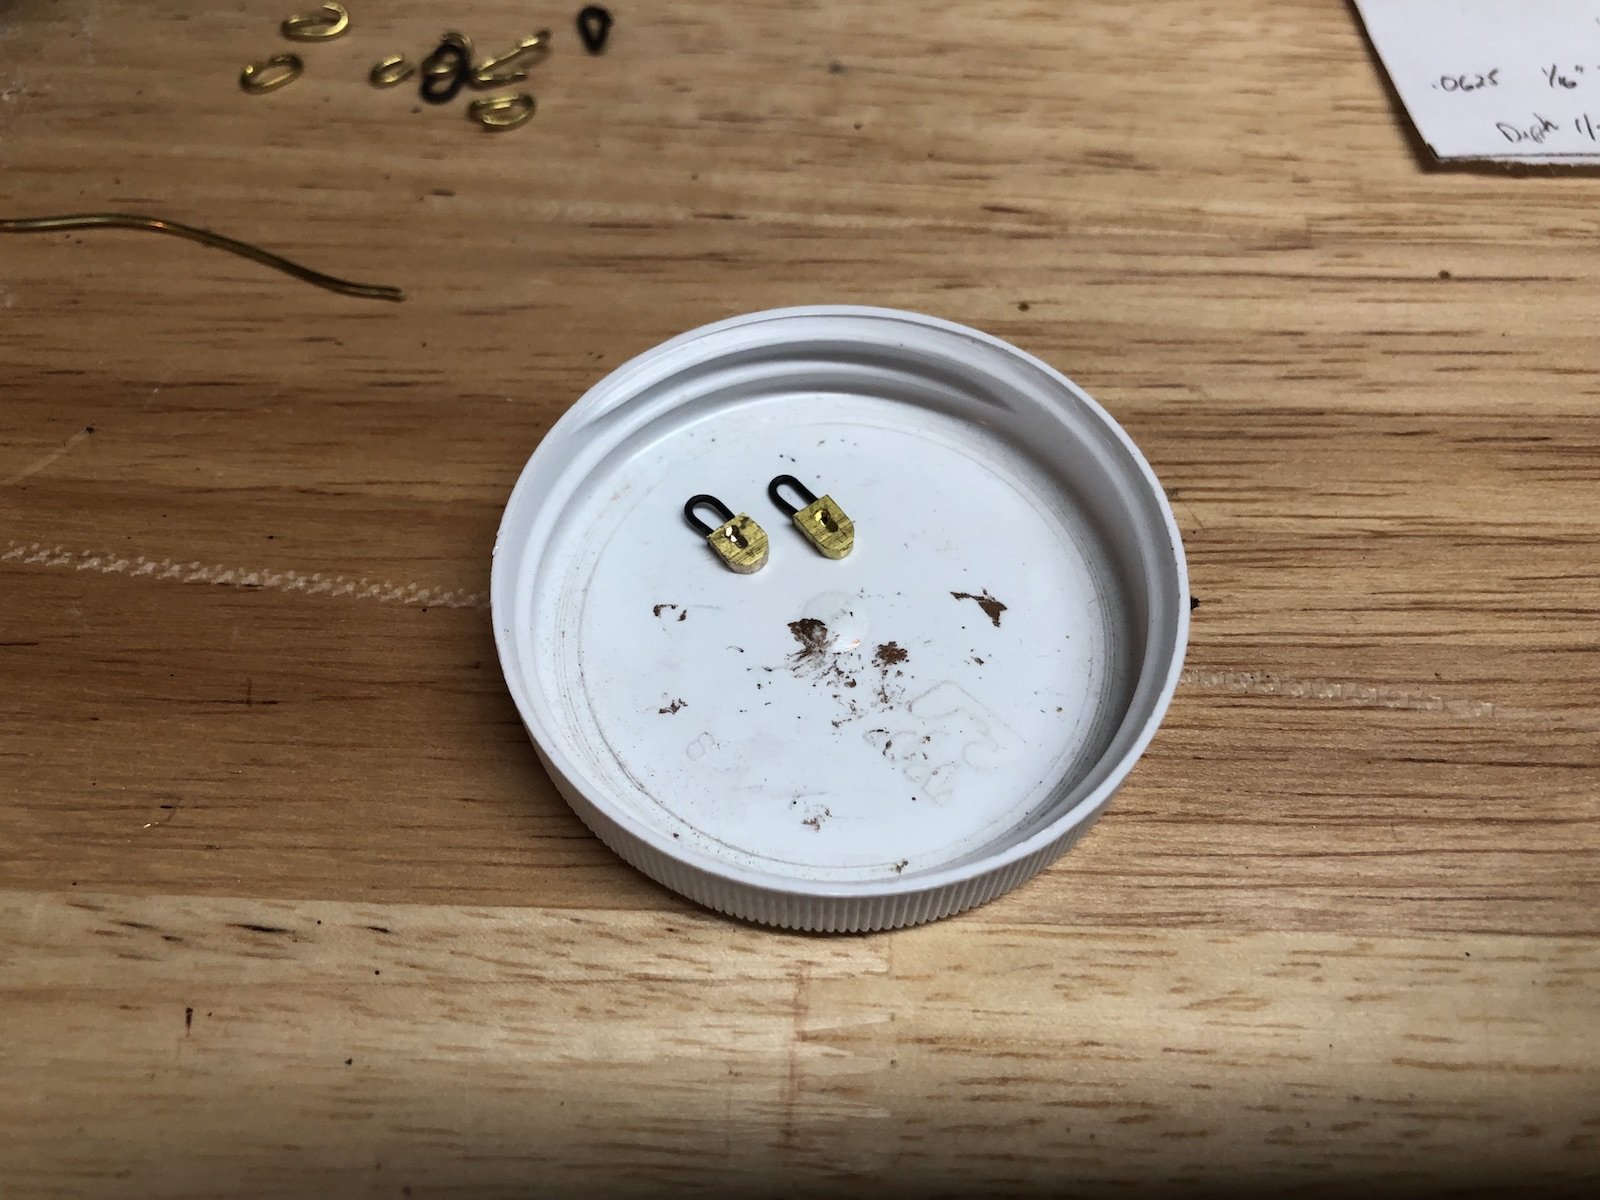
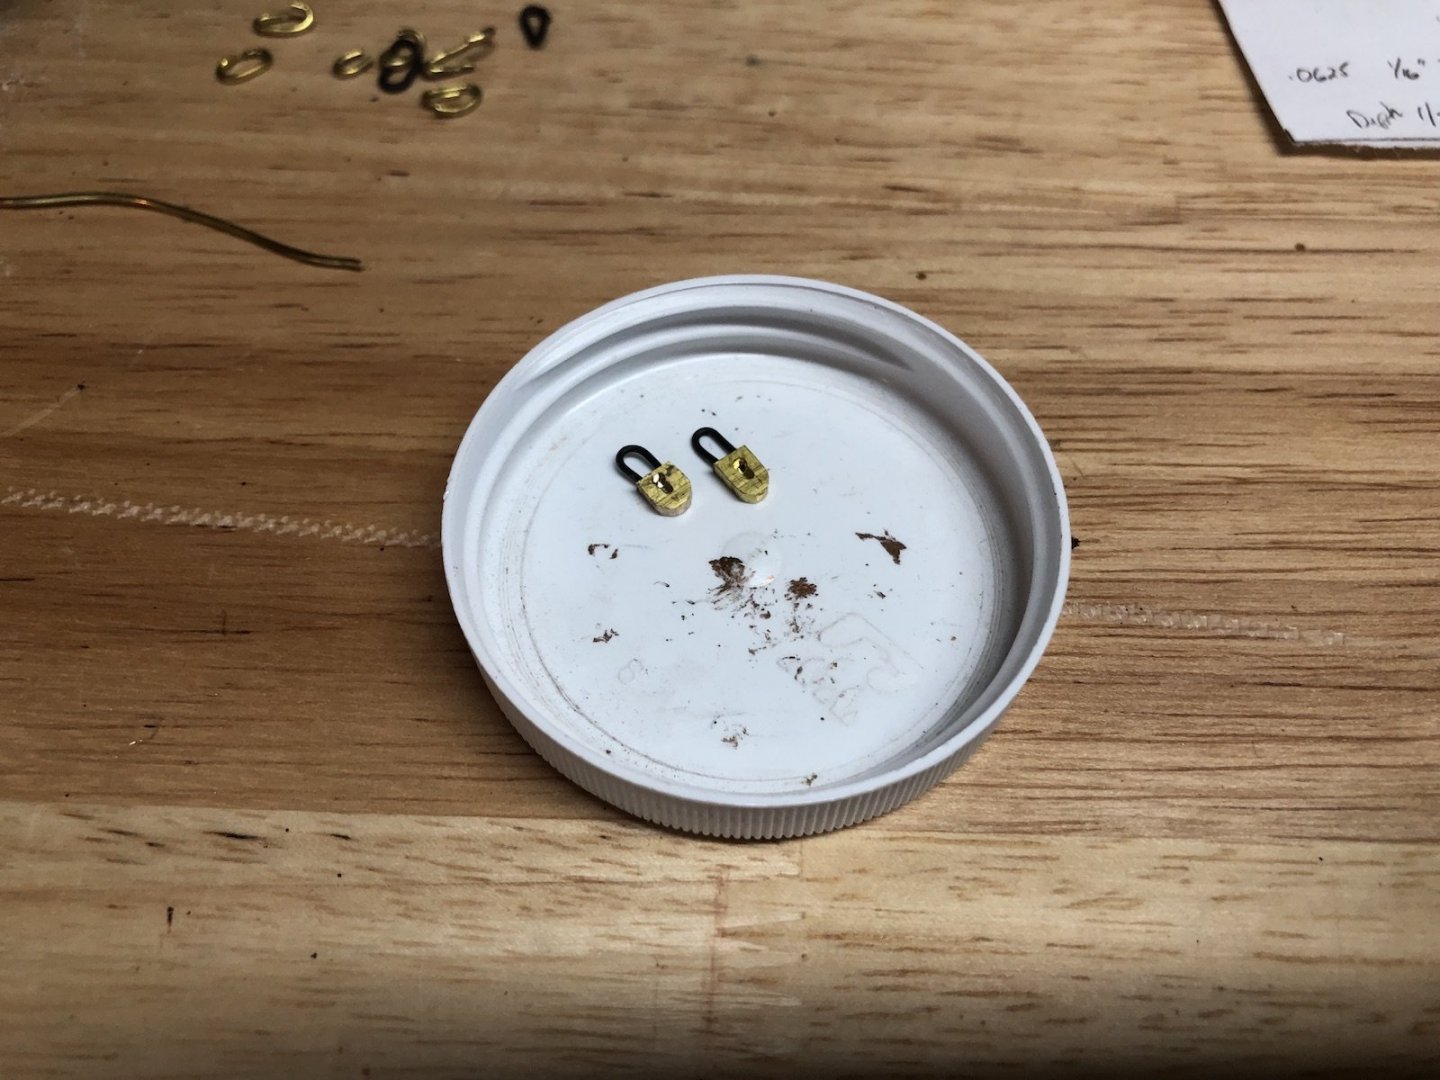
A small update but I am pretty happy with these padlocks. Took me a few hours but it was really fun using the mill for what it is intended. I made these by cutting four 1/8" strips into some 1/16" brass angle using my band saw. I then put the angle into the mill vise so the flat surface was pointing up. I then used a small mill bit to make a 1/16" slot in each piece and a slightly larger drill but to make a hole at one end of the slot. These only go about half way through the brass strip. I then used the band saw to cut each strip off the angle and picked the best two. I used a disk sander to round the two corners at the end of the slot. I then cut off the excess and filed the square end flat, then used the mill to drill two small holes in the flat end for a wire loop. I still need to clean these up and blacken them. The padlock loops won't be glued into the padlock bodies until the locking bars are in place and I can slide the padlock loop around the locking loop in the deck.
- 131 replies
-
- 6
-
-
- santa lucia
- panart
- (and 1 more)
-
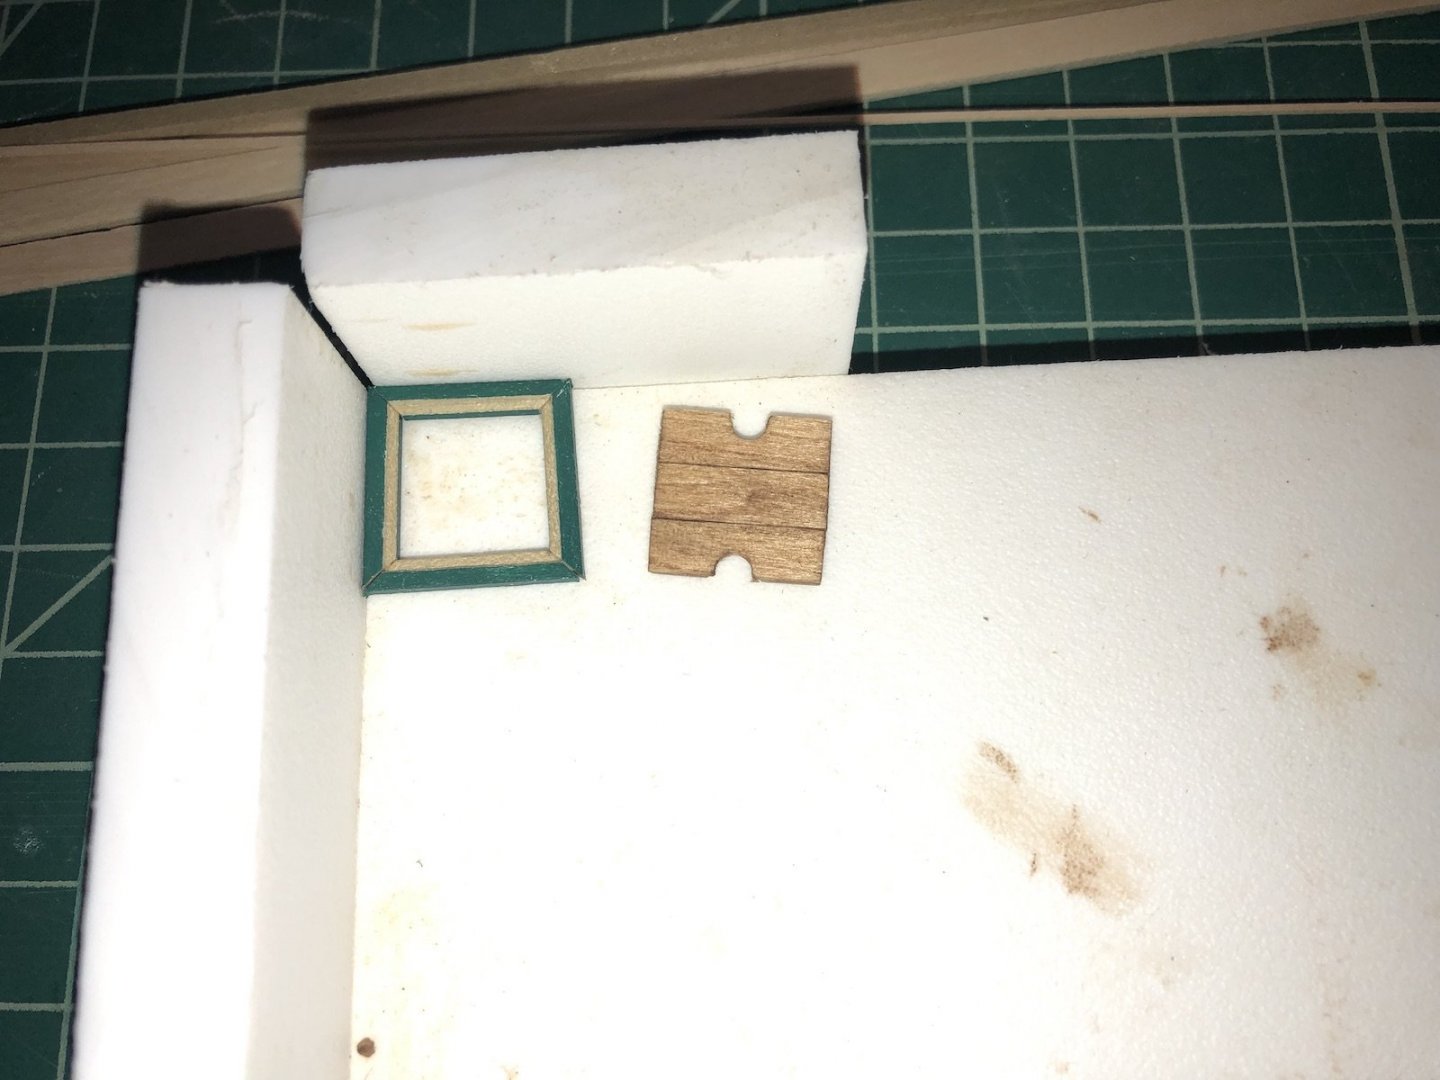
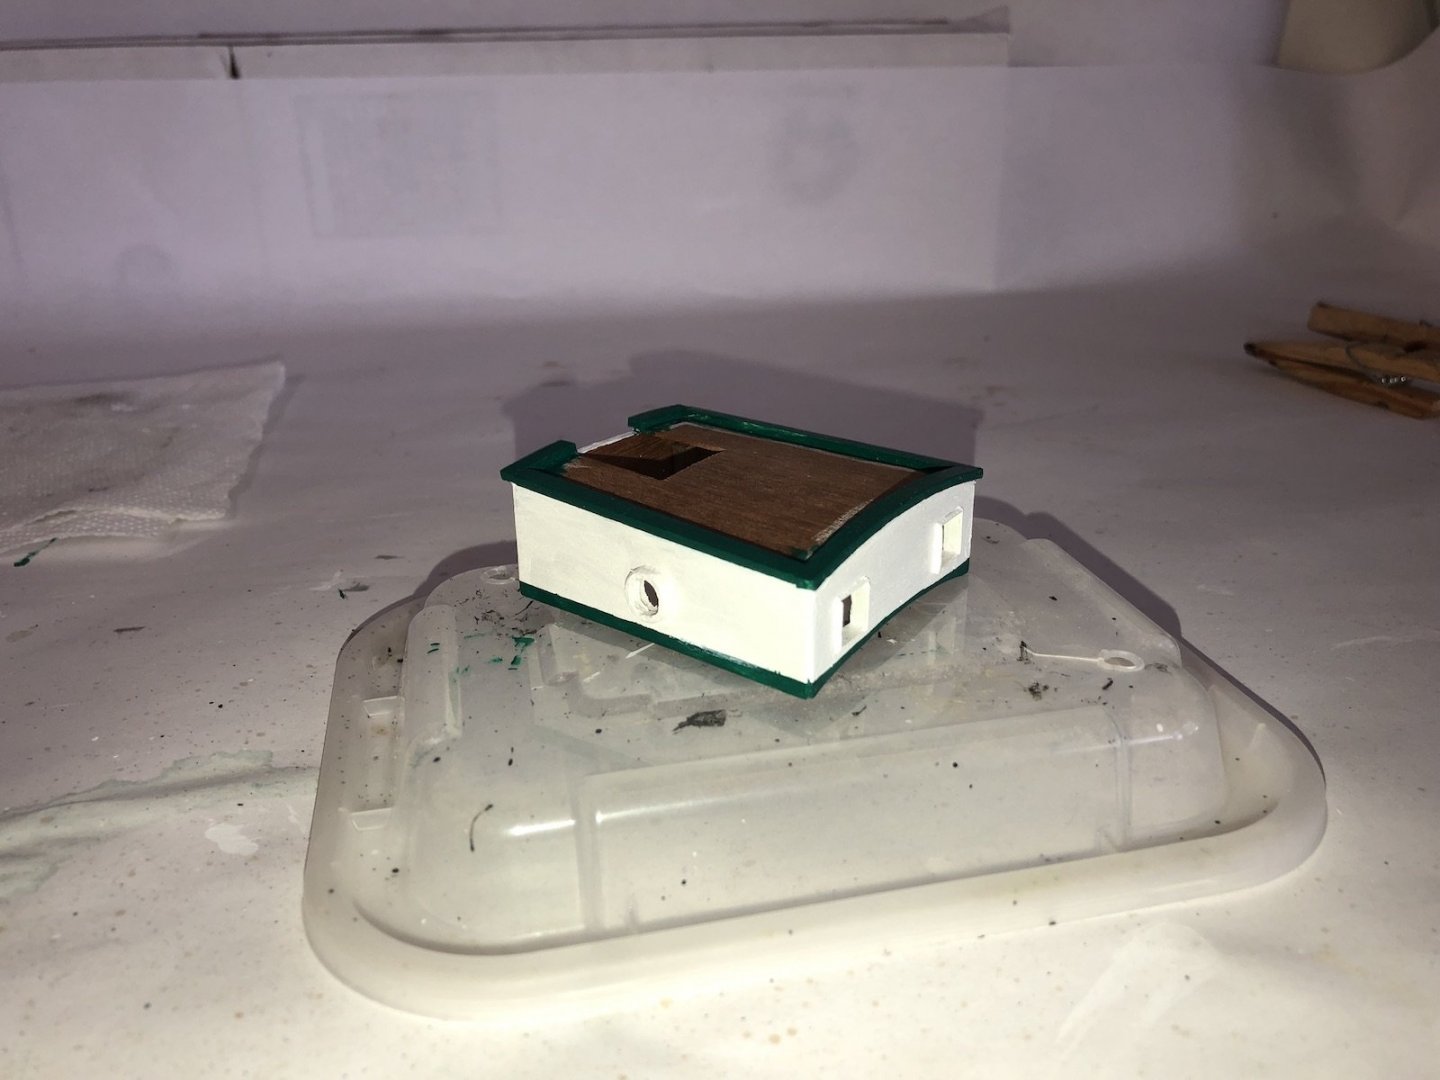
I was away at my son's for the weekend but had a lot of time today in the shop. I gave the planks on the hatches a second coat of oak stain and will give them a coat of wipe on poly when they dry. I assembled the locking straps and bars for the two hatches but will wait until the planks are finished before installing them. All those loops in the cup need to be placed around those bars which is going to be quite sporting, I think. Here is where I am with the wheelhouse. I have finished painting it and have added the planks on the roof after I took this picture. You can see the finished sliding cover at the top of the previous picture. I need to add the door to the aft side before I put the cover on, and also put pieces of clear acetate in the windows and port holes. And this is the hatch frame and cover for the opening into the sail room. I used the mill to add a rabbet to a strip of wood then cut pieces to make the frame. I have since painted the frame all green. There are ladders that go inside this frame and the wheelhouse which I will make next. I should have more to show tomorrow.


- 131 replies
-
- 5
-
-
- santa lucia
- panart
- (and 1 more)
-
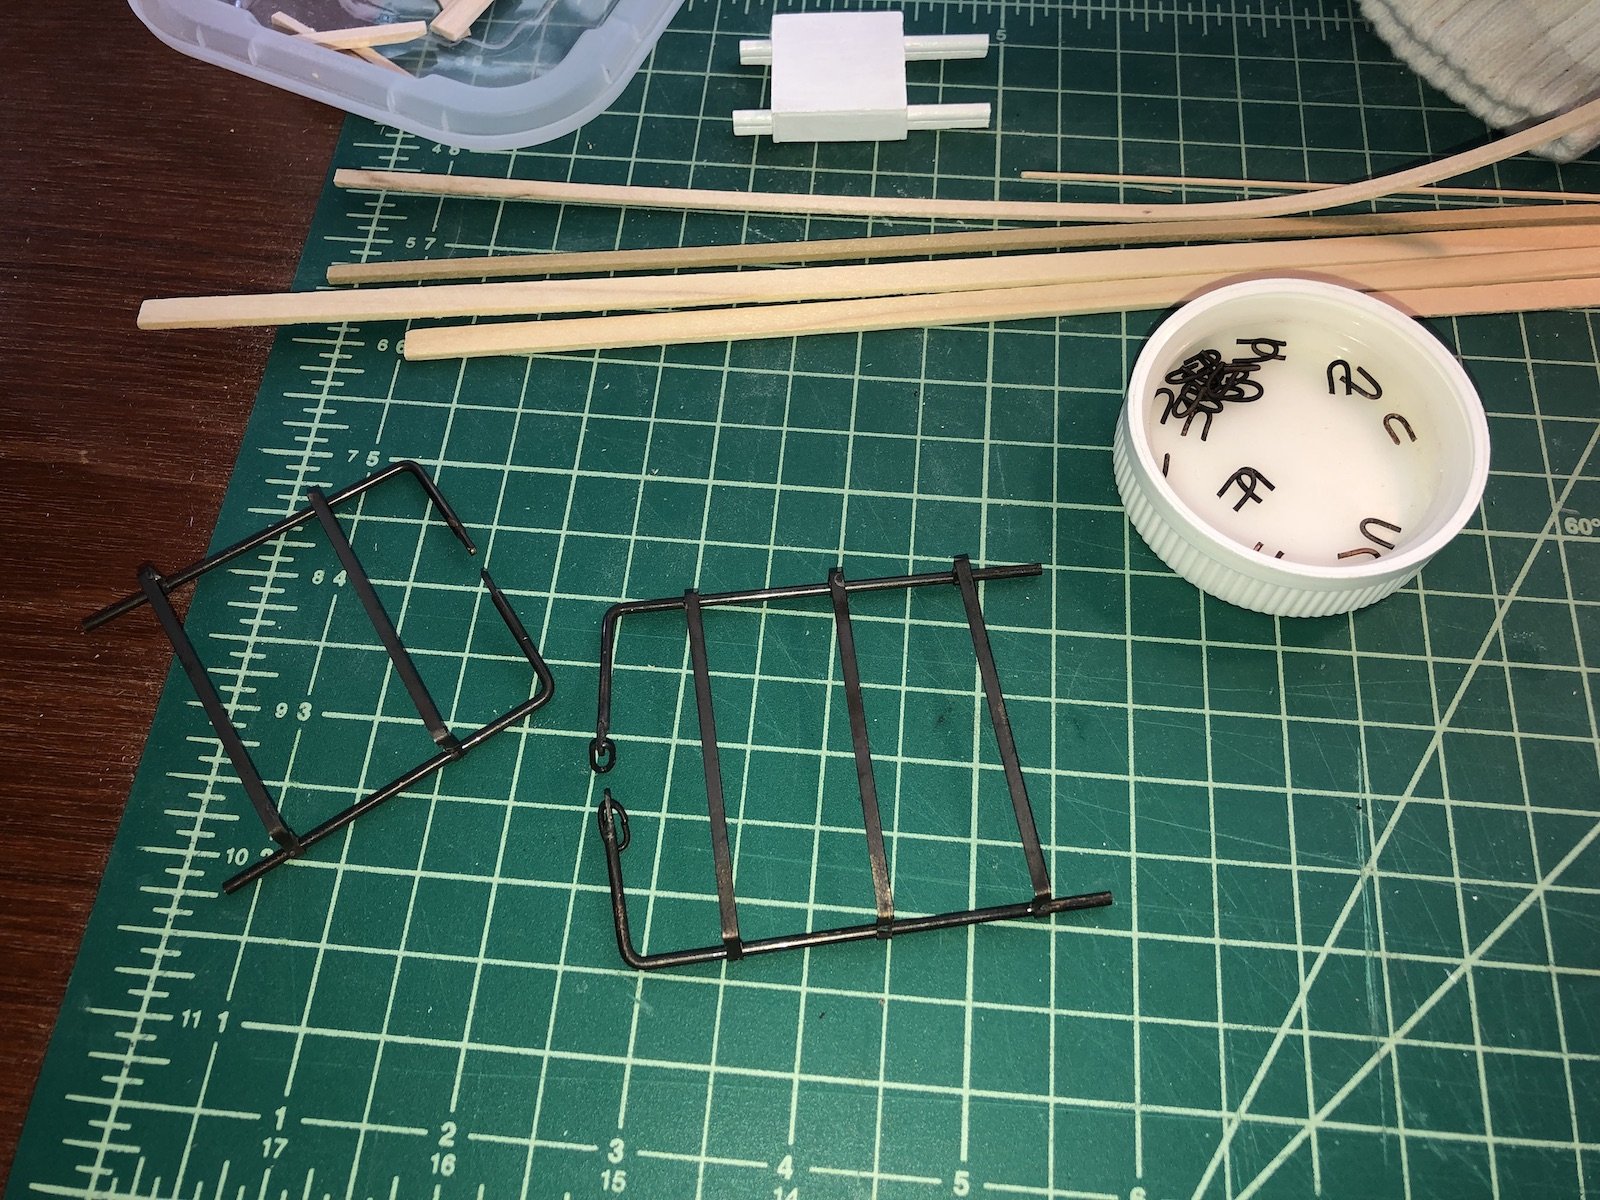
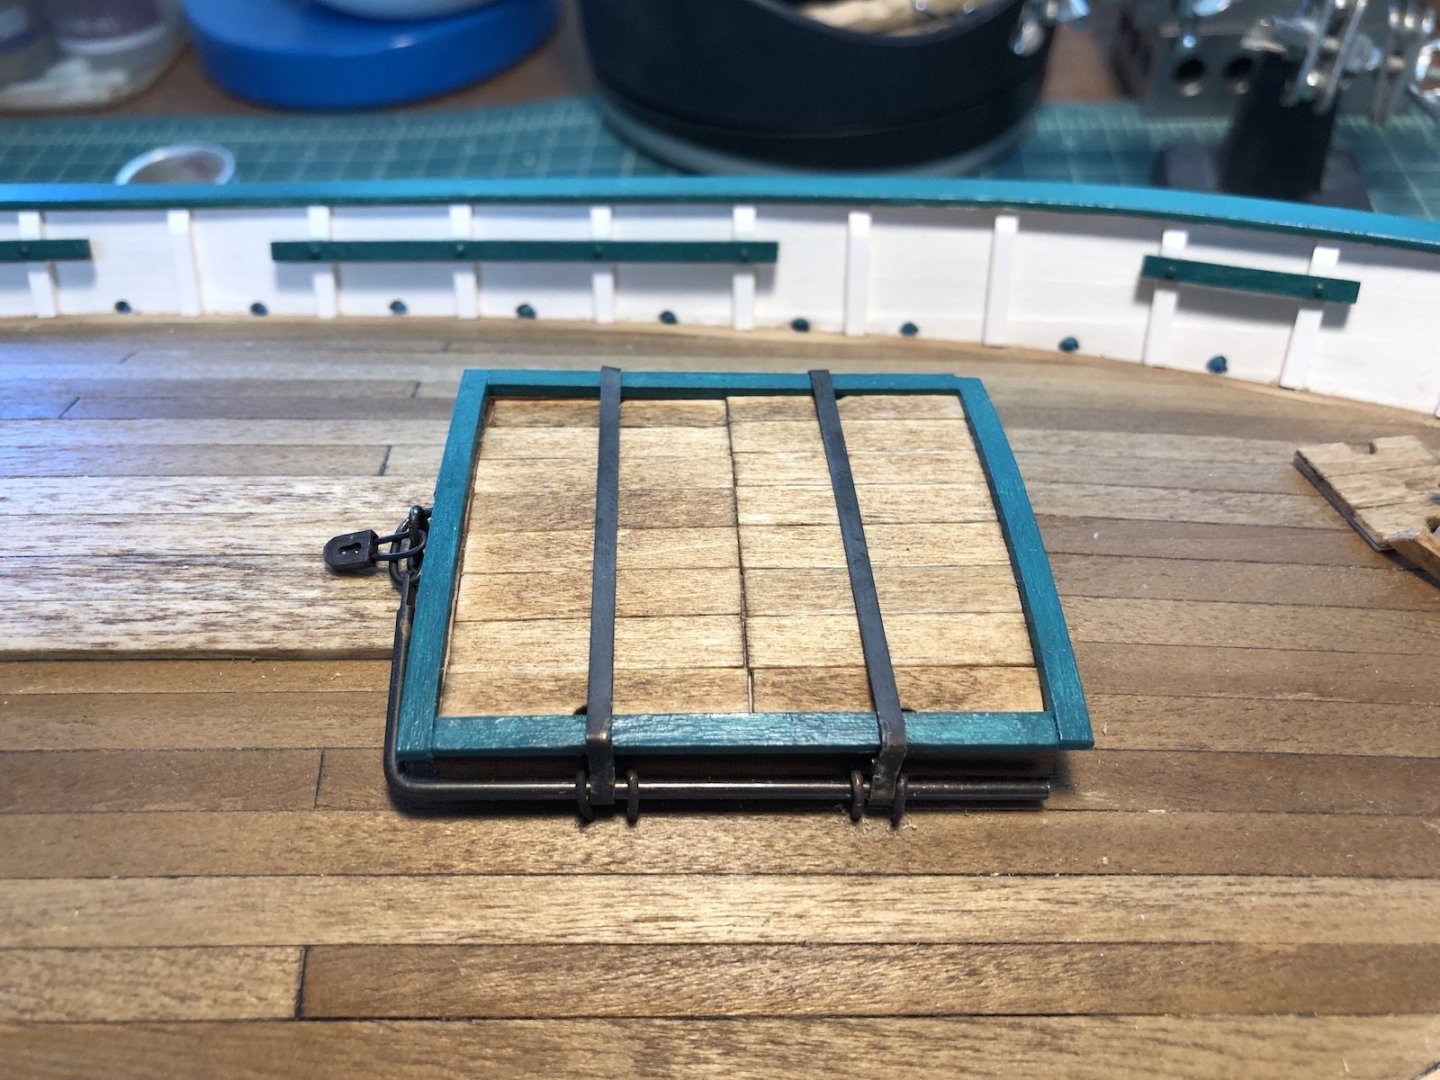
Both hatches are now planked and have a first coat of oak stain. Yesterday I made the hardware that locks the hatches closed. This consists of straps that go over the hatch planks with loops at the ends that a bar slides through. The bar has a loop on the end that slips over a loop in the deck and is locked with a padlock. There are also loops in the deck to hold the bars down. The kit supplied copper strip to make the straps, which I started with. I measured the lengths, made the loops by wrapping the copper strip around the bar material, and soldered the loops closed. The copper got very soft, though, so when cleaning up the solder the straps bent all out of shape and two actually broke. So I used some brass strip that I had and remade them, and these came out much better. I also used a drill bit that was larger then the bar material to make the loops which helped with the finished loops. To shape the ends of the bars for the locking loops, I used the mill to cut a flat on one end of each bar, then drilled a hole in the flat again using the mill. I rounded the end with a file and added the locking loops, which I made by wrapping brass wire around two nails. The next step was to bend the bars to fit around the end of the hatch. I had no problem getting the bend at the right place, but there are only two ways the bend could go and the first two I bent 90 degrees off, so the locking loops did not lie flat to the deck. Of course there was no extra material for the bars, so I improvised. I cut off the flat end, used a razor saw to make a slot in the new bar end, and doubled over some thin brass strip, leaving one side longer. I slipped this side into the slot then soldered the strip in place as well as soldering the seams on each side. I then drilled the hole and rounded the end of the strip. Problem solved and the other two bars I made sure to bend the right way so no extra work was needed on them, except to cut all the bars to length. Here are some of the pieces drying after blackening. I already made and blackened the hold down loops and I am starting to work on the padlocks. The two long hold down loops are for the locking loops on the bars. I needed to make these longer than the regular hold down loops so the padlocks will fit.
- 131 replies
-
- 5
-
-
- santa lucia
- panart
- (and 1 more)
-
Those frame ends look so delicate but the overall hull shape is just beautiful.
-
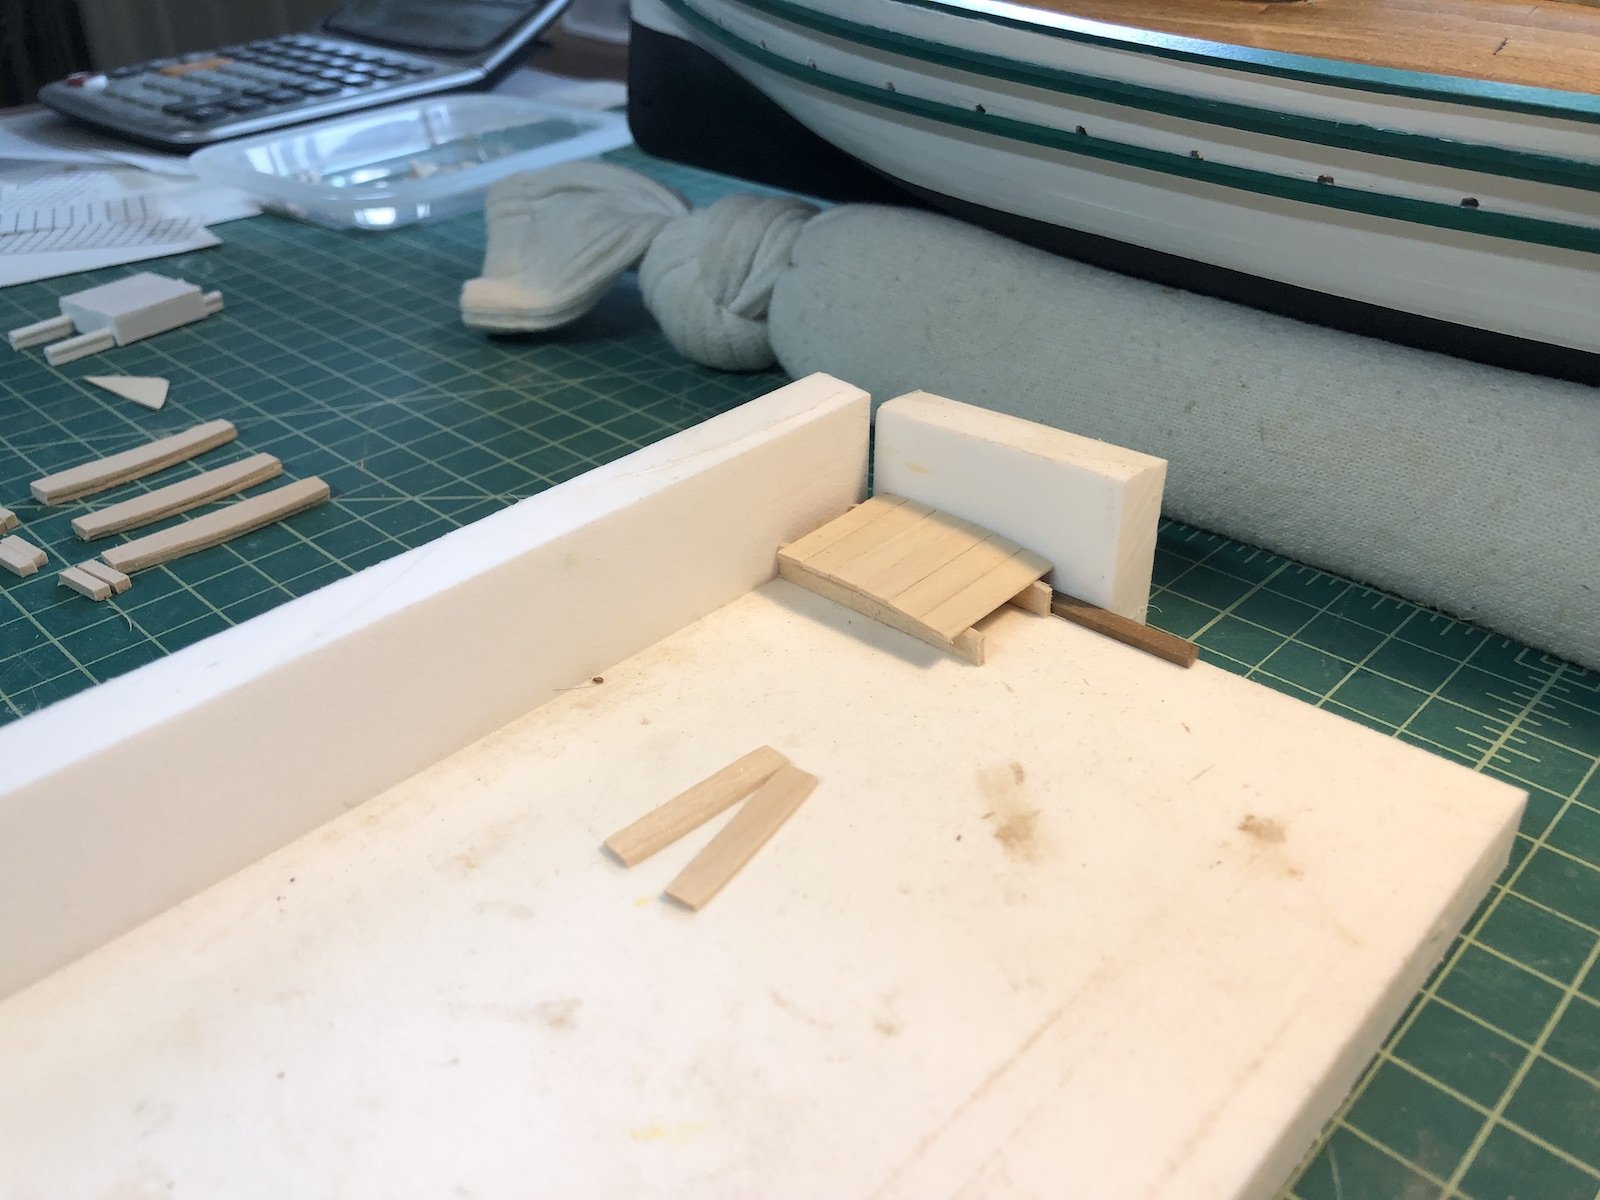
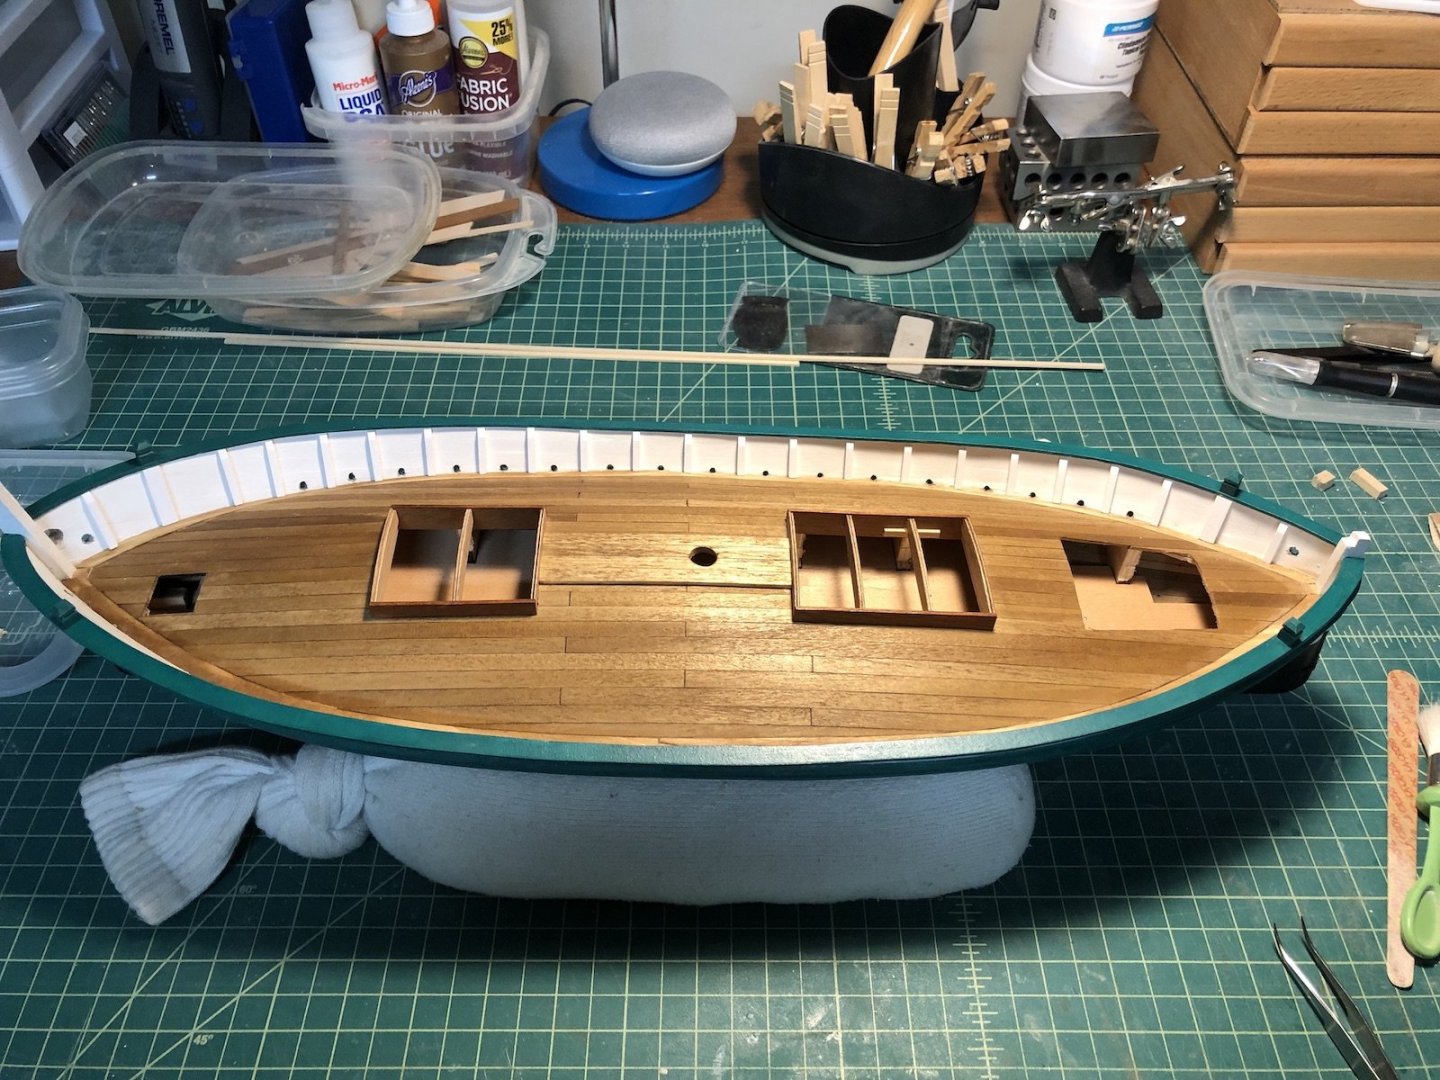
Thank you Fernando and those that hit the like button. Adding planks over those hatch openings is the next step. I first thought that I could add each plank individually since I had a shelve on each side for them, but I didn't want to glue them down as I went because I knew they would not exactly fill the opening and I would have to make adjustments to their widths. But his proved to be too fiddely as they planks kept falling down into the openings. Since I had already glued the supplied supports into the openings to make shelves for the planks to rest on, I made more supports using the openings in the laser cut sheet as a template so that I could glue the planks to these supports before adding the whole assembly to the opening. This worked very well and looking back on the plans is how I should have used the supplied supports in the first place. I used a gluing jig I made years ago to keep the planks aligned along one edge as I glued them to the supports. I cut the planks on the Byrnes saw using the cross cut sled which gave me very precise planks. I started planking from the middle of the supports but left off the two end planks. I glued this assembly into the opening, then adjusted the width of the two end planks to fill the remaining space and notched them with a round file. I glued these in to finish each opening. I am now using the same procedure for the three openings on the large hatch. I plan to stain these hatch planks to match the decking.


- 131 replies
-
- 5
-
-
- santa lucia
- panart
- (and 1 more)
-
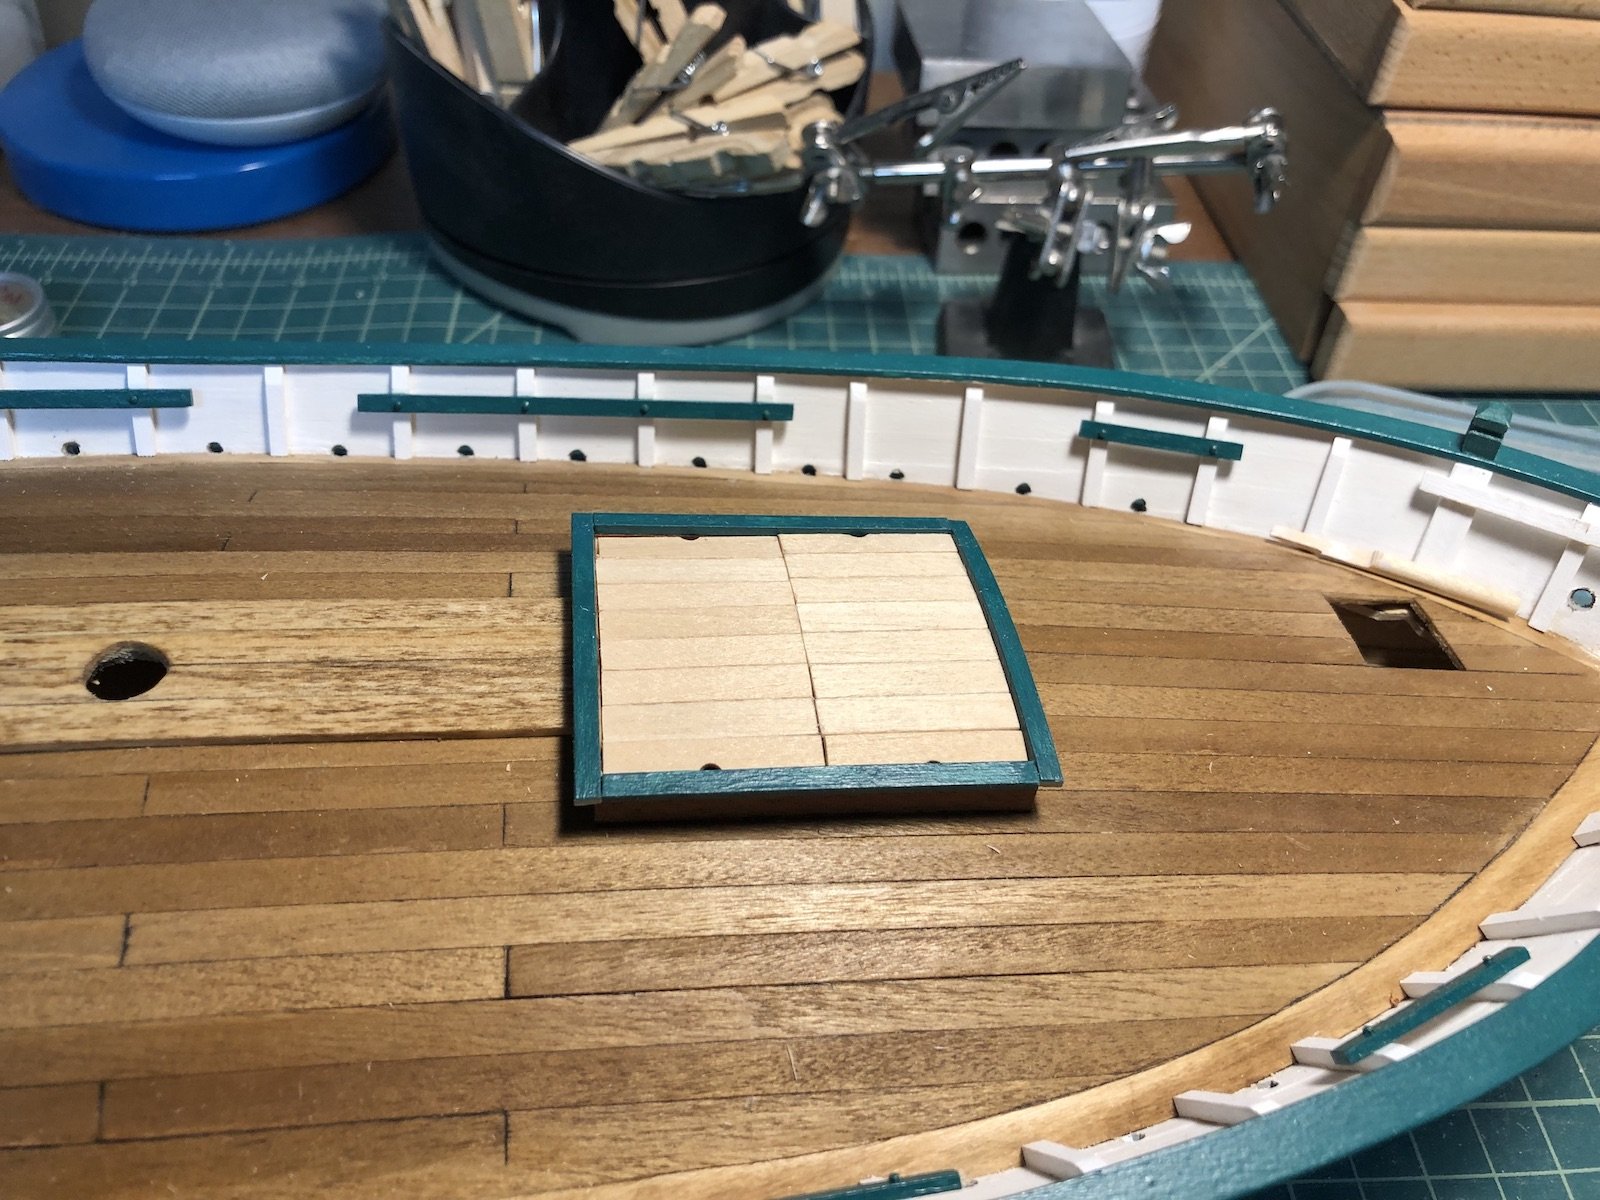
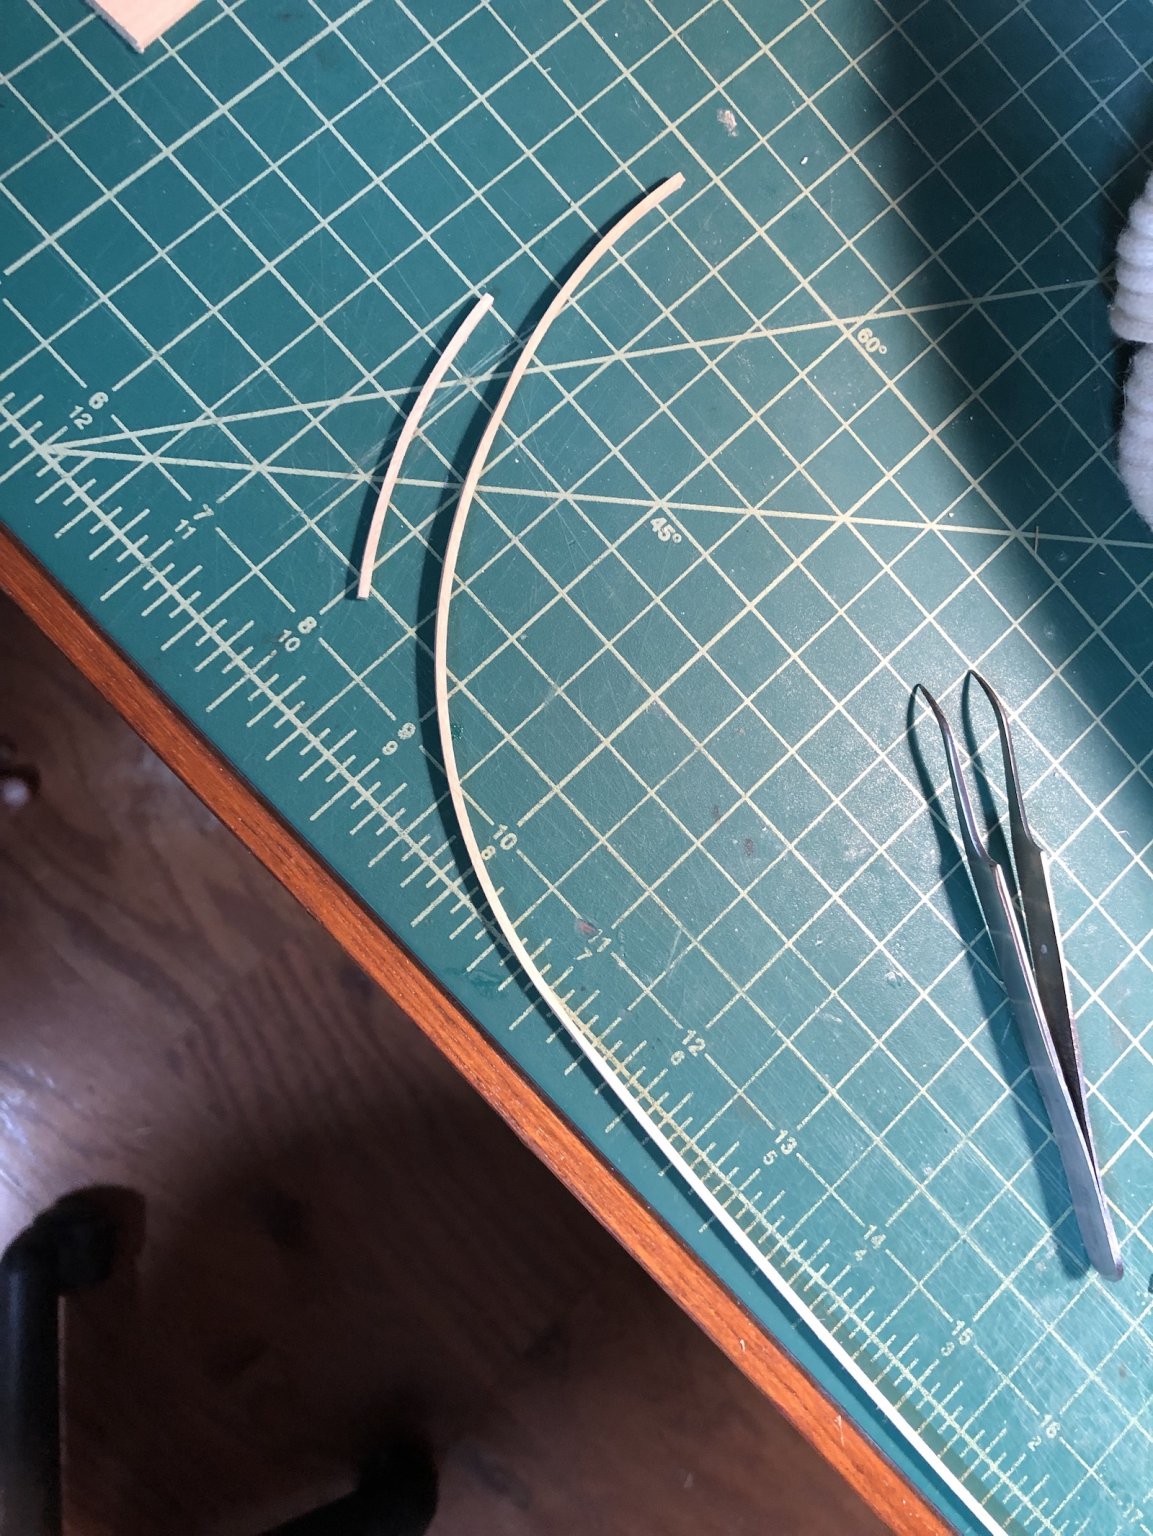
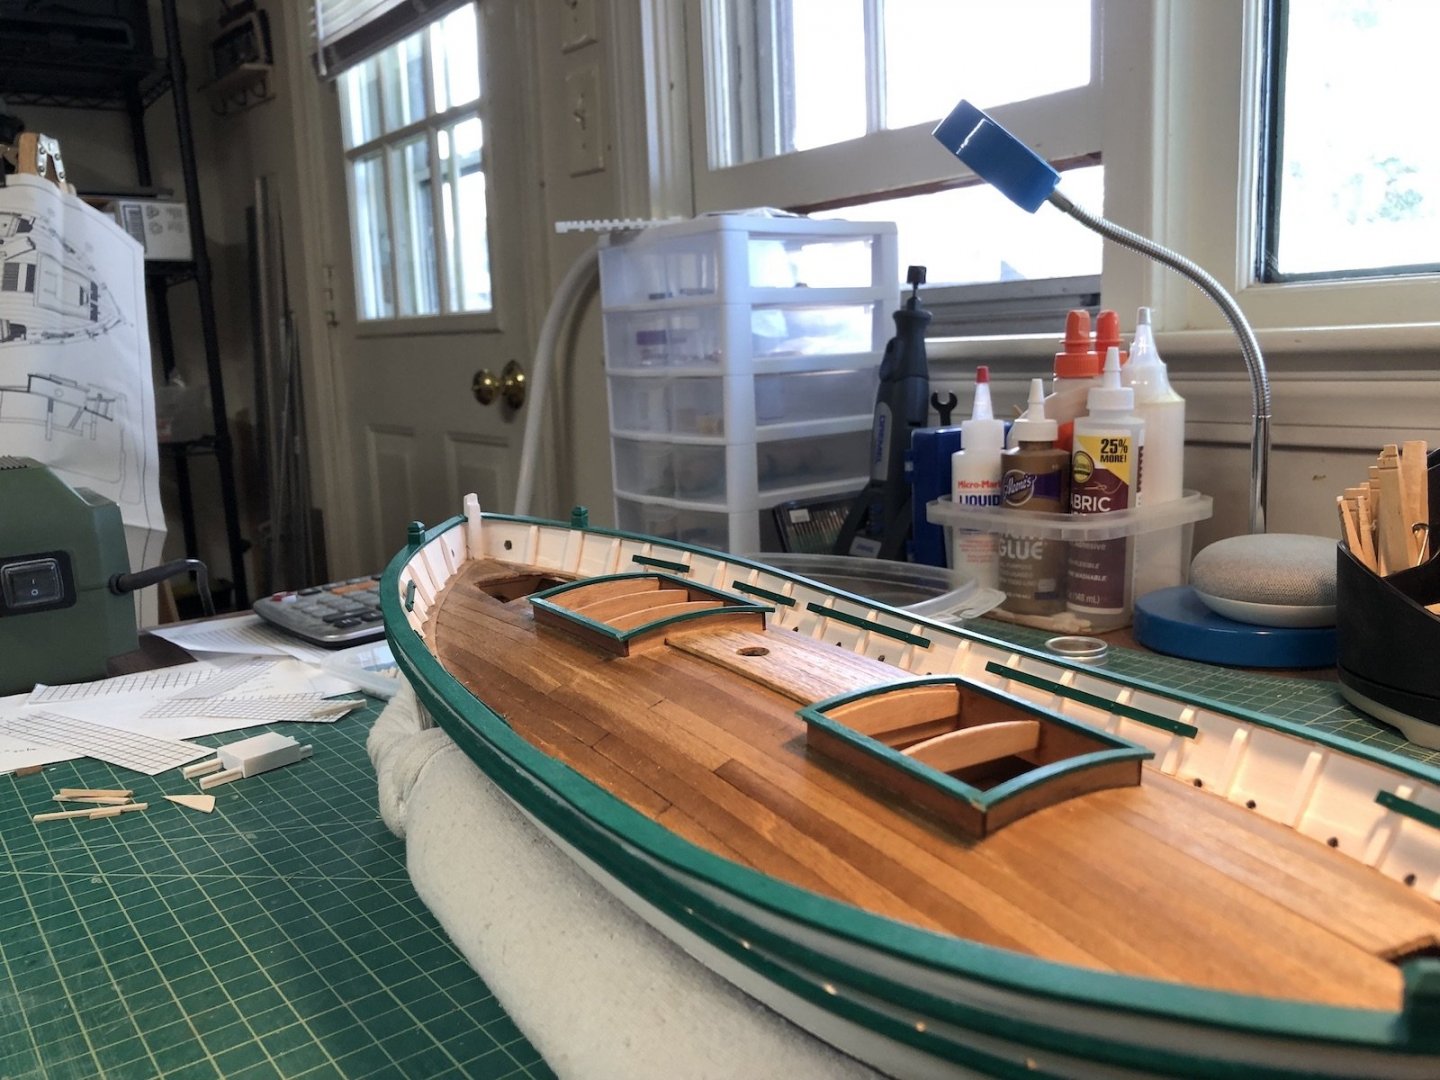
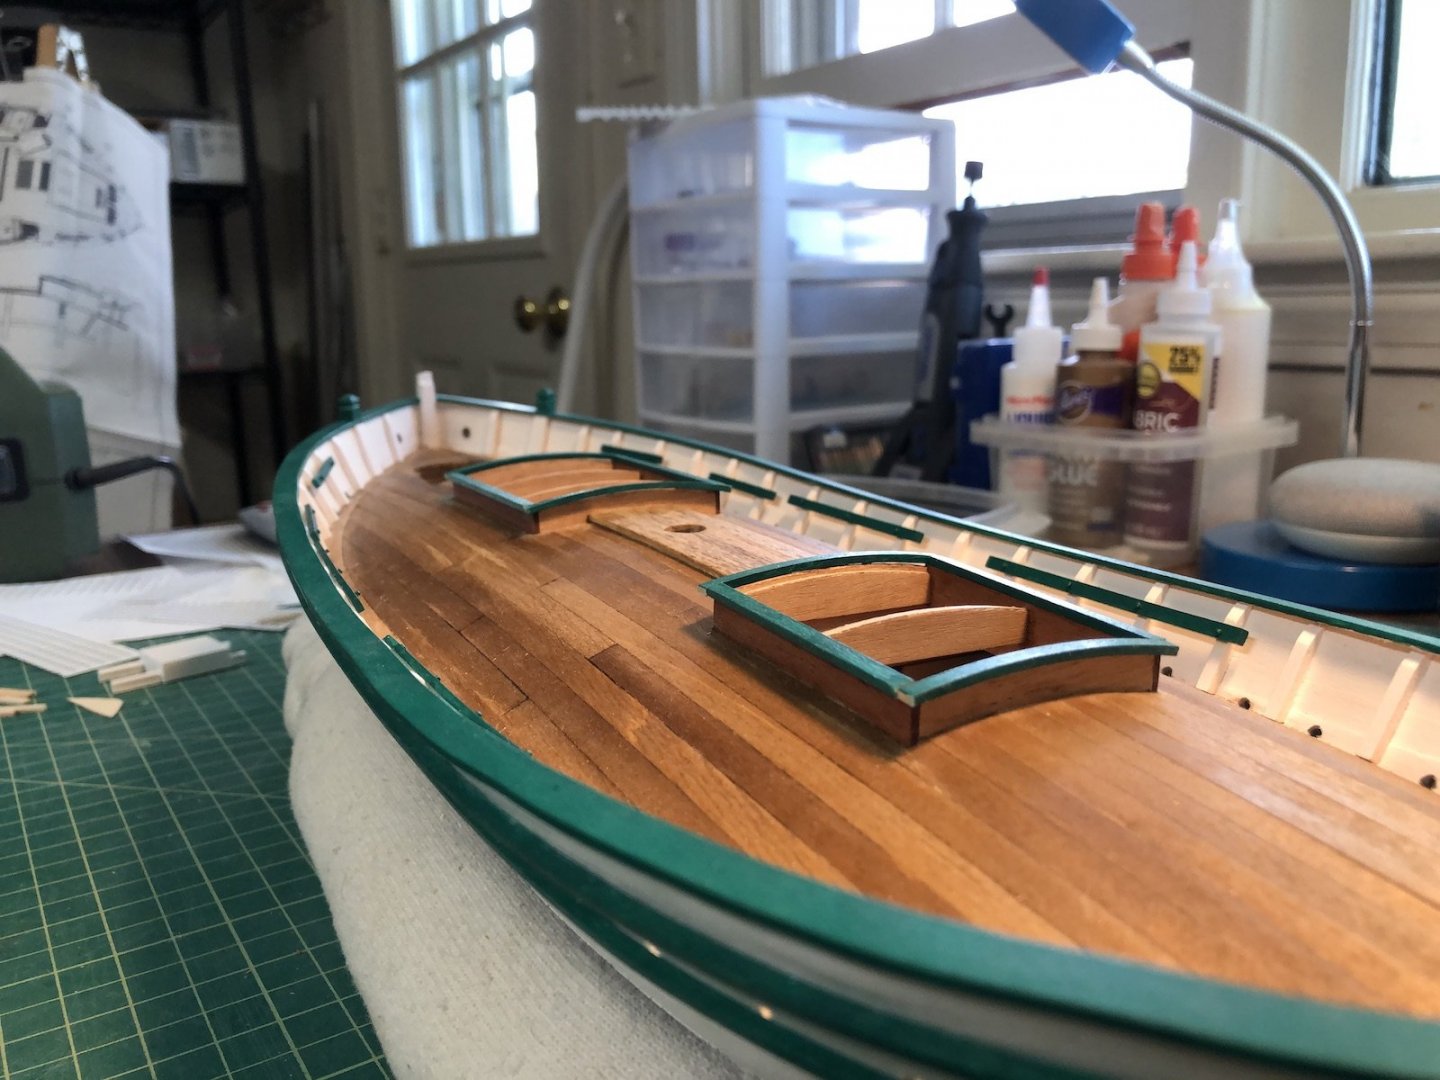
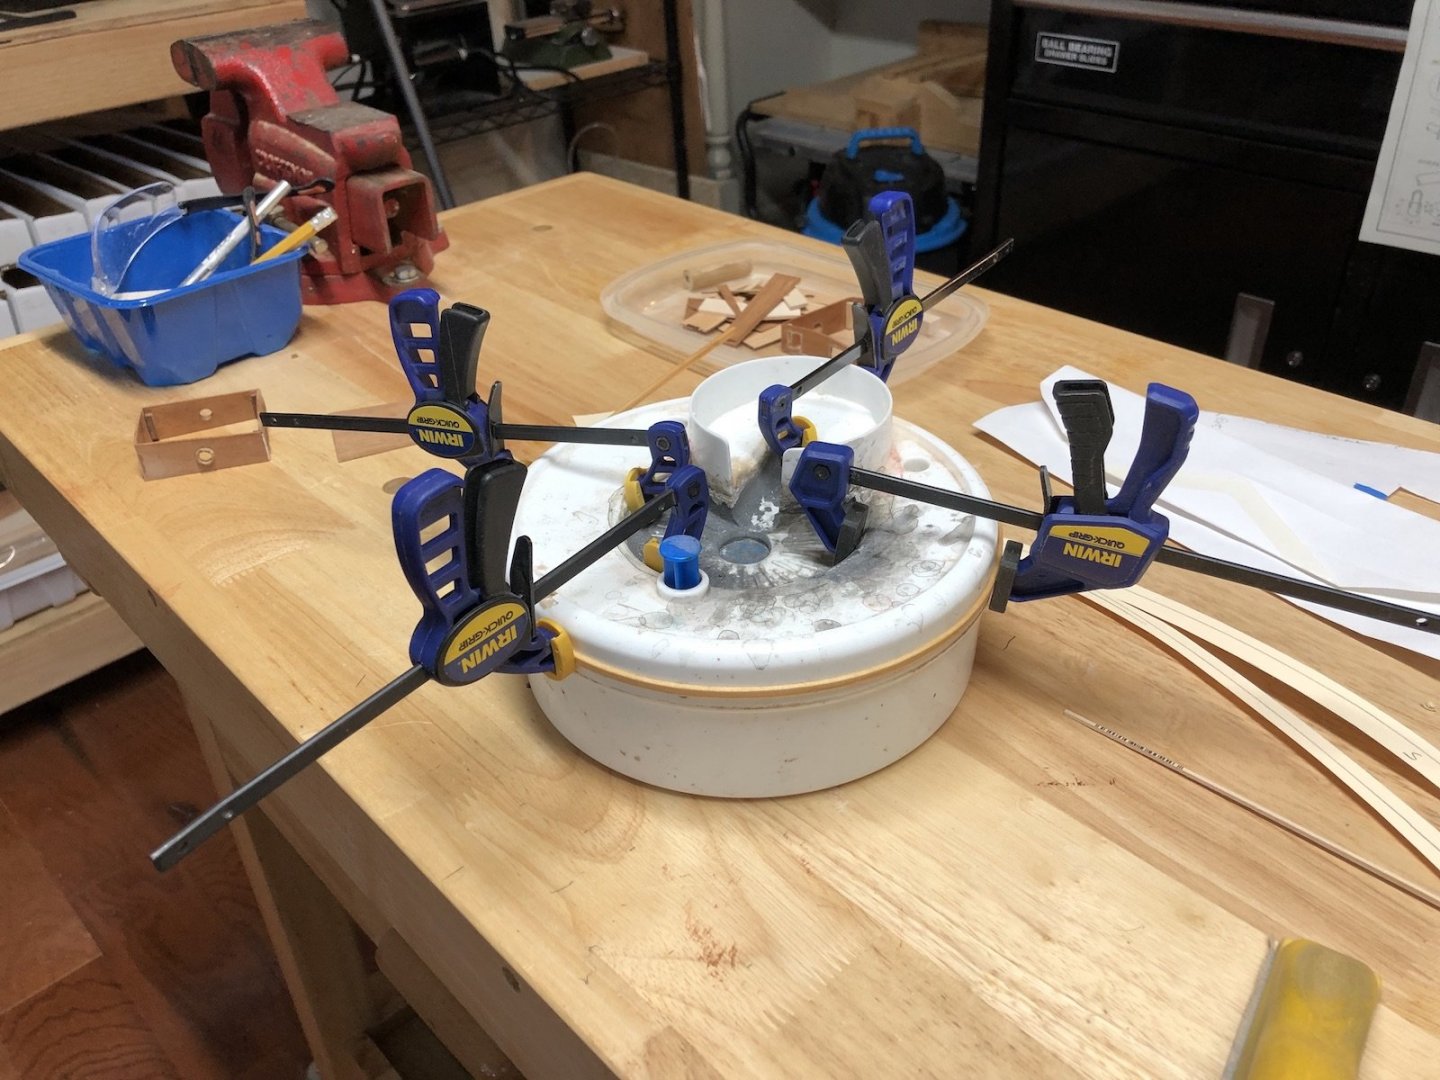
To make the frames for the hatch coamings, I needed to bend the wood to the curve of the coaming pieces. Luckily I found that the curve of the brush cleaner I have is about the same curve as I needed, so I soaked a piece of wood for the trim and clamped it to the outside of the cleaner. I then used a heat gun to gently heat the wood to dry it. When it was dry I took off the clamps and this is what I had. I cut section from the curved wood and they were an exact fit to the coamings. I cut the individual pieces, painted them green, then glued them to the top of the hatch coamings after doing some final trimming. I still need to touch up the green paint on the ends that I trimmed. The next step is to cut and attach the planks that go inside the frames. There is also some brass parts that need to be made that lock the planks down, which I have started to make.

- 131 replies
-
- 7
-
-
- santa lucia
- panart
- (and 1 more)
-
Thank you K. Your Connie is looking great too.
- 1,354 replies
-
- 2
-
-

-
- constitution
- model shipways
- (and 1 more)
-
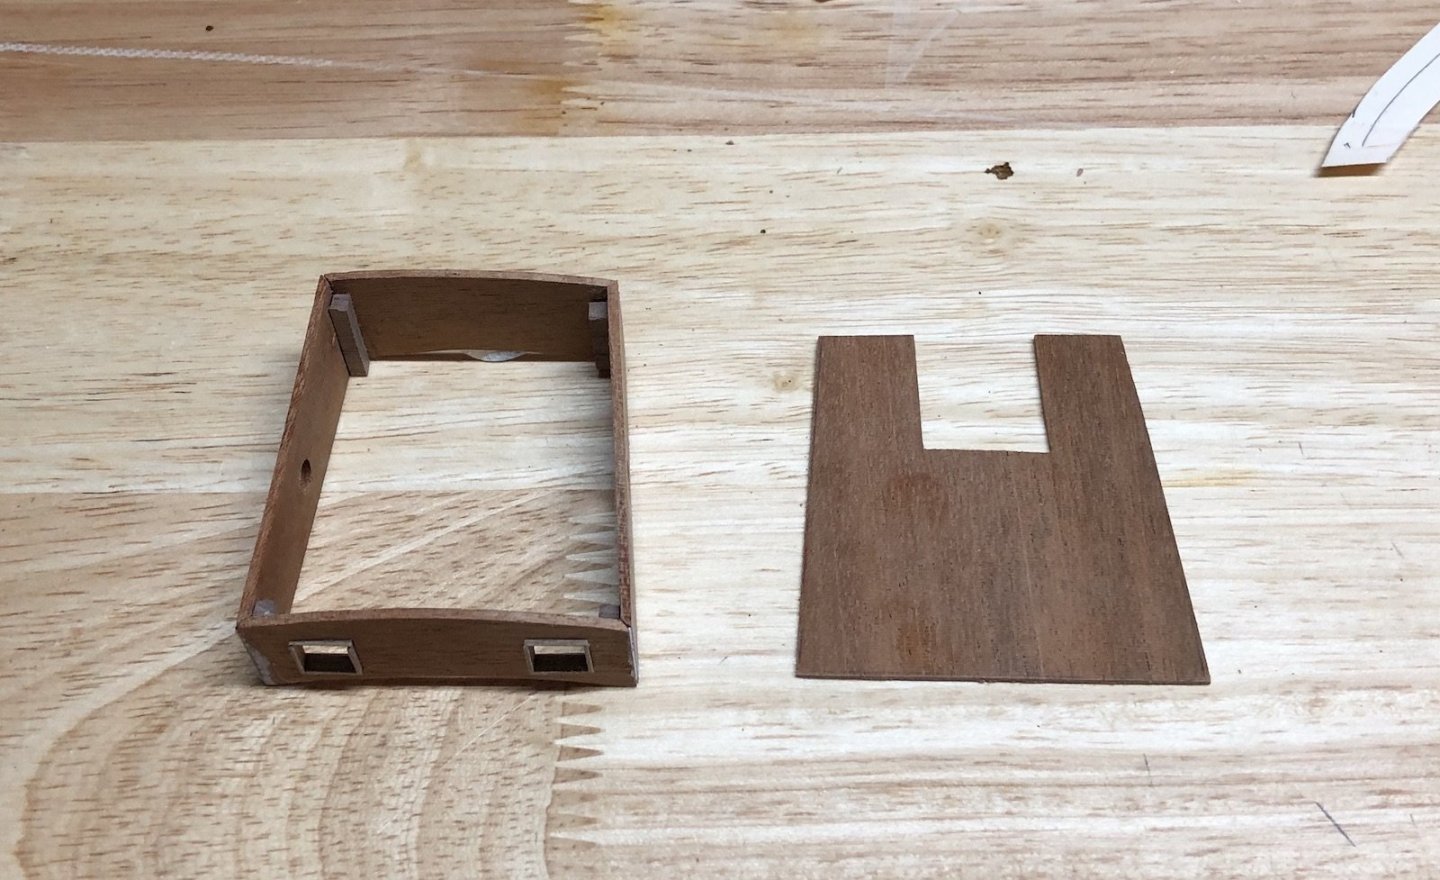
Thanks Popeye and the likes too. That is the same green I used on the Constitution bulwarks. I had mixed up a bunch and had a lot left over. I made the ties that go between the bulwark supports and glued them to the supports, then drilled holes through them into the supports and pushed in cut off brass nails. I then painted the nail heads the same green as the supports. Here is the latest wheelhouse version. This is the second one I have made. The sides of the first one were a little too short to fit the opening. This one is a bit longer so it fits nicely. You can see the supports I sanded to fit in the corners which make it quite strong now. You can also see the frames in the windows. I will be placing some thin acetate in the windows from inside so they won't be open holes. I will do that with the round windows on the sides too. There are a lot of deck fittings to be made which is going to be fun and keep me busy for a while.

- 131 replies
-
- 5
-
-
- santa lucia
- panart
- (and 1 more)
-
Just a quick update to show the starboard bulwark supports and mooring bollards glued into the hull. I just finished painting the port bulwark supports so they will be glued in tonight. I also started remaking the wheelhouse frame pieces using sheet mahogany instead of the plywood pieces supplied. I milled the square windows into the end piece and cleaned them up with a flat file. I'll have pictures when I have them completed.
- 131 replies
-
- 6
-
-
- santa lucia
- panart
- (and 1 more)