-
Posts
2,423 -
Joined
-
Last visited
Content Type
Profiles
Forums
Gallery
Events
Everything posted by usedtosail
-
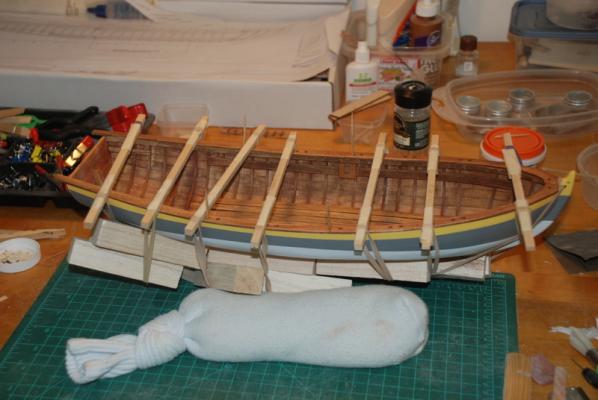
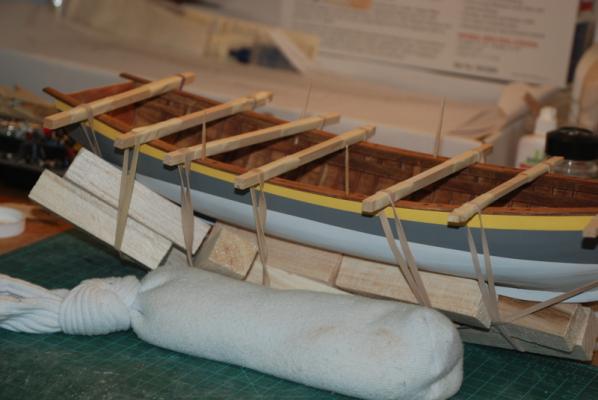
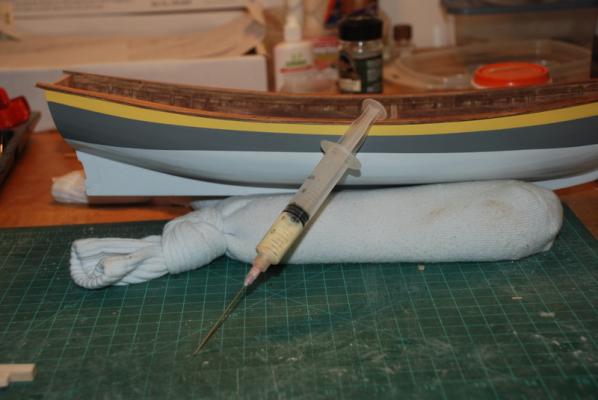
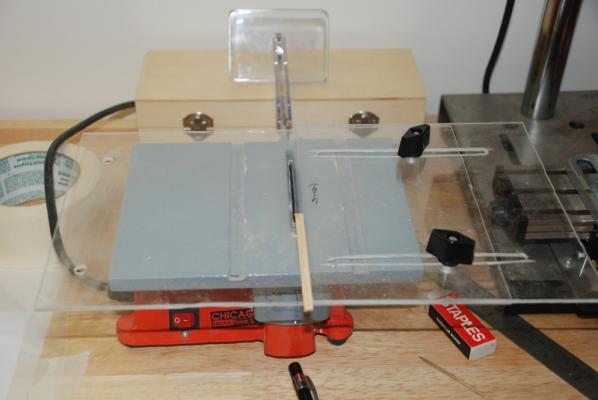
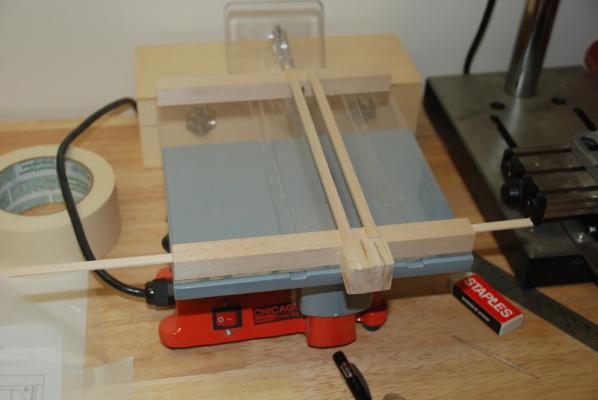
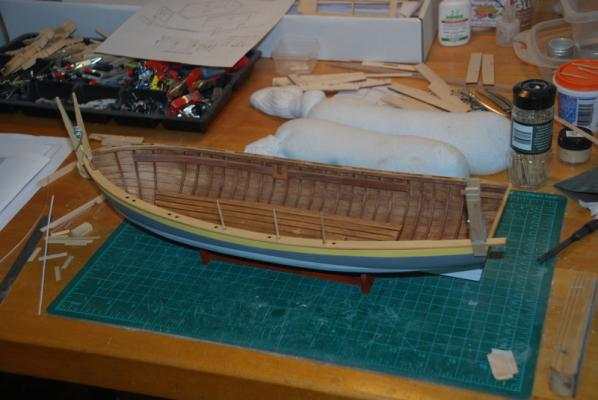
Here's the progress over the last week. I glued the gunwales to the hull, using clamps made from wood strips wrapped in masking tape where they contacted the gunwales and rubber bands. These worked pretty well, but there were a few spots where the gunwales did not bend enough to make contact with the hull. I added balsa wood blocks under the rubber bands to give the clamps more pressure and this helped pull the gunwales down to the hull. The next day I removed the clamps and addressed the couple of areas that were not in contact. I used the glue injector shown in the next picture to inject glue under the gunwale in the spots that didn't make contact, then re-clamped these areas. The injector is just a large syringe I got in a kit to fill ink jet printer cartridges and it works great with wood glue. The tip will plug up right at the end, but a piece of wire in the nozzle clears it right up. This step brought the gunwales into place. I made up the strip of wood to fit between the two gunwales at the stern, using some basswood sheet. I cut it using my cheap table saw from Harbor Freight. This saw is nothing like the Jim Byrnes saw, which I hope to have someday, but for now it works fine with this sort of job. This saw is very under powered, so you have to use it appropriately, but with care it works OK on soft woods like basswood. I bought a slitting blade for it on eBay, which make nice thin cuts. I also made the Plexiglas fence shown in the picture, since the cheap saw came with no fence. It acts as a zero clearance insert, and makes the saw usable. The second picture shows a sled I also made for this table saw, which comes in handy for cutting longer pieces. The next post will discuss how I made (and remade) the quarter deck.
- 153 replies
-
- model shipways
- bounty launch
-
(and 1 more)
Tagged with:
-
Ed, that is beautiful work as always. I really enjoy following your builds, and have learned a great deal. I have a mundane question however, which I hope you don't mind. What kind of board do you use under the frames when you are gluing them up? I am looking for something that will hold pins like that but be easy to insert them into, if there is such a thing. Bulletin board material (cork?) would be too soft, I think. Thanks very much.
- 3,618 replies
-
- young america
- clipper
-
(and 1 more)
Tagged with:
-
Yeah Robbyn, don't feel bad. If there are two ways to do something, I always seem to do the wrong one first
- 234 replies
-
- 18th century longboat
- model shipways
-
(and 1 more)
Tagged with:
-
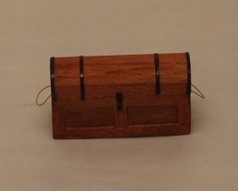
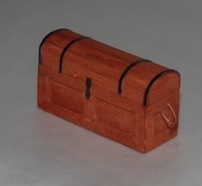
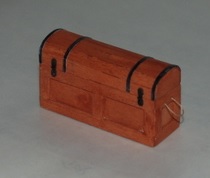
Thanks Mike, Pete, and QA. Sorry to hear you can't get this kit in the UK. I have found that Model Expo kits are very nice to build. Is it a problem with shipping overseas? Here is the completed toolkit. It doesn't open like others have done, so it doesn't have miniature tools inside. I wanted to make the outside a little more detailed than the kit version, so I added a latch and hinges, and some iron bands. I finished it with very watered down Burnt Siena paint, so it was almost like a stain, and was very happy with how it came out. Here are the gunwales being glued together. I shaped the areas around the stem and decided to glue the two sides together off the model as the instructions say to, with the little scrap piece for support. These now need to be stained, then glued to the hull.
- 153 replies
-
- model shipways
- bounty launch
-
(and 1 more)
Tagged with:
-
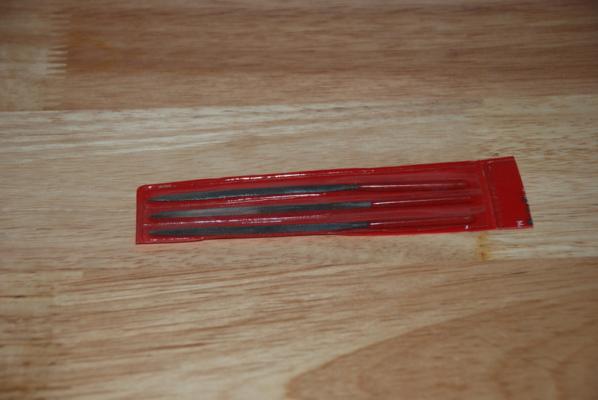
When I first started I bought one of the Deluxe Tool sets from Model Expo. I found pretty much everything in the set useful and I still use most of it today. The best items, though, are these tiny files that came in the set. I used them all the time: I find a good set of tweezers especially useful, too. I actually have about three different styles that I use, but the curved ones seem to work best. I have two - one that I use for gluing and one that I keep clean for rigging. I hope this helps.
-
Yes, the first picture is two blocks stropped together. Since they are on the mast cap, one of the two is for the yard lifts and the other could be for the sheet or tack of the sail above. The second picture is a sheave in the mast, like what was one the cat heads. I believe this was used for raising and lowering the topmast. This can be simulated with two holes and a slot, which is how I would do so you don't weaken the mast too much. Hope this helps and someone please correct me if I am wrong.
-
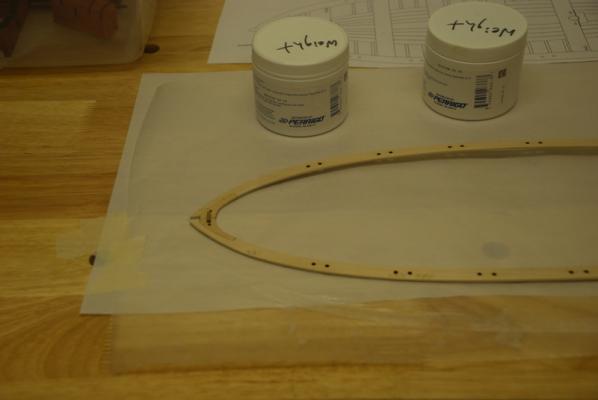
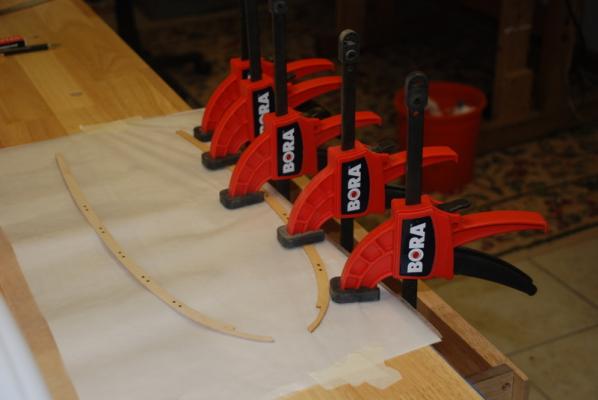
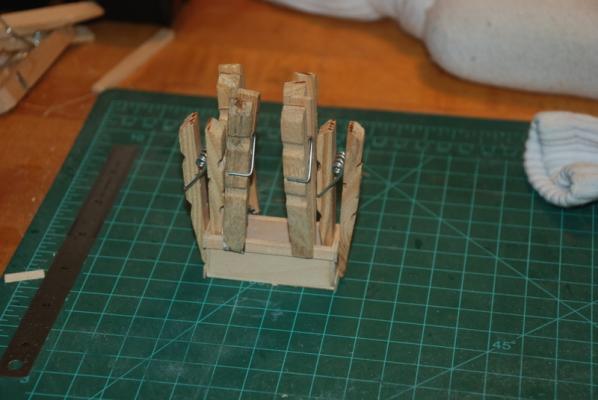
I started working on the rails tonight. I had previously drawn the outline of the gunwales on a piece of paper, so I expanded those out to the edge of the rail on both sides to use as a guide for shaping the rail pieces. I taped this down to the workbench, then taped a sheet of wax paper on top. I soaked the port rail for a while, then placed it on the template and bent it laterally to shape. I used clamps to bend it against and also to hold it flat to the workbench: I then added the spacers along the gunwales to give the rail pieces more gluing surfaces, After I added them all, I thought about another way to shape the rails, using the hull itself. I soaked the starboard side rail piece then put it on the hull, using toothpicks to hold the center out to the edge. I used clothes pins as clamps on the bow and stern, after bending these ends to the gunwale. I checked the shape along the gunwale and the rail had a good overhang on both sides, so I left it in place to dry. I also pushed the center down to the hull edge, so I am getting the vertical bend as well as the lateral bend this way: I may end up building the rails on the hull instead of as one piece off the hull. I will have to see how the port side comes out.
- 153 replies
-
- model shipways
- bounty launch
-
(and 1 more)
Tagged with:
-

Landlubber Mike's technique for furled sails
usedtosail replied to Landlubber Mike's topic in Masting, rigging and sails
Thanks Mike. That looks like a great method that I will try on a future build. -
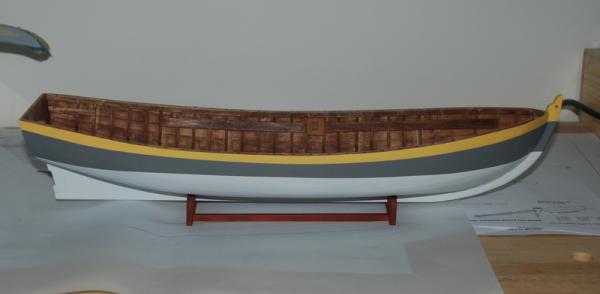
As promised, here is the completed painting of the exterior. I made up the latch and hinges for the toolbox and blackened them last night, I should have pictures of the completed toolbox later this week. Next to tackle are the rails. It looks like I will be able to use the kit supplied rails, even though my hull is a little wider in the middle (much like me). I think I can wet and bend them to the correct shape using a spacer in the middle to get the width I need.
- 153 replies
-
- model shipways
- bounty launch
-
(and 1 more)
Tagged with:
-
Yes, Dunolde, There was a lot of material to remove. I did get a bit carried away however, and had to add some back with wood filler, mostly in the area under the last two gunports. I am still not sure how I did that, except that I didn't use heavier stock for the templates. I do remember being uncertain where the templates aligned at the deck level. I believe I had them too high. Good luck with this step, I am sure you will do fine. Just take it slowly and keep checking the fit.
-
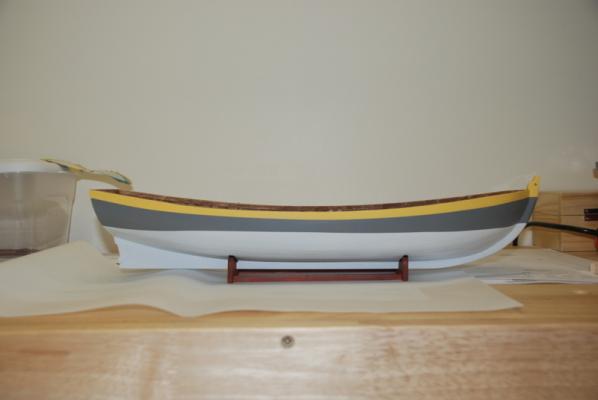
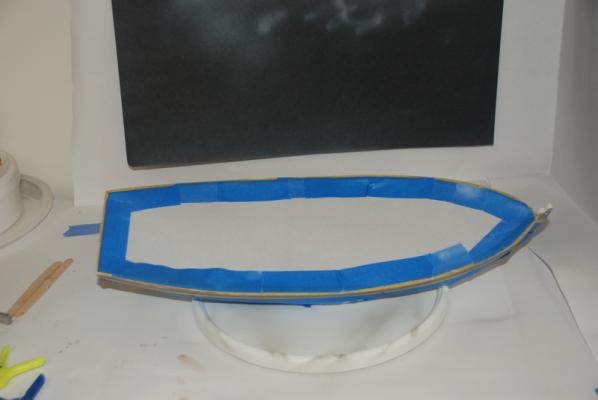
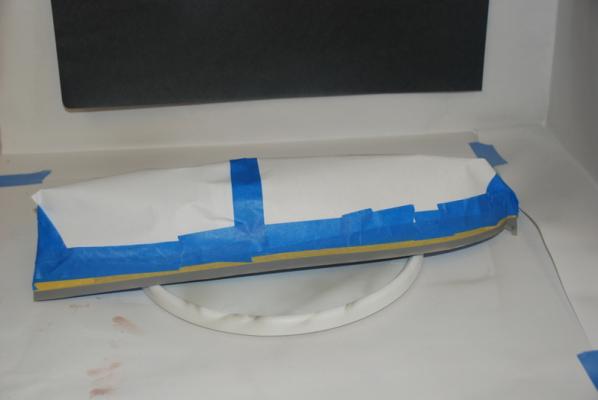
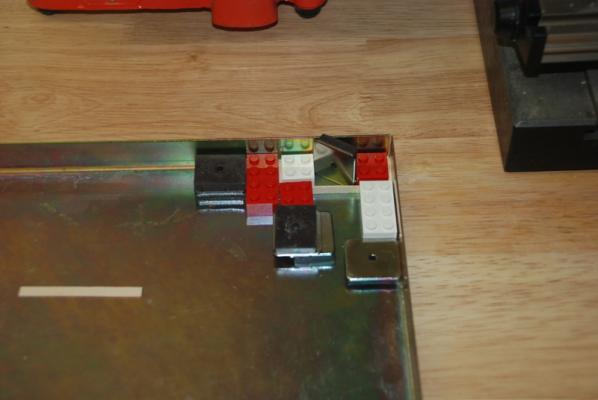
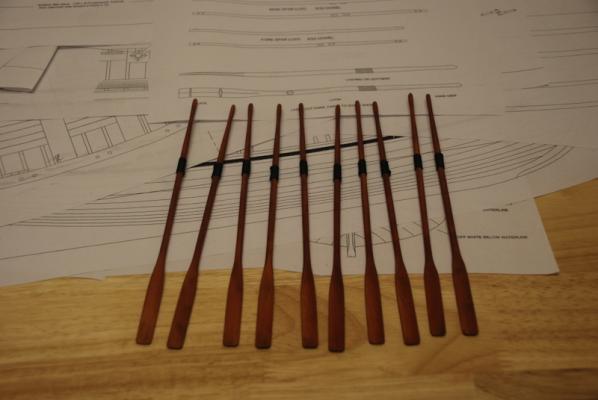
Here is the hull so far, with the off white and grey colors: I re-masked the whole hull for the yellow stripe, being a lot more careful at the top edge, as the yellow needs to get right up to the edge: I first sprayed yellow straight, but ended up toning it down with some white so it was a paler yellow. I sprayed the last coat last night so I should have some pictures of the whole painted hull soon. I started making the lid for the toolbox by gluing two planks to the two end pieces, after sanding the end pieces smaller so the lid will fit flush on the box. I have had this magnetic jig for a while and it worked OK but not great. When I added the Legos pieces to use as small squares, it really made this much more useful: Finally, I stained the oars, but did not like the finish, so I ended up spraying them with some burnt sienna paint, which I liked a lot better. I also added the lashings to them, which I painted with a very diluted solution of white glue and water to fix them in place. I am very pleased with the results:
- 153 replies
-
- model shipways
- bounty launch
-
(and 1 more)
Tagged with:
-
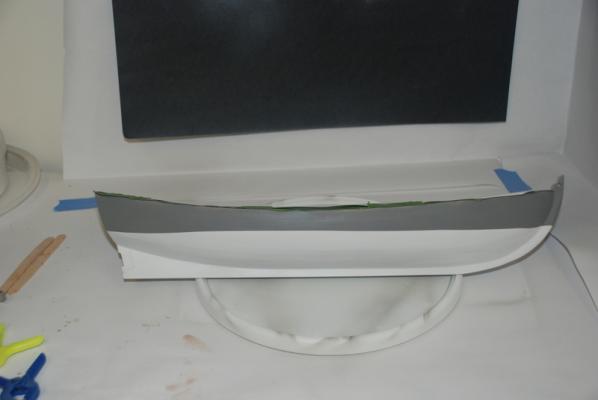
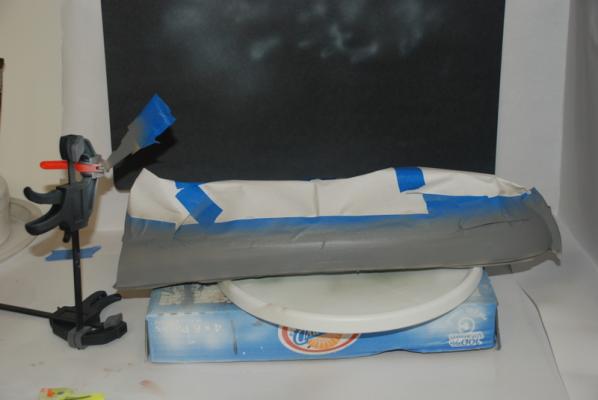
I marked the waterline on the hull but forgot to take any pictures. I used a laser level on a tripod, with the hull in the cradle, to project the waterline onto the hull, then instead of marking the line with a pencil, I placed long strips of masking tape along the laser line. I did it this way because I didn't want any pencil marks showing up on the white portion of the hull. I also masked off the rudder at the same level so the waterline will continue from the hull to the rudder. I masked off the rest of the hull and rudder with masking tape and paper, and sprayed three coats of grey paint above the waterline: Between coats, I started putting the tool box together. Here I am adding some of the trim pieces. I mitered the joints between the trim pieces at the corners. I am going to try making the lid for the toolbox from the two side pieces that came with the kit, but instead of using the solid pieces for the rest of the lid, I am going to use wood strips to plank the lid.
- 153 replies
-
- model shipways
- bounty launch
-
(and 1 more)
Tagged with:
-
Henry, I am glad that you are back to shipshape. I know the feeling as you watch your model fall. The other night I was holding the hull to line up some masking tape and the next thing I know it is bouncing off the work bench. No damage except to my heart, luckily.
- 196 replies
-
- plastic
- soleil royal
-
(and 2 more)
Tagged with:
-

Sanding Block
usedtosail replied to Hexomega's topic in Building, Framing, Planking and plating a ships hull and deck
I have been using rubber cement to hold sandpaper to a wood block. The paper can be pealed off easily when worn and replaced. -
Nice work on those metal bits, Henry. I am sure it will be worth all the effort once you have those guns rigged.
- 196 replies
-
- plastic
- soleil royal
-
(and 2 more)
Tagged with:
About us
Modelshipworld - Advancing Ship Modeling through Research
SSL Secured
Your security is important for us so this Website is SSL-Secured
NRG Mailing Address
Nautical Research Guild
237 South Lincoln Street
Westmont IL, 60559-1917
Model Ship World ® and the MSW logo are Registered Trademarks, and belong to the Nautical Research Guild (United States Patent and Trademark Office: No. 6,929,264 & No. 6,929,274, registered Dec. 20, 2022)
Helpful Links
About the NRG
If you enjoy building ship models that are historically accurate as well as beautiful, then The Nautical Research Guild (NRG) is just right for you.
The Guild is a non-profit educational organization whose mission is to “Advance Ship Modeling Through Research”. We provide support to our members in their efforts to raise the quality of their model ships.
The Nautical Research Guild has published our world-renowned quarterly magazine, The Nautical Research Journal, since 1955. The pages of the Journal are full of articles by accomplished ship modelers who show you how they create those exquisite details on their models, and by maritime historians who show you the correct details to build. The Journal is available in both print and digital editions. Go to the NRG web site (www.thenrg.org) to download a complimentary digital copy of the Journal. The NRG also publishes plan sets, books and compilations of back issues of the Journal and the former Ships in Scale and Model Ship Builder magazines.


