HOLIDAY DONATION DRIVE - SUPPORT MSW - DO YOUR PART TO KEEP THIS GREAT FORUM GOING! (Only 20 donations so far - C'mon guys!)
×
.JPG.ca33079f5815b861e67b9c2cccd37982.JPG)

Blue Ensign
-
Posts
4,564 -
Joined
-
Last visited
Content Type
Profiles
Forums
Gallery
Events
Everything posted by Blue Ensign
-
 If it’s individual planks that have been sanded through, could the section not be removed, and replaced? I have done this using a scalpel blade and fine chisels. Any residual ca can be removed using acetone. Just a thought. B.E.
- 443 replies
-
- 9
-

-
- Indefatigable
- Vanguard Models
- (and 1 more)
-
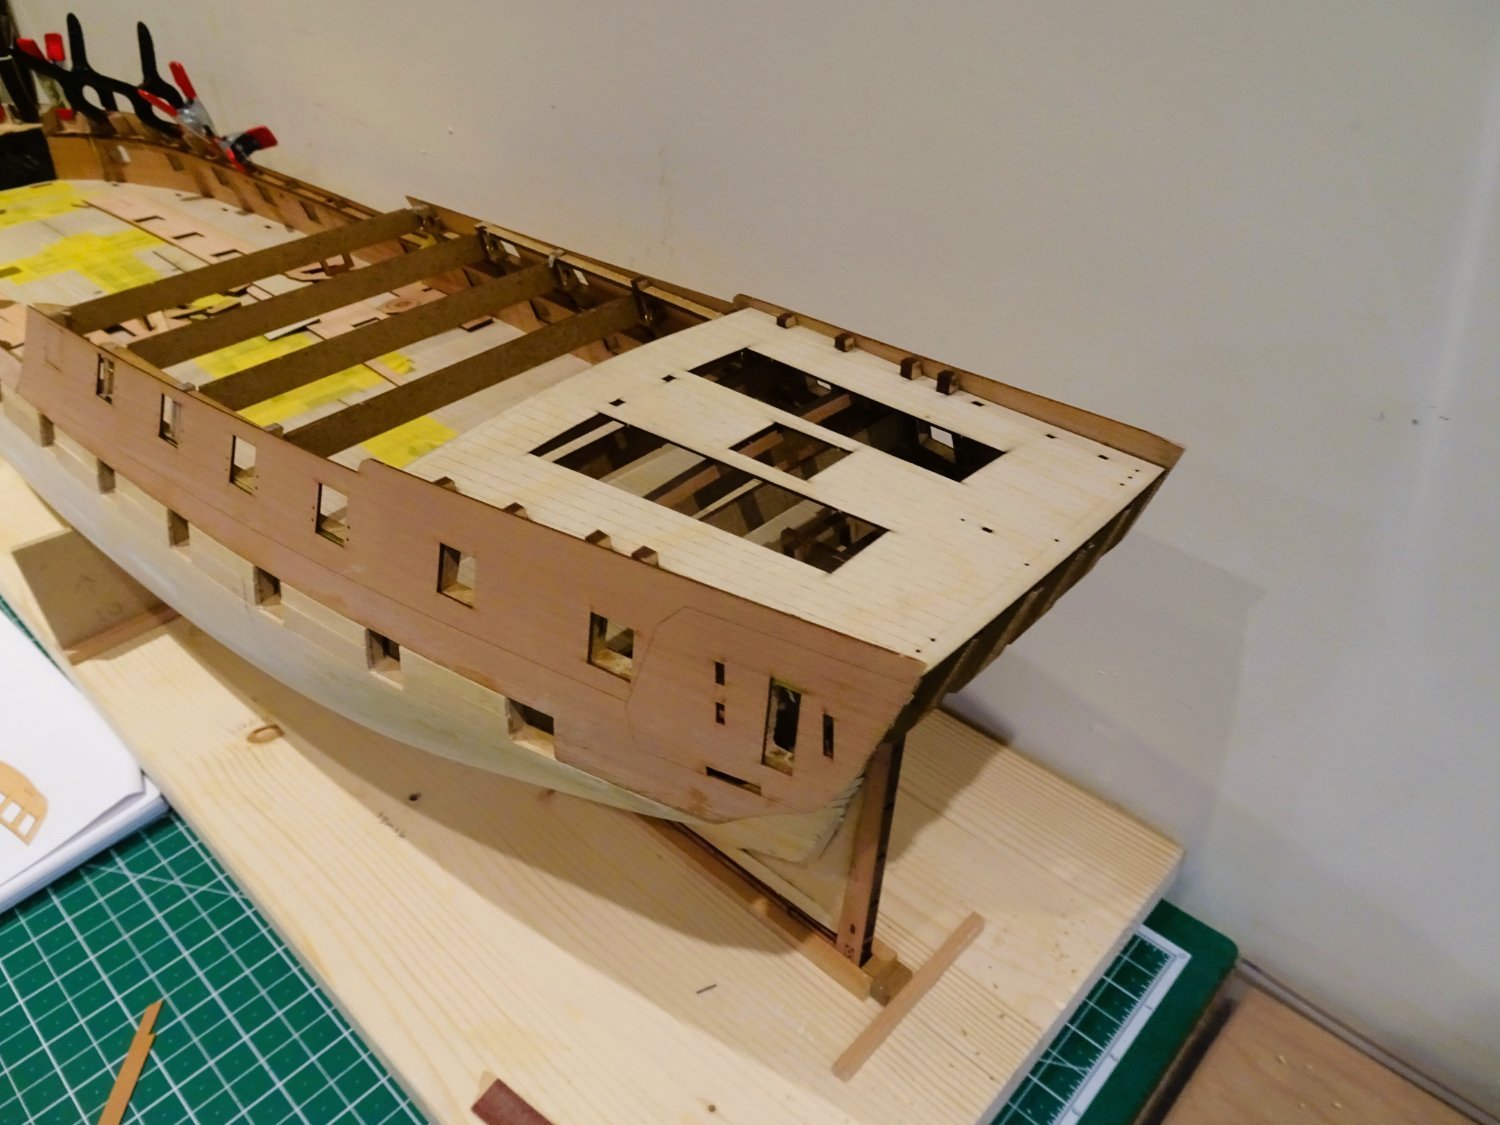
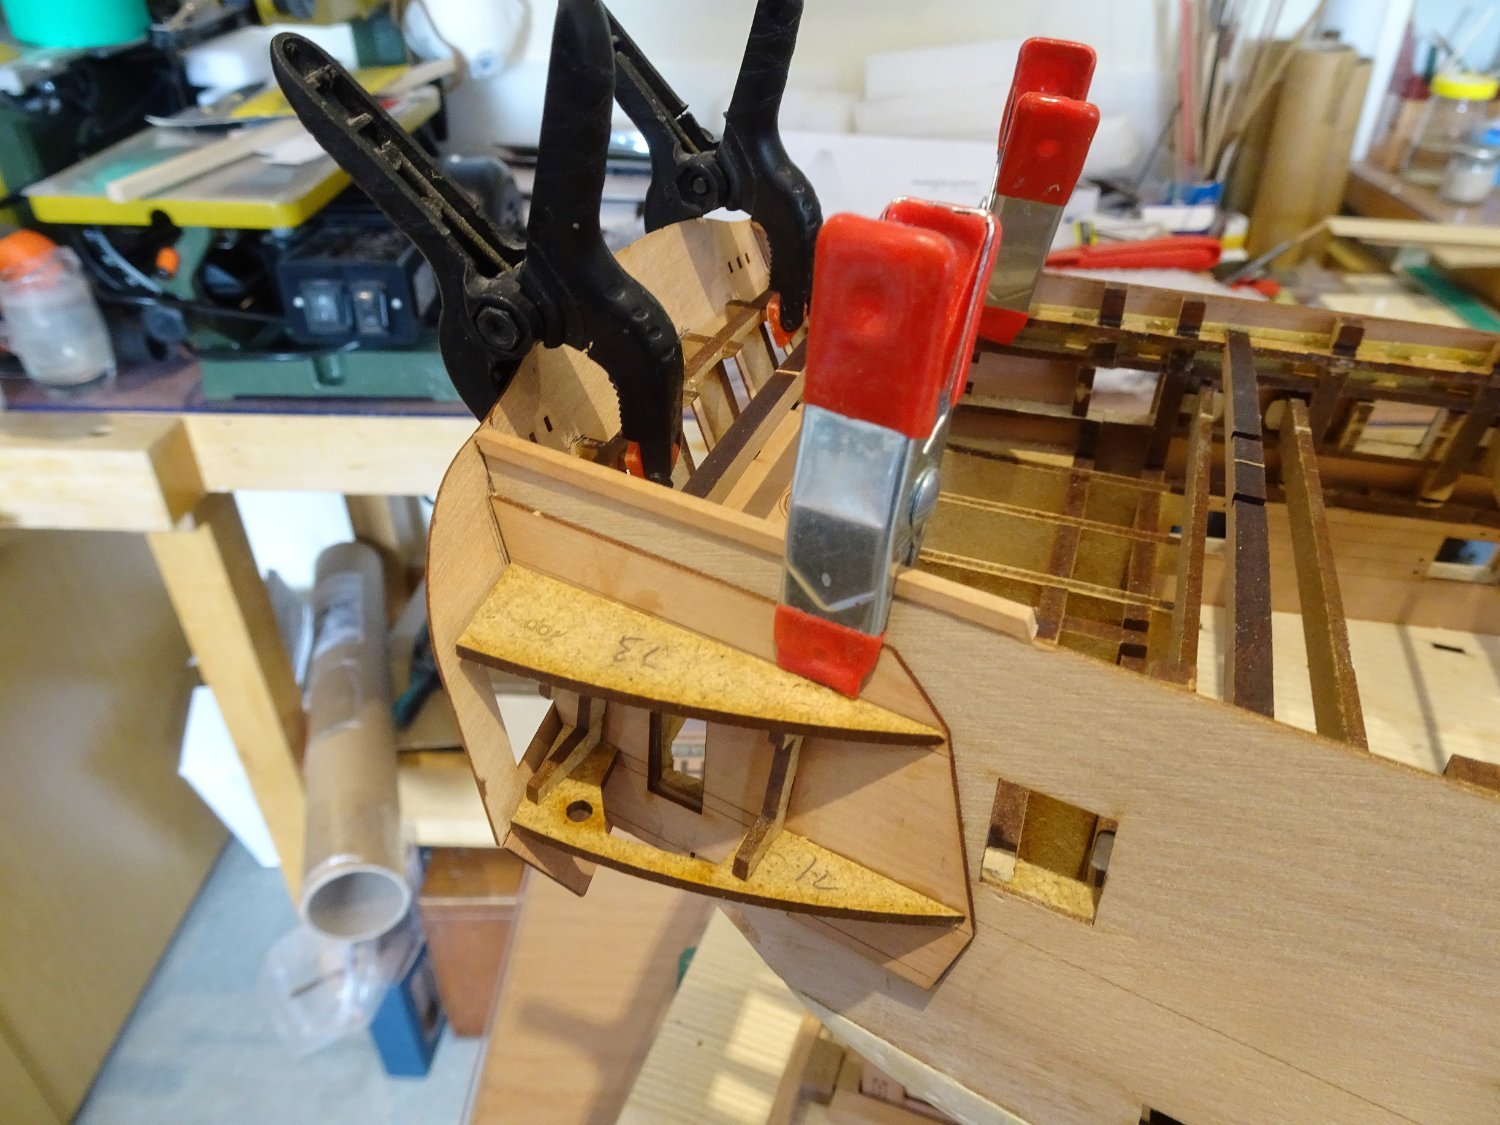
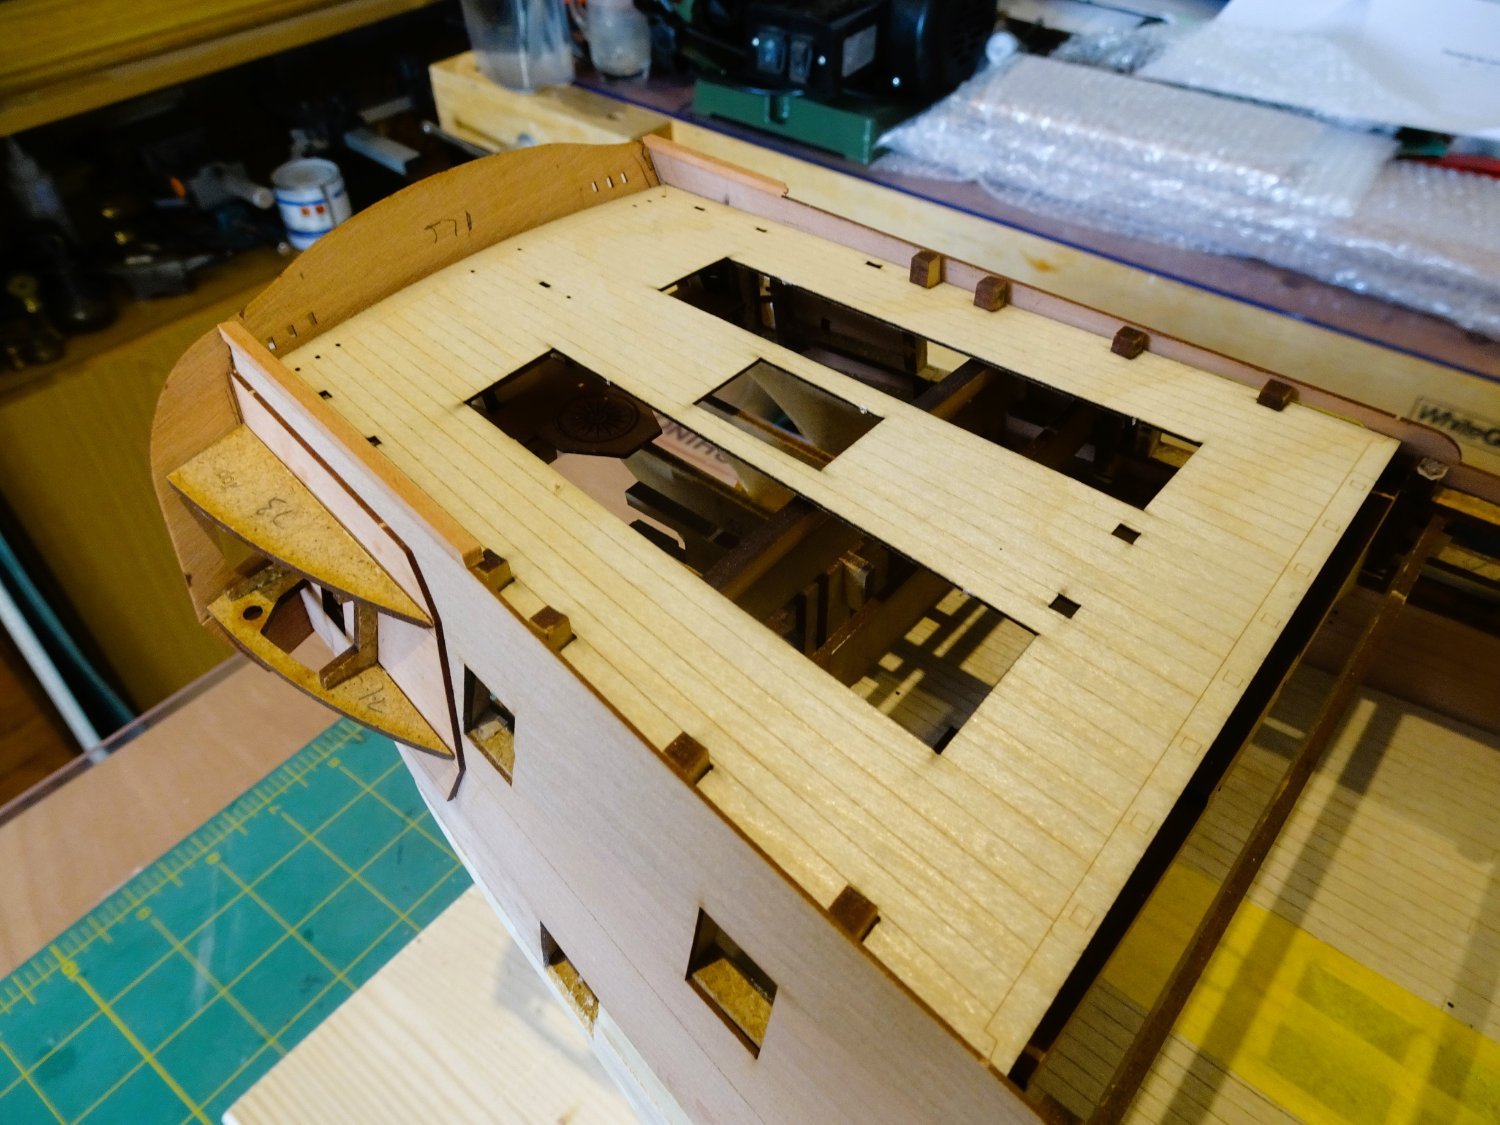
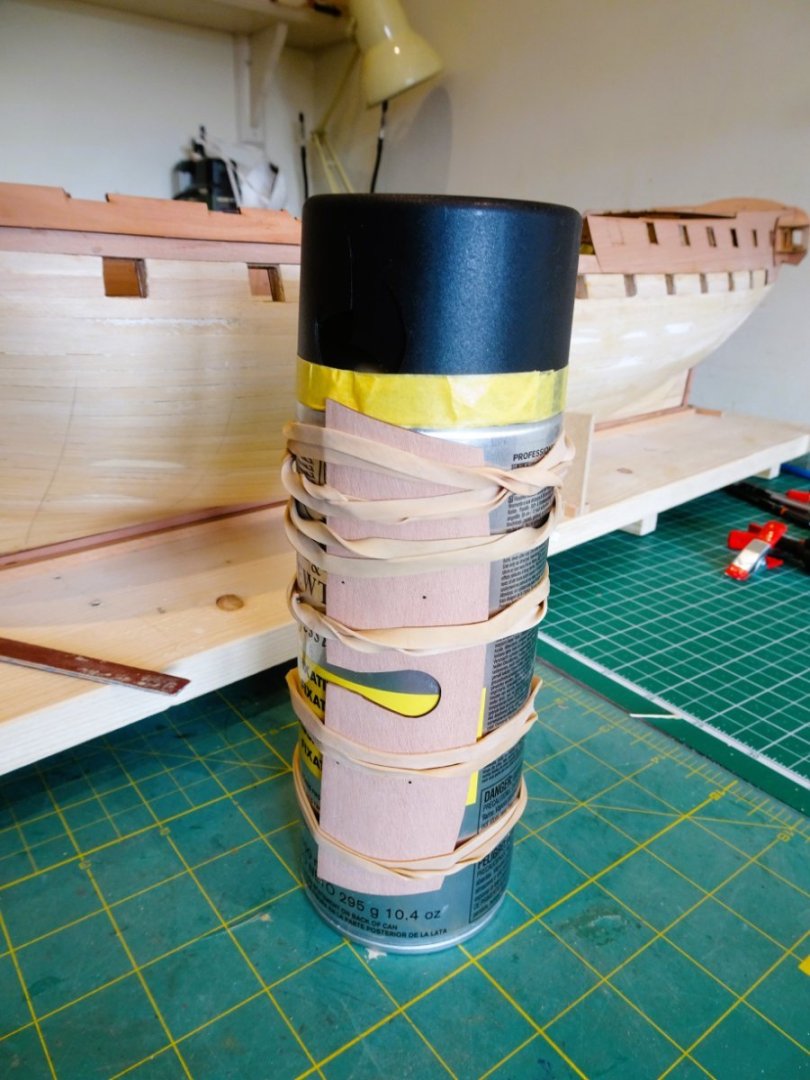
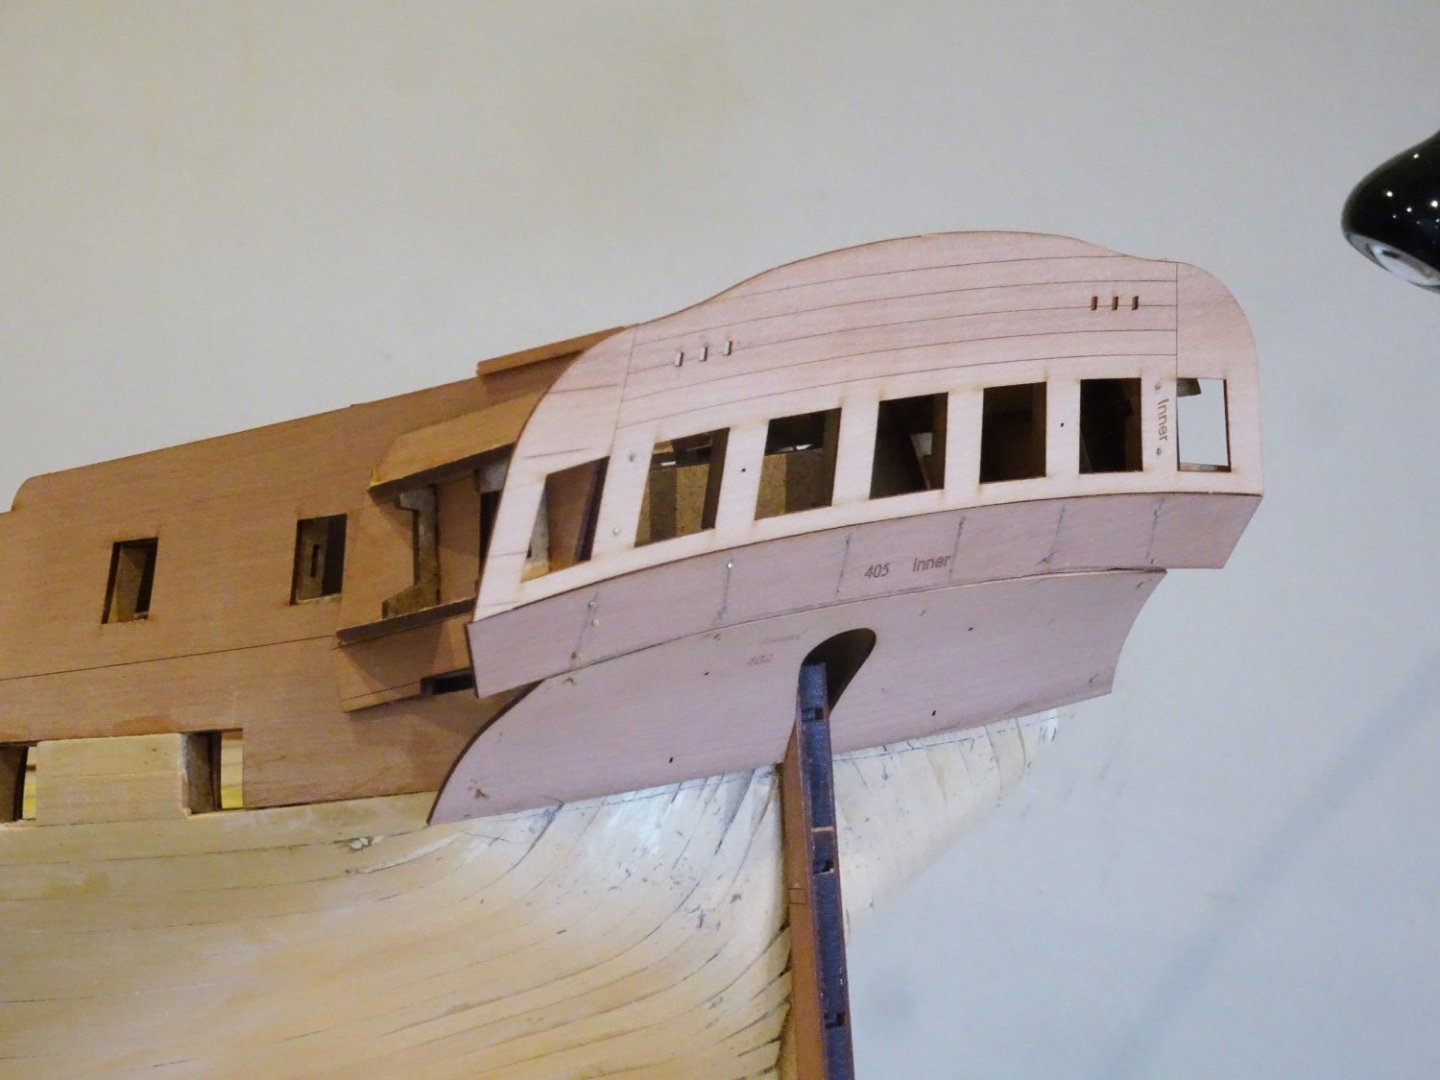
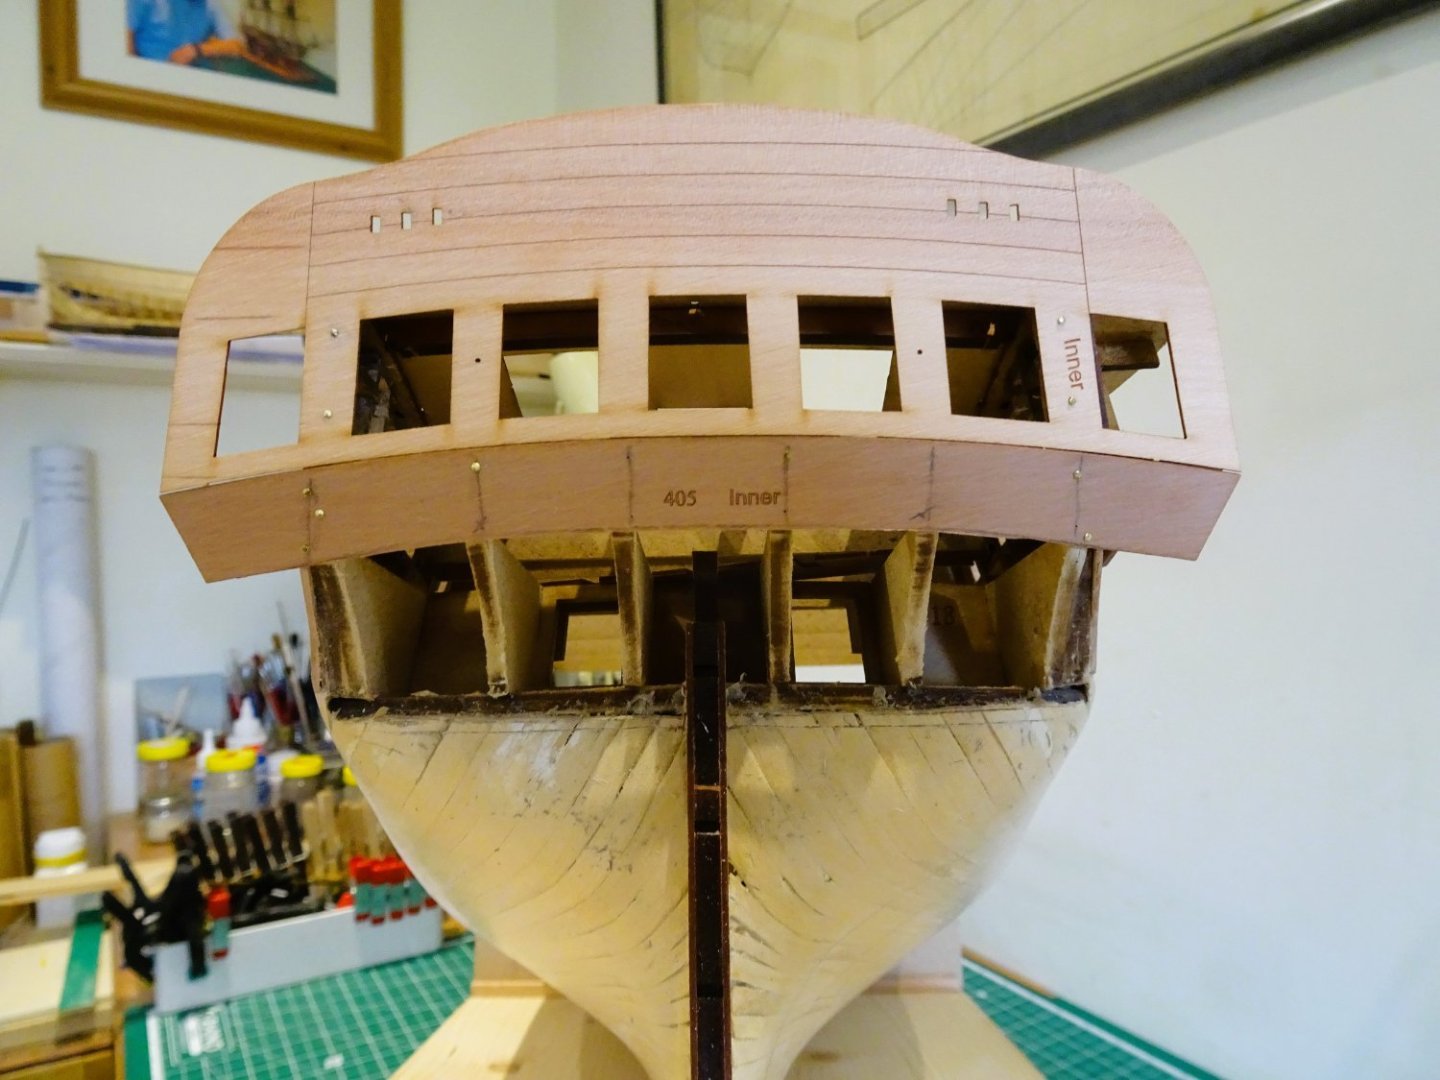
A few days away for my shipyard assistant to enjoy. 2984 Refreshed, and back at the bench. Post Twenty-five Stern and Quarter Galleries I now return to Section 165. Here Chris has ticked all my boxes, realistically constructed Quarter galleries, and correctly levelled stern bench, incorporating the rudder housing with a nice compass design on the top. Right up my Strasse and saving me a shed load of work. Even so, getting the stern gallery, Upper and lower counters, and Quarter galleries all correctly aligned is one of the most important and tricky areas of a build. In gathering together the parts for the next steps, the following is noted for clarification. Qtr Galleries. Section 174 indicates use of parts #71/72, it should read 71/73. These represent the top of the Qtr gallery (#73) and one of two layers of part #71 which form the seat of ease. Parts#72 are the bottom segments of the Qtr Gallery that slots into the hull. 888 Test fitting the Qtr Galleries. 0844 Test fitting the Poop deck. The test deck beams and deck pattern slipped seamlessly into place. 0893 There will ultimately be a lot less of Poop deck planking on my version. The next stage is that tricky business of getting the stern gallery, and upper and lower counters aligned. 0891 I used a couple of 2mm pear strips to represent the capping rails which the top of the stern gallery should meet when fitted. 0900 I found I did need to shape the lower edge of the Upper counter to fully meet the upper edge of the Lower counter. I used the lower counter as a template to match the curves. 0897 The lower counter was soaked and formed around a tin before fitting. 0904 I was in no hurry to finish this section, these parts were pinned and re-pinned several times before I was satisfied that the stern area looked good from every angle. 0903 The planking line was then trimmed to suit. On with the show. B.E. 29/04/2023


- 648 replies
-
- 23
-
-

-
- Indefatigable
- Vanguard Models
- (and 1 more)
-
Your third photo looks to be of a French Seventy-four. You can see the double stove chimneys in the square on the Foc’sle. The photo also shows arms chests either side of the galley hatch. I never could make my mind up what those two elliptical protuberances were supposed to be on the kit. There is also a bench seat for the watch officers afore the berthing to the Main Ladderway, a very French thing, and the typical chicken coops on the Poop. This model at my local museum has a jeer capstan. Most of the ship here are British. Perhaps a captured French ship would keep it upon transfer to British service? Following capture in 1798, Spartiate was re-fitted between 1801-1803 to British standards of armaments and fittings, which was the usual practice. It is impossible to know whether any French prizes retained any fittings, but removing moulded in fittings on a plastic kit is difficult, and maybe best left alone, unless they are to be covered by something else. Hmmm… if I were to cut off the jeer capstan what would go in that space? I see what looks like the stove chimney here. I suppose you could change the jeer capstan into a chimney – it’s almost there already, remove the little stove pipes, and board over the area. Regards, B.E.
-
I will be be simply using wipe-on-poly, does it for me. B.E.
- 443 replies
-
- 5
-
-
- Indefatigable
- Vanguard Models
- (and 1 more)
-
Not necessarily a strange omission, remember it’s a French ship you’re basing your model on. What would be strange is the inclusion of a Fore Jeer Capstan on a British ship, they were common on French ships of the period. That strange erection on the Fore deck abaft the fore mast is the jeer capstan. B. E.
-
The port side looks good to my eye now completed, I like the clean line you’ve achieved at the stem. Any oddly shaped planks below the round of the hull won’t have any visual impact on the display, I usually end up with one on my efforts. On with the show Kevin. 👍 B.E.
- 443 replies
-
- 6
-
-
- Indefatigable
- Vanguard Models
- (and 1 more)
-
That thought fills me with horror, the amount of planking you get thro' and the excellent results you achieve with the proto builds, I just couldn't live with the pace of it. Chris has got the right man. @ Alistair - send me the air fare, I'll be there .😉 B.E.
- 648 replies
-
- 4
-

-
-
- Indefatigable
- Vanguard Models
- (and 1 more)
-
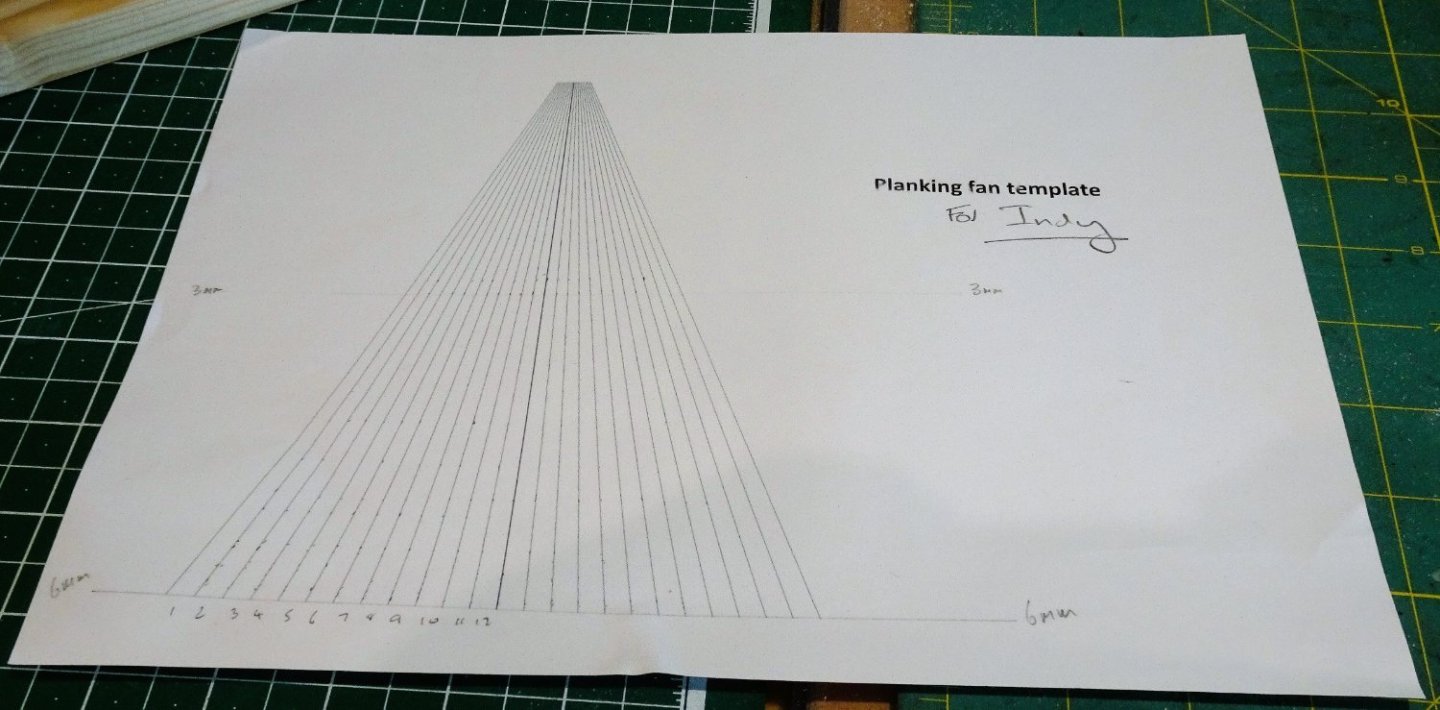
Hello Joe, thanks for looking in on my build. Kevin has provided a link to a planking guide, which is a good place to start. In addition, if you go into the Articles database at the top of the ribbon you will find a copy of the planking fan contained within Chuck Passaro’s article as below, and an excellent guide how to use it. Lining Off your hull for planking (thenrg.org) Scroll down to the Framing and planking section, there is a wealth of advice to be had. Regards, B.E.
- 648 replies
-
- 3
-
-
- Indefatigable
- Vanguard Models
- (and 1 more)
-
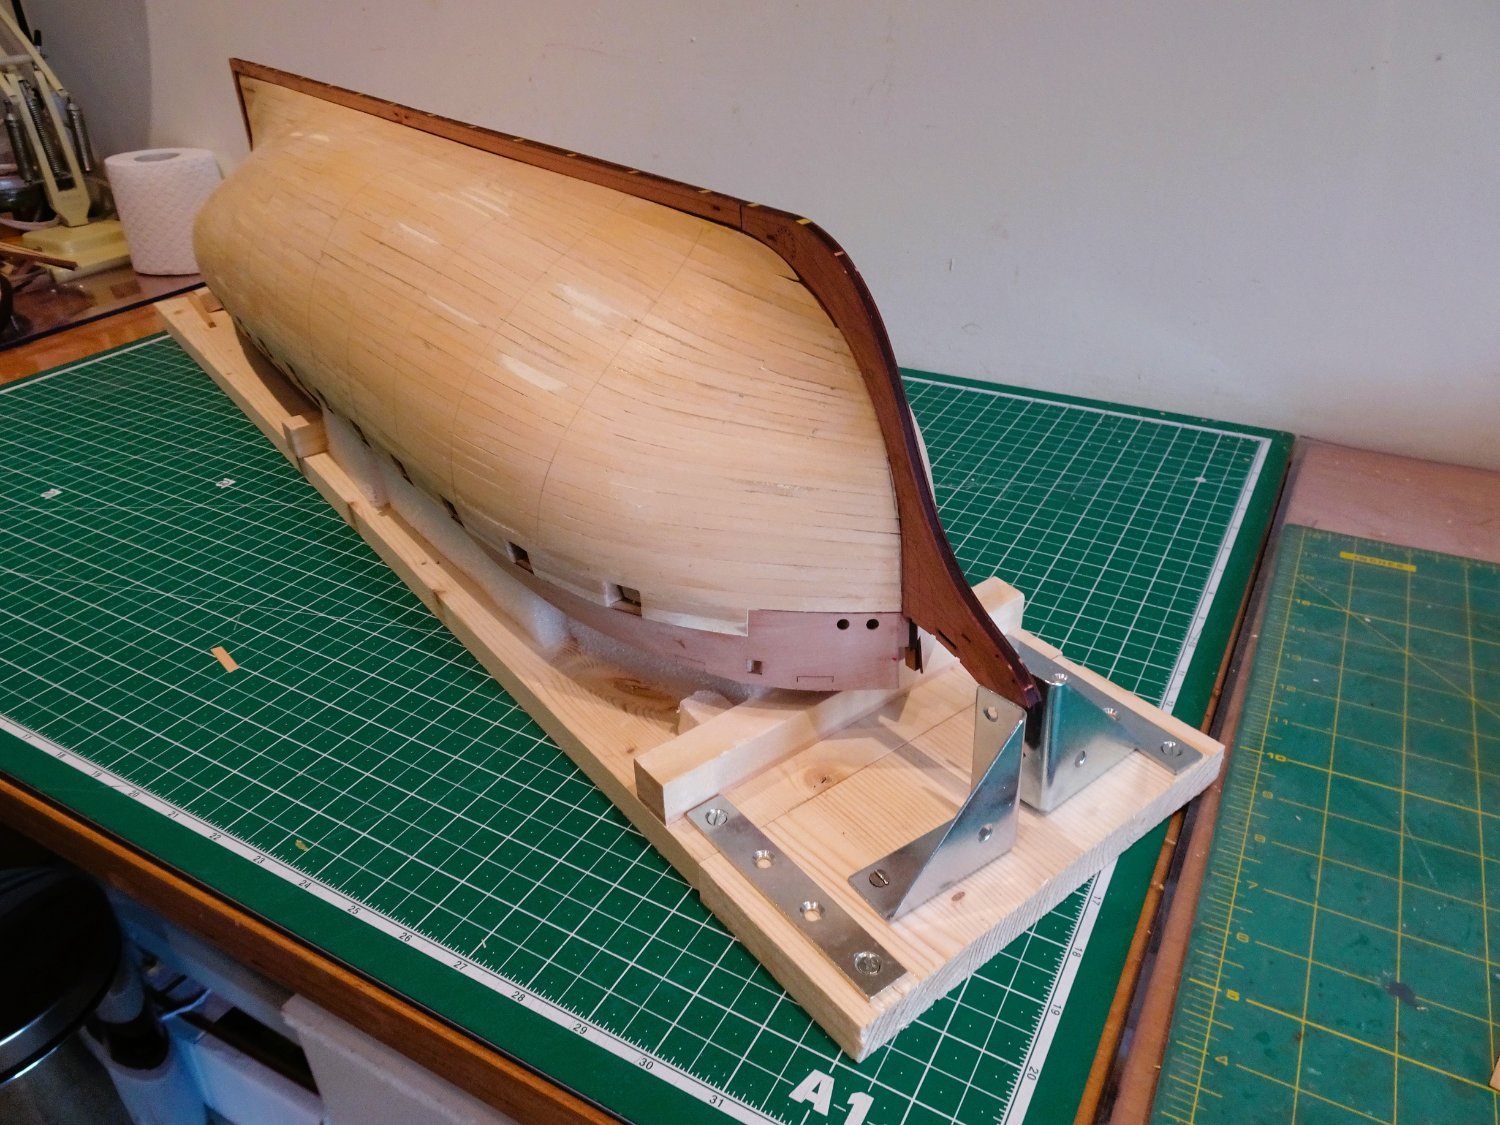
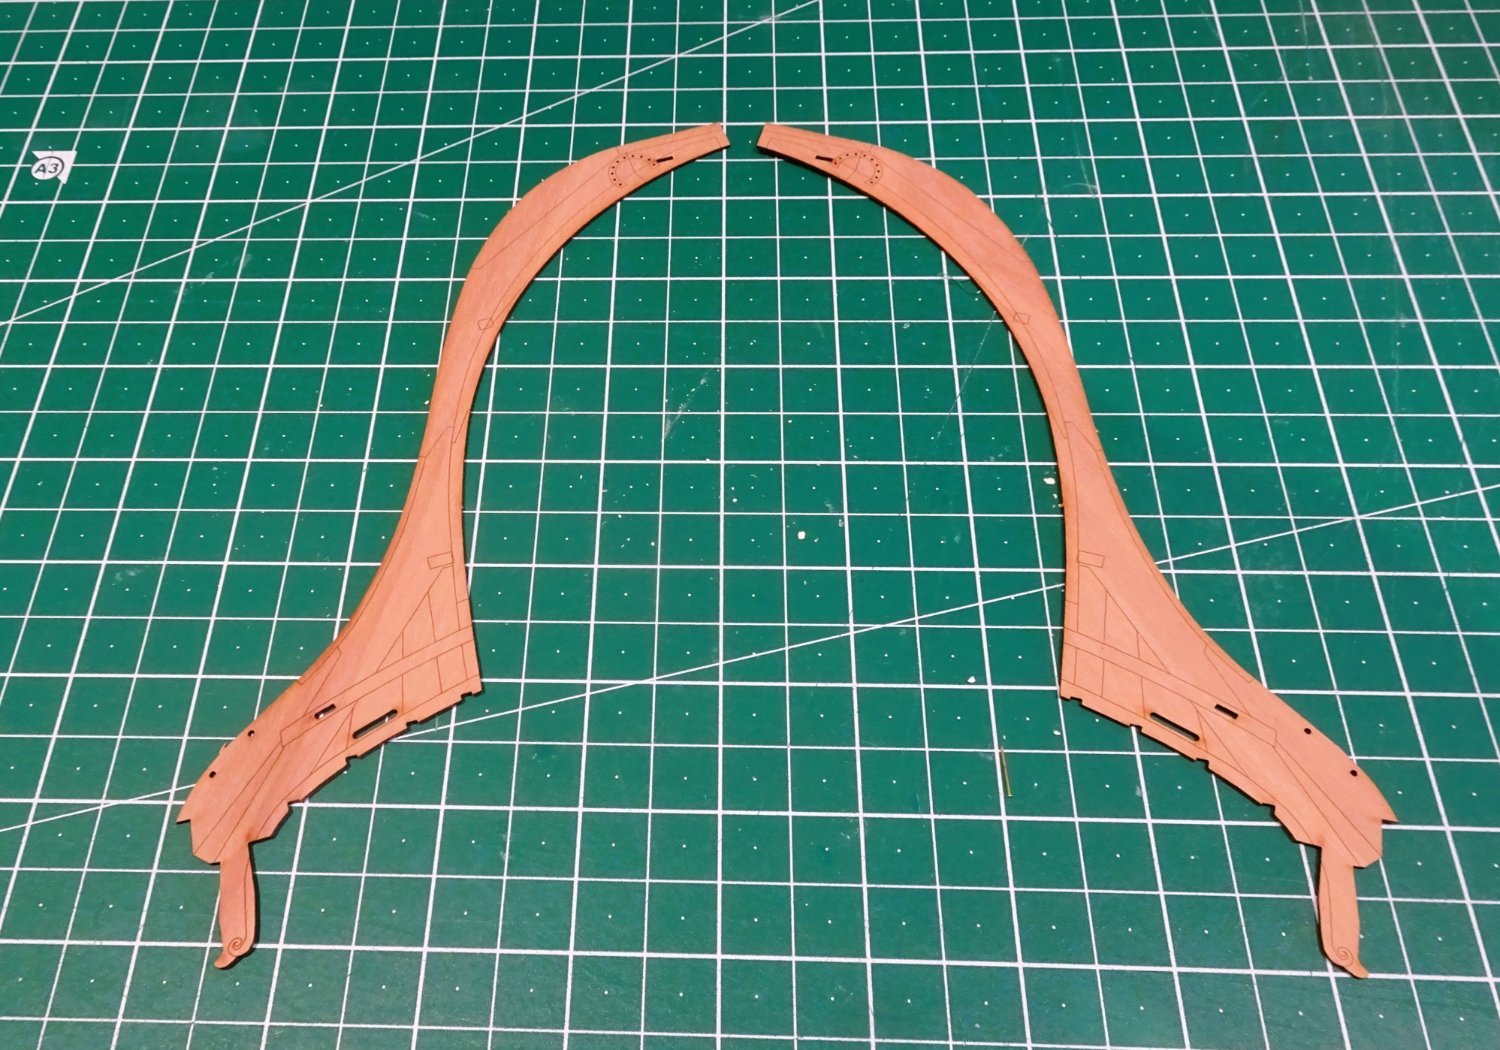
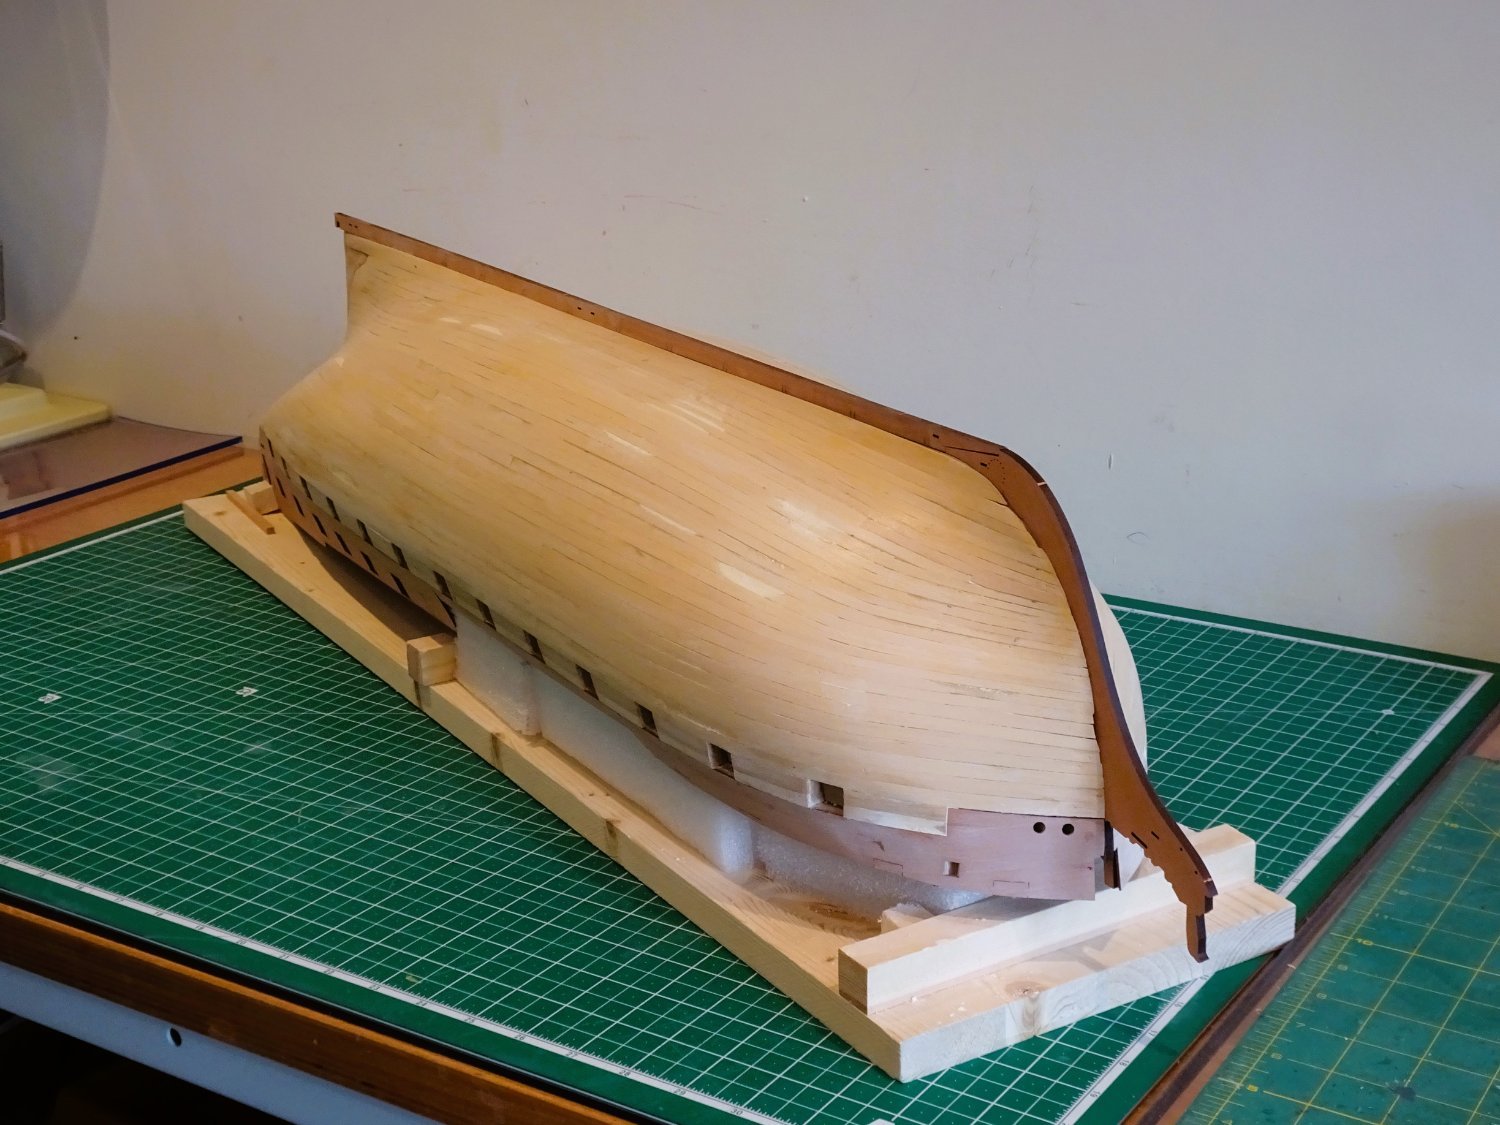
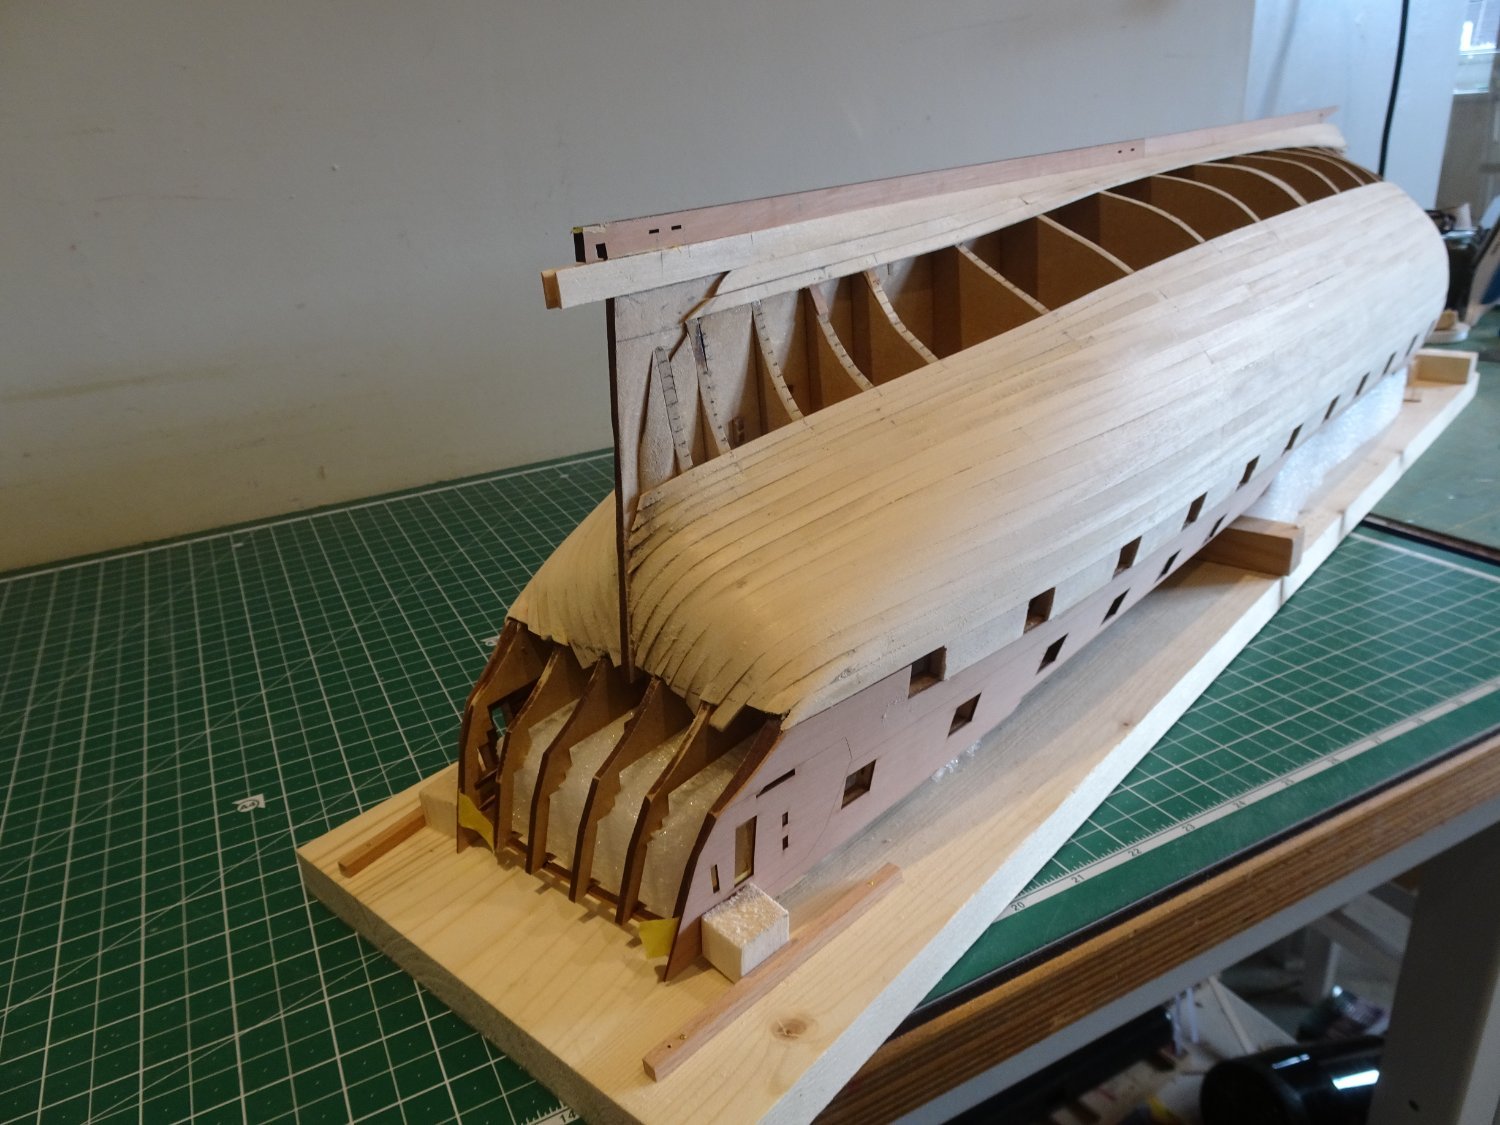
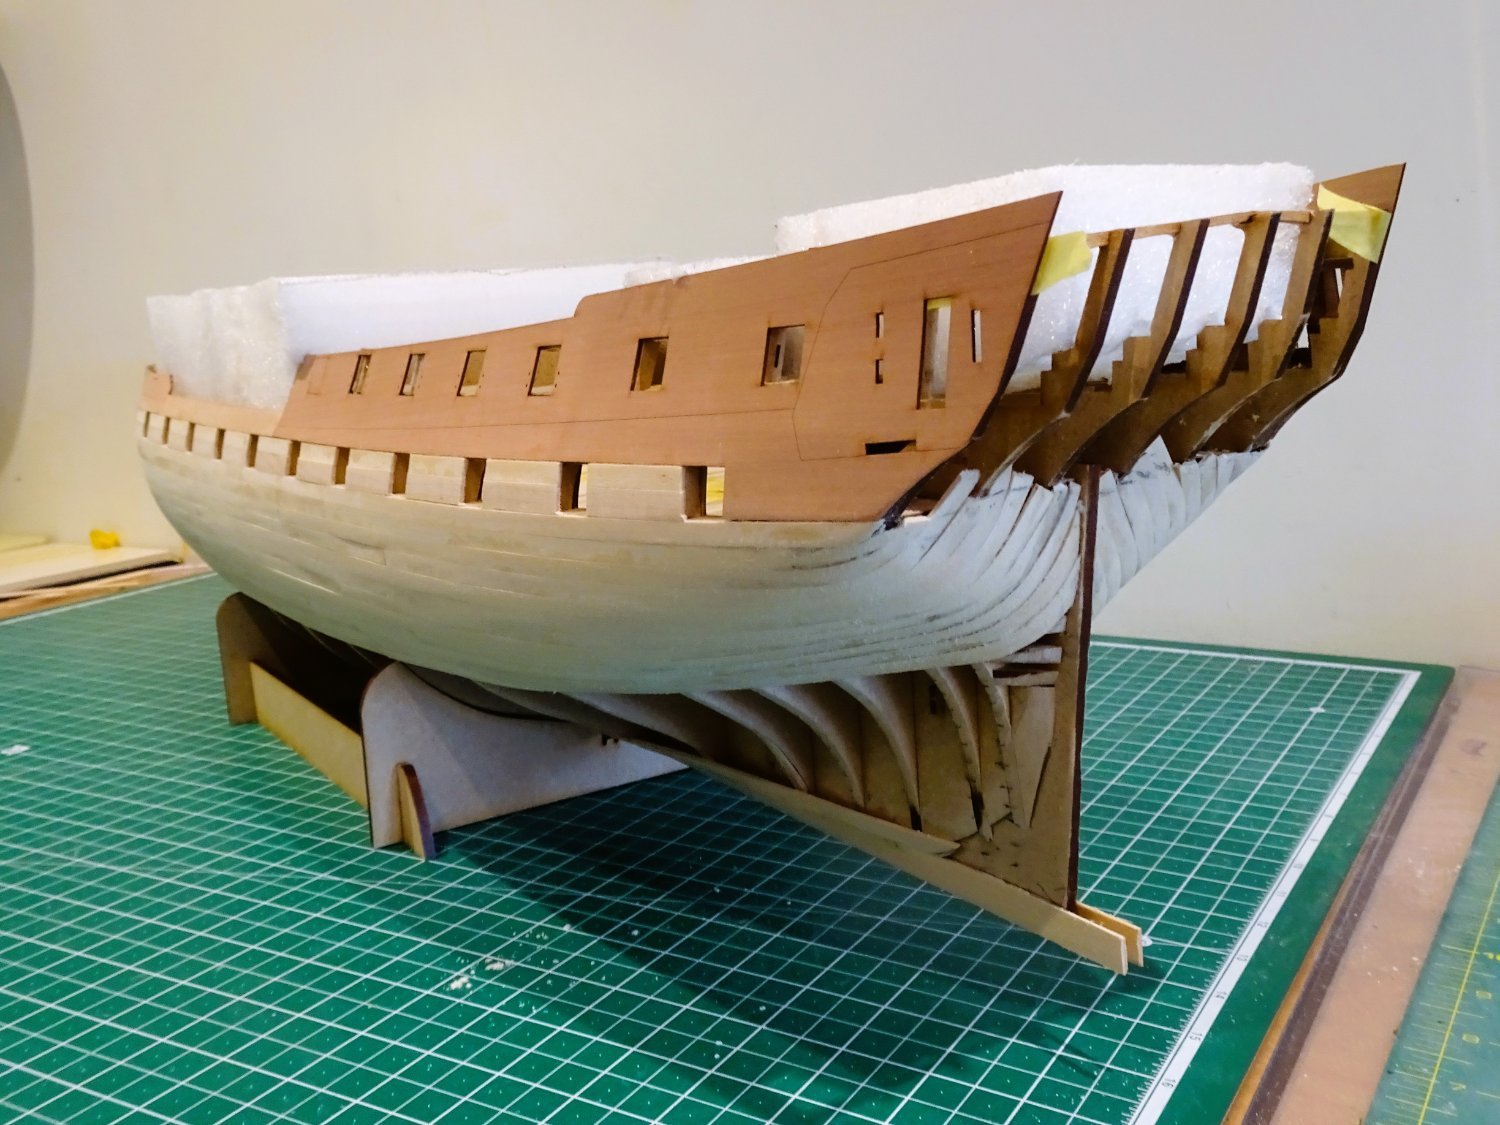
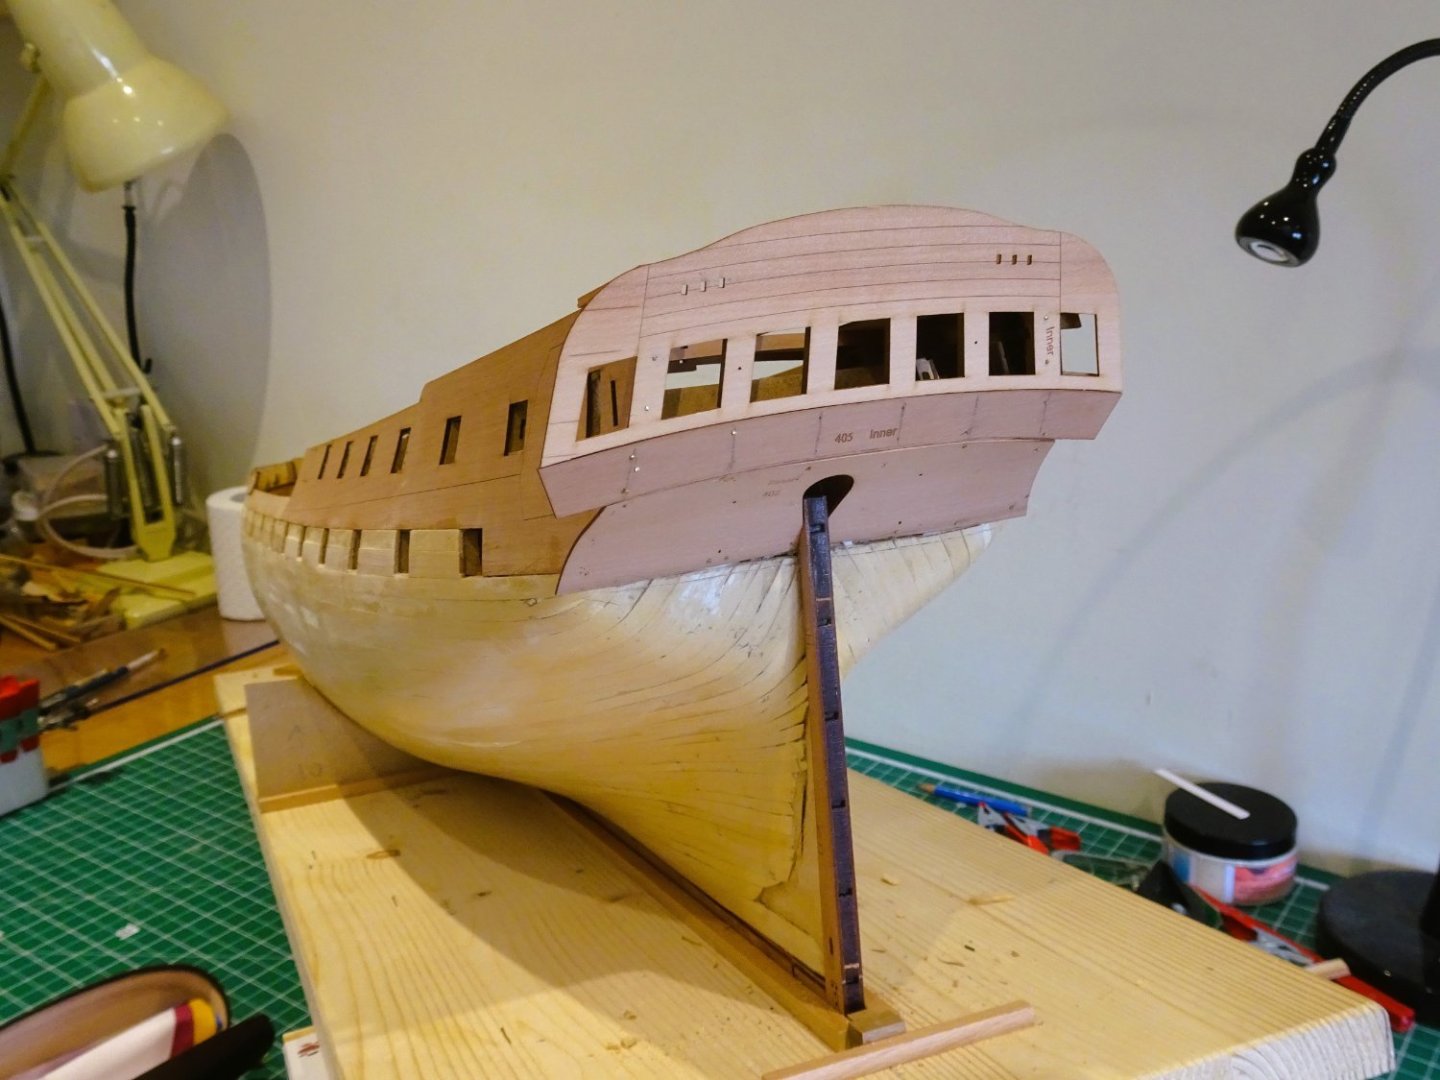
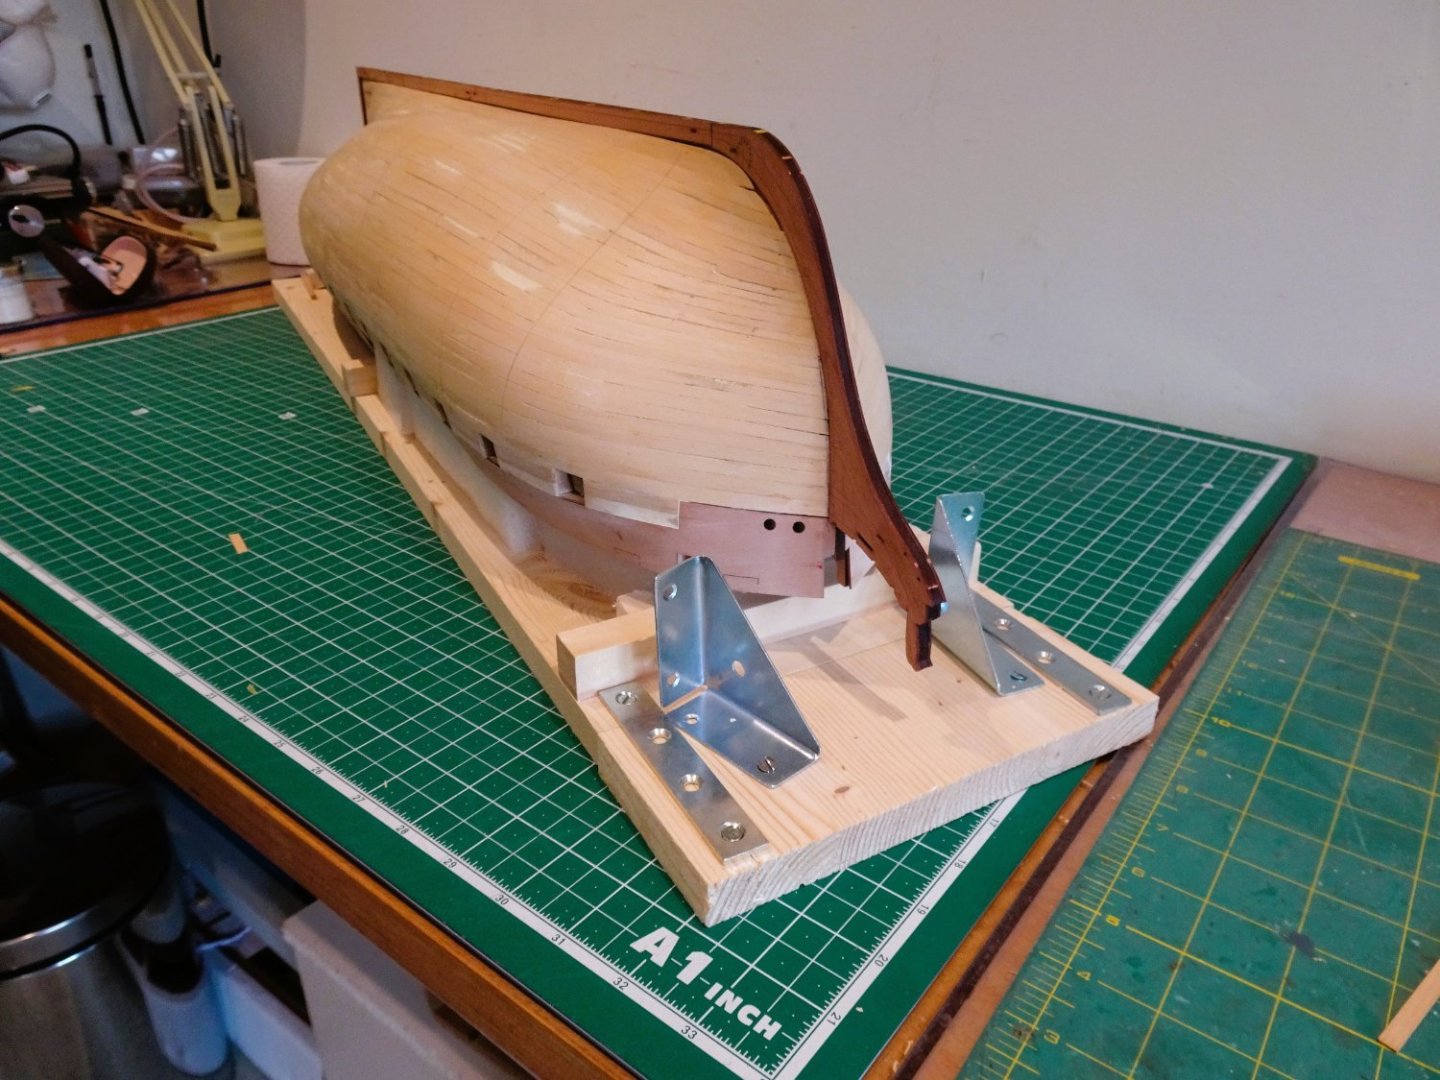
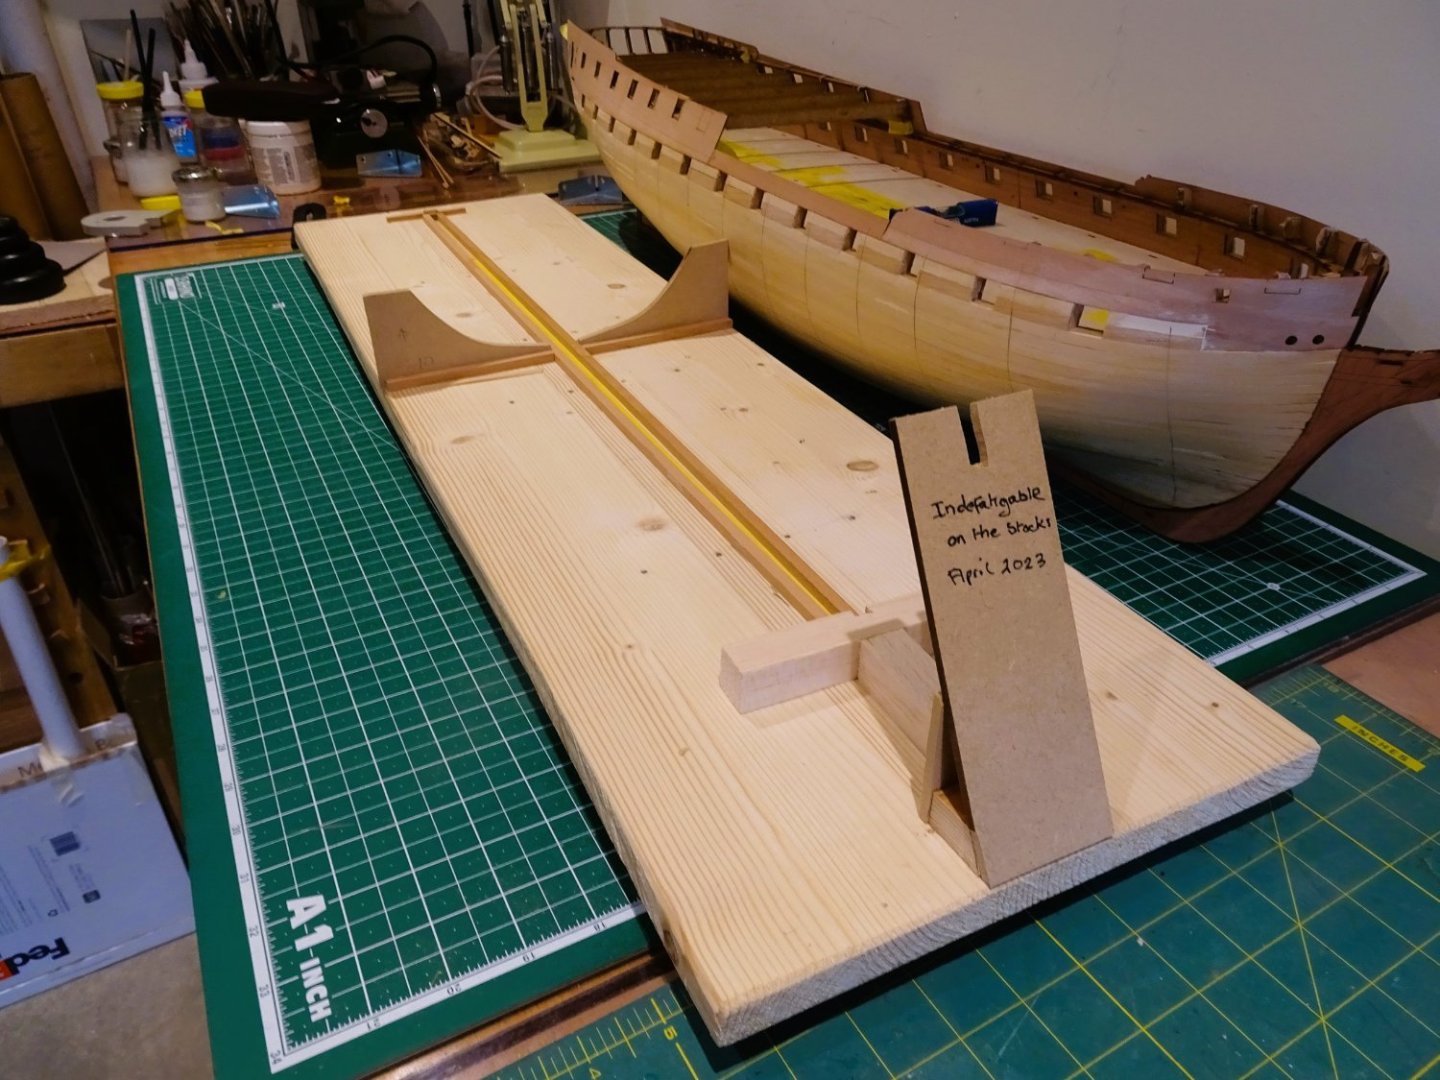
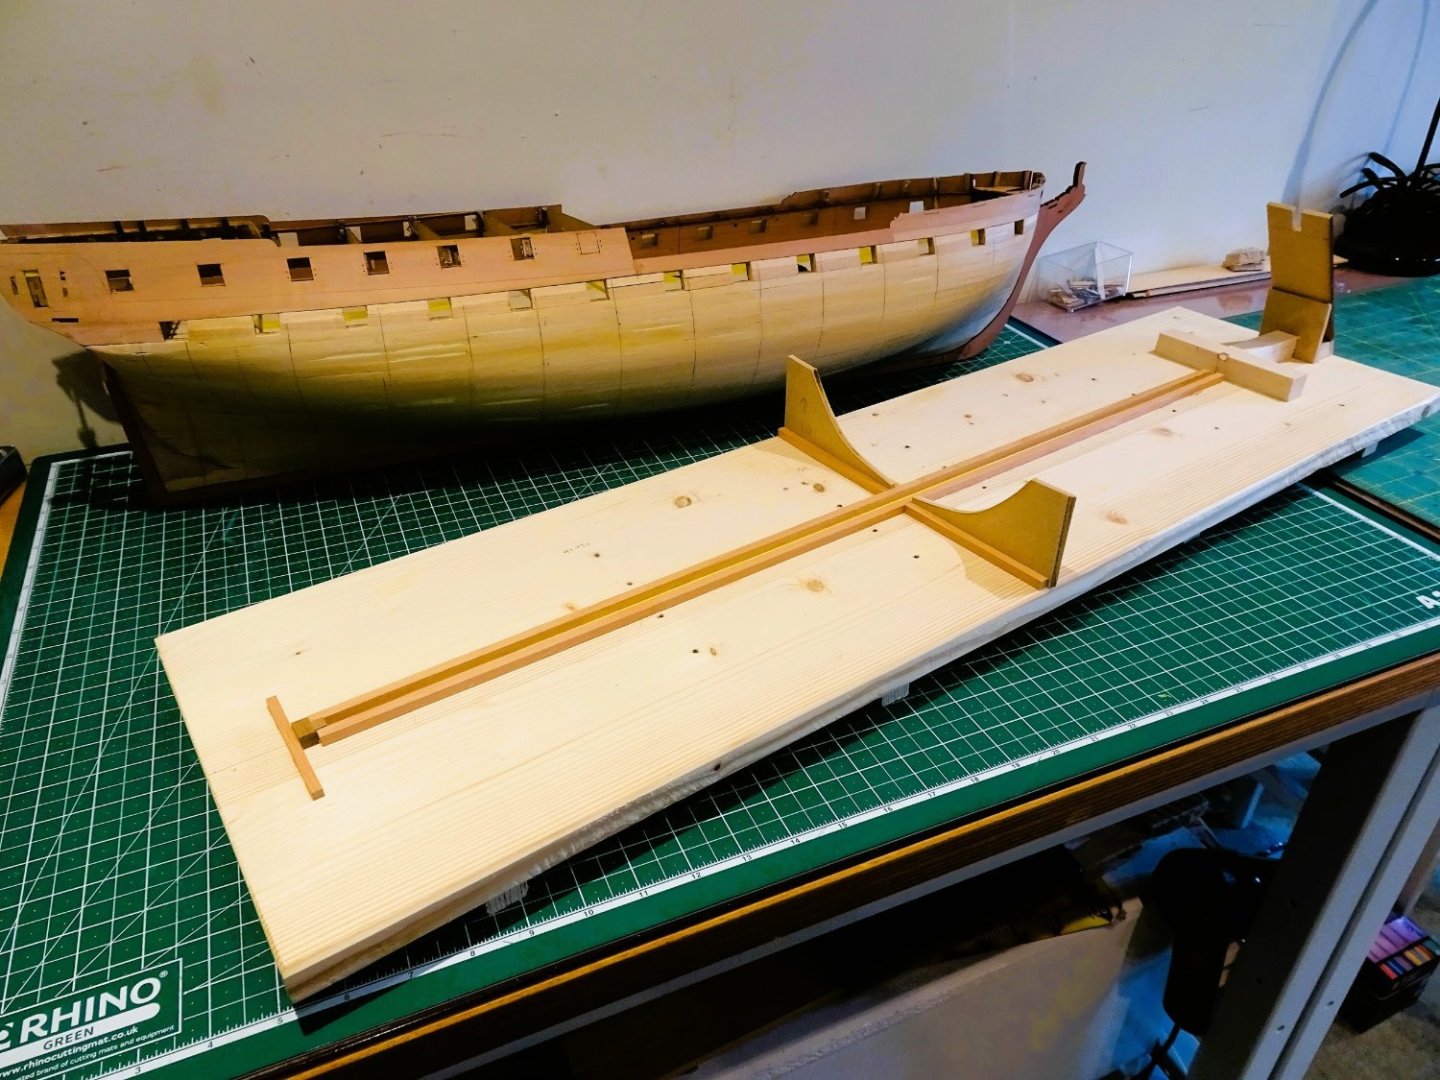
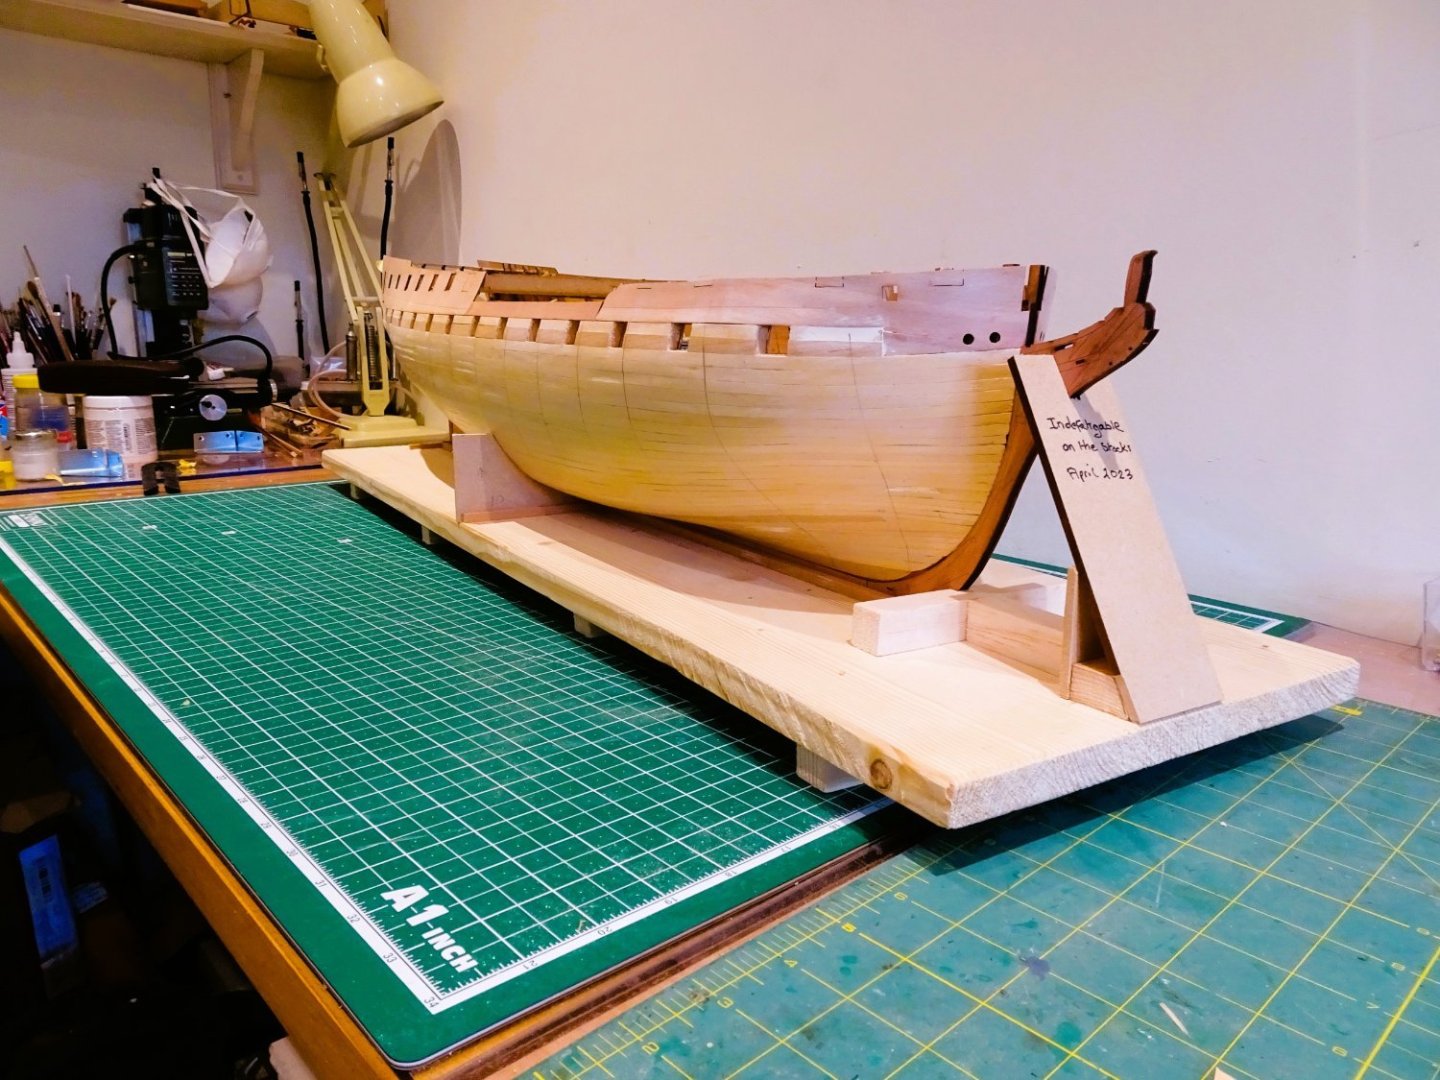
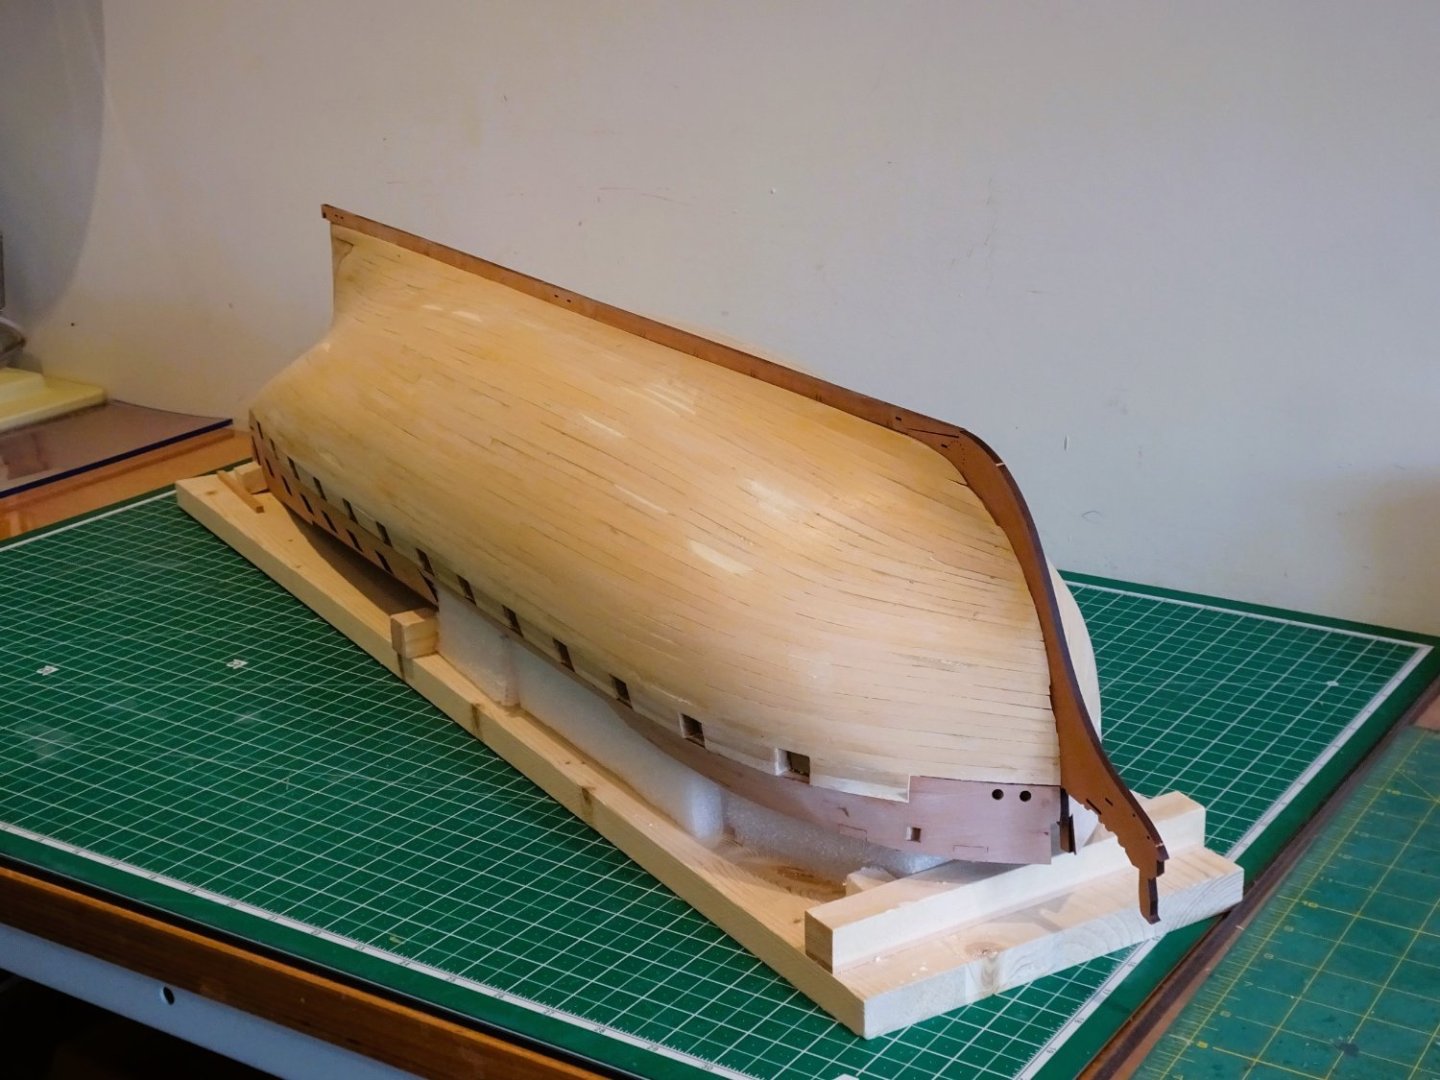
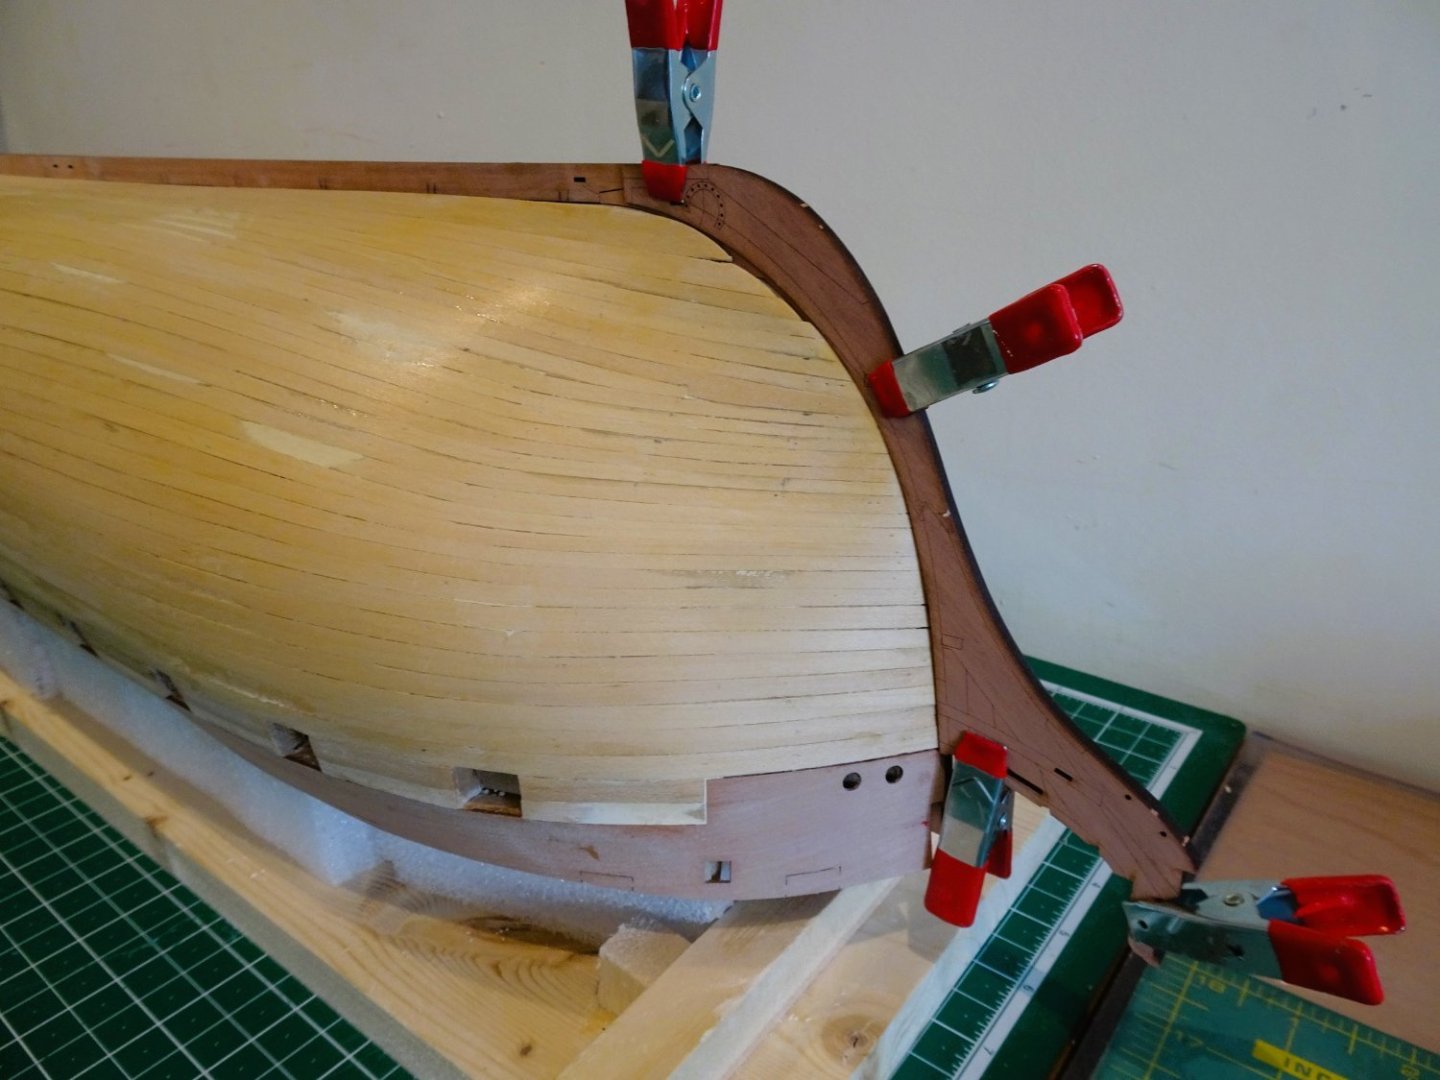
Post Twenty-four At this point I skip sections 165-191 and move to fit the keel, stem, and sternpost pieces. I want the keel pieces in place to modify the build board for the upright hull which will be used for most of the fitting out and detailing. All these pieces fit together nicely. Note: The keel facings are numbered 437/439 (Fore) and 438/440 (stern) – not as shown in the manual. The pieces are port and starboard specific. 0832 I found the trickiest part was fitting the stem facings. I needed to further tweak the planks ends using a micro chisel to allow the facing pieces to sit flat against the stem at all points, and line up with the peg slots. The hull will remain inverted for hull planking and that board has been modified to protect the vulnerable stem piece. 0833 0835 The stem protectors can be swung in and out of position. It would be a tricky issue if the delicate figure seating at the prow was to be broken off. 0840 0841 The upright building board has now been modified to support the planked hull. 0842 0838 Indy is now secure and sitting level, I don’t want this beast moving around whilst I am working on her. On with the show. B.E. 19/04/2023

- 648 replies
-
- 25
-
-
- Indefatigable
- Vanguard Models
- (and 1 more)
-
I'm not prepared to risk it Jason, it also has implications for the keel. Knowing when not to meddle is a valuable skill in our business.😉 Cheers, B.E.
- 648 replies
-
- 5
-
-
- Indefatigable
- Vanguard Models
- (and 1 more)
-
Glad to hear you're feeling better Hakan, hope you have a more settled 2023. I can continue to enjoy your model as she is, in frame, all that lovely woodwork, and I would be happy to display her as is. Regards, B.E.
-
I like your approach to hull planking Cisco, she's shaping up to be a very nice model. 👍 Regards, B.E.
-
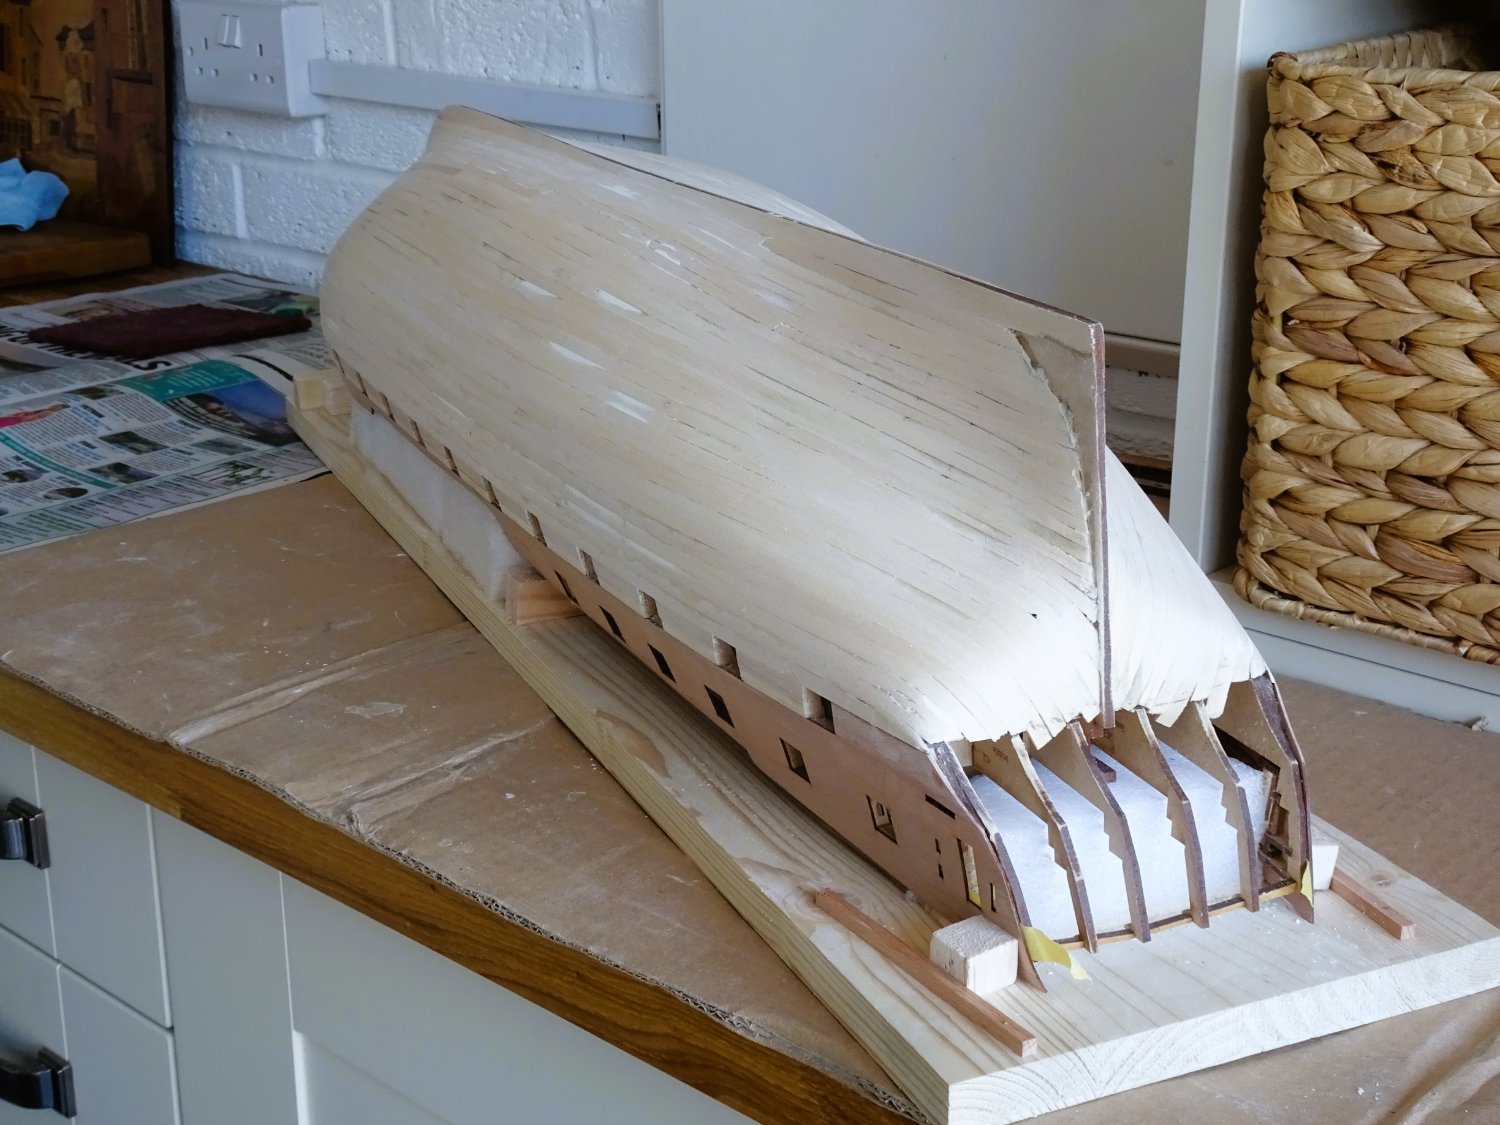
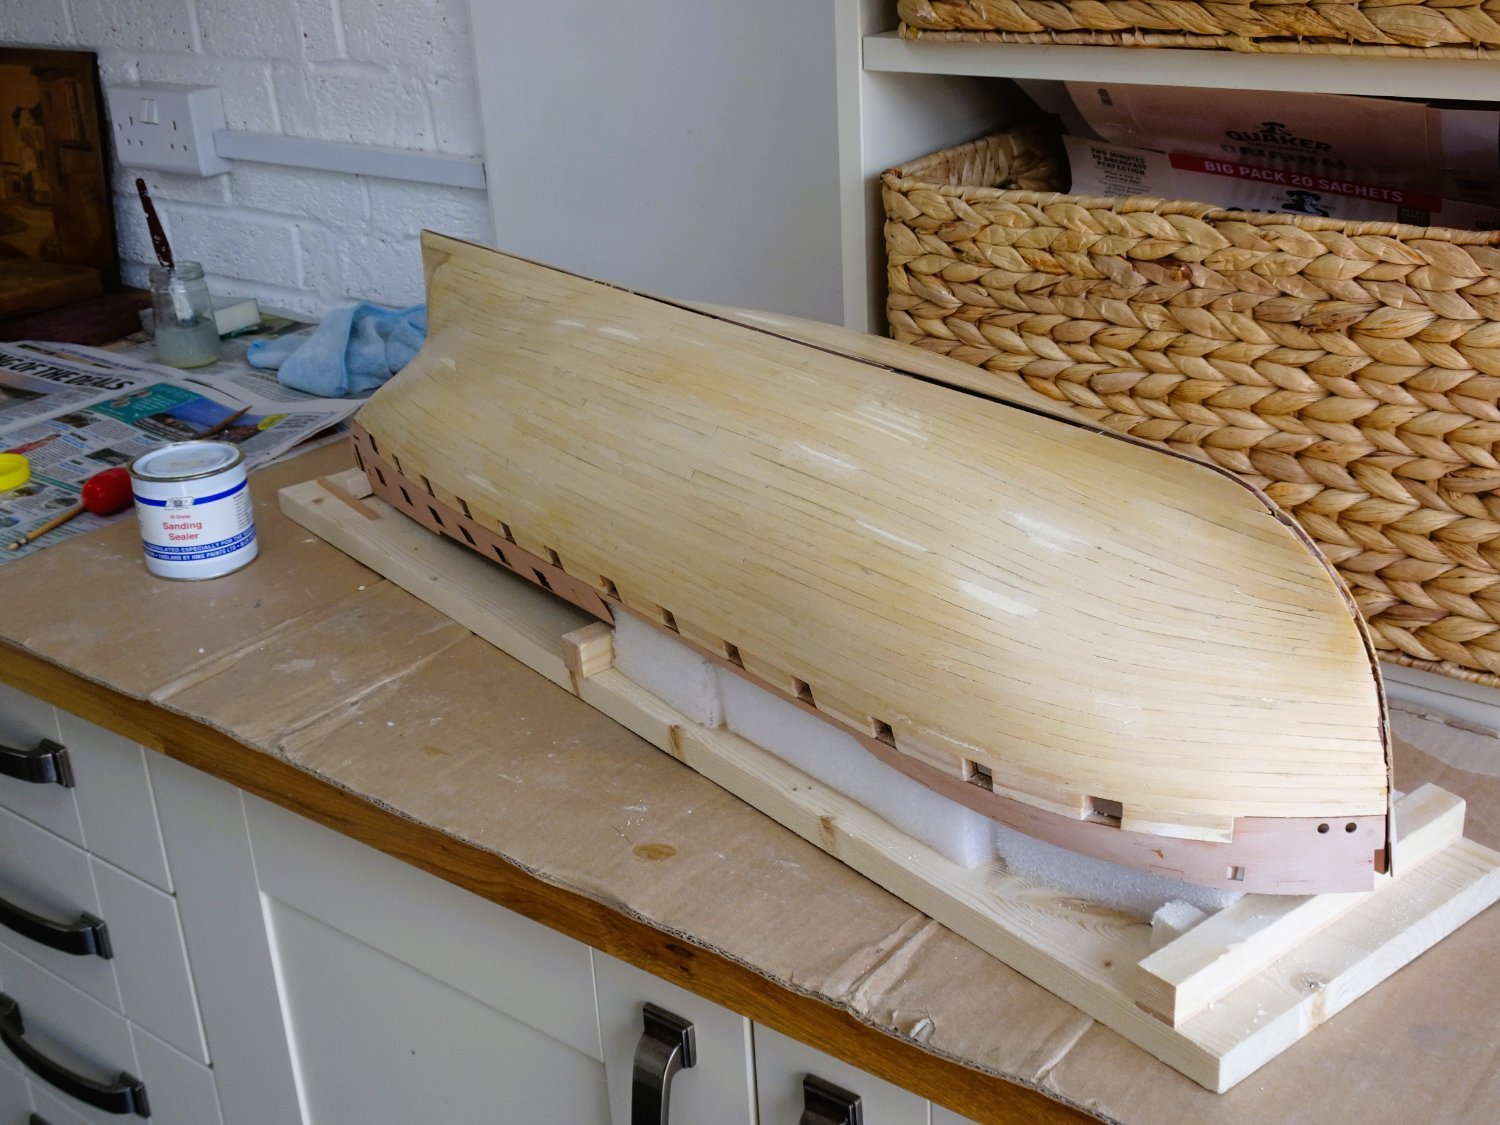
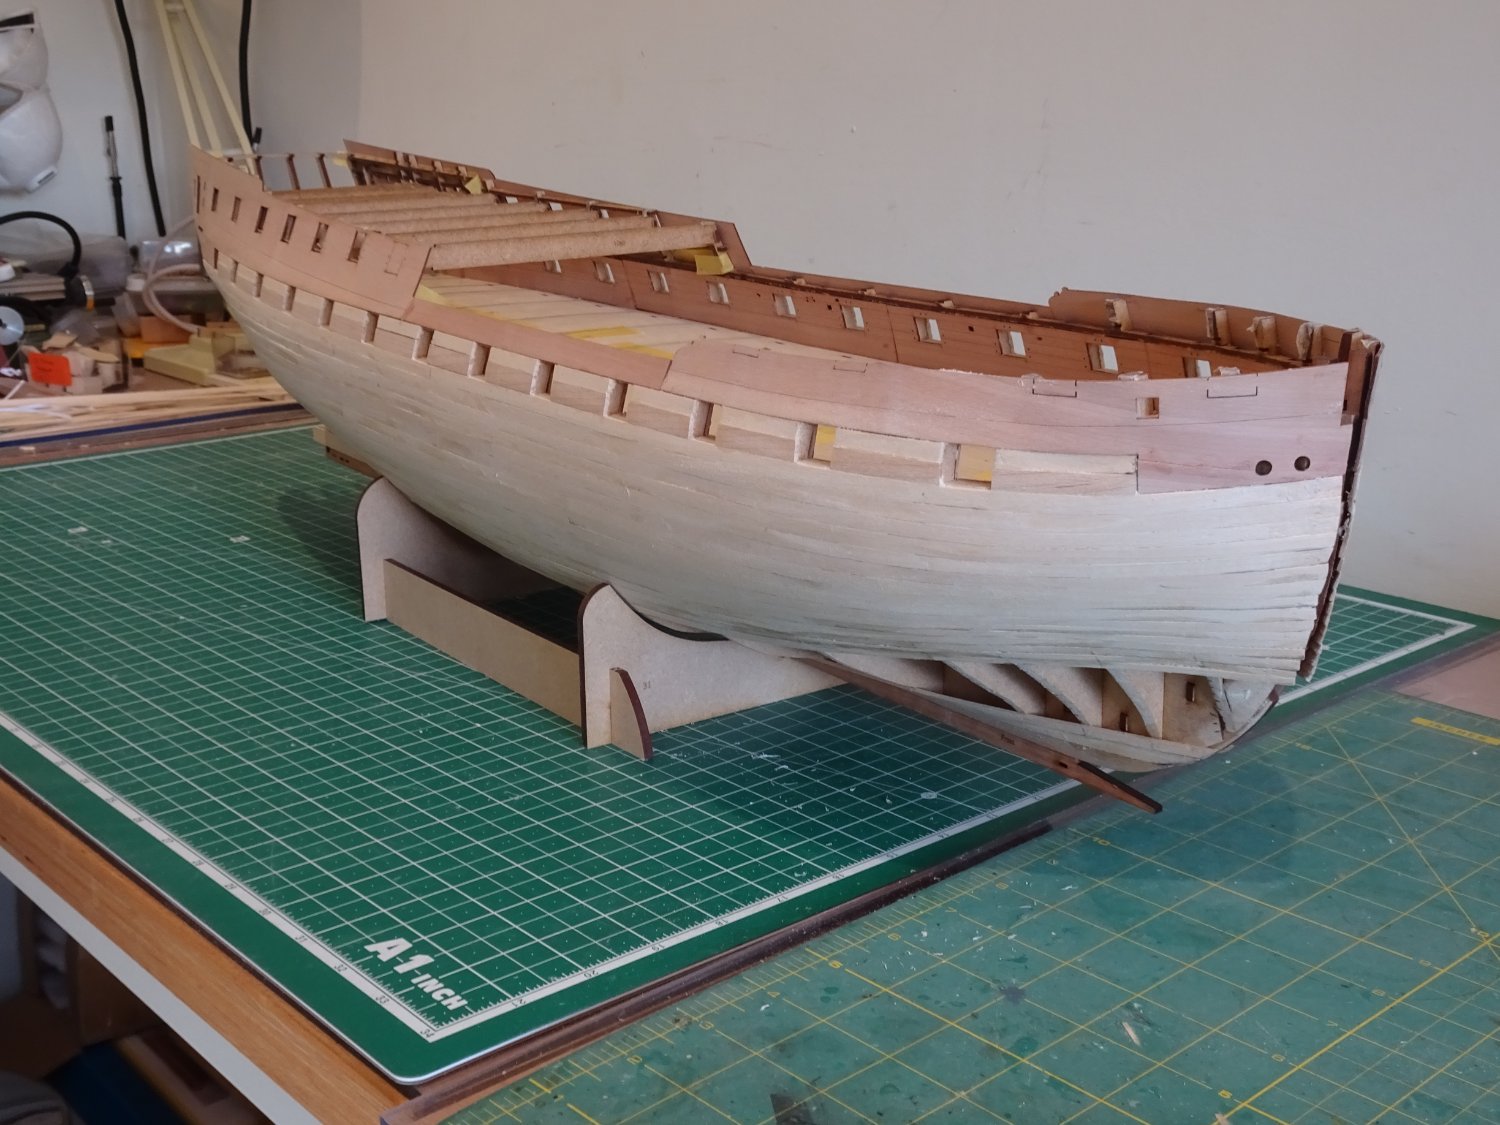
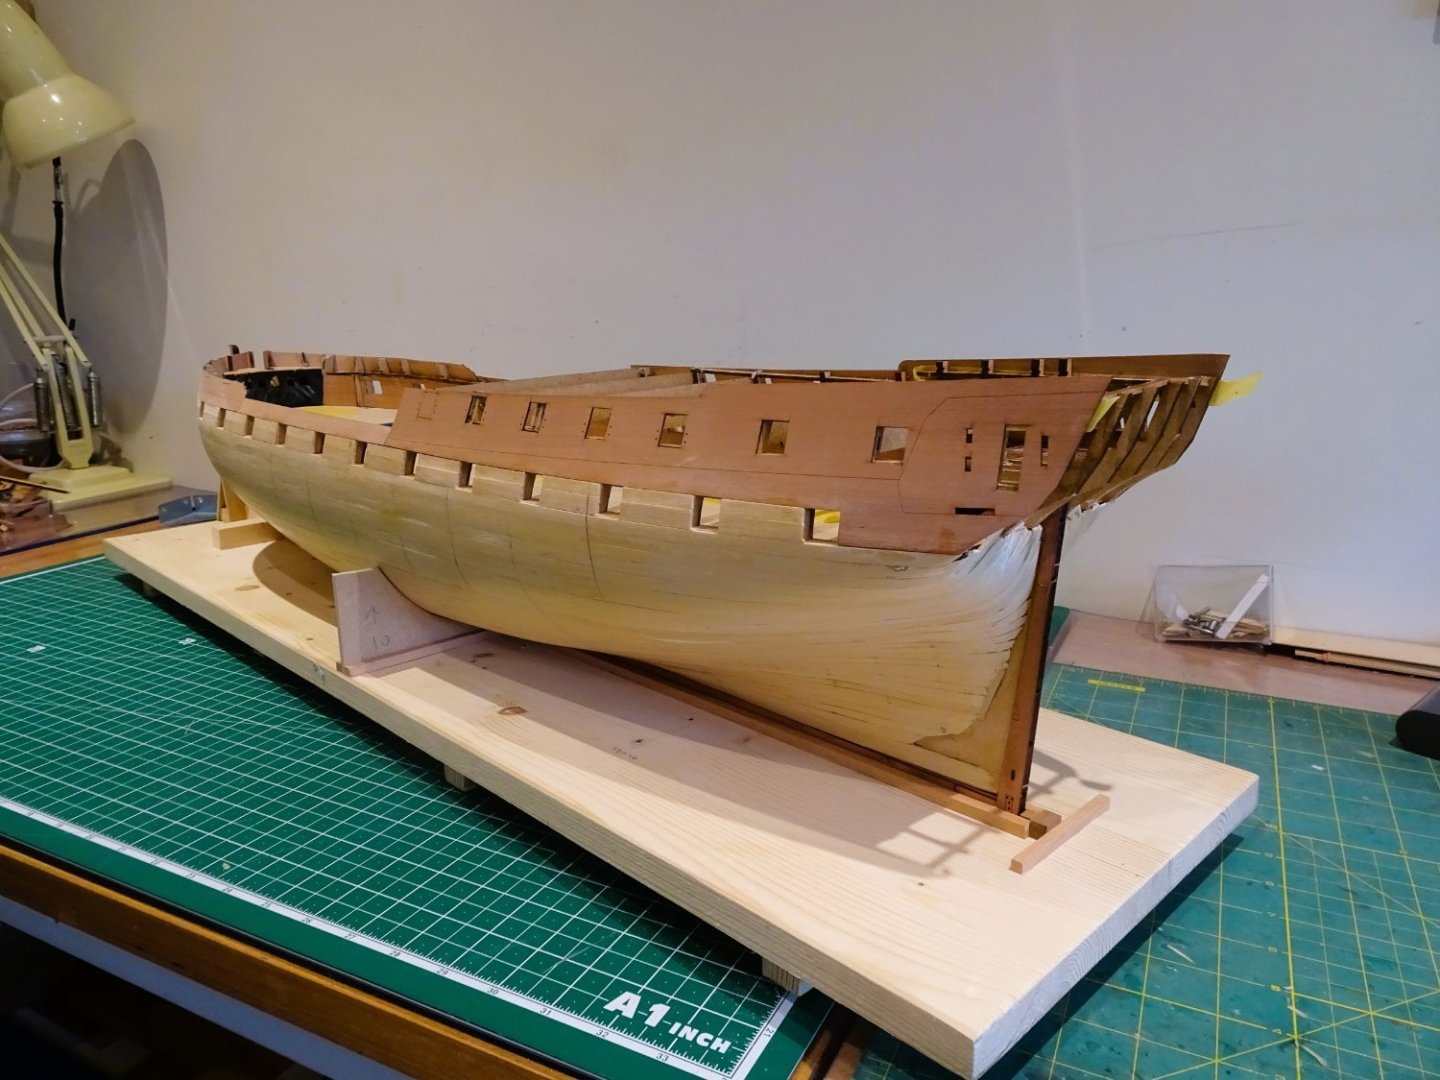
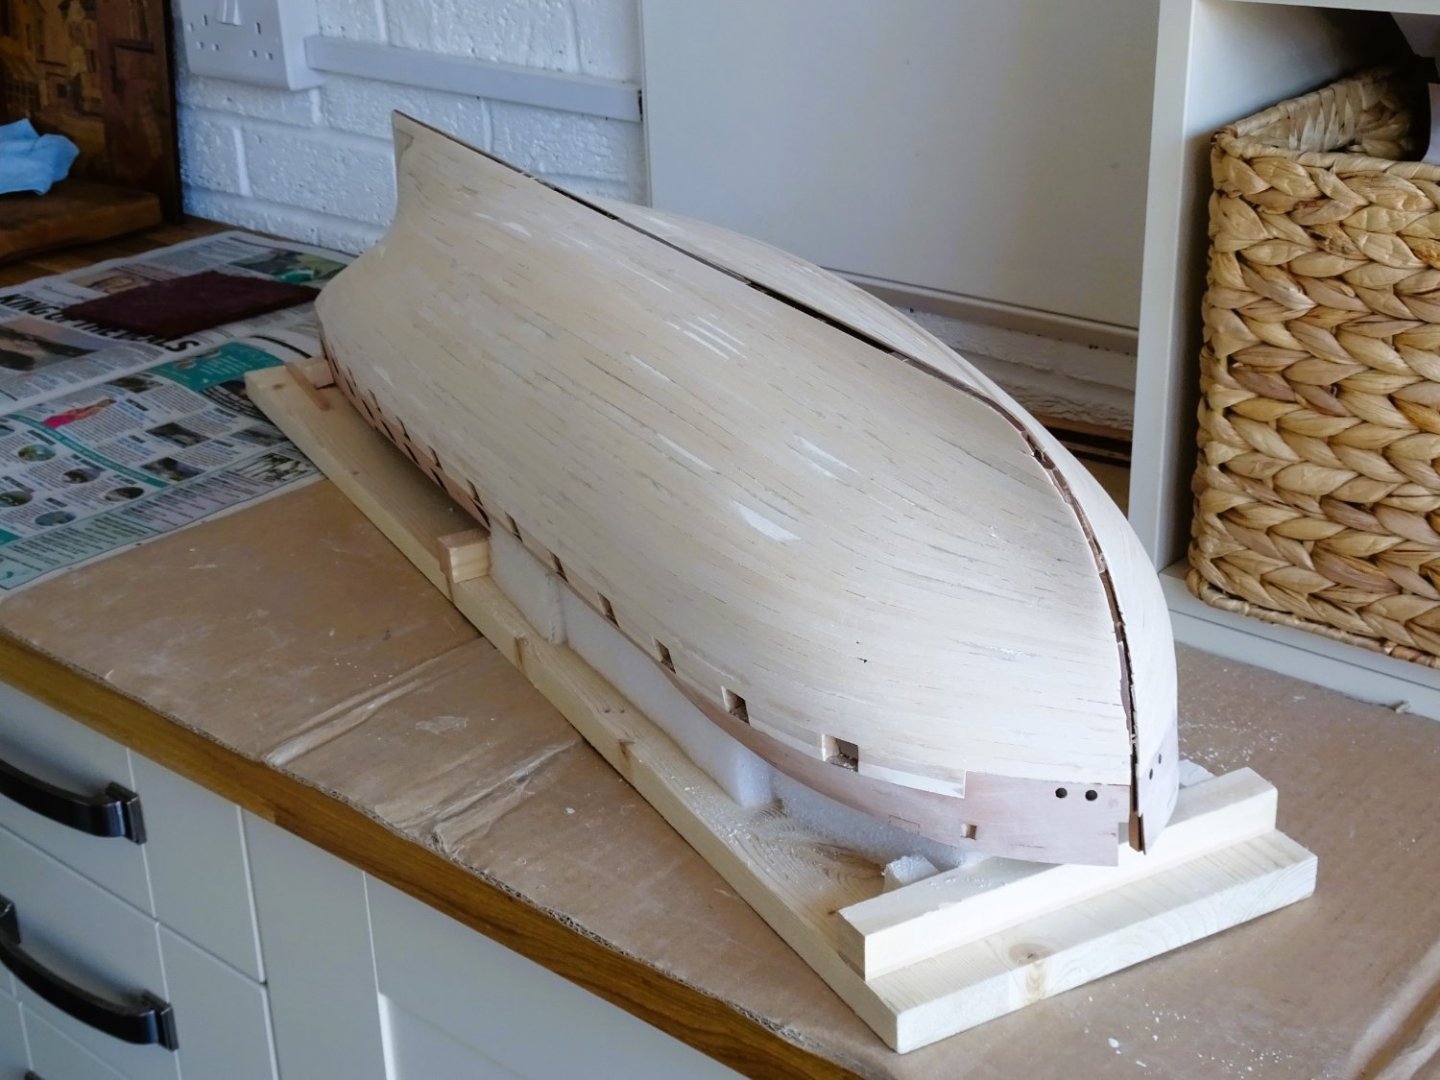
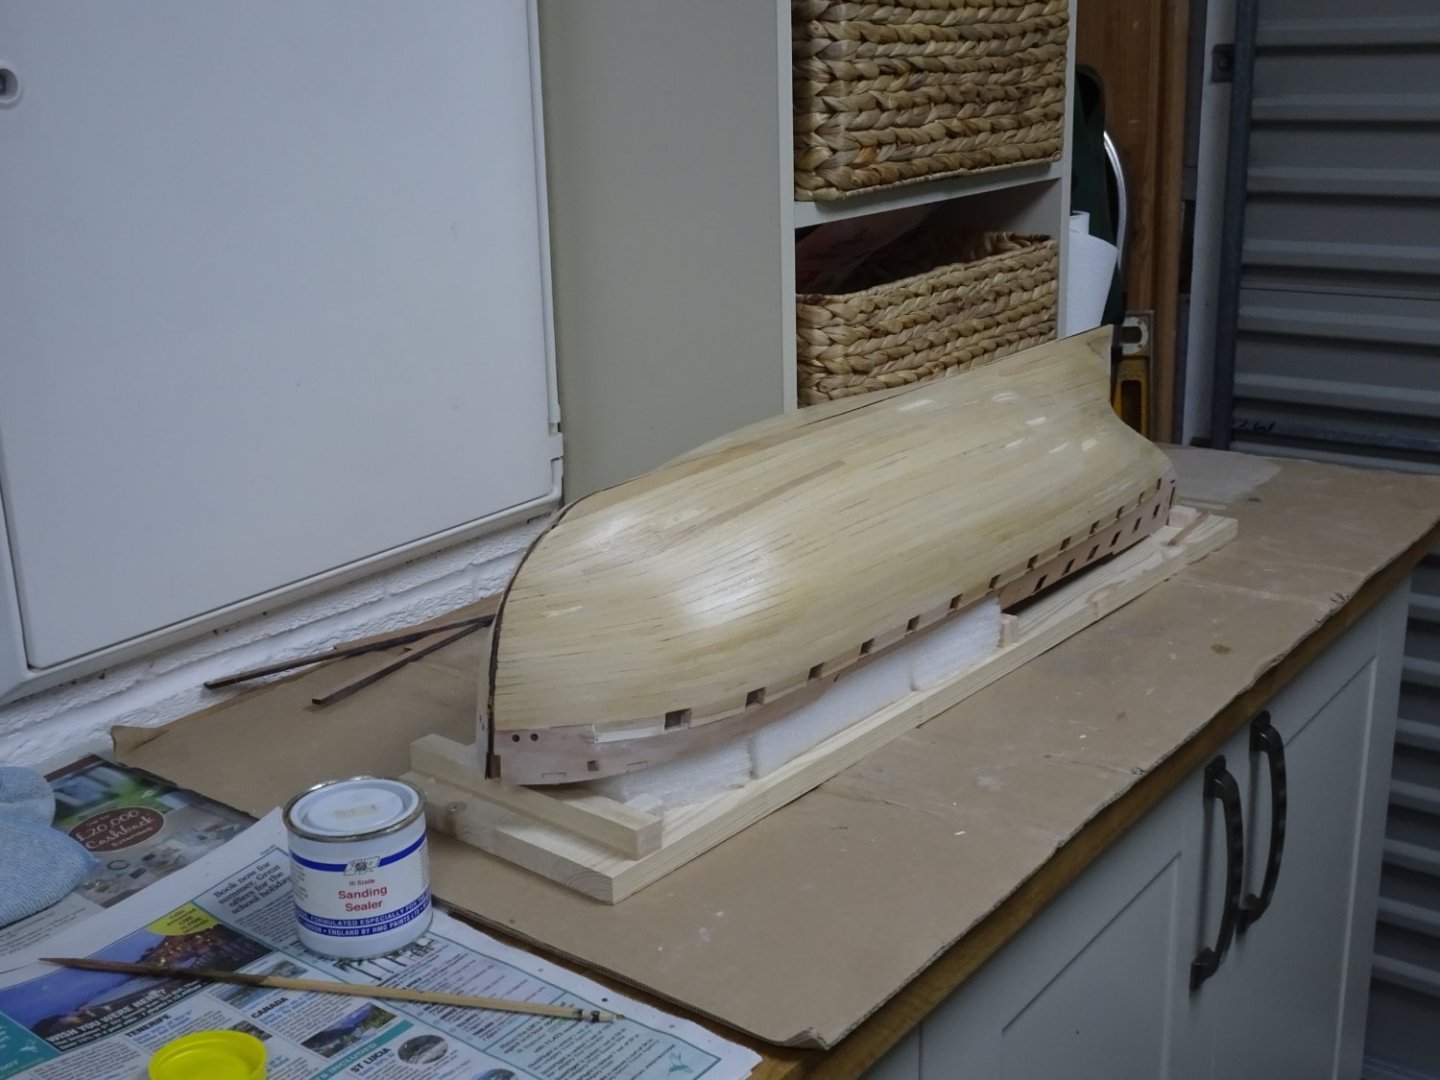
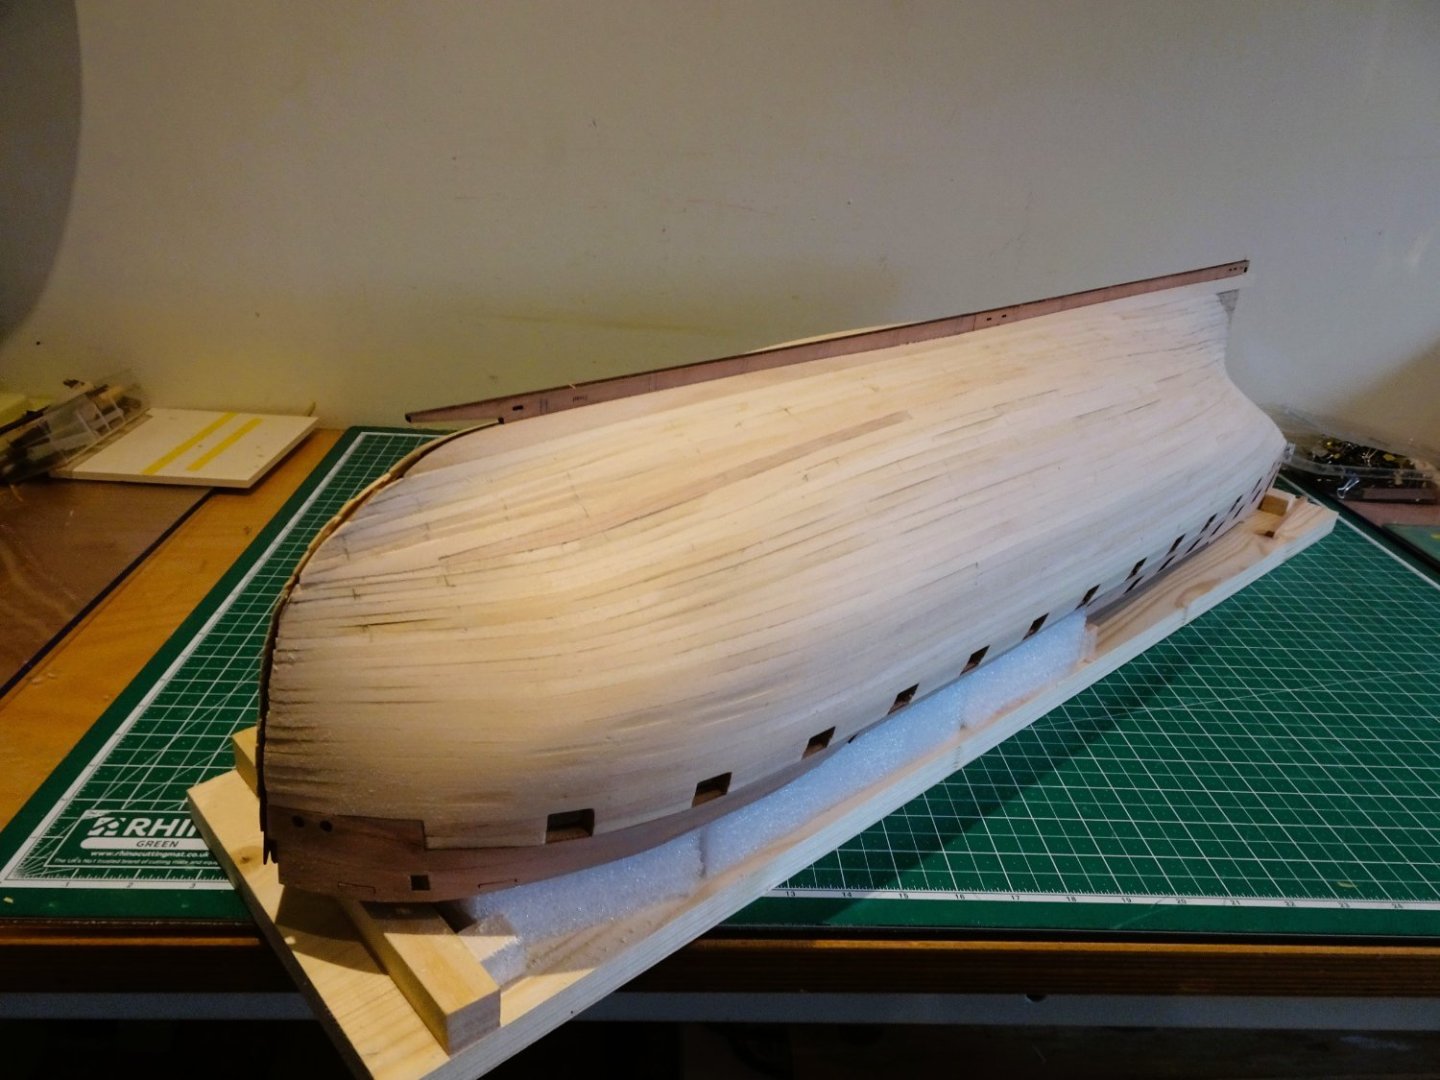
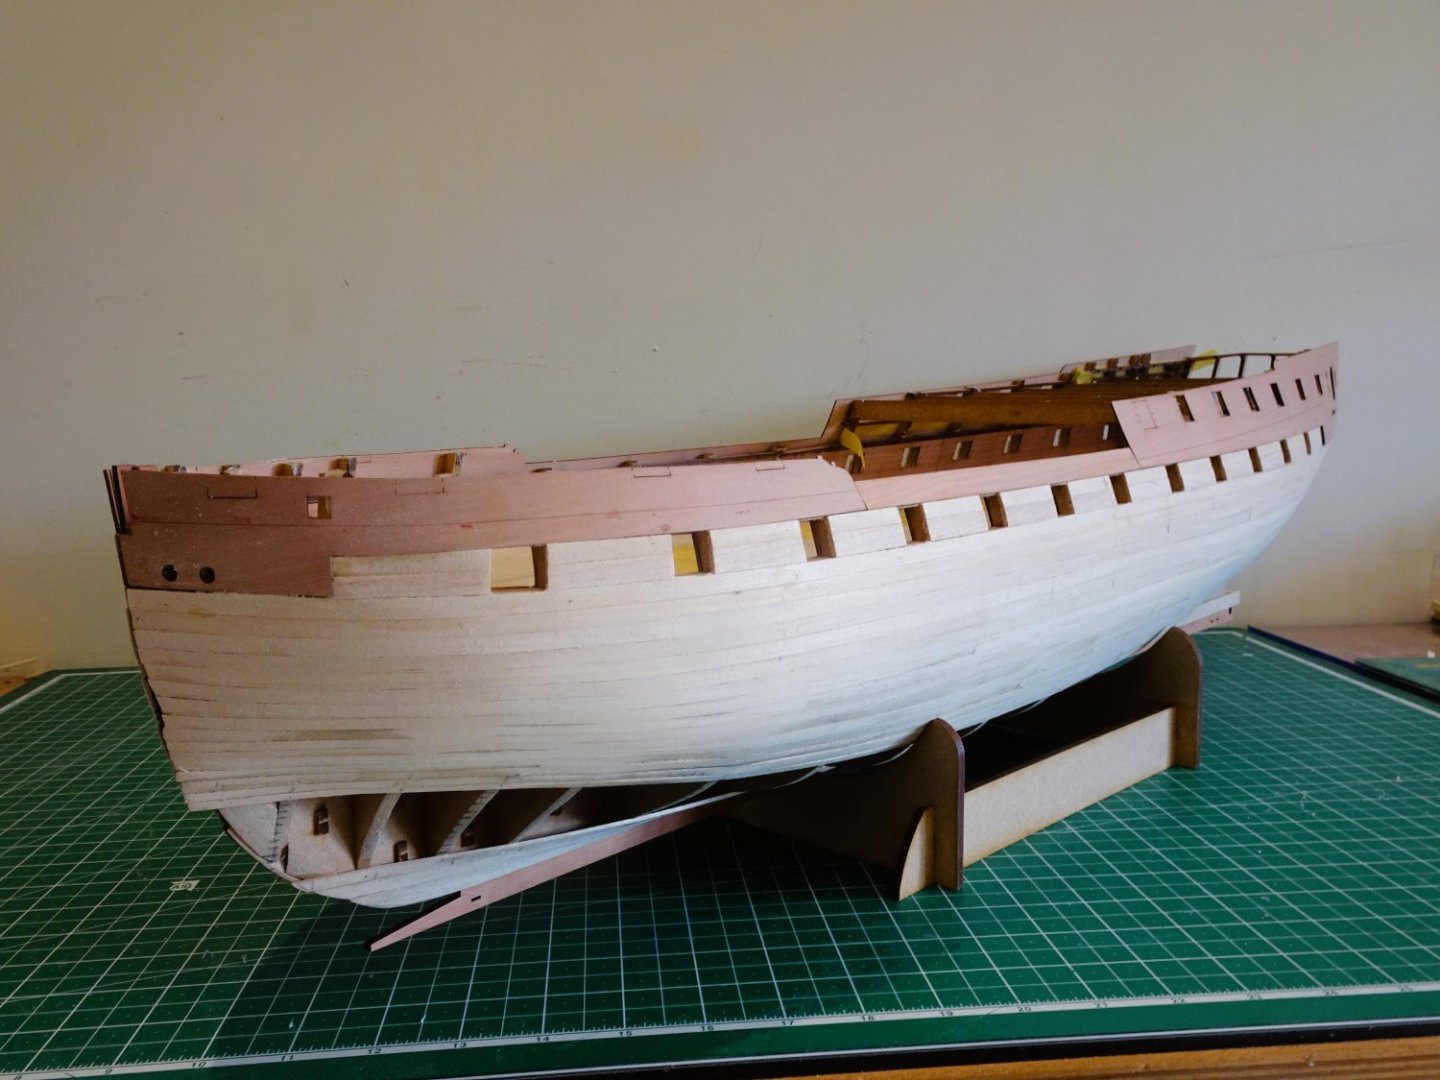
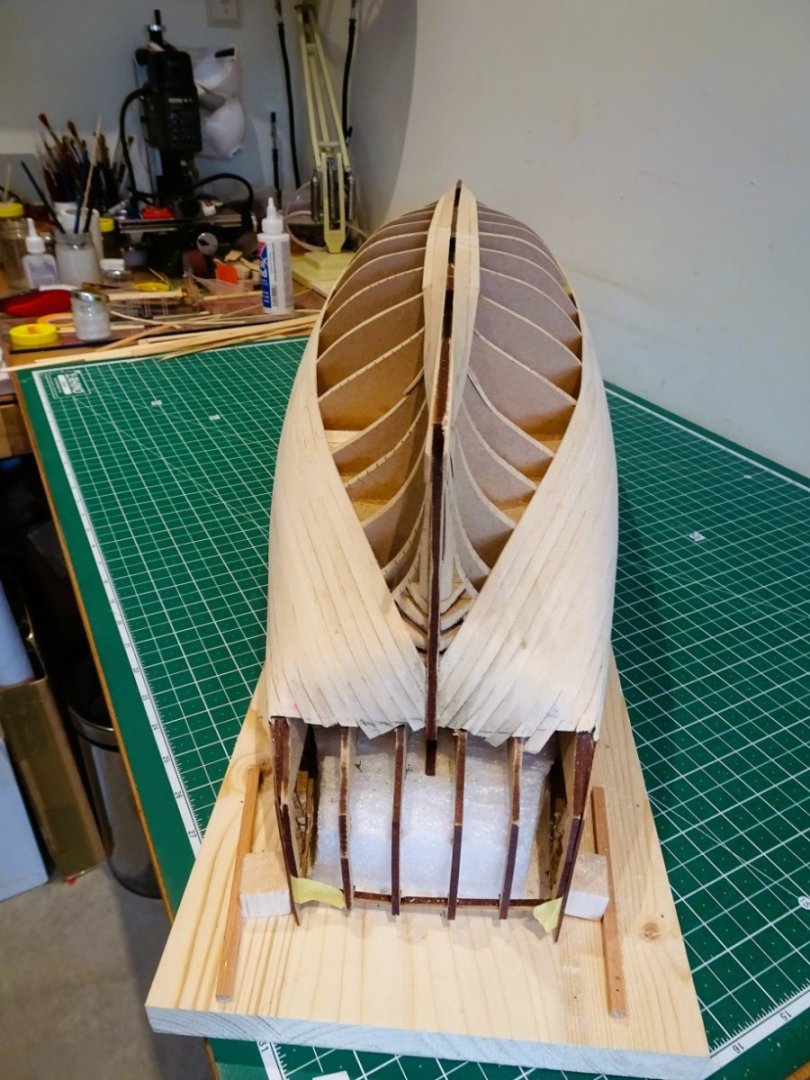
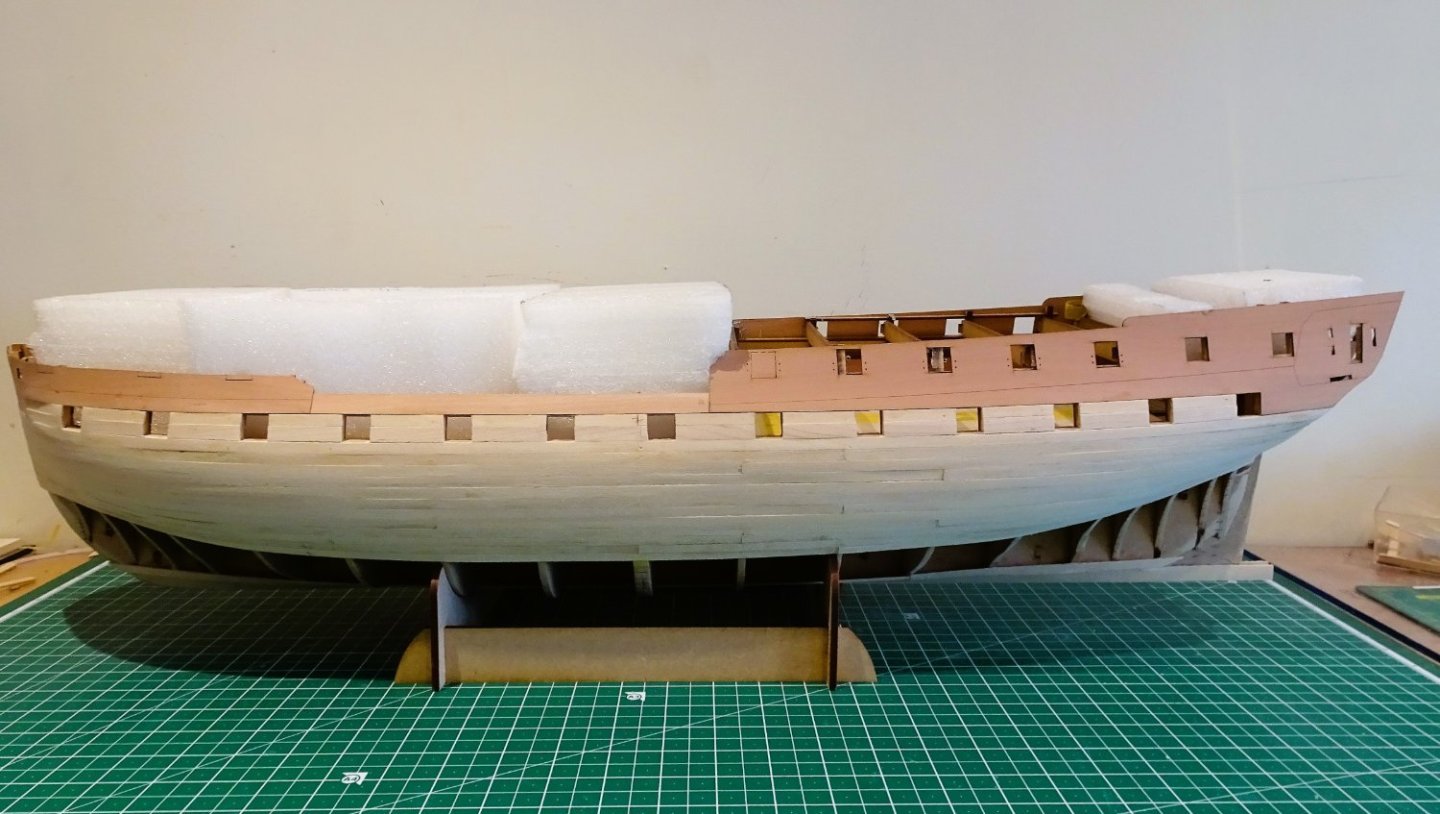
Post Twenty-three The Sanding business 0811 This is a lovely hull to sand, large enough to sweep along it with flexible sanding sheets and blocks. 0812 At the stern the planks are feathered into the false keel to receive the top layer. 0815 There were a few low spots that I filled and sanded and once I was satisfied with a blind feel test I deemed the job complete. 0819 The whole process was completed over two days, and the hull was finally given a coat of sanding sealer. 0821 Sanding sealer contains Xylenes, and is nasty stuff, best done in the open air and wearing a mask and gloves. 0822 At this point I dry fitted the stem, keel, and sternpost parts. The stem fitted neatly into place with a light tap of the hammer, but before final fitting I was interested to see how the facings related to the curve of the bow planking. 0810 These facings of 1mm stuff are engraved with the lines that denote the various parts of the head and provide a rabbet for the second planking. 0830 I fined down the plank ends a little to provide more leeway in the rabbet. I find it always pays to constantly look a few steps ahead in a build, and check what’s coming up. B.E 18/03/2023


- 648 replies
-
- 30
-
-
- Indefatigable
- Vanguard Models
- (and 1 more)
-
Thank you Dave, Pavel, and Kevin. I'm quite pleased (relieved) with the way the planking has gone, but I'm still very edgy about the second lot. I think I'm feeling the weight of the large investment in this kit plus the expensive timbers I could potentially mess up. message to self - just get on with it! B.E.
- 648 replies
-
- 5
-
-
- Indefatigable
- Vanguard Models
- (and 1 more)
-
Amazing the difference a butt shift pattern makes, the starboard side is going well. 👍 B.E.
- 443 replies
-
- 6
-
-
- Indefatigable
- Vanguard Models
- (and 1 more)
-
Thanks Alistair, may not be epic but planking a 26' launch is no mean feat, as I experienced with my Sphinx build. Those Vanguard boats are great little projects in their own right. B.E.
- 648 replies
-
- 4
-
-
- Indefatigable
- Vanguard Models
- (and 1 more)
-
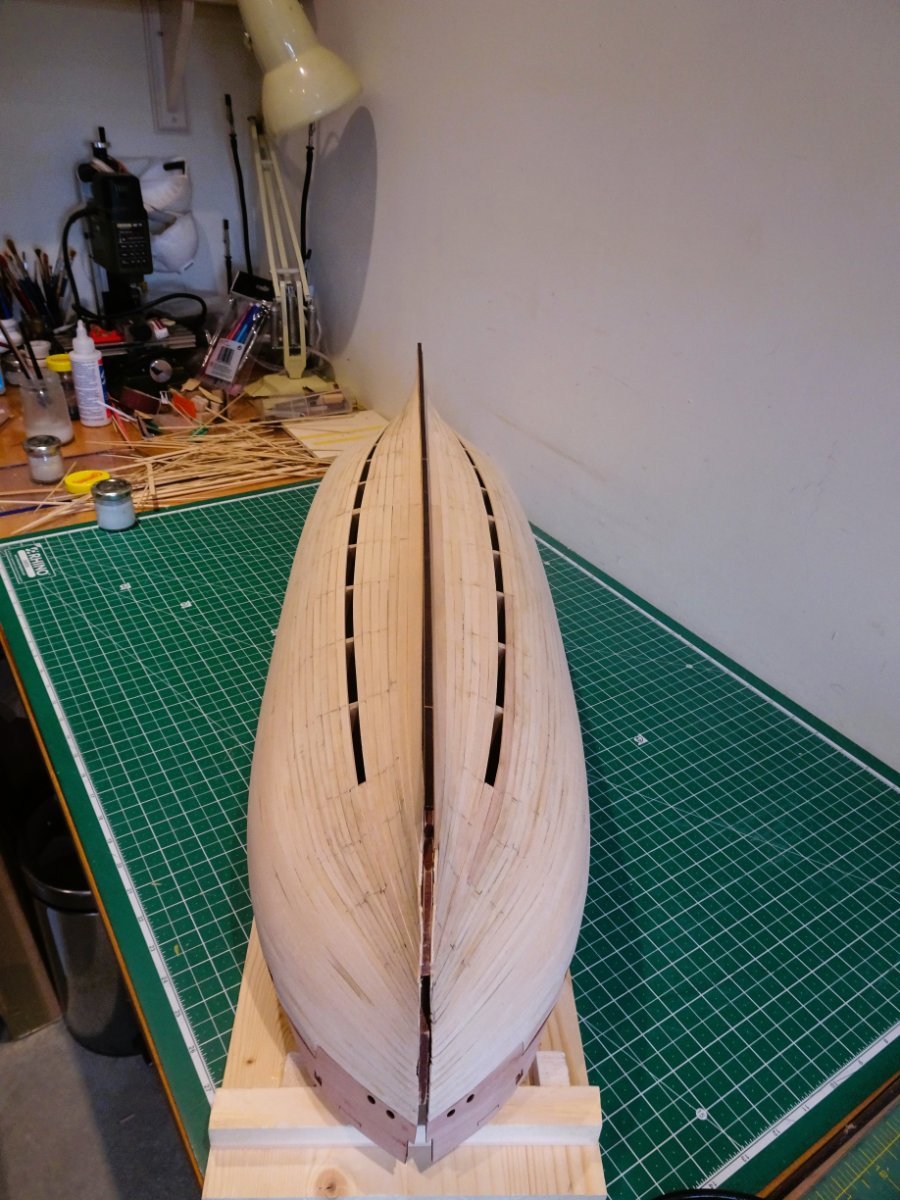
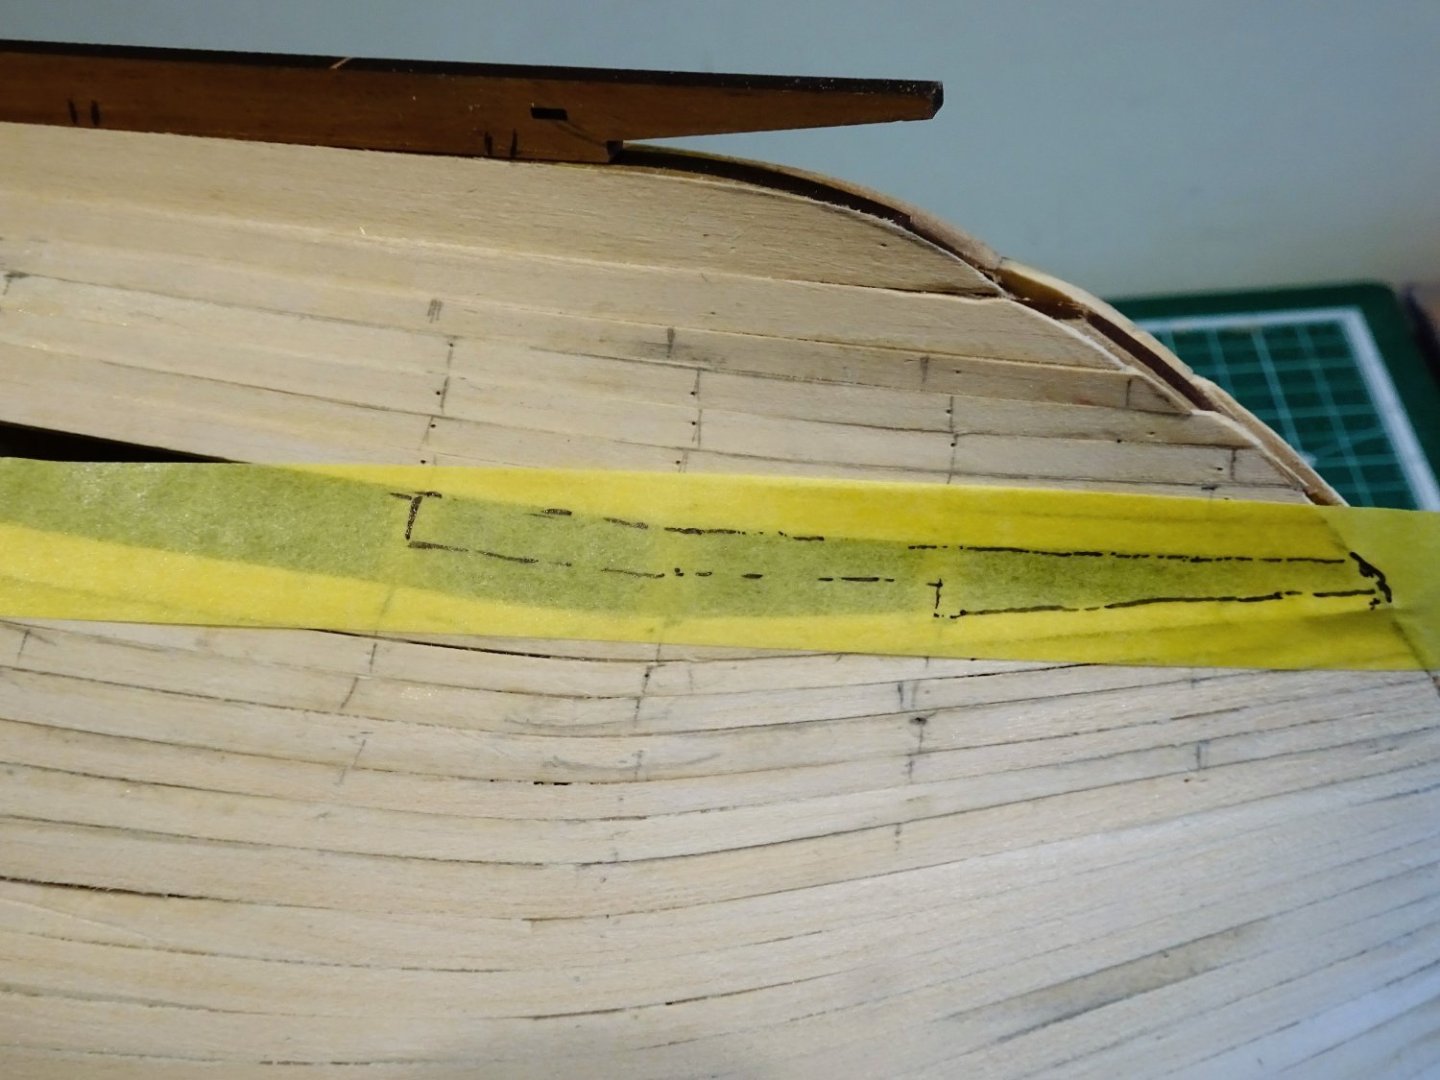
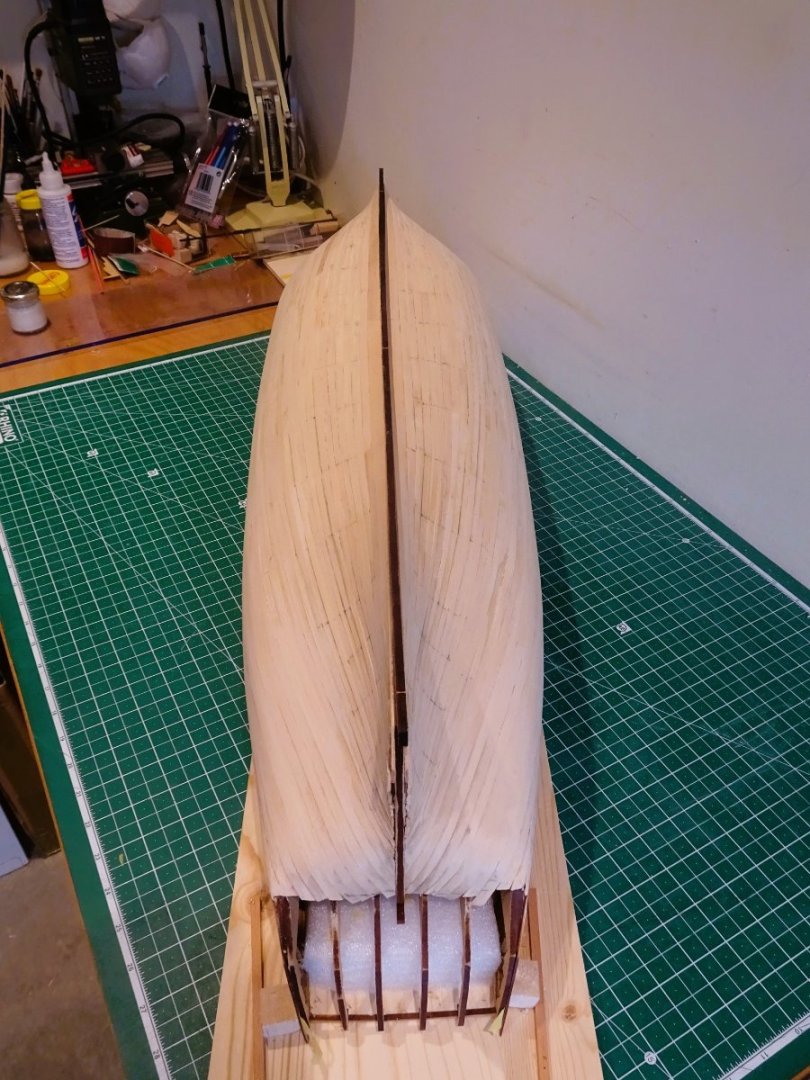
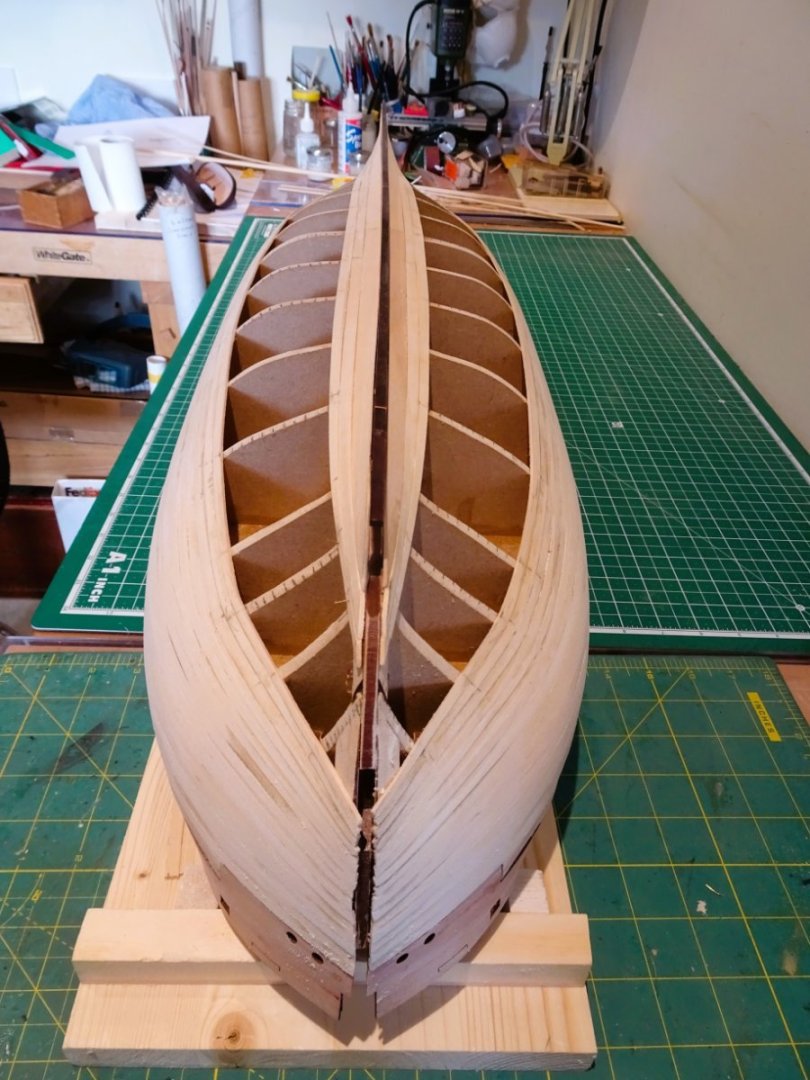
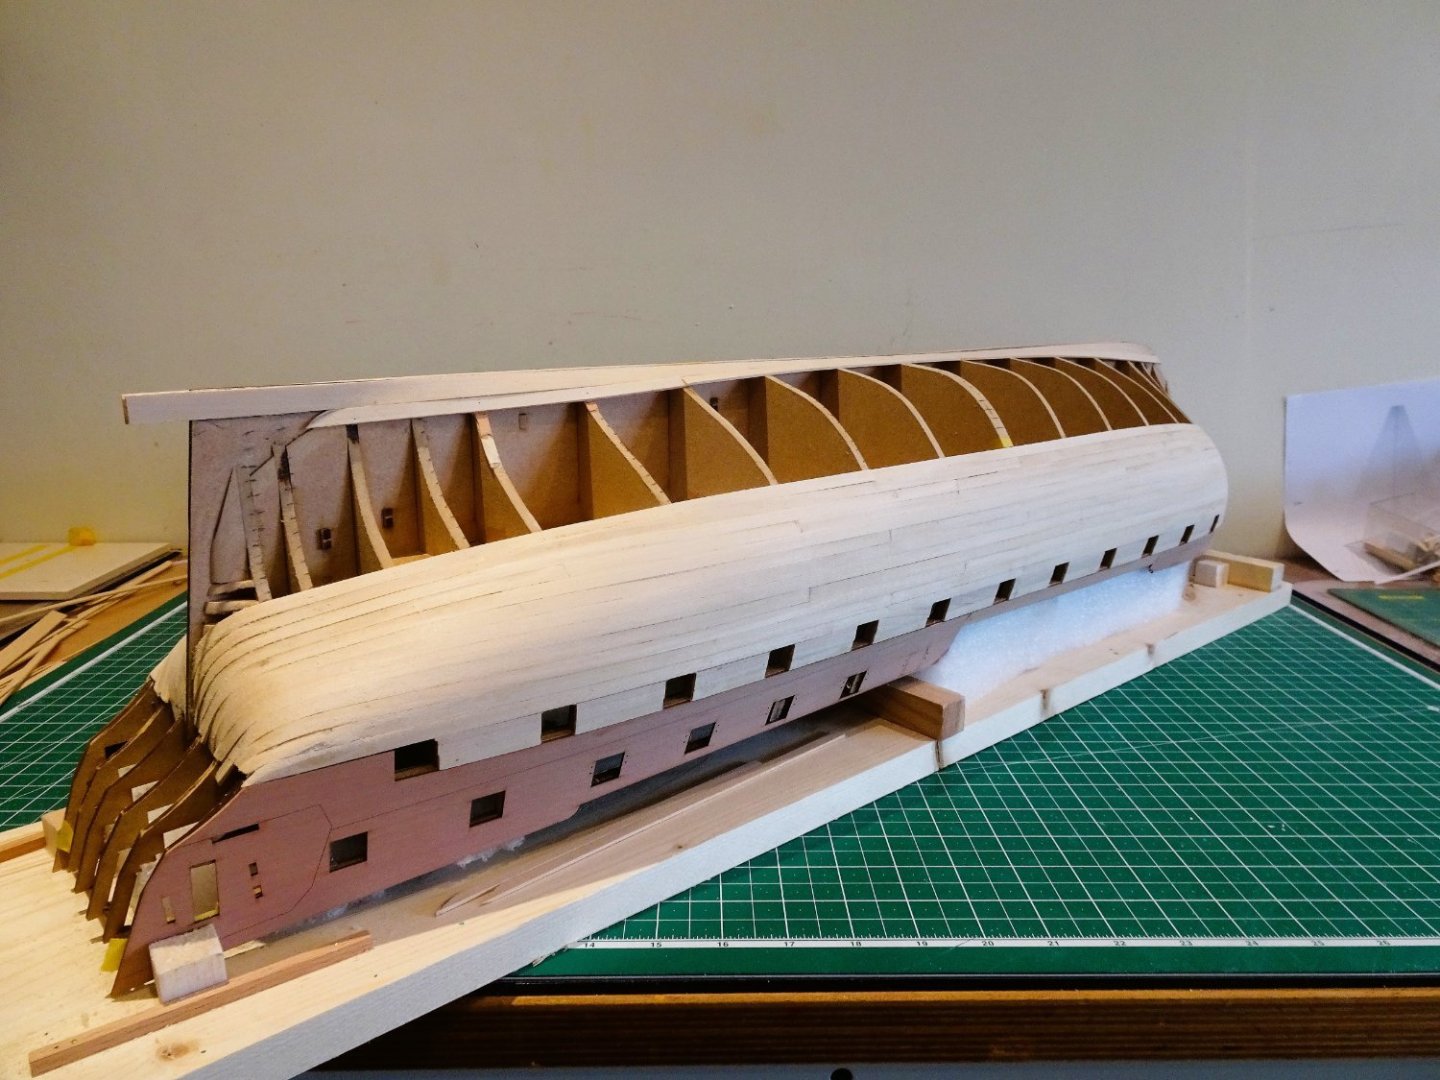
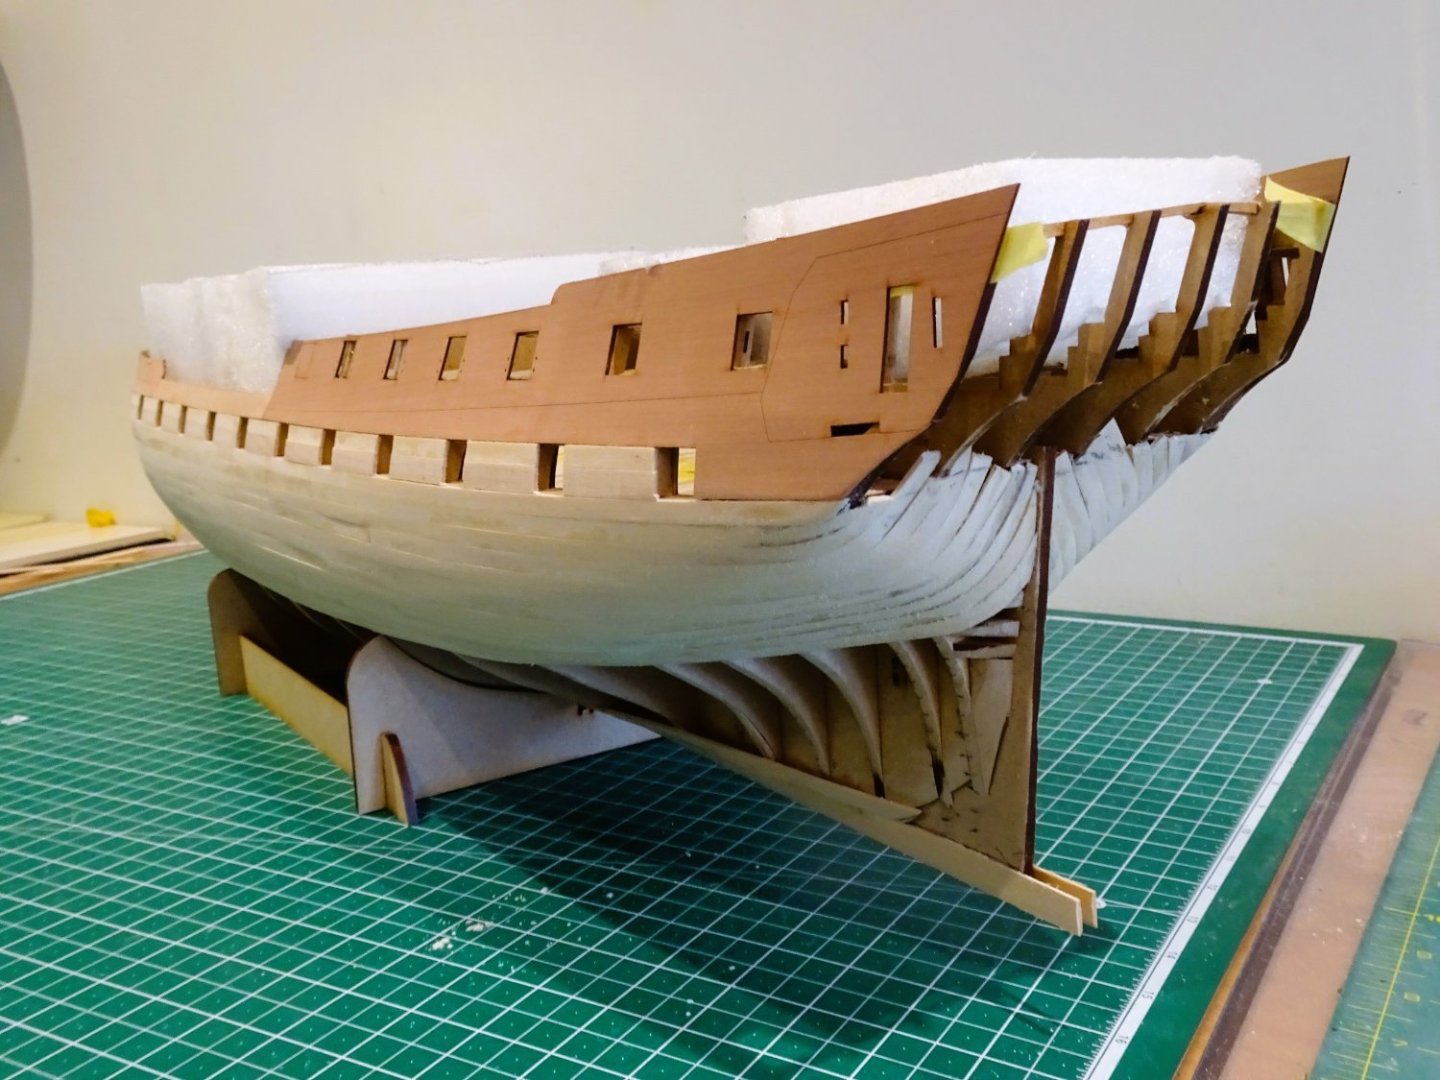
Post Twenty-two Countdown to completion 0762 0766 Three strakes left. 0768 0769 Two strakes left and getting a little tight at the bow. 0771 I could get a fit but I decided just for the fun of it to add a drop plank here. 0774 It extends from the stem back to the fourth bulkhead. 0776 0779 One strake only left to abut the drop plank. Things have worked out pretty well with the remaining strake sitting below the hull round. 0783 A good supply of lime was provided in the kit; I have a fair number left over, but I did use a few wider strips, to form planks like the Garboard and drop planks. 0784 0792 0790 0787 It’s now a case of sand, sand, and sand again. B.E 17/04/2023


- 648 replies
-
- 29
-
-
- Indefatigable
- Vanguard Models
- (and 1 more)
-
The planking strips are narrower and thinner for the second planking and I hope to do a reasonable butt shift pattern, and more or less scale lengths. B.E.
- 648 replies
-
- 4
-
-
- Indefatigable
- Vanguard Models
- (and 1 more)
-
Wishing you a quick recovery Chuck, take your time and get well. B.E.
-
Hello Spy, The single lengths are 900mm long, too long in my opinion to handle the run. As I mentioned in an earlier post to halve the runs down the double middle bulkheads offends my eye. I can't bring myself to apply the first planking 'any which way', simply because it's 'only the first planking'. I prefer to use a limited tick strip, edge bend, approach which gets me into the rhythm for what is to come. Just one of my little foibles , but in the final analysis 'any which way' will get you there, providing the fairing and sanding is completed to a reasonable standard. Cheers, B.E.
- 648 replies
-
- 6
-
-
- Indefatigable
- Vanguard Models
- (and 1 more)
-
Cheers, Glenn, and Alistair, I expect the second layer planking will take a lot, lot, longer to complete as I transfer each and every tick mark from hull to plank. My approach has been somewhat abbreviated on this first layer, but it has given me a lot of pointers to consider when I reach that stage. I don’t know about ‘fatigable’ Alistair, I tend to keep at it once I’ve started, sometimes to the exasperation of Mrs W. This is the largest hull I have planked since Norske Love and that was so long ago I’ve forgotten how I felt. The difference with Norske Love is that it is single planked, which without the comfort blanket of two layers, tends to concentrate the mind.🤔 Regards, B.E.
- 648 replies
-
- 10
-
-
- Indefatigable
- Vanguard Models
- (and 1 more)
-
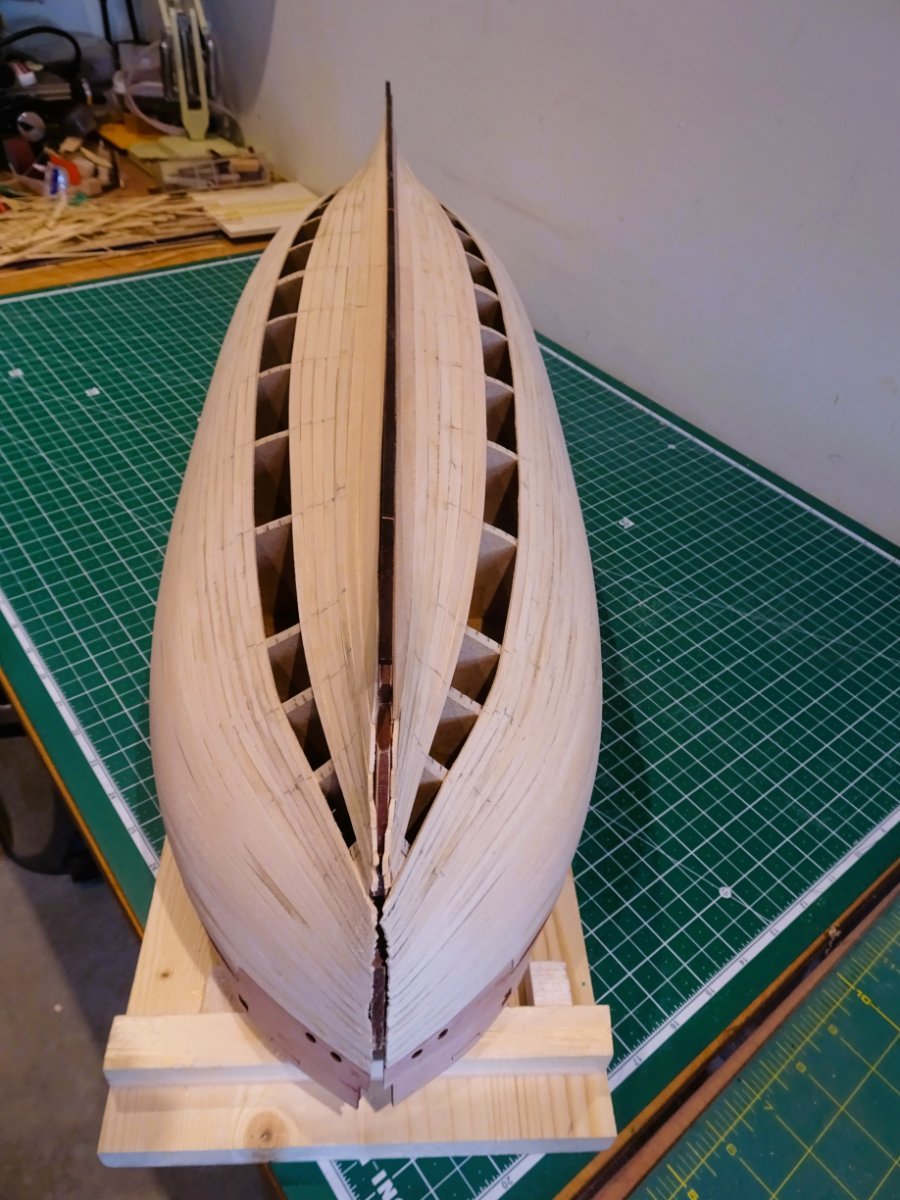
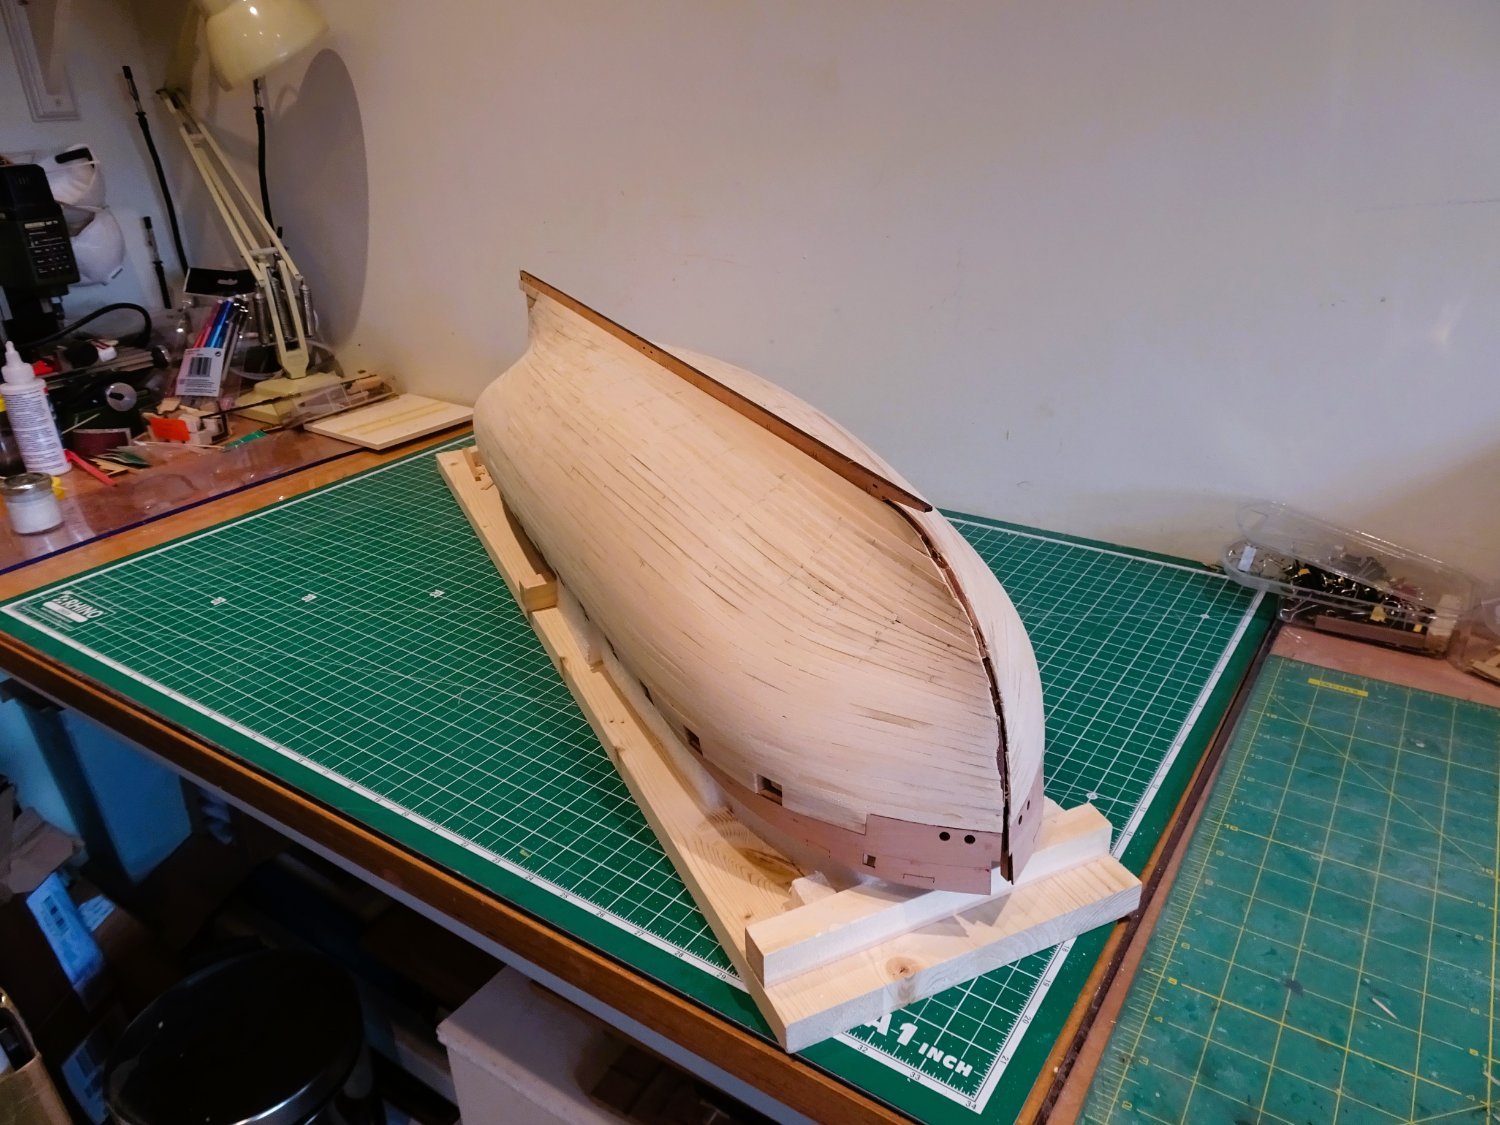
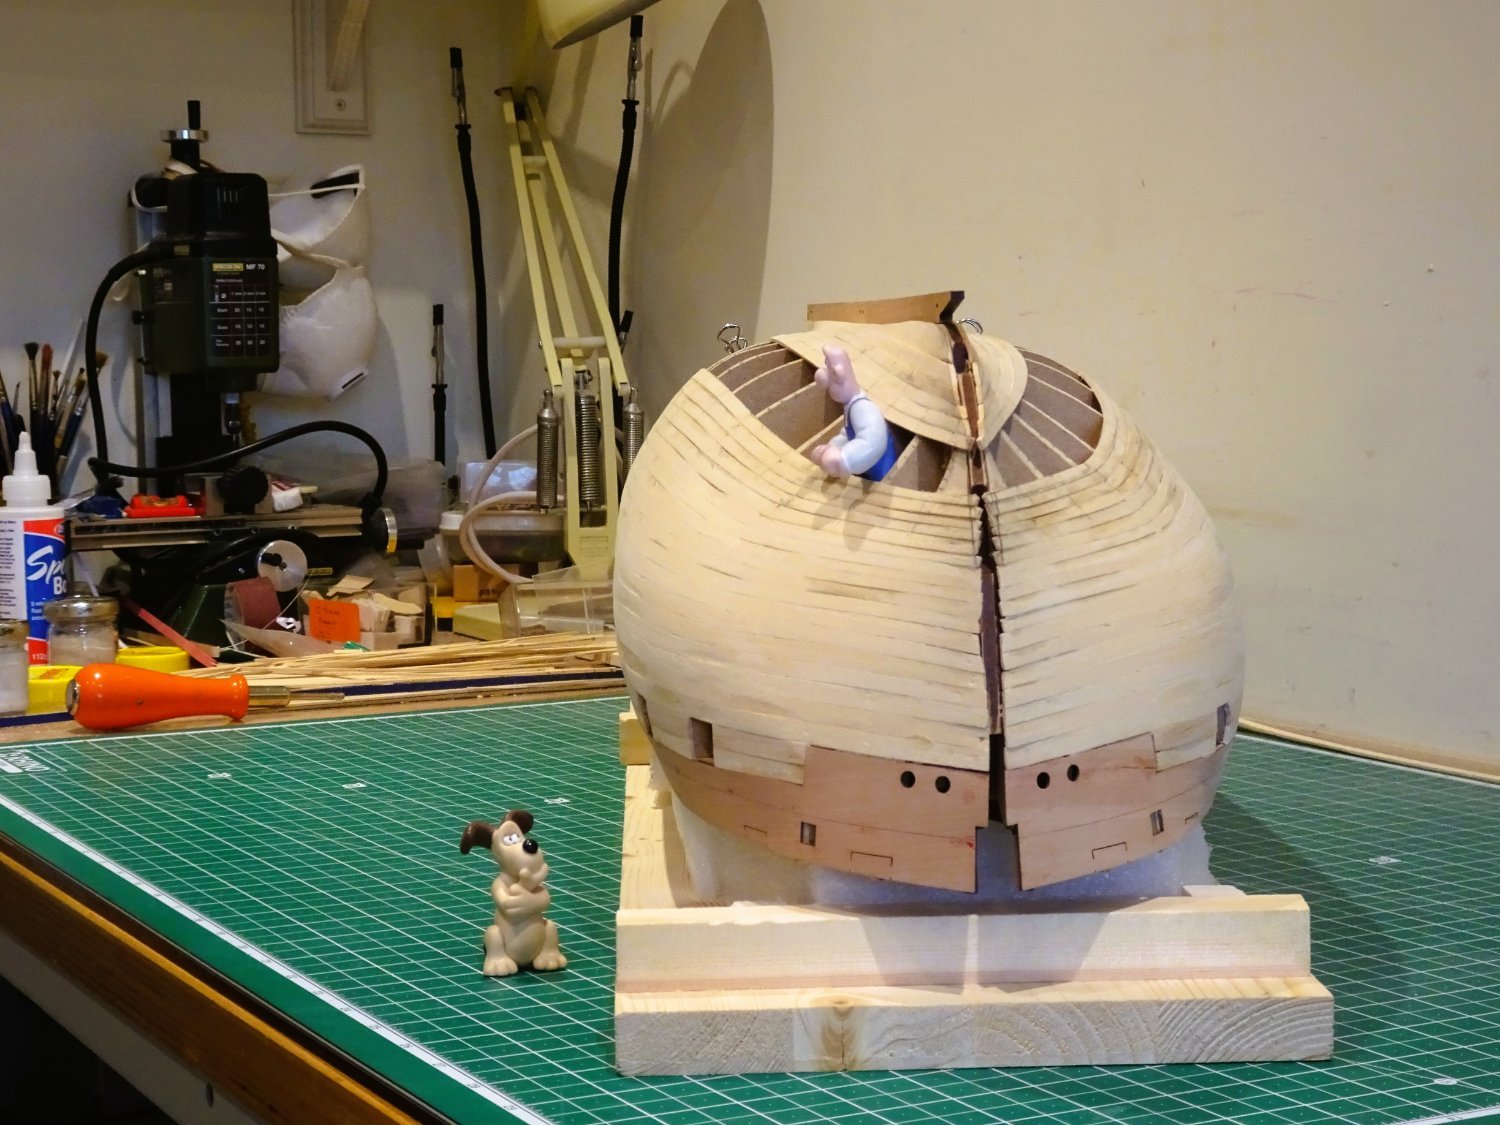
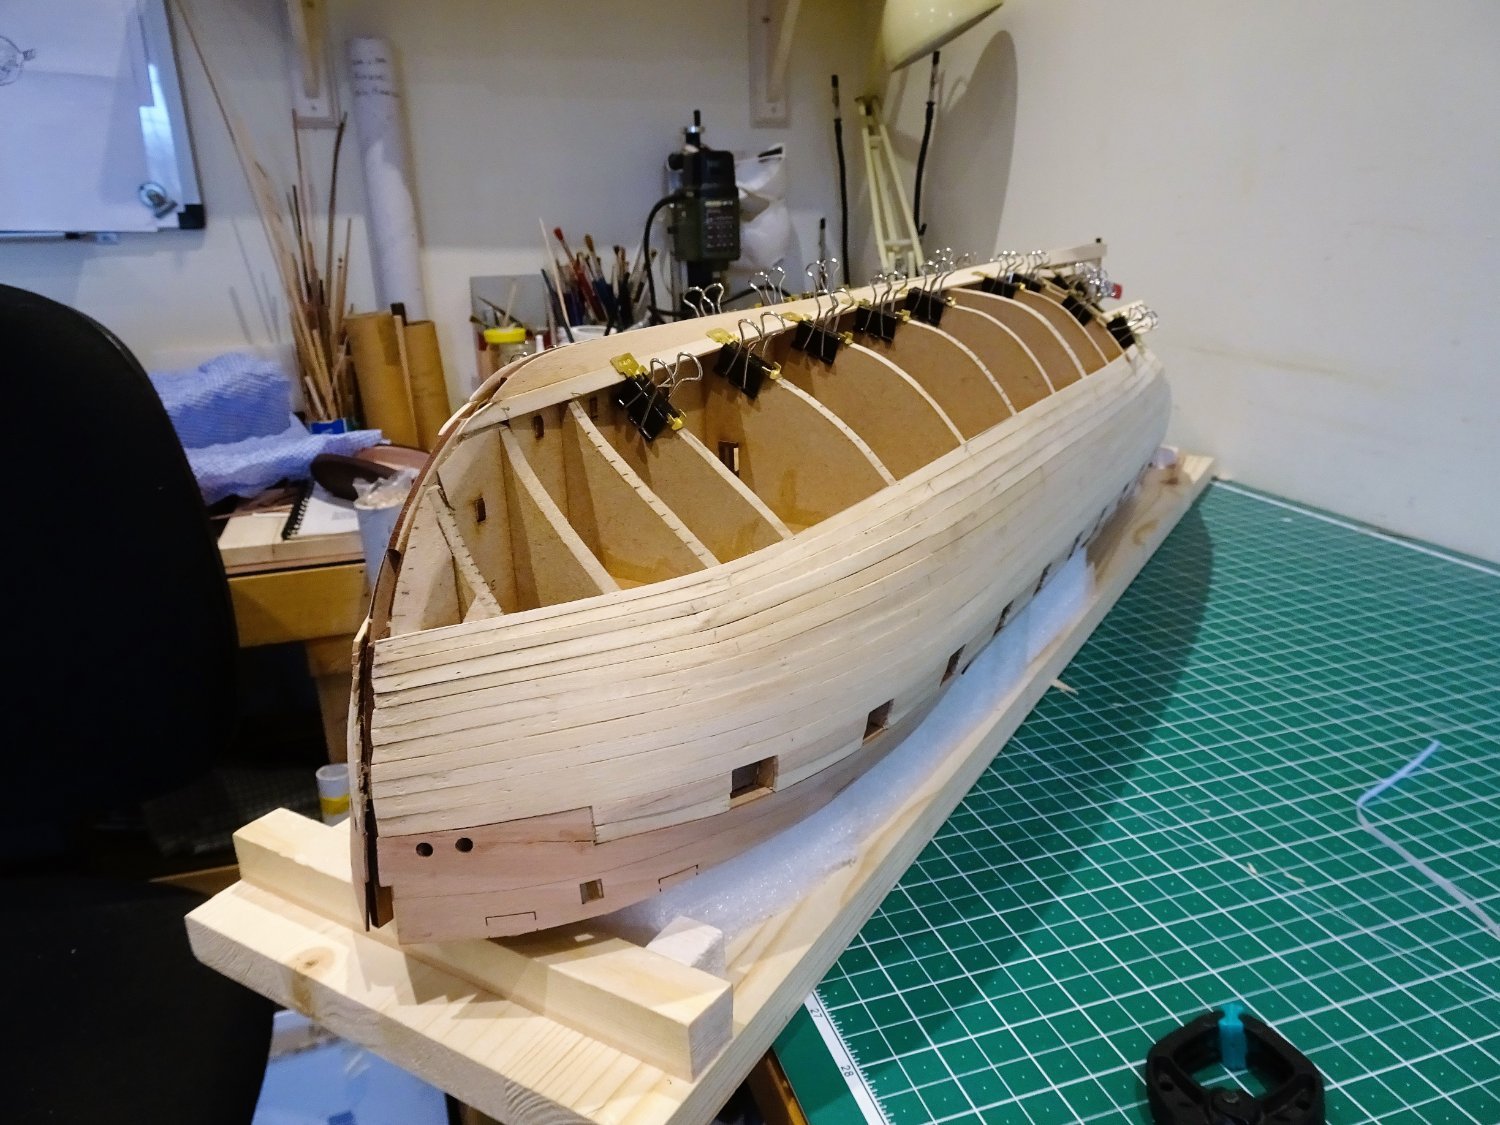
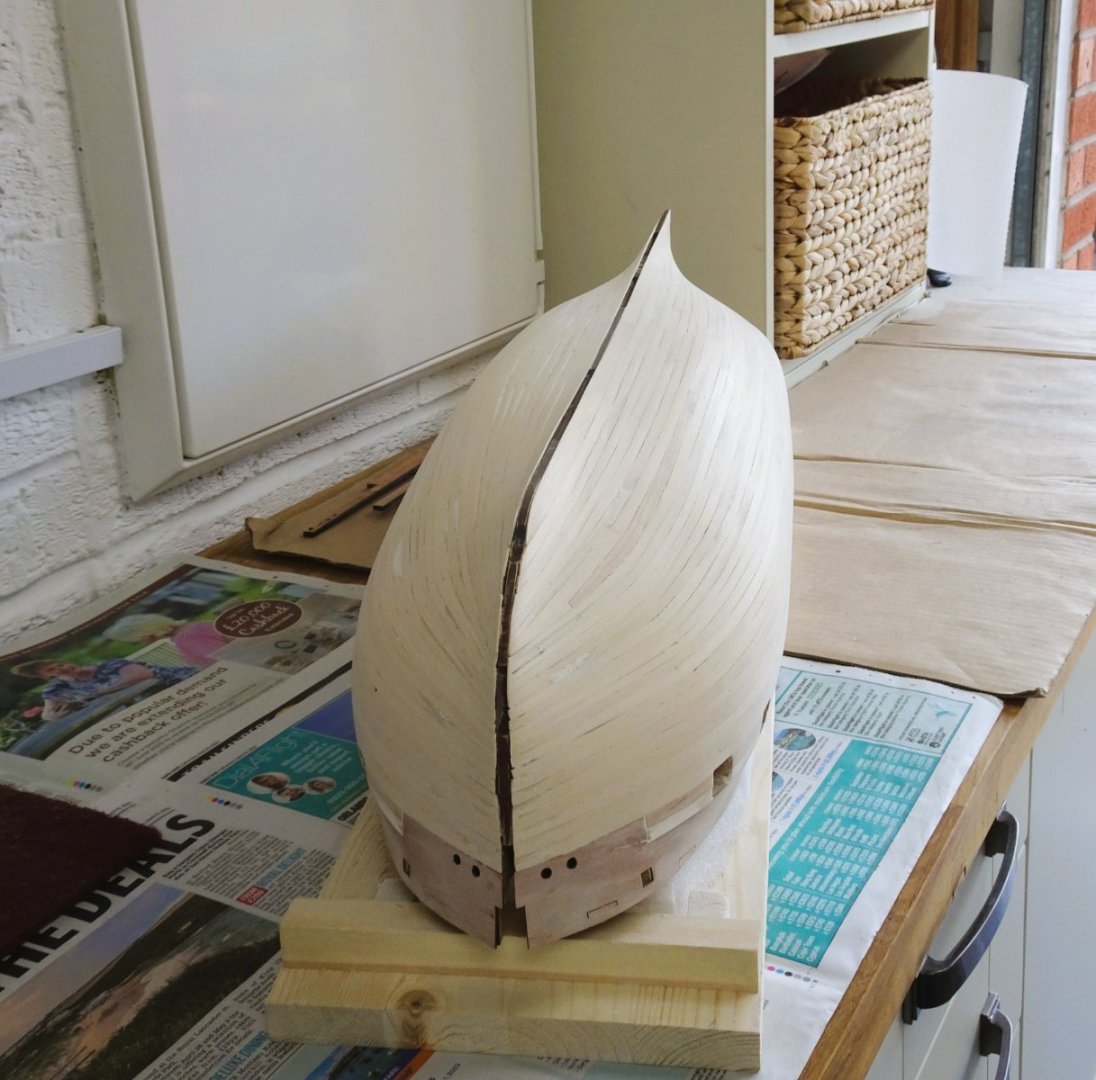
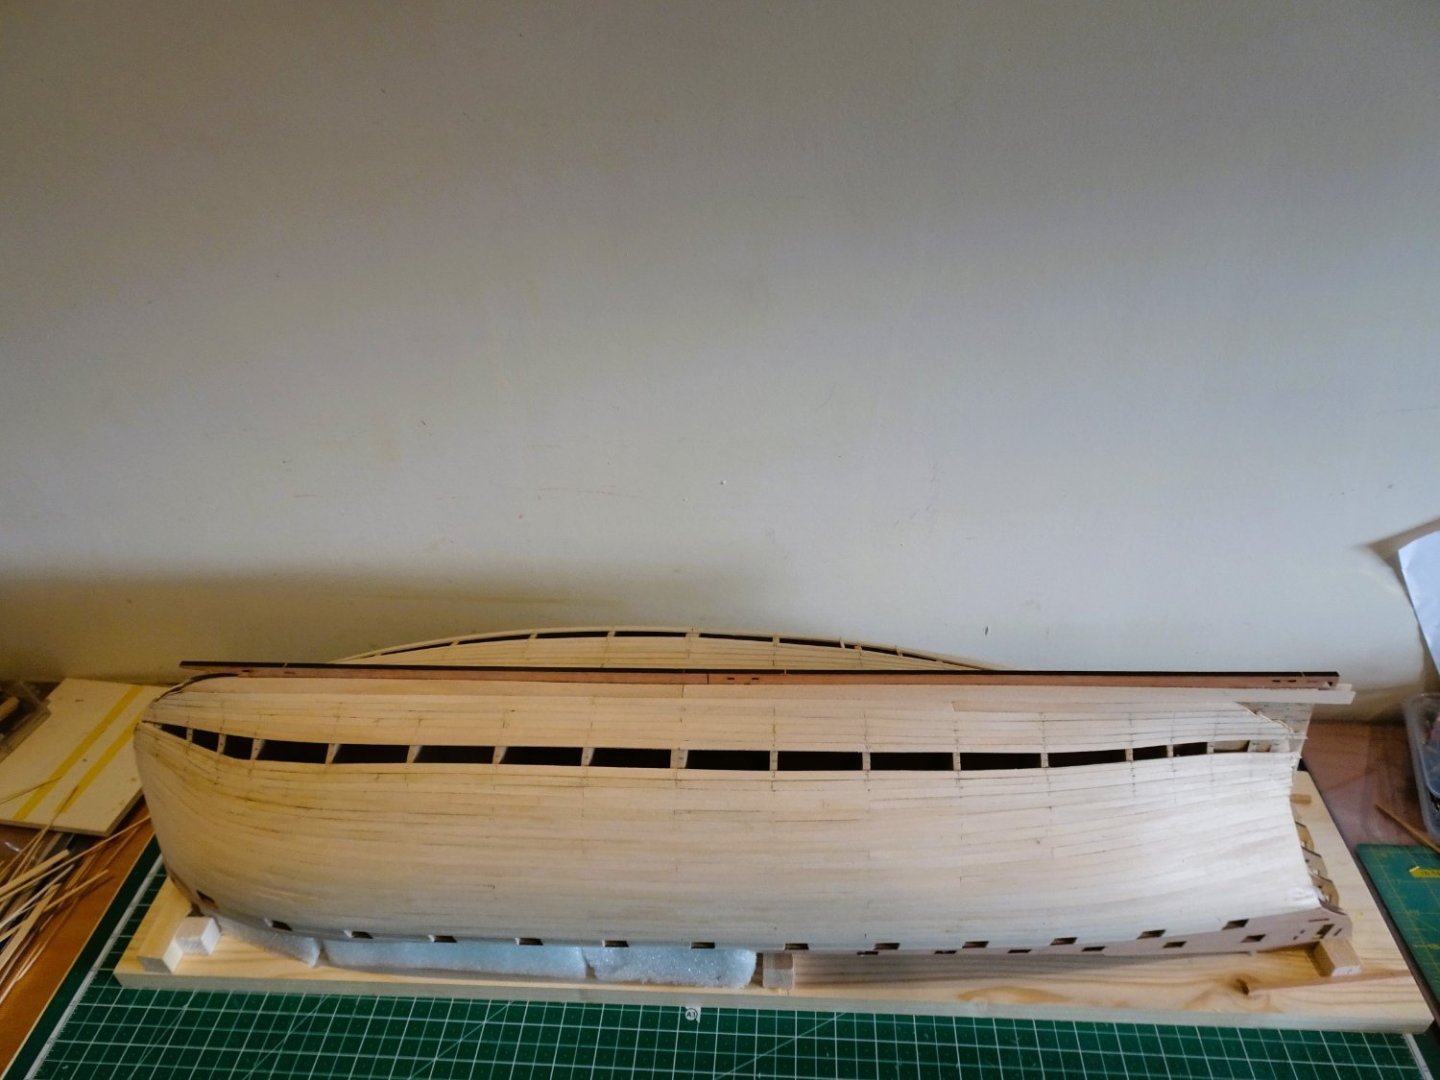
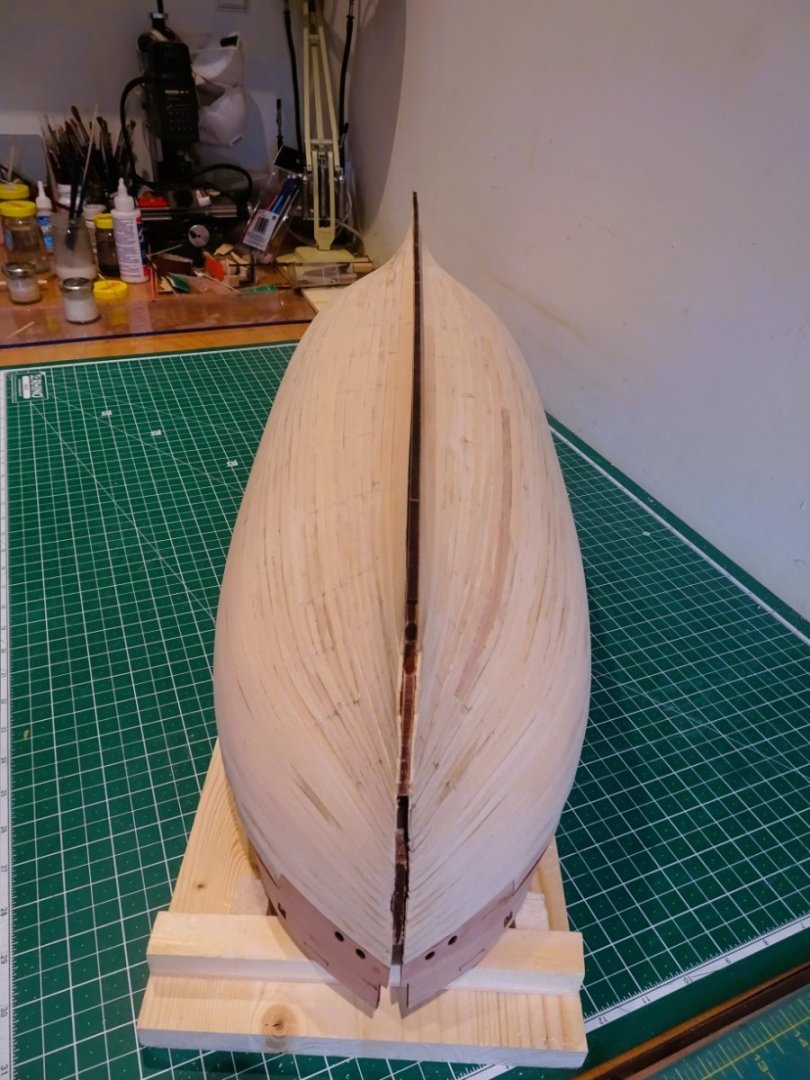
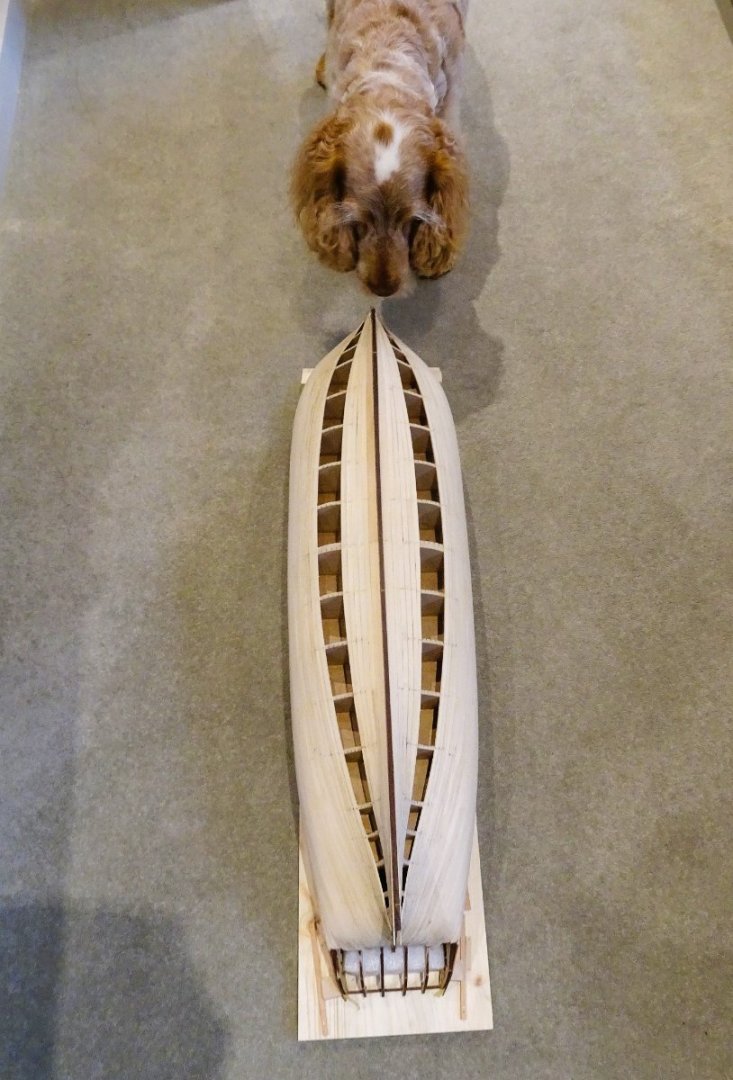
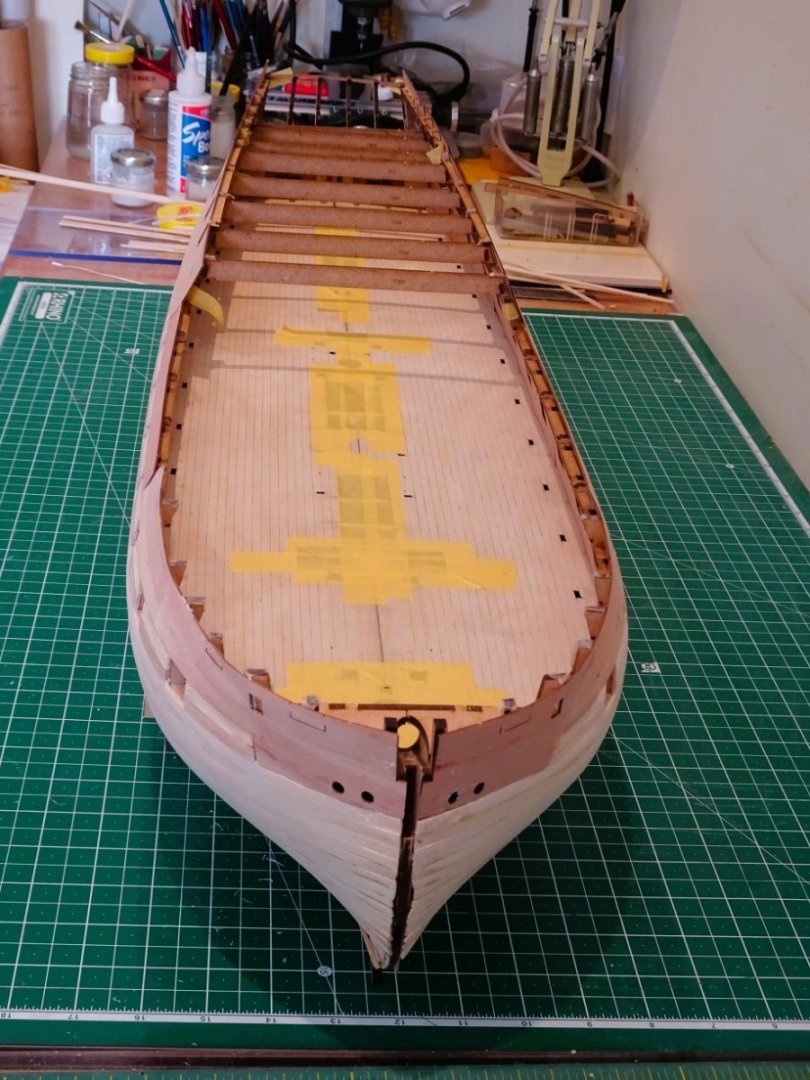
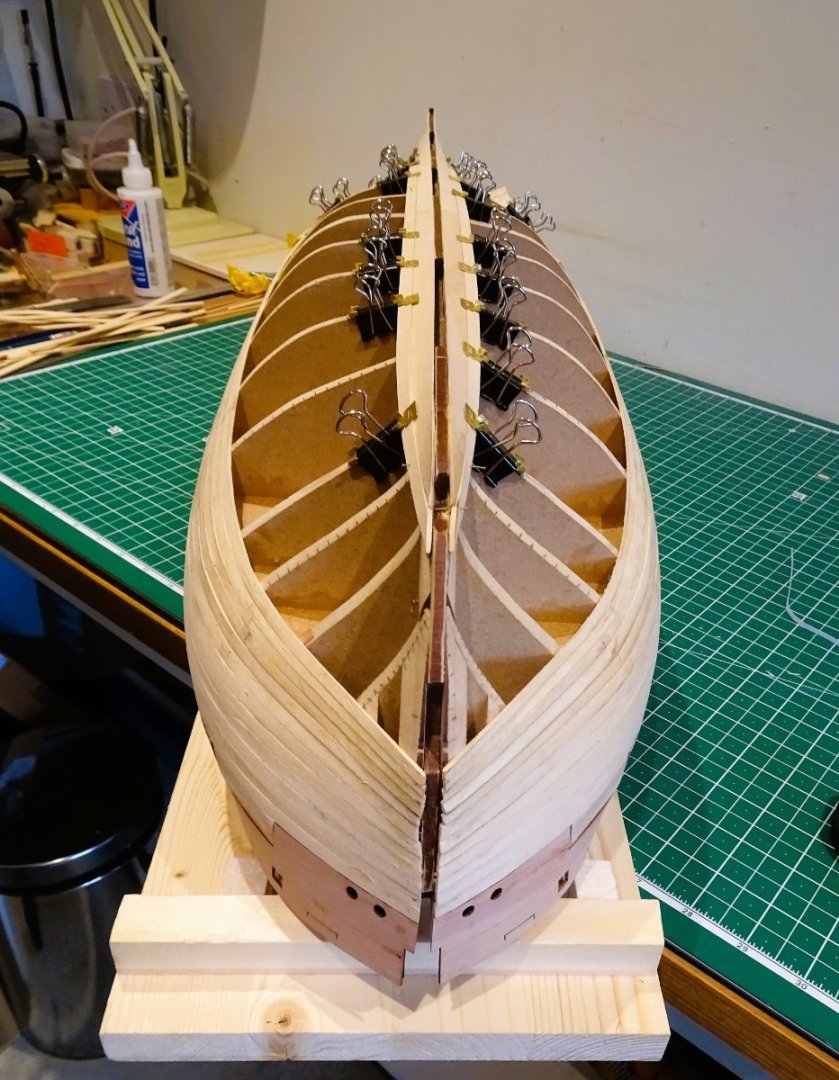
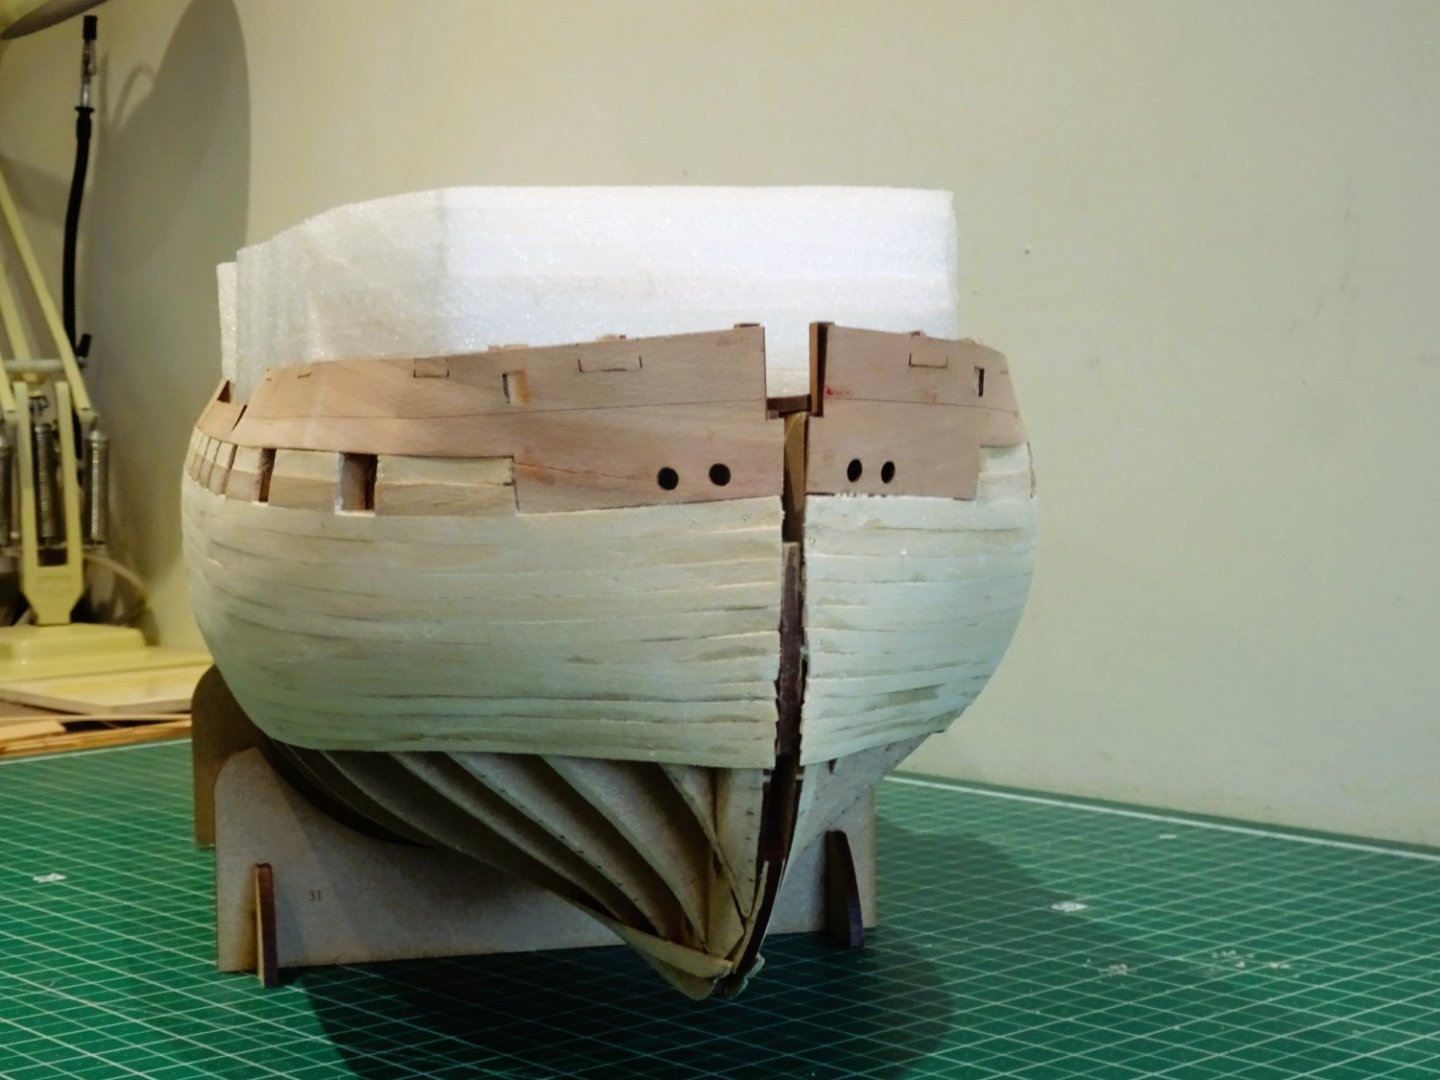
Post twenty-one Light at the end of the tunnel. I am now alternating the plank strakes from top down and keel up which should leave the final strake below the round of the hull at midships. This is a good place to have it in case the final strake works out to be less than uniform in shape. 0752 So, Gromit, how’s it looking – RUFF. Have faith Gromit, there’s a fair bit of fettlin’ to do yet. 0761 Five strakes now remain, and I have re-marked the ‘ticks’ hopefully for the last time. 0755 0757 Don’t say it William, I’ve heard it all from Gromit. 0760 Has it only been three weeks since I started planking, how time flies when you’re having fun. 🙄 Onwards… B.E. 15/04/2023


- 648 replies
-
- 36
-
-

-
- Indefatigable
- Vanguard Models
- (and 1 more)
-
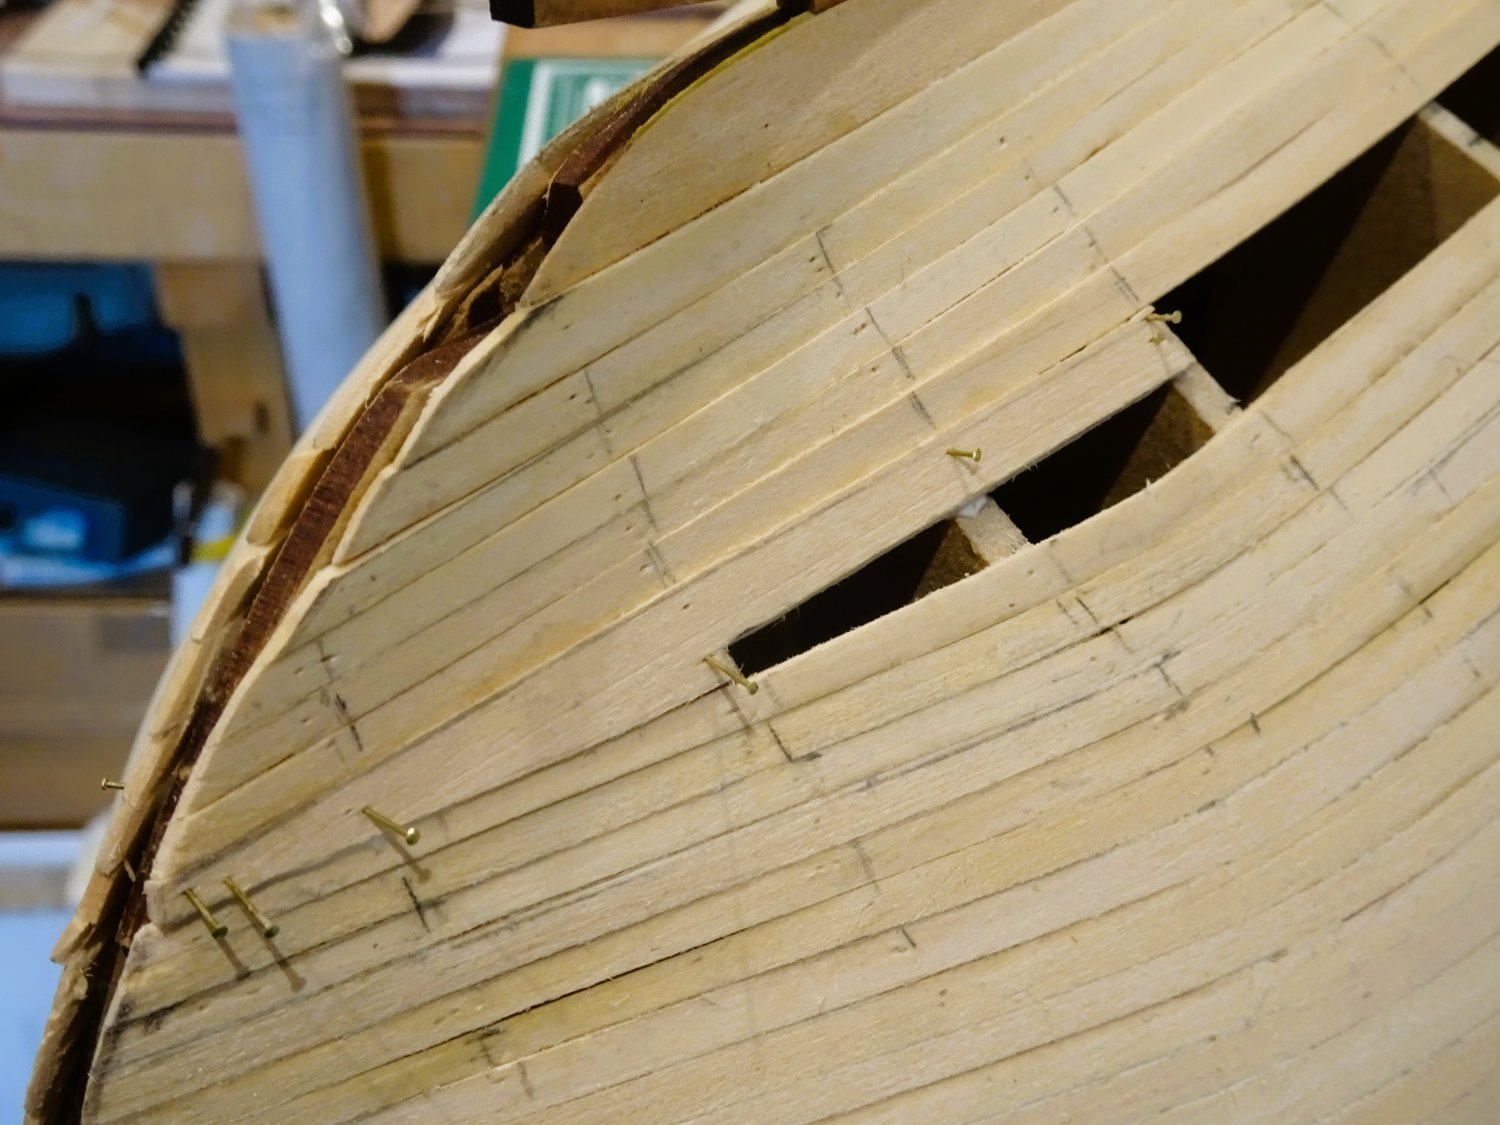
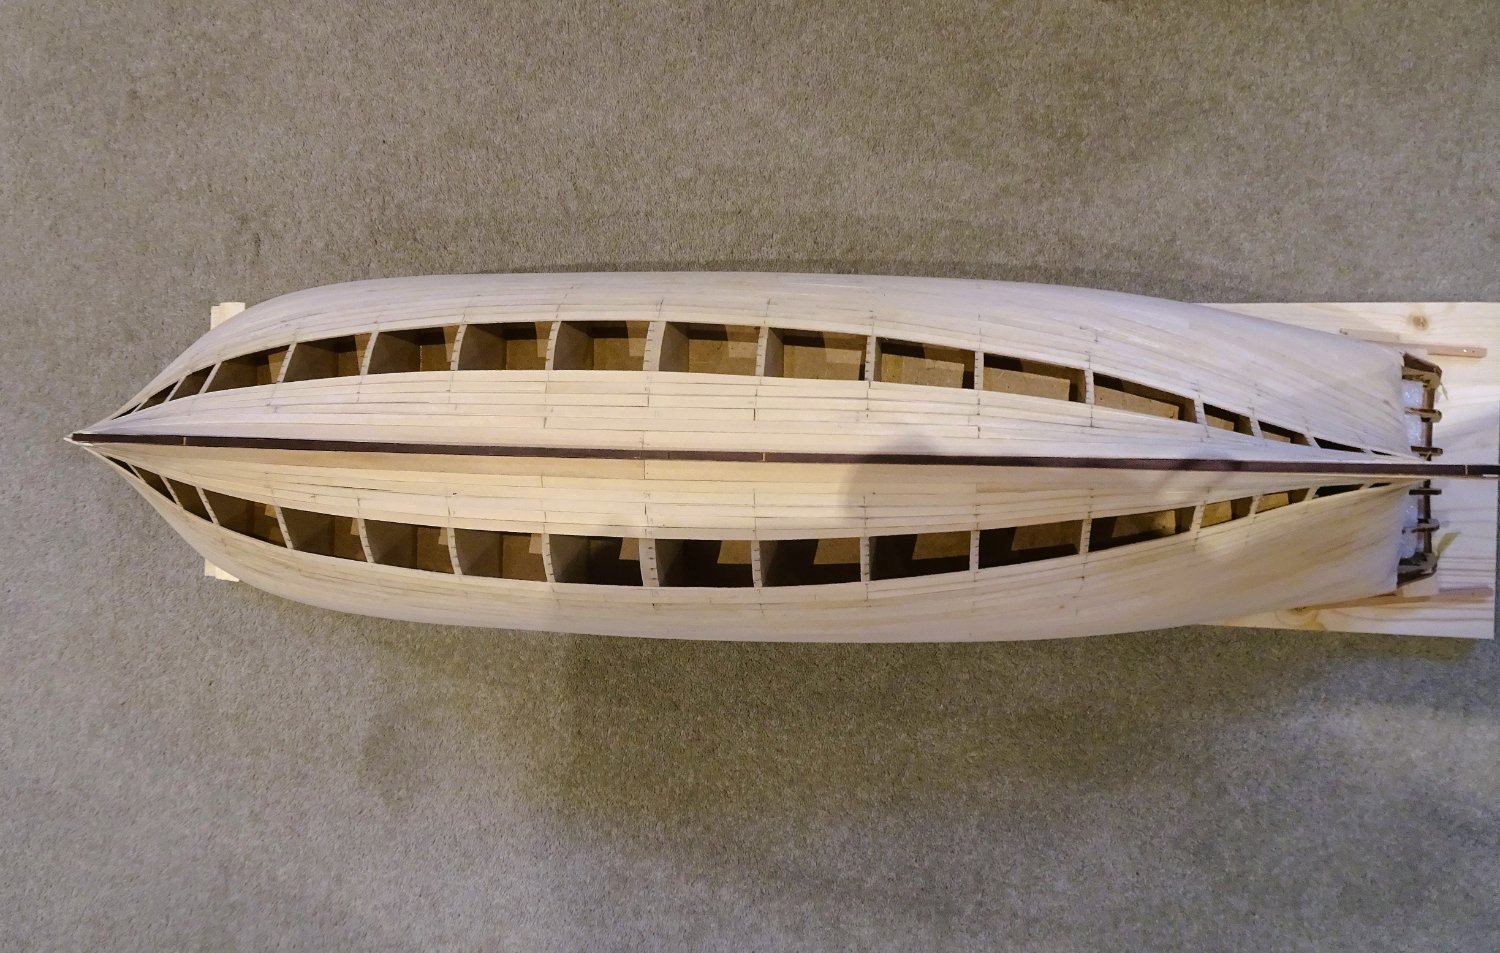
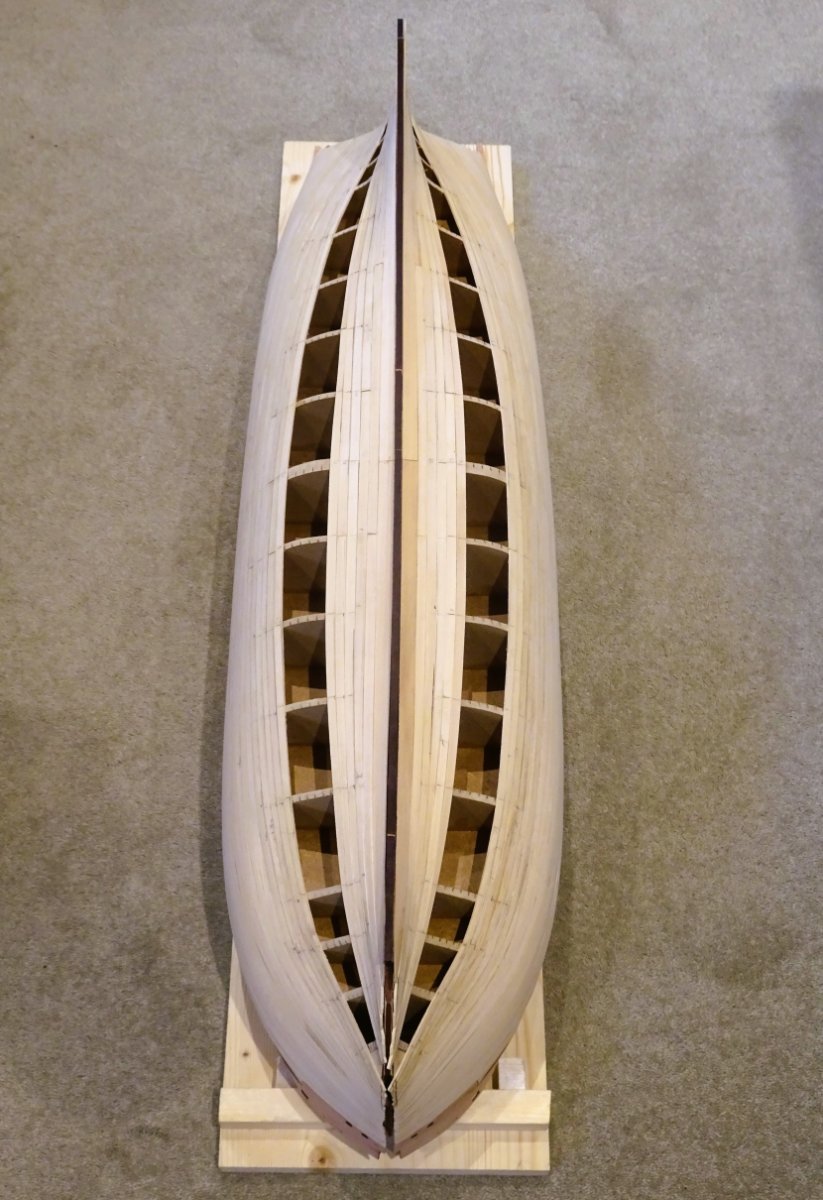
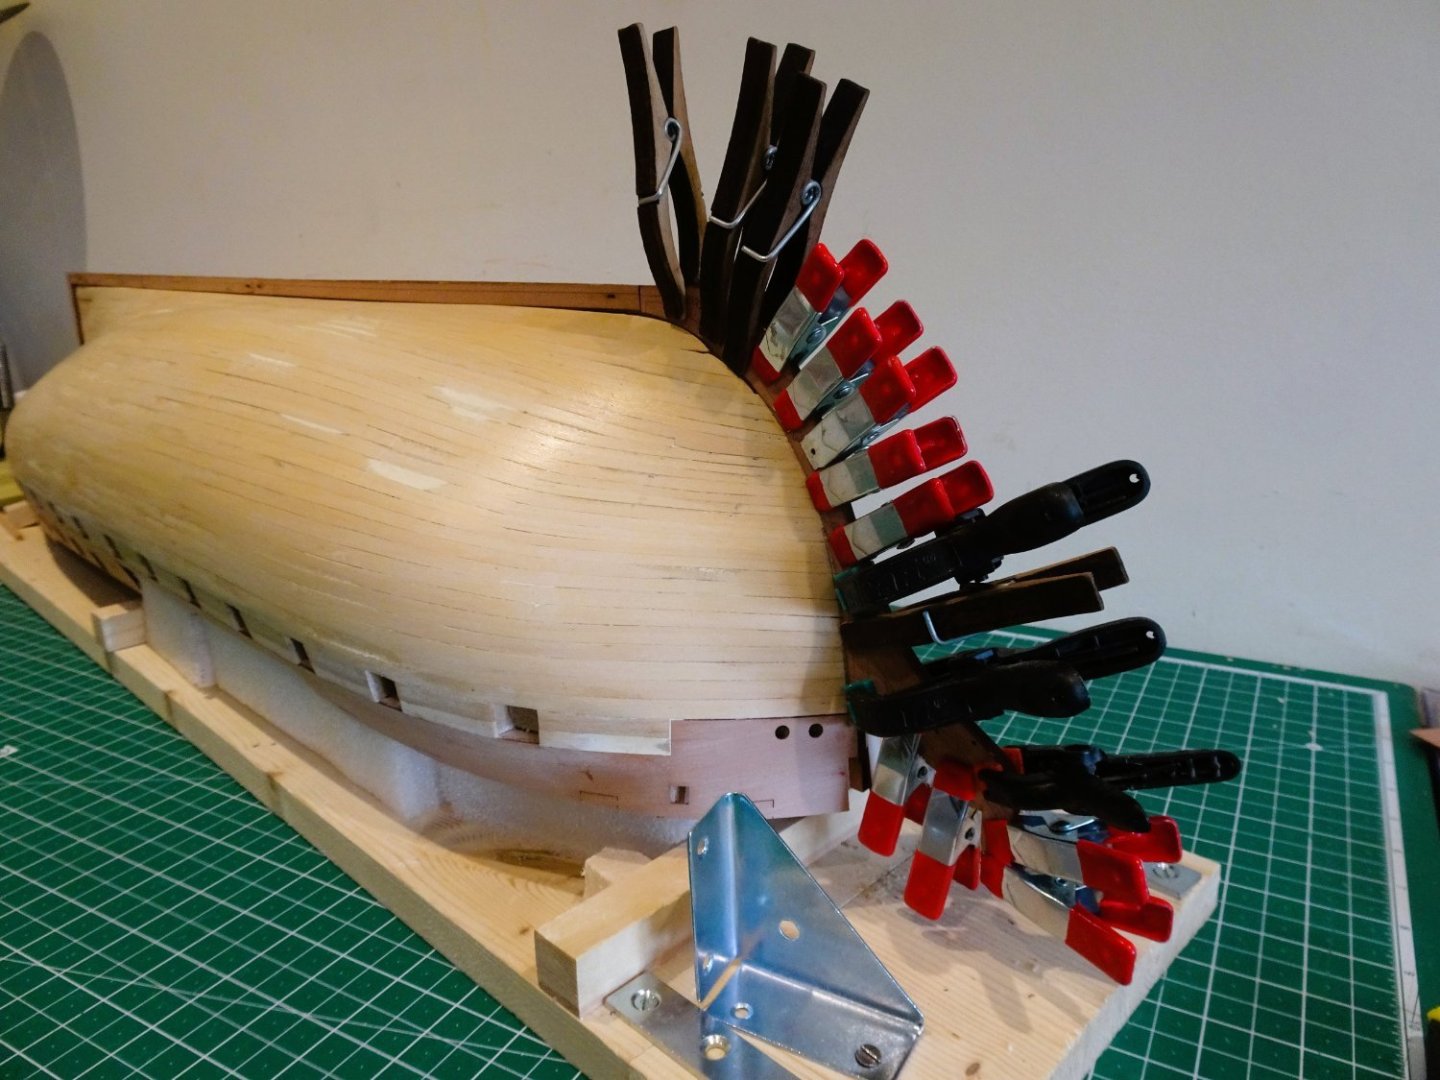
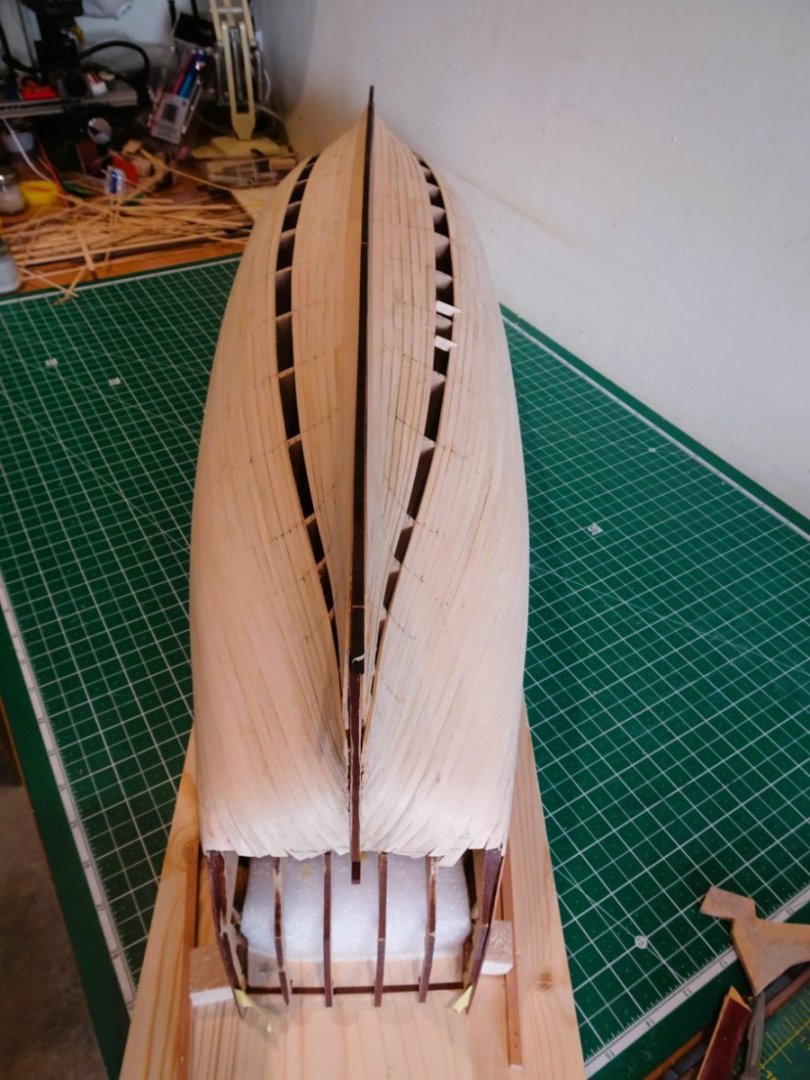
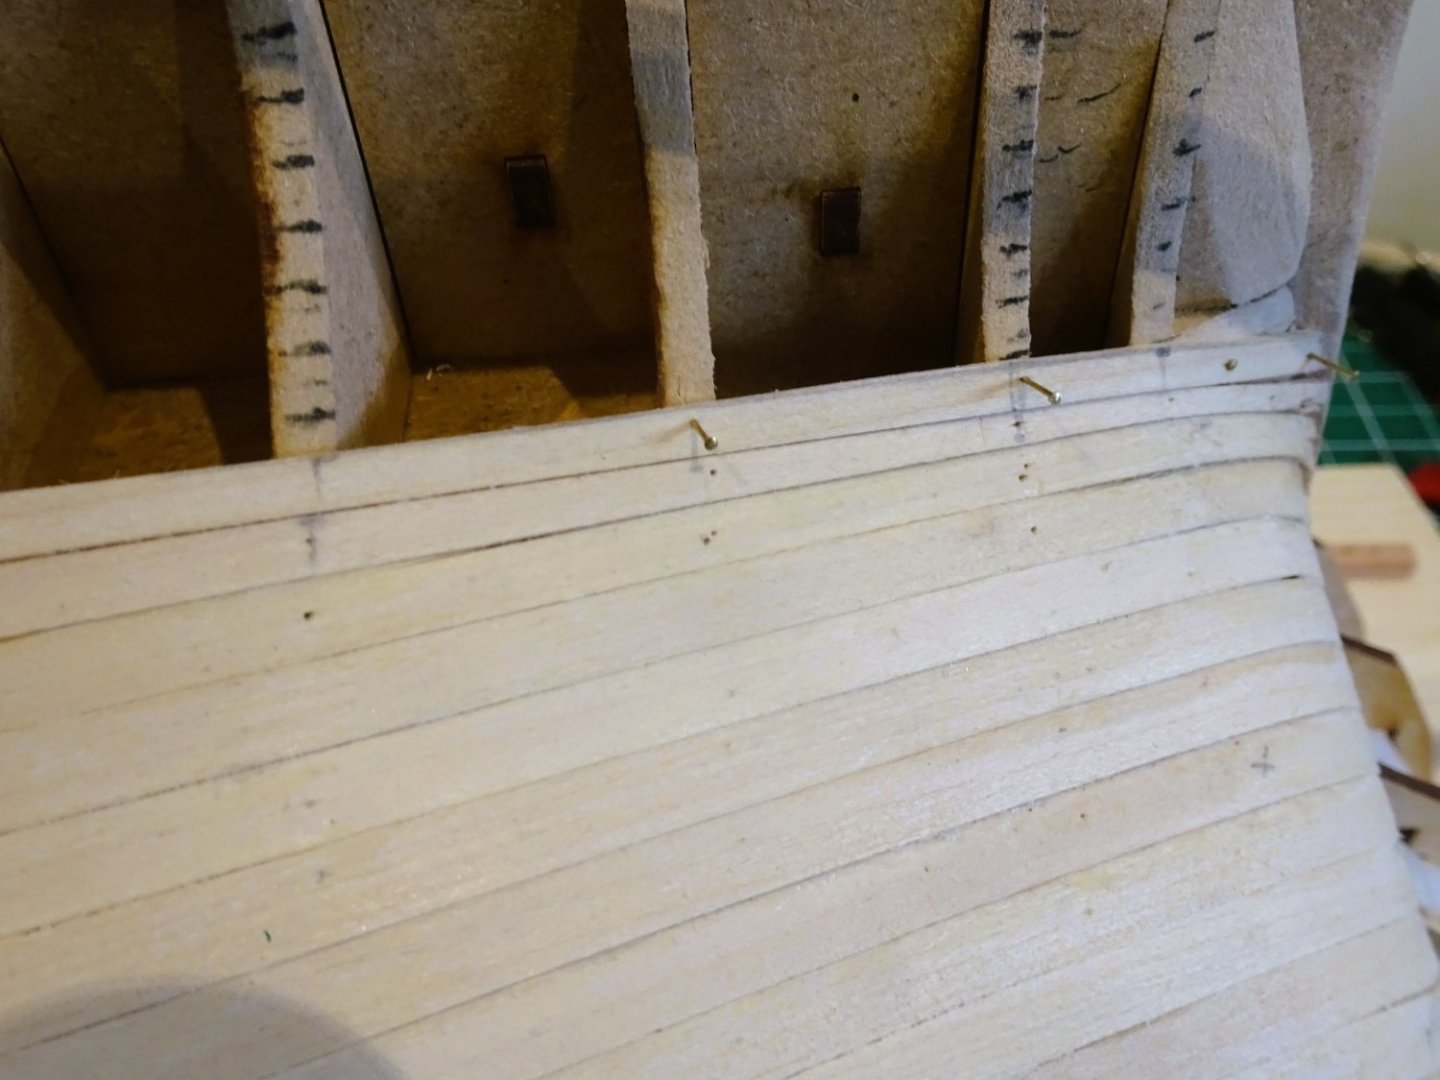
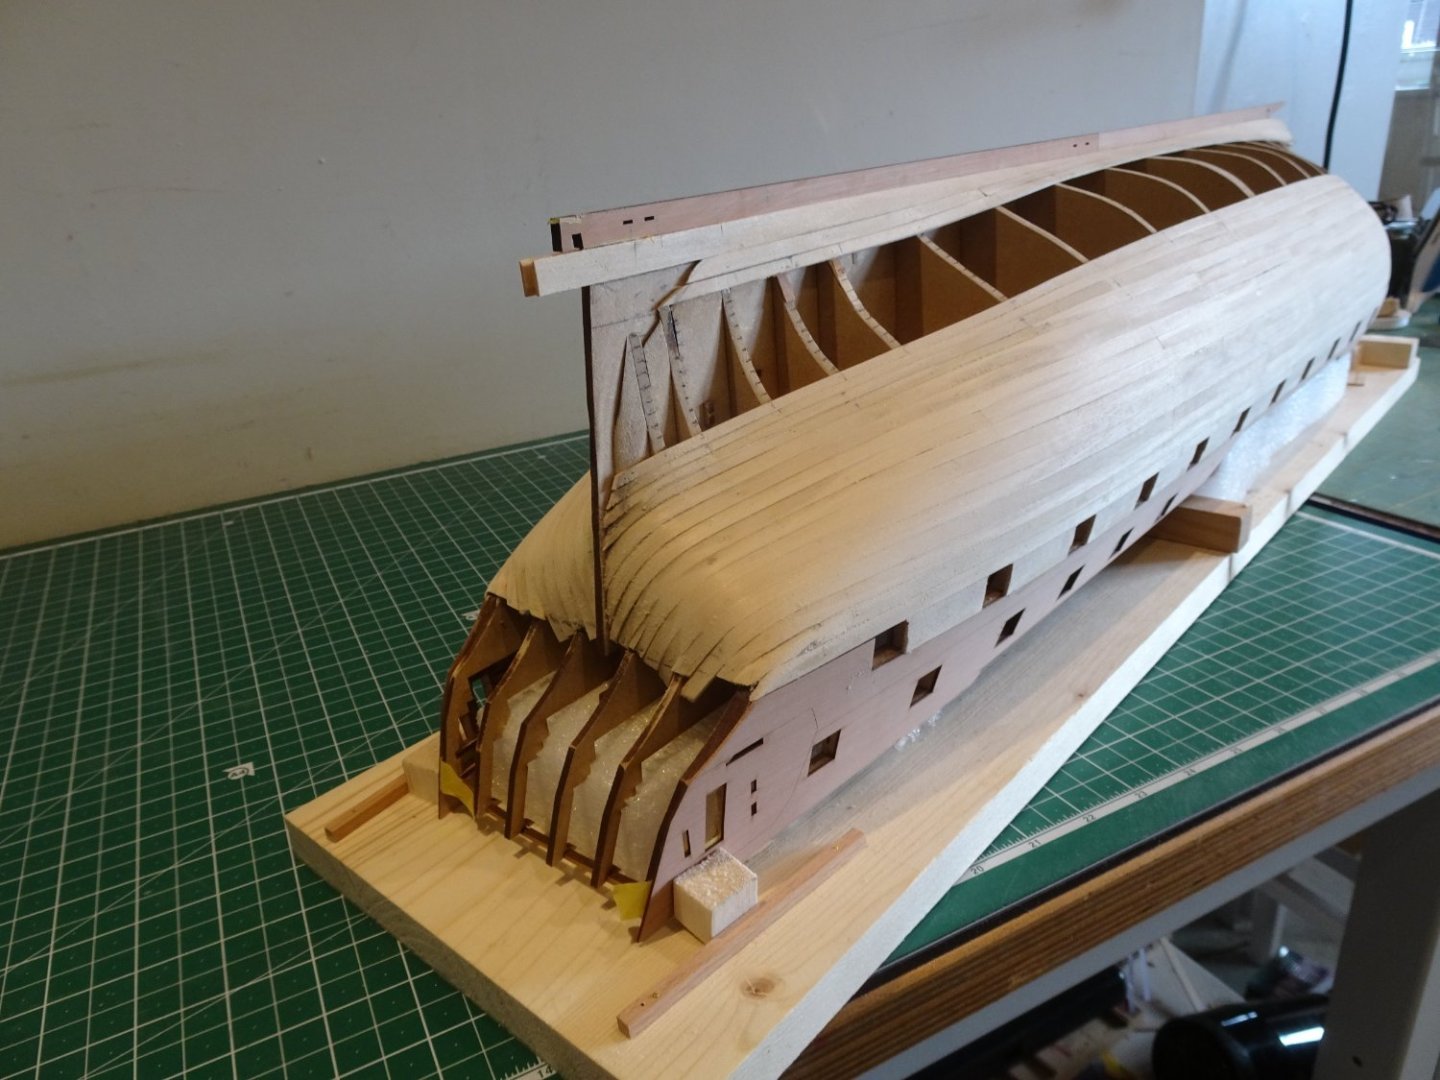
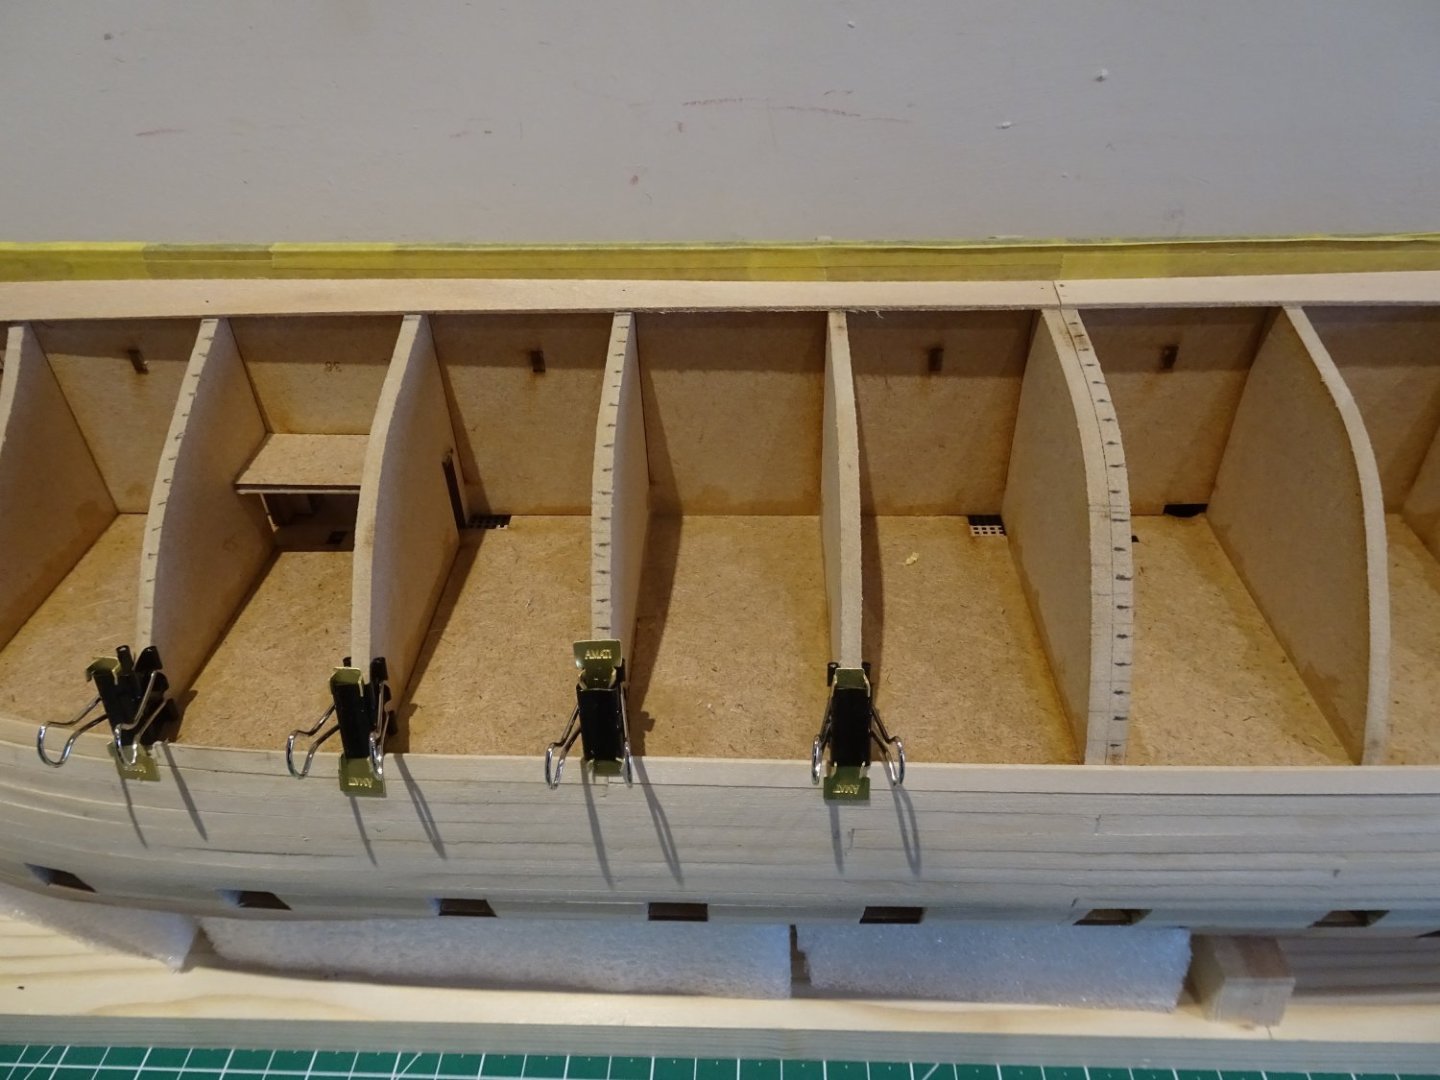
Thanks Alistair, Glenn has provided you with the answer. You can make them yourself using the spring clip with one of the handles from another inserted lengthways to provide the tongue. Post Twenty … and more planking. 0731 A couple more plank strakes are now added up from the Garboard and slowly the gap reduces. I am content that the midships gap each side remains even at 60mm. 0736 I now have ten strakes left each side to complete the first layer planking. 0729 At the stern, once I reached the stern post I began tapering; this is not a hull shape that requires wider planks at the stern. The tick marks have been recalibrated three times to this point. 0737 0749 0751 0750 Two, maybe three days should see the first planking completed and ready for sanding, and I suspect a little filling. B.E. 12/04/2023.

- 648 replies
-
- 23
-
-
- Indefatigable
- Vanguard Models
- (and 1 more)
-
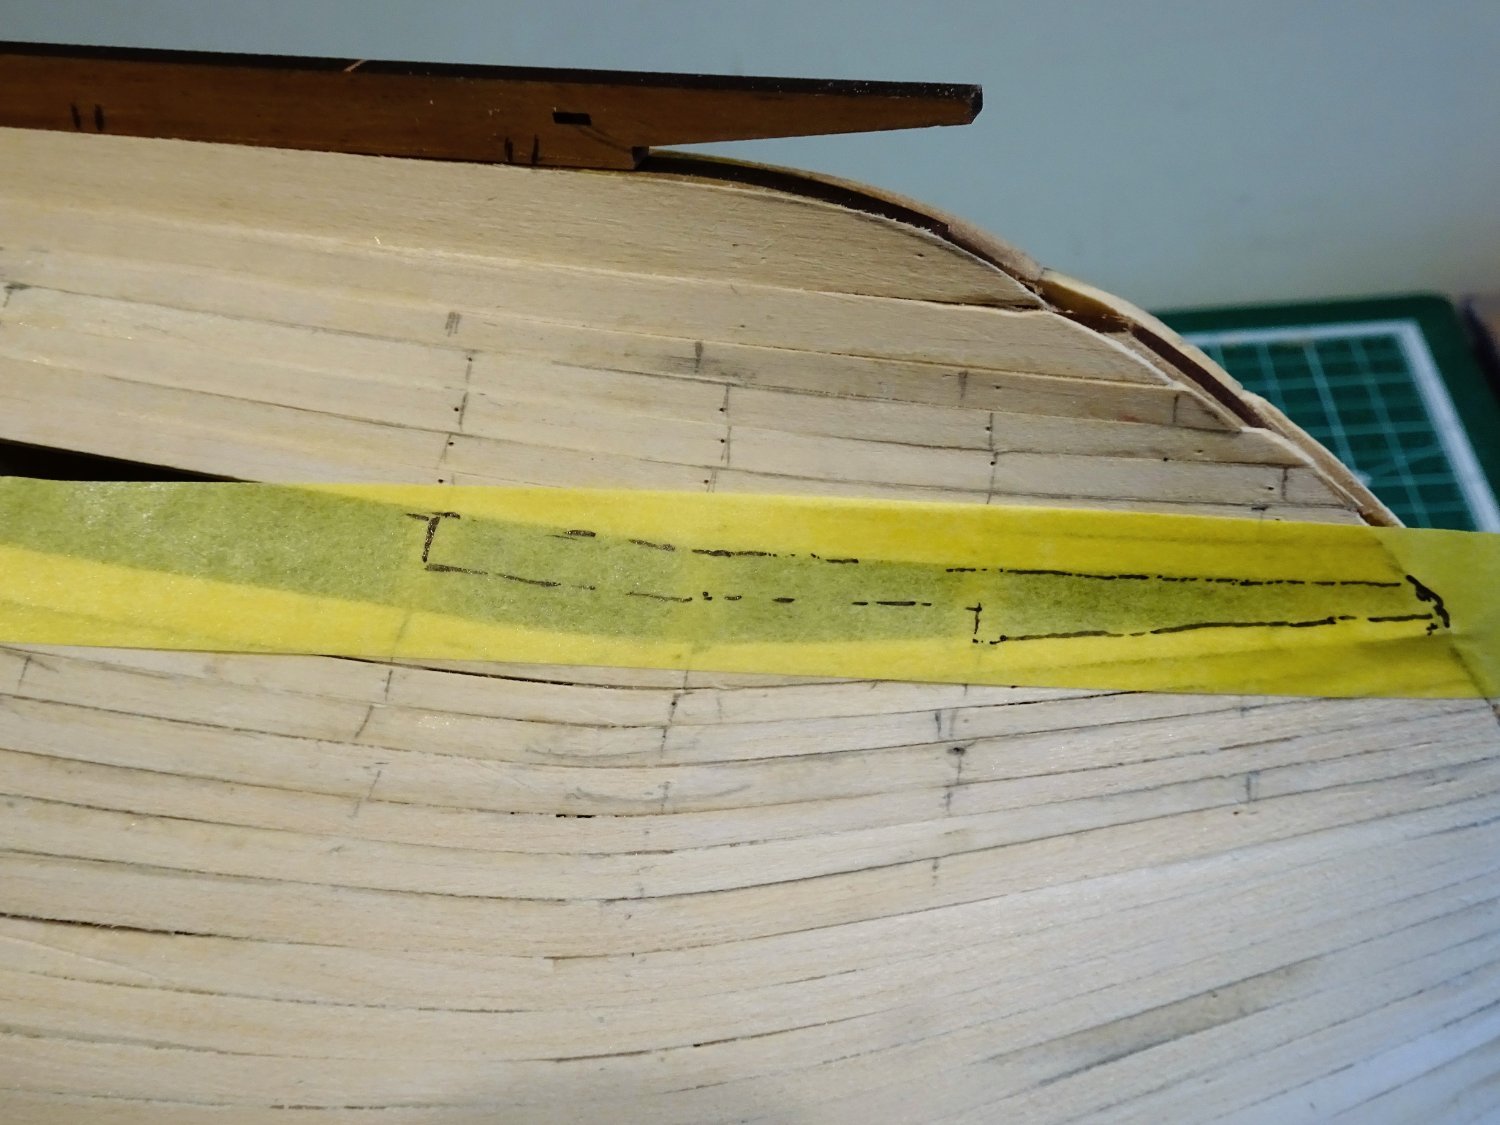
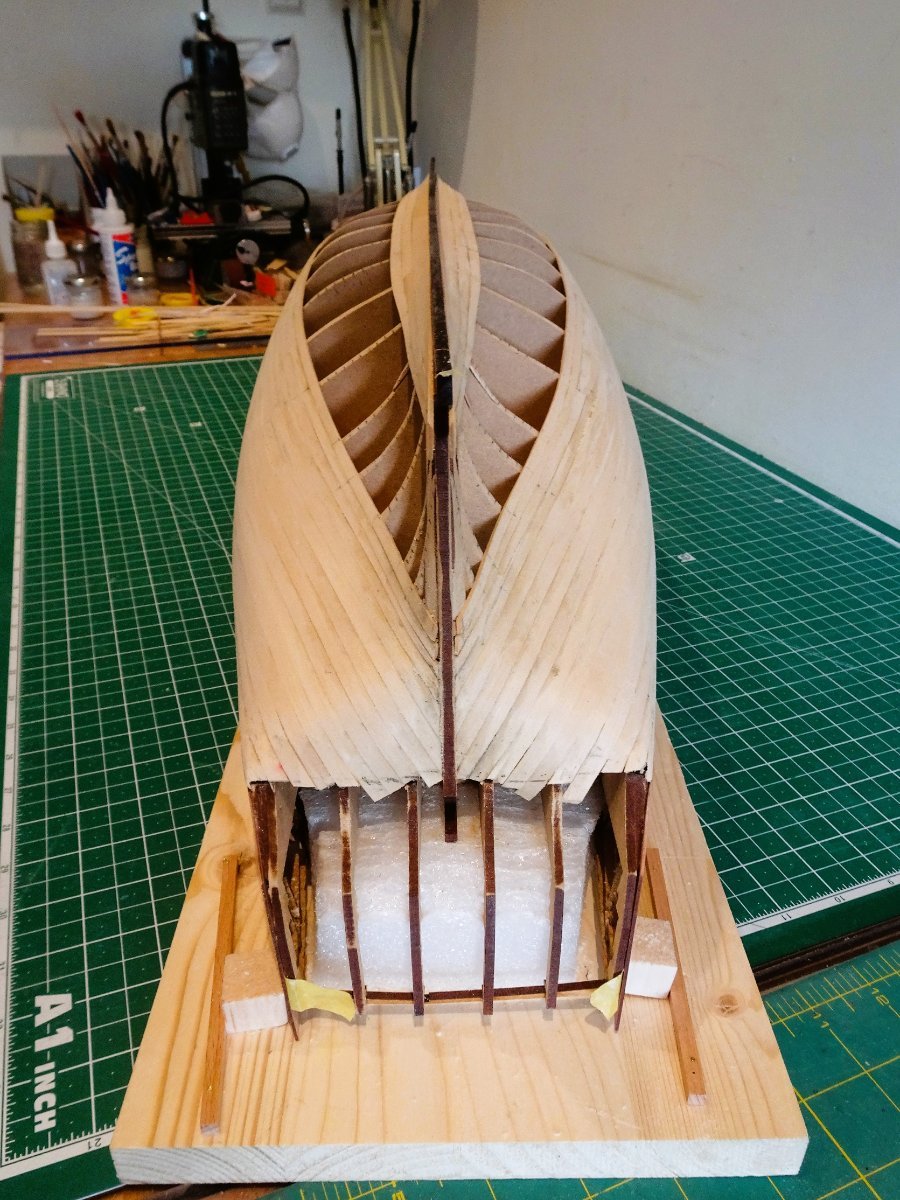
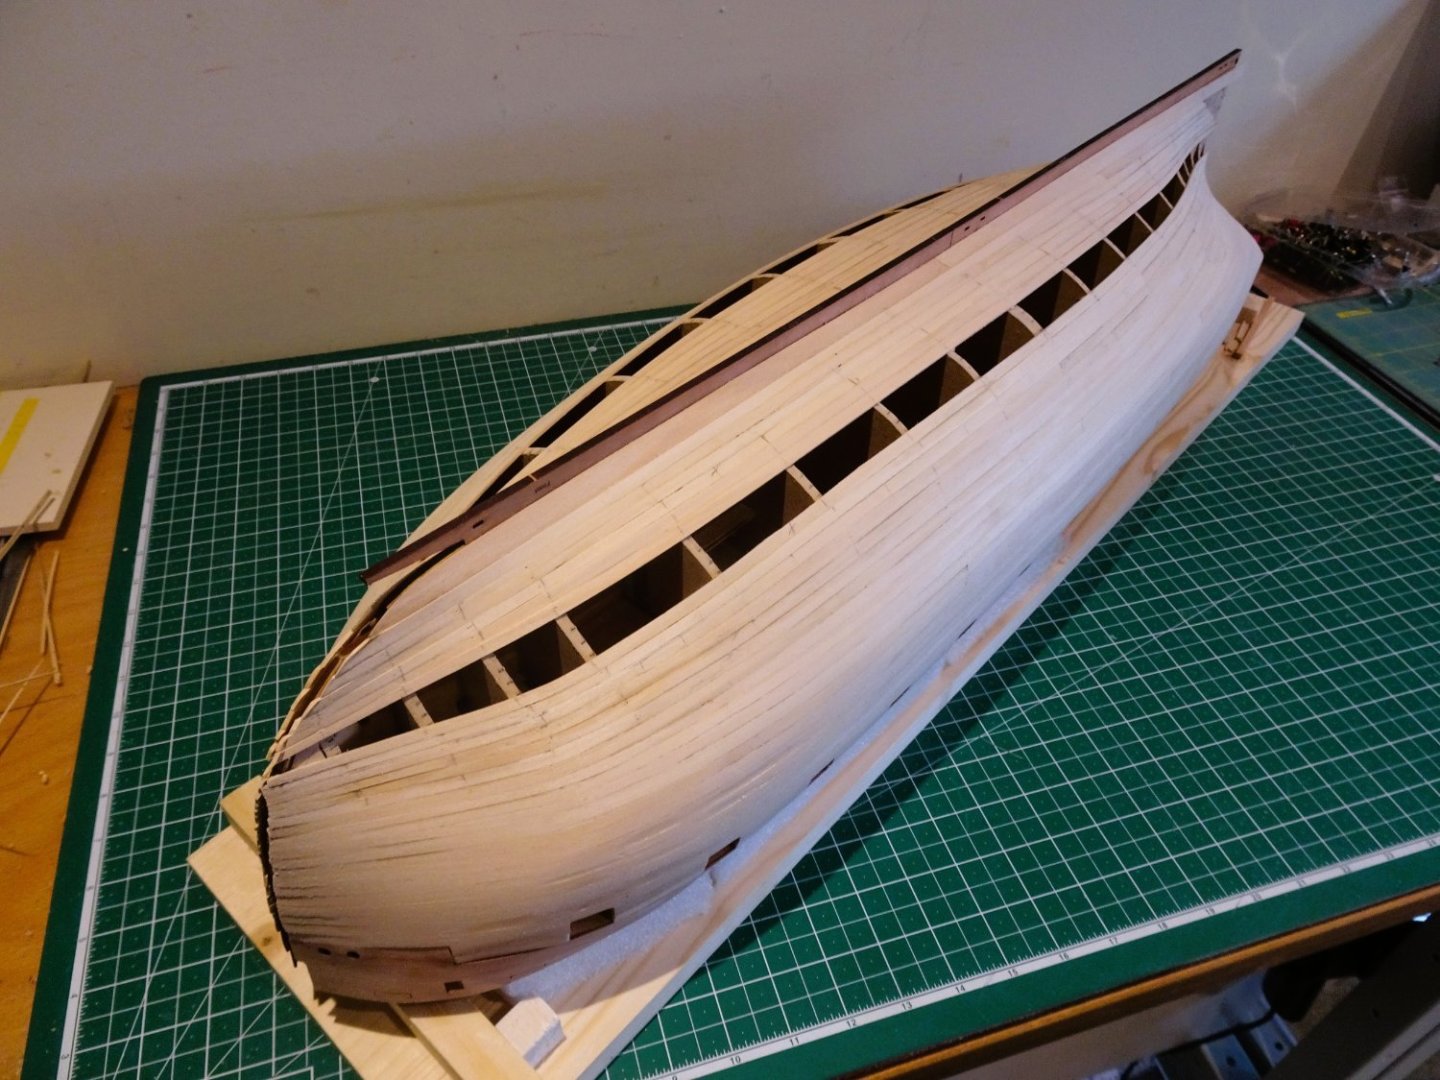
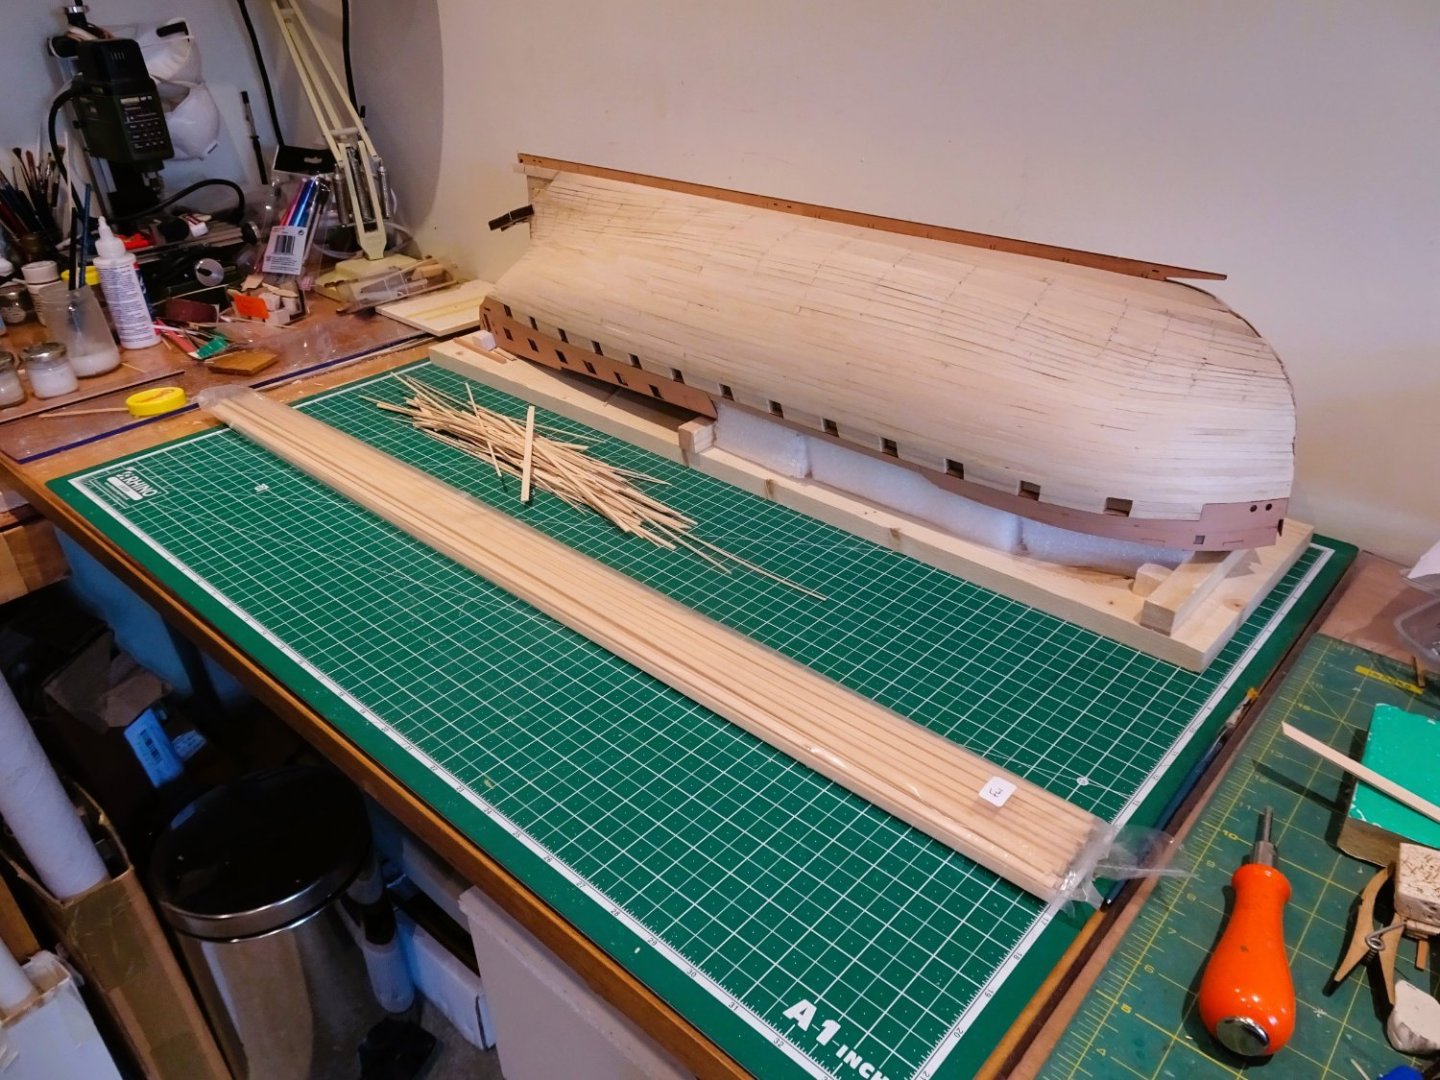
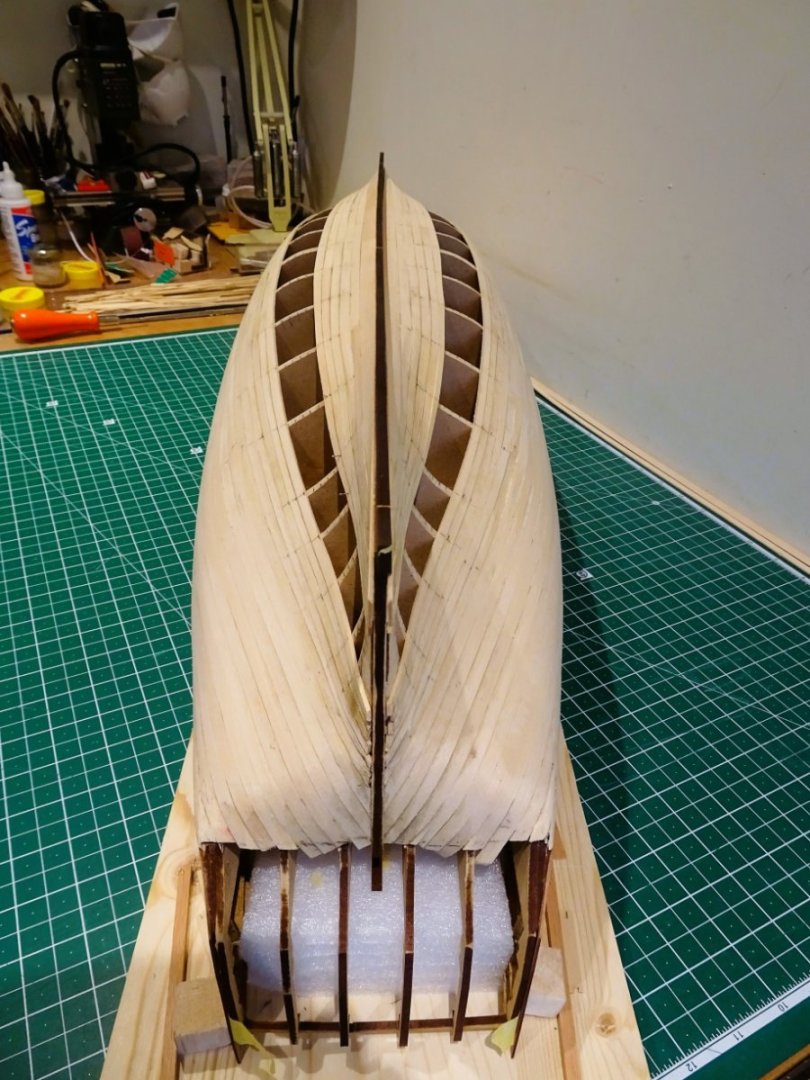
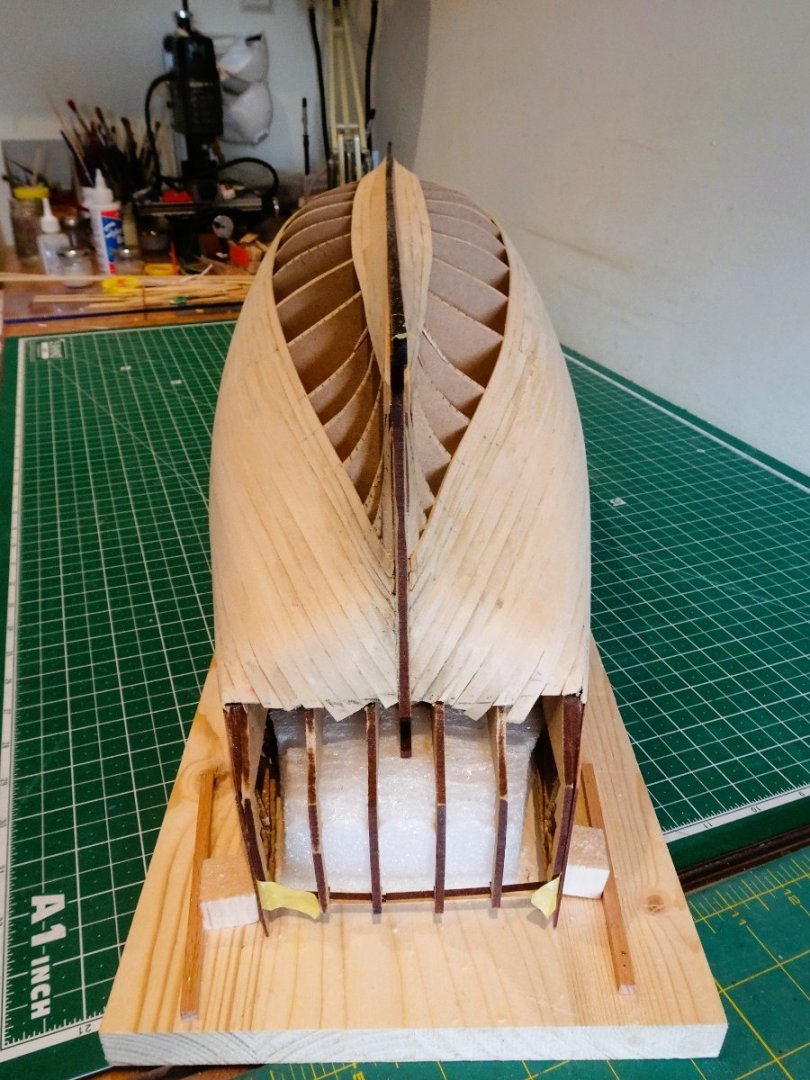
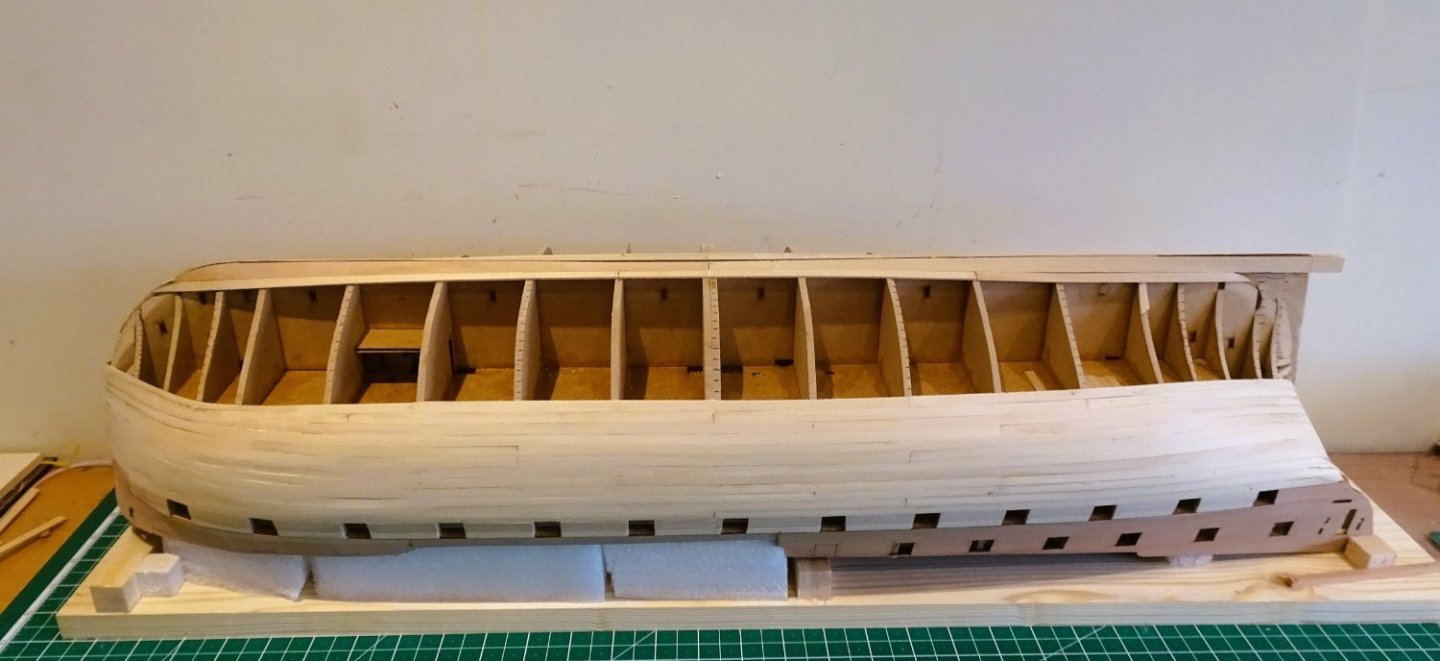
Post Nineteen Hull planking continues I can now work out the planking runs. If my arithmetic is right, on paper at least I will need (20) strakes of 6mm stuff and (I) of 5mm. At the bow the planks will need to taper to 3mm. 0718 I am using the MSW download planking fan which has the added advantage of being the correct 6mm spacing at the maximum width of the base of the fan. The provided lime strip is of a nice quality but there are variations in widths. A random sample indicates a range between 5.3 – 6.0mm and thickness 0f 1.42 - 1.58mm. These small variations do have a cumulative effect and create ridges and hollows. This is not a big issue and there is plenty of meat to sand out the irregularities. 0706 On first layer planking I use tick strips to mark the central and every other bulkhead with the planking lines. Variations in plank widths will also impact on the marked plank runs and there will inevitably be error creep as the strakes are applied. 0707 At this point five more strakes have been added, together with another strake adjacent to the Garboard. 0713 On this build I didn’t bother to thin down the false keel in the area around the bearding line to accommodate the second planking. I thought I would follow Jim’s example and finish the first planking short, and fay it to suit the second planking against the stern post. 0714 0716 0709 Edge bending is now required on all bow strakes. 0720 0721 Not a pretty sight in its raw state, but hopefully she will emerge as a swan at some point. 0726 I will now re-mark the tick strip results in the remaining space and apply another five strakes. B.E. 10/04/2023

- 648 replies
-
- 29
-
-
- Indefatigable
- Vanguard Models
- (and 1 more)