DONATION DRIVE - SUPPORT MSW - DO YOUR PART TO KEEP THIS GREAT FORUM GOING!
×


jwvolz
-
Posts
979 -
Joined
-
Last visited
Content Type
Profiles
Forums
Gallery
Events
Everything posted by jwvolz
-

Cruizer-class Brig-Sloops of the Royal Navy
jwvolz replied to molasses's topic in Nautical/Naval History
Here's the profile plan of the Gannet/Belette(2nd of that name) which seems to show the bow platform, but not the one at the stern. The more digging I do, the more confusing this is...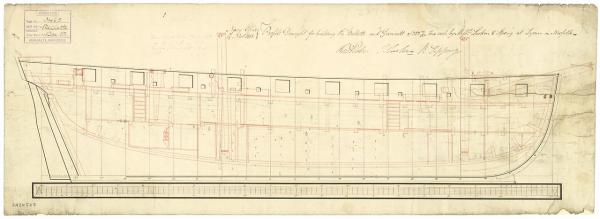
-
Cruizer-class Brig-Sloops of the Royal Navy
jwvolz replied to molasses's topic in Nautical/Naval History
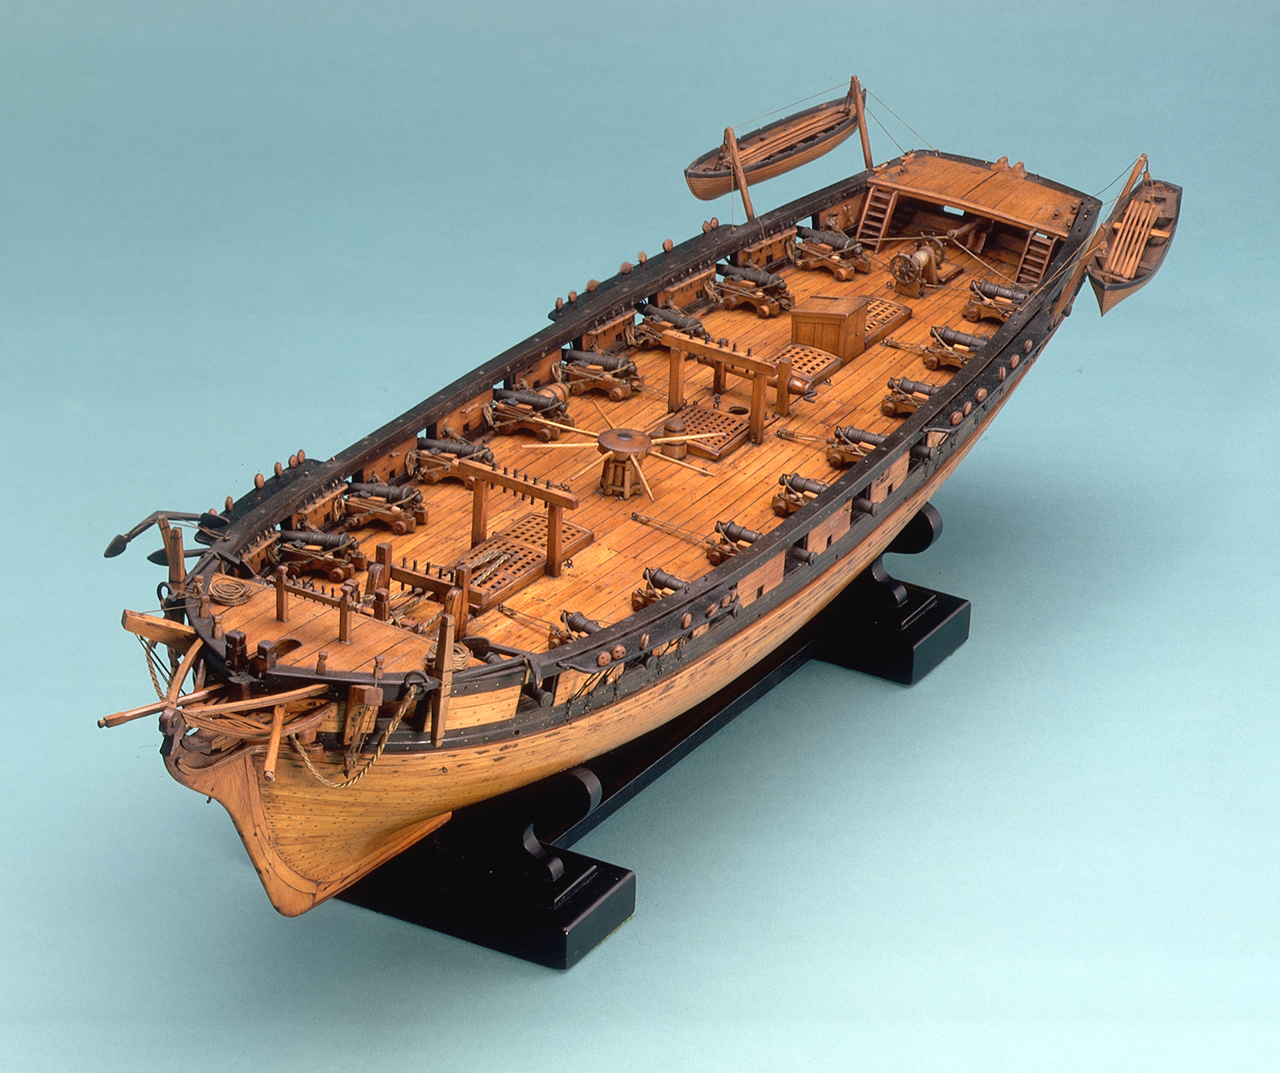
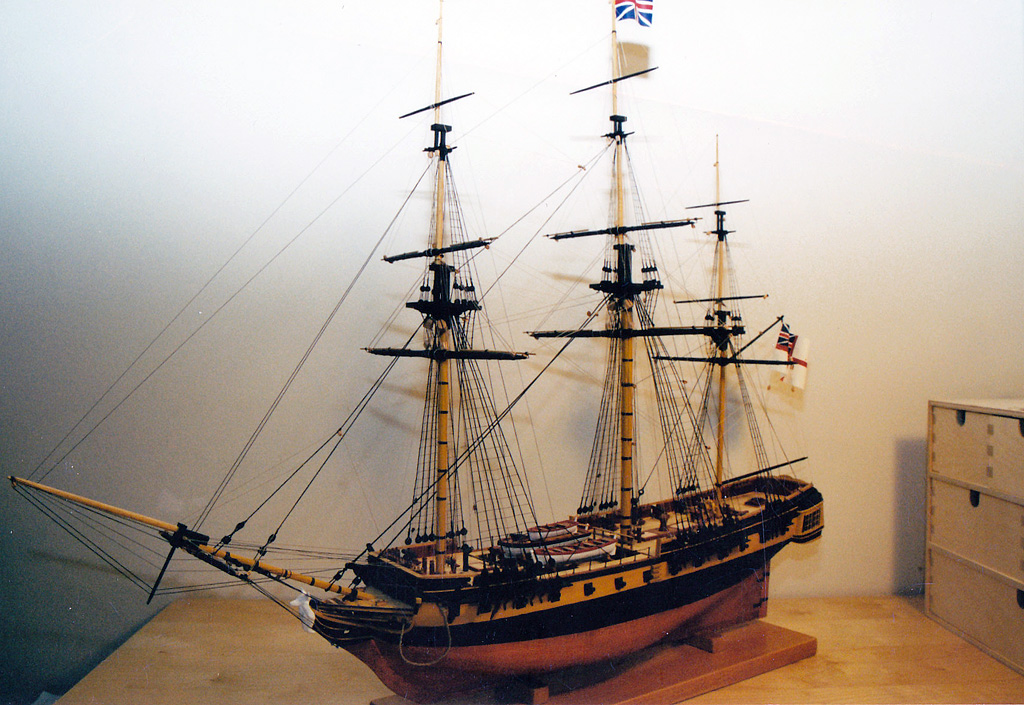
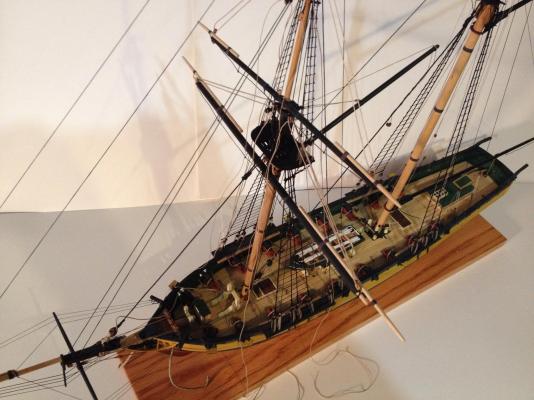
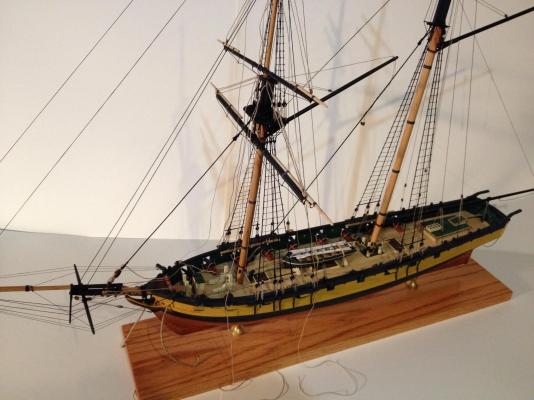
Exactly, the raised platforms above the deck. I had read that some of the Cruzier class brigs had both platforms as per the photo of the model below. Just trying to figure out how to determine which ones, and what the best route would be to take to model using either the Caldercraft Snake or Crusier as a starting point.
-
What jumps out at me Ian is how top heavy the Corel dimensions are relative to Steel. I'm starting to remember why I didn't use Corel's plans for the masting and rigging when I built her...Even the yard dimensions are all larger, but I think that is less of an issue than the out of balance masts. Still, I'm not saying Corel has the spars right either. My gut tells me you should stick with Steel's numbers, the masts will be much better balanced. Hard to argue with him, vs. a kit manufacturer, especially with the other errors we know are in the kit. I used a mix of sources (didn't have Steel then), that generally agreed for the most part and was pretty happy with how it came out.
-
Cruizer-class Brig-Sloops of the Royal Navy
jwvolz replied to molasses's topic in Nautical/Naval History
Found this thread while doing a little digging around for my next possible build. I'd like to build one of the Cruizer-class brig sloops and am just trying to get some ideas here. I like the look of the fore and aft platforms as on the Snake, but with more possible build options by going with one of the brig sloops, rather than the much less numerous ship sloops. I've perused some of the links and those plans available online at the NMM, but just can't get a handle on which of the brig sloop versions would have had the fore and aft platforms. I don't necessarily have to build one of the more "famous" vessels like Reindeer, Grasshopper, Frolic etc..., just want something a bit different; there are certainly enough name choices! As to which kit, I'm thinking of buying the Snake since it is all set up for the platforms and also comes with carronades, as opposed to the long 6's in the Cruizer kit. I'd have to re-work the channels and make new mast steps in the keel, but still think it may be the smarter route than starting with the Cruizer kit. I might also have to get a hold of the Caldercraft Cruizer plans for the masts/spars, general rigging arrangement. Deck layout changes I can get from the NMM plans most likely. Thoughts??? Just a great thread Dave, and everyone else who has contributed. Thanks for the research. -
Ian, It's looking very nice. With regards to the spreadsheet, maybe you could screen capture the page/table, and turn it into a .jpg file? Then you could post it as a photo. Should work.
-
what is the ideal modelling table?
jwvolz replied to AON's topic in Modeling tools and Workshop Equipment
Height adjustment (with stability) would be a big plus in a work table. I find that the proper height for hull work is generally too high for rigging. I find myself standing a lot to rig. Full walk-around access a big plus as well. -
Mike, Although a lot of my build recollection is foggy, I know I didn't use Corel's mast and spar dimensions on the build, referring at the time to "Historic Ship Models" by Zu Mondfeld. I would definitely use an outside reference when compiling mast and spar tables for the build.. The outward flare of the upper bulwarks as Ian pointed out, I agree is very likely wrong. If anything there should be an inboard tumble home. Never did address that on mine... Deck beams for the waist area will certainly take away the issue that Ian mentioned of trying to accommodate both sheer and camber in one large sub-deck piece that is already going to need to be made narrower through the waist.
-
Mike, I would definitely just use the forecastle and quarterdeck portion of the deck template. I made deck beams myself to support the narrower gangways I made in the waist area.
-
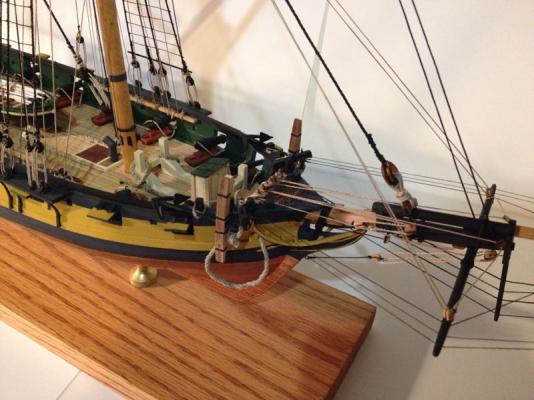
Some more progress on the running rigging this weekend, and also shipped the anchors. Missed a cleat on the bulwarks for the fore gaff vangs and don't have any left in the fittings stash. Slight delay as I wait for the order to arrive this week now from Expo with those. Also ran out of my stash of eyebolts...

- 30 replies
-
- 3
-

-
- finished
- model shipways
- (and 1 more)
-
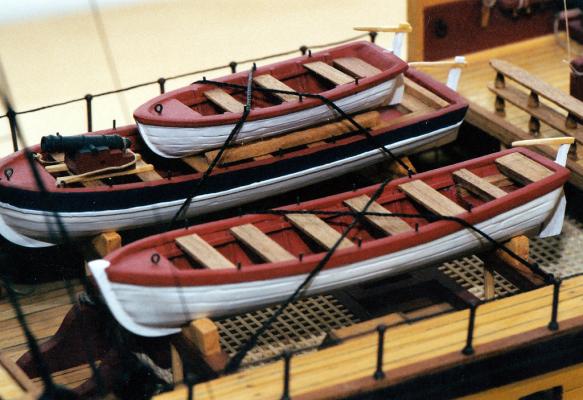
Mike, The boats are plastic shells that Model Expo used to sell. Not sure of the manufacturer, but I think it was one of the European companies. I hollowed them out further from their original form with my Dremel, and added details from wood. They came scribed with that planking pattern on the outside of the hull.
-
Ian/Mike, I didn't use the Corel rigging plan, at all if that helps. Hate to keep posting my pics in your log Mike, but hopefully they help the other Unicorn builders. Here is the waist area with the ship's boats. I'm having a hard time recalling a lot of the changes I made since it was so long ago,
-
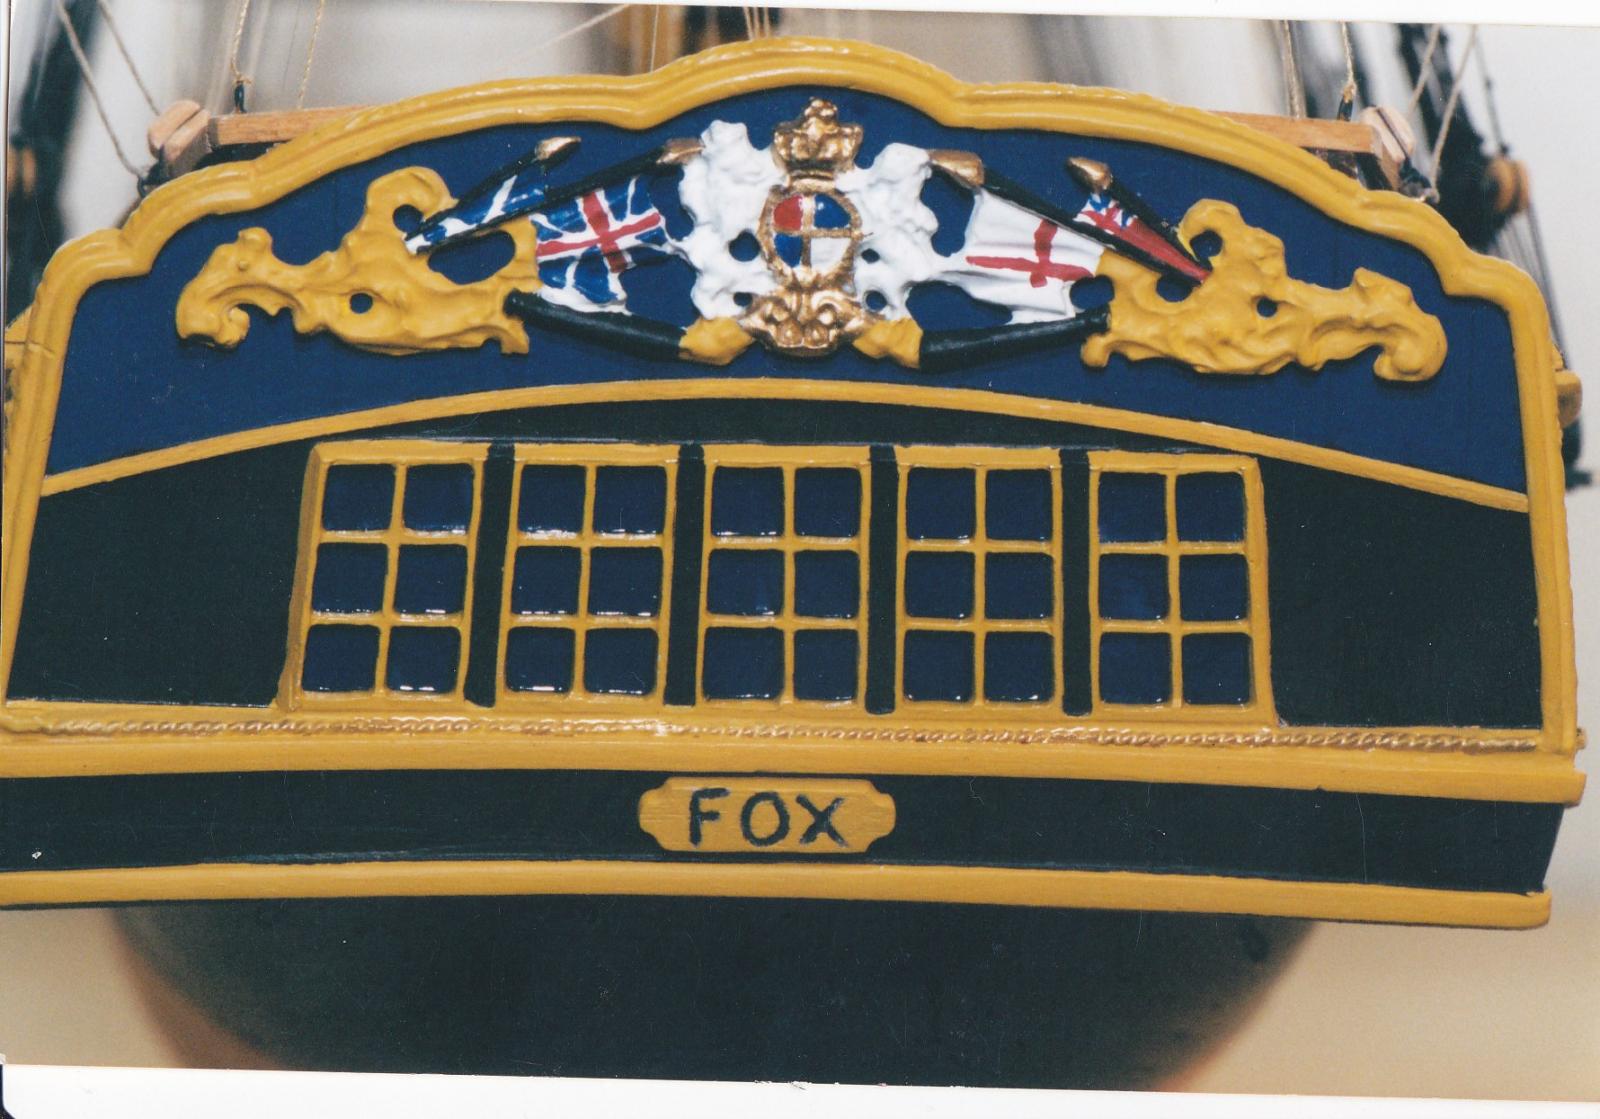
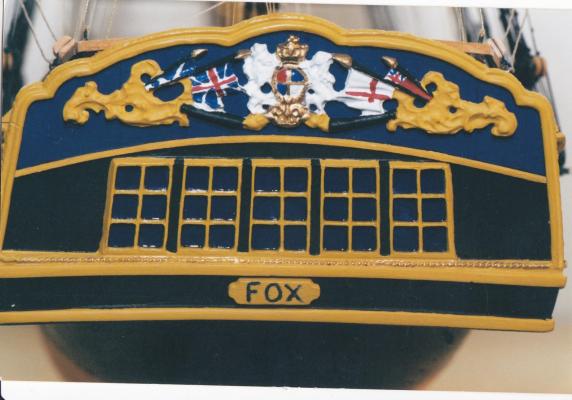
Mike, I "modified" the stern area, chopping up the cast metal piece and just using the square windows, not the arched portion. Thought it just looked more authentic, without having to do too much surgery.
-
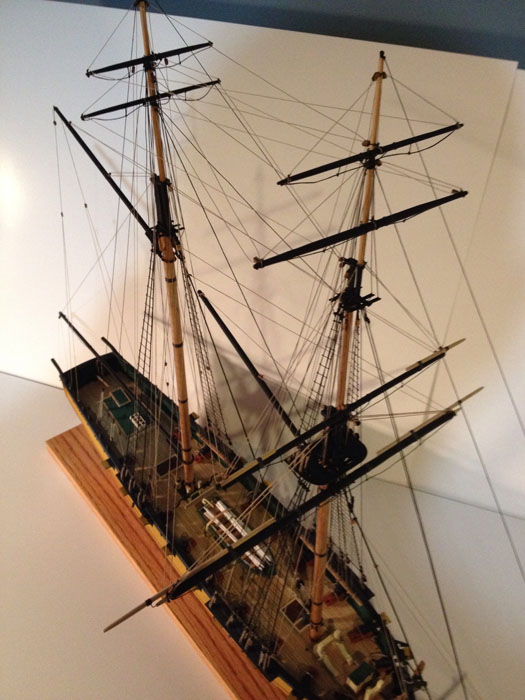
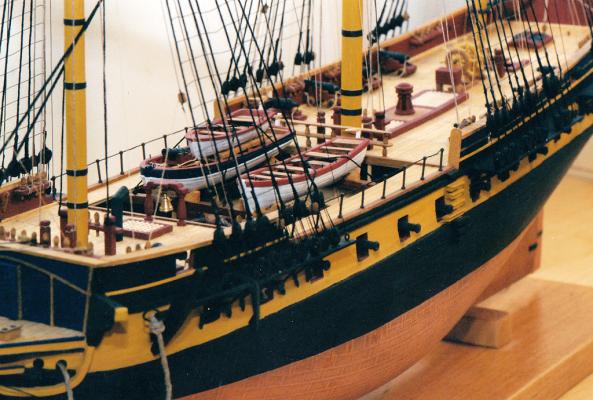
Hi Mike, I built the Unicorn about 14 years ago (converted as best I could to HMS Fox, as that's a family name...) and found that there were enough belaying locations, at least as I rigged without sails, and some of their associated lines. Here's a picture for you, that was scanned from a 4x6 print, as that's all I have, since I sold her not long after I built her. I have a few more photos, let me know if you are interested. Don't want to hijack your build log!

-
Eamonn, Another trick you can try to get a clean edge is to spray or brush a clear (gloss or matte, either will work) over the Tamiya tape and the demarcation with the area you wish to paint. This clear barrier helps prevent the new color from seeping under the tape. A slight variation on what Nigel suggested.
- 1,039 replies
-
- 3
-
-
- ballahoo
- caldercraft
- (and 2 more)
-
Thanks all. I made some progress this past weekend, hope to get some pictures posted soon. The lifts, halyards, and parrals are complete and all tied off and belayed on the foremast. I also built up a few rope coils (one of my least favorite tasks) for the pinrails. So on to the braces next.
- 30 replies
-
- 1
-
-
- finished
- model shipways
- (and 1 more)
-
Just terrific work on the head, and all around. I'm really leaning toward Granado more and more for my next build. Your log has been very inspiring in that regard.
-
Great job on the build. Those sails look terrific!
-
Nice to see a build of the "Arrow", as I've been considering this unique vessel for a future build. Any photos of the kit contents?
-
Well Tom, I don't have an answer either, and it has puzzled me from the get-go... I placed the long guns in the forward most ports, but agree that there is no way they could recoil there without hitting the companionway! I thought of making them stern chasers, but it just didn't look right.
-
Thanks guys. I've learned the important lesson on this build not to be afraid to rip things out and re-do if they aren't good enough. I've done that a few times in the past couple of weeks...
-
Crossed the fore lower and topsail yards over the weekend, with halyards, trusses and lifts installed. Everything hanging loose for now. Also got the breast stays rigged.
- 30 replies
-
- 7
-
-
- finished
- model shipways
- (and 1 more)
-
I like the look of the random coils. As you mentioned it gives a "in use" kind of look, very nice.
-
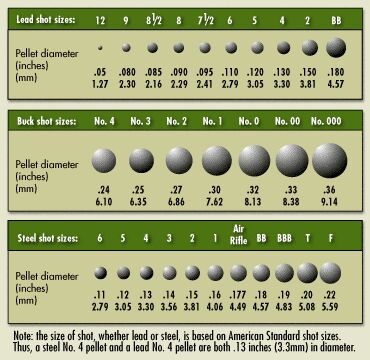
Here's a handy chart of shotgun pellet sizes for reference if anyone chooses to use those to represent cannon balls.