jwvolz
-
Posts
979 -
Joined
-
Last visited
Content Type
Profiles
Forums
Gallery
Events
Everything posted by jwvolz
-
 Andy, I always work from main yard, up. I just find it easier and I find with the extra work required on lower yards I like having the most access. Drill a hole in the mast where each yard goes and a corresponding hole in the yard. Use a brass nail cut off to make a pin and glue into the yard and then you can pin into the opposite hole in the mast, adding a touch of CA to hold. Or if you want extra time to be certain you get it level, use 5 minute epoxy. If you don't want to glue, just make it a very tight press fit. That should hold until you get the appropriate lines rigged.
- 188 replies
-
- 2
-

-
- constitution
- mamoli
- (and 2 more)
-
HMS Druid by Krug - FINISHED - 1:48 - Hahn
jwvolz replied to kruginmi's topic in - Build logs for subjects built 1751 - 1800
Great to see ship modeling exposed to so many people Mark, well done. I have come to the conclusion based on the last picture that I will never understand art... -
Very nice Chuck. Caldercraft would have you knock up the windlass on the Granado kit in a similar way, but the parts don't fit nearly as well...
- 1,051 replies
-
- 1
-
-
- cheerful
- Syren Ship Model Company
- (and 1 more)
-
Update My cannon barrel arrived as promised. I can now continue with that part of my build.
-
Fred, The filler blocks are balsa. They are very easy to shape with a rough file and then sandpaper, you won't need a scroll saw. Just cut them a bit oversize and finish them back to the proper dimensions. To cut them out initially you can use a jeweler's saw. Best of luck with your Granado build. Start yourself a build log so we can all follow along.
-
Ron, Here's the thing... I got read receipts from the very same Richard Wright on all four e-mails I sent to the Jotika, yet he claims he only received one. That's pretty bad, to outright lie like that. This the last I'll say on all of this, and I really hope my part does arrive as promised.
-
I do still agree, it is terrible service overall. I also made sure I got read receipts on all of my e-mails, so they are definitely full of it when they say they only got one e-mail from me. I'll reserve my final judgement if and when I actually receive my part. It is very disappointing, considering the quality of their kits.
-
Wow, those gunnades are a thing of beauty.
- 1,051 replies
-
- 1
-
-
- cheerful
- Syren Ship Model Company
- (and 1 more)
-
Looking very nice.
-
The masts are looking great! And that is one hefty pile of lumber.
-
Thank you Frank, Alistair, Wayne and all of the likes, much appreciated.
-
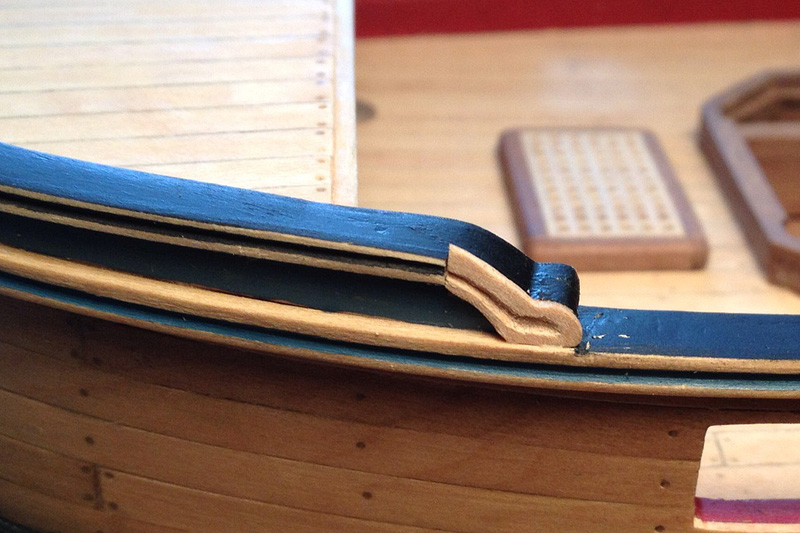
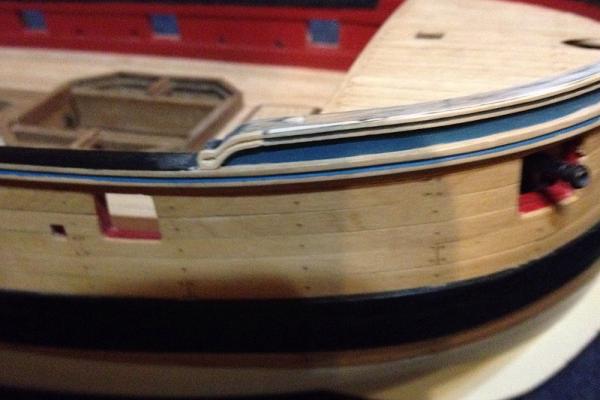
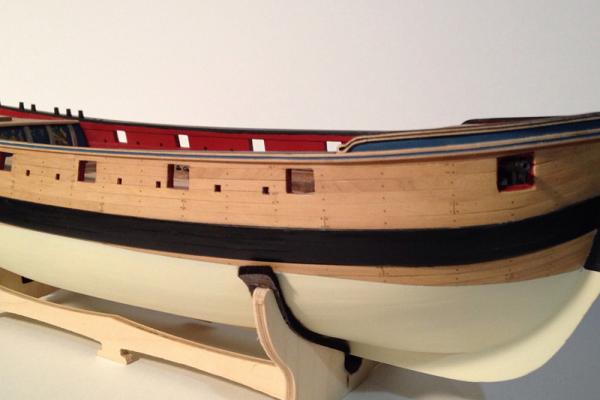
Got the forecastle capping rail trim molding installed. This is something not even called out for in the instructions, however it is there in the AOTS book. This is a narrower molding than the sheer rail, so I ripped a 1x4mm piece of boxwood lengthwise to about 2.5mm wide, and carefully scribed the recess into that. This one I painted black, which is how it appears on the AOTS cover, though it is so small it is hard to tell. The finishing piece on the end was done with a 4mm strip laid on an angle an cut oversized, and finally trimmed to shape and scribed in place. Railing were all touched up and given a final coat of paint, and the quarterdeck timberheads were installed and painted. Pretty happy with how the trim work came out.

- 302 replies
-
- 16
-
-
- granado
- caldercraft
- (and 1 more)
-
I did finally get an e-mail reply last week. They said they only got one e-mail from me, not the four I sent. Nevertheless, my cannon barrel is on the way to me, so all's well that ends well.
-
I concur completely with Alsitair on waiting for Hobbymill. The boxwood I got from Jeff has been wonderful to work with, and in my case far superior to the kit planking strips. Maybe you could work on some deck furniture, guns etc... Trust me, it is worth it.
-
You know I stole that idea from you of course Wayne... You have some great techniques in your build, and it's been a great source of ideas. Thank you.
-
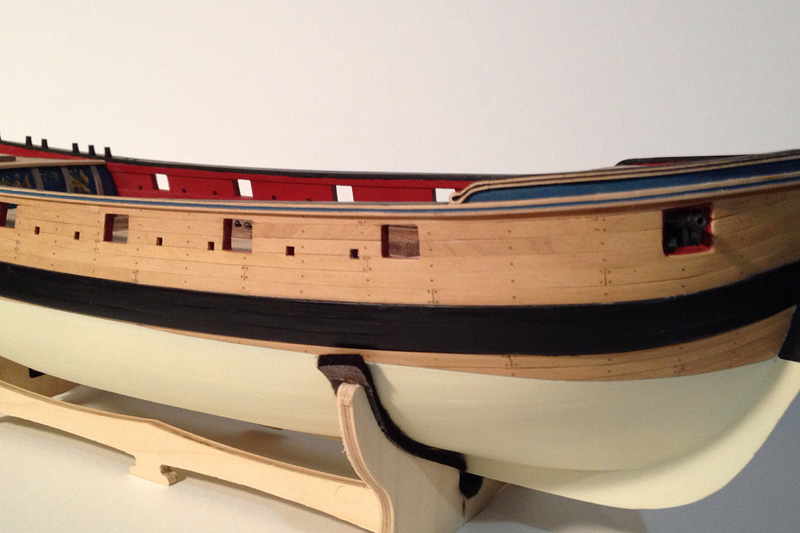
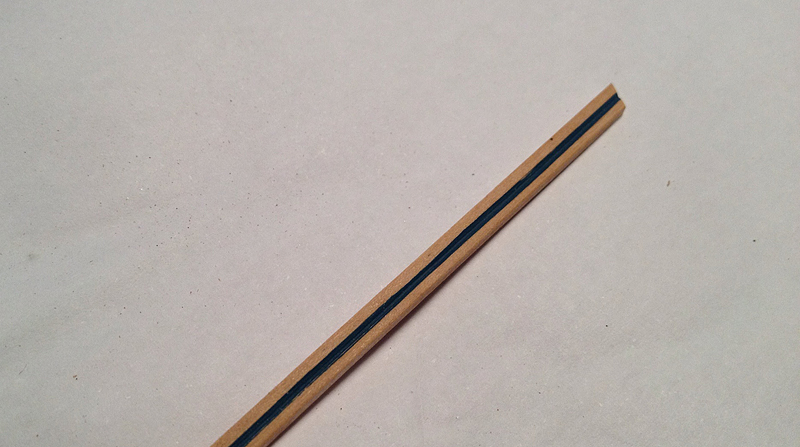
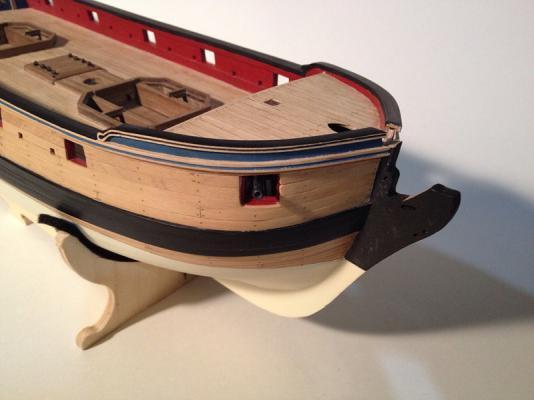
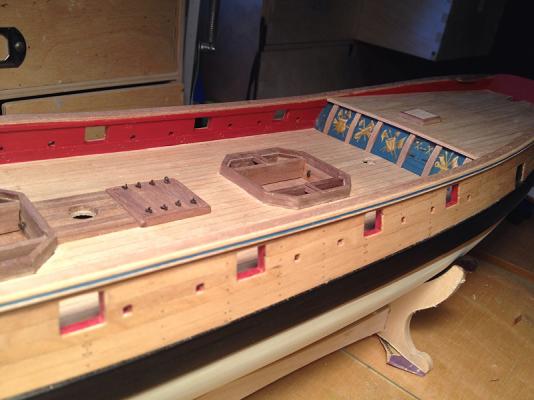
The capping rails have been installed (CNC-cut parts) without issue and now the sheer rail strip is next. Caldercraft supplies profiled brass for this but I choose to use boxwood. A groove was scribed into a 1.5x3 mm strip and deepened with a needle file. The center was then painted blue and a razor blade used to scrape the flat surface clean of excess paint, which gives a nice sharp edge. These were then installed per the plans. A little filler was used to lend with the capping rail and the area above the sheer rail at the bow was painted blue. The trim along the forecastle capping rail will be next.


- 302 replies
-
- 14
-
-
- granado
- caldercraft
- (and 1 more)
-
Nicely done Mike!
-
Brian, If you don't feel like replacing the kit blocks, you can always try rounding off the corners with sandpaper or easier still, a sanding stick. This makes them look much more realistic. You can try clamping them in locking tweezers to hold them while you do that. Good luck with your build.
- 831 replies
-
- 2
-
-
- Armed Virginia Sloop
- Model Shipways
- (and 1 more)
-
OK, thanks Jason.
-
So, one of the 4 pound cannons is missing from my Granado kit. I have now sent three separate e-mails over the course of several weeks to multiple different e-mail addresses from the JoTika website with no reply whatsoever. I get back "read receipts" so I know they are reading them, but conveniently ignoring them. Has anyone else had an issue with them, and does anyone have a thought on how to resolve this?
-
Jon: Thank you for the kind words. It is a really nice kit of a little bit different subject, and I've been very pleased with it so far, other than the outer walnut planking. Jason: Thanks, as well. It does come a bit over-sized, and the main capping rail seems OK in that regard. I must have just not gotten the curve quite right at the bow, and worried about keeping the pre-cut slots for the timberheads and knightheads centered over the bulwarks. There was just no way to keep it all centered, so I felt this was a better solution. Thanks everyone else for all the "likes".
- 302 replies
-
- 1
-
-
- granado
- caldercraft
- (and 1 more)
-
Thanks for the validation on that Wayne. It was going to be real close fit-wise, even with sanding, and it wasn't difficult making the replacements.
-
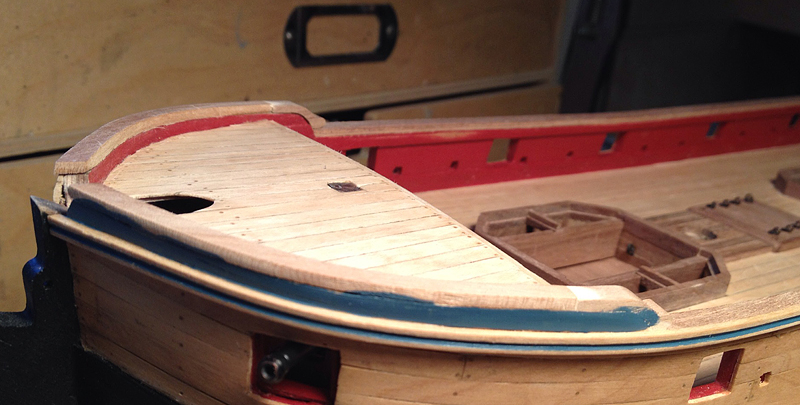
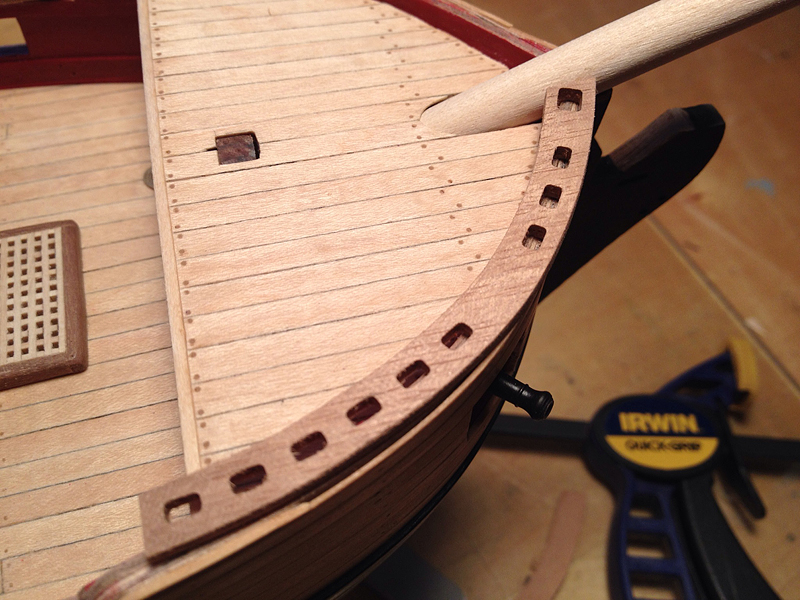
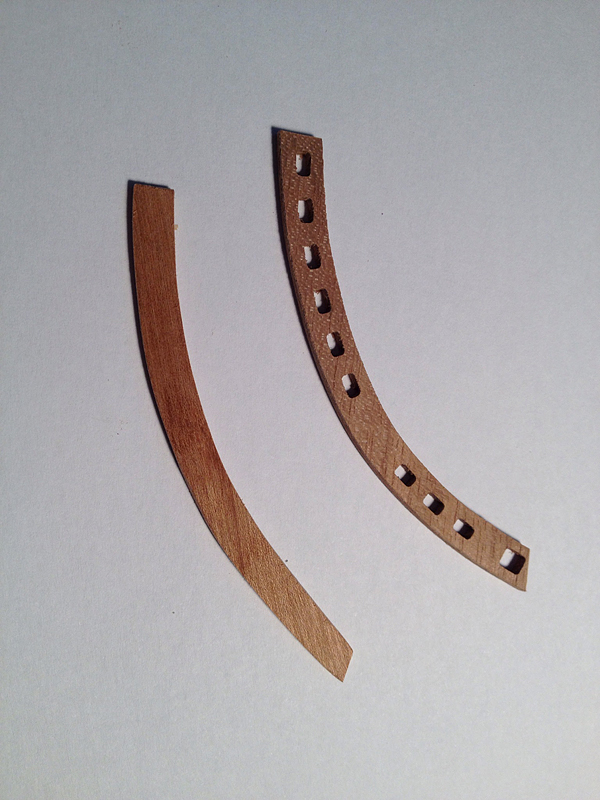
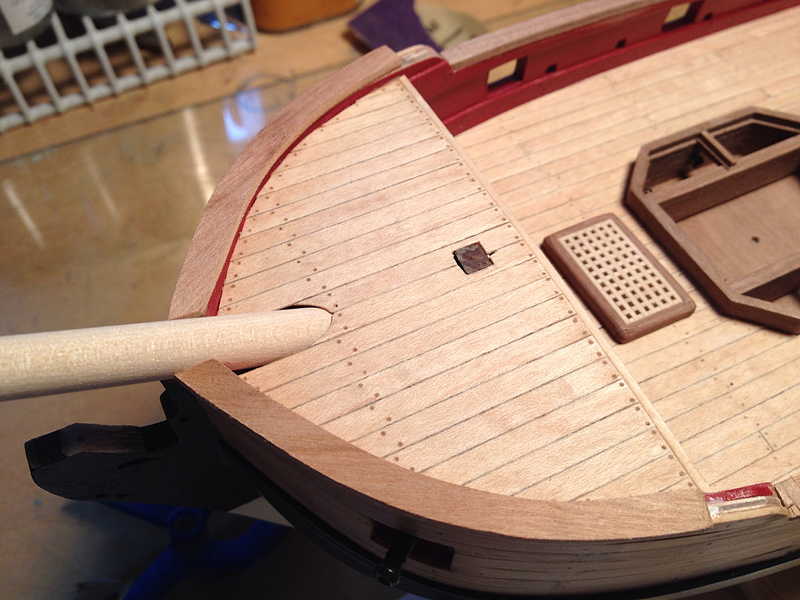
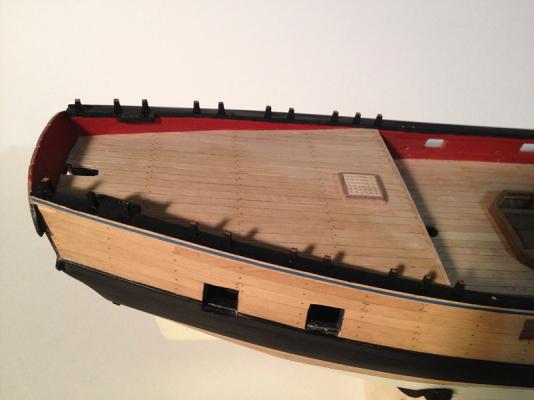
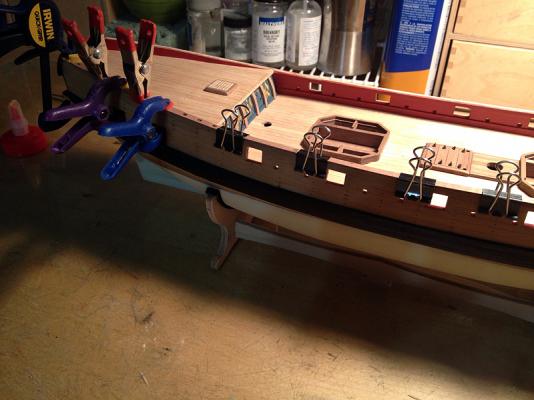
No, I'm not working this fast... I'm catching up on the photos from my vacation week at home. The forecastle was planked and treenailed in the same fashion as the other decks, and I again installed a small trim piece at the stern end to hide the ply sub-deck. The AOTS book does show this. When attempting to install the forecastle capping rails it appeared my bulwark curve is off a bit at the bow and the CNC cut parts, not being edge bendable, were not going to fit. Luckily my symmetry is good, because I had the same issue on both sides. I cut new ones from a piece of cherry I had and am pleased with the result. I don't think I'm going to try to carve/route out the knighthead and timberhead locating holes, but merely trim those items back flush with the rail and pin them when I get to installing.

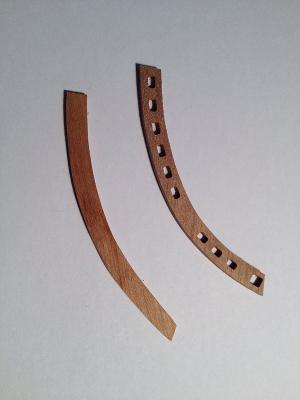

- 302 replies
-
- 7
-
-
- granado
- caldercraft
- (and 1 more)
-
Jason, My Granando kit came with Maple for the deck planking and I was quite pleased with how it turned out. Certainly better than the Tanganyika. Love the jig idea.