HOLIDAY DONATION DRIVE - SUPPORT MSW - DO YOUR PART TO KEEP THIS GREAT FORUM GOING! (89 donations so far out of 49,000 members - C'mon guys!)
×


jwvolz
-
Posts
979 -
Joined
-
Last visited
Content Type
Profiles
Forums
Gallery
Events
Everything posted by jwvolz
-
 Nice improvement with those scratch items Mike.
 -
I pulled the trigger and sent an e-mail to Jeff at Hobbymill ordering some wood. I'm going to plank below the wale in walnut and above it in boxwood for some contrast. I also ordered some boxwood sheet to replace some of the kit CNC-cut items that are made of walnut ply.
- 302 replies
-
- 1
-

-
- granado
- caldercraft
- (and 1 more)
-
What a great photo Ed. Beautiful work.
-
The more I think about it the more I agree Floyd. It's "only" two months or so, and my building does slow down this time of year anyway with outdoor activities.
-
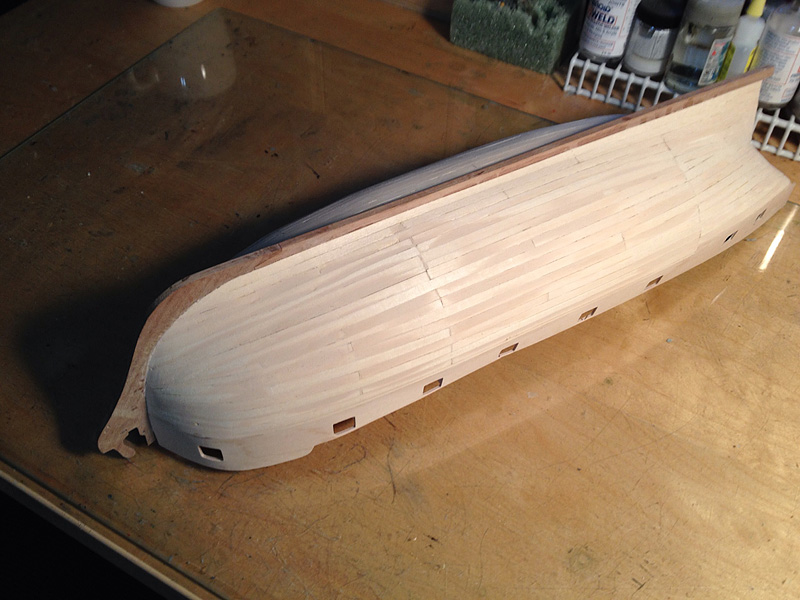
Thanks for the birthday wishes Mike. Finished the first layer of planking and got it all filled and sanded. Pretty happy with the way it came out. I also spent some time trying to clean up the walnut for the next layer of planking. It's very rough along the edges and wants to splinter easily. I really wish Hobbymill weren't so far out on delivery, or I'd replace it.


- 302 replies
-
- 10
-
-
- granado
- caldercraft
- (and 1 more)
-
No update, but my lovely wife gave me this for my birthday today.

- 302 replies
-
- 6
-
-
- granado
- caldercraft
- (and 1 more)
-
Thanks Timmo. I figured better safe than sorry on that. I'll further evaluate what can be seen when that quarterdeck bulkhead goes in.
-
Small update. I got a few strakes of the first planking in place, as well as the garboard. I began tapering immediately with the first one under the gun port template just to avoid crowding issues at the bow. I don't get at all obsessive about the run of planks or accuracy on under-planking, but I do generally use less than full length pieces because I just find them much easier to handle. That's it for a few days as I'm on the road for work until Friday.
- 302 replies
-
- 7
-
-
- granado
- caldercraft
- (and 1 more)
-
She looks really terrific. Wonderful work Pete.
-
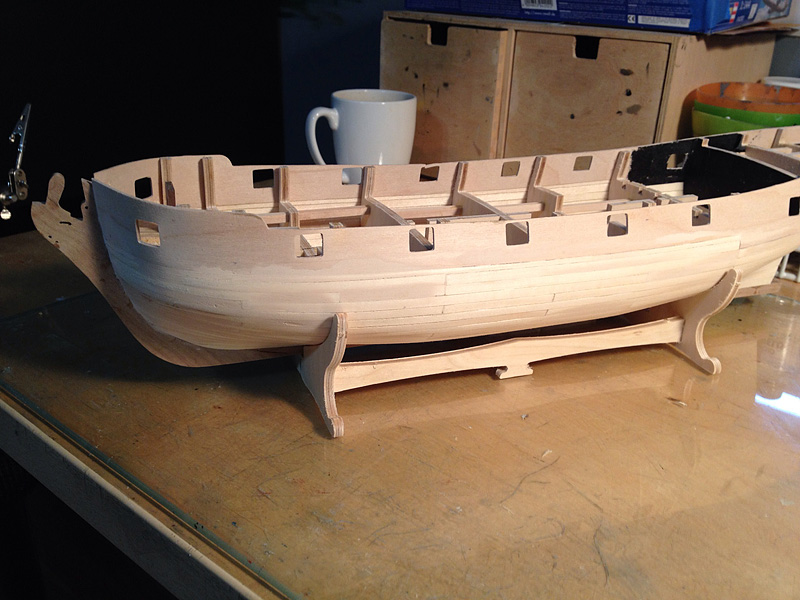
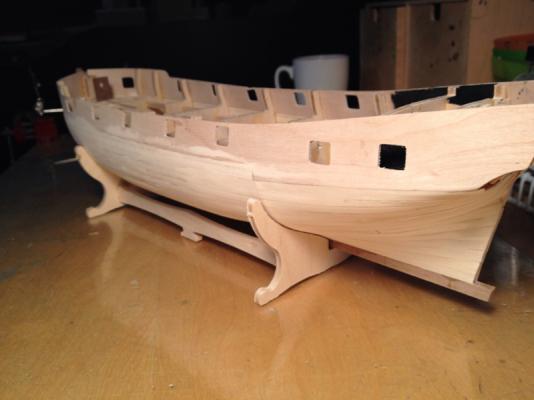
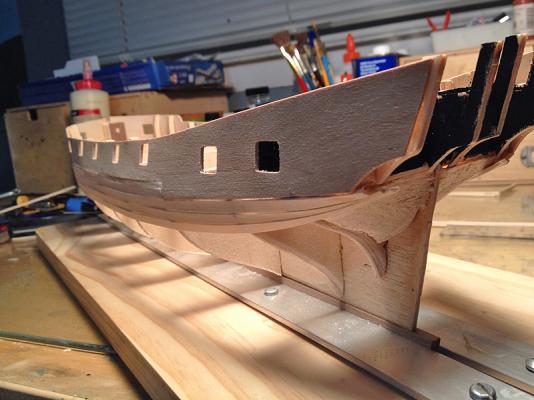
Both gun port patterns in place, and they look to be even and have good smooth runs which mirror each other well. I also framed out the stern cabin light with some basswood sheet and painted it black since those ports will be open and there is nothing in there. The forward one will be finished once I install the quarterdeck bulkhead a little later on. That's it for today, off to my son's baseball game.


- 302 replies
-
- 8
-
-
- granado
- caldercraft
- (and 1 more)
-
Nice work on those chainplates Timmo. The two of them look great there in the sun together!
-
Setting flags - which way does the wind blow?
jwvolz replied to rodgerdodger's topic in Masting, rigging and sails
If your model doesn't have sails, and thus no presumed wind direction, point them any way you like and no one can tell you you are wrong. -
Looking good Stergios.
-
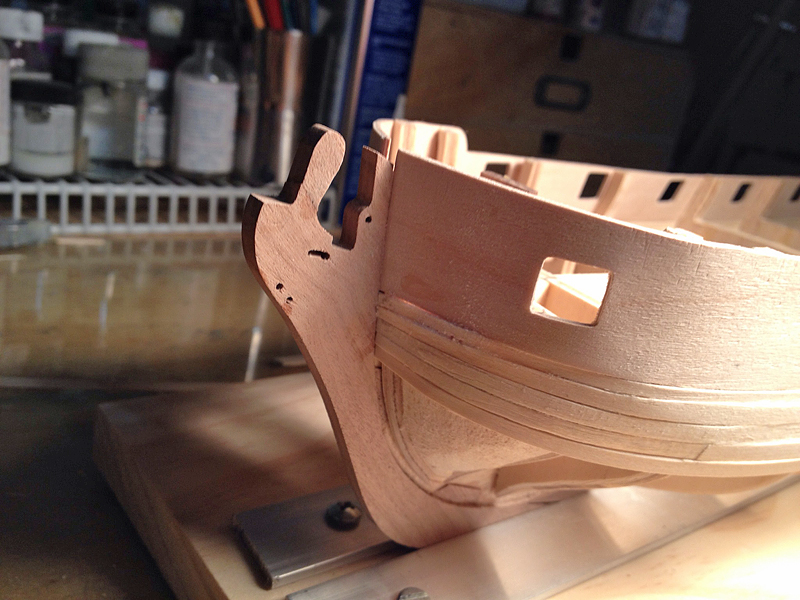
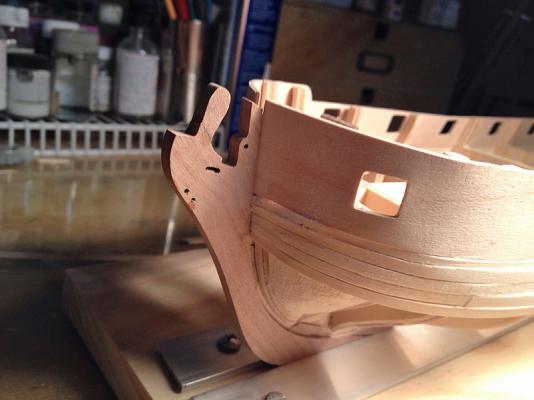
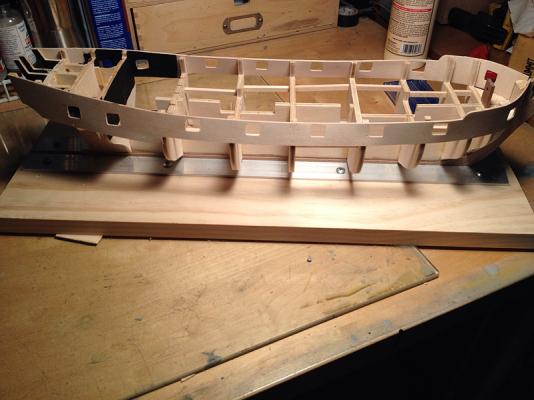
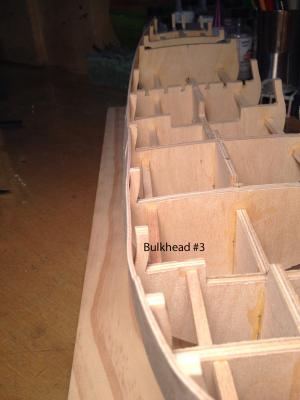
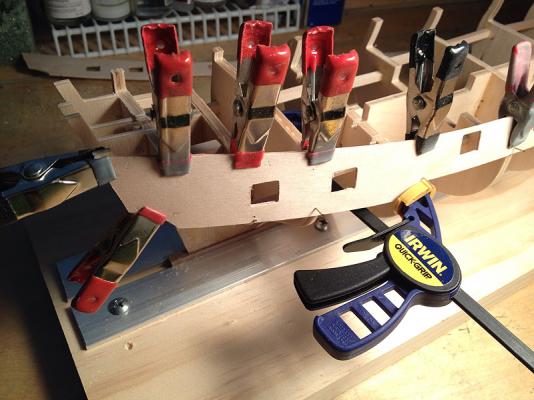
Clamps are off the starboard side, and the run of the pattern looks good. The second photo shows pretty clearly the concern I had over how the pattern runs across bulkhead #3. If I had clamped that tightly to the top it would have developed a kink. I only glued that one at the base of the pattern, where it contacts the actual bulkhead that will remain after the extensions are cut to deck level. Worked out OK.
- 302 replies
-
- 6
-
-
- granado
- caldercraft
- (and 1 more)
-
Glued it shut, eh? I've done that a number of times myself with Super Glue on some pretty good sized cuts. That was it's original use after all.. Hope you can get back to it soon Patrick.
-
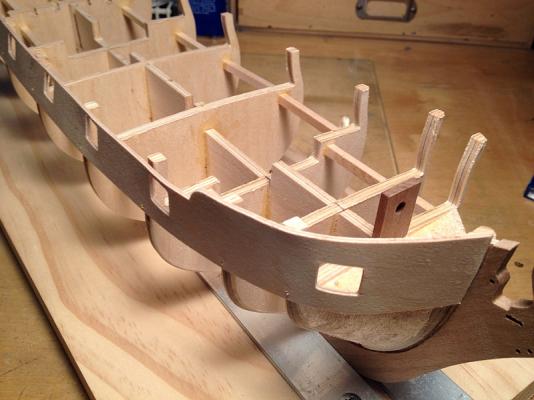
Mike, Jason, Timmo , thanks and everyone else for the likes. MIke, the planks are definitely Maple in this kit and they're very nice. I do wish hey were a bit thicker than .5mm though. Great idea on those pins, where dd you buy those? Timmo, I've realized how critical that alignment is and it did require a little beveling and trimming at the fore end to get the tab to lay right on bulkhead 7, and to make sure everything was flush at bulkheads 1,2 and the stern extensions. So far looks pretty good. On to the other side!
-
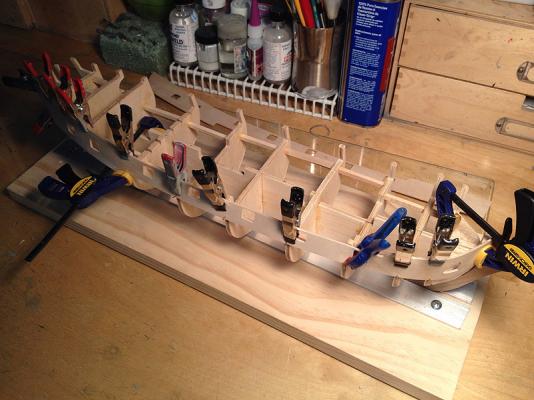
Starboard side gunport pattern installed without issue. On the third bulkhead where it wanted to kink if I clamped too close to the top of the bulkhead extension I clamped it low against the actual bulkhead. Worked out OK.

- 302 replies
-
- 9
-
-
- granado
- caldercraft
- (and 1 more)
-
Very, very nice work Tom.
-
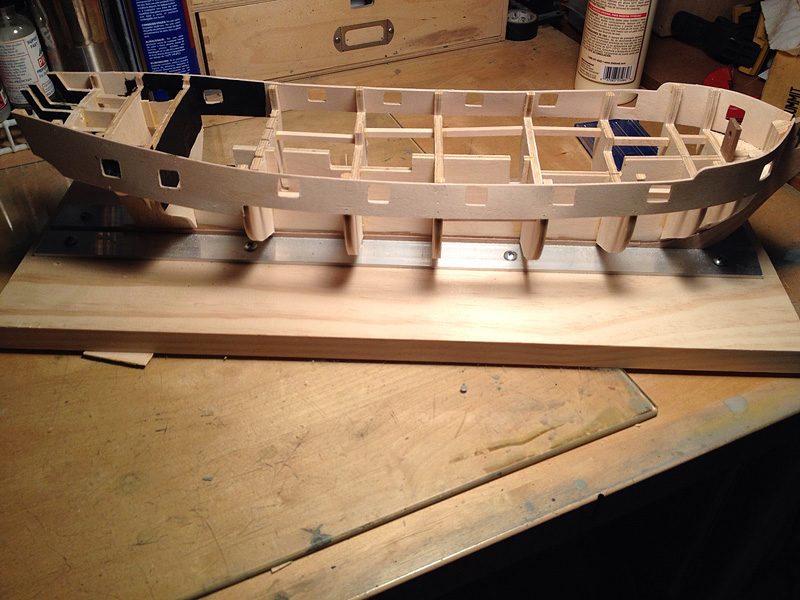
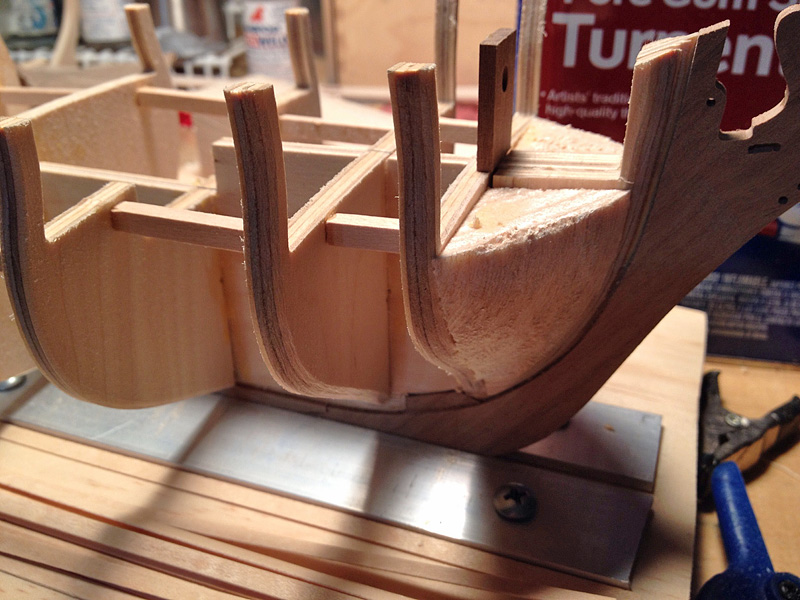
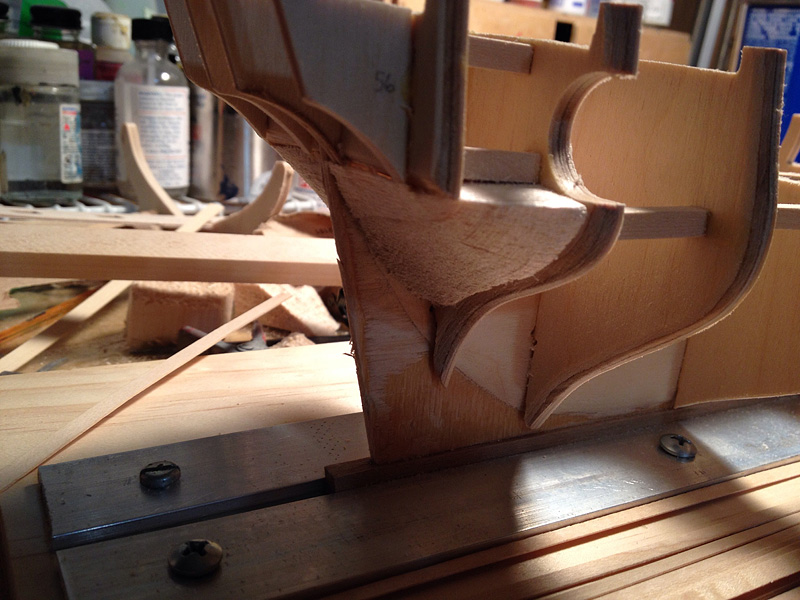
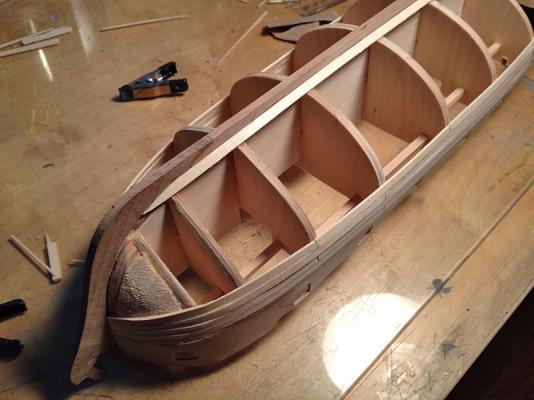
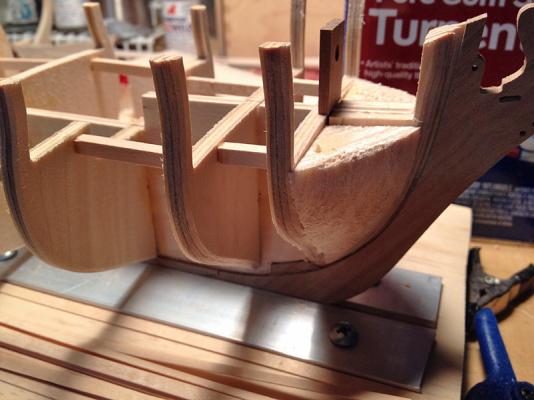
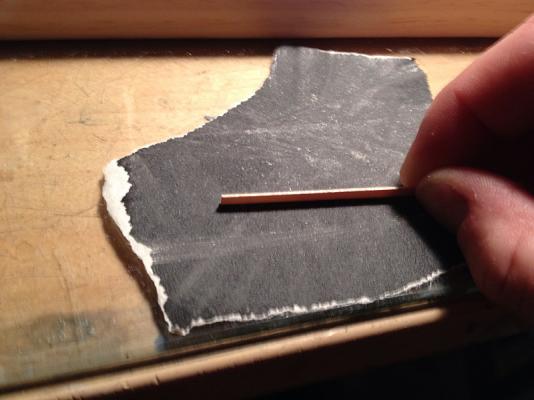
Tonight I shaped the bow and stern filler blocks I glued in place last evening. I also went to work cleaning up the slightly rough edge of the otherwise very nice maple deck wood. I lightly drew each strip across a piece of 320 grit sandpaper, which squared up the edge nicely. It probably wasn't completely necessary, but it made me feel better as to how tightly and smoothly the planks will lay. I had originally planned to replace some of the wood on this build, including the deck planks, but Hobbymill is out to July 28 for shipping. I'll have to plan a little better next time. On to the dreaded gunport strips next...

- 302 replies
-
- 8
-
-
- granado
- caldercraft
- (and 1 more)
-
Removing paint
jwvolz replied to Don Quixote's topic in Painting, finishing and weathering products and techniques
Lacquer thinner. But it may not get it all out of the pores and grain. -
Mike and Ian, I'm really enjoying watching you guys think your way through these Unicorn builds. I'm also glad a bit of research ignorance kept me in the dark when I built mine or I may never have gotten her done!!!
-
Glad to know I'm not alone Mike. I gathered as much from reading a lot of build logs on here. What I think I'm going to do is make sure it is well glued at the base where it contacts the actual bulkheads, and simply spot glue to the extensions, making sure it follows a good line. The extensions are concave where they meet the gunport strip and I do think that is intentional to make less of a surface contact area, thus making them easier to remove down the line. In theory...