Chuck Seiler
-
Posts
1,878 -
Joined
-
Last visited
Content Type
Profiles
Forums
Gallery
Events
Everything posted by Chuck Seiler
-

Hello from the not so sunny Spain.
Chuck Seiler replied to Jandrus's topic in New member Introductions
Jandrus, Welcome to Model Ship World and wooden models and a toast to your girlfriend for talking you over the line. -
Matthias from Berlin, Germany says Hello
Chuck Seiler replied to victory78's topic in New member Introductions
Matthias, Welcome to MSW. I applaud your decision to stay with the hobby and go with a simpler model. Many are attracted to the hobby by the big fancy ships, only to be easily discouraged. I had a similar start as you. I wanted to build HMS VICTORY and USS CONSTITUTION but I eventually went smaller/simpler and worked on my skills. Now I am building ship types I have never heard of before and having much fun. -
Greetings, and welcome, from Southern California.
-
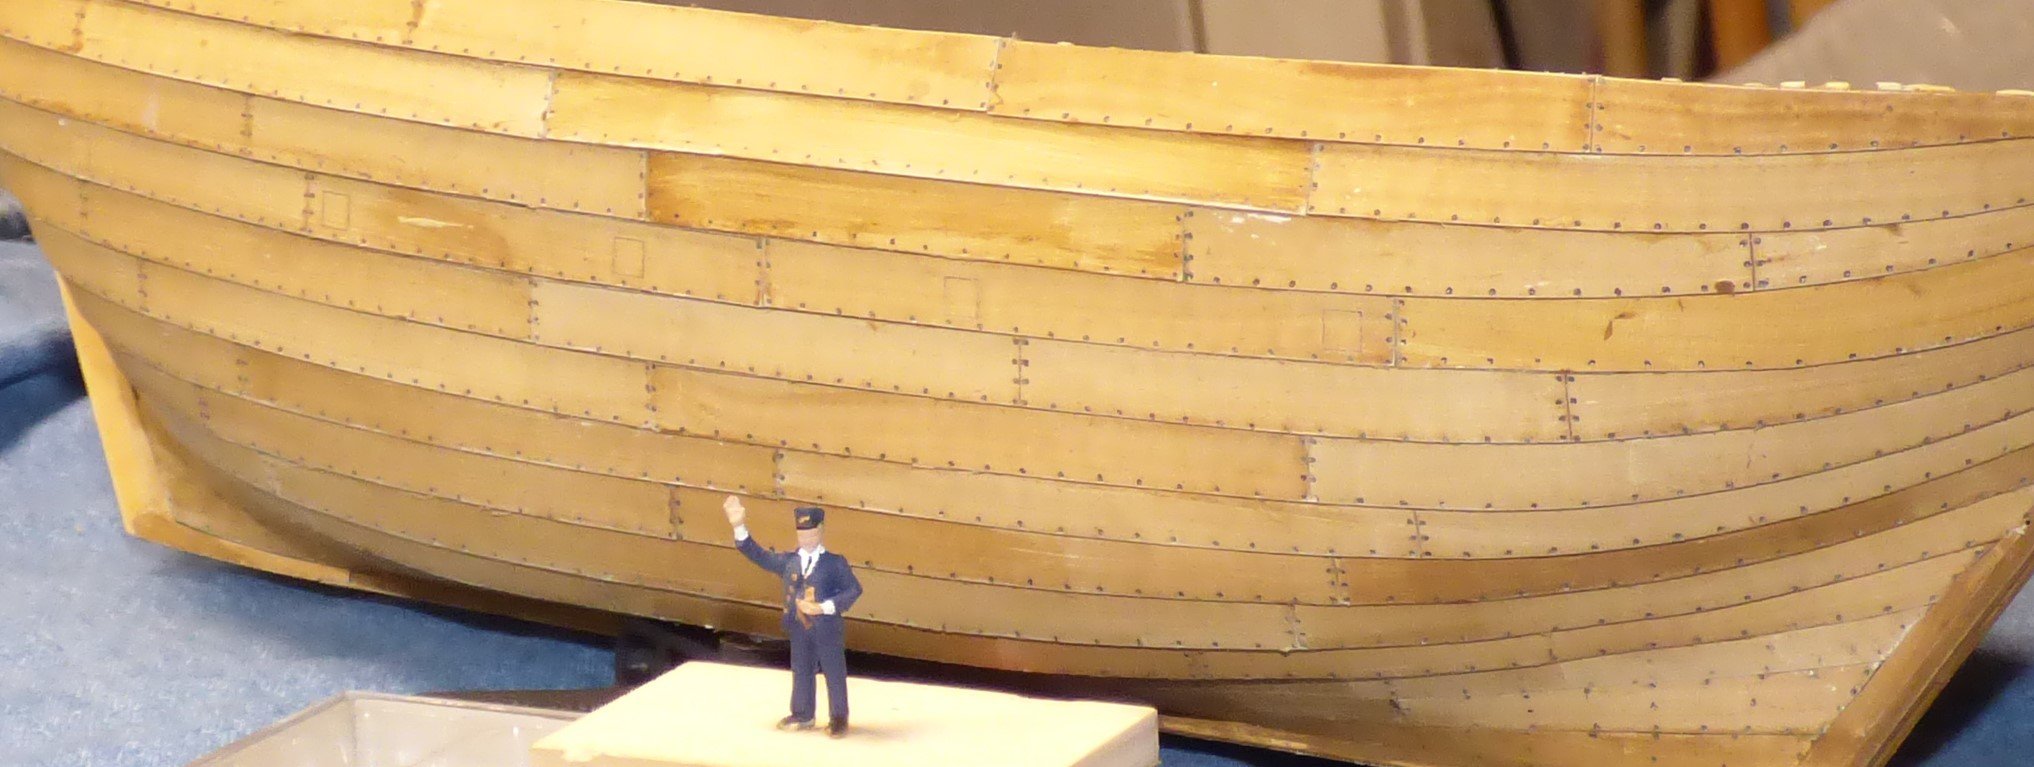
The strakes or the planks in the strakes? Are you basing that on the above picture and other representations or of the wreck? I don't think the planks are small, I think the people are too big. The planking pattern on the above picture, and other representations I have seen, is similar to the Wunterhund model. I think they LOOK short because they are wide. The above station master is 5 scale feet (5 feet 1 inch). The plank 3 strakes above him is 14.5 feet long and about 2 feet wide. I believe the representations show the cog as they see it, but the people are much larger...artistic license. Whadya think?

- 179 replies
-
- 5
-

-
- shipyard
- wütender hund
- (and 1 more)
-
Chris, I am working on my inner planking. I currently have the picture of the Roland von Bremen on my desktop as inspiration. As I am installing the inner planks I am noticing things on the RvB. Shouldn't the model have cap rails? Nowhere in my instructions do I see cap rails.
- 179 replies
-
- 2
-
-
- shipyard
- wütender hund
- (and 1 more)
-
CRI, In my humble opinion, your pictures and log look great with or without spaces. PLEASE don't stop posting.
-
I can see what CRI is talking about. The pictures are butted up against each other top to bottom. If he had not mentioned it, I would not have noticed. I just looked at a couple other logs...some have spaces some do not. I am using Firefox. Try to manually put a space between pictures...see how that works. Beautiful build, by the way.
-
Since the model seems to be somewhat based on the Bremen Cog wreck, I'm thinking they did SOME research. Maybe not. Having driven a 12 foot sailboat and a 4000 ton destroyer, I find it hard to believe they would lock their rudder in place and good exactly the way they wanted to go without any minor adjustments. I can't do that in my car.
- 179 replies
-
- 3
-
-
- shipyard
- wütender hund
- (and 1 more)
-
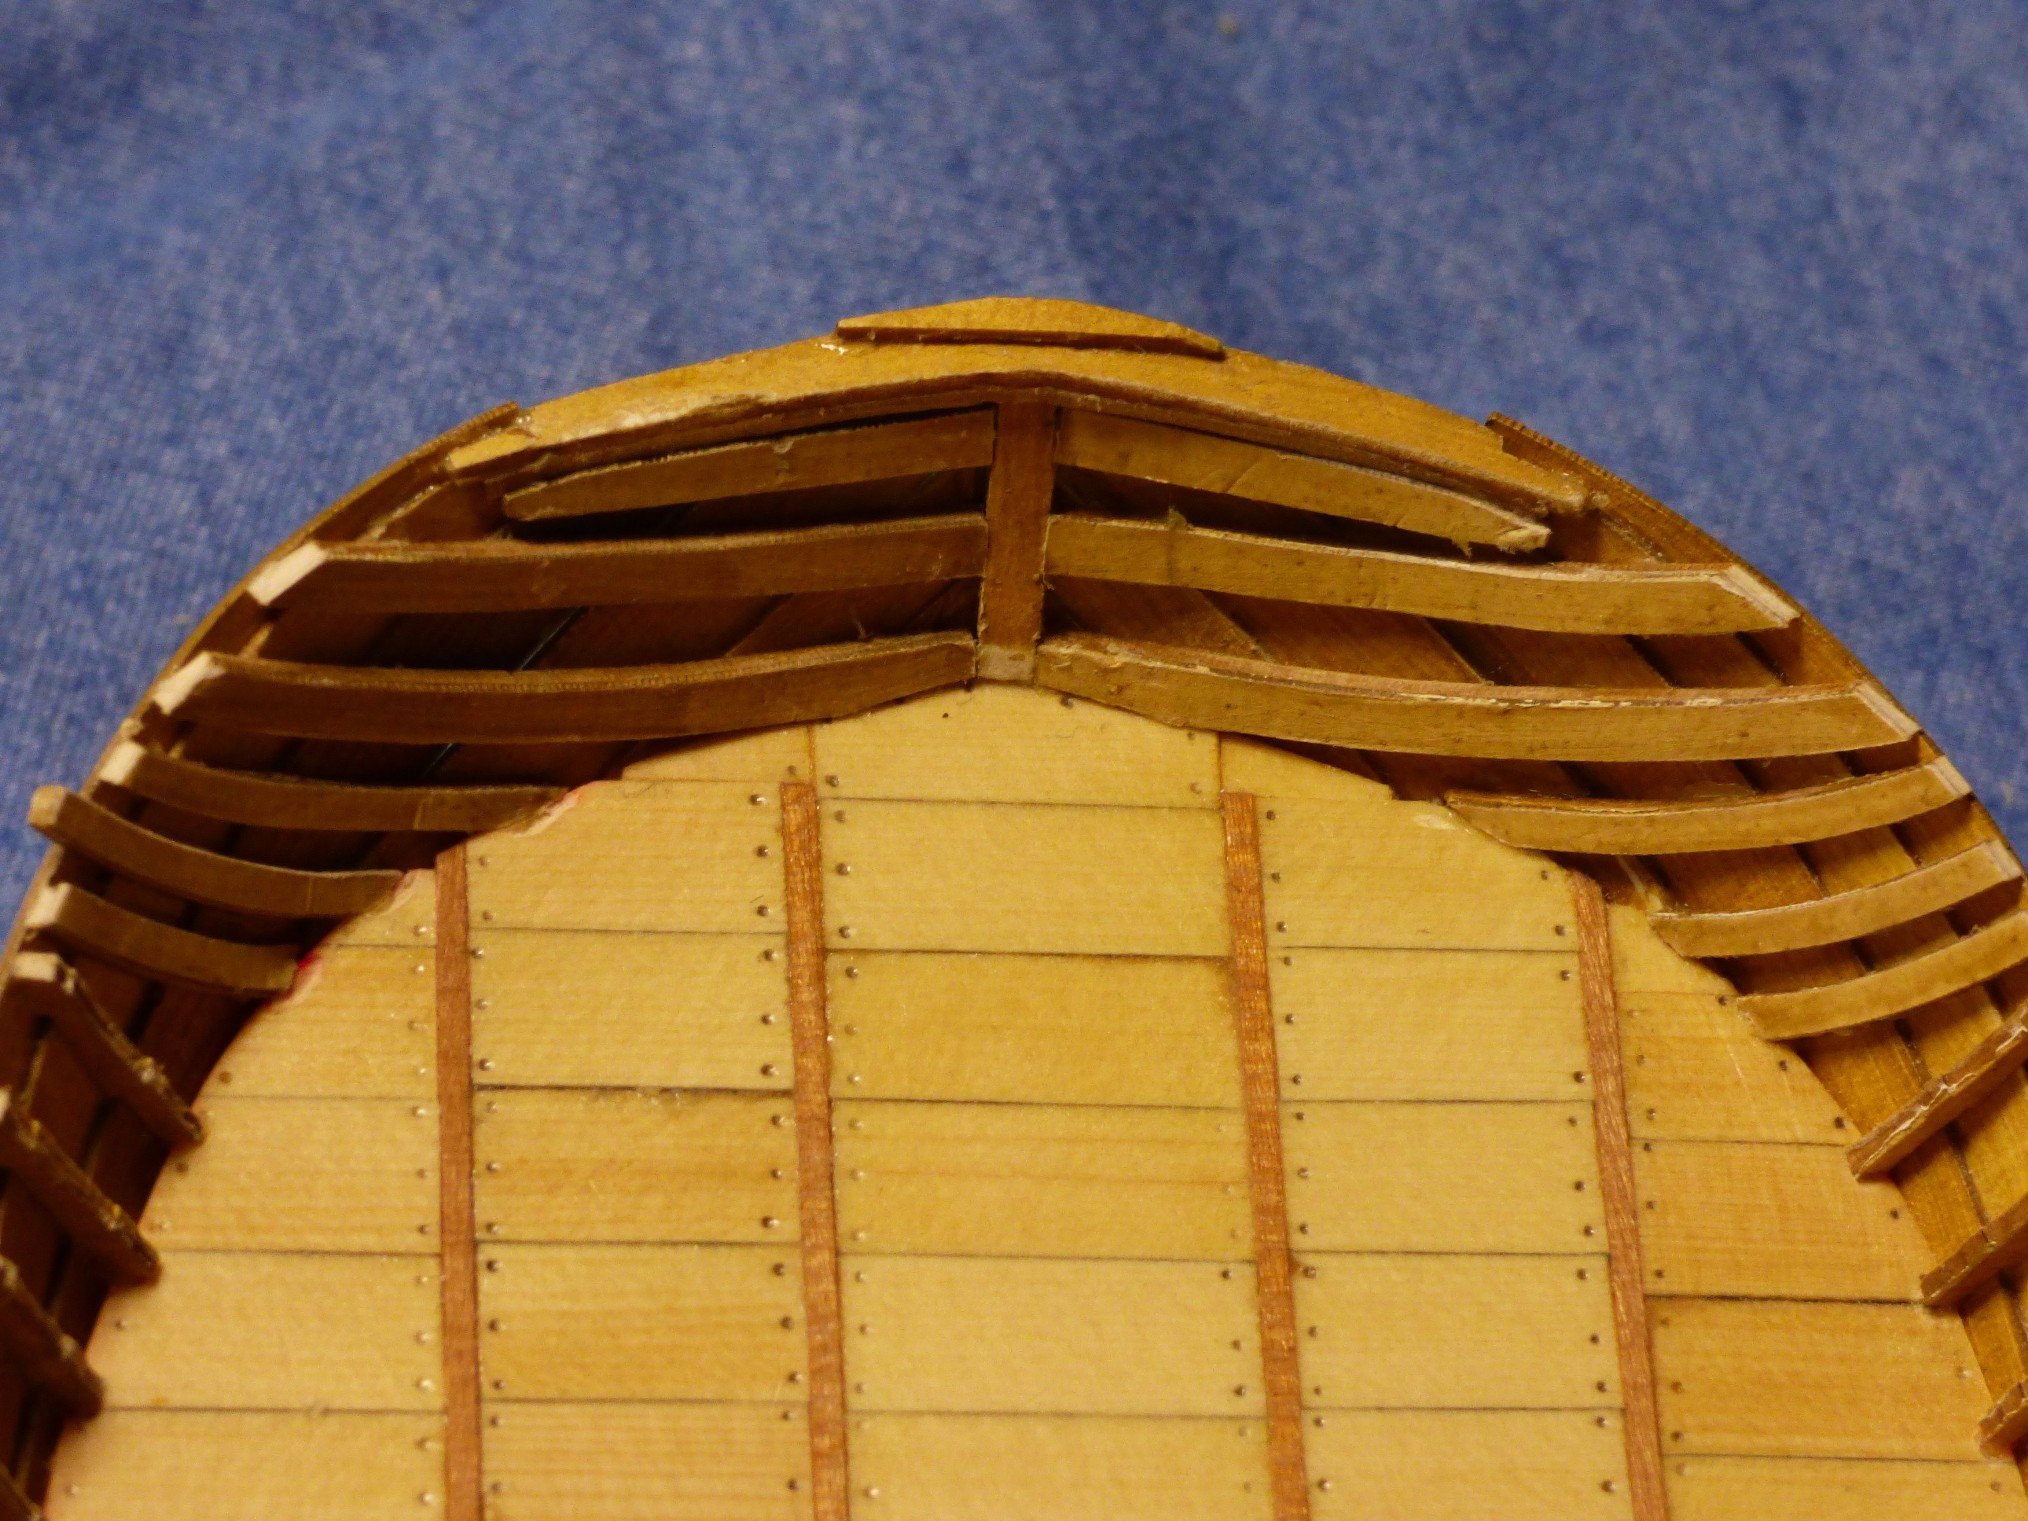
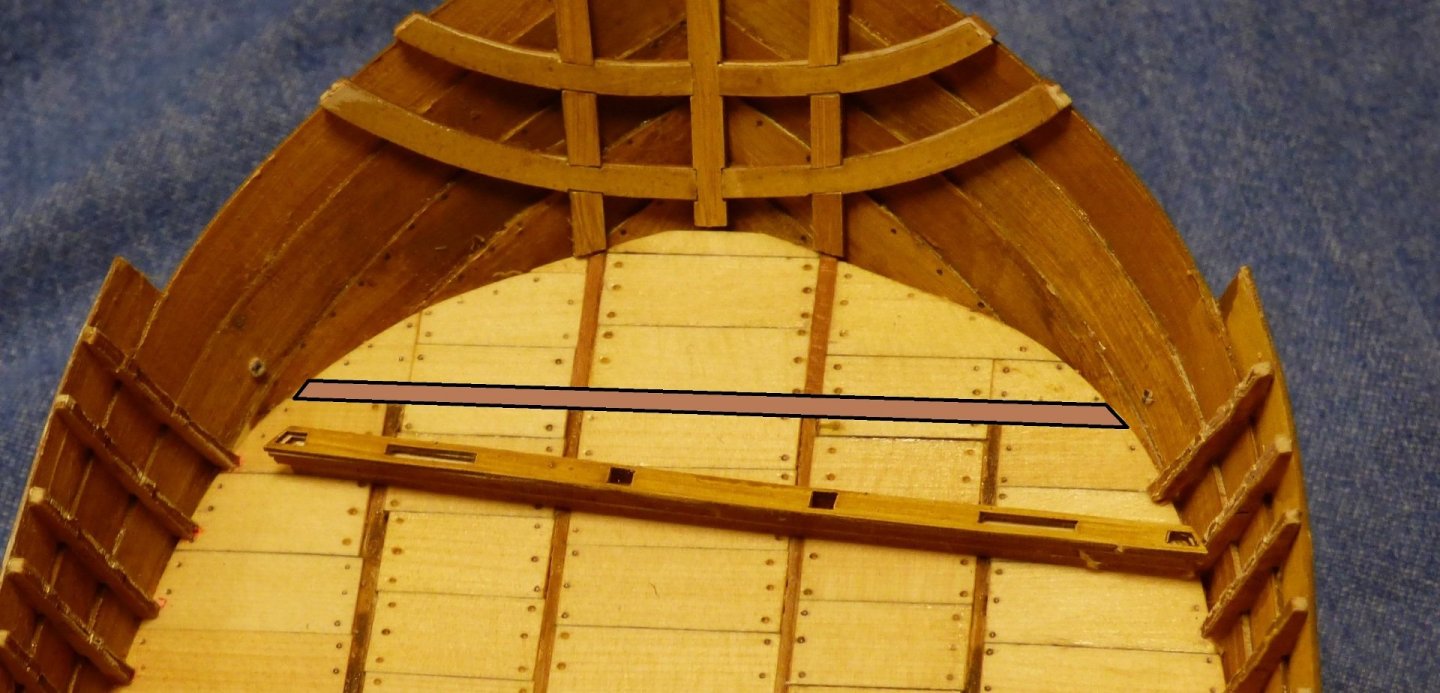
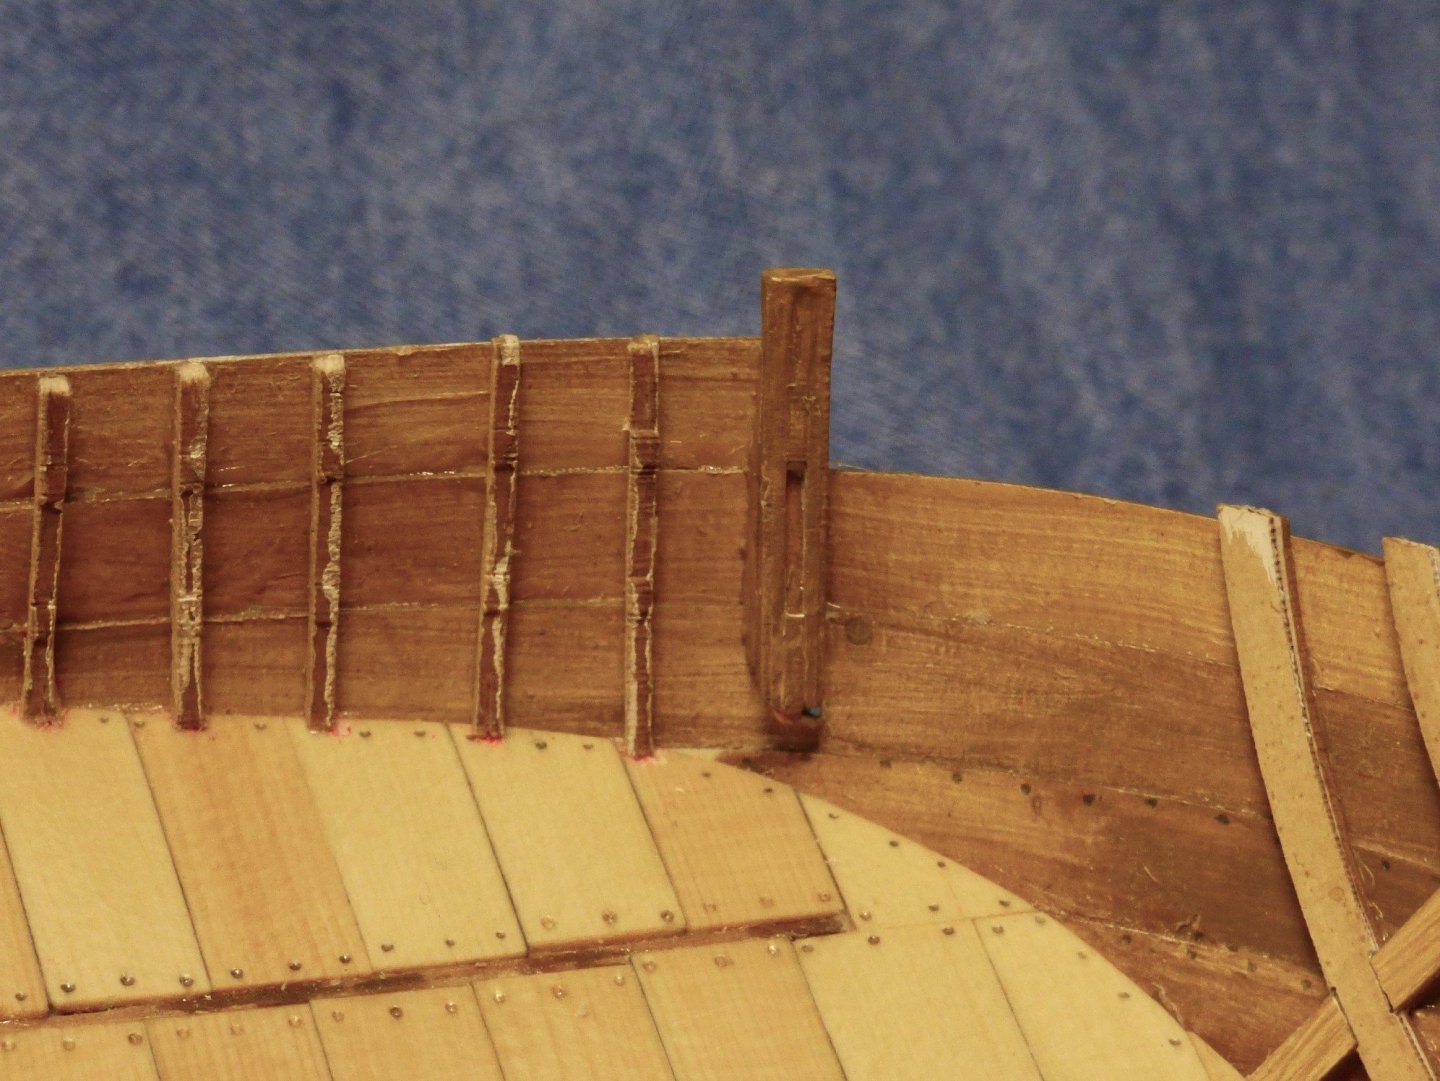
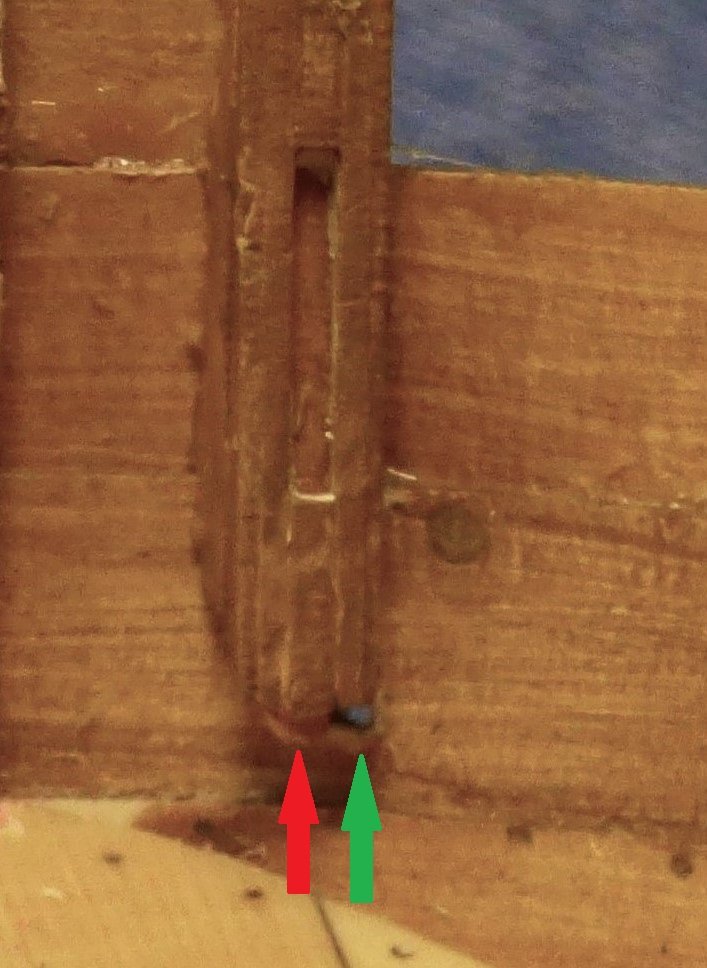
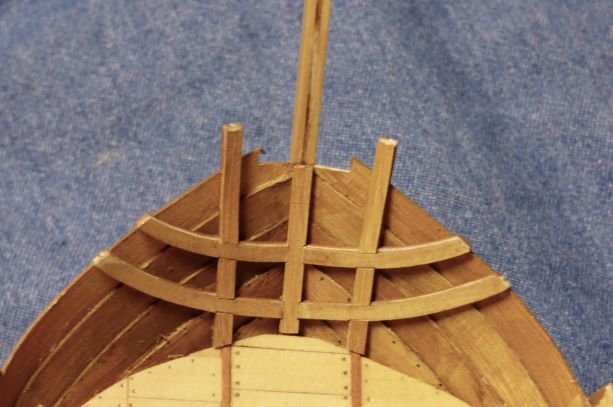
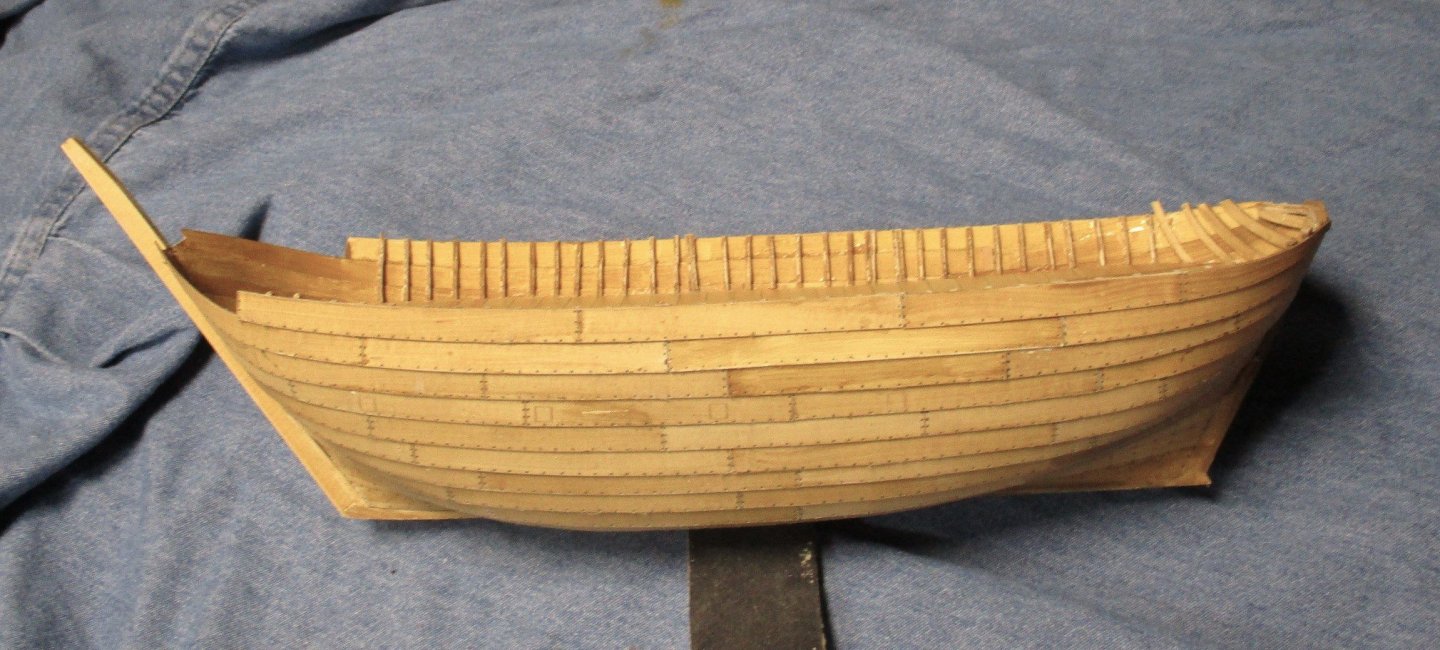
Progress continues. After seeing Chris' progress pics, I am embarrassed to post. Frames extensions on the round end. Less than great. Fortunately this will be covered by the stern castle. Hey, get the carpenter over here to trim that frame end!!! Progress on the pointy end. Wait! This is the same shape as the round end. Okay, the end with the antenna. What do you call it? Oh, the bow. The next step is the above deck athwartship deck beam. Up to this point, the model has had reference marks to keep me somewhat on track. I decided to make my own here. The small printed square/rhombus is where the deck beam would come thru in real life. If I put a hole thru the hull at the center to the square, it will give me a reference point. Hole on the inner hull. No worries about the hole showing. It will be covered up. The deck beam should run from hole to hole. Unfortunately, first I need to install the deck beam support/cathead thingy. I guess I COULD install the deck beam first...why start following instructions now. A couple things have got to line up. First, the tab at the bottom of the support SHOULD line up with the hole. Second, it SHOULD be perpendicular to the beam. Later a knee will be added from the beam to the support and it should be square. Unfortunately if I do that it will not line up with the edge of the top plank which angles slightly aft. Roll the dice and see what happens. The support is about a millimeter to far aft but I can live with that as long as the one on the other side is the same. Green is the hole. Red is the tab. The top of the support sticks out from the plank a little, but acceptable, in my view. I may live to regret that. It's time to trim frames and touch up the edges with paint.


- 130 replies
-
- 8
-
-
- wütender hund
- hanseatic
- (and 2 more)
-
Chris, Outstanding!!! Very crisp. So, what is the deal with the rudder? Did they have to untie and retie the rudder lines each time they altered course?
- 179 replies
-
- 2
-
-
- shipyard
- wütender hund
- (and 1 more)
-
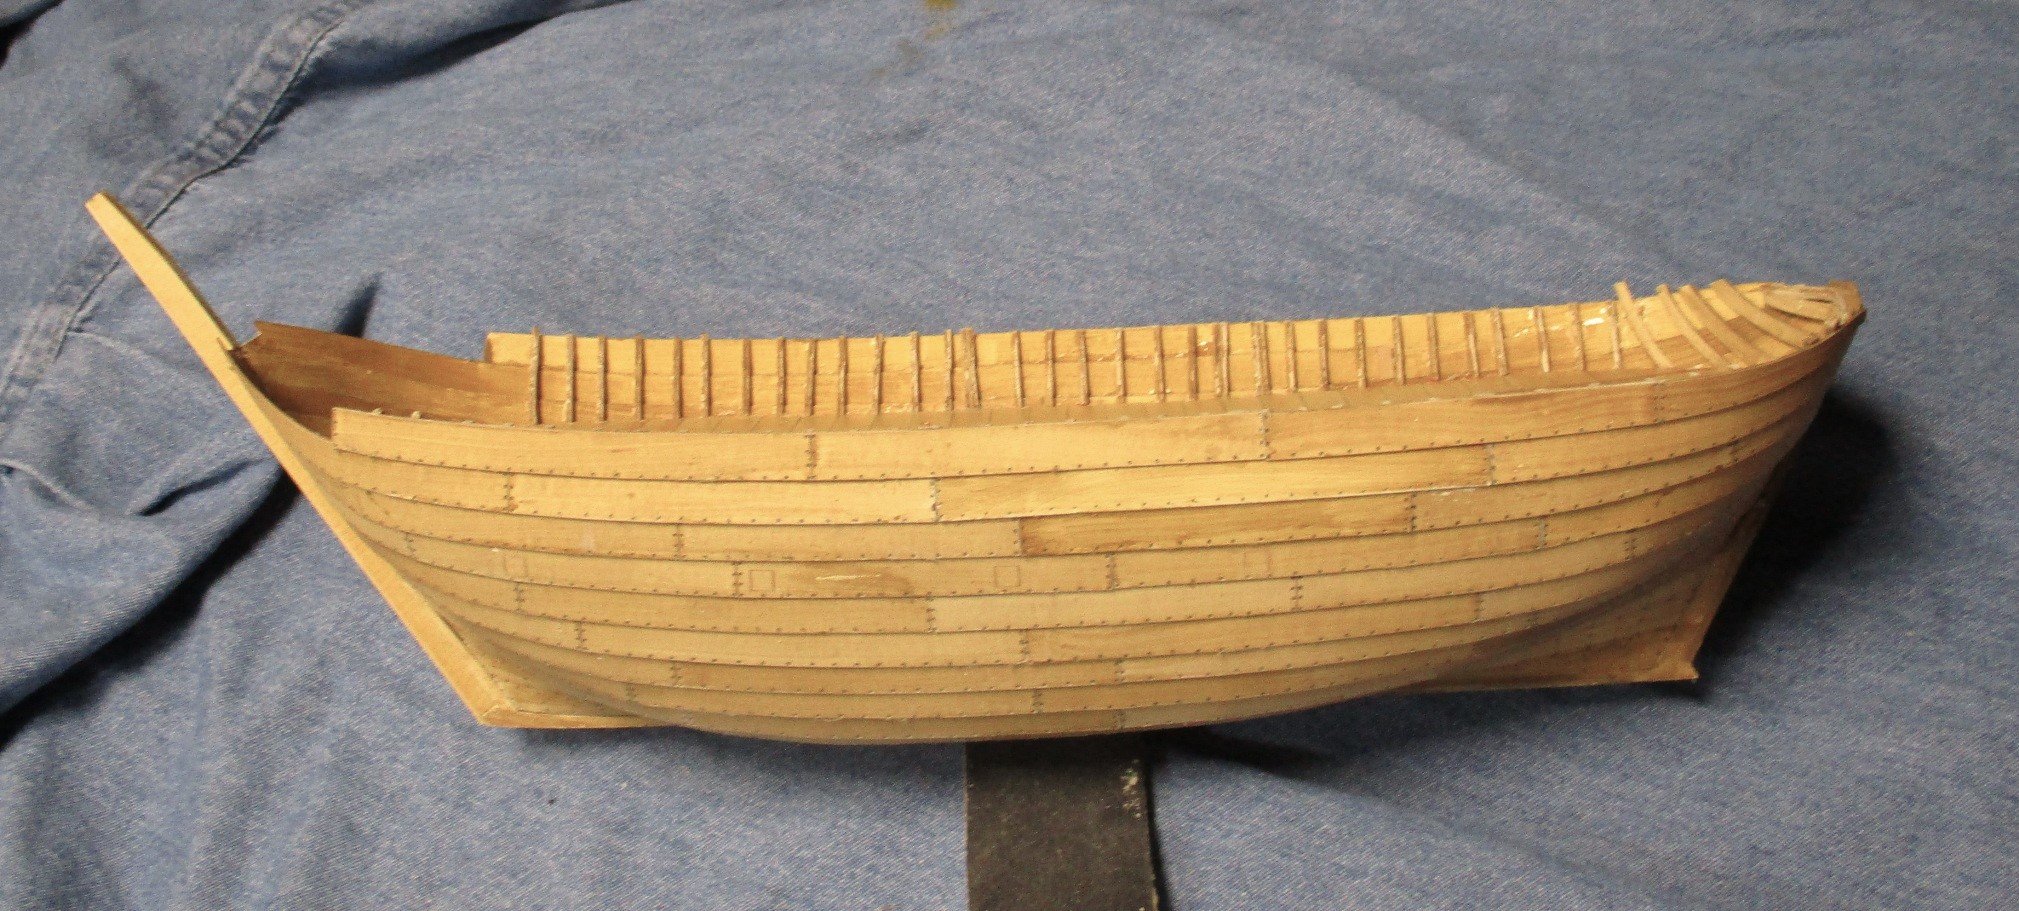
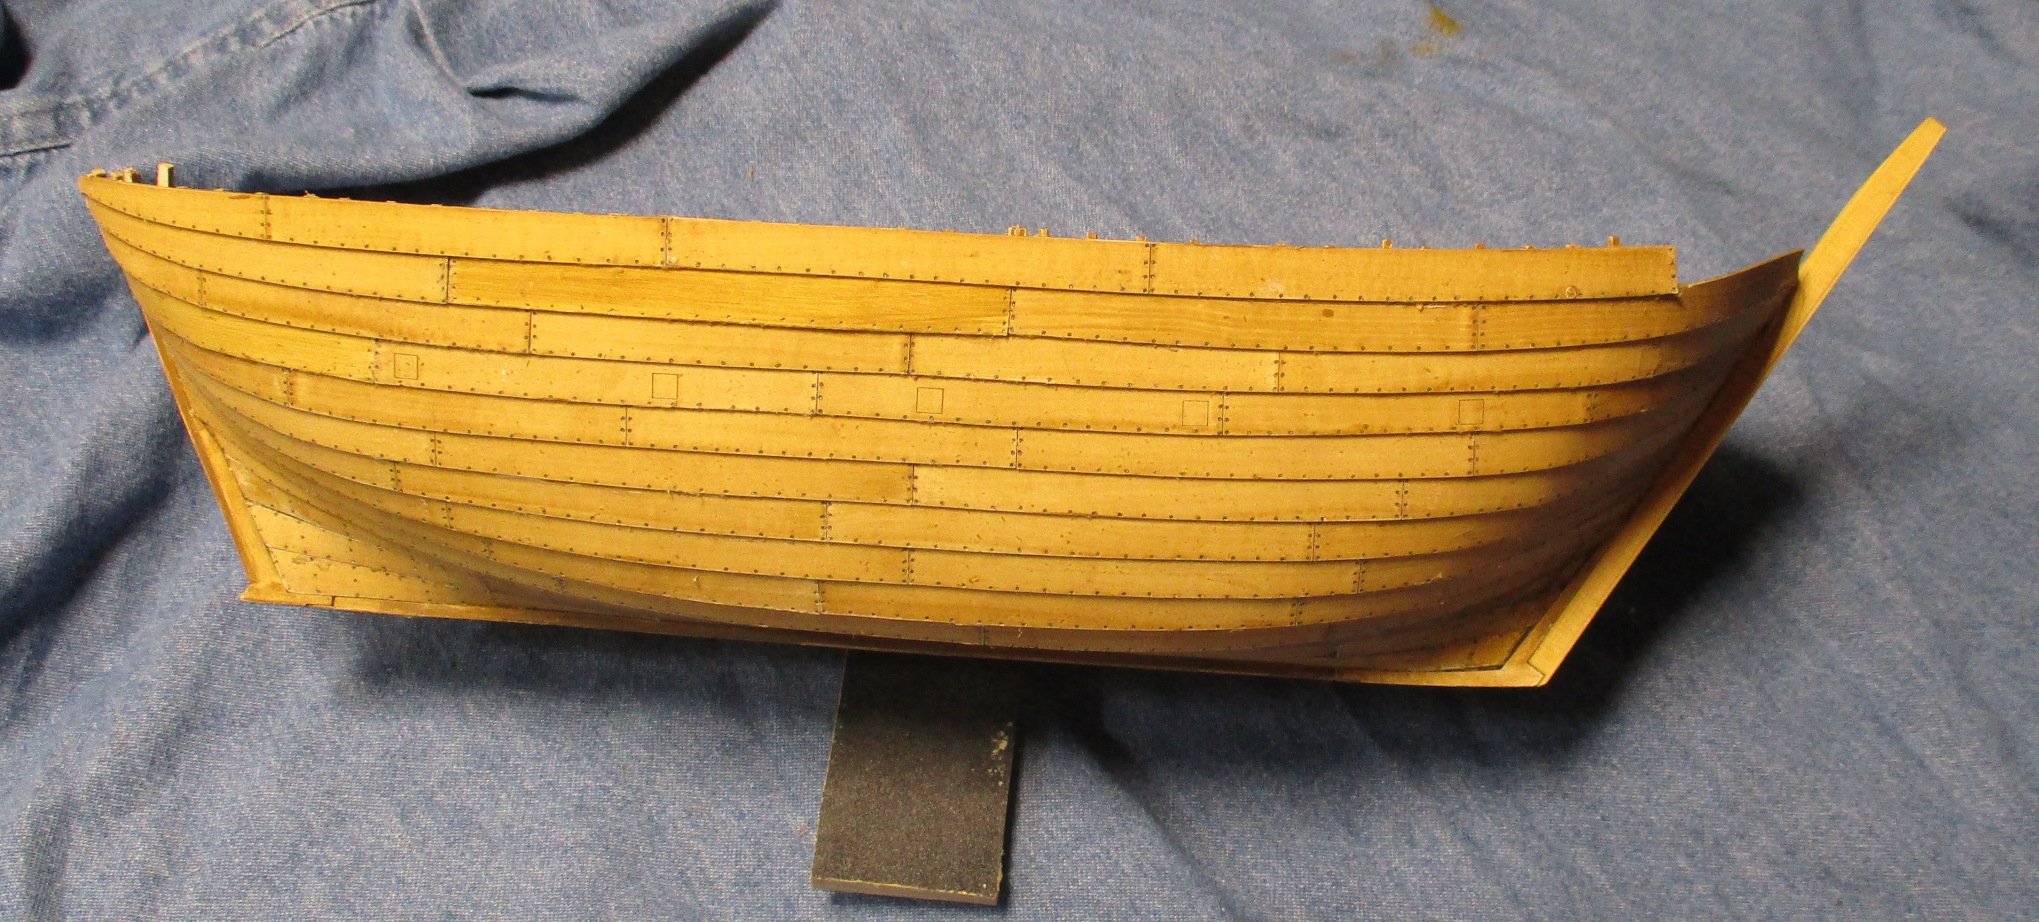
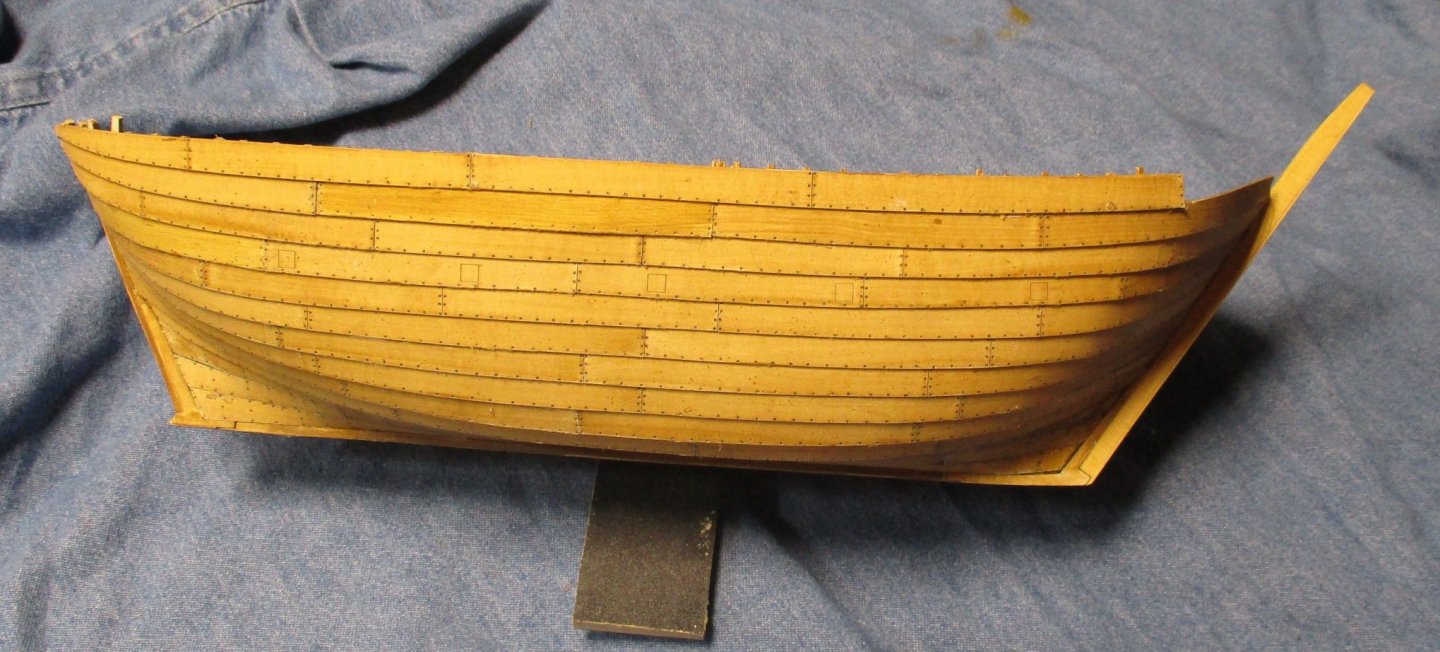
Progress continues. Hull planking and (most) frame extensions complete.
- 130 replies
-
- 5
-
-
- wütender hund
- hanseatic
- (and 2 more)
-
Chazz, Thanks for the info. I will check them out.
-
I have been bitten by the cog bug. After watching Chris Coyle's log, I invested in the wooden version of Wutender Hund (Woody Dog). It arrived a few days ago and I just had a good look at it. My intent is to bash it slightly so it is a non-military/more commercial version. I am very impressed with it. The instructions seem more detailed and the parts more crisp. Don't get me wrong, the parts on the Cardy Dog are good quality and the laser cutting is top notch. The cardboard, however, has issues as I mentioned above when it is hot or humid. My first reaction is to set aside Cardy Dog and start working on Woody Dog. I vow not to, but...… <build me. build me.>
- 130 replies
-
- 5
-
-
- wütender hund
- hanseatic
- (and 2 more)
-
Experiment complete. Aware of the risks posed in post #5, I took my experiment outside with adequate ventilation. I still ended up with a slight headache and mild buzz. I took a gob of contact cement and placed it in a shallow container, mixed in some acetone. It thinned a little on the surface but the result was not great. At this point the bottle is nearly unusable, so I will put some acetone in the bottle and see how that works...give it some time to work.
-
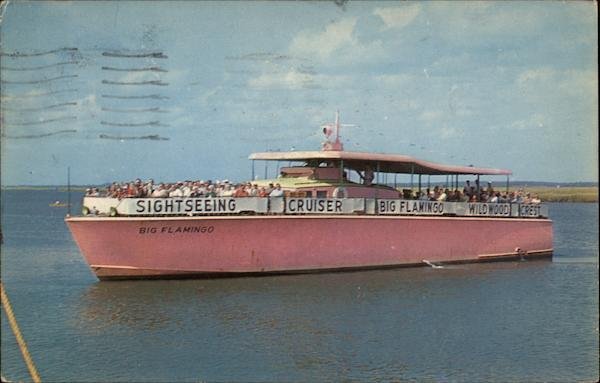
Throbbing engines, indeed! Back in the 60's, when I was a wee lad, we used to ride on an old PT boat converted for tourists...The Pink Flamingo. I still remember the engines. No 50 cals.
-
I used to go to TJ alot in the 90s. Not anymore. Too dangerous for me.
-
All, Many thanks. I have no idea what toluene is, but a check of AMAZON says it is more expensive than I want to pay. Better to toss the bottle and get new. I will get some 100% acetone and try it out without burning down the house or asphyxiating myself. Bob, I get my Cali banned stuff from Arizona.
-
Many thanks to both of you. Good info.
-
I'm not sure if I am posting in the correct forum, but I can't find one for glue. What is the best way to thin contact cement. I am using Weldwood DAP contact cement on my card model. I am down to a third of the bottle and it is getting a bit thick... coming out in gobs. I want to thin it down a bit so I can continue to use it. I see nowhere on the bottle the recommended "clean up" material.
-
Newly dabbling in cogs, I have become interested in medieval ships, particularly of northern Europe...but not exclusively. As Louie da Fly said, I have been lured to the dark side (wait...I thought that was scratch building). Expanding from the cog, the more I read the more confused I get. On one site it lists Lisa von Lubeck as a late era cog or krewaal. Some have noted that this is also a caravel....is it? MATTHEW, the replica of John Cabot's ship is listed as a caravel also. When I think caravel, I think Nina and Pinta while MATT and LISA look more like carracks. I plan to do more research, including reading Louie (Stephen) and other medieval modelers, but thumbnail...how is LISA a caravel and not a carrack?
-
Two half hulls spliced together. Interesting concept. Beautiful work. I will be following along. Good luck with that ebony. I have never had much success when working with large pieces. I found it to be too brittle. That is definitely one wood where you need to be wearing a mask when sanding.
-
Postscript: I was able to dry fit the three aftmost port side planks. Notches not withstanding, the planks fit with room to spare. The gaps between the strakes are smaller than planned, but that is not a bad thing.
- 130 replies
-
- 4
-
-
- wütender hund
- hanseatic
- (and 2 more)
-
Is there an easy wooden tall ship out there to build?
Chuck Seiler replied to thegrindre's topic in Wood ship model kits
Model Expo went thru a rough patch a few years ago (as I recall) but they are a thriving business. I regularly get emails from them regarding sales and specials. Their customer service is normally top notch and John Garcia responds quickly to emails. I believe he frequents this forum. As mentioned before, if you have problems with parts from their kits (Model Expo kits), they happily replace the parts.