


jack.aubrey
-
Posts
1,268 -
Joined
-
Last visited
Content Type
Profiles
Forums
Gallery
Events
Posts posted by jack.aubrey
-
-
Posted: Mon Jun 25, 2007
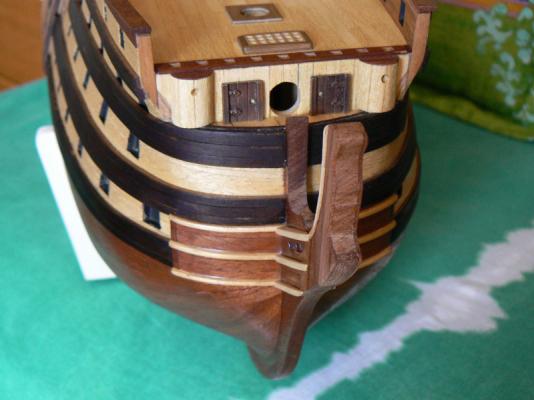
As promised I'm back to show more details on the work done .....
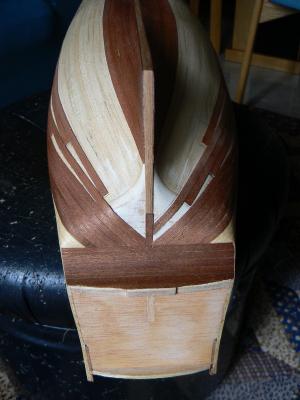
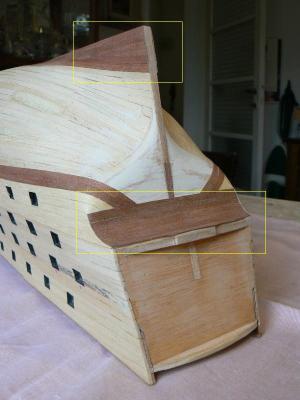
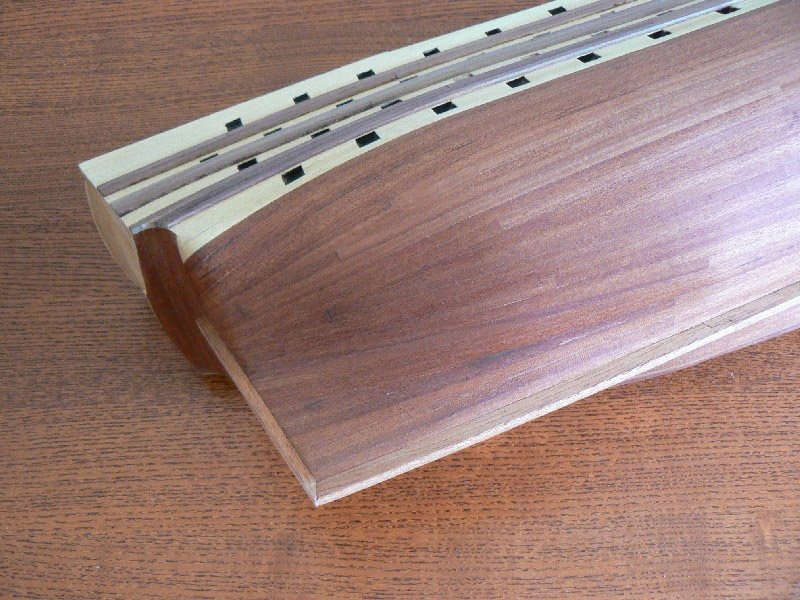
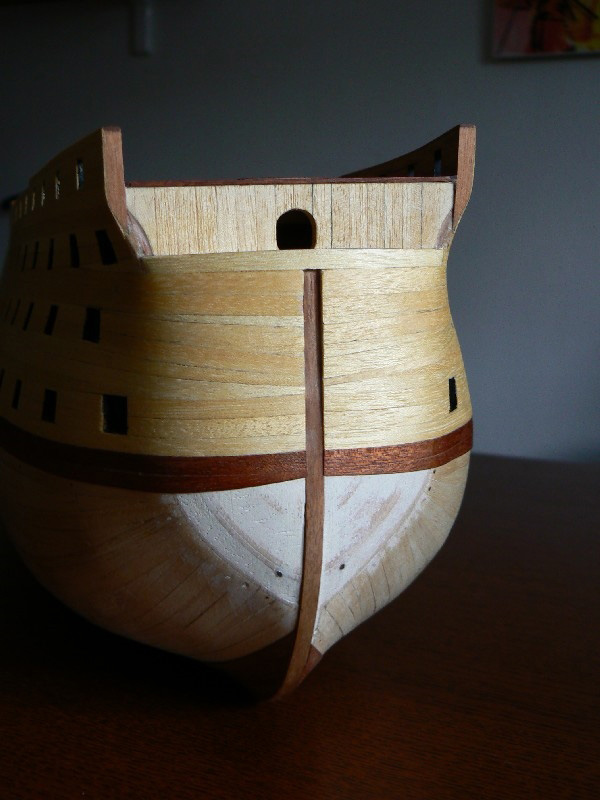
Here I will show the results of my work in the stem area. During these activities I accidentally broke a piece of the stemson, just near the figurehead should be installed.
The reason of this accident was due to the wrong direction of the wood fibres, that made the piece fragile. To repair the mistake I had to:
- glue the broken piece
- plank in the right direction some strips of mahogany (1x5mm.)
- level the three strips in ramin (the quasi-white wood) and install three new strips over them.
After that the piece is fully repaired and strong enough. The only problem is that now it is two millimeters wider.
In the last photo it is possible to see also the now finished lateral reinforcements of the wales in the middle of the hull.

- CaptainSteve, yvesvidal, gieb8688 and 2 others
-
 5
5
-
This model represents my return to active shipmodeling after 40 years of inactivity . .
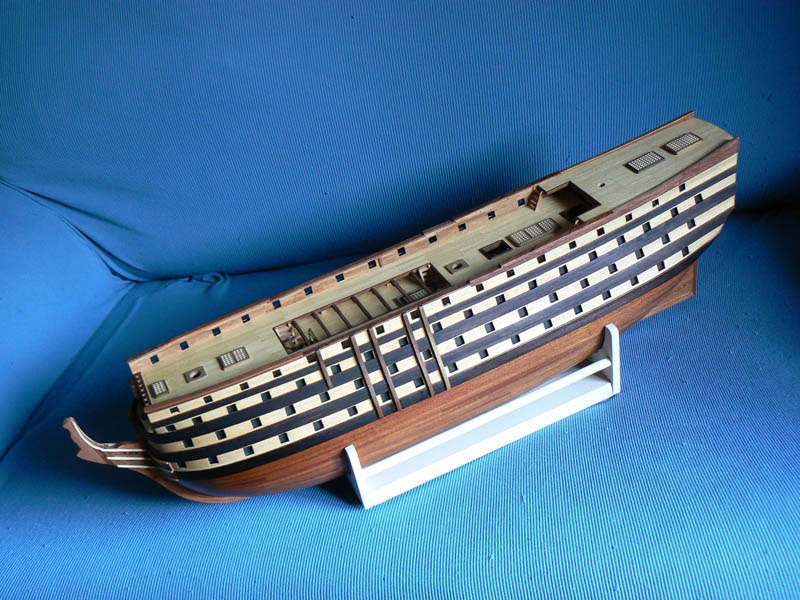
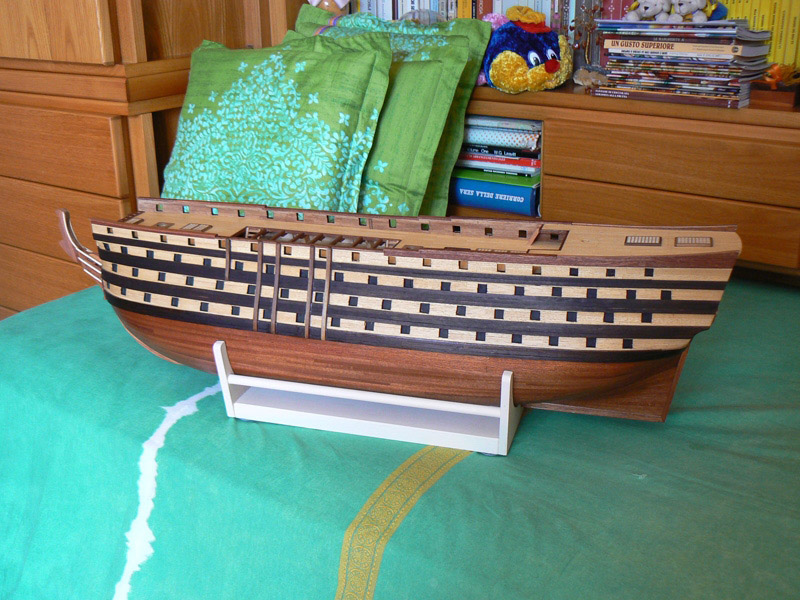
Posted: Sun Jun 24, 2007
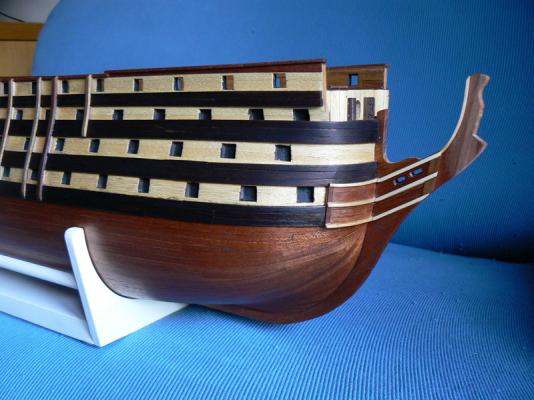
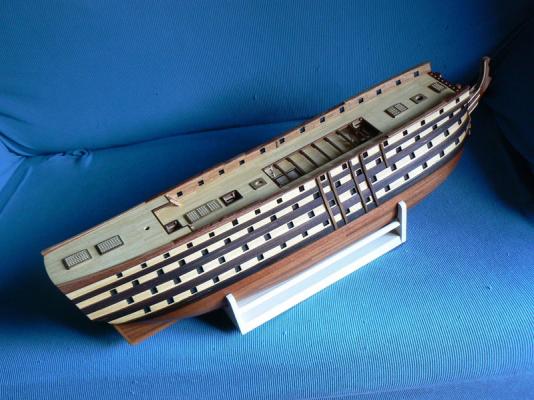
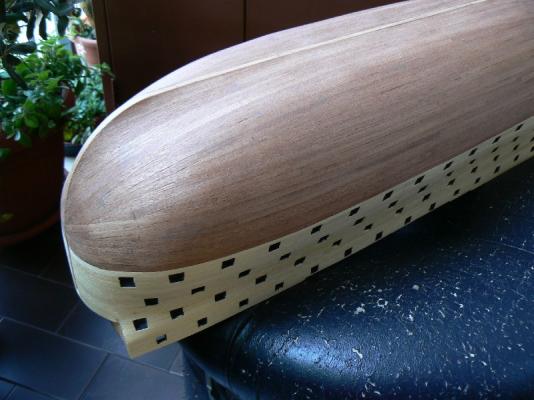
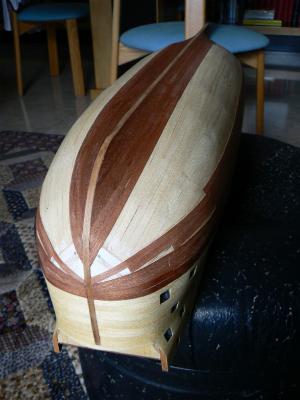
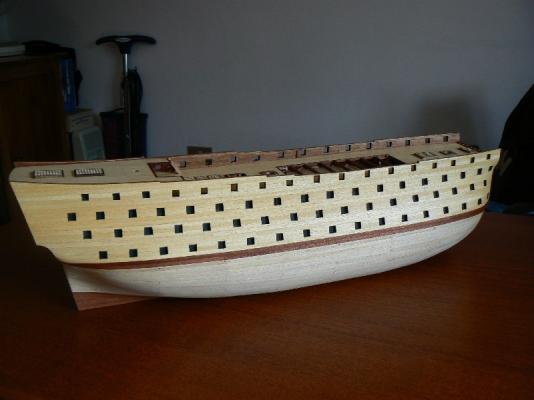
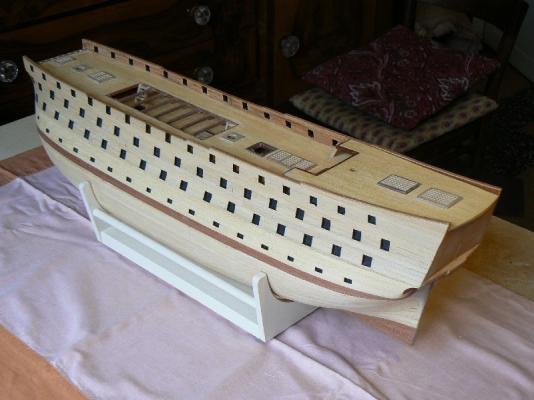
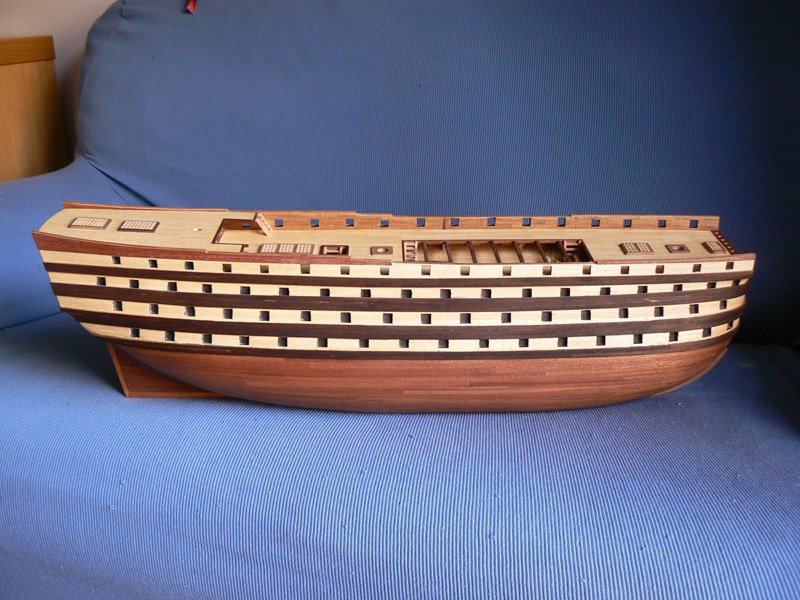
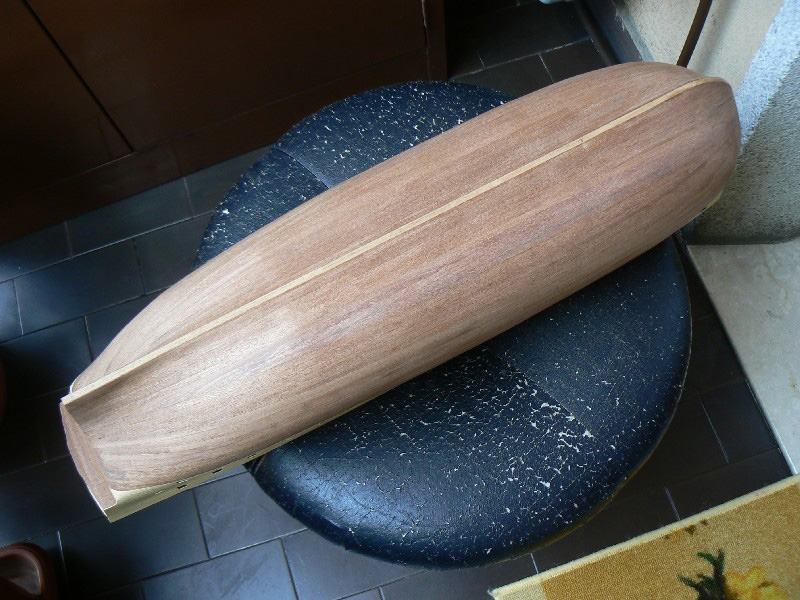
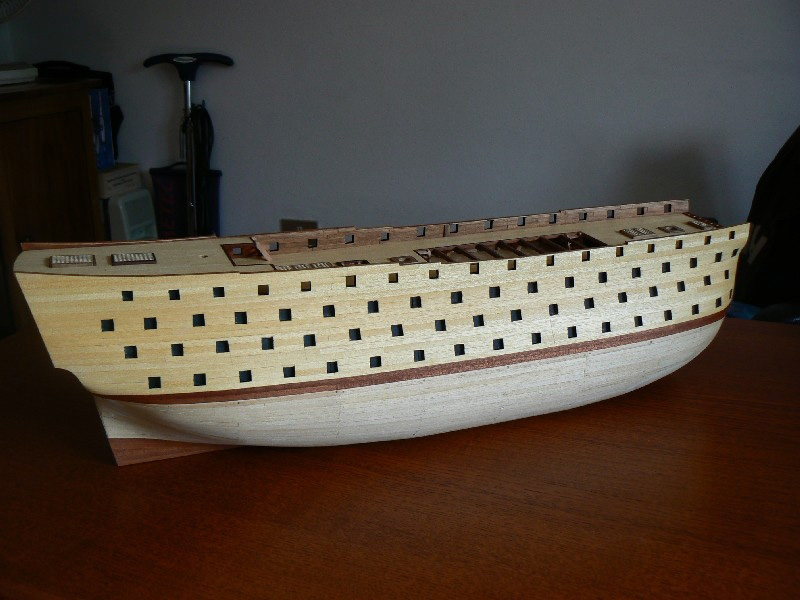
These three images are showing the model as it was yesterday, June 23.
They show the overall model. With respect of my previous messages I have done some new activities that I will show and explain better in the next messages, that will follow soon.


-
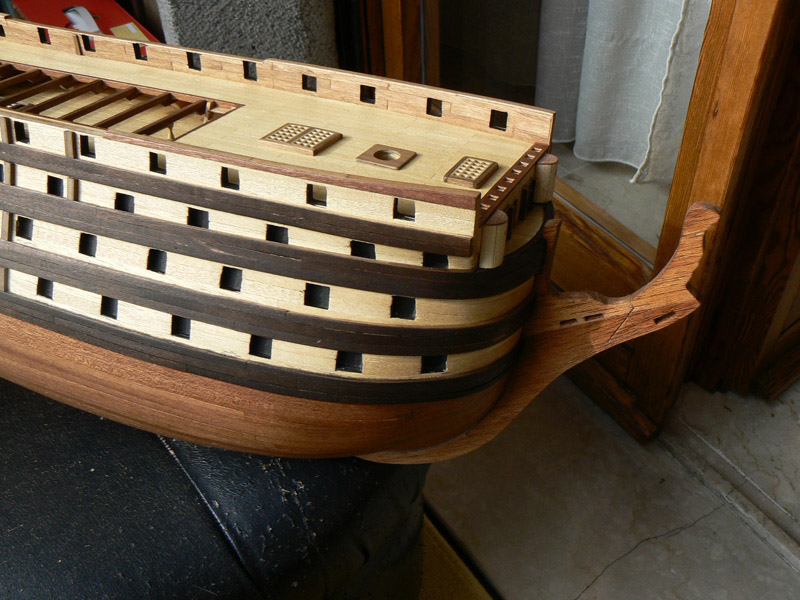
Posted: Thu Jun 07, 2007
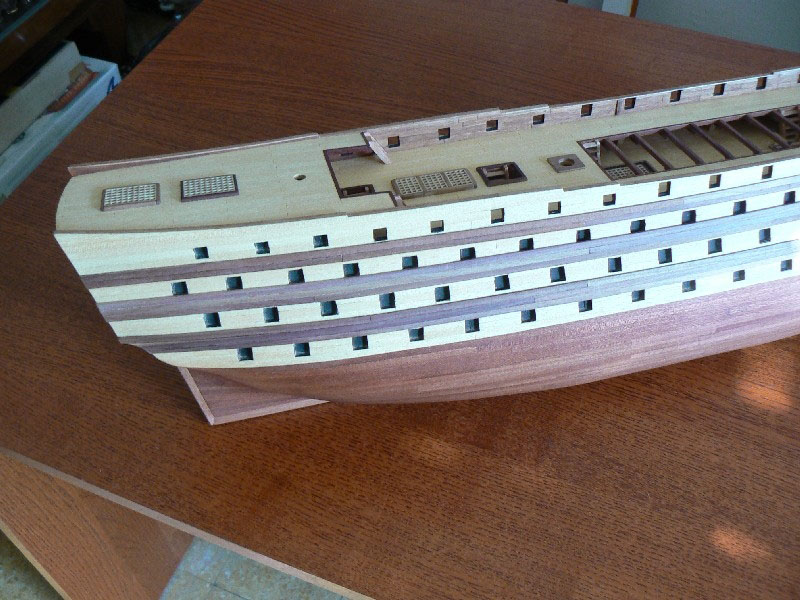
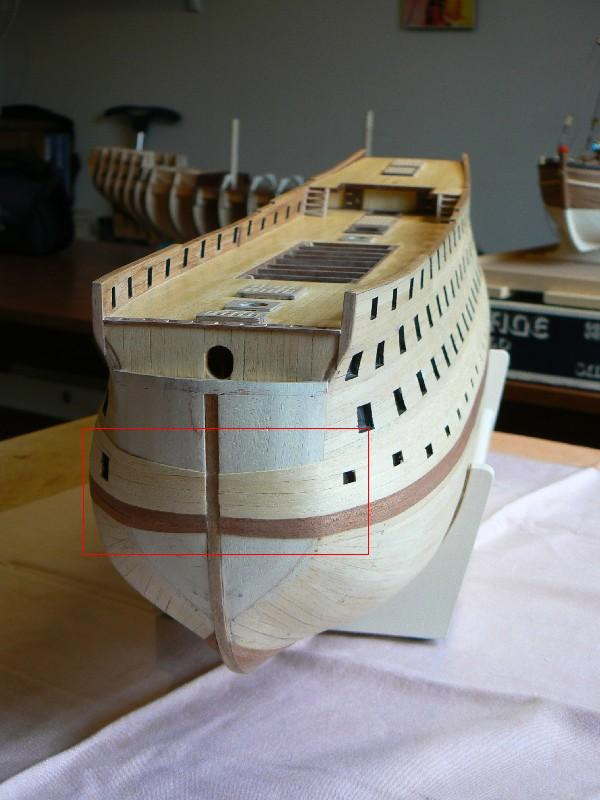
After the wales I am now working on some details on the hull.
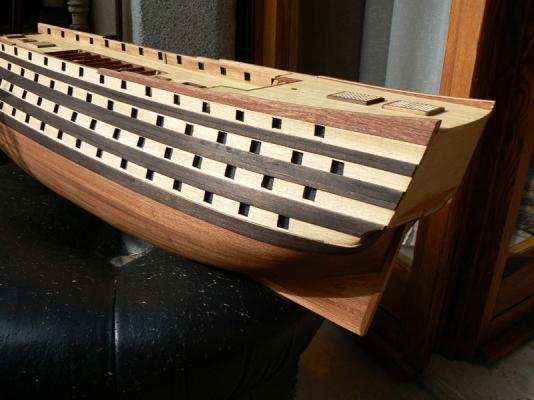
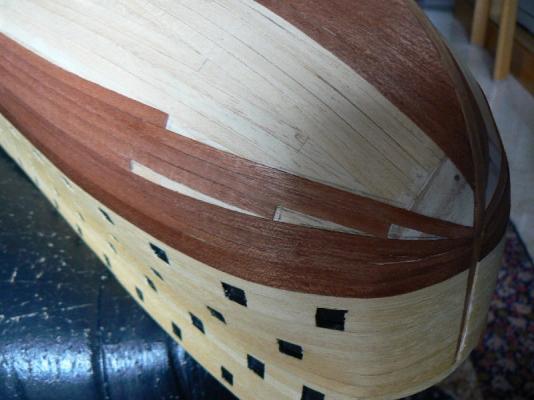
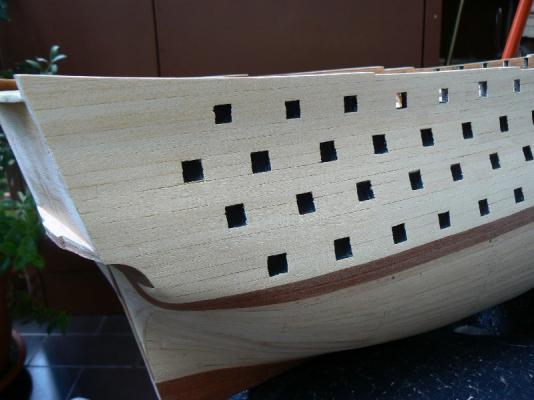
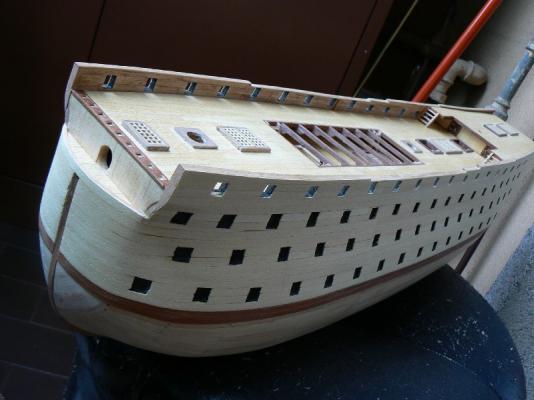
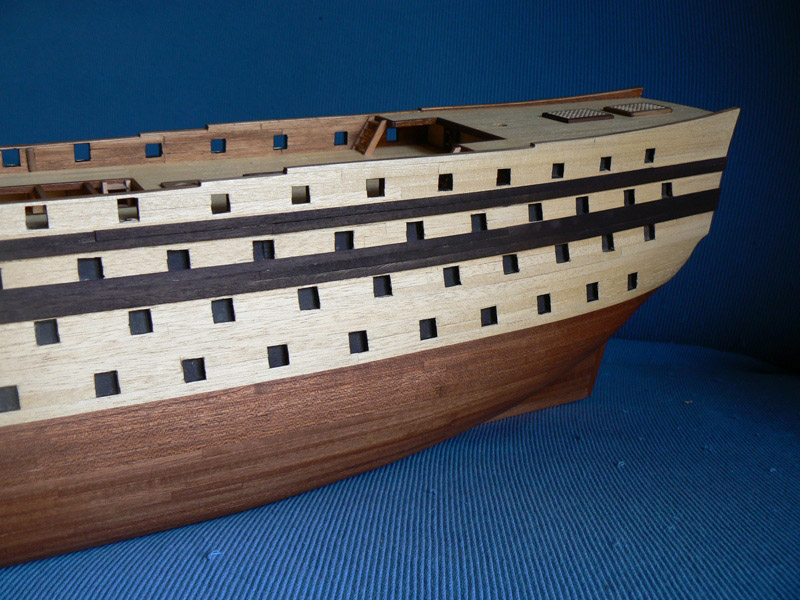
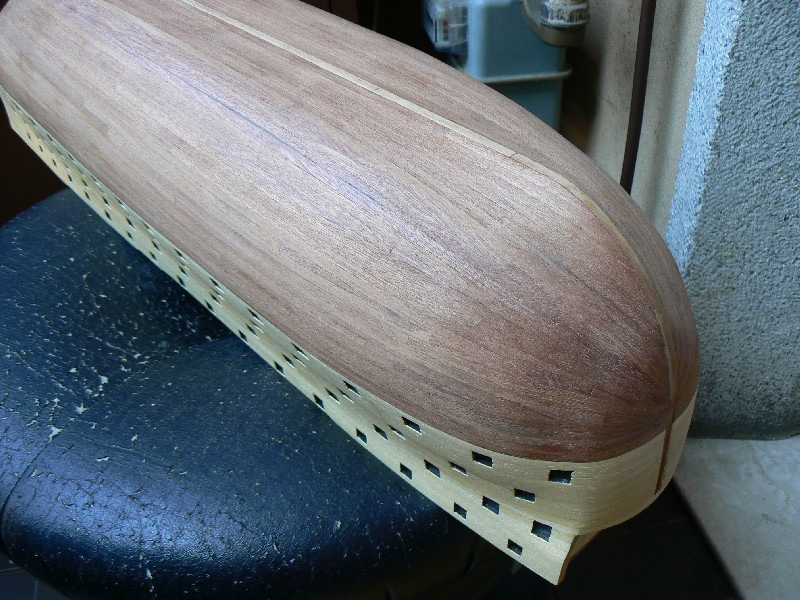
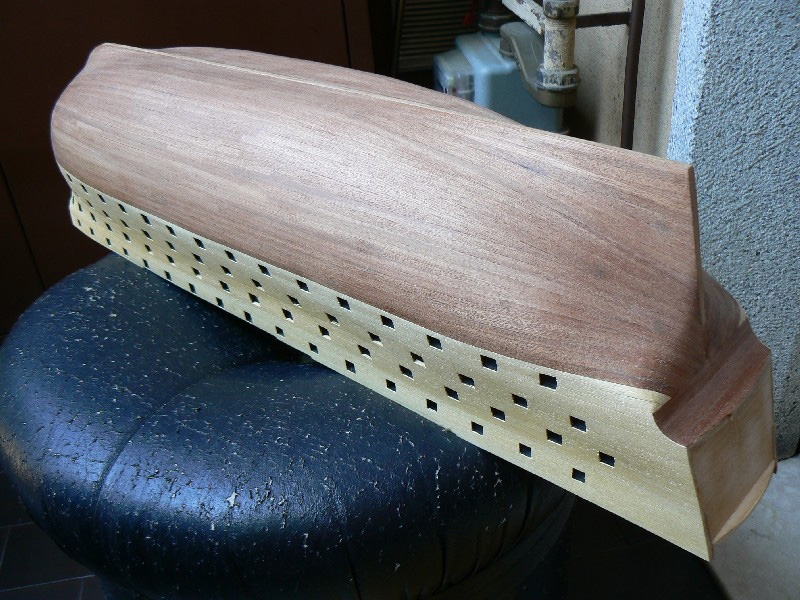
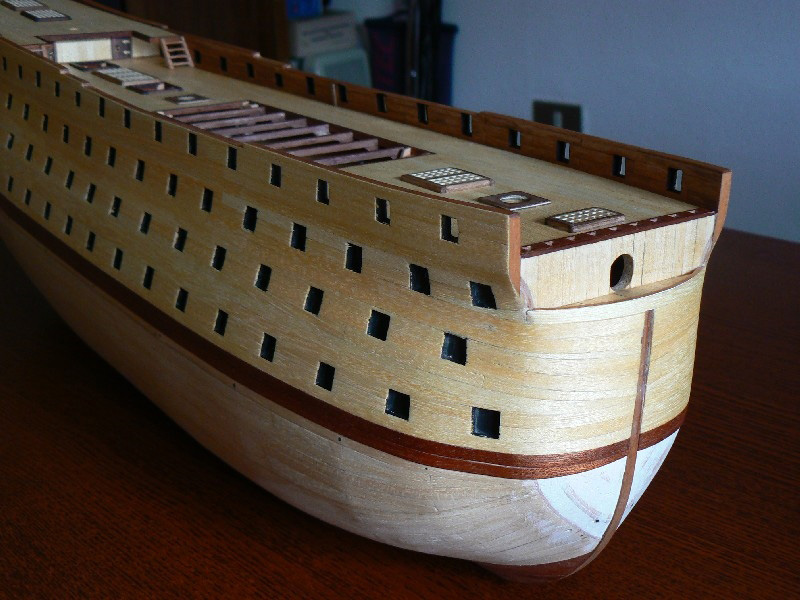
The first image shows some kind of reinforcements that were installed on the vessel in the proximity of what should be the waist (the waist was not present on the S.S.Trinidad because she was a four decker, but it's very common in the two deckers).
I have now to glue the last pieces of these reinforcements but I'm now soaking the strips, so I need another one or two days before having terminated this activity.
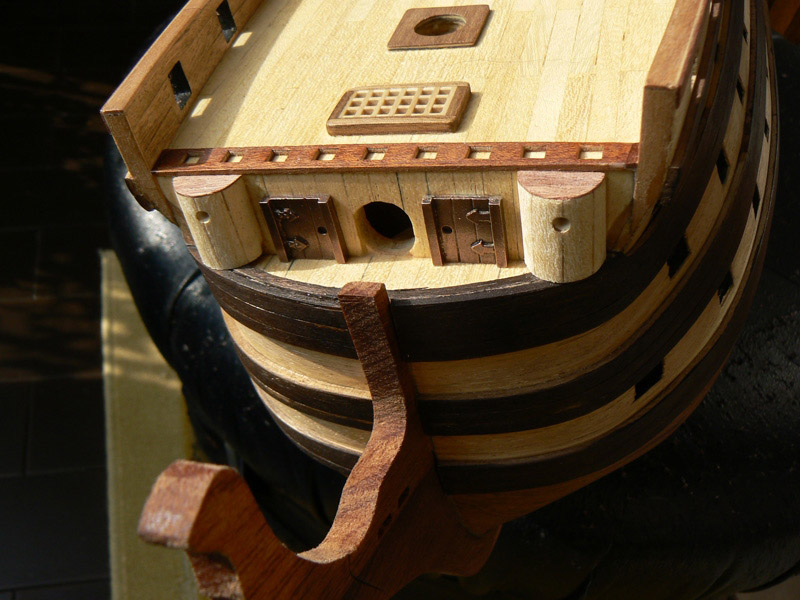
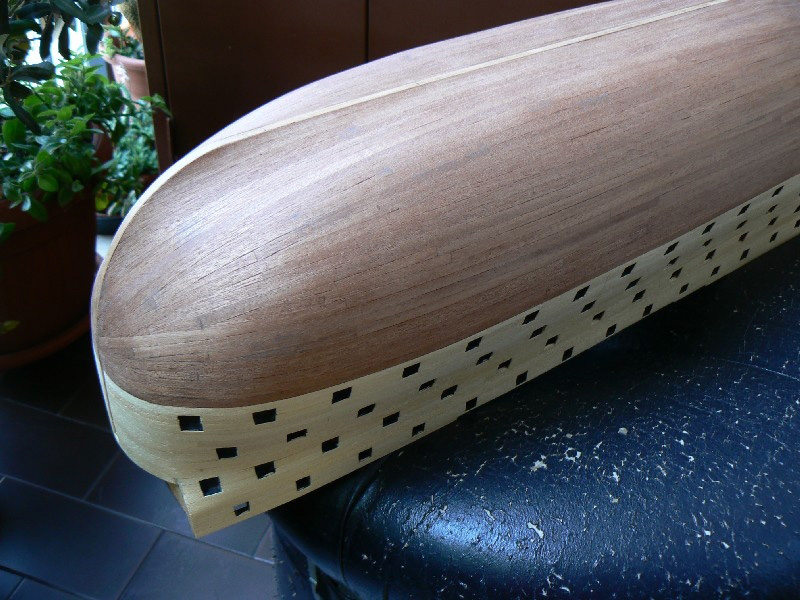
The remaining images are some details of the bow, with the stemson in evidence. I'm working on the small deck where will start the bowsprit.
In evidence the two half cylinders near the doors. I think everybody knows what they are ..... (the toilets)


- GuntherMT, algeciras1801, WackoWolf and 2 others
-
5
-
Posted: Tue Jun 05, 2007
June 5th, 2007.
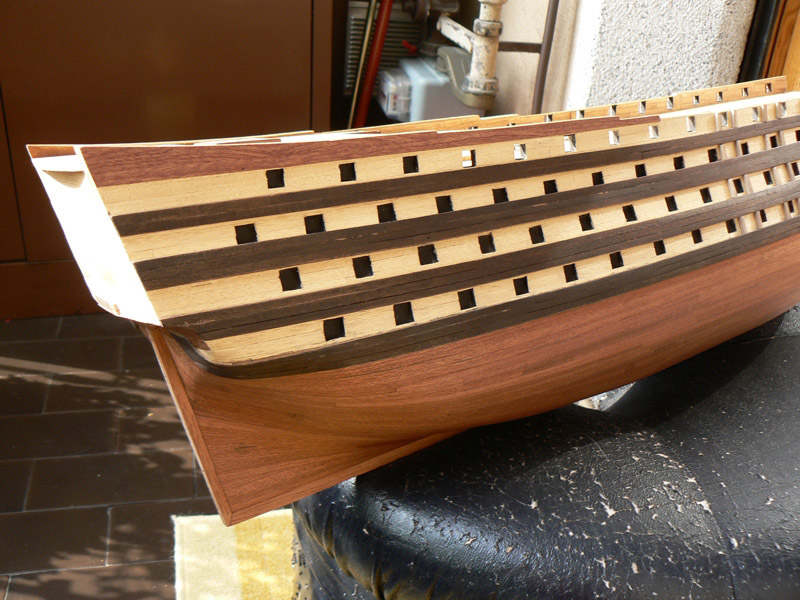
Finally I have finished to install the wales. Both sides are done ... and as usually, the second side done is resulting the better. The importance of the experience ...
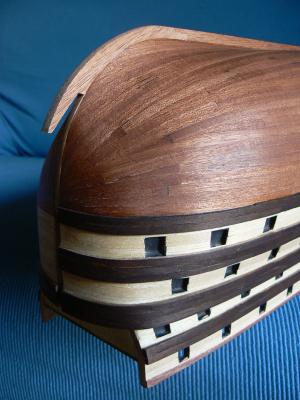
As you can see I have completed the lower wales in the stern area with the critical curve near the sternpost.

-
Posted: Fri Jun 01, 2007
PS: at the moment of writing I have received a new shipment (month of june) of material and instructions.
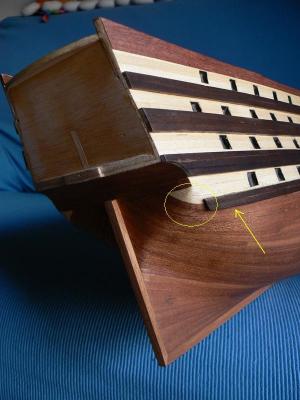
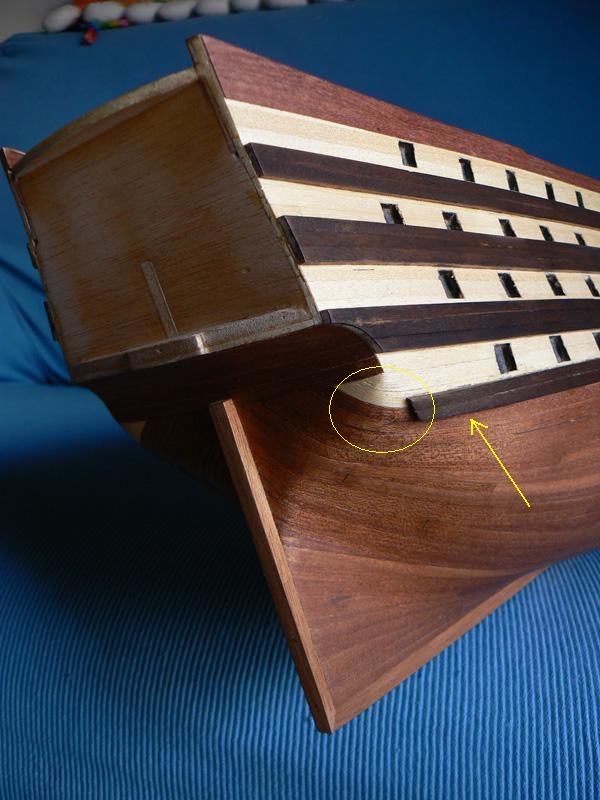
I have discovered that the last wale, the one close to the waterline is not complete: I have to install another strip in the position of the arrow of the second photo and to continue the wale towards the poop. This is an interesting curve to do !!
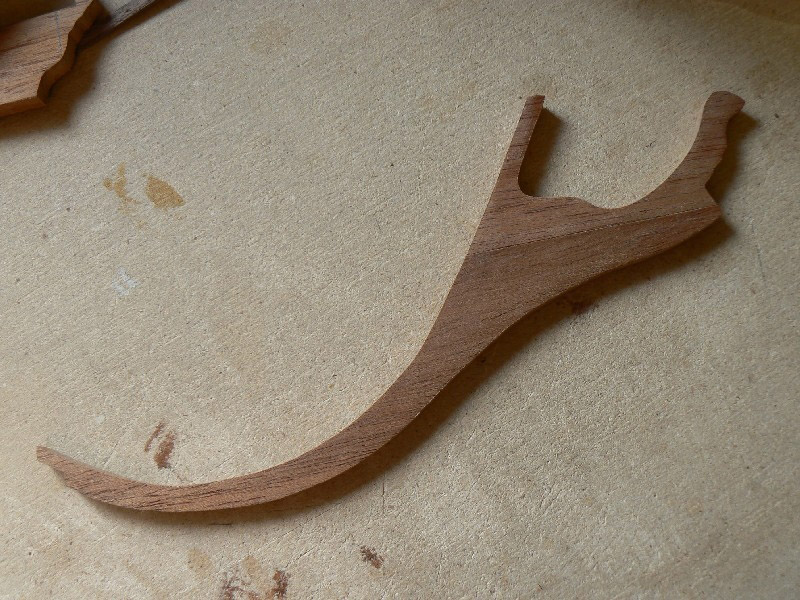
I am also modifying the stemson in order to have it made of three pieces, more similar as it was in reality. One of these pieces is showed in the first photo.
-
Hi Yves, while building this model I discovered for the first time this oil and I have always used it in my more recent models such as the St.Trinidad's Cross section and the Soleil Royal. I like very much it and I appreciate the fact that it is totally absorbed by the wood and, unlike varnish of every kind, you can continue to use the vinyl glue to add new things to the surface treated with it. Regards, Jack.Beautiful result Jack. That oil really transforms the wood.
I agree with you that there is no need to varnish anything.
Yves
-
Posted: Fri Jun 01, 2007
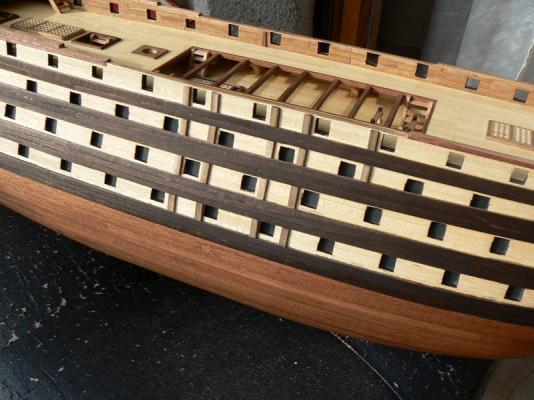
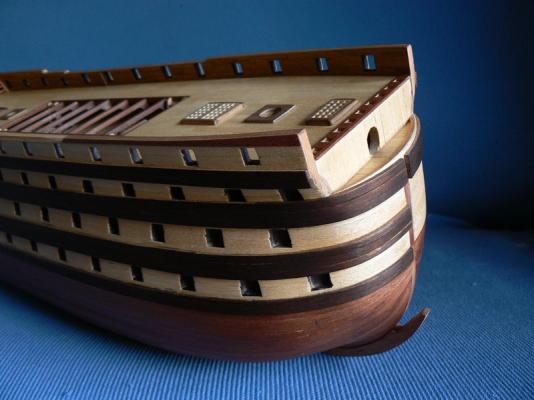
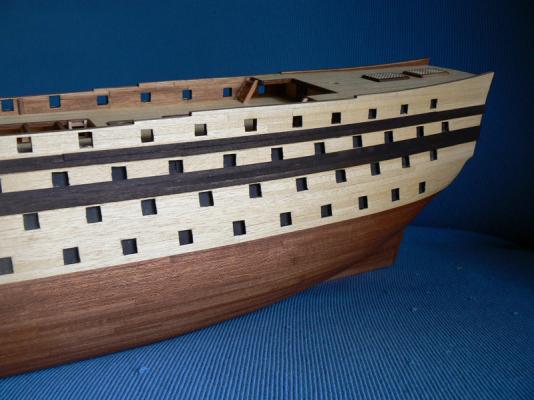
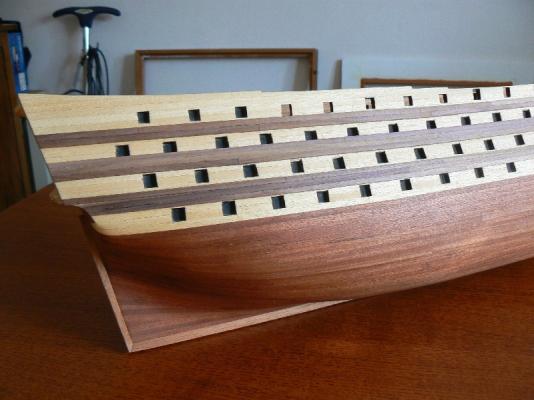
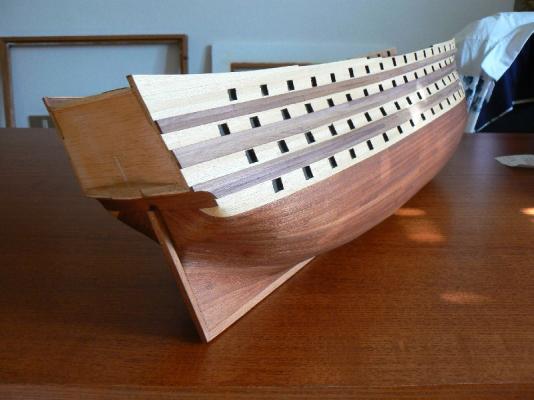
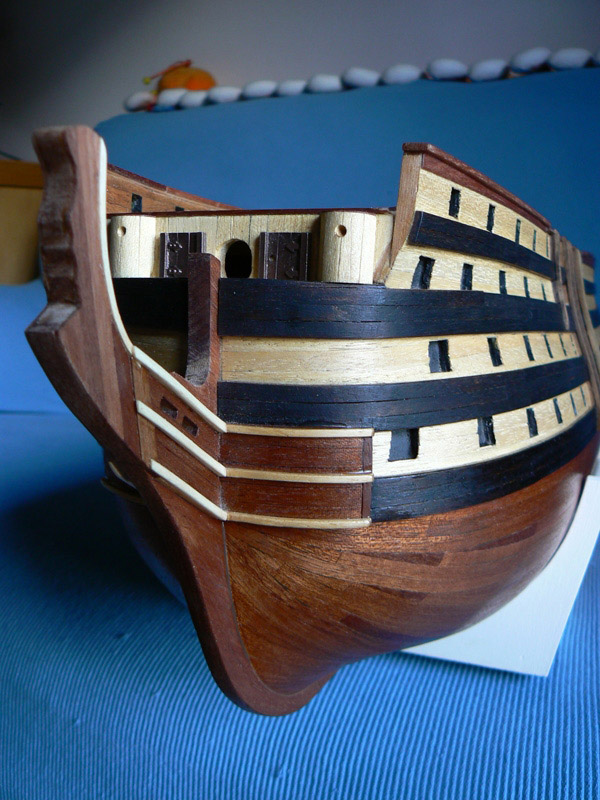
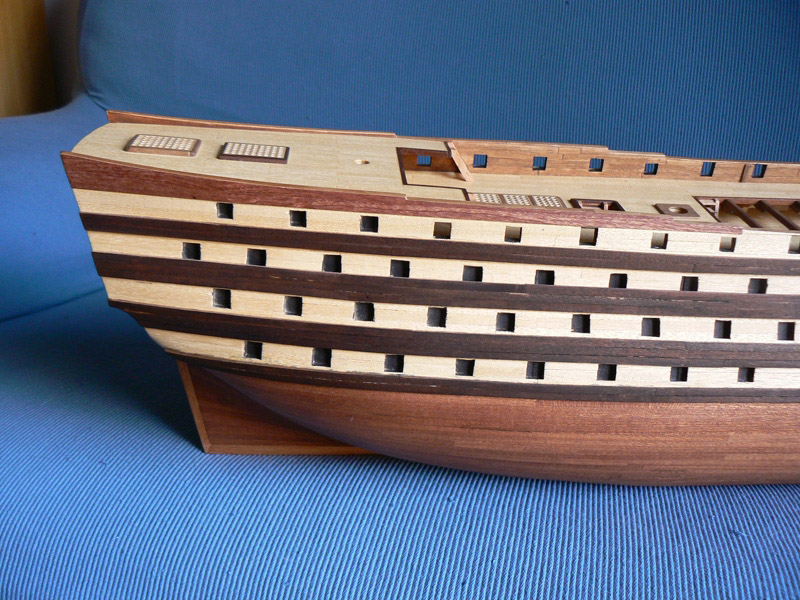
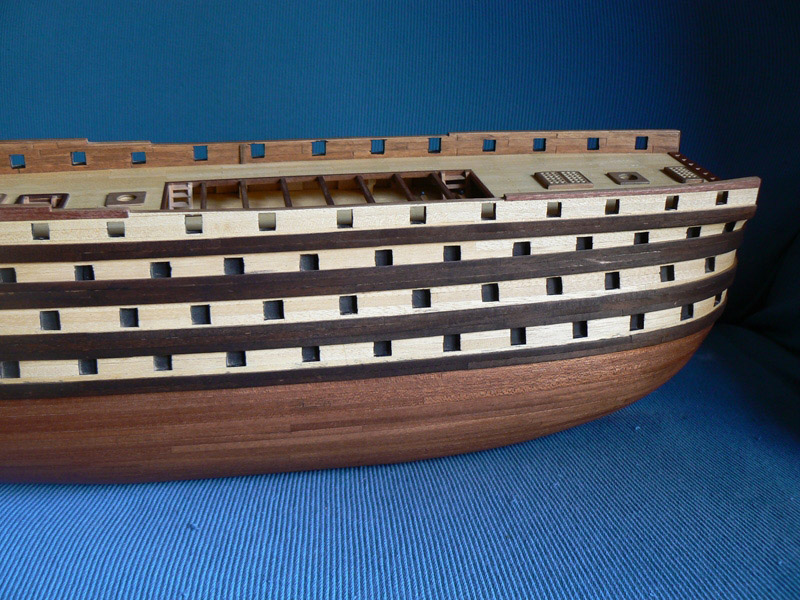
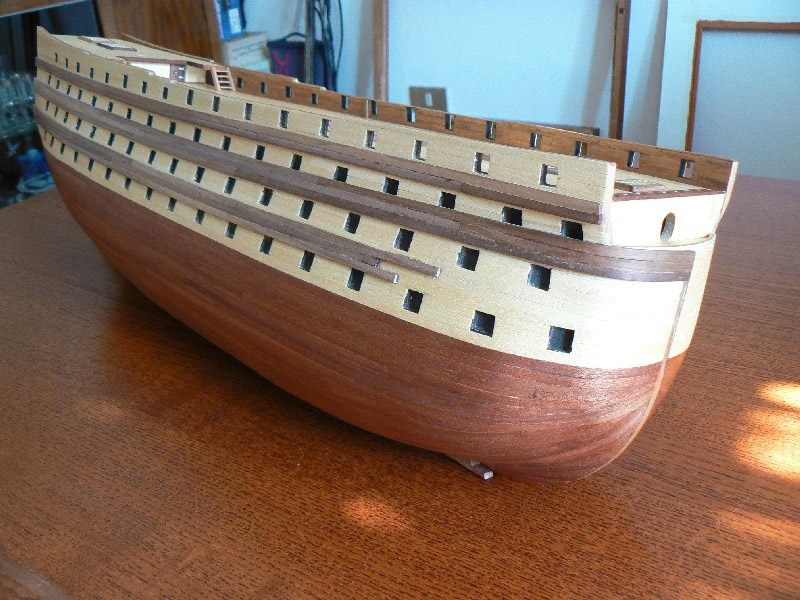
Three more detailed images of the starboard side of my Santìsima Trinidad.
In these images you can easily see that the whales have been coloured. Normally they should be black but I have decided to use a different method.
Instead of using an acrylic black paint I have used a powder for coloring wood to be diluted in water. I think its name is mordant but I am not 100% sure. This powder is available to simulate several kind of woods. I have choosen the ebony type. As you know ebony is practically black.
I have applied this liquid with a paintbrush for three times in order to fill as much as possible the color. Finally I have applied another color (mahogany) for a fourth time.
The result is a very dark brown, close to black, that I like very much.
Now I'm working in the same way on the larboard side.


-
Posted: Thu May 31, 2007
The starboard side of my Santìsima Trinidad is now completed. In addition to the wales, made with walnut, there are, in the topmost side of the hull, some veneer stripes of mahogany.

- WackoWolf, le débutant and yvesvidal
-
3
-
Posted: Sun May 27, 2007
And here are two other images taken in the same day. I like particularly the second one. Note that I have applied the danish oil in the lower part of the hull.
THE OIL ! I have to say that this oil is simply fantastic. Once it is dryed perfectly (3-5 days) the appearance of the wood is very, very nice.
Compare these photos with the same without the oil and you will discover the difference ! I'm honestly thinking not to use the varnish as final painting and, instead, to apply another coating of this oil.
Has anyone soggestions / experiences regarding this idea ? Any comment is well accepted.
-
-
Posted: Sun May 27, 2007
In the meantime I am preparing and installing the wales of the startboard side, I made another interesting activity.
In the previous photos of the hull you have probably noticed that the sternpost, the stemson and the keel are not there.
In the may shipment of the magazine these pieces are included.
Unfortunately, after a quick review of this material I found them of poor quality: I was expecting some kind of solid wood and I found'em made of plywood !! Also the cut wasn't perpendicular !!
I decided this was unacceptable for me and so I have used this material as a sample to reproduce my own pieces.
Obviously they are all made with solid mahogany wood.
I then mounted the sternpost and the keel in the proper position on the hull. At the moment I have not yet installed the stemson because I have to finish the whales before. But the piece is ready.
The following image shows the stemson ready for the installation.

-
-
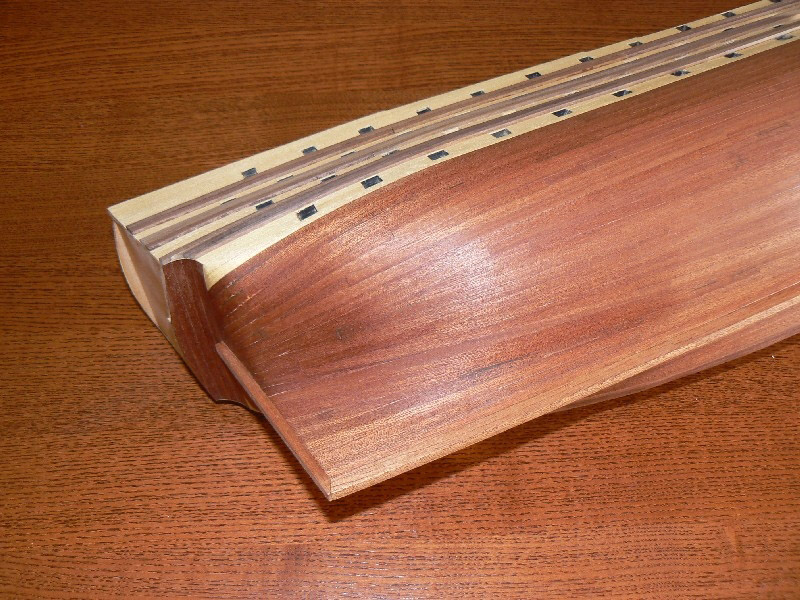
Posted: Sat May 26, 2007
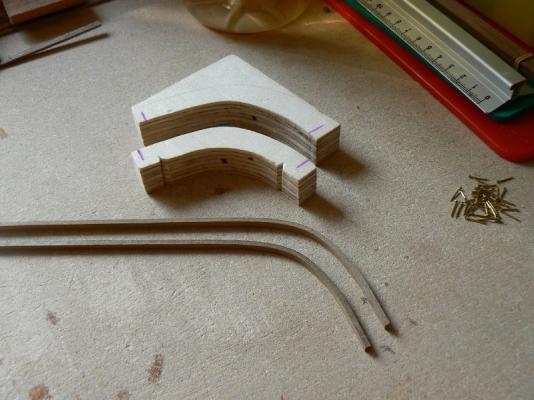
As anticipated in my previous message I have prepared some jigs to curve the strips I have to use for the whales. The whales are made of african walnut of mm. 2x4 and are very hard.
The following photo shows one of the jigs I have done. The jig consists of two parts, that I call male and female. There is also an example of the strips obtained. The thickness of the jig can accept three strips at a time. Every whale is made of up to three stripes.
I proceed as follows:
- soak in water and ammonia for 24 hours three strips;
- preadapt the soaked strips to the curve by working with a candle;
- block these strips between the male and the female components of the jig;
- with some rope and adhesive tape, keep together the male and the female;
- leave the strips to dry for 24 hours;
- in the meantime I soak in water and ammonia three other strips.
As you can see the stripes are curved in the right way and, most important, they maintain the desired shape.
The installation at this point is only a matter of patience:
- take care to glue the stripes in the proper position on the hull (this is particularly important for the first of the three);
- once the whale is done, level the stripes with sandpaper.
Initially I used the vinyl glue but I wasn't satisfied, so I tryed with the cyan glue and I found this method perfect.
I had some problems with the quality of the stripes, mainly for differences in the color and in size. I have solved the differences in size with sandpaper but I haven't a same solution for the color.
I think I will adopt one of the followinf two solutions:
- use mordant color for wood to uniform the colors or
- use black enamel to color the whales.
-
Posted: Mon May 21, 2007
May 2007.
And this is the Santisima Trinidad after I have terminated the second planking.
I had to spend three hours with sandpaper, and in very few places with some colored filler ... before to achieve this result but I think it is satisfactory.
The photos have been taken before the application of the oil. For this reason the color of the wood is not fully enjoyable. With the oil it looks much better. Now I have to wait two or three days to allow the oil to dry and the next activity will be the istallation of the whales ....
But to do this I need to think a way to curve properly the strips for the whales (mm. 2 x 4).
I'm thinking to adopt the following method: build some woodden blocks of the right shape of the curves and lock the strips (kept in water and ammonium for sometime) in the between.
But I need also time to do some other tests with steamers and/or a candle. There are also special pliers. After I will decide.
Bye to the next time .....


-
Posted: Mon May 21, 2007
May 2007.
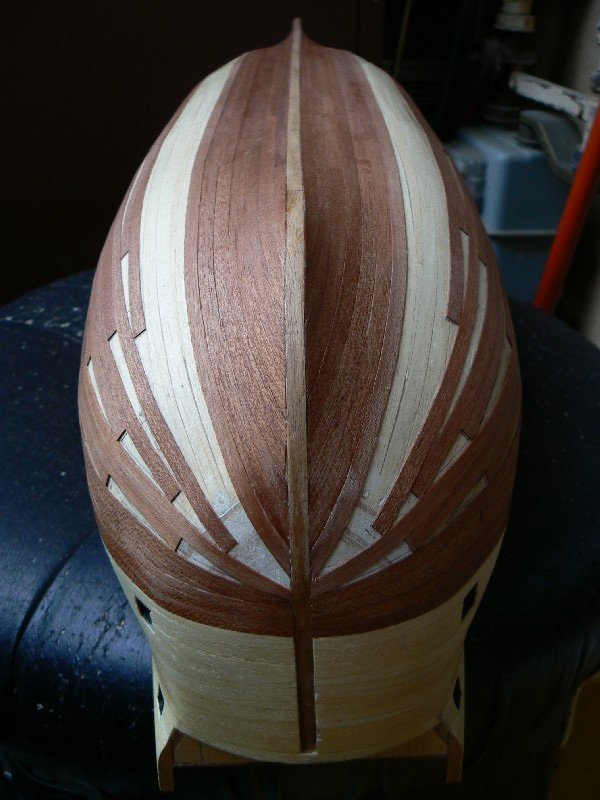
Once you have fixed the first stealer/drop plank, you need to repeat the same process for every empty area on the hull and, at the end (of the end), this should be the final and desired result.
It's very easy, do you agree ?
NB: This is not my model but a picture from the magazine, next some very (very) recent photos of mine model.

-
Posted: Mon May 21, 2007
May 2007.
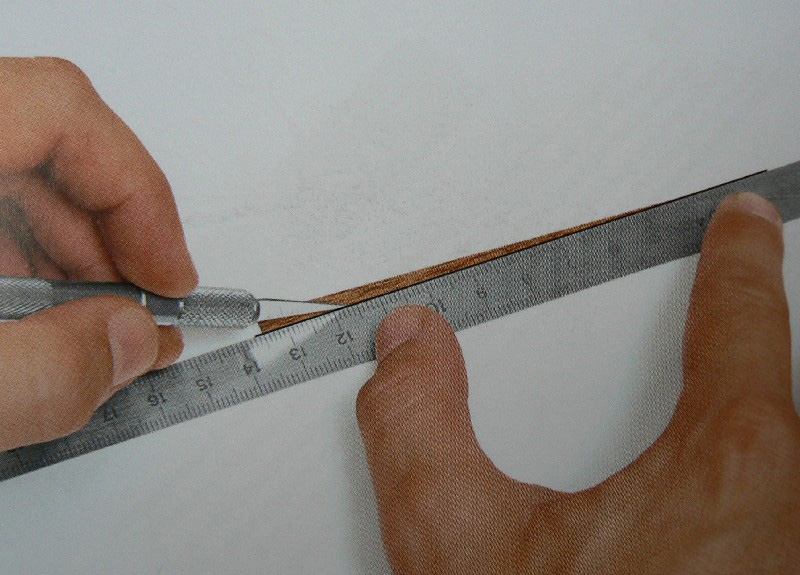
Once you have built the stealer or the drop plank (these should be the names of the triangles) and, more important, you have tested if the piece fits correctly, you simply need to fix it in place by using some glue and, optionally same adhesive tape.
The attached picture shows the method.
-
Posted: Mon May 21, 2007
May 2007.
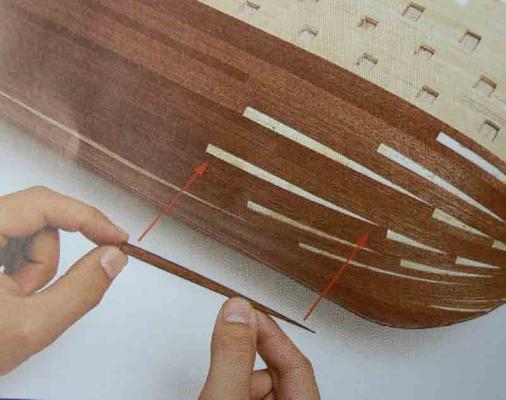
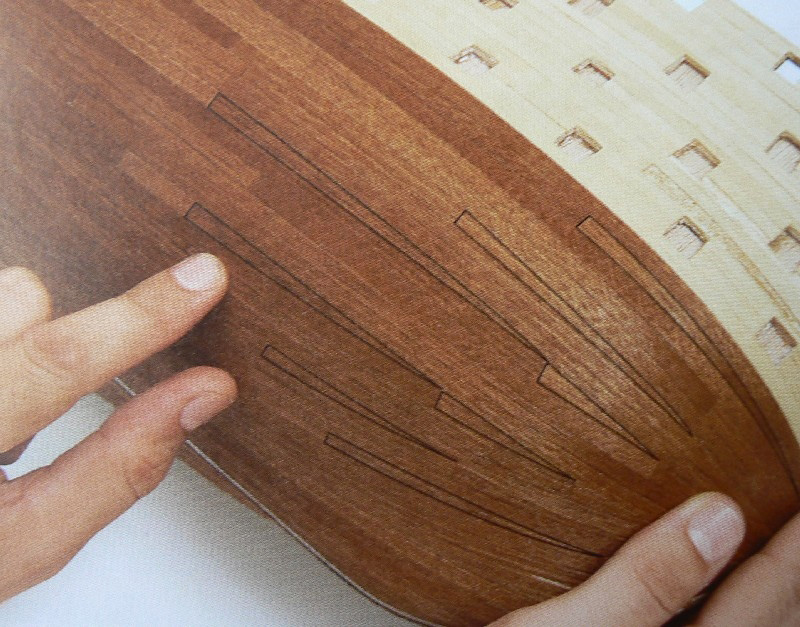
I have terminated to lay the veneer planks in the lower part of the hull.
Now there are a lot of short and long white triangles (or trapezium) where it wasn't possible to glue the plank. I think that the previous photos let you imagine very well what to do next: build for every unplanked area a triangle or a trapezium of veneer to glue inside.
This photo (a picture from the instructions contained in the magazine) explain how to build this piece of wood: take the proper measurement, cut the plank at the right lenght and after, using a cutter and a ruler, cut diagonally the strip. It's not so simple but at 90% this will be enough. In some cases you need some adjustments with the cutter and or sandpaper.

-
Friday, November 7, 2014
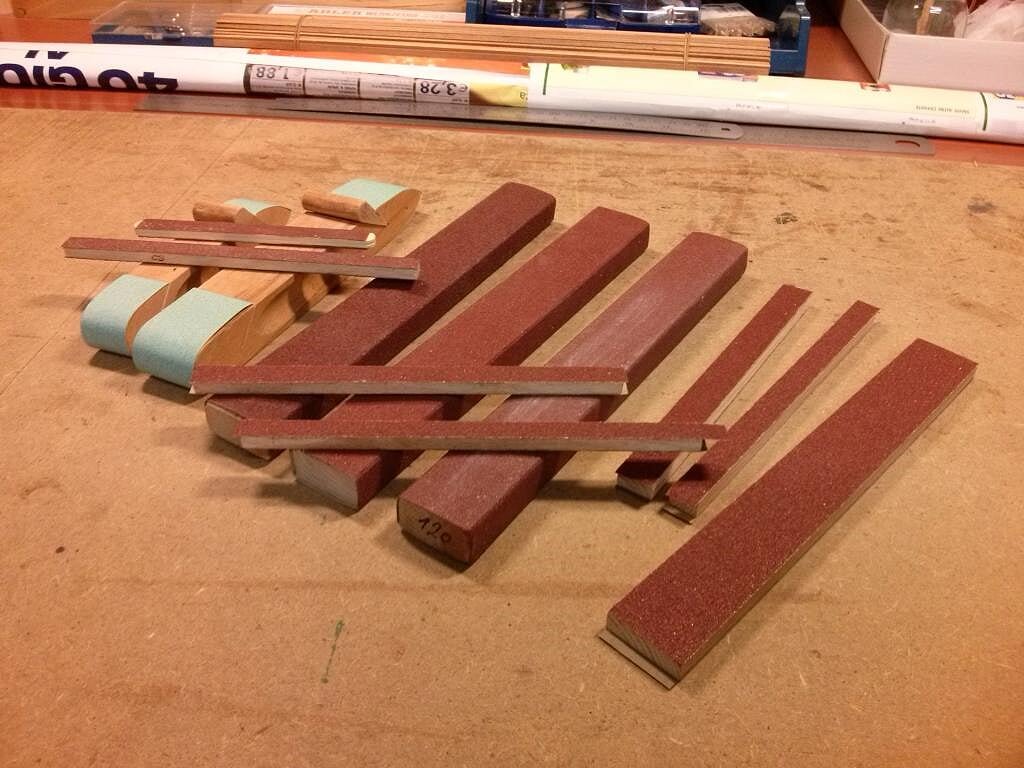
The production of this last week has been rather poor: the bad weather, the need to study in detail a ANCRE plan, which I found (in my opinion) wrong, and the need to make some preparatory task to the work itself, which probably will start next week, all together influenced my poor productivity.
As preparatory work for the smoothing of the lower sides of the hull, to prepare the bulkheads with the correct bevel angle, I had to set up a large number of sanding blocks, which I show here below. .
01 Brick%20de%2024%20Plans/CAM00364_zps4e2e650a.jpg
02 Brick%20de%2024%20Plans/CAM00359_zps0dafe71f.jpg

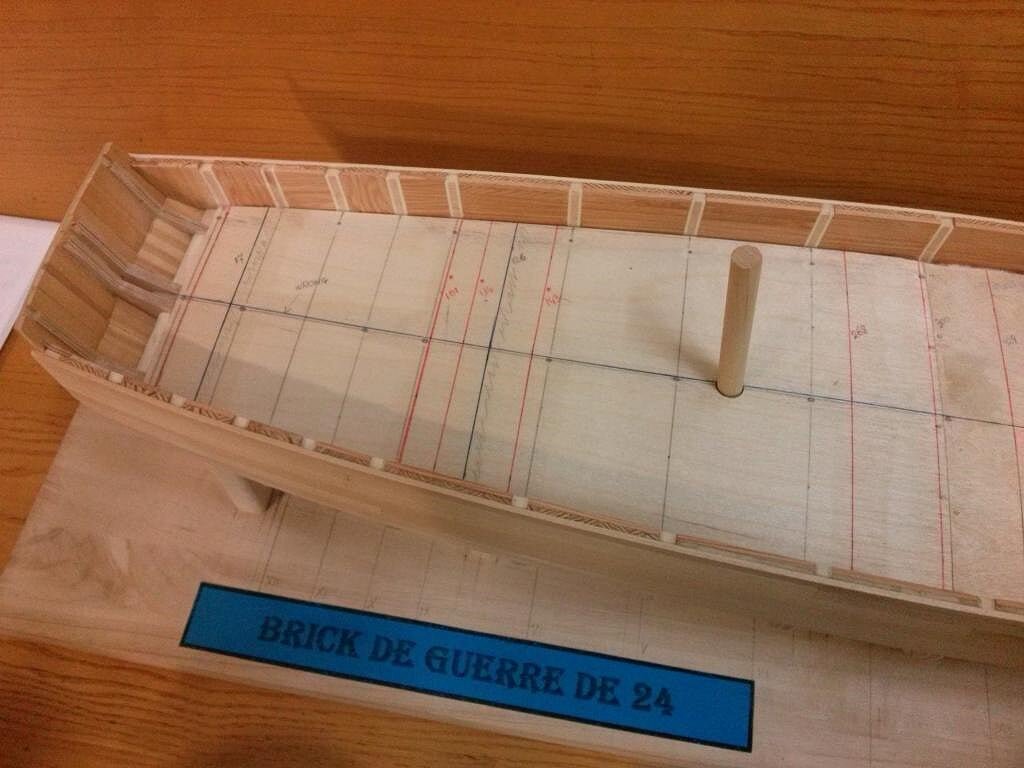
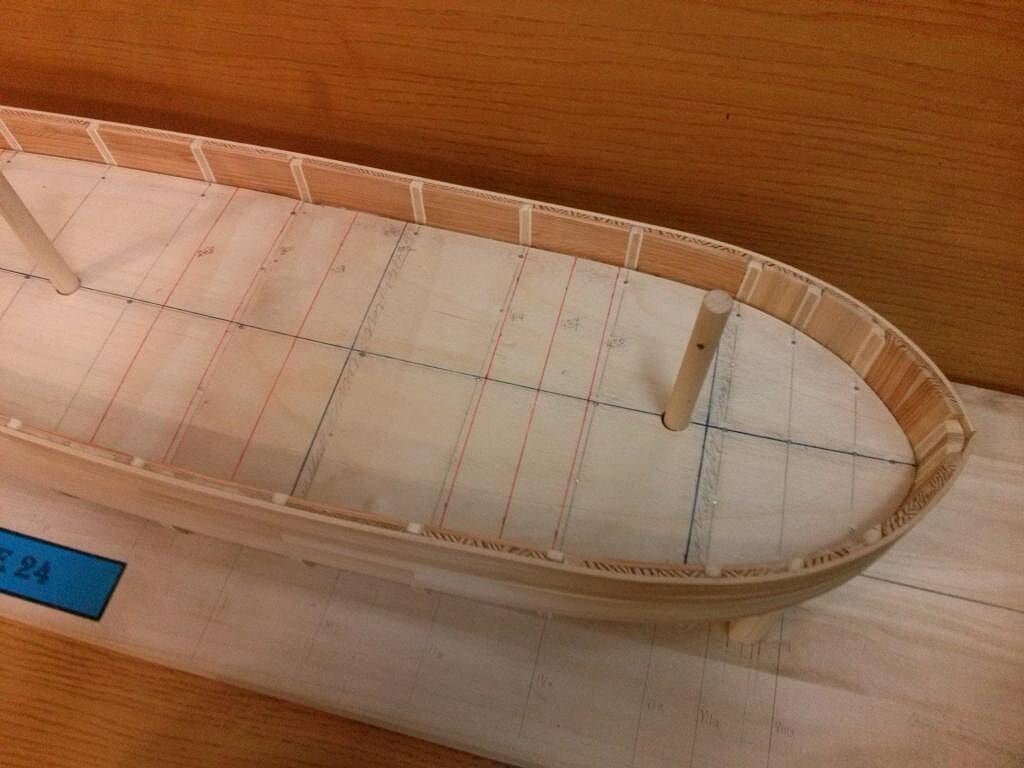
I wrote before about the ANCRE plan. To my surprise, observing the planks of the deck, I noticed that there were no joints, as if the plank was a single piece of wood . . with a length of about 29 meters !!!
It's highly unlikely that this is true, then I have studied a solution in which a plank of the deck was composed of four sections of a more realistic size, say around seven meters.
Helped by the arrangement of the deck beams, as identified by the signs of the nails on the plan, I split the deck into sections and, after determining the correct distances on the drawing, I set out with a stroke of red pen on the real model false deck.I also identified on the surface of the deck four lines (blue color even if they may appear black) which I have called "control stations" where the width of each strip of the planking, taken from the drawing, will be marked and will allow me to prepare the strip with the right shape and taper before applying it.
03 Brick%20by%20JackAubrey/CAM00357_zpsf8fab199.jpg
04 Brick%20by%20JackAubrey/CAM00356_zps15ac9455.jpg
As always, until next time, Jack.
-
Posted: Sun May 20, 2007
May 2007.
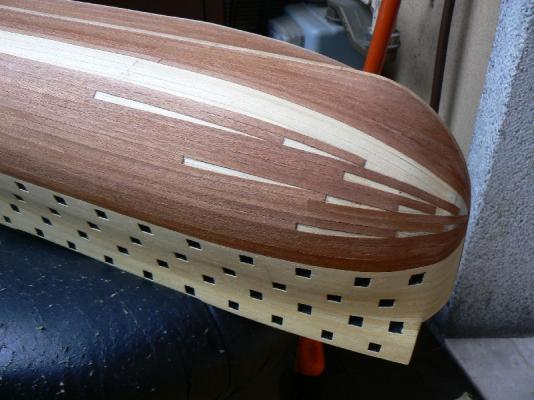
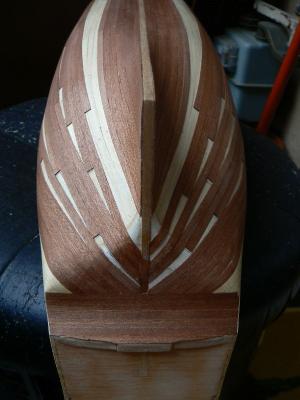
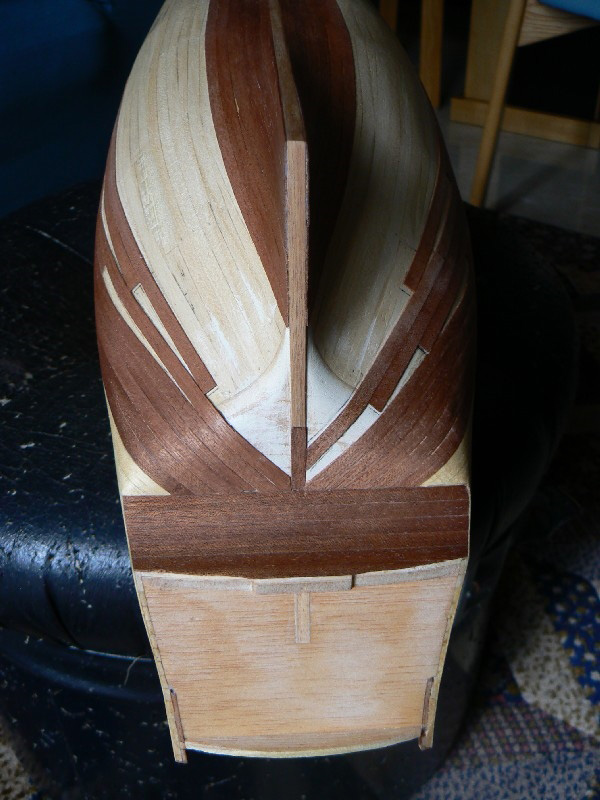
The job is still in progress .... some new planks of veneer are added from the top towards the bottom. A final effort and the task will be complete.
The next time I'll exercise myself by planking a eggplant or a water-melon.
The white triangles at the stem and the stern are also growing. In the next message I will explain how to cover them.

-
Posted: Sat May 19, 2007
May 2007.
This month I have received the shipment of the previous month. Two days later I have also received the current month shipment.
After the usual review of the material/instructions included I realize that this month there is a lot of work to do: at least the equivalent of april and may together.
The first task is to plank the upper part of the hull with strips of ramin: this was already done (refer to my previous message).
The second task is to plank with mahogany veneer strips tho lower part of the hull. Previously I had to lay two strips close to the upper part and four strips close to the keel (see some previous images). Here there was nothing of really difficult, only two small stealers in the stern area.
Now I have to add three other strips from the bottom to the top: simple and easily done.
And after I have to start planking from the top in the direction of the bottom. Here there are some initial problems. But the instructions are very detailed and the work progresses nicely.
Some planks are not layed until the end of the stem or the stern. They follow the natural shape and curves of the hull and must stop before. The next four photos, two from the stem and two from the stern, explain better than many words what I mean. As you can see there are in these areas some small triangles where the planks are missing.
During these tasks I use the vinylic glue. It is fast enough to avoid clamps or other mechanical tools. What is now necessary and useful is sometimes (in the stem and stern areas) the usage of adhesive tape for some minutes.
The work is continuing ..... bye.

-
Many thanks Archjofo.
Wednesday, November 5th, 2014
Yesterday I spent some time visiting two model shops looking for some wood strips suitable for planking the deck.
In the first shop I found the usual walnut, mahogany and lime; in addition I found beechwood.
In the second I found the same woods but, when I was loosing hope, I discovered in a corner some unusual strips and I was told it is OAK: the colour is perfect neither dark nor clear and also the size is right (2 x 6mm ). I bought all the strips stock and I have decided to use this wood to plank the deck of my brick . . .
Regards, Jack.
-
Posted: Fri May 18, 2007
Here we are at April 20th, 2007.
This month, for the first time when I started the Santìsima Trinidad, I have missed a shipment. More in detail the postal service has not yet delivered the box with the instructions and the materials.
So I cannot proceed on the model. But I decided to proceed anyway, also because it was easily intuitive what there was to do.
The risk to do something wrong was low, so I decided to finish planking the upper part of the hull.
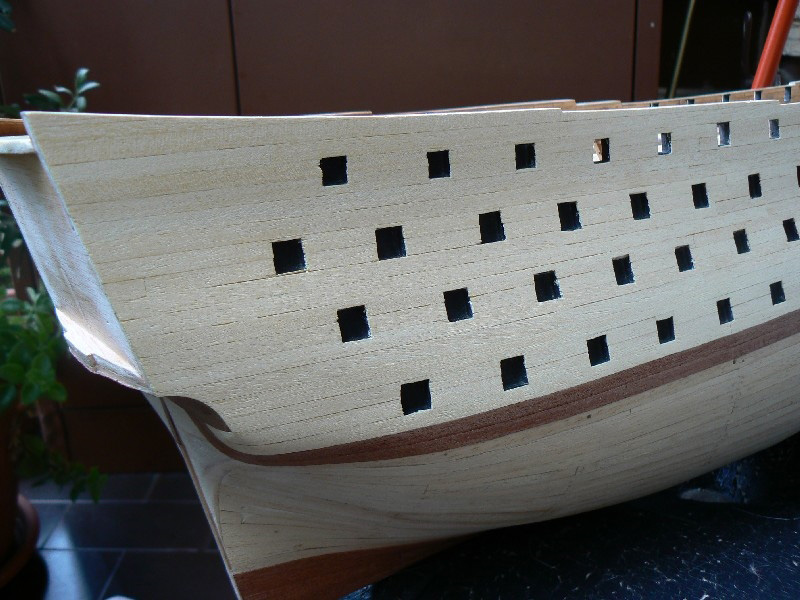
Work very easy and with no surprises at all. The only boring task was to cut the gun holes every two lines of strips. But is was easy. The only problem came from the quality of the "ramin"strips ... but they were solved with some additional work. Last I've applied the danish oil to the decks and the planked sides.
At the time I'm writing the missed (april) shipment is finally arrived (a month later) together with the may's shipment. So now I'm working strongly in order to recover the lost time.
But this time I have made some photos of the planking that will be useful for my next message.
As usually some picture of the ship on April 20th.


-
Posted: Wed May 16, 2007
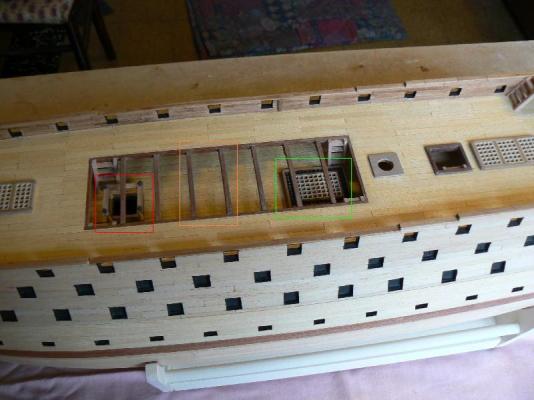
The next four photos are dated March 25th, 2007.
The work on the Santisima Trinidad didn't progress too much in this period of time. I have highlighted with rectangles the area of activity.
Most important is that I have started the second planking.
The strips used are of two kinds: "ramin" for the upper part of the hull and "sapele" for the lower.
While the sapele strips are very, very good in terms of quality and consistency, the ramin one have not the same quality and are quite difficult to work. Anyway the work progresses quite well.
Added some more details to the stairs between the middle deck and the upper deck. Added the iron balls to the upper deck grating ... and so on.

-
Posted: Tue May 15, 2007
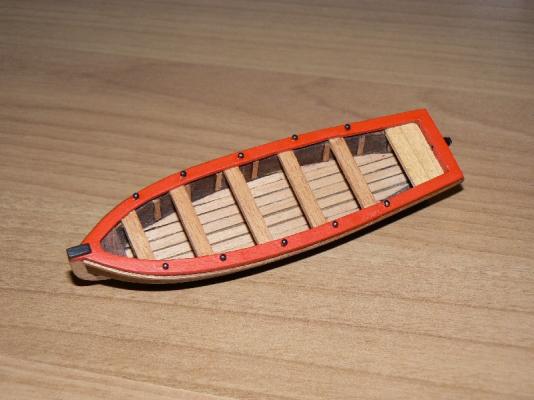
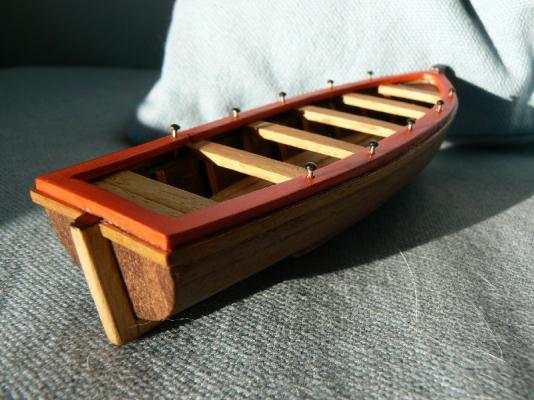
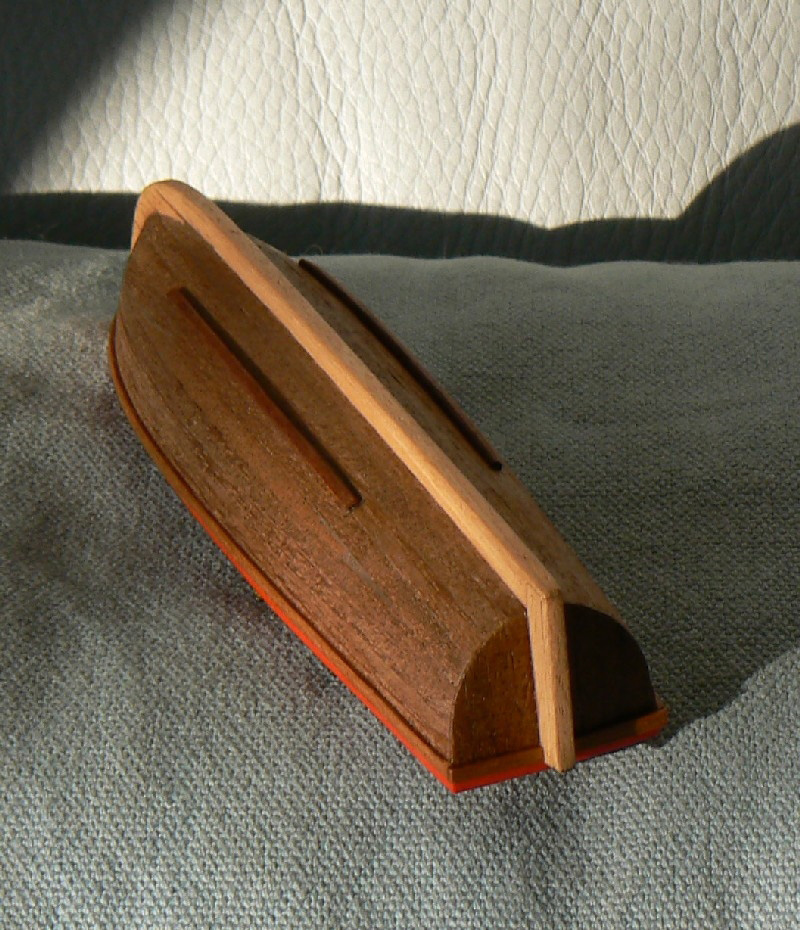
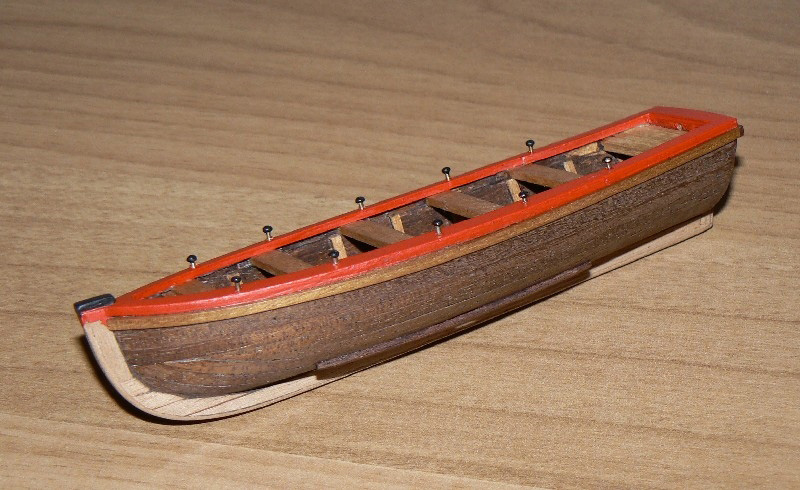
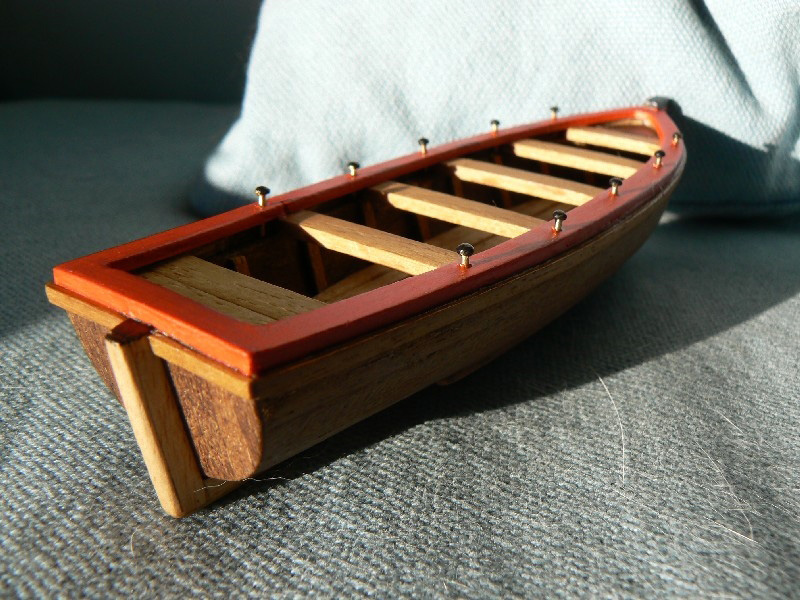
Second part of the ship's boats history ............
Having realized I had to build another boat, smaller than the previous, this time I decided to pursuit another way.
Instead of using the instructions and the material shipped with the magazine I used another method: I found in a shop a hull of a boat, same size of the one I had to build and I started to work on it.
1) The hull was made with wood so what I had to do was only to plank it. I used mahogany veneer strips and vinylinc glue.
2) After the planking, I mounted the complete keel, included the front and the rear.
3) Then the plaksheer, made with plywood of the proper height and shape. And the internal fittings.
4) As in the previous boat I decided to paint (in red) the planksheer.
Here follows four views of the second ship's boat. I amused myself and I am happy with the result.


Santìsima Trinidad by jack.aubrey - De Agostini - Scale 1:90 - Full Model
in - Kit build logs for subjects built from 1751 - 1800
Posted
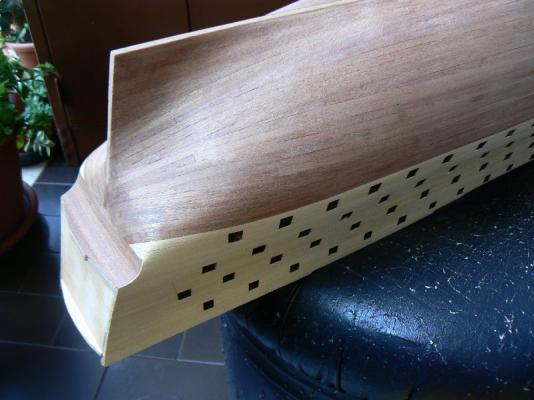
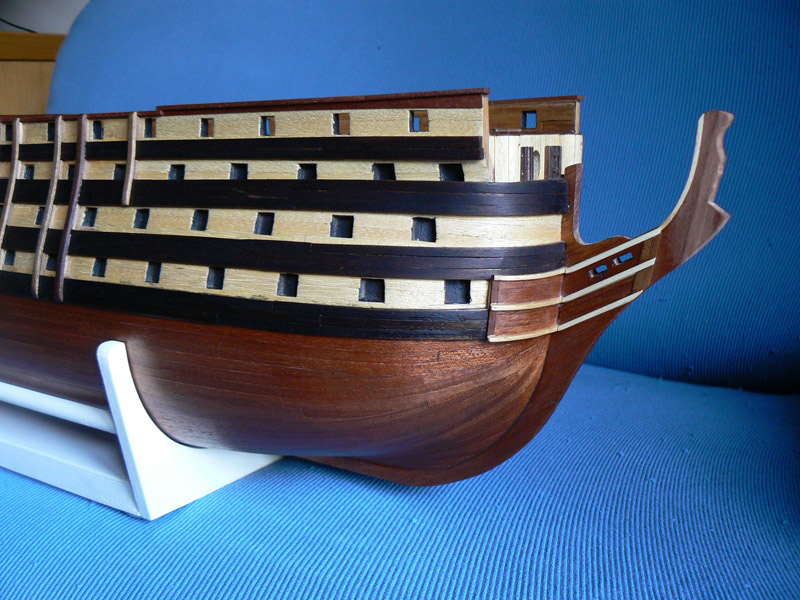
Posted: Mon Jun 25, 2007
The next three photos show the work done in another area of the hull.
In practice I have installed the planksheer all around the sides of the hull. The plaksheer is done with a strip of mahogany of mm. 2x7 and, once installed, it lays not as a straight line, but as a very, very large curve. In order to install it properly I have adopted the following technique:
- I have applied on the surface to be glued, for the 90% the vynilic Pattex Express
- In the remaining 10%, at the two extremities and in the middle, I have used the Super Attack Gel.
- I have then positioned the plaksheer in the proper position with the large curve,
- I hold it for some seconds in order to have the cyan-acrilate gel dry and ... the piece was installed.
- Wait then for a couple of hours and the installation can be refined with sandpaper, ect.
The only exception is the two planksheers in the forecastle area. Here the curve was more sensible and it wasn't possible to force the strips in the right position.
Here the planksheer is made up of three pieces. I had to refine the results a little bit more but I am satisfied.