
Supplies of the Ship Modeler's Handbook are running out. Get your copy NOW before they are gone! Click on photo to order.
×


SawdustDave
-
Posts
1,770 -
Joined
-
Last visited
Reputation Activity
-

 SawdustDave reacted to pete48 in Mayflower by SawdustDave - Finished
Very Nice Work Dave, HAPPY NEW YEAR
Best Regards,
Pete
-
SawdustDave reacted to edmay in Mayflower by SawdustDave - Finished
Nice workmanship Dave,may the new year bring you wellness and prosperity ,cheers. Edwin
-
SawdustDave reacted to NenadM in Mayflower by SawdustDave - Finished
Dave, I tried something simmilar, and give up ( 60 pieces) . You turn me to come back the devil's road again.
Very nice work
All the best to you and your fammily
-
 SawdustDave got a reaction from Model Mariner in Mayflower by SawdustDave - Finished
Finally got both lifeboats lashed down on the grating mounts.
Back to creating a few more deadeyes so I can get one step closer to tying a boatload of clove hitches.
-
SawdustDave reacted to KenW in Fair American by KenW - FINISHED - Model Shipways - 1:48 Scale
I was able to get some time in the shipyard today so I took the best photos I could of the ‘mess’ of lines and blocks under the tops (as requested by GaryKap). I don’t know if this will help anyone because I feel that it looks just like the photos included in the instruction booklet. My photos are in color, of course.
The foremast top looking aft:
The mainmast top looking forward:
The mainmast top looking aft:
The boat as seen from the dock:
Now it's on to the spritsail.
-
SawdustDave reacted to marsalv in Royal Caroline by marsalv - FINISHED - Panart
So I finished perhaps the worst part of standing rigging (at least for me) - crowsfeet. I had to redo it several times before I achieved at least partially satisfactory look - ie. crowsfeet rope stretched as far as possible without "lifting" the stay.
-
 SawdustDave got a reaction from riverboat in Alert by riverboat - FINISHED - Krick - 1/25th scale
Your weathering / ageing techniques are awesome Frank. Looking sweet.
Dave
-
 SawdustDave got a reaction from augie in USF Confederacy by Augie & Moonbug - FINISHED - Model Shipways - 1:64
Nice work on the ship's stove Augie. Also one of my personal favorite parts of building her.
Like you said.... You (and God) will know it is there.
-
 SawdustDave got a reaction from GLakie in USF Confederacy by Augie & Moonbug - FINISHED - Model Shipways - 1:64
Nice work on the ship's stove Augie. Also one of my personal favorite parts of building her.
Like you said.... You (and God) will know it is there.
-
SawdustDave reacted to augie in USF Confederacy by Augie & Moonbug - FINISHED - Model Shipways - 1:64
As luck would have it, did manage to find some time to work on deck fittings over Christmas. So, at about 800 hours into the build here's where we are:
THE CAPSTAN
Supplied as a laser cut sheet, this reminds me why I don't scratchbuild:
I'm leaving it with the natural finish to show off the pins made of 28 gauge wire. The ring on top was photoetched. She's just pinned on deck for now. Still need to make some pawls.
And that brings us to THE STOVE. Also supplied as (many) laser cut and photoetched parts:
The basic structure was assembled and brass strip cut for the corners and feet:
Lids with copper wire handles and more venting added (along with access doors)
Photoetched parts painted and brass tubes added to simulate stove vents:
Finally, the rotisserie was added!
Here it is just placed on my fine Italian brick hearth from fore/aft. The vent stack will be permanently added once we fit the upper deck beams:
Lastly, just an overall look:
Sorry to be so long-winded but I thought a walk through the stove construction might interest some. It was all given a coat of flat acrylic as a final touch.
Much of this will be obscured as the upper deck beams and partial deck go in. But I know it's there. And, I have to fess up ---- this was a LOT of fun.
Hope to have some deck bulkheads and deck beams in place by New Years. If I'm not back before then, Best of the New Year to all here on MSW!
-
SawdustDave reacted to popeye the sailor in Mayflower by SawdustDave - Finished
the ship's boats will be the perfect break from all the tedious stuff. they won't look like that one though.......a bit more..rustic. of course, some might think your stalling do you plan to use the plug method?
as I say when faced with repetitious steps.......thanks be to the sub assemblies and mini builds that starve the boredom!
-
 SawdustDave got a reaction from EdT in Young America 1853 by EdT - FINISHED - extreme clipper
What a treat.... Haven't had much time to enjoy these visits lately. Beautiful progress master ET. YOU've got something really special going on here. Thank you again for the great lessons.
-
 SawdustDave got a reaction from SkerryAmp in Mayflower by SawdustDave - Finished
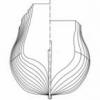
Good day in the shop. Here are a few sequence shots of how I am building the tops with planked sides.
1st Pic....Split shot showing the block of pine wood as it is marked on both sides before being shaping into the form used to build the sides. Note, the thickness of the block is exactly the height of the finished top.
2nd Pic.....After shaping the block and fitting the 16 vertical planks equally spaced around the form and beginning to fit the first row of planking. Note the glue used to fit these vertical planks is diluted to facilitate removal later. Also note, I have begun with the form placed upside down on a metal surface in order to keep the outer edges of the starting planks perfectly aligned. Also note the alternating pattern of end cuts.
3rd Pic....The pattern of the planks is more evident showing the third row being fitted. The joint gaps are desired as glue cavities for the outer vertical planks.
4th Pic.... Split shot showing the removal of the block form with very course rasp bits.
Note in the left shot, the outer "seam" at each of the 16 joints has been sanded flat to provide a good glue surface for the vertical planks.
Note in the right shot, the outer vertical planks have been fitted before final removal of the remaining pine form material.
5th pic.... There you are. Ready for floor piece, knees, and top rail, to be fitted....not included herein.
-
SawdustDave got a reaction from SkerryAmp in Mayflower by SawdustDave - Finished
Got in some real good shop time since last update.....
Finished up the tops, including ripping out the oversized knees and replacing them with smaller scale.
Created main and mizzen masts, fitting and staining them and stepping all three masts.....
She is now tall....I do like shots from high above....
Close in on one of the completed tops....note that I widened the rails on each side where the deadeyes will be fitted (builders choice).
Shot of the fitted main mast....
-
SawdustDave got a reaction from SkerryAmp in Mayflower by SawdustDave - Finished
For what it's worth....
Gammoning....
Bow Collar....
Main Collar....
Standing Rigging.... just beginning.....
-
 SawdustDave got a reaction from CharlieZardoz in Mayflower by SawdustDave - Finished
Several milestones in every build are worthy of small celebrations. The final hull plank is one of those "Miller Time" moments.
-
SawdustDave got a reaction from CharlieZardoz in Mayflower by SawdustDave - Finished
Getting the complex geometric three color paint scheme within reason has been a major challenge. Not going to say how many times I ripped it off and started over. That's modeling, huh?
-
 SawdustDave got a reaction from Cuda1949 in Mayflower by SawdustDave - Finished
Update....Mayflower #2
Watching this guy pressure washing my neighbor's house, using bleach....gave me an idea. That dark plank that I was so put out with - could it be bleached to a lighter shade?
The photo on the far left shows how dark that plank was....
Photo's center and right.....After sanding, painting with bleach, and placing it in the sun for several hours is still darker but appears much lighter and more acceptable in my eye.
What say ye?
-
 SawdustDave got a reaction from Piet in Hr. Ms. O 19 1938 by Piet - FINISHED - scale 1:50 - submarine of the Royal Navy Netherlands in service 1939 - 1945
As always, your work is a real treat to visit Piet. Beautiful work.
Happy holidays my friend.
-
SawdustDave reacted to Piet in Hr. Ms. O 19 1938 by Piet - FINISHED - scale 1:50 - submarine of the Royal Navy Netherlands in service 1939 - 1945
Hello friends and thank you all for visiting and your likes!!!!
I spend all day in the shipyard (garage) to work on the dinghy. I fabricated the gudgeons and pintles for the rudder. Believe it or not but that took me three and a half hours to do. One wouldn't believe that something that simple can take so much time.
I used 0.2 mm brass shim stock and 1 mm brass tubes with 0.5 mm brass pins for them. No reason to draw a picture, all of you know how they look like.
The brass shim was cut to 1 mm wide and so were the brass tubes. I bend the brass strips into a U shape to fit the keel and rudder. The toughest part was soldering these small pieces of tube to the bend up strips. I placed a picture of my soldering jig below. I used a steel sewing pin to hold the tube to the gudgeon with my left hand while soldering with the right. Oh yeah, I used a rosin core silver solder, feeding that with my third hand Actually, I pretinned the parts.
For the pintles I used the same method except that I first soldered the brass rod in the tubes and then holding that to the bend-up strips I soldered i all together.
This doesn't sound like 3 1/2 hours worth of work but that includes a few remakes, naturally
The pictures below were taken before I cleaned everything up by CAREFULLY filing extra solder away. The nowy look presentable and I am happy. Gwen also liked them, she said it looks rather spiffy.
I cemented the gudgeons and pintles to their assigned locations with CA.
Next I shaved some wood away from the oarsmen seats but I think that the forward one can still use to loose some more wood..
I also made an eye bold for the bow frame where the mooring ting will be. This I glued into the top of the bow frame with CA.
After lunch I started on making the oar locks. Hmmmm - - - not having much success with them. Spend almost 3 hours on them and managed to make only one, which I will have to reject. They are supposed to be 0.5 mm wide from some 0.2 mm brass ship and then drilling a 0.5 mm hole in it for a bras pin. They'l be bend into a U shape to fit the 0.8 mm oar shaft. They'll be slightly smaller the on version 1.0 but it seems to give me more trouble tat way.
Soooooh, I'm back at square one with them. Well, tomorrow is another day and I can start out fresh.
That's it for today and here are a few pics of today's efforts.
I put the gudgeon over a piece of scrap wood with the same thickness as the keel. You can see the sowing straight pin in the 1 mm tube and yes, it does get hot
Here are all the pieces completed but still in the rough state. After I cleaned them up and filed the excess solder away they do look presentable. I also filed the ship pieces even to 1 mm wide,
Cheers,
-
SawdustDave reacted to KenW in Fair American by KenW - FINISHED - Model Shipways - 1:48 Scale
The topgallant yards have been mounted and fully rigged, including the braces. All went without incident. Again, I used Lees and Peterseen whenever the FA plans were incomplete or unclear.
Next up is to finish the rigging for the topsail (braces) and lower yards (braces, sheets and tacks) as well as mounting the spritsail yard.
-
 SawdustDave got a reaction from SaturnV in Lifeboats by SaturnV - FINISHED
OK Richard....now my biggest concern is that your lifeboats are going to make mine look bad.
What a great looking start. I'm completely lost for words.... and that's saying something in my case, as you may know.
Can't wait to see your finished fleet.
-
 SawdustDave got a reaction from Omega1234 in Lifeboats by SaturnV - FINISHED
OK Richard....now my biggest concern is that your lifeboats are going to make mine look bad.
What a great looking start. I'm completely lost for words.... and that's saying something in my case, as you may know.
Can't wait to see your finished fleet.
-
-
 SawdustDave got a reaction from Ryland Craze in Lifeboats for Warriors Project by SawdustDave - FINISHED
So much has developed with this little lifeboat in such a short time frame, I thought I would take a few moments and bring all of you special modeling friends at MSW up to date.
What was intended to be a small local project, very quickly within less than a month, spread to major cities across North and South Carolina through their city Parks and Recreation Departments…. (Fayetteville, Raleigh, Charlotte, Charleston & North Charleston to name a few) All of these programs are being scheduled to launch in the mid-March time frame under the official name of Lifeboats for Warriors Project.
My favorite motto of all time has been…. “If you think you can…. Or if you think you can’t…. YOU ARE RIGHT!”
Please visit our home website designed to explain the Parks and Recreation program…. http://www.l4wproject.com/
The following build log was developed for the instruction manual for the lifeboat kit.
Anyone interested in building one of these and donating it to the project, please send me a PM and I'll be glad to send you a PDF with plan sheets and instructions.