
HOLIDAY DONATION DRIVE - SUPPORT MSW - DO YOUR PART TO KEEP THIS GREAT FORUM GOING! (89 donations so far out of 49,000 members - C'mon guys!)
×


Landlubber Mike
-
Posts
4,540 -
Joined
-
Last visited
Content Type
Profiles
Forums
Gallery
Events
Everything posted by Landlubber Mike
-
 Awesome subject Chris! I really need to finish mine. Looking forward to following along!
 -
Maybe paint them the camo color but dry brush them with a slightly lighter color for highlights? That would help set them off better and given that they are on the outside, the light would be hitting them first/brightest.
-
I saw that too - bidding almost doubled at end 😳
-
Great subject and excellent start! Glad you were able to locate the knocked off pieces. Does the hull come with the windows already like that? Looks really good. Makes me want to pull out one of my Flyhawk kits. I think I have the Lutzsow and Bismarck in the stash.
-
Looks really good. I just got Very Fire's 1/700 Missouri kit - their kits are very well done, and very comprehensive. I was really impressed.
-
Thanks Alan! The Artist Hobby set is very well done, I'm just hoping to not screw it up too much. I have always liked the Akitsushima. It's the kit that got me sucked into the plastic WW2 ship model world - first kit I bought. I later found a 1/350 Snowman kit of the Akitsushima which I'll build some day too. It's resin and PE, and seems to build up very nicely. Probably a little easier than the 1/700 kit given the scale and fact that the bridge is mostly resin, rather than built completely from PE.
- 24 replies
-
- 3
-

-
- Akitsushima
- Pit Road
- (and 1 more)
-
Thanks man! I'm slowly getting better at it. And yeah, I really like the quirky vessels for sure. Wow, that AJM kit looks fantastic! Very cool subject with the camo, two raised flight decks and the different colored biplanes. That's going to be a stunning model. I saw one on Modellmarine.de that had some good information in case you haven't seen it: https://www.modellmarine.de/index.php/modelle/493-nick-shipp/5269-2018-07-04-05-22-49 AJM models seem to be very similar to the Niko kits. Both from Poland and are all in one multimedia kits of resin and PE of rare subjects. But, a lot better (more detailed instructions). I'll have to put AJM on the list!
- 24 replies
-
- 3
-
-
- Akitsushima
- Pit Road
- (and 1 more)
-
Thanks! I tend to use an Optivisor with LED lighting, but found that I can usually get away without it as I have a pretty strong LED desk lamp. I'm always yelling at my kids for reading in the dark, but I think it's just my eyes that need more light. I'm also using very fine tweezers (from Dumont) which help. Luckily I have fairly steady hands, so long as I don't drink too much coffee. Thanks again for looking in!
- 24 replies
-
- 5
-
-
- Akitsushima
- Pit Road
- (and 1 more)
-
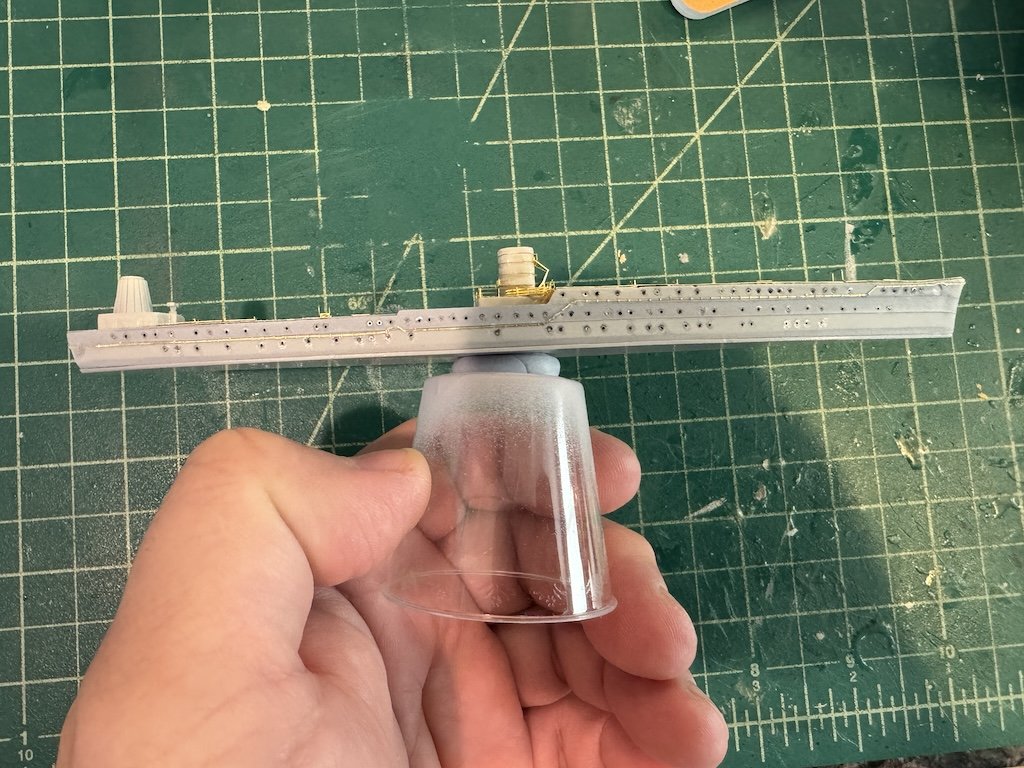
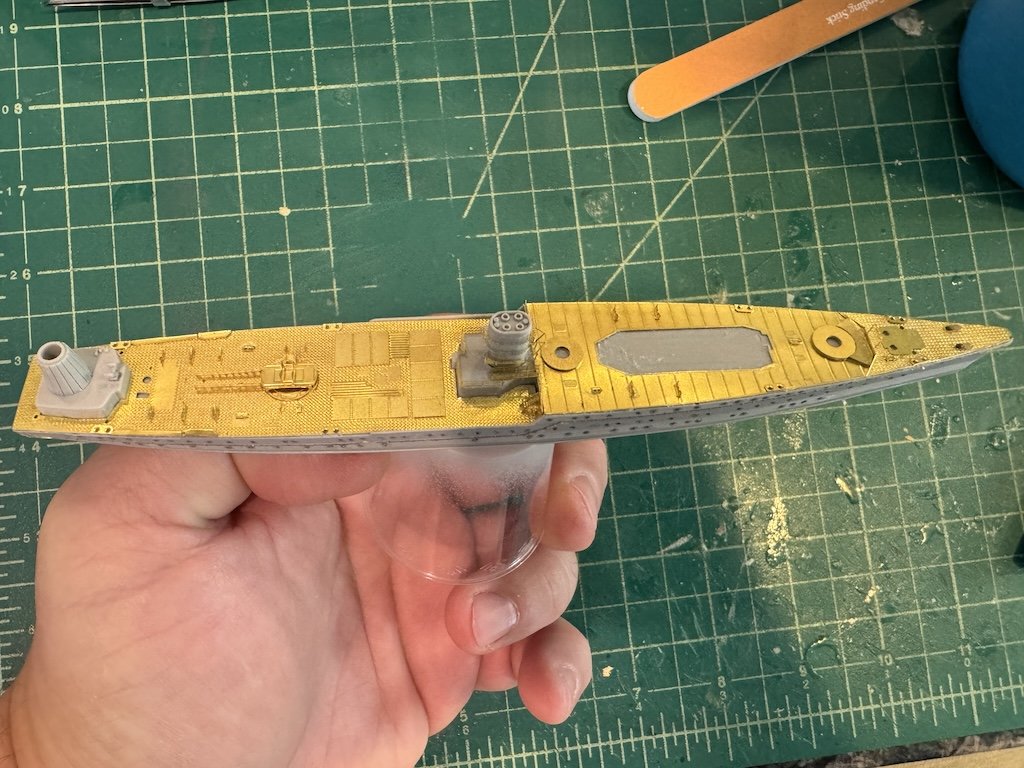
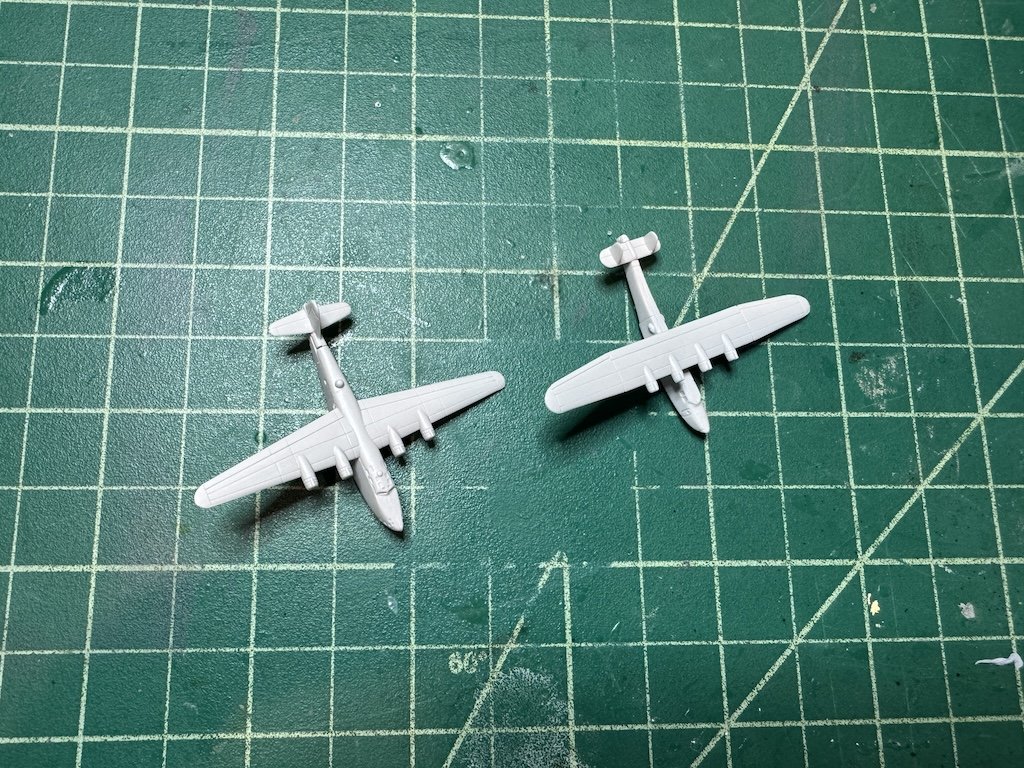
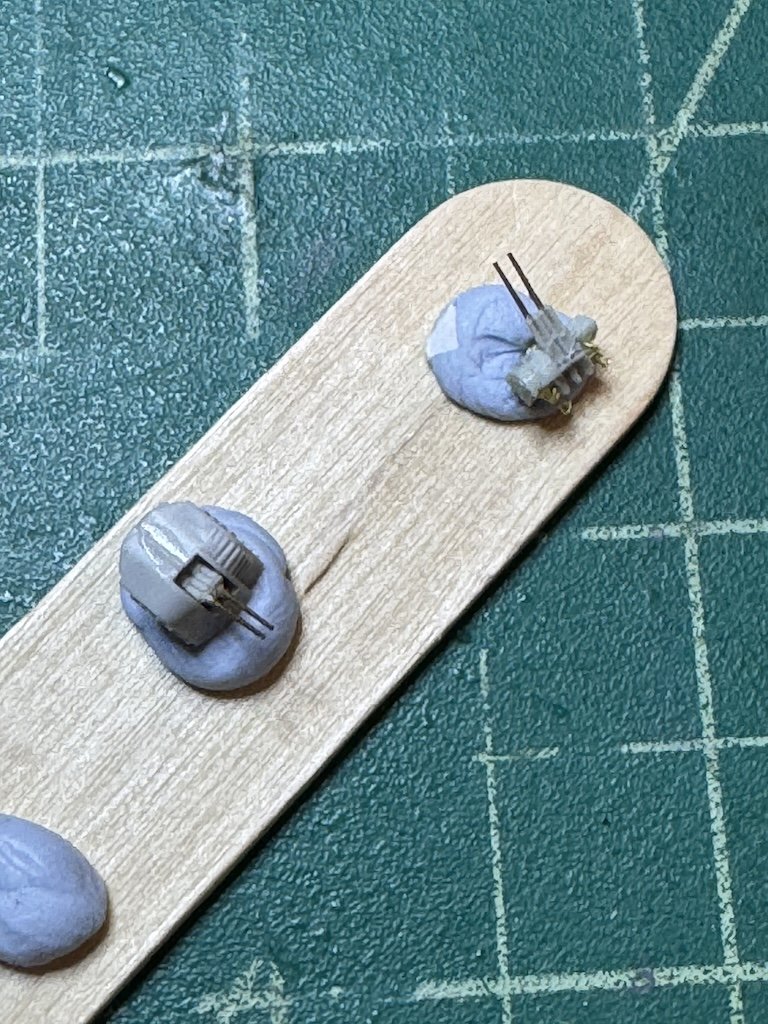
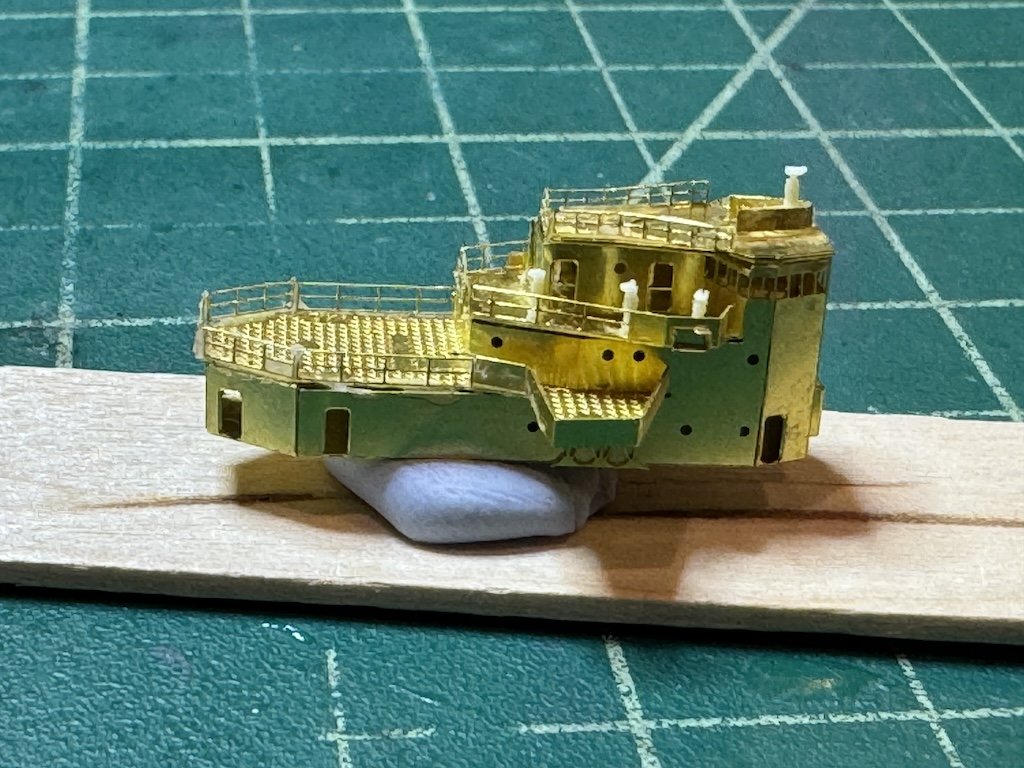
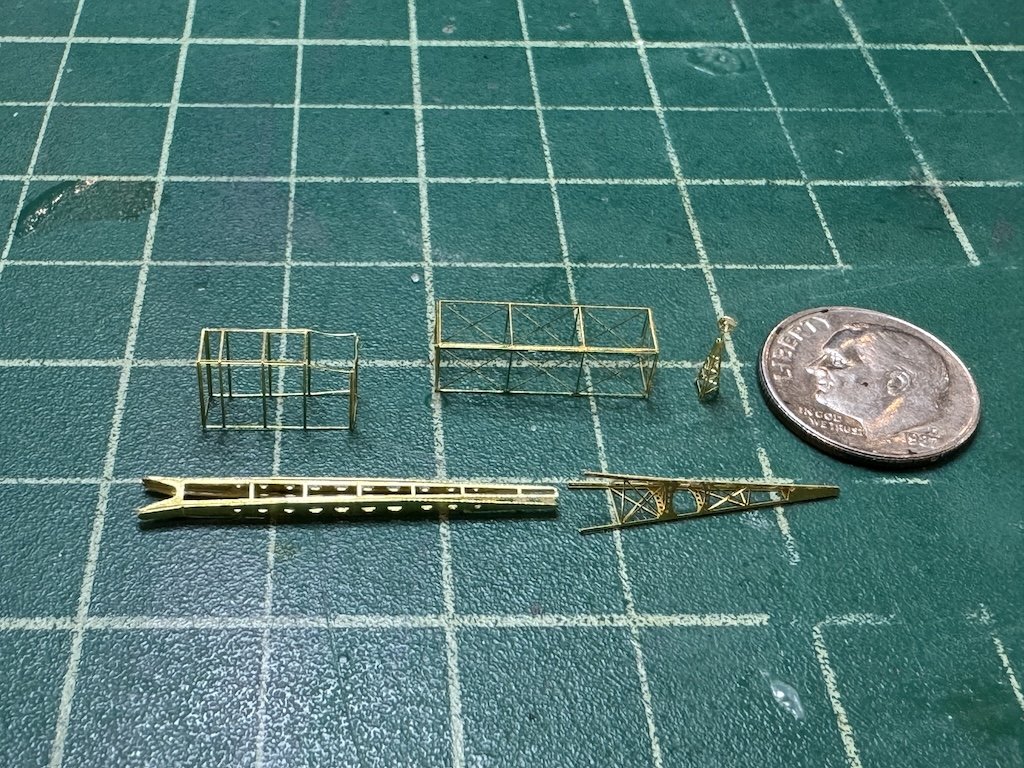
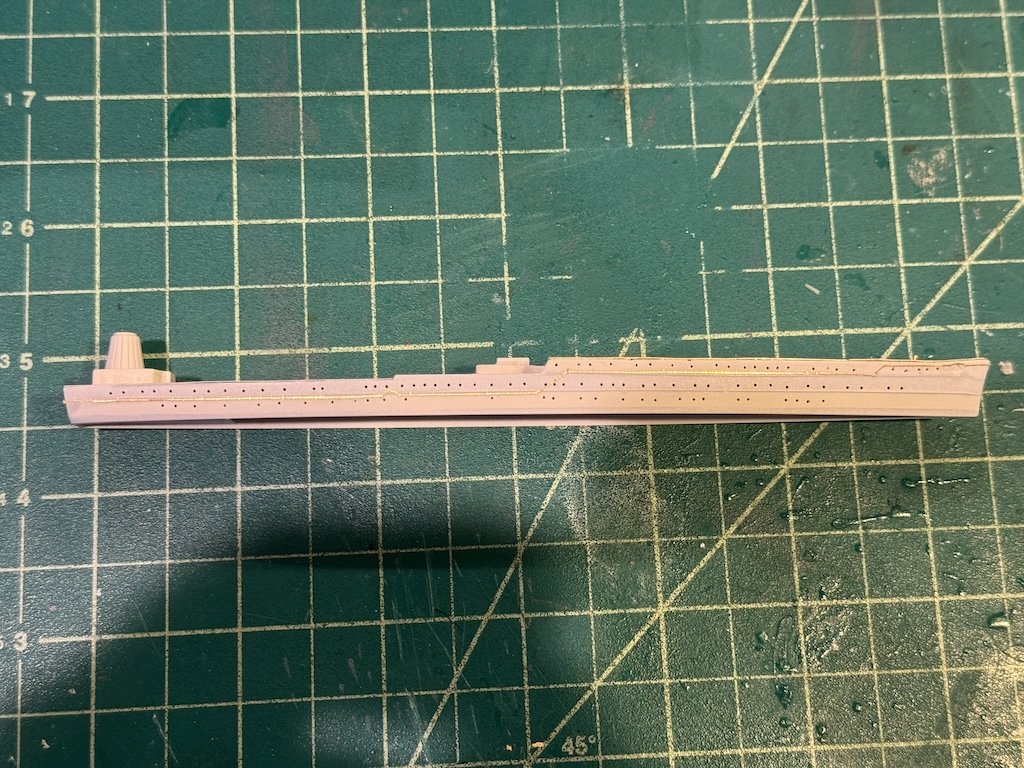
I've been making some good progress on the Akitsushima. The Artist Hobby set is really well done, I couldn't recommend it more for this kit. Here I added porthole surrounds to the hull - there are lots of them, and it's a bit tricky when they are about 1mm in diameter: Bridge just about completed - need to add some doors and equipment. Looking at this, I might need to add porthole surrounds as well. Deck mostly completed. Still have some work to do on the rear crane mast section: Cannons built up: The kit comes with two seaplanes - a Kawanishi H6K Type 97 (Mavis) and a Kawanishi H8K Type 2 (Emily). I plan on putting one on the deck and one in the water. Need to decide which goes where as I'll add spinning props to the one in the water to show a water landing. There's not much room on the deck so I might include the smaller one on there. I might actually try to model it hoisted on the crane rather than on the deck turntable. Just need to figure out how to it was done and make sure whatever line holding it is of material that can support the weight. Here are some detail pieces. I think at this point the main detail piece I need to complete is the rear crane tower. I already have the crane section built up, but need to figure out how to do the tower which is a little complicated: Thanks for looking in!
- 24 replies
-
- 9
-

-
-
- Akitsushima
- Pit Road
- (and 1 more)
-
Another cool figure Alan! Well done!
-
Wow BE, another stellar model! Congratulations! Thanks for sharing the journey.
- 332 replies
-
- 3
-
-

-
- Harpy
- Vanguard Models
- (and 1 more)
-
Looks like another great one! Looking forward to following along Alan - you do great work! By the way, love the Black Cat aftermarket you are using. I've picked up a few of their items for future projects myself.
- 24 replies
-
- 3
-
-
- Eskimo
- Tribal class
- (and 3 more)
-
Weird, I had posted my last reply a while back but it got stuck. Now I see you finished - really great job! Quick build too! Thanks for sharing with the group!
- 42 replies
-
- 4
-
-
- Zulu
- Tribal class
- (and 2 more)
-
What I like to do is run a thin needle with CA to add a good amount to hidden areas - interiors, etc. Seems to work very well. I’ve also done the same with two part epoxy. I’m surprised you can solder such thin pieces of brass without destroying them - very impressive! At some point I’ll have to learn to solder so that I can build up the GLS corvette class aftermarket.
- 42 replies
-
- 4
-
-
- Zulu
- Tribal class
- (and 2 more)
-
Welcome back Jason! Diana is looking amazing!
-
For 1/700, do you need to solder? I’ve always just used CA, sometimes with accelerant for a quicker bind. For things like planes I’ve at times used two part epoxy. i have a 1/72 Corvette class with very heavy PE from GLS. They recommend soldering given the weight of the PE. With the parts so thin in 1/700, I’m really impressed with the results you’ve obtained.
- 42 replies
-
- 4
-
-
- Zulu
- Tribal class
- (and 2 more)
-
Great stuff Alan! Destroyers seem like smaller easier ships to build, but they are jam packed full of stuff on the decks. Makes it tricky to paint. I usually try to build as much as I can before painting, but here as you are doing you have to paint a lot of stuff off the model and then carefully assemble it. It's a bit of a nerve-racking process given how delicate the items are in 1/700. You're doing an amazing job!
- 42 replies
-
- 4
-
-
- Zulu
- Tribal class
- (and 2 more)
-
I think so - these 1/700 models seem to look much better to me in a water dio setting. I believe the Pit Road kit allows you to do full hull or waterline. I didn't add the bottom half yet to the hull in part because I'm still deciding what to do (at 1/700, a full hull isn't very deep) and because having the open bottom allowed me to drill holes from underneath to help get glue between the PE deck and the plastic hull. There were a couple of places the PE deck were not sitting flush, so a hole or two drilled underneath allowed me to get more glue in that spot and with a little pressure, got the deck to fit flush.
- 24 replies
-
- 5
-
-
- Akitsushima
- Pit Road
- (and 1 more)
-
Yes, I think the knock on Trumpeter kits generally is accuracy - not only on parts but on colors. I haven't built a Trumpeter kit, but seems like they build into nice models. Regardless, I like where you are going with this kit!
- 42 replies
-
- 4
-
-
- Zulu
- Tribal class
- (and 2 more)
-
To simulate the hull plating lines, I taped alternating rows using Tamiya flexible tape and then sprayed a fairly medium-heavy coat of Mr. Surfacer 500. Once you remove the tape, you have nice simulated plating lines. I then added the degaussing cables. The Artist Hobby set gives you four pieces for each side of the hull, and then a piece for the stern. The pieces all fit together perfectly. I've been super impressed by the Artist Hobby update set. Everything fits the Pit Road kit like a glove.
- 24 replies
-
- 10
-
-
- Akitsushima
- Pit Road
- (and 1 more)
-
OC, I meant to get back to you on this. A lot of the escort carriers during and after the war were used to transport/carry "stuff" (for lack of a better word). The Copahee I posted above carried back a number of Japanese planes and engines and other parts during the war. I'm assuming the picture in this post shows a similar operation of transporting planes.
- 24 replies
-
- 3
-
-
- Akitsushima
- Pit Road
- (and 1 more)
-
Geez, I fall behind on MSW, look to catch up on current builds, see another log from Chris, and find out it's done. That didn't take long! Really great job as always Chris!
-
Really nice kit of a great subject. Looking forward to following along.
-
You're moving really quickly on this one Alan - really nicely done! I like the colors you are using, and the camo scheme is really sweet.
- 42 replies
-
- 4
-
-
- Zulu
- Tribal class
- (and 2 more)