Landlubber Mike
-
Posts
4,543 -
Joined
-
Last visited
Content Type
Profiles
Forums
Gallery
Events
Everything posted by Landlubber Mike
-
 Wow, that came out fantastic!! Really nicely done man! With winter I think I can get back down in the workshop and will dust off my Pegasus - your build is very inspirational!
- 261 replies
-
- 3
-

-

-
- Victory Models
- Pegasus
- (and 3 more)
-
Joelle, this is looking so good as per your usual high standards. I have the Hasegawa 1/700 kit with the Infini set in the stash. Your 1/200 build is a "big" inspiration! Nice catch on the scale difference for the compasses - that would have driven me crazy had I experienced that!
- 210 replies
-
- 2
-
-
-
- Russo-Japanese War
- Mikasa
- (and 2 more)
-
Thanks Joelle! Always appreciate having you along for the ride!
-
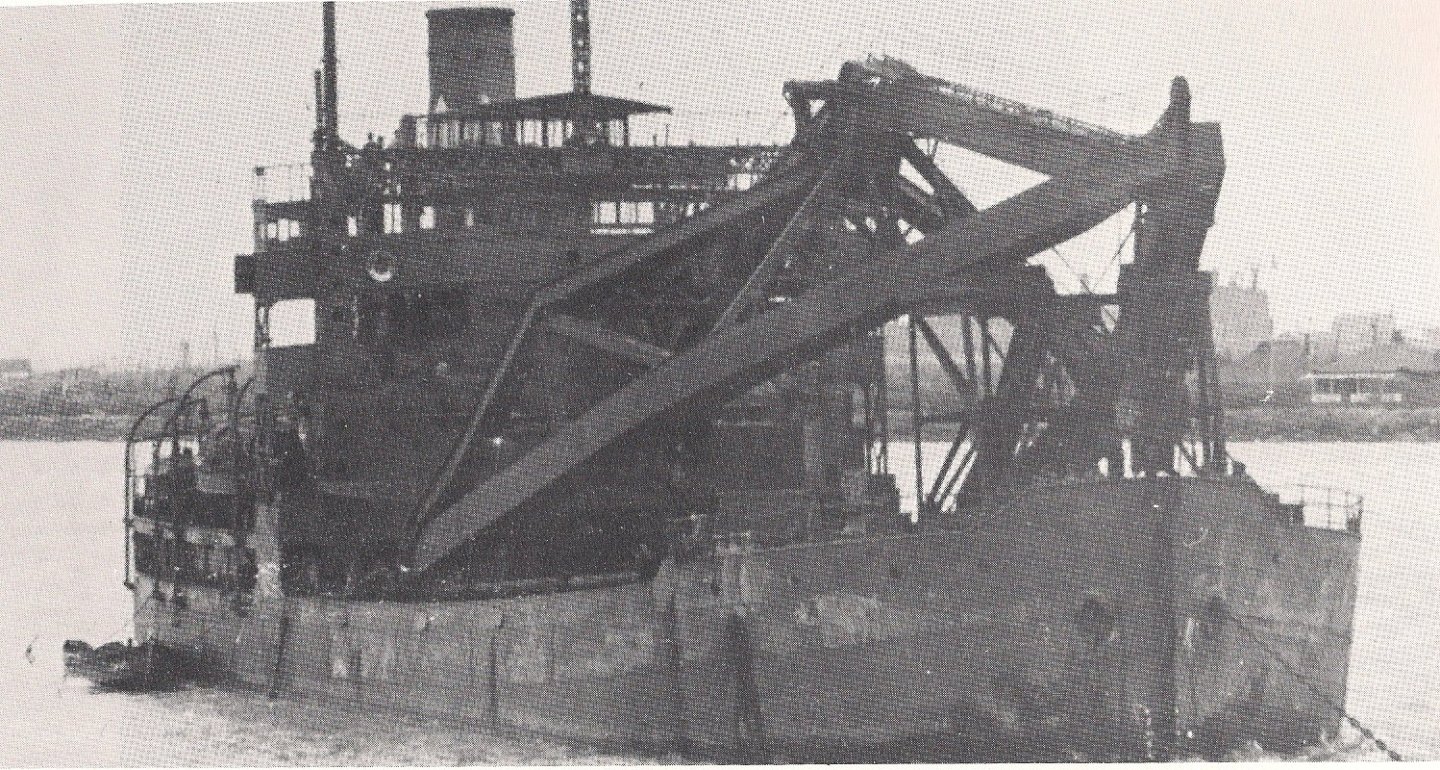
The Seishu Maru is definitely a cruder version of the crane ship compared to the AB-1. No turntable, as the crane arm just slides towards the bow while pivoting upward. Part of it might have to do with size. I’ll have to take a picture of the two side by side. I’m guessing the AB-1 is probably around 2.5 times the length of the Seishu Maru.
-
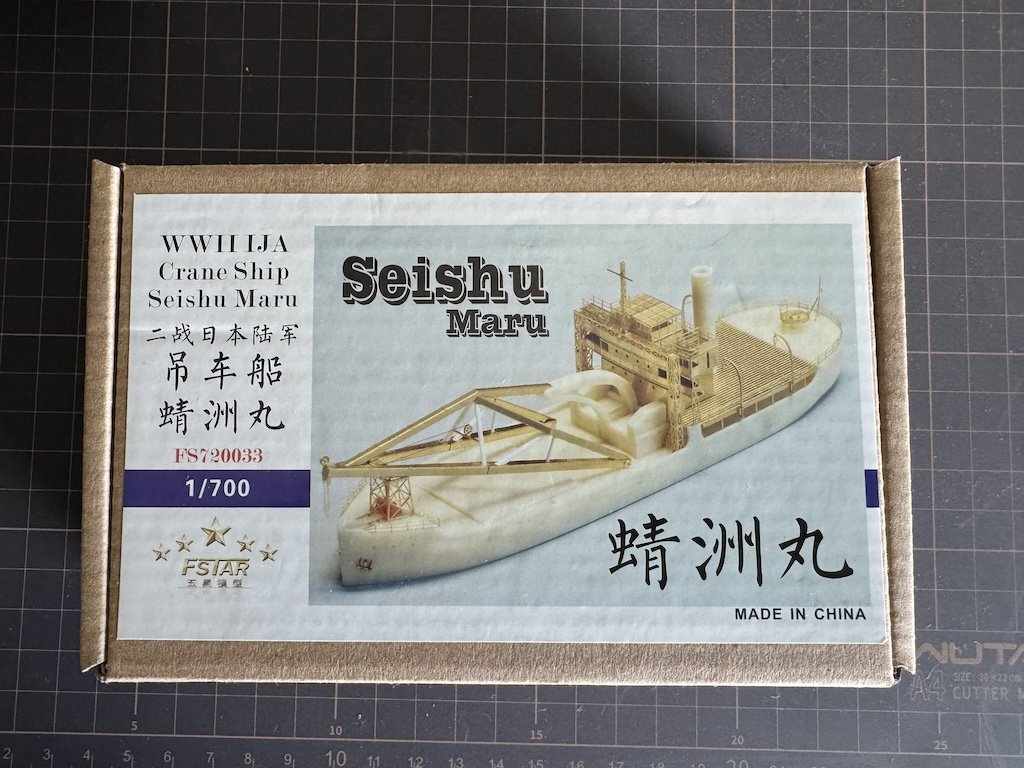
Hey Glen! Sorry to not shared it before. I have to say, having worked on a bunch of models in 1/700 scale, I think whenever I return to SIB modeling I will probably use a lot of photo etch, decking etc. from that world. Working in 1/700 has also gotten me to use other types of materials, adhesives, etc., which I think will come in handy. @Javelin might indeed enjoy building this subject. I'm building this as a warm up to building this US crane ship - the AB-1 that was converted from the USS Kearsage. Five Star makes a very very nice kit for it so I'm hoping to learn a lot from this build to take to that one. It's a much bigger ship, and the crane arm is really impressive but a lot more complicated to build than the Seishu Maru:

-
Thanks Ron! Part of the reason I had the paper towel was to get a better visual. My hobby mat is pretty stained at this point. The model at this scale is tiny, probably about 3" long, maybe 3.5". Eventually I need to get back to wooden modeling, but it's a bit hard given that my father-in-law lives with us now and his bedroom is right next to where I have all my power tools. Really limits the amount of time I can spend there making any noise - at this point it's usually bad words coming out of my mouth for one reason or another.
-
Thanks Chris! I tend to prefer these auxiliary ships, especially on the Japanese side where they converted ships intended for peacetime and other purposes for wartime auxiliary work. They have some quite odd looking ships!
-
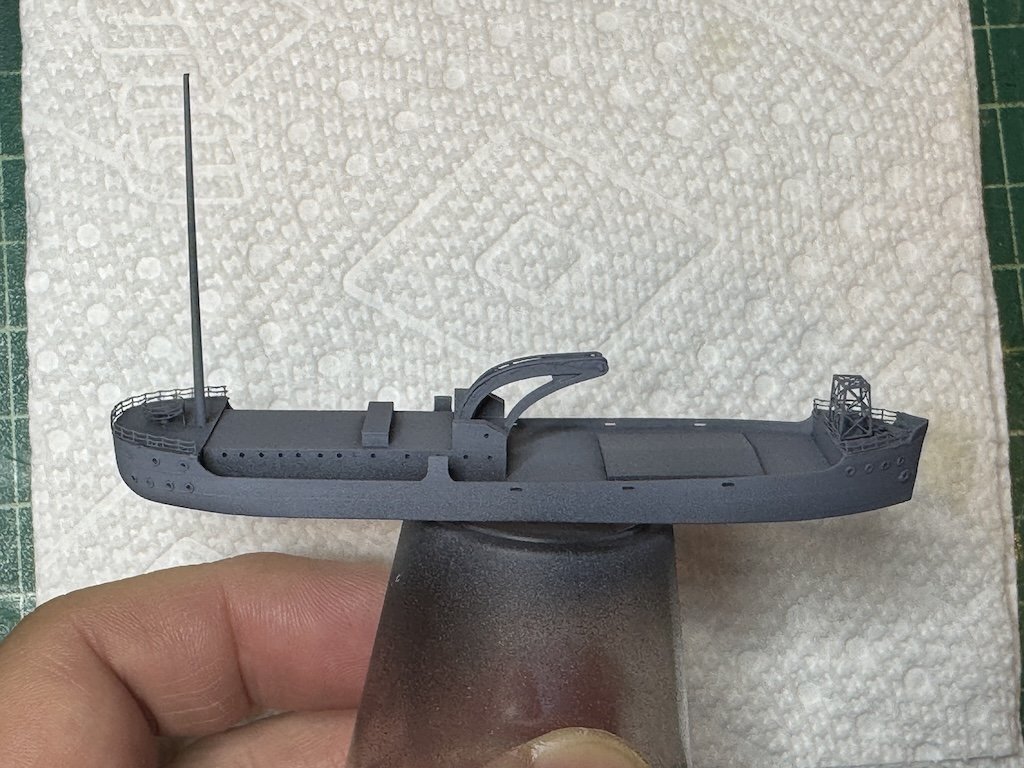
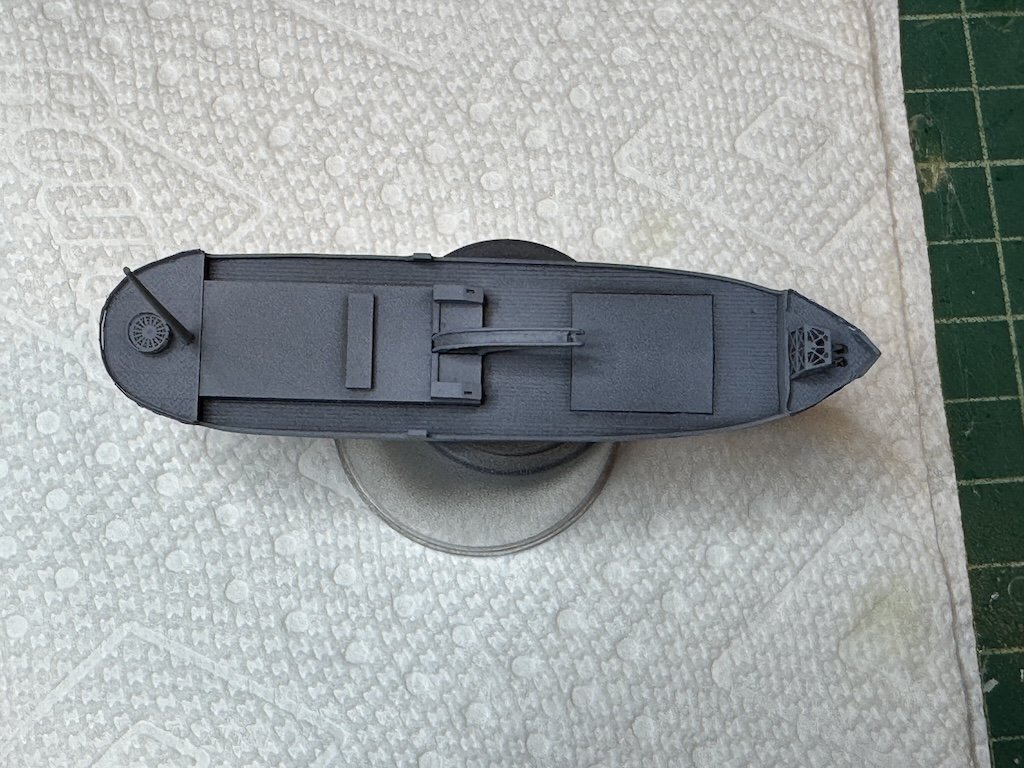
Where I am at the moment - took a lot longer to get here than I would have expected, but so far so good I think. Thanks for looking in!
-
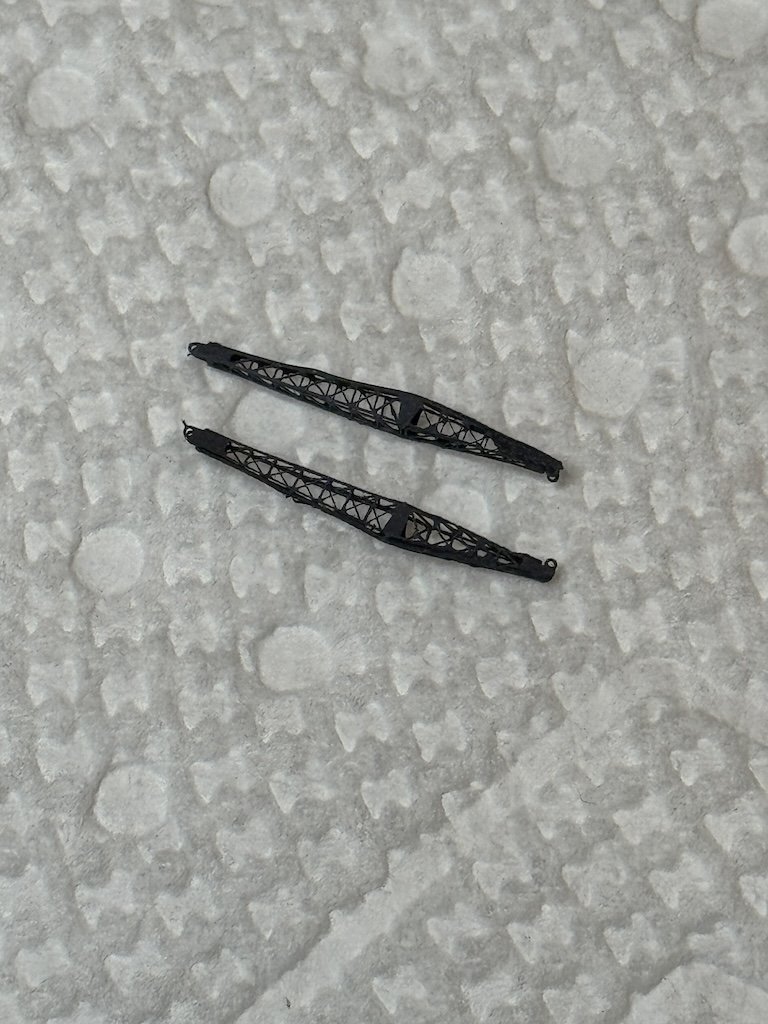
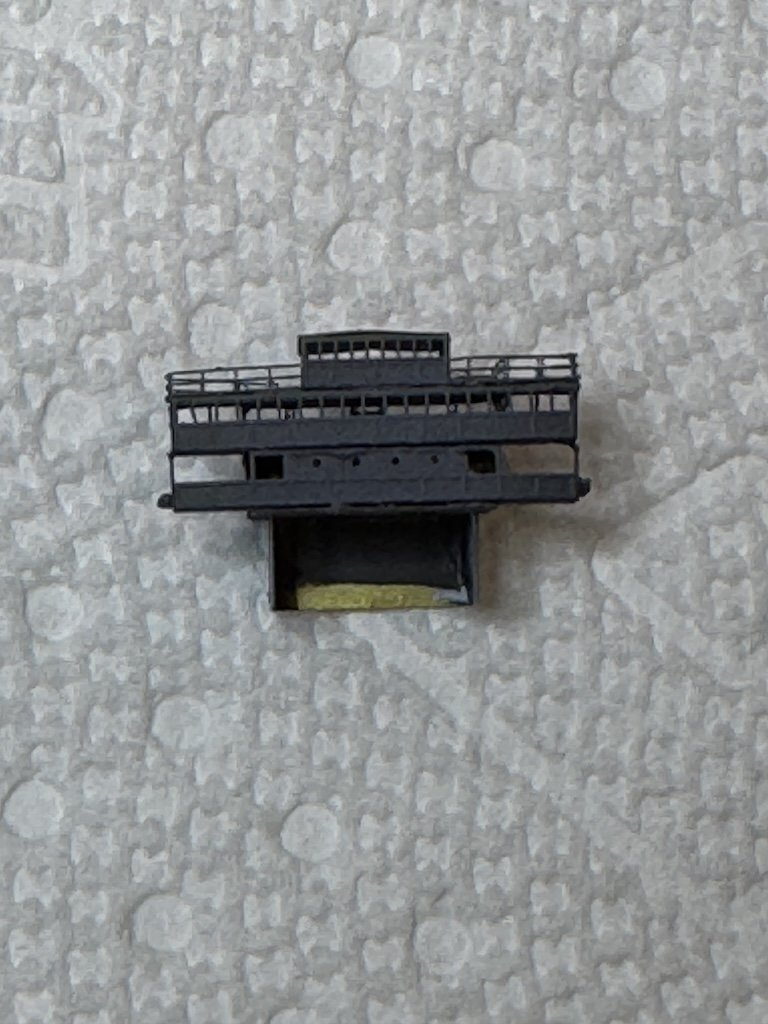
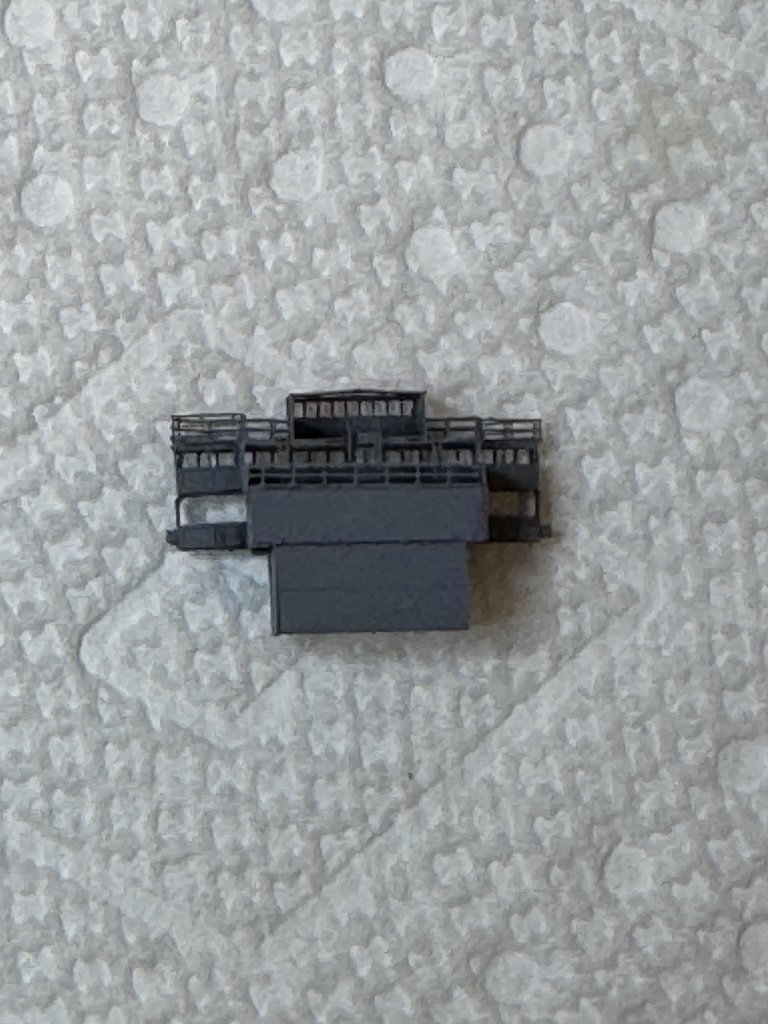
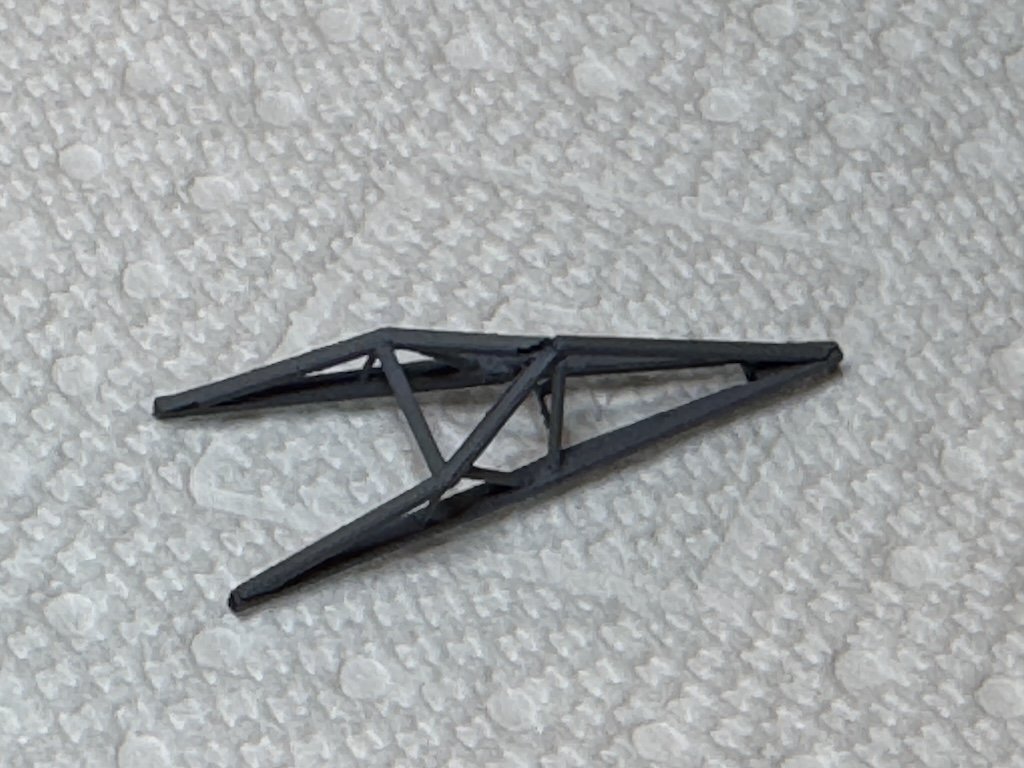
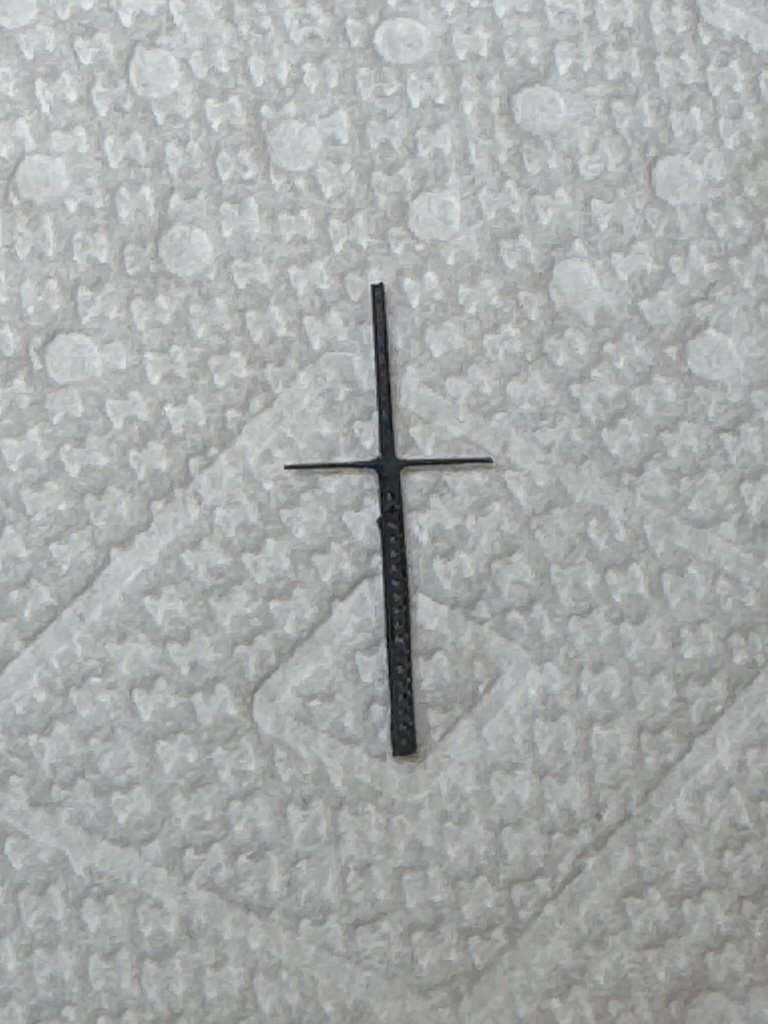
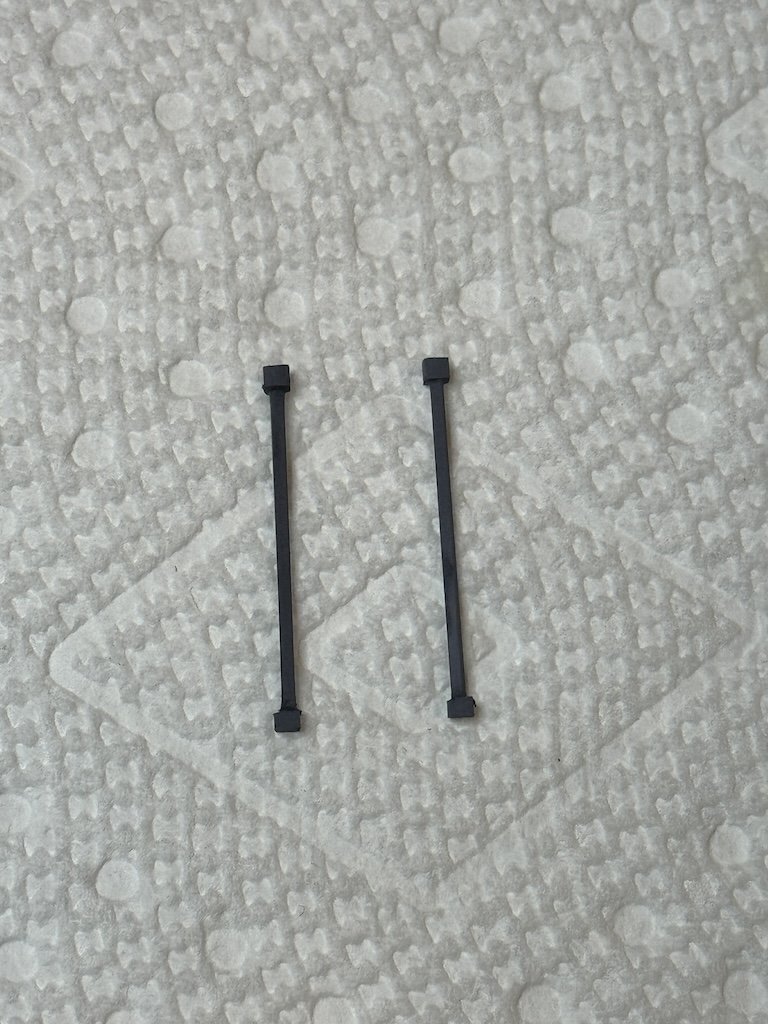
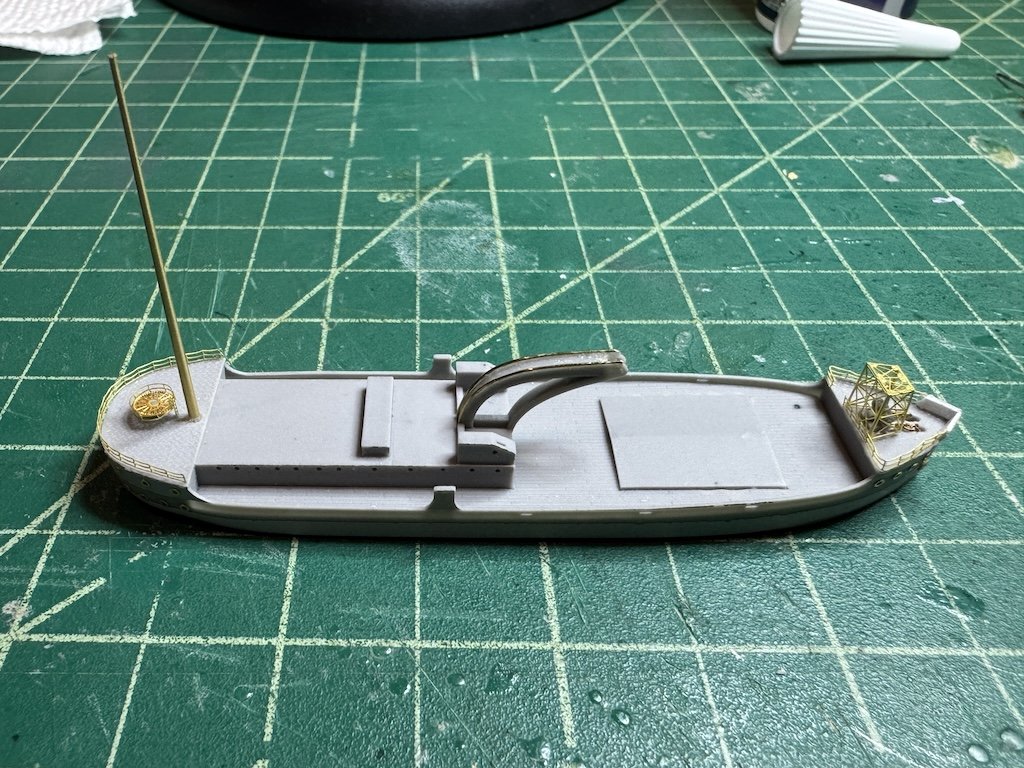
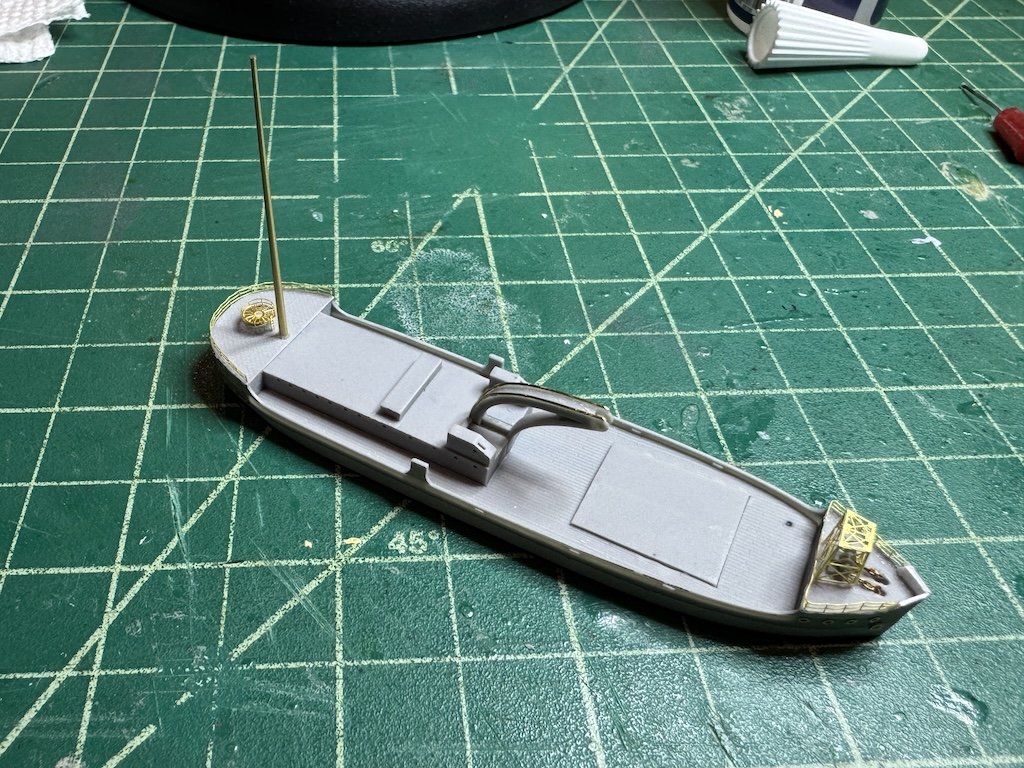
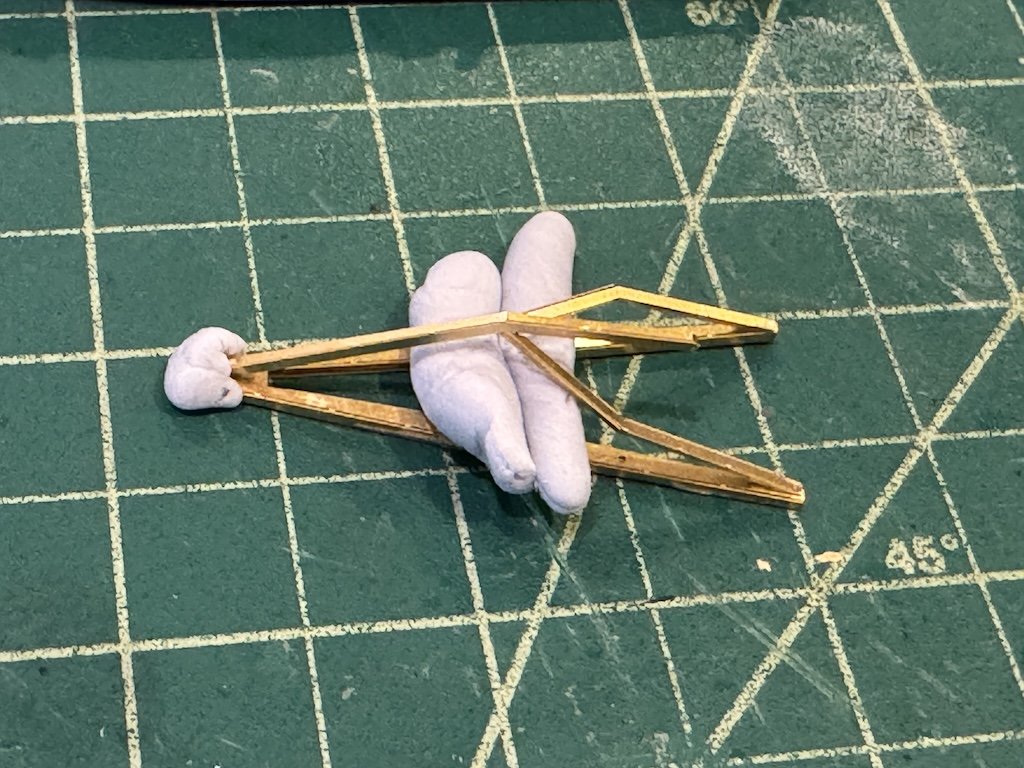
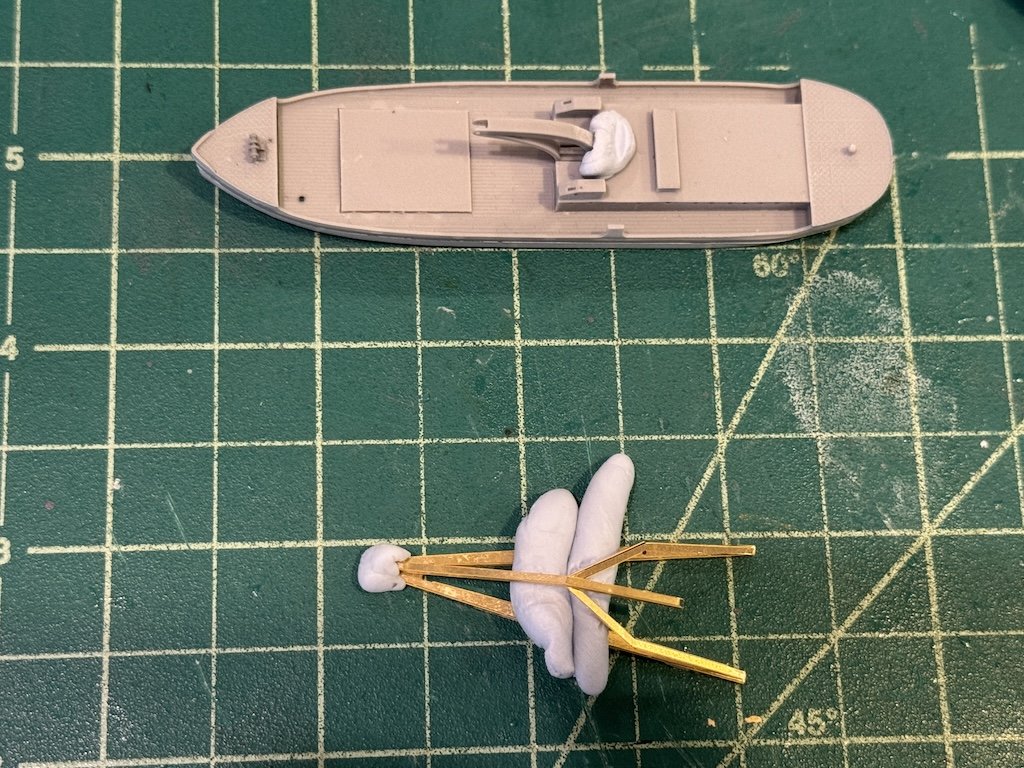
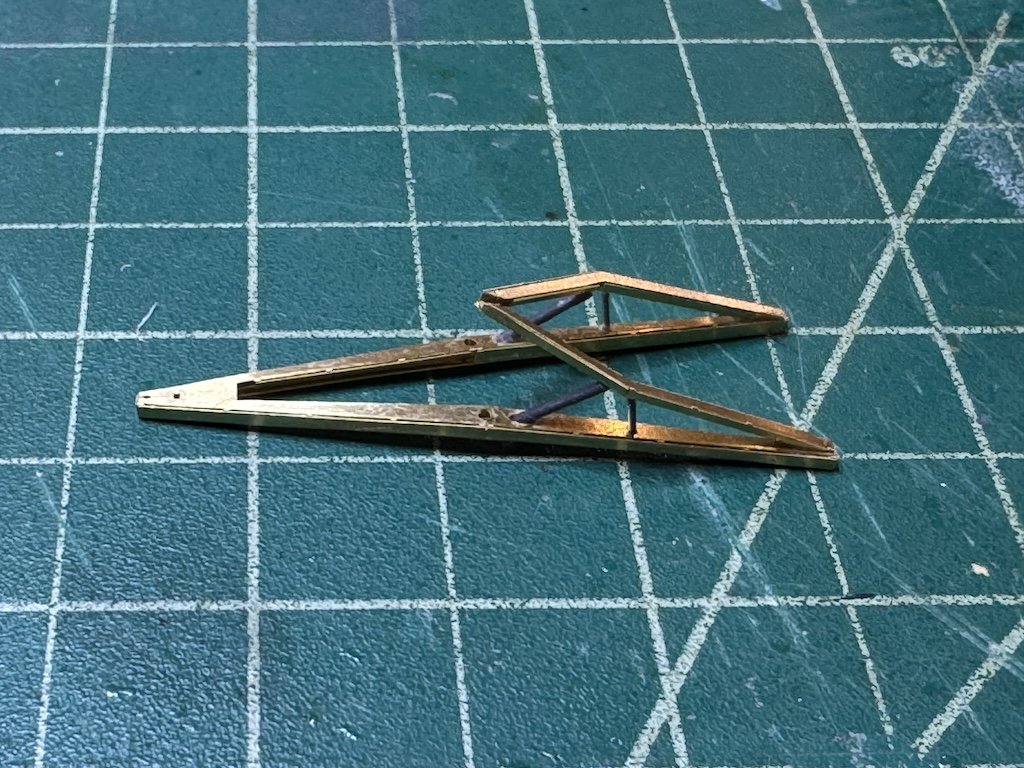
Along with the tall bow mast, from the pictures it looks like the mast on the bridge was lengthened considerable. So, I added a base built up from perforated structural beams from Ocean Spirit: Here is the bridge: ' I noticed from the Hong Kong pictures that there were two derricks hanging off either side of the bridge. The Five Star kit only gave one. So, I built up two derricks from a Tom's Model Works set: I also noted that the crane arm should have a cross piece, so that was added to the arm and it was painted: Finally, the pictures show that the crane arm slid out towards the stern along railings. I scratched built these out of square brass rod and styrene:
-
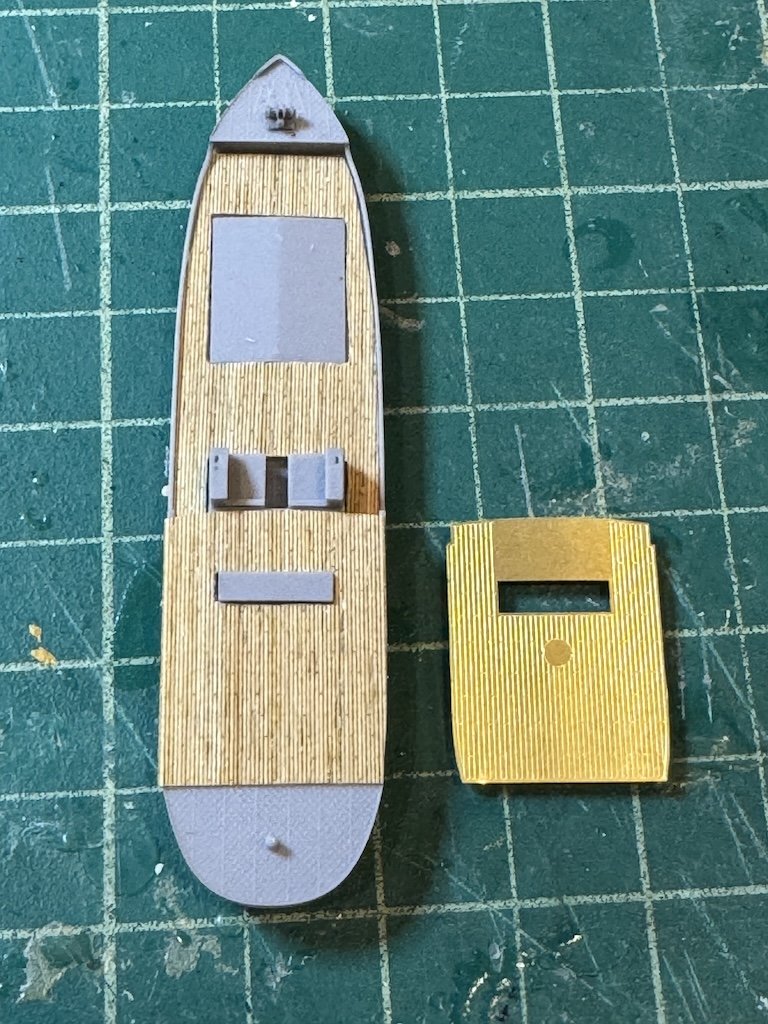
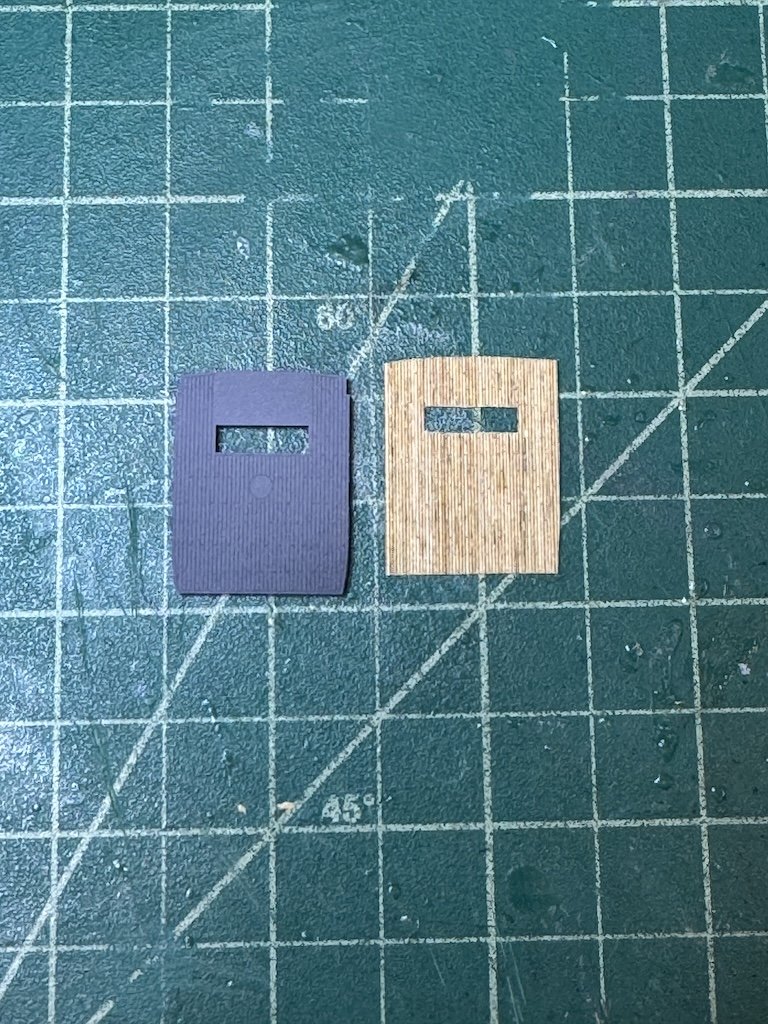
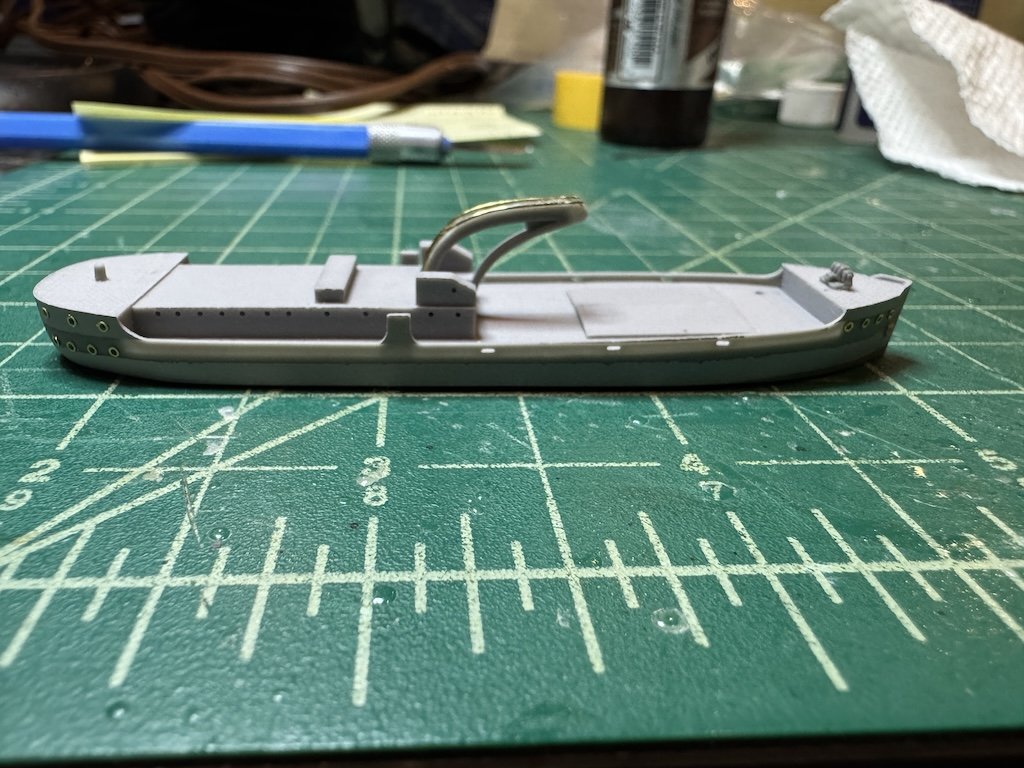
Before I got too far adding the various details and the bridge, I cut out the wooden decks for the ship using an Artwox generic wooden deck sheet. I figured it would look nicer than trying to paint the deck itself. Then I noticed that the 1945/6 configuration included a very tall mast at the box. This was added using a mast set from Five Star. I also added the bow and stern railings, as well as cut some links for the anchor chains that were included in the Artwox deck packet.
-
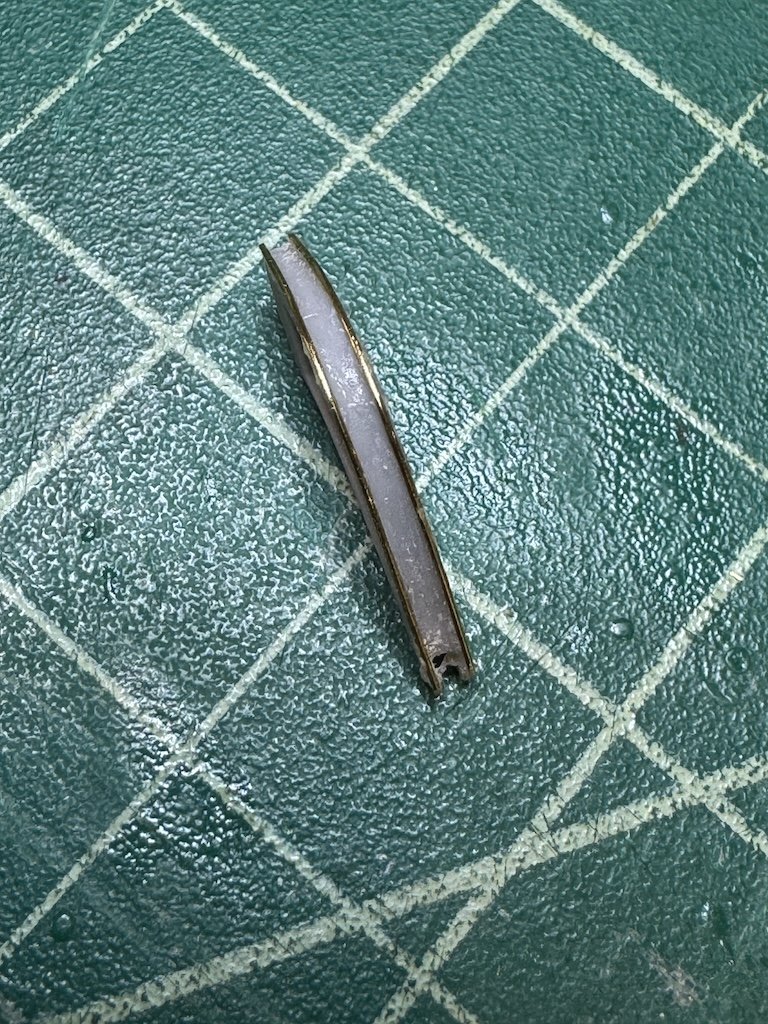
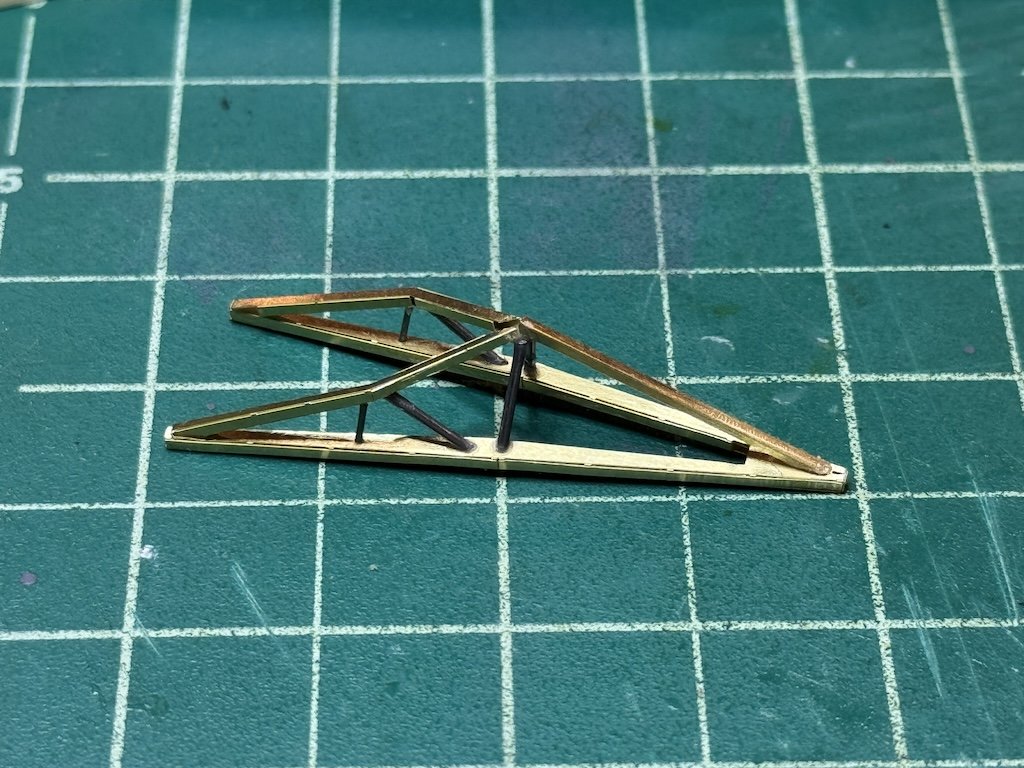
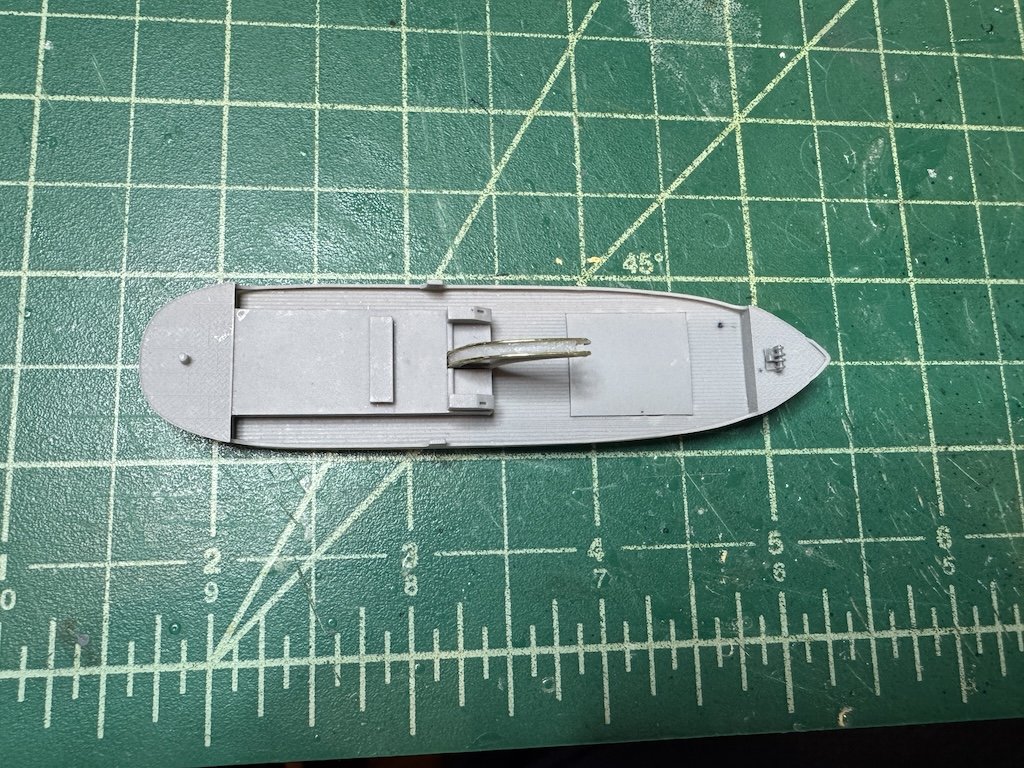
The kit is quite nice - I'm working on some other resin/PE multimedia kits from Five Star and really like them. The parts fit well and have great detail. The kit unfortunately simplifies things quite a bit so I'm adding details to it to get it closer to the 1945/6 configuration in the pictures. First I started with building up the detail pieces from PE: Next, I started to build up the crane arm. It's a little tricky in that you have three pieces come together in a pyramid, which took some time to get the correct angle. The kit asks you to add the support pieces using styrene, but here I used steel rod instead. I figured the added stability would help, as want it to be able to hold the locomotive as per the pictures: One issue I noticed is that the kit is designed where the crane arm connects to a hinge at the end of the bracket. I don't think this is correct as it would be impossible for the crane arm to be fully extended as per the pictures. Instead, from the pictures it looks like the bracket holding the crane arm has rails along the top where the crane arm slides along as the arm is extended and retracted. I tested this out and this seems to be how the arm actually extended and retracted, rather than pivoting at the end of the bracket. So, I added 0.3mm brass wire to the tops of the bracket to simulate the rails. For the hull, I simulated hull plating lines by masking off strips and painting the uncovered sections with Mr. Surfacer 500. I also added PE to line the port holes and the anchor chain frames at the bow. Then I glued in the crane arm bracket.
-
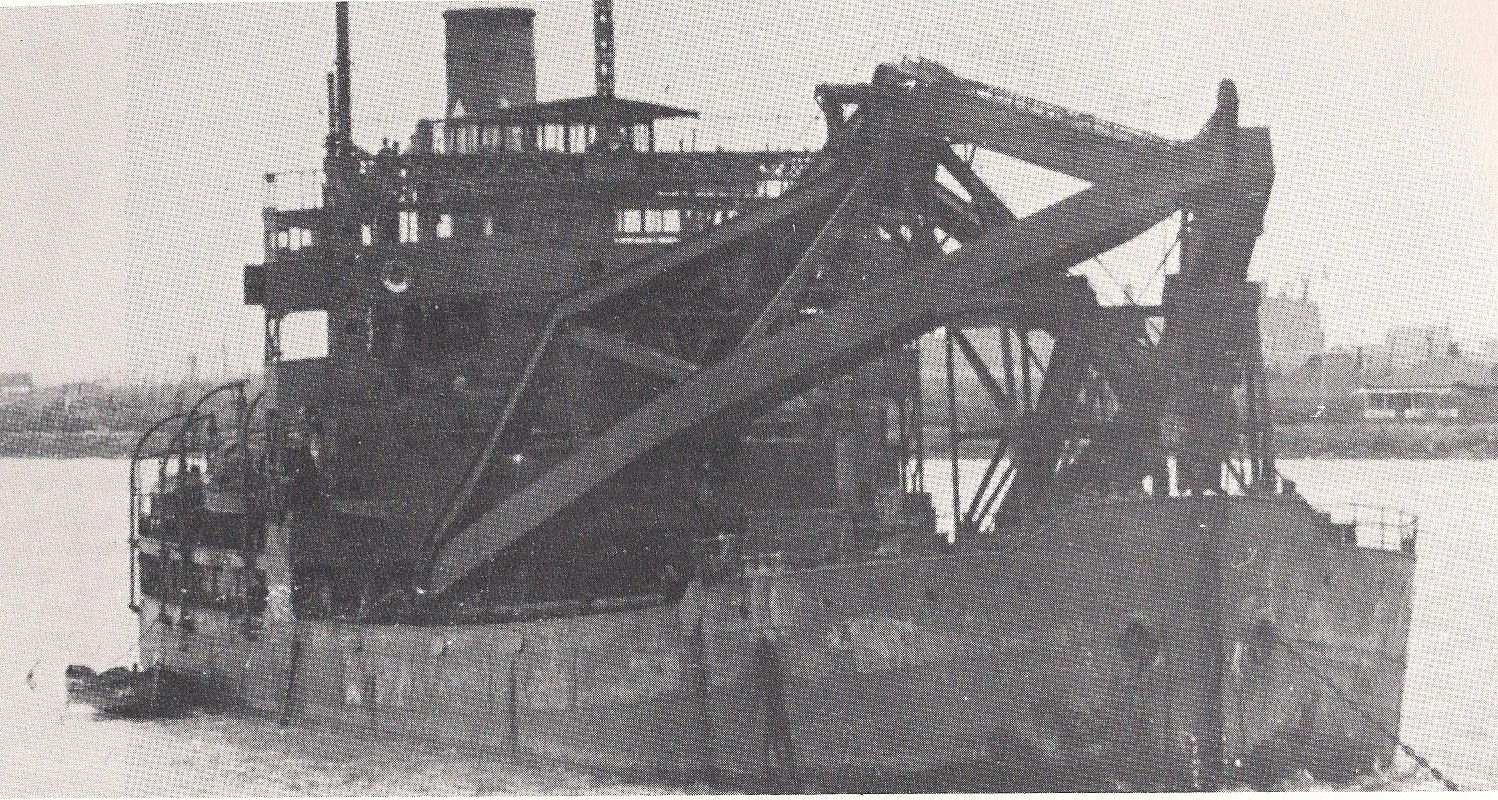
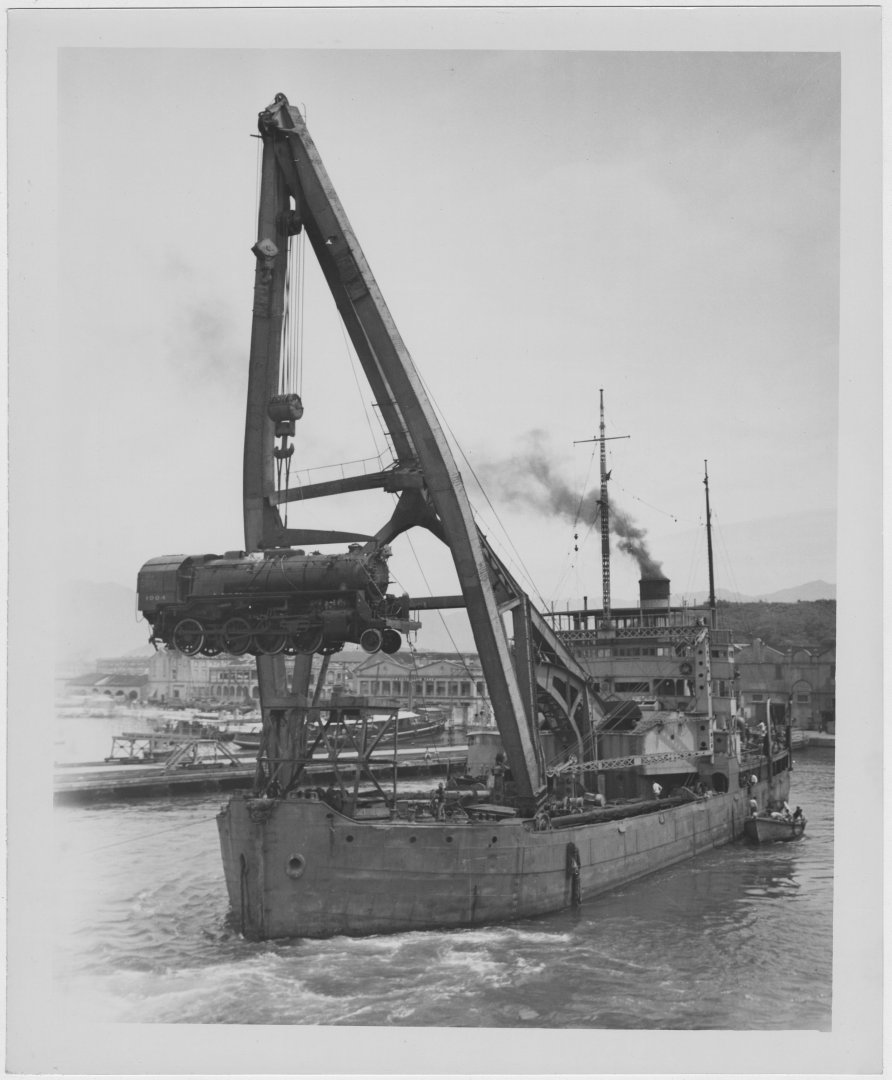
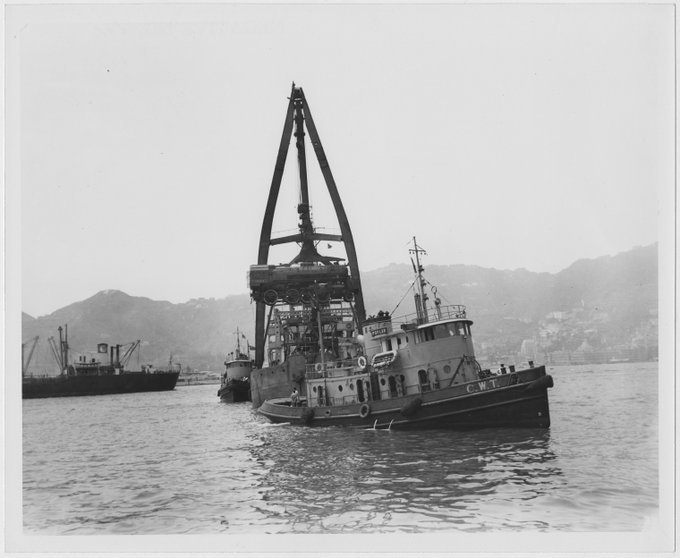
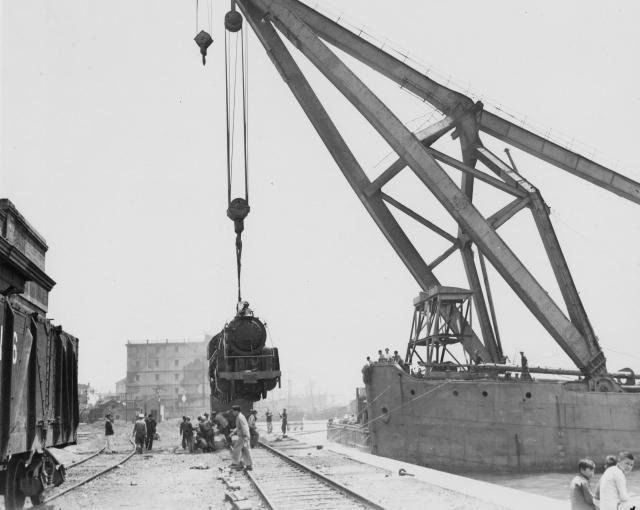
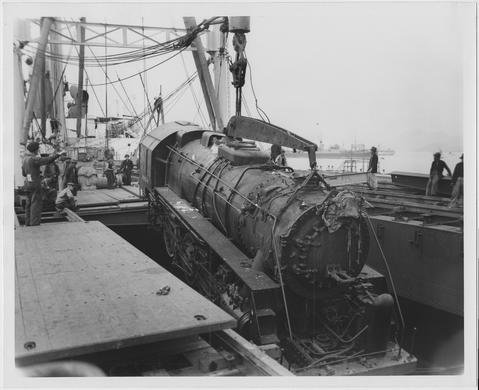
For this build, I found some really cool pictures of the ship delivering a locomotive off the coast of Hong Kong. I can't find a clear date for the pictures, but my guess is these pictures depict the Seishu Maru sometime between 1945 (when surrendered to the British) and July 1946 (when it ran aground in a typhoon near Hong Kong and was deemed a total loss). From the Trains Magazine forum site, I found the following additional information: "The former Imperial Japanese Army crane ship Seishu Maru unloads a US built 160 ton 2-8-0 for the United Nations Relief and Rehabilitation Agency at Hong Kong in 1946. This class of locomotive was identical to the US Arny’s (sic) S-160 class Consolidations." I plan to recreate this scene in a diorama:
-
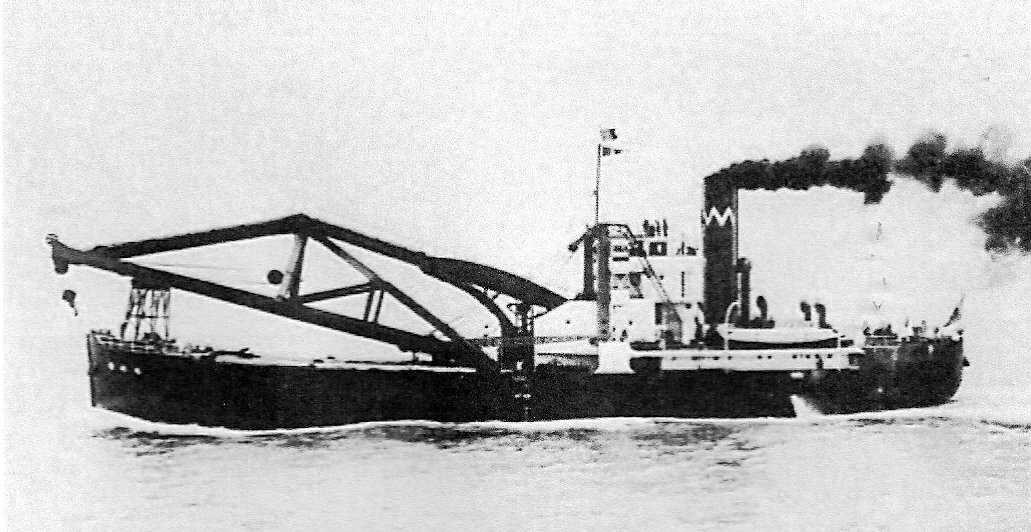
While on the road a couple of weeks ago for one of my daughter's softball tournaments, I decided to bring a small kit to work on while at the hotel. This one is the really nice Five Star kit of the IJA crane ship Seishu Maru. The kit is a combination of resin and PE parts to build a fairly interesting ship besides the typical warship. The Seishu Maru was completed in 1927 with a 147-ton crane and two 20-ton derricks. There's not much information on the ship out there, but combinedfleet.com notes that it was designed to transport and handle 12-inch (305-mm) turrets of old disarmed battleships. The ship transported the turrets from the breakers’ yards to various locations for use in coast defense. The ship was surrendered at Singapore at war's end, but lost in 1946 to a Typhoon off Hong Kong. Some blurry pictures from Shanghai 1937:
-
Hey Glen, what a great SIB! I haven't been on MSW much lately but just enjoyed spending the morning reading your build log and the adventure you took. Fantastic work my friend! I have to say, your creativity on subjects, display boards, extras, etc. really makes for some unique and special projects. I always enjoy your builds to watch how you not only conquer various challenges, but also how you put together an overall piece that has that touch of "special." Well done!
- 156 replies
-
- 5
-
-
-
- Queen Annes Revenge
- bottle
- (and 1 more)
-
Well done!! Congratulations on a fantastic build!
-
I was just going to ask the same thing. In a card model, how do you mount such things and how is it locked in?
-
Looking great Chris! We went to Gatlinburg for the first time two summers ago and really enjoyed it. I bet it's gorgeous out there right now with the fall foliage.
-
Nicely done Alan!
-
Thanks for the time and the explanation Dan. Thanks also for the tip on adding X-22 to Tamiya matt paints. I'll have to try that.
-
Hey Dan, this looks great! The Bulldog is such a cool looking subject. Silver Wings makes a great 1/32 resin kit that I've been eyeing, but this Airfix kit looks fantastic. Airfix seems to have really upped their game. Their Walrus practically snapped together and had very good detail. One question if you don't mind. How do you approach a model where the fuselage is aluminum but there are painted on details that are likely flat in color like the anti-glare coat? Do you gloss everything for the decal coats and weathering, then come back and apply a flat clear to the anti-glare coat? That seems a little tricky to mask off when more of the details are on the plane. I've been thinking of hand brushing Dullcote on my anti-glare section for my CW-22 to tone down the gloss a bit, but wondering if there are other approaches to consider. Thanks!
-
Another nice one Alan - well done!
-
Looks really good Alan! Your paint job is fantastic! Did you mask the bridge and the funnel and airbrush to get the different colors? Or did you just hand brush? I have to do something similar with my Akitsushima and am a bit worried about masking with the delicate PE attached.
-
Looks great Chris! Hopefully the fuselage went together a lot easier than the Accurate Miniatures kit I’m working on. I had a really hard time buttoning it up!
-
Excellent rigging Kevin, wow! Fantastic job my friend!
- 68 replies
-
- 3
-
-
-
- Scharnhorst
- Trumpeter
- (and 1 more)