


Landlubber Mike
-
Posts
4,547 -
Joined
-
Last visited
Content Type
Profiles
Forums
Gallery
Events
Everything posted by Landlubber Mike
-
 Thanks Shipman! 1/200 would be a really big kit, almost twice as long as this one! Looks like a nice kit.
 -
Mini lathe for mast making etc.
Landlubber Mike replied to Charlie pal's topic in Masting, rigging and sails
Proxxon DB250 would be a better bet in my opinion. -
John, thanks very much! I think I said this before, but the kit and Infini detail set are what do most of the work here. I'm just trying not to mess things up too much. Thank goodness for Optivisors and fine tweezers though!
-
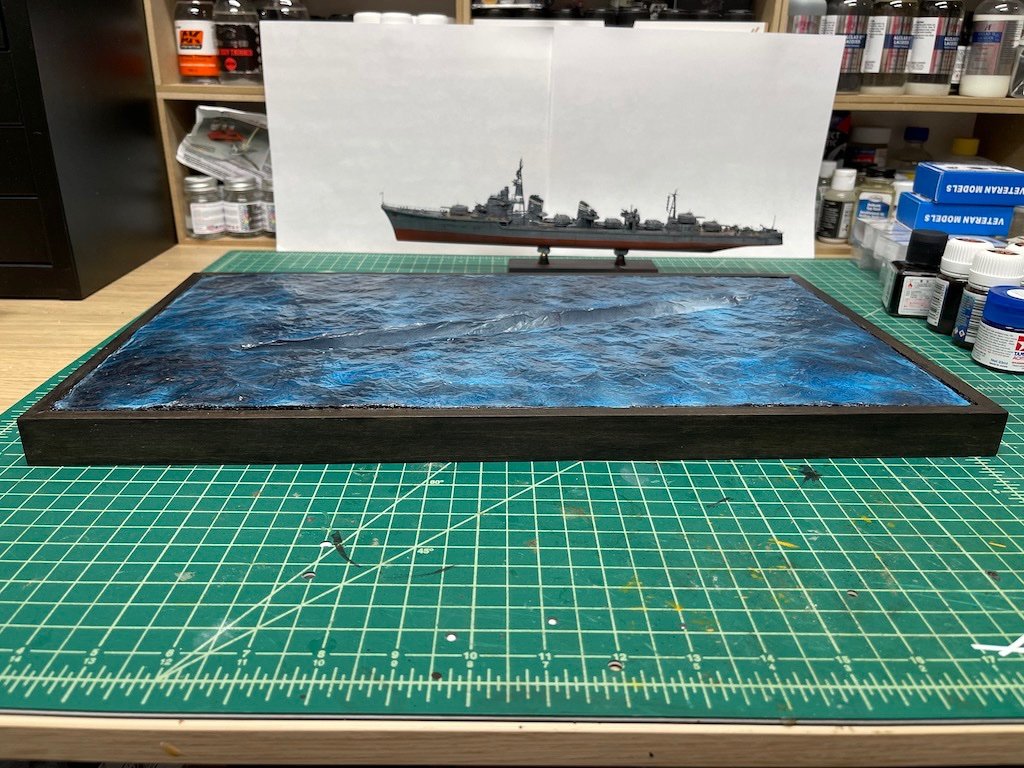
Hey Glen, There are a number of different techniques you can use. Some use this technique, others add clay to a base to get the waves, others use artist watercolor paper, and then there are those that carve the sea out of wood. In part, I think it depends on the scale you are working in and how rough the seas you are trying to portray. So for example, if you were working in 1/700 scale, the watercolor paper approach should be just fine. Working in a larger scale or with rough seas, paper wouldn't work I don't think. For the seas here, I followed the general technique by Scale-a-ton on YouTube. He has a few different builds on his channel with this technique. I think I used an amalgam of what he shows on his various videos, so take a look at his ship builds. I'm infinitely grateful that he took the time to share his techniques with the rest of us! Essentially, the steps are: 1. Get a board (I used insulating foam board from Home Depot), cut it to size, mark the outline of where your hull will sit. 2. Crinkle up bits of aluminum foil and put them on the board using white glue. When finished, put white glue over the entire board, and put a full sheet of aluminum foil over the top to smooth out any sharp points. 3. Next comes paints - I primed with white Mr. Surfacer, followed by a light and irregular spray of Tamiya sea blue. Then you spray Tamiya gloss clear over everything, followed by Tamiya clear blue, followed by another coat of Tamiya gloss clear. You can add in other colors (grays, blues, greens, etc.) as you see fit. The key is to not add a full, heavy solid coat of any of the paints, but keep the airbrush moving so you get interesting variations and tones. 4. Then you add the hull to the board, and use heavy gloss gel medium to build up the seas and spray around the ship. I used Liquitex. You can use cotton dabbed with the gel medium to indicate spray (the cotton stays white). I haven't tried this yet, but for larger waves, you can build them up using bits of toilet paper which turn clear when the gel medium is added. 5. Finally, you can use paints (white, light blues, light greens, etc.) to help indicate the wakes, waves crests, disturbed water around the ship, etc. It seemed like a very easy technique for my first time, and so far has worked pretty well on both my 1/700 and 1/350 builds. For my current Yaeyama 1/700 build, I might try the watercolor paper technique shown in this Vallejo video as I'm planning on showing the model anchored in still waters.
-
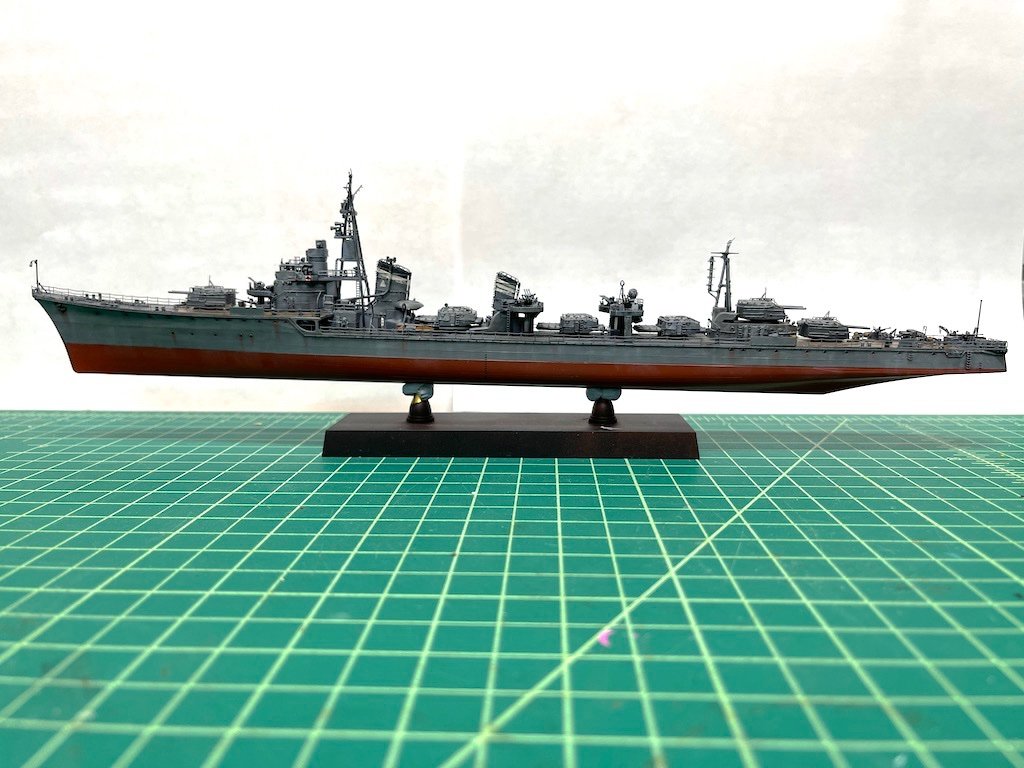
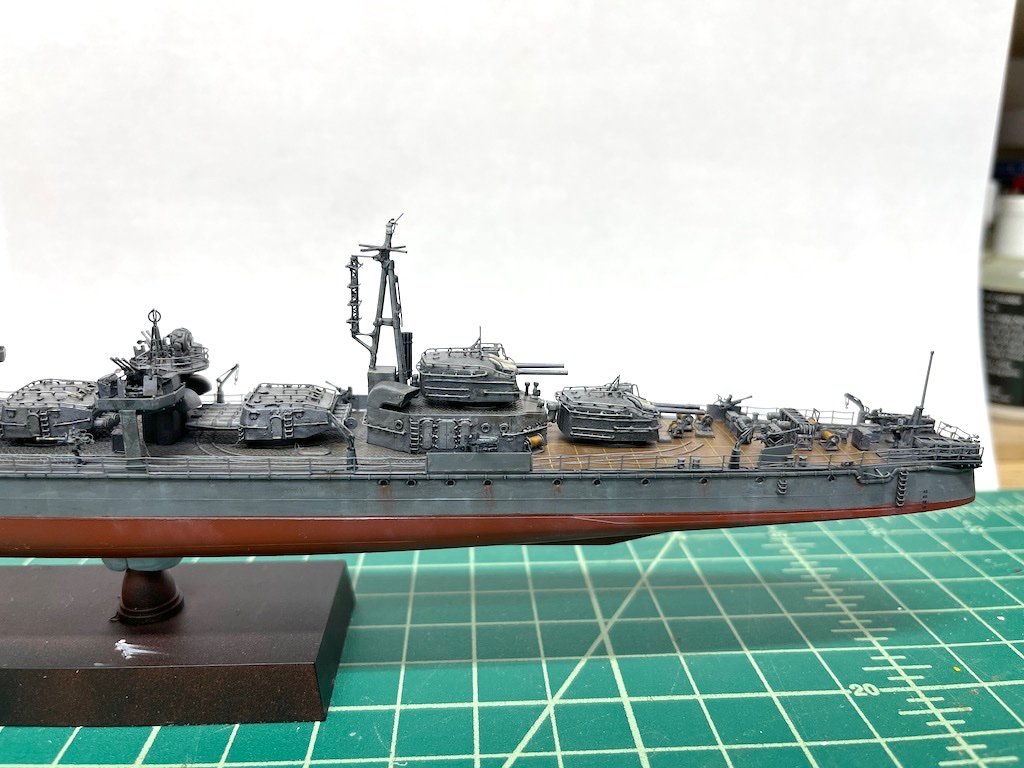
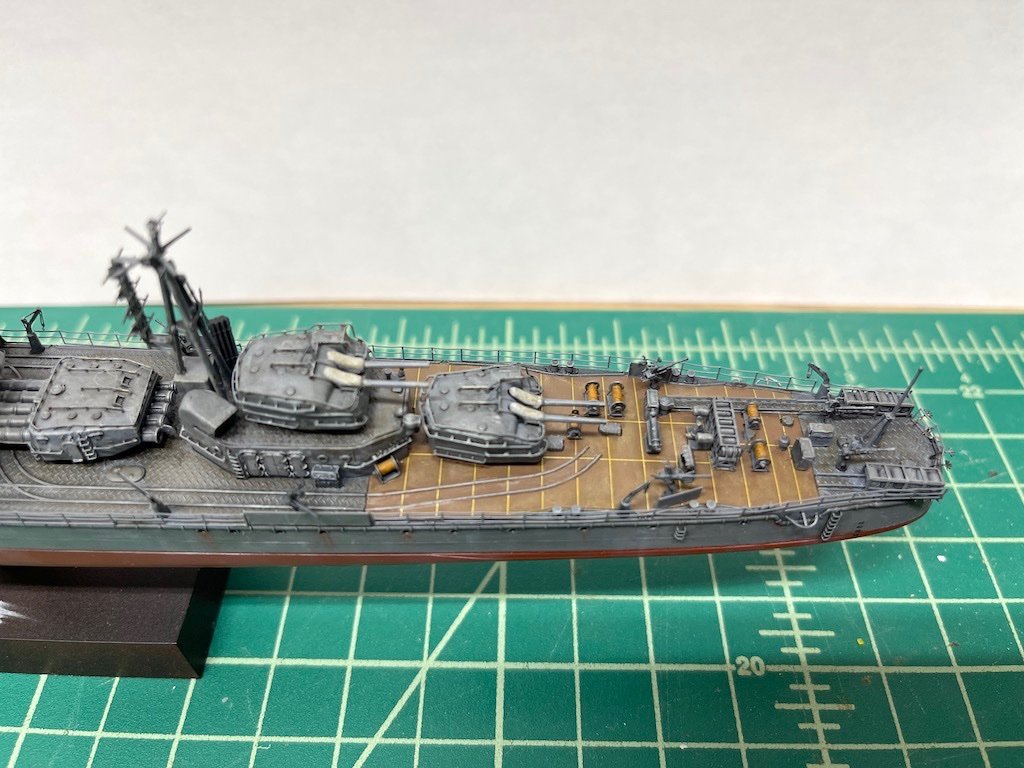
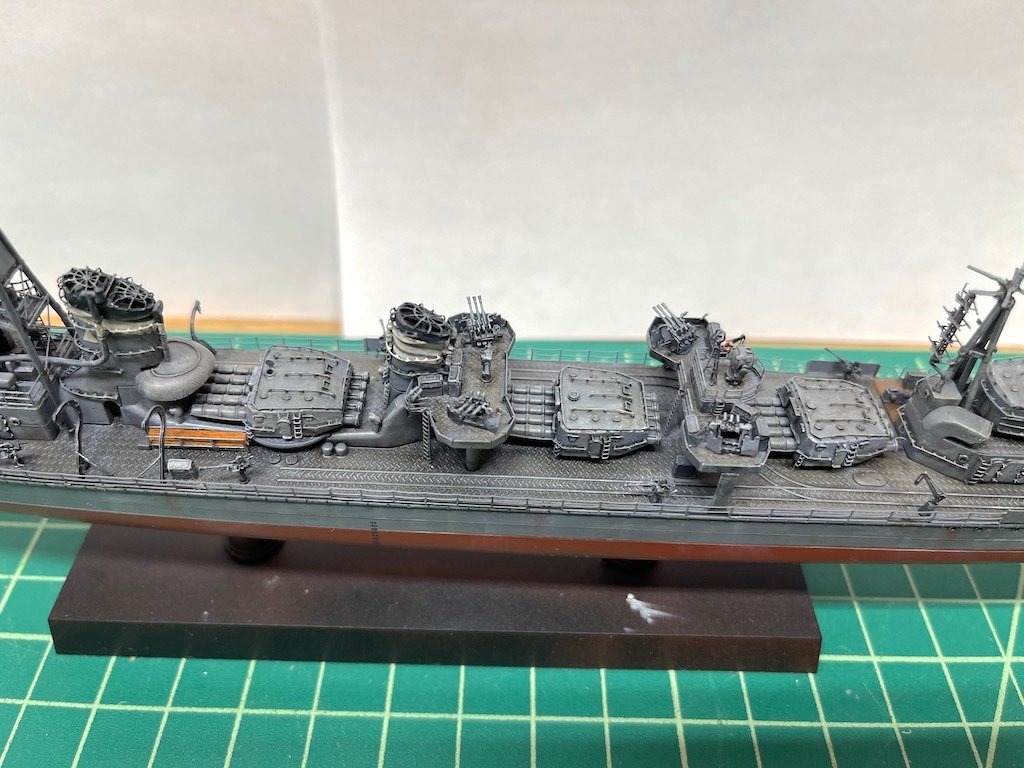
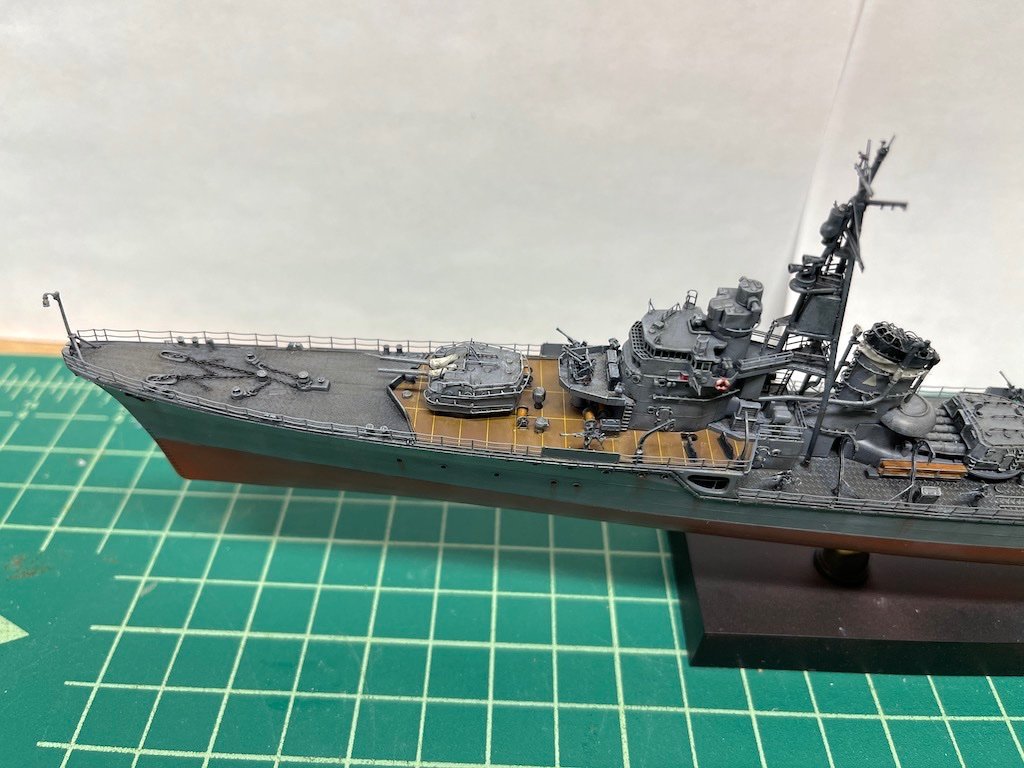
I'm on the home stretch with this build. Managed to add some other details including the wood slats in the rack near the funnels (used some cherry veneer I had, cut into thin strips and used wipe-on poly), then weathered and added the final clear coat last night. Will add the torpedos and carts, the small boats, and figures, and then rig the model and add flags. For my first 1/350 plastic ship model, I'm really pleased with how it's turning out. As a little preview, given how fast and sleek the Shimakaze was, ever since I got the kit, I thought presenting the ship in a waterline setting would really show it off. So, I built a waterline diorama base for the model as well. It's made of foam board using the crinkled aluminum foil technique. I built the frame for the diorama using balsa strips that I got from National Balsa in the thickness I needed, that I cut to size and stained. I first practiced making a waterline diorama for my 1/700 destroyer, which is just about done, and can post pictures of it in the next couple of days. This one obviously is a little bigger but so far so good. Thanks for looking in!
- 154 replies
-
- 15
-

-

-
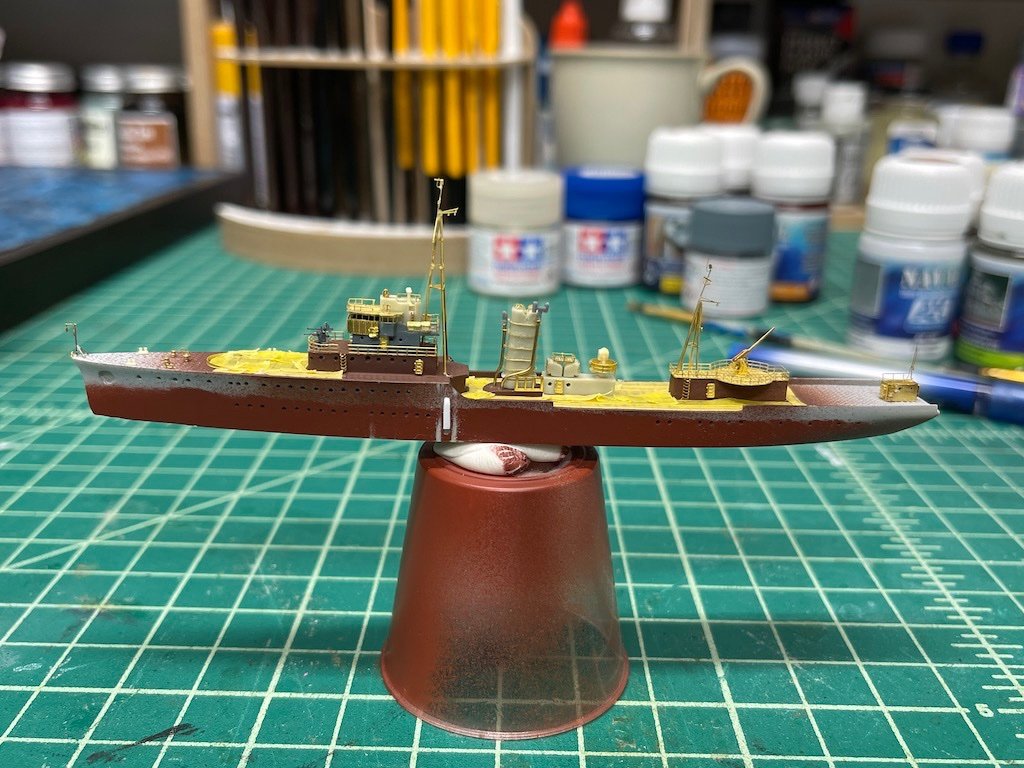
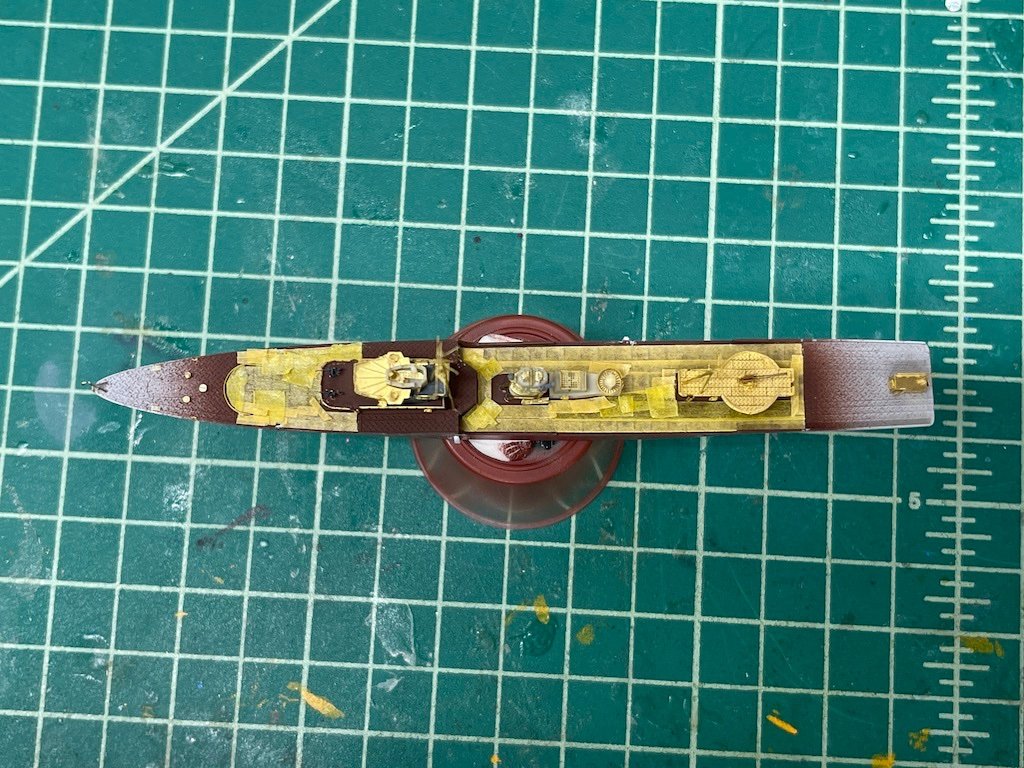
In between other projects, I try to squeeze in a little time on this build. I added a few more details, including the searchlight (not included in the kit for some reason) and these vertical tubes along the hull sides. Google translate on the Mara book suggests these are ash chutes, so I guess a way of disposing waste from the ship's engine? Since I'm at the point where it's not worth the risk of adding other more fragile details to the model (especially if I have to tape around them), I got the linoleum deck taped up which took quite a while. Last night I put on a coat of Mr. Surfacer 1500 black primer and worked on main gun at the bow and the small boats. I also starting thinking about the waterline diorama for the kit, marking out a piece of foam board for it. So, this is moving along pretty quickly relative to most of my other builds despite not spending as much time on it. Coming out pretty nicely I think. With the experience of the first 1/700 build, I feel like I'm not getting stuck as much or breaking things off in mishandling the model as I did on the destroyer. Thanks for looking in!
-
I tend to agree with Chris. It's supposed to be fun, not something you are going to dread for a long slog of the build. You could always try scratch building one on the side, and if it's going well, keep at it. If it is causing too much angst, just go back to the kit. Whichever direction you take, I'm sure it will look fantastic in the end.
- 169 replies
-
- 11
-
-
You probably already know this, but you can remove some of the tackiness of the tape by first putting it on your skin, then on the model. That removes a little bit of the adhesive and may lead to less pulling of the paint. I've done this with Tamiya tape and it still works fine. Another thing that might help is to let the primer cure completely. When priming, I let it sit for a good 24 hours. Acrylics are tricky in that they dry quickly but have a long curing time. To be honest, I haven't had much problem with Vallejo pulling off on plastic. It's usually on PE that's the problem.
-
I use Vallejo’s thinner with their paints and primers. I don’t use Vallejo on areas that will be taped as I find it can pull off. When I first got my airbrush, I thought you could rinse acrylics thoroughly through the airbrush with just water and not have to do a more detailed cleaning. With Vallejo, however, I find it leaves a residue which will gunk things up. So, I clean out the nozzle, needle, etc. after every session. It’s sorta soured me on Vallejo, but otherwise I like the color coverage, no fumes, and not having to mix in thinner in the cup. To really clean it, you can shoot lacquer thinner after shooting Vallejo but I know you don’t want fumes. Now I’m more a fan of Tamiya and Mr. Color, even with the pre-mixing and fumes. I find the paint cleans out of the airbrush much more thoroughly than Vallejo. But, certainly understand why you don’t want to go that route.
-
Looking great Glen! Clever use of the nails for the shrouds! If your nails were like mine, I think they are used to pin the planking to bulkheads. I use them to help pin the first planking, then remove them when the glue dries. I don’t use them to pin the second planks though.
-
I’d probably be reluctant to scratch the assembly. Given how distinctive and symmetrical it is, you’d really have to get it perfect or it will look odd, especially with how much visual interest the boom has. Not saying it can’t be done just I wouldn’t trust my modeling skills on that! Could always try it out and see how it goes? If you use brass, would it be too heavy and make it a tail sitter?
-
Looking great Egilman! Very intricate work on those harnesses which you pulled off perfectly.
-
That wheel looks a lot nicer (and more in scale) than a lot of the pre-fab wooden wheels out there. I might have to get one for my Pegasus.
- 419 replies
-
- 2
-
-
- Victory Models
- Pegasus
- (and 2 more)
-
How many kits do you have on the go at the moment?
Landlubber Mike replied to CaptnBirdseye's topic in Wood ship model kits
I get bored or burned out, so to keep modeling, I start another. I know others feel differently, but I personally don't care if I finish a model. In a lot of ways its anticlimactic for me, and I've been more about the journey than the destination anyway. Plus, I haven't quite figured out where and how I'll store or display my finished models. For me, I have 3 wooden ships, 3 plastic ships, and another 7 plastic car and plane models in progress. I'm at the point where almost all the plastic kits are completed, so I'll have to focus on the wooden ships -- or better yet, start another half dozen plastic kits 😬- 54 replies
-
- 12
-
-
Depending on the bottle opening and placement, I could see maybe creating two pre-formed sets of railings (one for port other for starboard), and then gluing them on after the ship is inserted. That might take a lot of dexterity to do though! Inserting after will avoid bending the rail or crushing the stanchions. You could always use a stiffer wire like copper for the rail which will set after being bent and resist bending better than brass wire. That would make it easier to keep the rail in shape when inserting. What’s hard is securing the stanchions at such small scale, as you can’t really pin them to the hull. On one I’m currently working on, it didn’t have railings thankfully but I tried using very thin plywood for the bulwarks that I glued to the hull. Really couldn’t get it to work. Ended up keeping the bulwarks and hull from a a single piece of wood, and just have to live with the out of scale effect.
-
Really nice work Glen, nice job! Railings at this scale, especially in a SIB build, are really tricky. You can make them to scale, but my guess is that they likely will be so fragile that they won't survive the insertion into the bottle process (the photo etch railings on my 1/350 and 1/700 certainly wouldn't survive the insertion process). Or you could make them stronger, but likely will be out of scale. I guess it's a balance.
-
Looking great Egilman. Cool that you can see so much engine detail on these! I happened to come across some new helicopter resin engines , rotors, and other parts that Reskit is putting out. They look really fantastic. Not sure if they have any parts for your particular model, but just wanted to pass that along.
-
Tiger 1 by Javlin - RFM - 1/35 - Early Version
Landlubber Mike replied to Javlin's topic in Non-ship/categorised builds
Looking great Kevin. Wow, that's a lot of detail! -
Hey Egilman, happy new year! Glad to see you picking this up again - very cool subject! Nice job!
-
You should be able to buy generic rails from a variety of manufacturers to replace the ones from your kit. I wouldn’t be surprised if Flyhawk offers them.
-
For what it's worth, for most things, I attach the parts unpainted and then paint when I have the assembly completed. First use primer (Mr. Surfacer) and then paint - Tamiya, Mr. Color, Vallejo, etc. For parts I'm going to include at the very end after most of the model is already assembled (e.g., the railings where there is a linoleum or wood deck), I'll prime and paint them while on the fret, attach them, then hand paint to touch up. It's fairly easy to do touch ups by brush, and I find there isn't too much to touch up. Once attached, I'll spray a clear coat over the entire model.
-
I'm on Safari, and doing a force refresh of the home page cleared things up for me.
