


Landlubber Mike
-
Posts
4,543 -
Joined
-
Last visited
Content Type
Profiles
Forums
Gallery
Events
Everything posted by Landlubber Mike
-
 Looks great Alan!
 -
Hi Greg, I saw the title and was thinking to myself, "didn't know Hasegawa made that kit??" Come to find out you're converting the Gambier Bay, very cool! Those pictures with the Ducks and Catalinas look like they would make for a really sweet model. I have the same kit in the stash with a bunch of the same upgrades. If you're looking for plane upgrade sets, Infini makes a USN aircraft details set (I think the one I have is IMP-35036R1). With the Hasegawa and Flyhawk sets, are you thinking the Infini USN radar set is still necessary?
- 126 replies
-
- 8
-

-
- Thetis Bay
- Finished
- (and 4 more)
-
Nice start King D - looks like a great kit. I have the Lutsow too and the nets are a little intimidating. This will be a nice one to cut your teeth on!
-
Sherline Mill Essential Accessories?
Landlubber Mike replied to Some Idea's topic in Modeling tools and Workshop Equipment
As I was reading this I was thinking of suggesting the Beall Collet Chuck for the Sherline as well. I use it to hold pen blanks when drilling the centers out and it works well. The collets I picked up on Amazon or eBay, I forget which. I wasn't particularly concerned about getting super accuracy so Chinese manufactured ones were fine - the ones I managed to pick up a few years ago seem a lot nicer than I was expecting. -
Realistic Water
Landlubber Mike replied to taylormade's topic in Painting, finishing and weathering products and techniques
I have this book and it is fantastic. Highly recommend it! -
I think that's where a Hold and Fold comes in very handy. It holds the piece in place, while you use a blade to create the bend. I'll also on occasion use the Tamiya folding pliers (they have two sizes) which work well too, but easier to keep things steady in a Hold and Fold.
-
Looks great! Glad you’re getting additional use out of the Bug - very clever!
-
Wow, this is looking really good. Very nice job!
-
Personally for me, researching and learning about the model subject is almost more interesting than the actual build.
-
The tape worked great! That was a concern I had with my Morgan build - how to make the white lines look even. That was a big part of my decision to use separately colored woods - no paint and taping necessary, just switch woods (I’m going to use holly for the white areas).
-
I kinda do as the diorama possibilities seem much more extensive than what is typically done with ships, planes, and cars which is what I currently build. But have too many future projects scattered in piles throughout the house and not enough time with 3 young kids in the house. I’ll just have to retire early and live to 100 🤓
-
Cool subject Alan, nice start! Looking forward to seeing this come together. Just don't make it too nice or I'll start adding armored vehicles to the stash 🙄
-
Hey Glen, I'm in on this one - what a cool project! I love your ideas, how creative! Looking forward to following along! At less than $10, I'll probably pass on helping you empty the bottle. Sounds like you have enough volunteers though
-
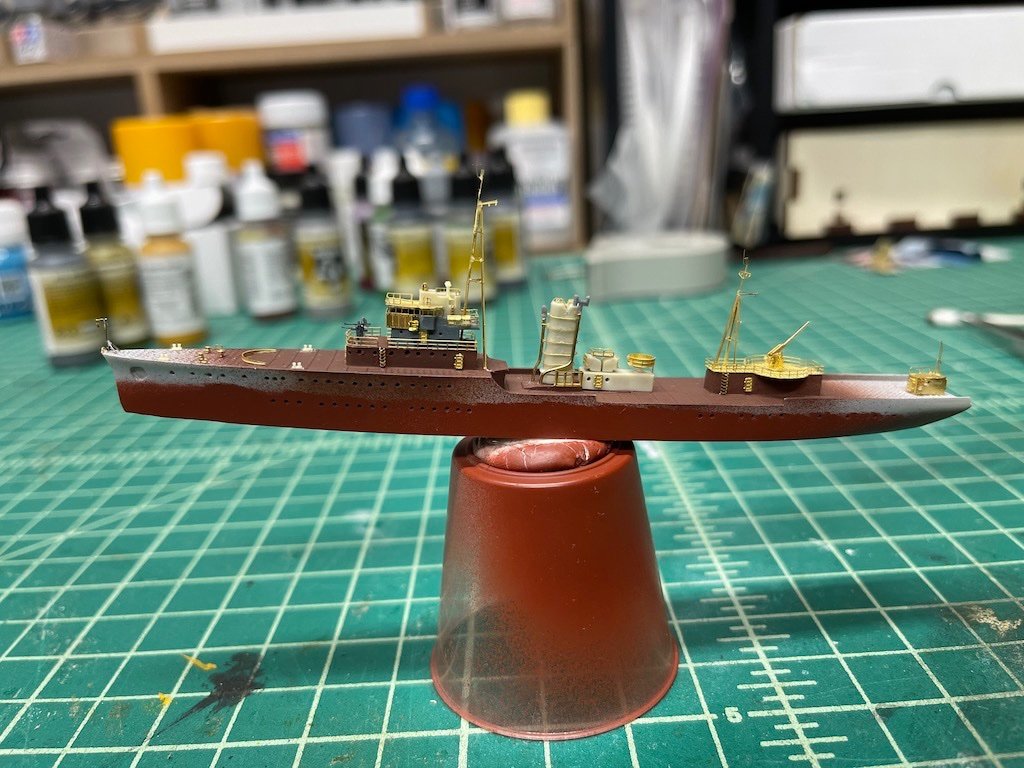
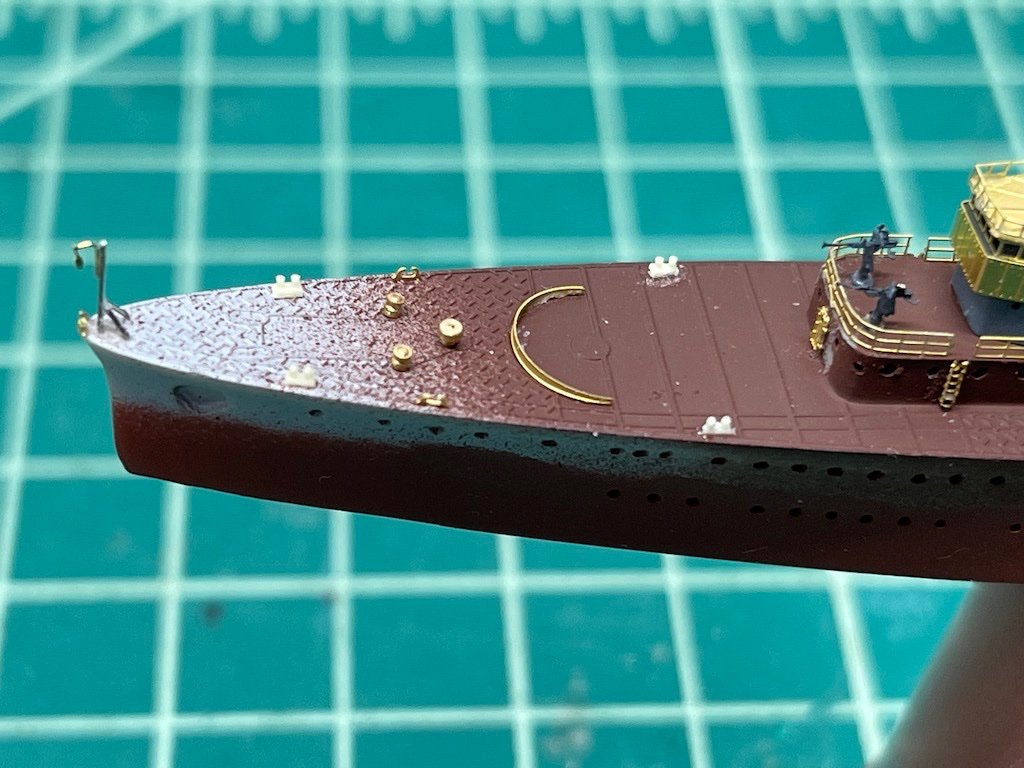
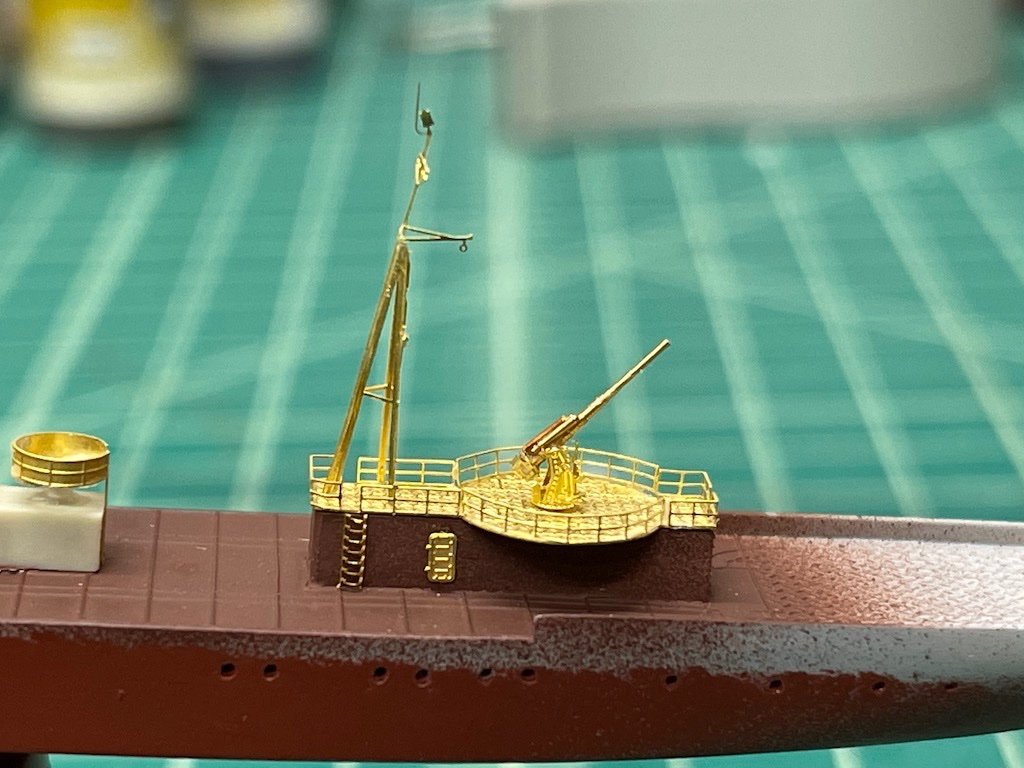
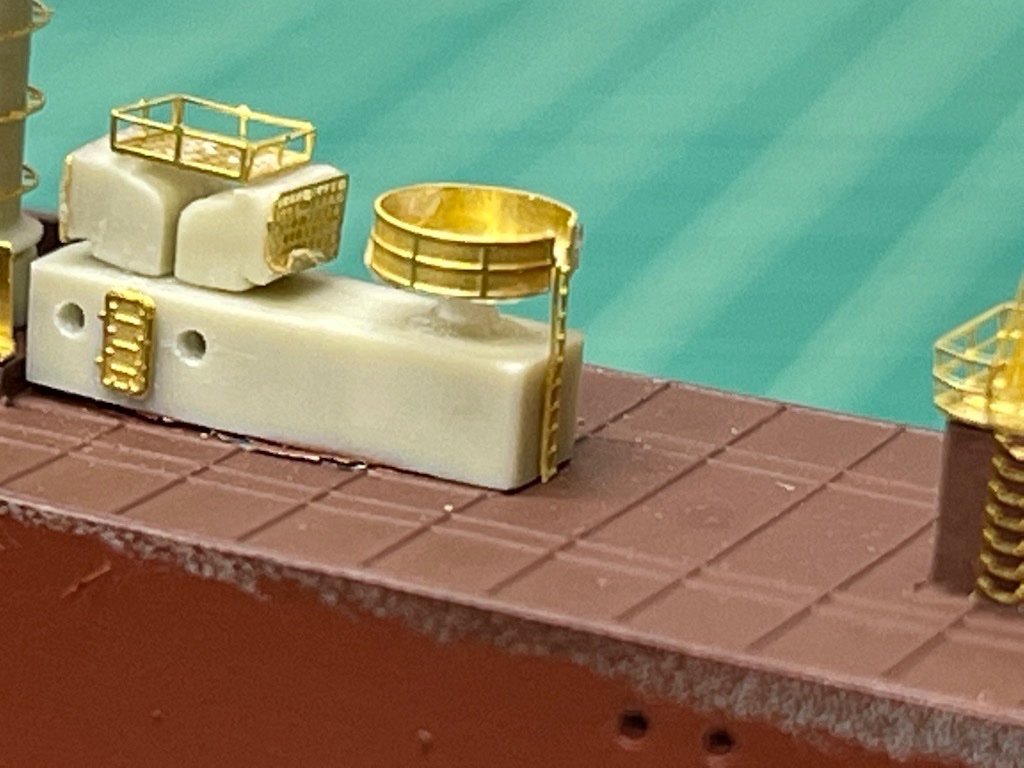
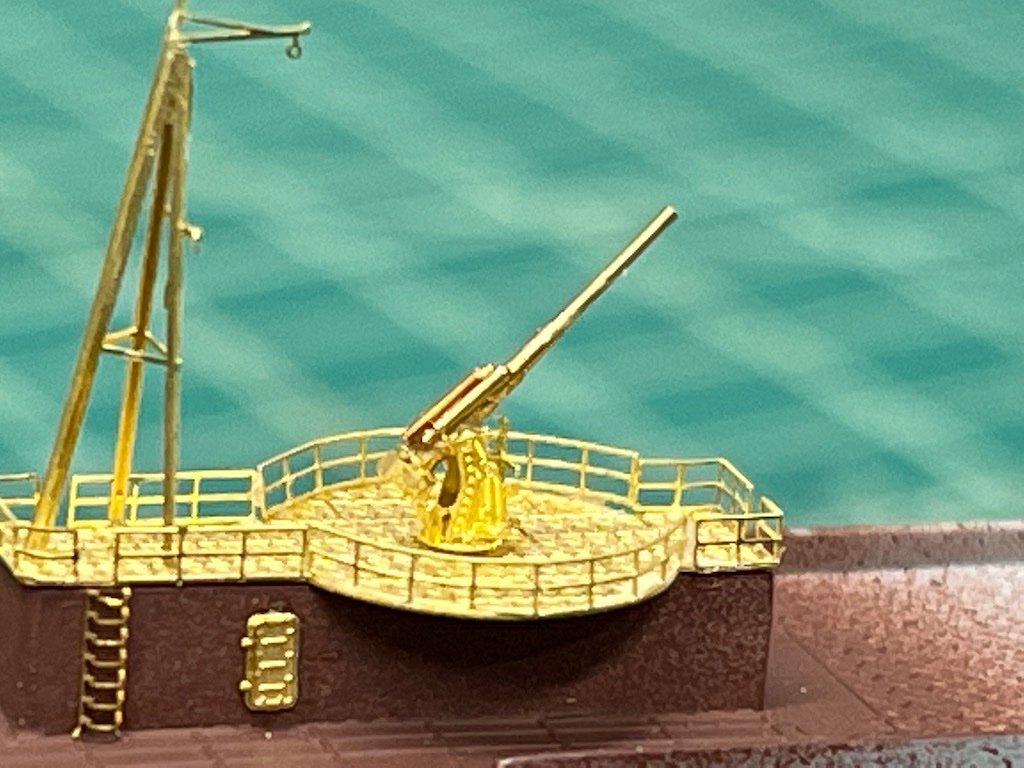
In between projects, I've spent a little time on the Yaeyama, which is coming along pretty quickly. Five Star does a really nice job with their PE sets, and while 1/700 is challenging at times, it's been a lot of fun. The instructions are sparse, to say the least, which adds to the challenge. Only four pages, and not all of the parts are shown on the pages - not to mention, generally no directions on how to fold things. Definitely not a kit for the first time builder. I added a bunch of additional details at the bow: The deck cleats are from the kit. The bollards are resin bollards from I believe Five Star. They are probably only a couple of millimeters long and about a millimeter wide, so cutting them off the resin plug wasn't easy. They look pretty good though, being three-dimensional versus PE. For the pole at the bow, I constructed the pole and the supports using insect pins. Brass at this scale is just too flimsy, and insect pins I believe are made of stainless steel so won't have to worry about bends. The lantern at the end is a PE add-on from Five Star I believe. I also added two AA guns. I had some extras that were pre-painted on the fret from my 1/700 Hatsuzakura build, so added them to the bridge deck. I ended up re-doing the railing around the searchlight platform. The kit gave you the option of doing plain railing or railing covered with canvas (thanks @lmagna!). What bothered me was that the railing I initially installed fully circled the platform. How would someone reach the searchlight, let along get up to the platform? So, I replaced it with the canvas railing, with a tiny gap and ladder going up to it. I couldn't tell from pictures whether this is historically accurate, but seemed to be a potential possibility so went with it. Also added the Type 99 AA gun. This came with the kit minus the top of the three cylinders that at the near end of the barrel. The instructions say to add a 0.4mm rod so that was pretty easy -- but not sure why they don't include that as part of the package. I even have a spare Type 99 AA gun set from Five Star and that set doesn't include all three rods either. I also added the fore and rear masts. Here is the rear, which apparently I need to bend the very top back into shape (looks fine to the naked eye, but looks rough under high magnification): Along with painting the bottom of the hull in hull red, I also added a number of ladders to the build, and here is where things stand now: I'm getting close to the point of masking the linoleum and painting the rest of the ship. There are a some cylindrical parts that are aligned vertically on both sides of the hull. Not sure what they are, and the kit doesn't provide them. So, I probably will take some rod or sprue and shape them. I'll probably also add the hull side access ladder as art of the diorama scene. I hate adding details that can get easily broken off, but at some point they need to be added and I just have to remind myself to be more careful around the model. Thanks for looking in!
-
Great look to the quarter galleries! I got stuck there with my Pegasus when I wanted to try to similarly make a three dimensional look to them. I’ll have to try out the microscope slide cover technique. Great idea!
- 419 replies
-
- 2
-
-
- Victory Models
- Pegasus
- (and 2 more)
-
That’s really amazing work Chris. As I said before, you have gotten really good at these card kits! I still can’t get over that these are in card - especially with all the compound curves involved. Great job!
- 89 replies
-
- 11
-
-
Good to know guys, thanks. I'll be on the lookout for it. When I bought my Byrnes saw, I had zero experience with table saws. I watched a number of videos online which were for full sized saws before starting, but I still ended up muddling through it for a while. Kickbacks a really scary! Even small hobby saws are no joke!
-
How was the workshop? Unfortunately I couldn’t attend due to a bunch of kid activities today.


