


Landlubber Mike
-
Posts
4,547 -
Joined
-
Last visited
Content Type
Profiles
Forums
Gallery
Events
Everything posted by Landlubber Mike
-
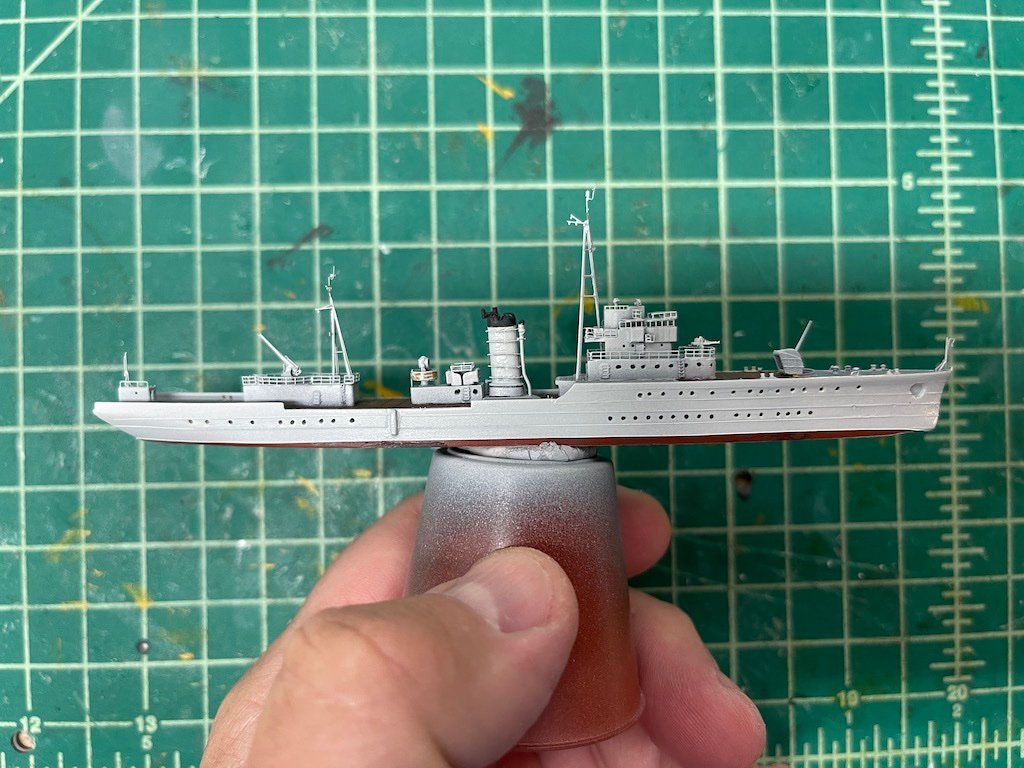
 Some pictures of where I am at the moment. I ended up spraying a thin coat of Mr. Color off white, then added a base coat of some darker gray to the non-linoleum deck sections. I'll probably spray a clear coat on this evening in preparation for the washes, etc., and then I can add the railings and various detail pieces. Thanks for looking in!
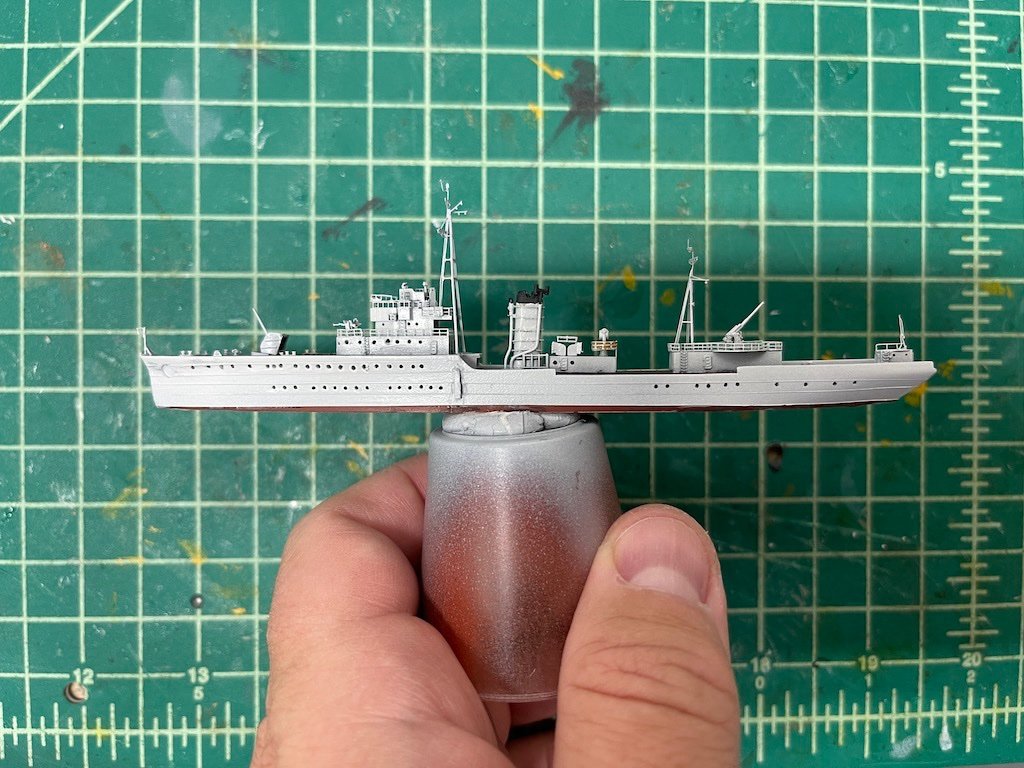
- 47 replies
-
- 10
-

-
Nice Craig! Looks fantastic! Quick build!
-
Thanks Cog! I ended up spraying it with a light coat of Mr. Color off-white. I figure with some washes, it will darken a bit so didn’t want to go too dark. I’ll post some pictures later this week. Thanks for looking in!
-
This is going to be an epic project. Looking forward to this one!
-
Glad you’re ok David. Really nice job on the Victory!
- 218 replies
-
- 2
-
-
- Victory
- Caldercraft
- (and 1 more)
-
Thanks Kevin. It looks fairly stark white, similar to the colors of the ships in the late 19th century through the 1930s. Thanks Glen - I can't take credit for it, as I saw it on another build log Helps add a little more detail and interest to the hull I think.
-
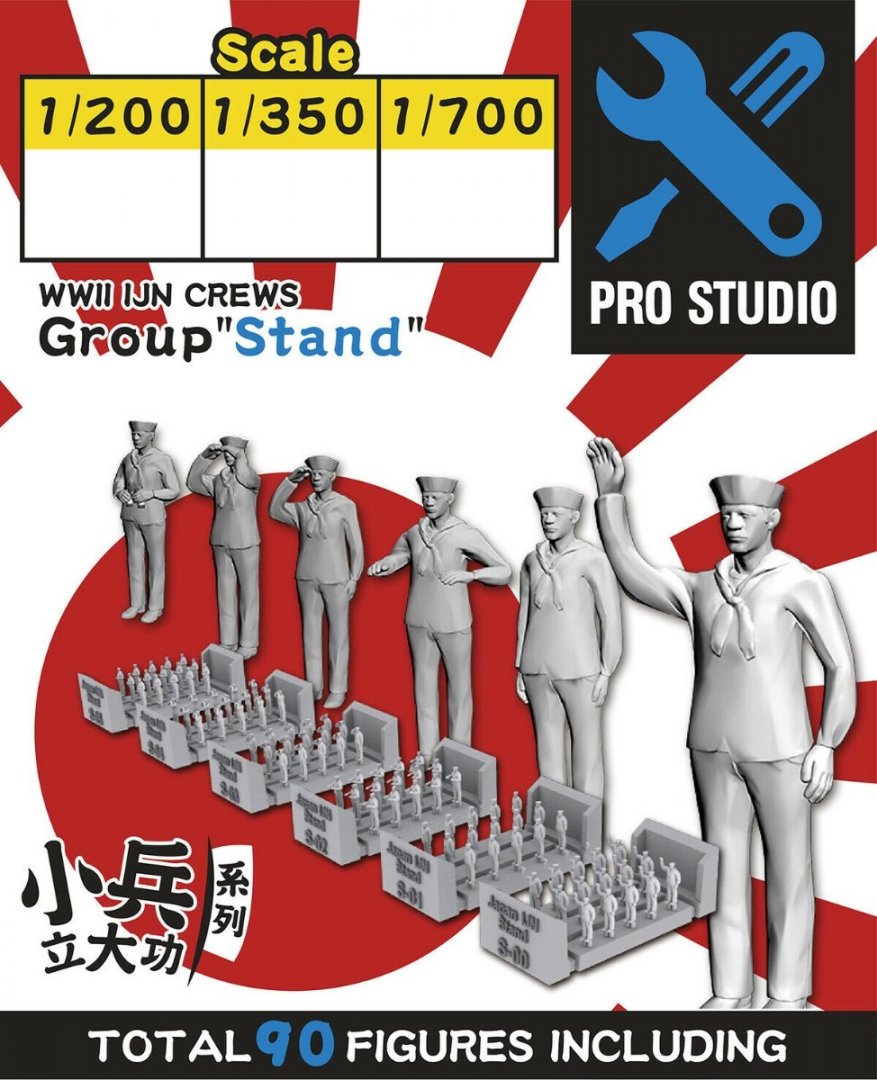
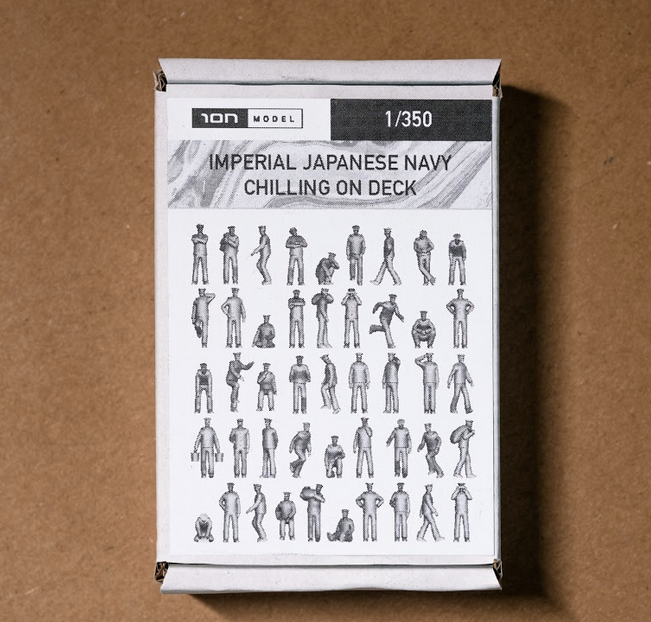
Hey Lou, thanks for looking in. I found these from Pro Studio and Ion that look pretty good. The Northstar figures look great, but frankly are a pain in the *** as they cram all the figures too close together on a heavy plug, so it's hard to individually paint them and remove them without breaking them. These are on separate plug rows which makes things infinitely easier. The Pro Studio I found on eBay. The Ion are on eBay and also Freetime Hobbies carries them. They also make sets for other navies as well. I wouldn't care as much in 1/700 as the figures are so small, but at 1/350, having different poses is more ideal.
-
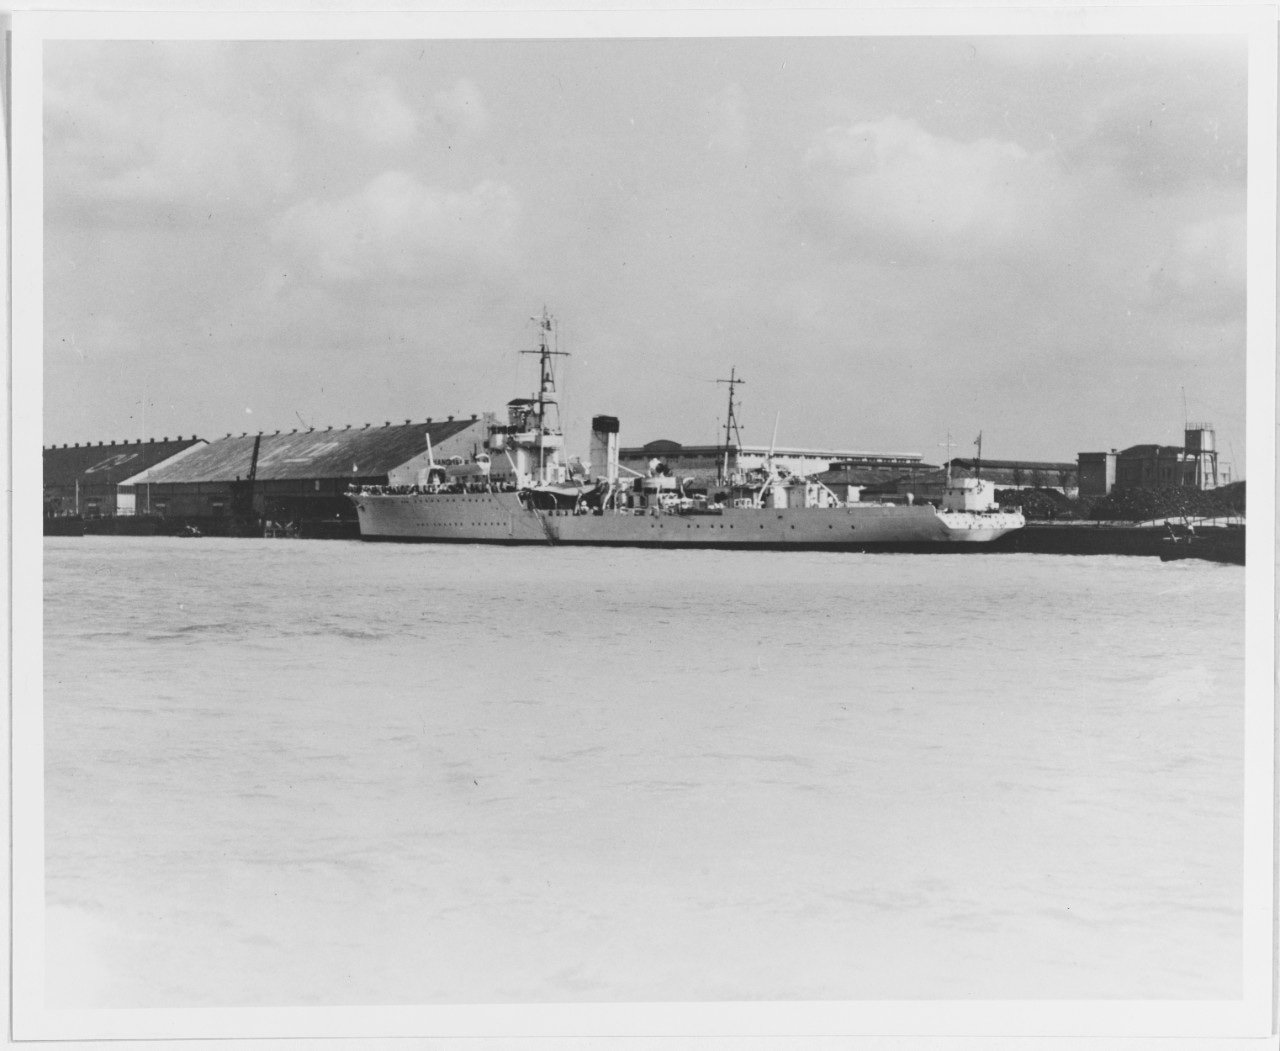
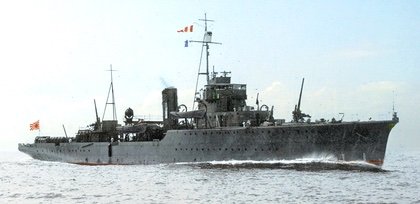
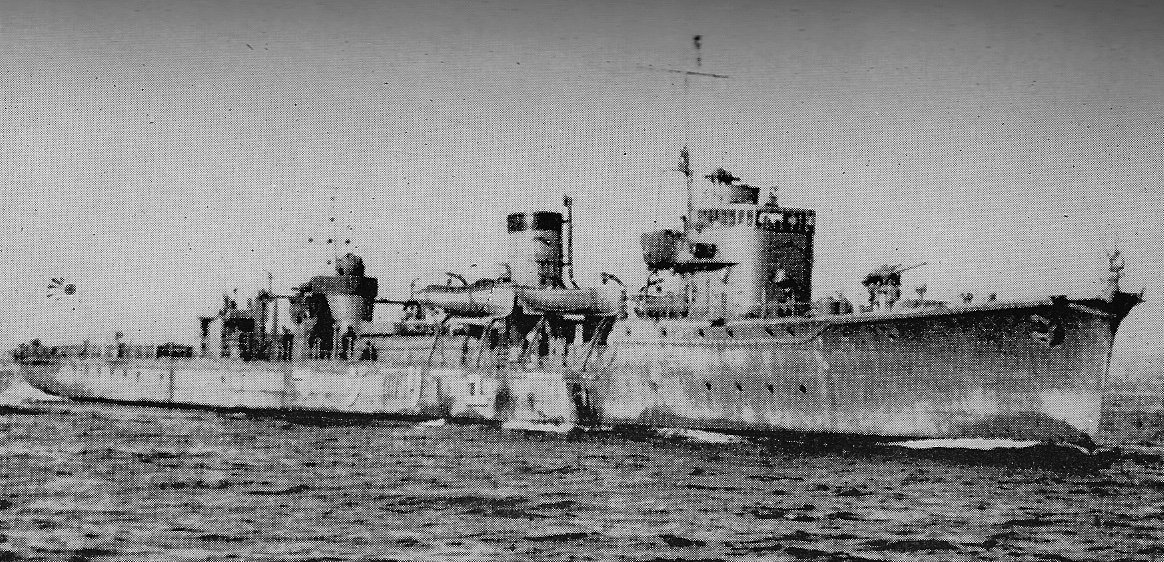
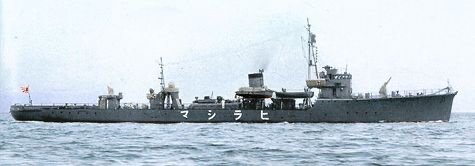
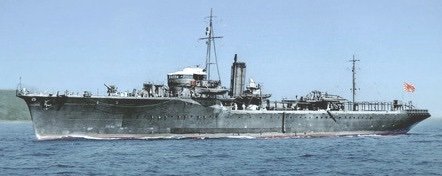
Part of the delay on this build is that I'm bit stuck on what color to paint the hull on this one. The Maru book has a lot of black and white pictures of the ship, which went through various refits over its service life and different colors - from what looks like white, to a lighter gray, to a darker gray. FiveStar doesn't indicate what period of ship the model is supposed to represent, but it seems to be closest to one of the lighter/white shades. Anyone know what "white" color the IJN used to paint its ships? I'm assuming not stark white, but maybe something like Insignia White or even a little darker. White hull: Grey hull (colorized): Other minelayers:
-
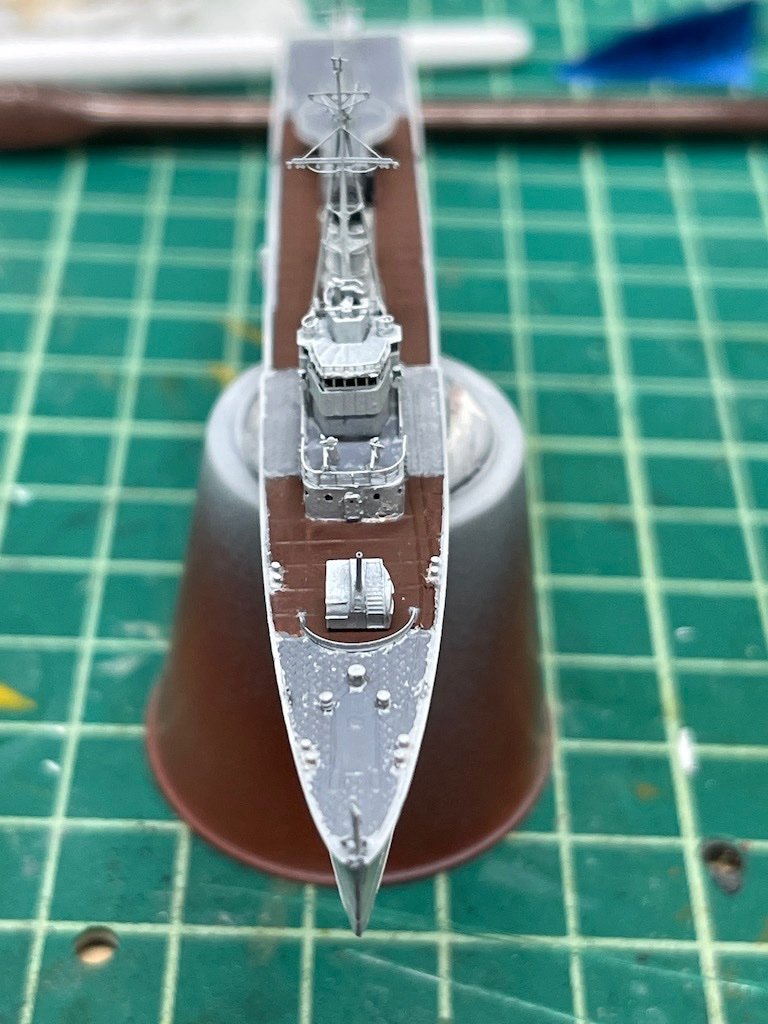
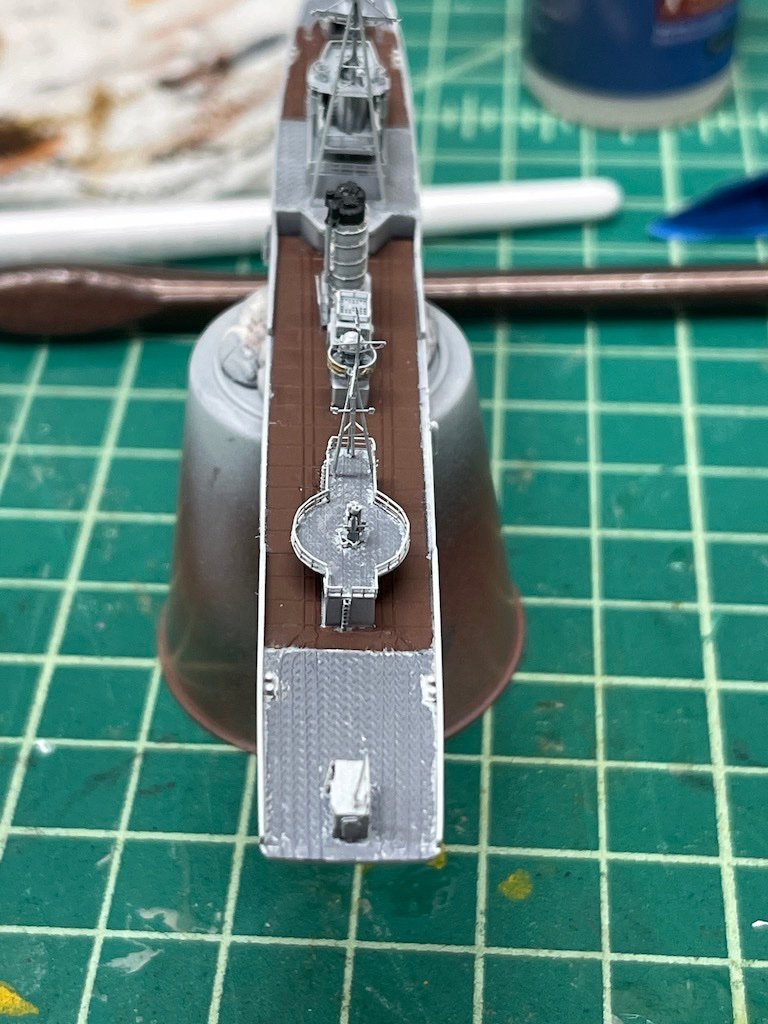
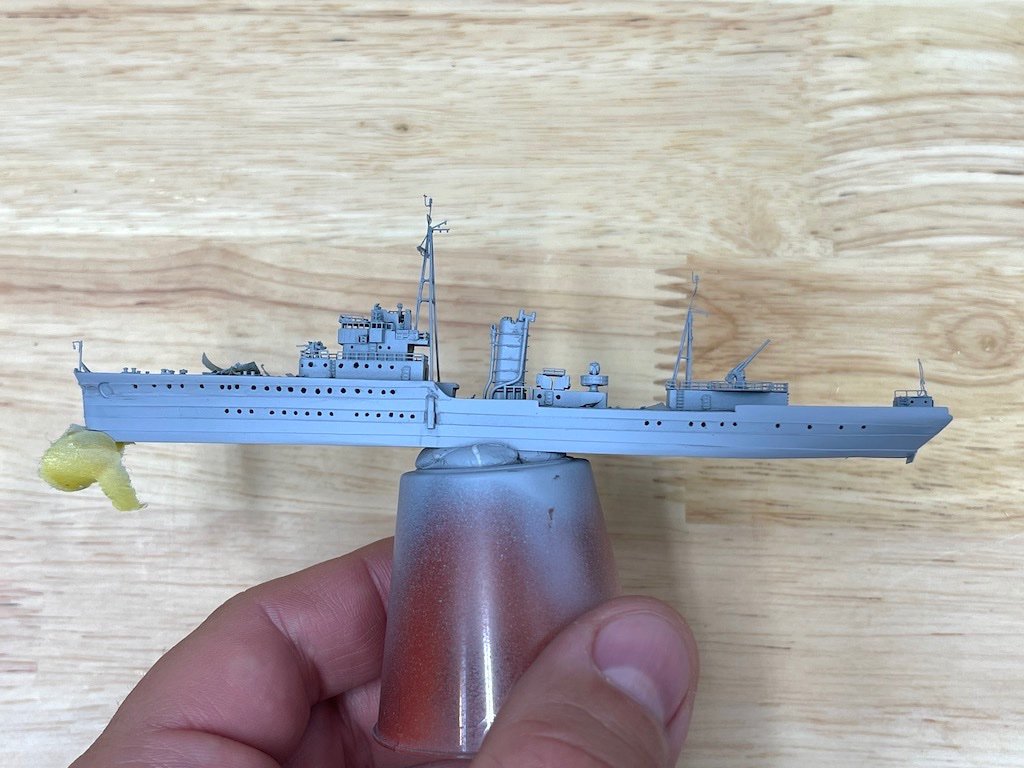
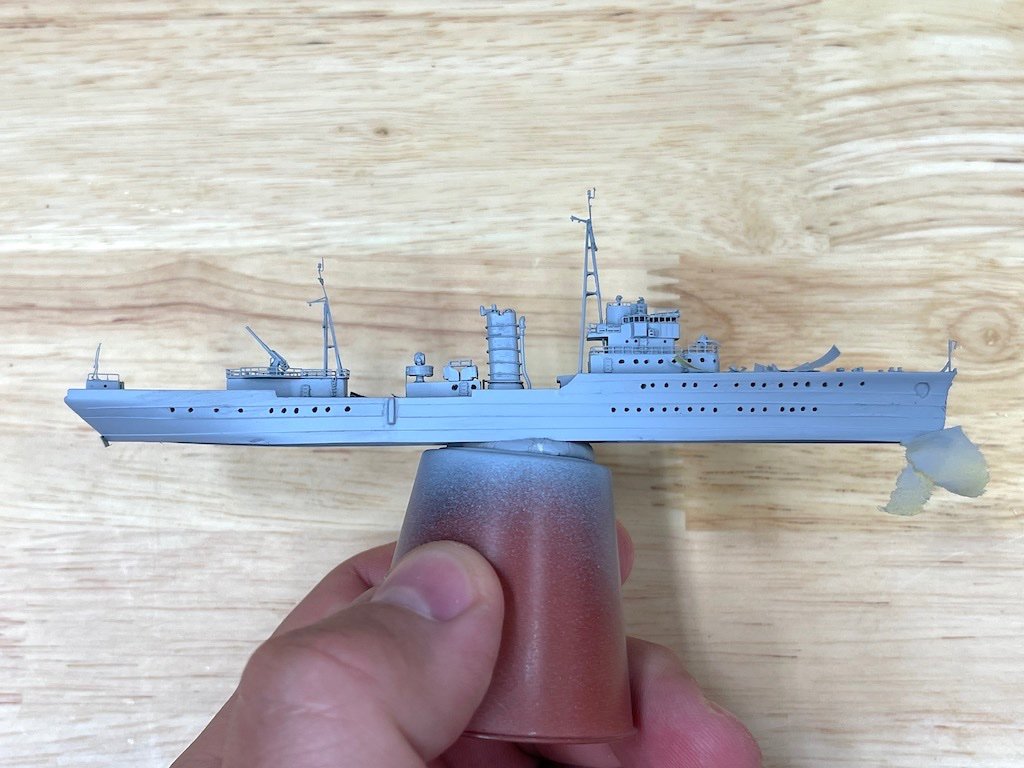
I haven't made too much more progress on this one except to get most of the hull and deck completed, aside from crates, boxes, and a few other items that will be added later. I tried something new for me and tried to simulate the hull plate runs by running alternating rows of masking tape (I used Tamiya's flexible tape), priming the model with a heavier coat of Mr. Surfacer, then removing the masking tape and priming the hull again with Mr. Surfacer. I need to touch up a few places where the primer pooled a bit too heavy, but I'm fairly pleased with how it came out. Looking at the pictures, I might need to ream out some of the portholes to get them more uniform, or re-do some completely. I'm not sure how apparent it will be when the model is in the diorama base and one is looking at the model from a normal viewing length though.
-
You're a brave man Kevin! I have a bandsaw, but I don't trust myself enough to not cut my fingers off running the hull through it. The hull is only 5.5" long, and less than 1" in height without the superstructure base. Pretty small area to hold onto! For glue, I generally use medium CA for the PE, especially for things like railings. For things like the doors, I sometimes use Gator Grip PVA. I'm starting to get more comfortable with Gator Grip so I'll probably use it more in the future. On the funnels of this one, to attach the rings I used CA and in some spots, it went on a bit thick. I was able to use CA remover - which worked really well - to remove much of the excess. It can eat through paint though, so one has to be aware of that factor.
-
Thanks Kevin! I have the ship in the diorama, and now I am working on the figures to add to the deck. I want to do the figures, then finish the rigging and end with the waves, etc. I had a bunch from Northstar, but they didn't have too many figure positions so I was a bit hesitant to add a large amount of very similar looking figures. I did end up finding a few other sets from what appear to be new manufacturers which give me a lot more variation, so those came in the mail not too long ago. It's kind of a pain to paint them all, so I haven't really been eager to get back to the bench to finish them, plus have had a lot of work and family stuff going on. This week looks good though, so I think your post will give me the push to finish it up
-
F-86F-30 Sabre by Egilman - Kinetic - 1/32nd scale
Landlubber Mike replied to Egilman's topic in Non-ship/categorised builds
I will NEVER order from Kitlinx again. The last order I placed included an order for a couple of Taurus resin engines which are not exactly cheap. When my package arrived, they were not in the box. Despite multiple emails, including to the owner Loic directly (I had his email because of an issue with a product in an earlier order I had placed which they resolved), no response at all. Apparently from another modeling board, this is a common pattern as others have been shafted with no recourse or resolution at all. Beware - I highly recommend staying away from Kitlinx. End of public service announcement. -
Love this aircraft Chris - looks like a little bulldog ready for business. Can't wait to see what you do with it!
-
Really nice Dan! Love the colors. I like the Vallejo metal colors too. You definitely have to go light or you get weird puddling effects. I've sprayed it on top of the Vallejo gloss black, but with your experience, I might try spraying it on Tamiya or Mr. Surfacer instead. Not too big of a fan of the Vallejo primers at least relative to Tamiya and Mr. Surfacer, especially if you need to tape.
-
Oh wow, what a sturdy looking chassis and cage. Looks awesome!
-
Very cool Shipman!! I'm jealous! Dan, not sure if it was or not. Looks like a fun ride for sure!
-
Wow, that's a nice stash! If you don't mind me asking, I assume you have the CMK resin interior/flaps for the JRS-1? Is it nice? I recently reached out to CMK and they aren't planning to make it anymore ☹️
-
Thanks Popeye! It's actually a pretty decent kit. My windows were a bit marked so I used a lot of Novus to get them in as good a shape as possible, but otherwise, things fit together quite nicely. Thanks Lou, really appreciate it! I'd have to say this is probably the quirkiest on the shelf. I have a bunch of kits spanning the 1890s-1910s brass age, a group from the 1930s, and then a batch from the 1950s-early 1970s. I also have been picking up those old metal Hubley kits with the old Fords, Chevys, Packards and Duesenbergs. Cars might have fewer parts than plane and ship models, but I find them pretty tricky as you really need a perfect finish on them, whereas you can get away with a lot more on planes and ships with weathering, etc. Still need to learn a lot more! I blame you for introducing me to the mutt planes though I have a few amphibious planes in the stash - JRS-1, PBY-5A Catalina, JRF-5 Goose, OS2U Kingfisher, Supermarine Walrus, F1M2 Pete, etc.
-
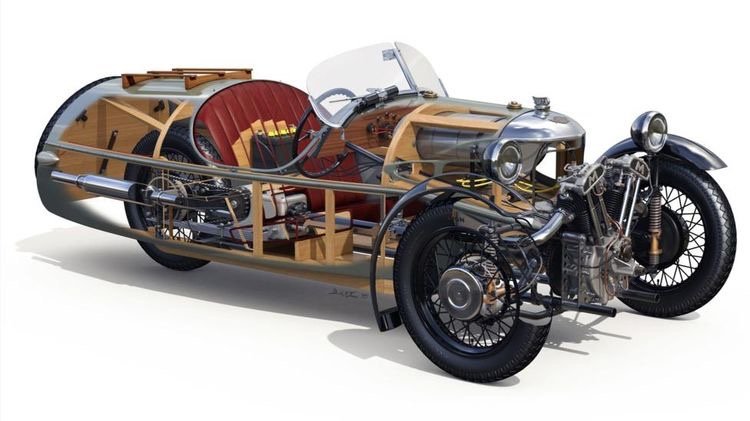
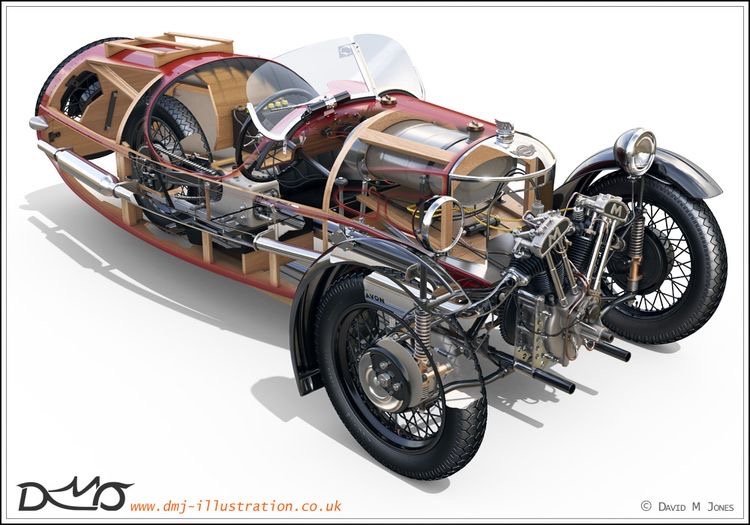
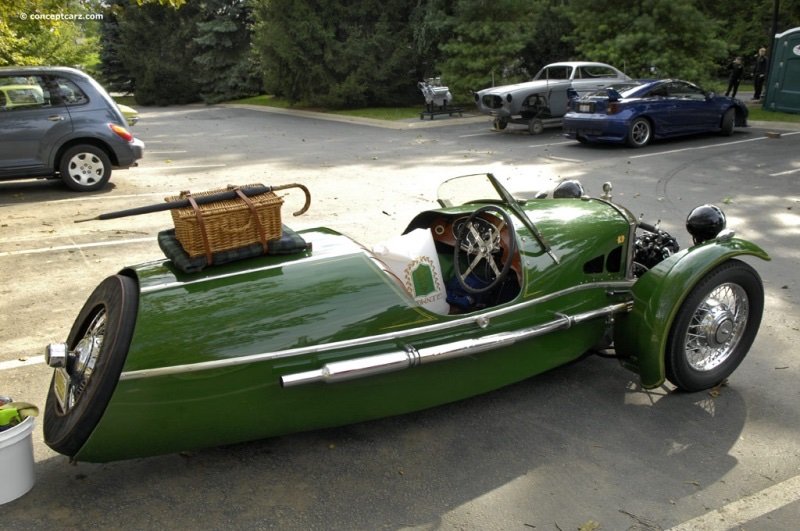
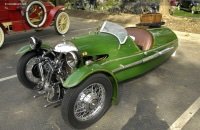
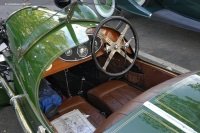
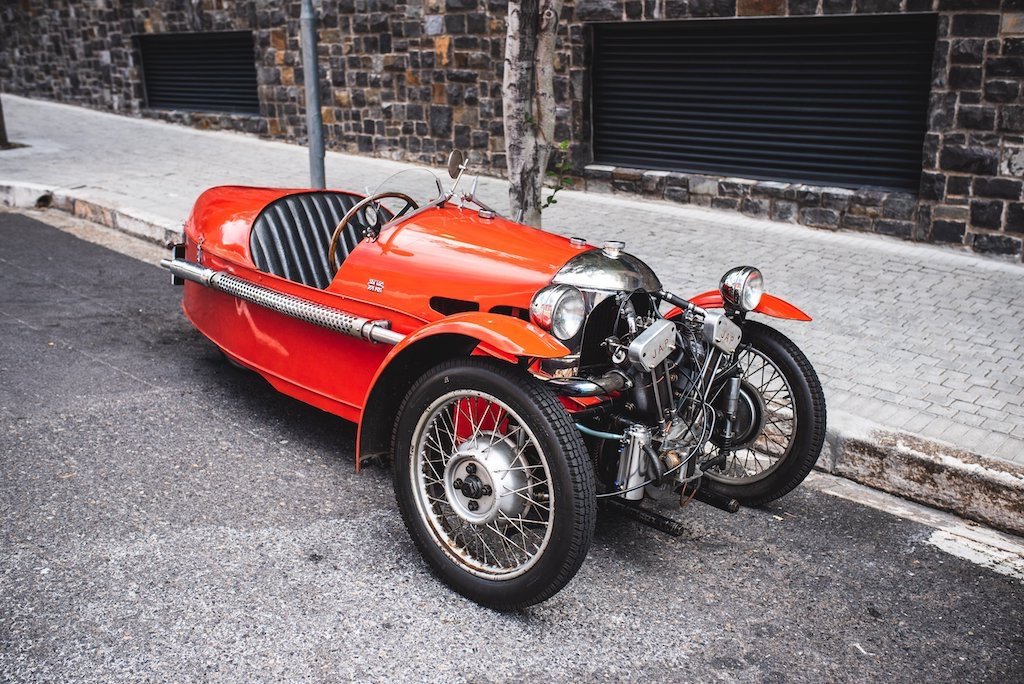
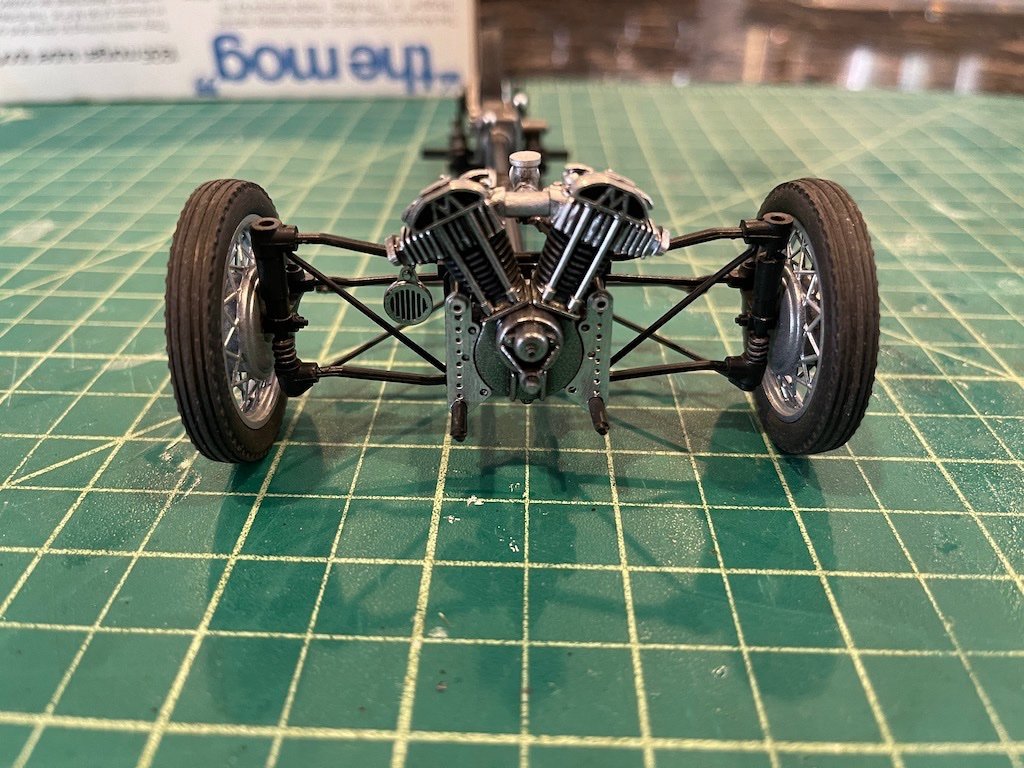
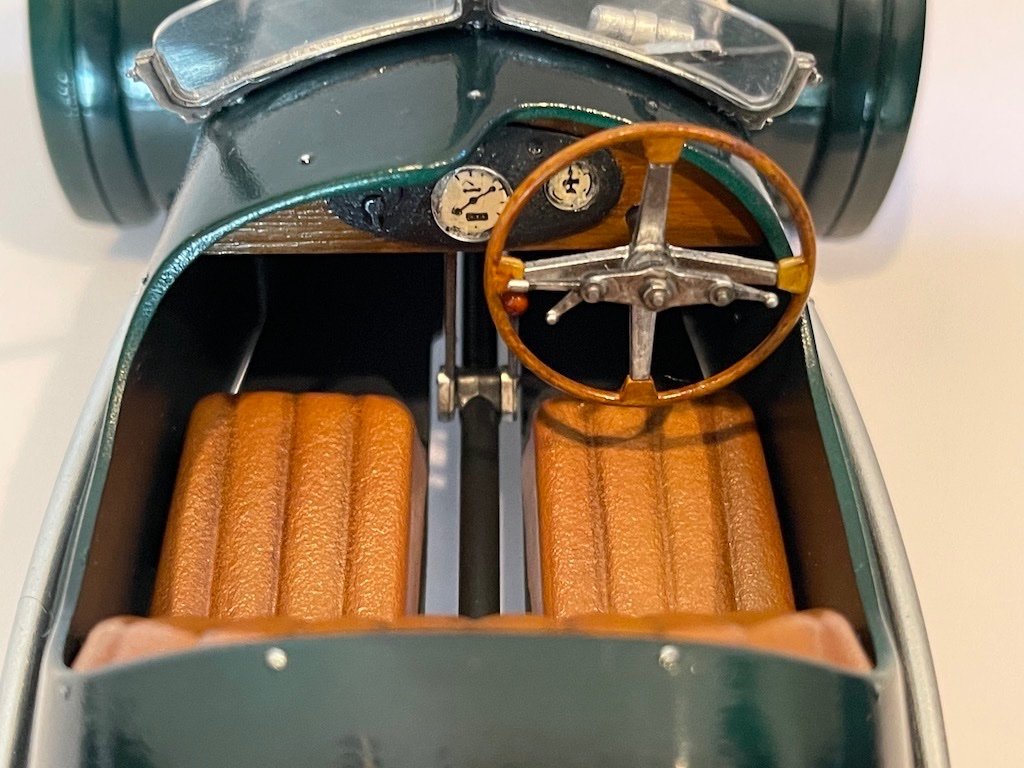
Some cutaway pictures and pictures of the real thing. I believe Morgan still makes them! Looks like a fun car to drive.


- 22 replies
-
- 11
-
-

-
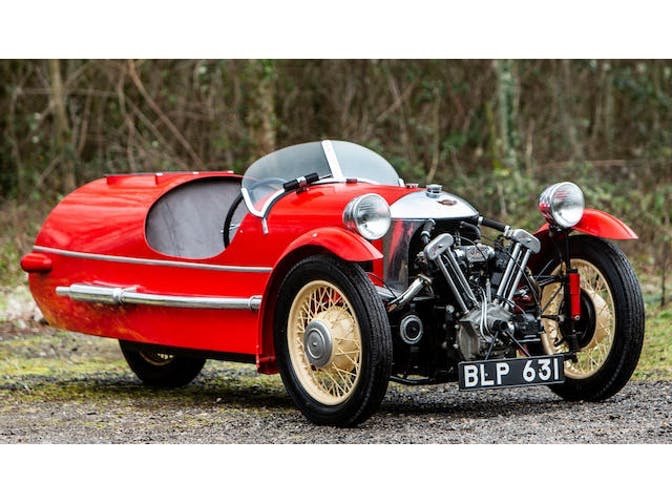
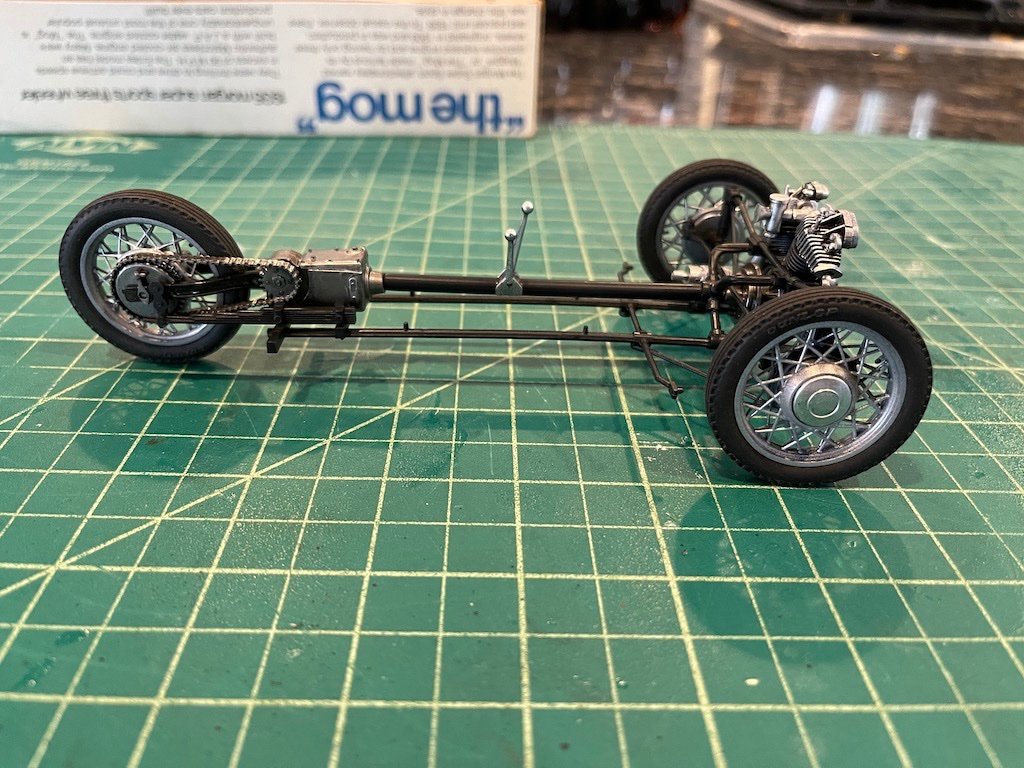
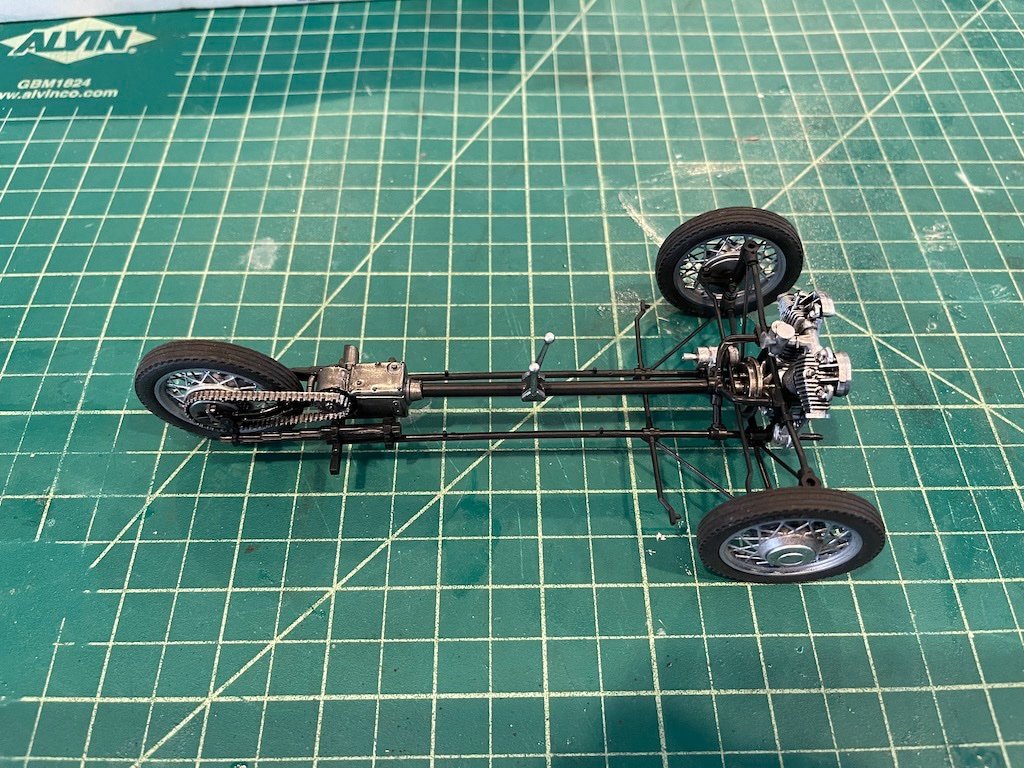
I didn't take many in-construction pictures, but here are a few that show how the drive train was set up:
- 22 replies
-
- 12
-
-
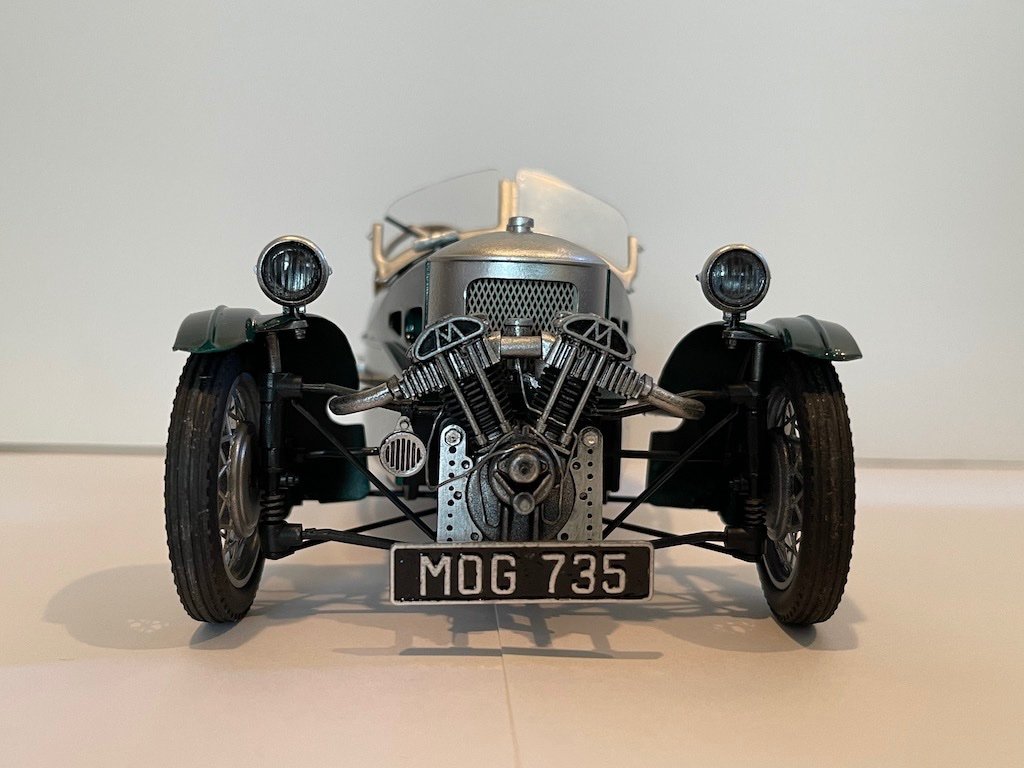
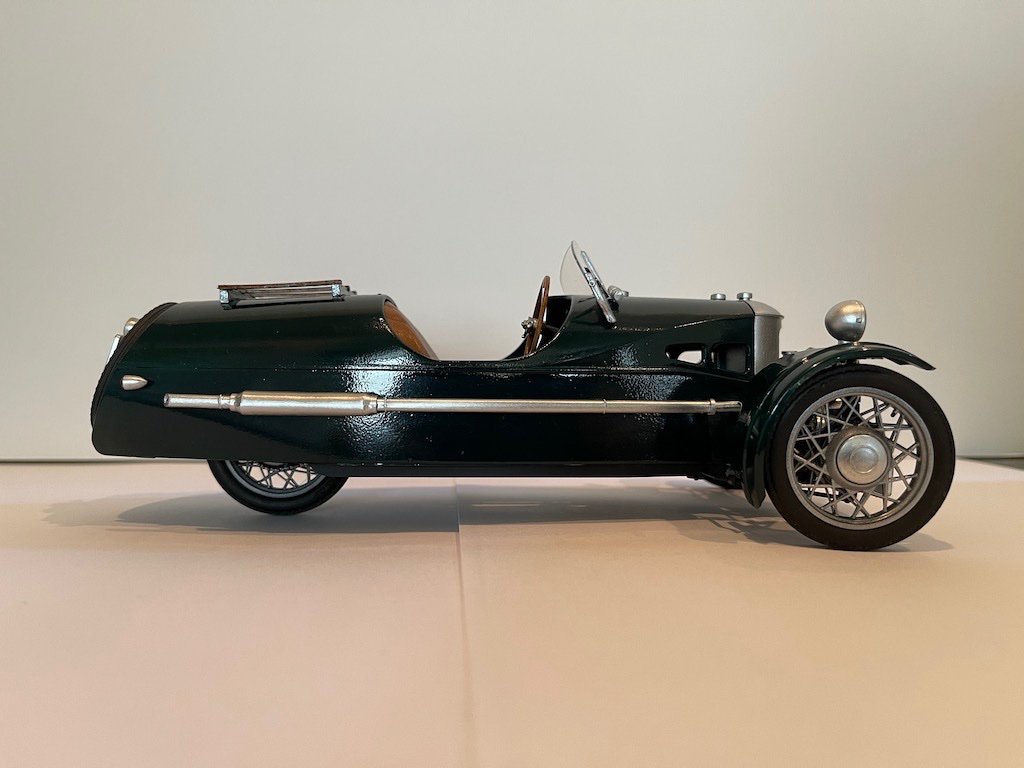
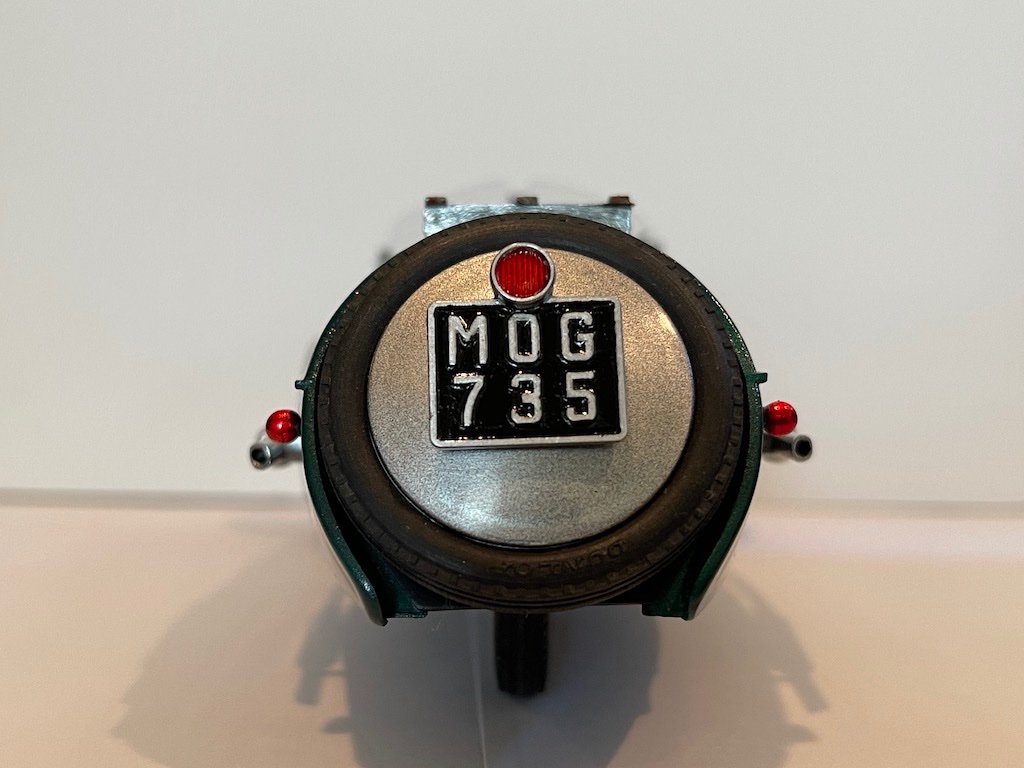
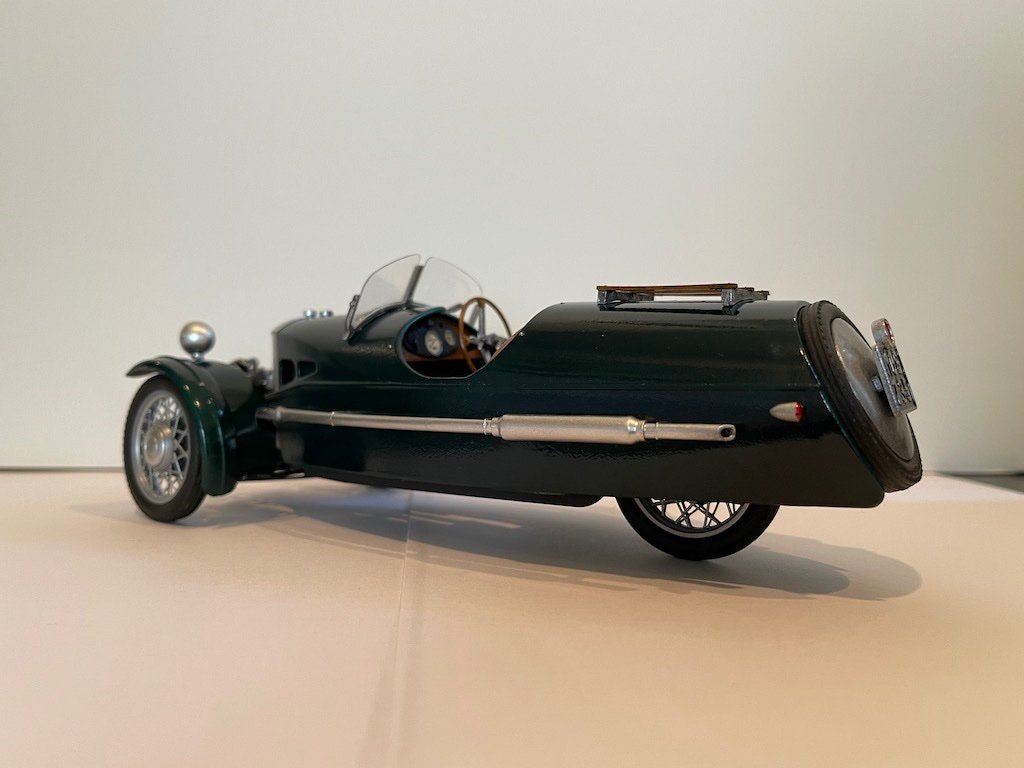
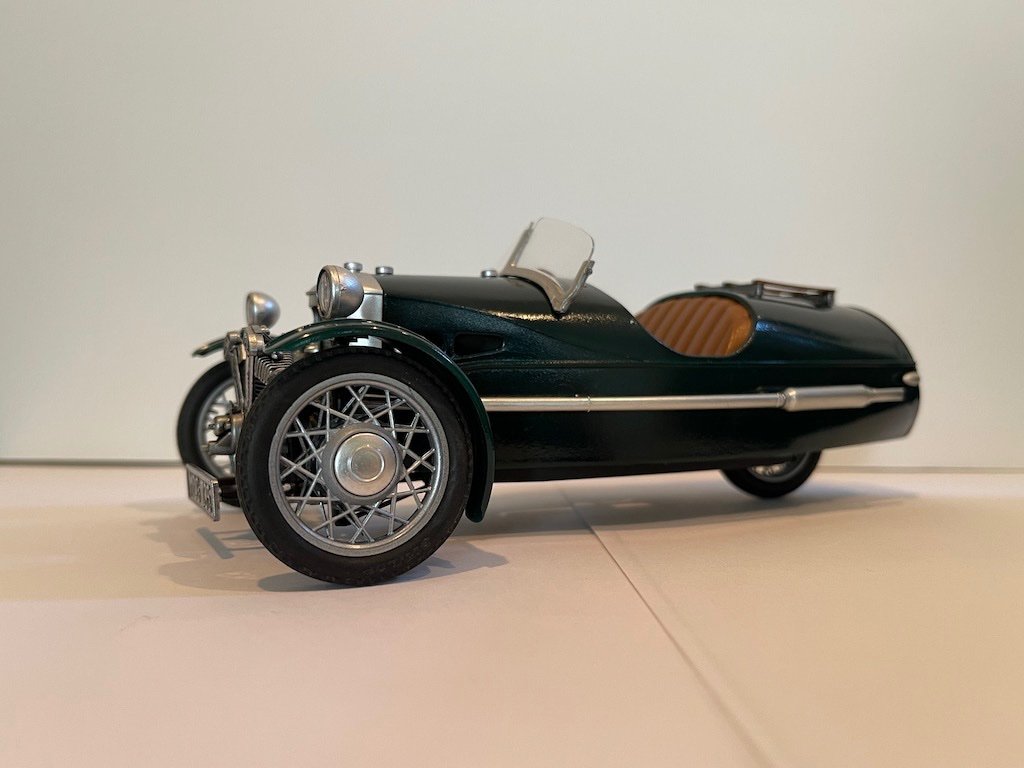
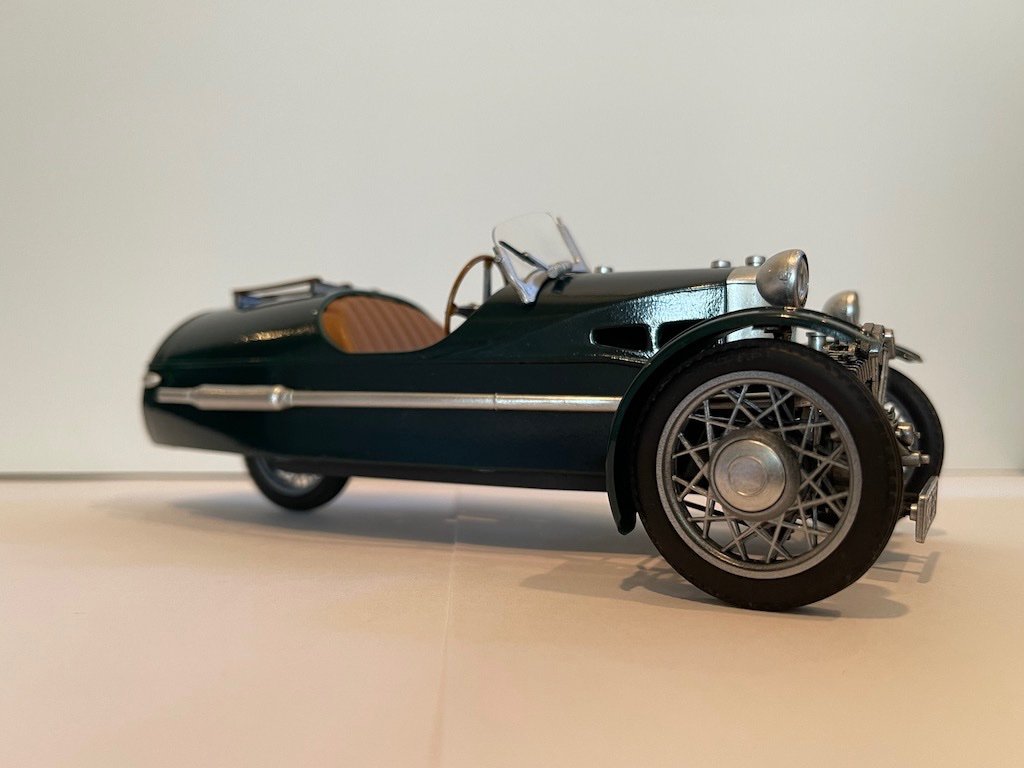
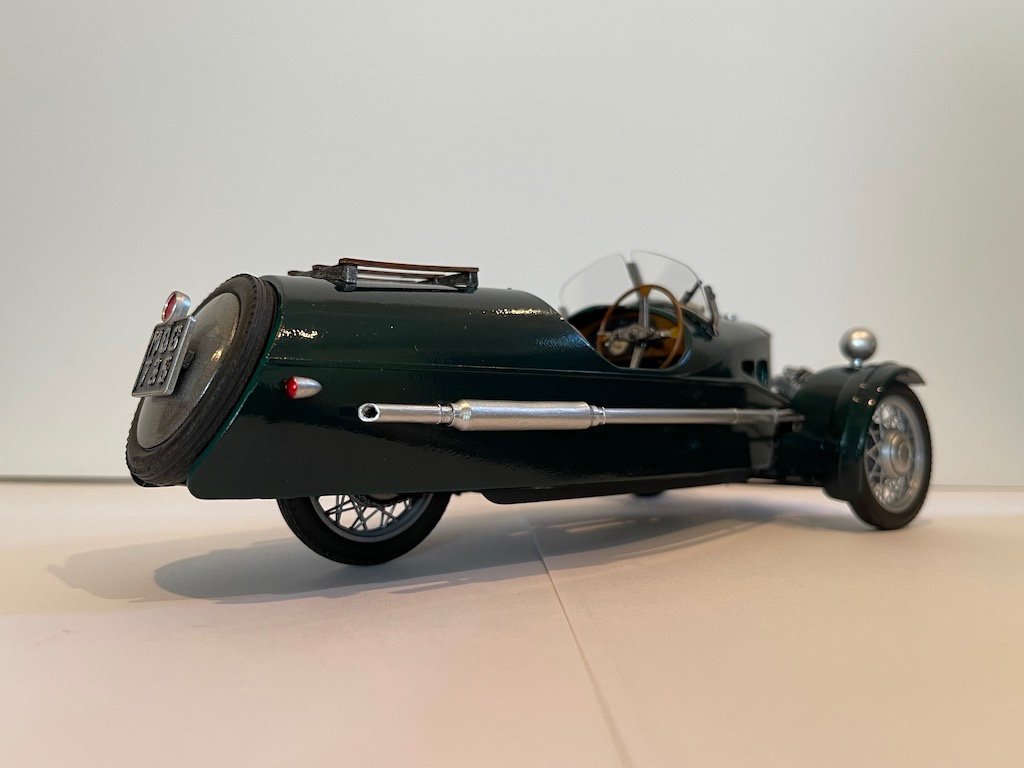
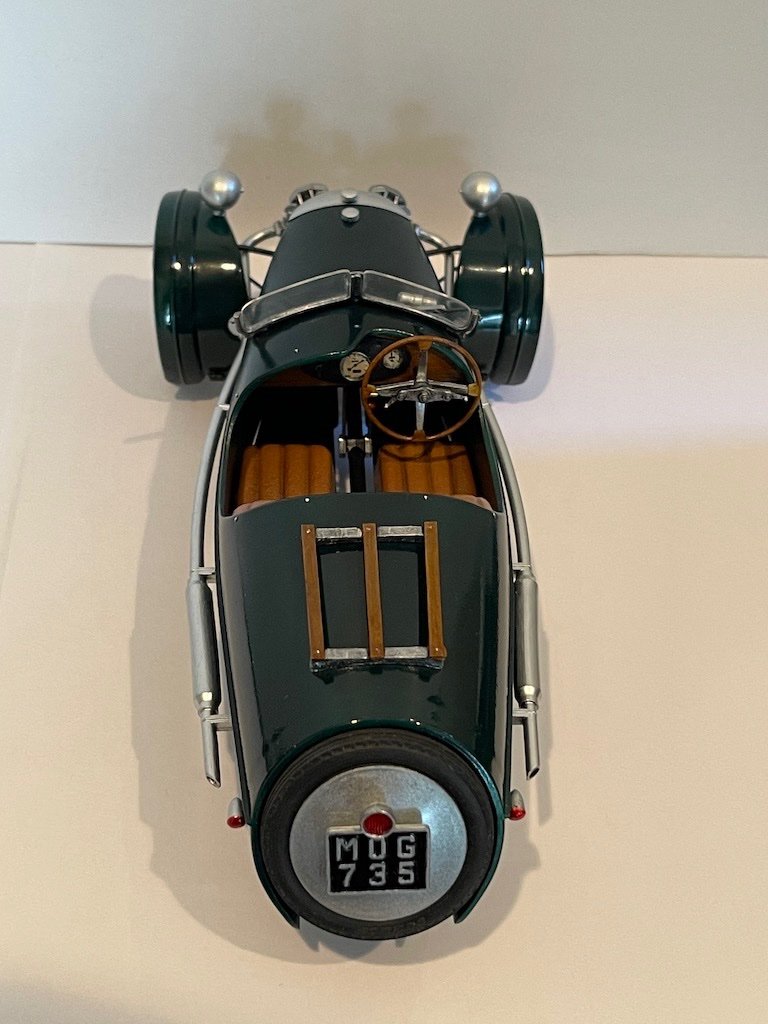
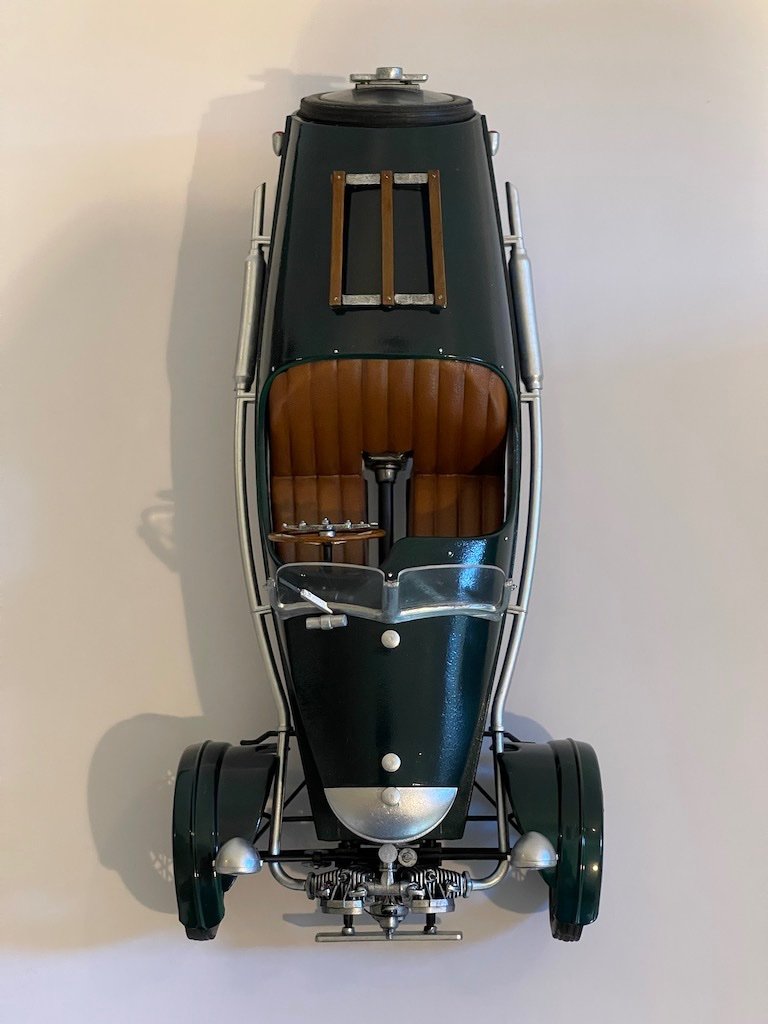
In trying to wrap up various models I've been working on, I finished this old kit from Entex that I think is from the 1970s or maybe the 1980s. I tend to like quirky subjects, so this seemed to fit the bill. It went together fairly well, and I built it mostly out of the box except to add some engine wiring and replaced the radiator grill with a stainless mesh. I used Zero paints for the body and seat, Vallejo for the chrome, dash, wheel, etc., and oils and Tamiya clear orange for the wood portions and for the leather seat. The hood emblem decal disintegrated, so for the dashboard gauges, I used Microscale's liquid decal film to help firm up the decals. That helped a lot but there was some tearing still, so I just cut them out and glued them on with the paper backing still attached. Fun little project!

- 22 replies
-
- 13
-
-

-
Spectacular work BE! I love how you painted the friezes - on my Pegasus, I've been toying with the idea of hand painting them on, rather than use the PE. Seeing how detailed they are, I'm working if i'm better off with the PE.
- 857 replies
-
- 1
-
-
- Sphinx
- Vanguard Models
- (and 1 more)
-
Sorry to have just now found this build log - wow Chris, you've gotten to be really good with these card models! Fantastic job! I like the idea of the resin frame. That must have saved quite a bit of time and angst in trying to get everything square and stable.
- 331 replies
-
- 10
-

