


Landlubber Mike
-
Posts
4,543 -
Joined
-
Last visited
Content Type
Profiles
Forums
Gallery
Events
Everything posted by Landlubber Mike
-
 Nice job Craig. For placing tiny pieces of PE like this, if you haven't already, try wax pickup pencils. They hold the part which just enough adhesion and let the part go when it comes in contact with the surface. Much easier than tweezers, toothpicks, etc. They are used by people that do craft work like making jewelry to pick up tiny things like rhinestones. I used them this weekend to attach the ends to depth charge cylinders that were maybe 2mm across if that. Really easy. https://www.amazon.com/gp/product/B01MF6VLZ5/ref=ppx_yo_dt_b_search_asin_title?ie=UTF8&psc=1
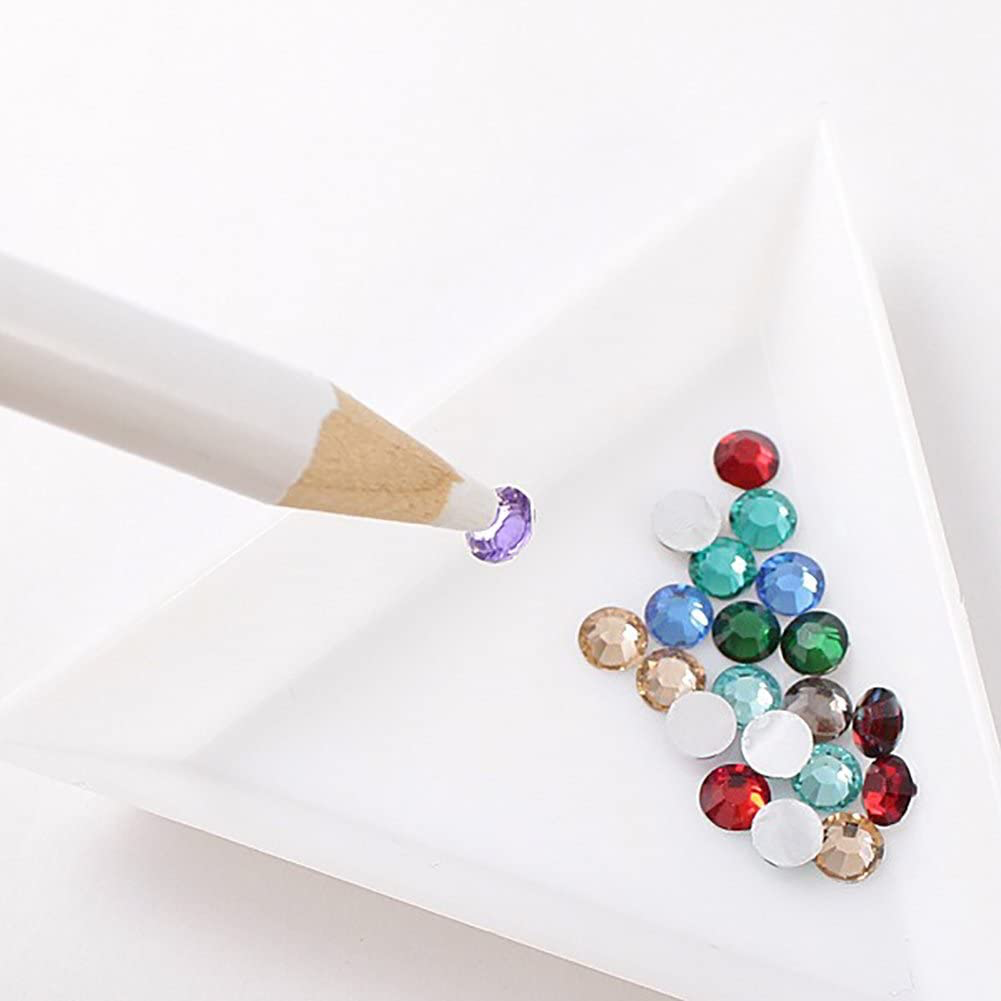
-
Very clever! The Model Shipways kit similarly uses the bread and butter method, but I think there they have something like seven slices of bread. Looks great!
- 71 replies
-
- 1
-

-
- Charles W Morgan
- bottle
- (and 1 more)
-
My table arrived yesterday with some of the accessories. Rest is to ship next few weeks. The table is nice quality and should come in handy.
-
Looking great! When I finish my Shimakaze I might tackle this kit. Looks like it goes together pretty nicely.
-
I bought mine from Cornwall Model Boats.
-
Thanks - I was just looking at this the other day and was considering this one. Good to know you like it, thanks!
-
Yeah, Sherline is another one. Always seem to be coming up with cool new accessories for the mill and lathe!
-
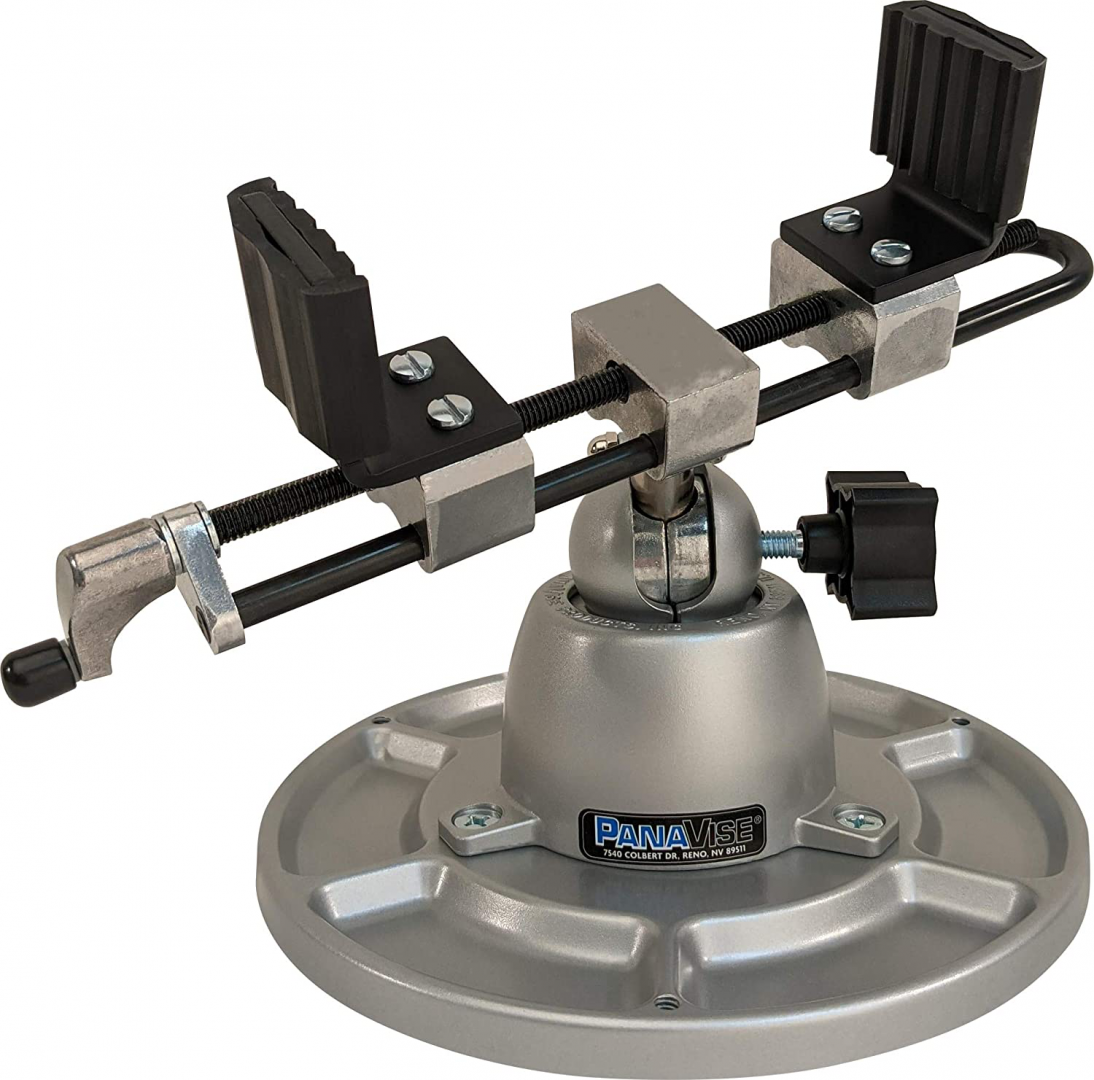
That swivel feature is really nice. This is what I have, which has served me pretty well over the years. I don't know if I could plane a small piece of wood held in the jaws, but maybe I could.
-
If you don’t mind me asking, how did you deal the tape edges? I hand brushed Tamiya clear on my current destroyer build along the tape edges to protect stripes and triangles on the funnels, and it worked really well. Just wondering what others do.
- 460 replies
-
- 4
-
-
- Finished
- Flower-class
- (and 1 more)
-
Beautiful work Alan - love the Flower Class ships! Your camo scheme looks fantastic!
- 460 replies
-
- 3
-
-
- Finished
- Flower-class
- (and 1 more)
-
Hey Alan, not sure how this escaped me. Just caught up and wanted to congratulate you on a fantastic build. Love the water diorama, nice job!
-
I noticed after I posted that Lee Valley included instructions under the care tab. Looks like a great little vise!
-
Just ordered my Christmas presents for this year. Thanks Jack! By the way, how do you like the mini vise? I have a Panavise that I use but was wondering about the mini vice. Does it need to be attached to a bench or table?
-
Having completed a 1/700 destroyer and now on the home stretch with a 1/350 destroyer, I have to say, in some respects I like the 1/700 scale better in that the models are just a lot more compact. Fewer individual PE pieces at 1/700 because you just have a single piece that you fold multiple times, versus trying to fold and attach multiple PE pieces to each other to build an item. Also, the variety of 1/700 subjects is much greater than on the 1/350 side. That being said, I have a few 1/350 kits in the stash. I also have the Trumpeter 1/200 Bismarck with all the goodies from Pontos, etc., and wondering where I'll be able to keep it. But, I would say that if you can build at 1/700 scale, the larger scales aren't going to be much of a problem.
-
If comparing the Caldercraft and long-promised Amati kits, one thing to remember is the scale difference. Caldercraft is a really big model at 1/72 scale. Amati I believe is going to be even bigger at 1/64.
-
Wooden Mallet by Elijah - FINISHED - 1:1
Landlubber Mike replied to Elijah's topic in Non-ship/categorised builds
Very cool Elijah! Nicely done! -
Looking really great Kevin, stay with it my friend! You’re doing a fantastic job!
- 322 replies
-
- 4
-
-
- enterprise
- caf
- (and 1 more)
-
Beautiful work Craig!! Congratulations on another fantastic build!
- 174 replies
-
- 5
-
-
- prinz eugen
- trumpeter
- (and 2 more)
-
Dornier Do-217 by Javlin - Revell - 1/48 - PLASTIC
Landlubber Mike replied to Javlin's topic in Completed non-ship models
Good to know! Your build looks really clean and crisp, it looks like the fit was very nice. Thanks for the tip! I do have the Eduard mask, along with a ton of other goodies - Eduard PE, Verlinden Detail set, Master guns, and the CMK engine kit (4100). Got the full package on eBay for a great deal. I later got this Koster conversion set which allows you to do the closed nose night version J-1 or N-1. I’d probably have to do the J-1 since the CMK engine set is for the same engines as the J-1 (BMW801 versus the DB603 used on the N-1).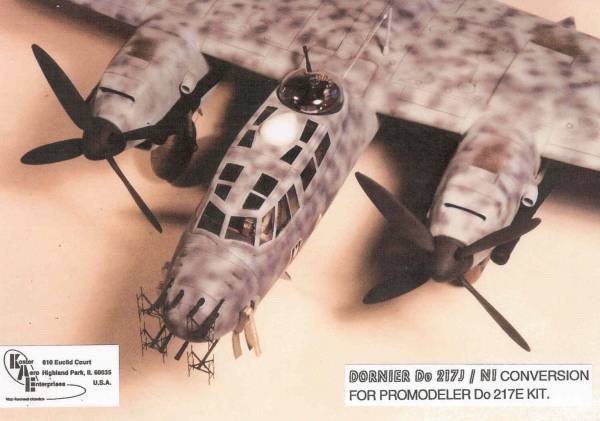
-
Looking great Edward - show that model and detail set who’s boss 😬
-
Dornier Do-217 by Javlin - Revell - 1/48 - PLASTIC
Landlubber Mike replied to Javlin's topic in Completed non-ship models
Hey Kevin sorry to just see this one. What a nice model! Really well done! Is this the E-5? I have the Pro Modeler kit but was going to try using the Koster conversion set to turn it into the J-1 night version. -
Beautiful build Kevin - will be waiting to see your return on this one!
- 273 replies
-
- 4
-
-
- panart
- amerigo vespucci
- (and 1 more)

