


Landlubber Mike
-
Posts
4,549 -
Joined
-
Last visited
Content Type
Profiles
Forums
Gallery
Events
Everything posted by Landlubber Mike
-
 Great look to the quarter galleries! I got stuck there with my Pegasus when I wanted to try to similarly make a three dimensional look to them. I’ll have to try out the microscope slide cover technique. Great idea!
- 419 replies
-
- 2
-

-
- Victory Models
- Pegasus
- (and 2 more)
-
That’s really amazing work Chris. As I said before, you have gotten really good at these card kits! I still can’t get over that these are in card - especially with all the compound curves involved. Great job!
- 89 replies
-
- 11
-
-
Good to know guys, thanks. I'll be on the lookout for it. When I bought my Byrnes saw, I had zero experience with table saws. I watched a number of videos online which were for full sized saws before starting, but I still ended up muddling through it for a while. Kickbacks a really scary! Even small hobby saws are no joke!
-
How was the workshop? Unfortunately I couldn’t attend due to a bunch of kid activities today.
-
Wow nice Chris!!
-
Nice work KD! Looks fantastic! I have the Lutzow in the stash too - seems like a fantastic kit. I think the one I have has the torpedo nets, I’ll have to check. Will be looking for your build log on it!
-
That’s the foil I have in the stash too - I haven’t tried it yet. Sounds like it can have great results but then again I’ve seen a number of models where it doesn’t look as smooth as one would hope. I’ll have to try it out as the car guys seem to love the stuff for window moldings.
-
I haven't done many cars, and I've been struggling with what to do. Your situation is why for the few I've done, I've stripped the chrome and repainted. I've used Vallejo Metal Colors, and was thinking about trying Alclad and Zero Paints for comparison. I've used Molotov chrome pens, but it can be a little tricky as you can't go back over what you did or it gets screwed up (haven't tried it in the airbrush yet). Also haven't foiled yet. What I think is tricky is trying to get a consistent chrome finish across all chromed parts - a little hard when you're using kit parts, foil, Molotov, paint, etc. in different places.
-
This looks fantastic! Really well done! You mentioned using foil for the window trim - what did you do for the chrome on the bumpers and other trim? Looks great, and a nice contrast against the body color.
-
Well you know more than me! Or at least can guess about them more than me 😀 What impresses me about the IJN ships is the variety - tons of different types, especially on the auxiliary side. Pretty amazing what they were able to build when they didn’t have the natural resources we had.
-
Thanks Lou! I haven't come across that site before, looks like a great resource! I should have consulted you first before spending hours scouring the internet, buying a Japanese magazine (in Japanese) and trying to decipher things using Google translate, etc.! Unsure if that rear structure is a big potty or radio room. Seems that the cross-mast was removed in the later versions. I noticed also that about the guns pointed straight up. At first I thought it was only when pulling into port for safety reasons, but it looks like that was the positioning when out at sea too. Those barrels are massive! Thanks again!
-
Thanks John for the vote of confidence. So far I'm hopeful, but don't want to get too far ahead of myself
-
Wow where did you find that? That’s one of the best pictures I’ve seen. Interesting how light in color it looks. The kit includes both a railing and solid wall for the searchlight ring. I used the railing but the solid wall looks pretty cool.
-
Probably! Looks kinda spacious!
-
Looks great - a mask and lots of decals is a great addition to kits.
-
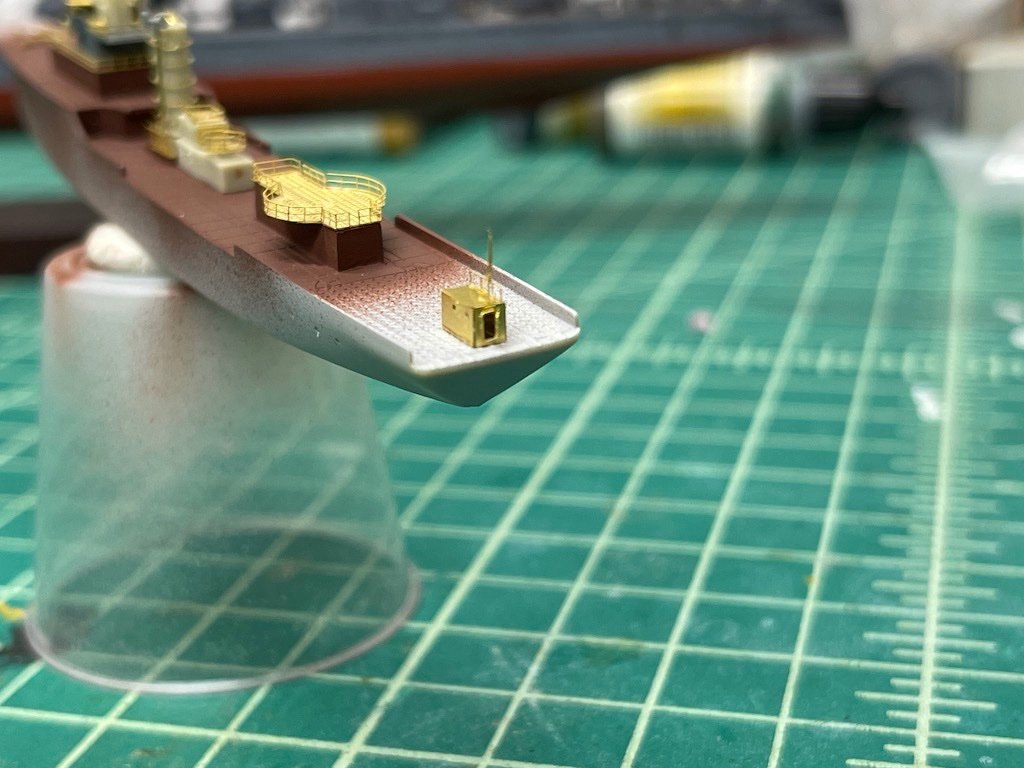
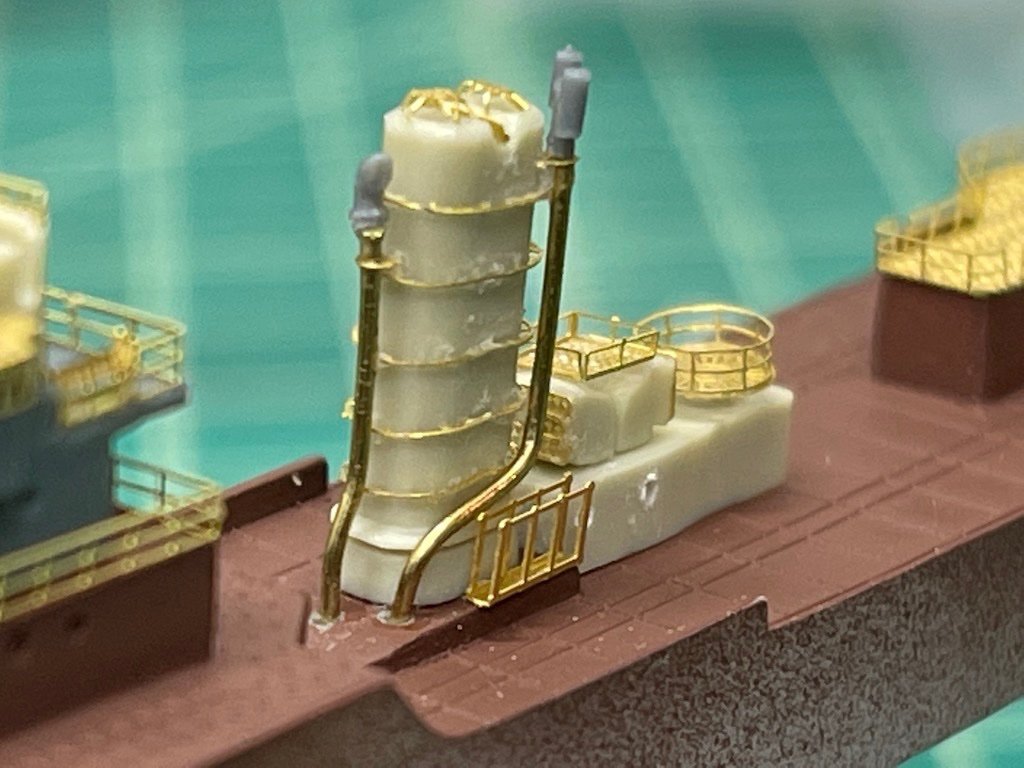
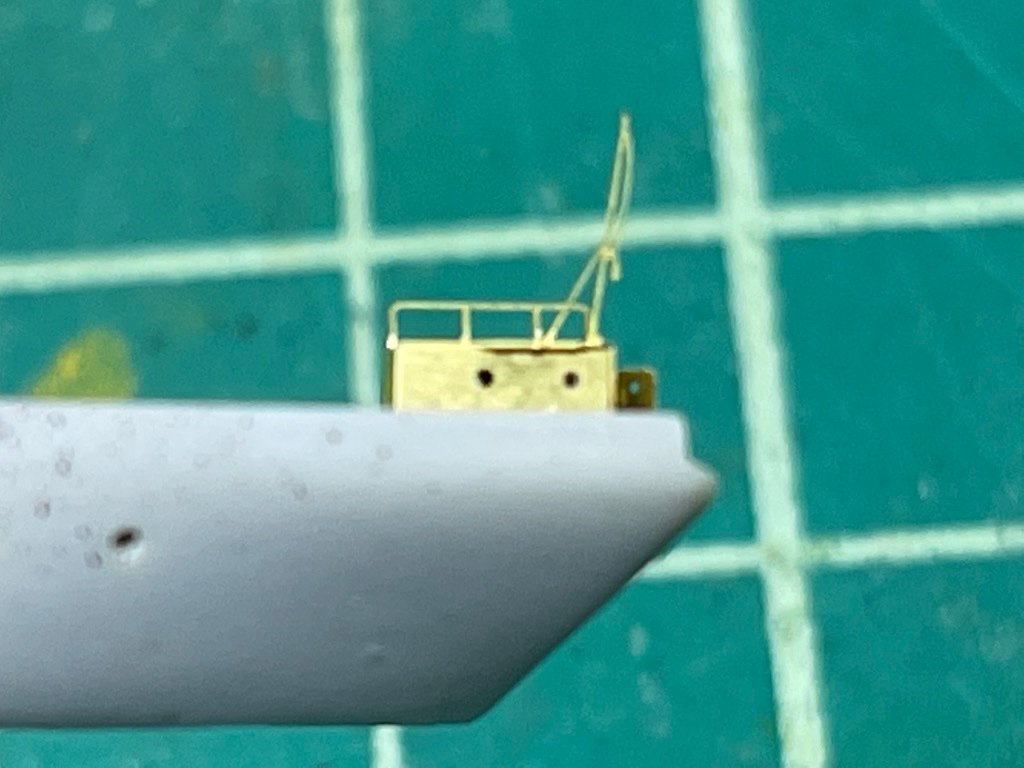
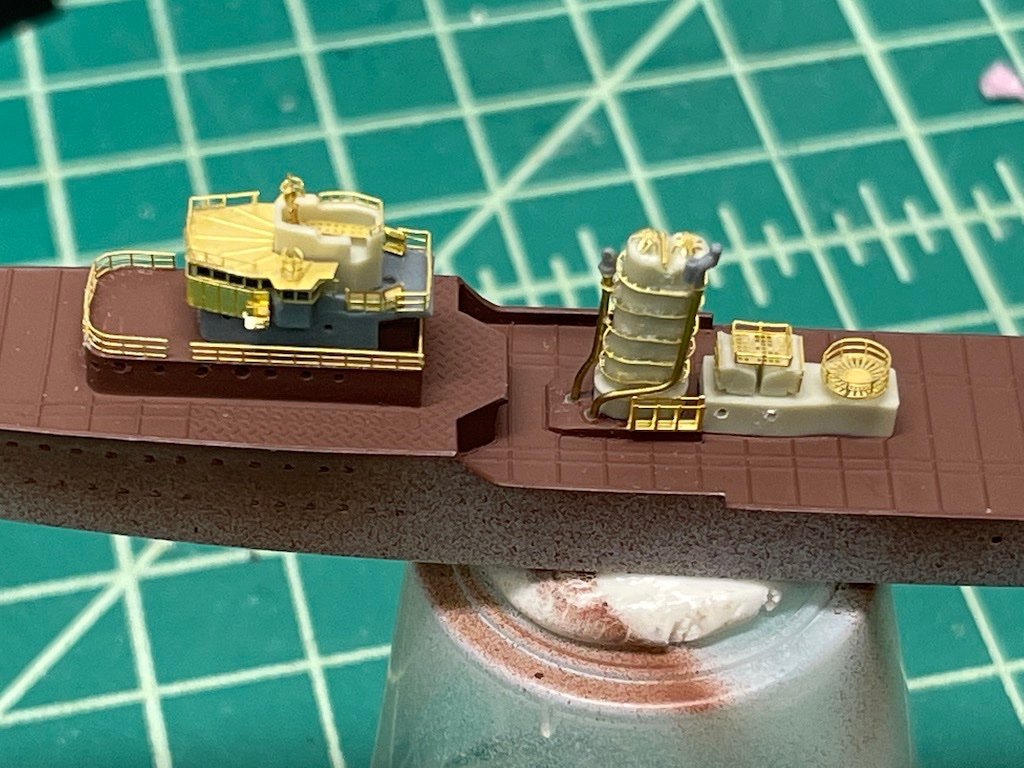
While waiting on diorama bases on other projects to dry, I put in some more time on this one. First I built up the funnel. There are five PE rings that come with the kit, but the two steam pipes do not. Took some very thin brass rod (I think 0.4 or 0.5mm) and bent it to shape, and added the pipe tops to each which came from a Rainbow accessories set. Alongside the funnel is a rack which I think was used to carry wood, so I'll have to add some at the end of the build. Just behind the funnel was another structure which includes two vents, a rack on top, and then a circular platform where the searchlight goes. Next I built the stern structure. Not exactly sure what it is designed to do, as there is a rail on only one end and sort of a semi circular extrusion on the port side. The kit includes an opening for the door at the stern side, so I installed it with the door open. Here's a look at the full model - looking pretty good I think. Before I go too much further, I might add a red stripe at the waterline to avoid accidentally breaking any of the more sensitive things like the masts when trying to mask. Once the lower hull is painted, I can tape the lower hull and linoleum deck, and add the two masts and a few other details, and paint the hull. Despite the need to add necessary details not included in the kit (like the funnel pipes and the searchlight), I'm really enjoying the build. Five Star makes really nice PE parts which are a perfect fit. The subject also has plenty of open spaces so you can treat it as a blank canvas to add various details. Thanks for looking in!

- 47 replies
-
- 11
-
-
You've gotten really good at these card models Chris. Very impressive how you can get compound shapes to fit so well together.
-
RFM 1/35 Panzerkampfwagen IV Ausf.G-Finished
Landlubber Mike replied to Javlin's topic in Non-ship/categorised builds
Very nice job Kevin, looks fantastic! -
What a cool subject Alan, doing a great job on this one! The design is so simple, it almost looks futuristic or even Mad Max-ish 😀
-
Looks great Alan! I'm sure a nice diversion from dealing with the printer...


