


cobra1951
-
Posts
947 -
Joined
-
Last visited
Content Type
Profiles
Forums
Gallery
Events
Posts posted by cobra1951
-
-
This build has very nice lines, a nicely shaped boat

- Seventynet and Elijah
-
 2
2
-
-
-
-
-
-
-
Thanks Elijah
it's heavy too 
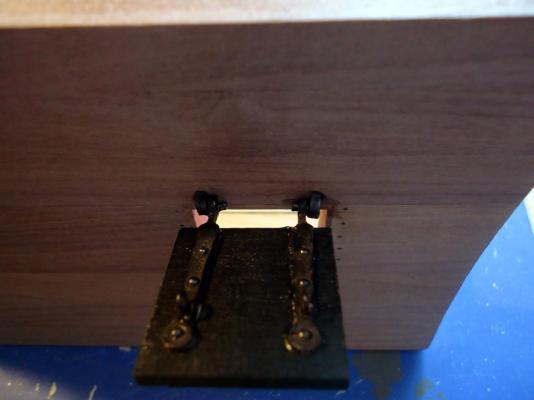
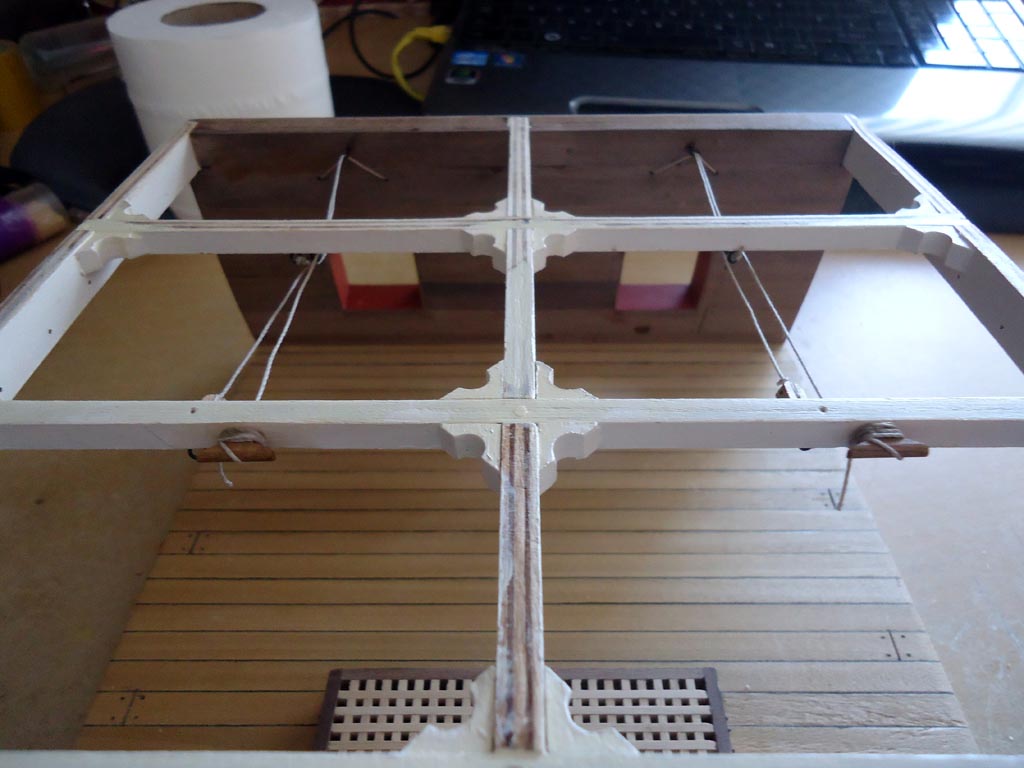
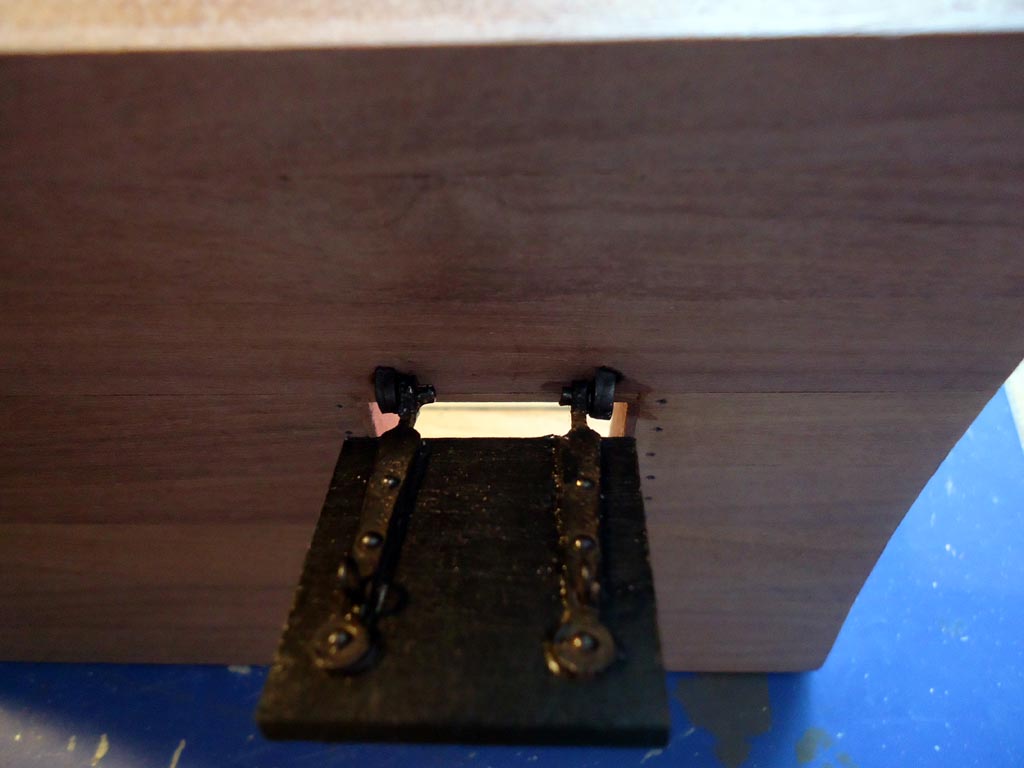
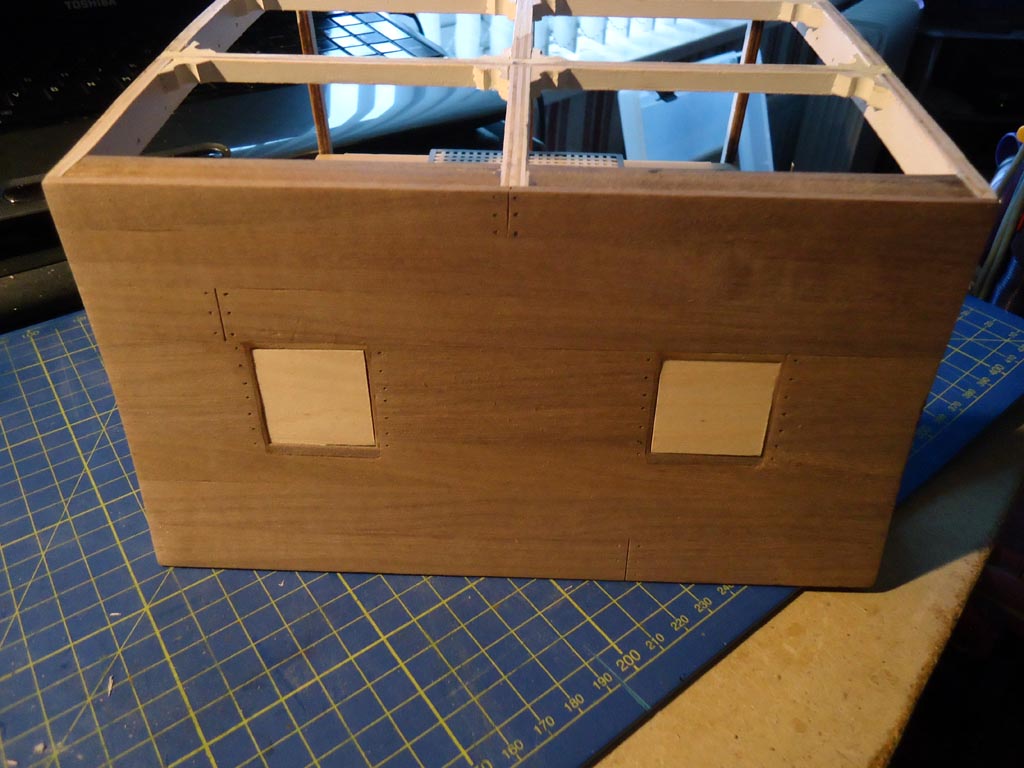
Gun port lids made and fitted, went with the black on black as the hinges are still visible against the black lid. Just a bit of touching up were the black has been chipped off the brass parts then i will do the rigging for them. They will not be moveable as i glued them in place because i don't want any moving parts once finished

-
Hi Per
Yes i am going to go with black on black, i checked out a few pictures of HMS Victory's gun port lids and they are black on black and look fine
Thanks for your input

- Elijah, slow2cool, Seventynet and 5 others
-
8
-
Hi Ian
I agree sharing knowledge is a great thing and IMHO it's what a forum is all about
As for constructive criticism that is a good thing too if it helps you improve, but up to now i have found nothing in your build to critisize. Yes you say you messed up the bending of your wood combing, but you stuck with it and got it right in the end and it looks great.
Carry on the way you're going you will make a fine modeller
- Elijah and Seventynet
-
2
-
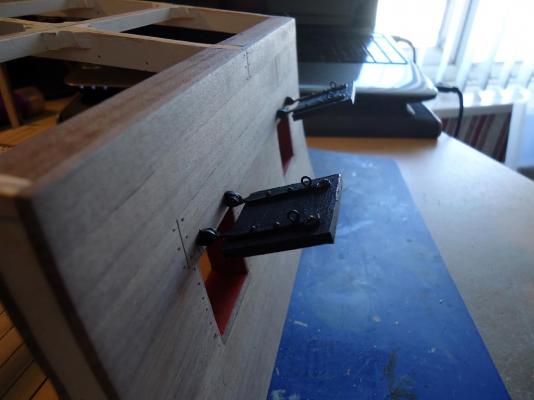
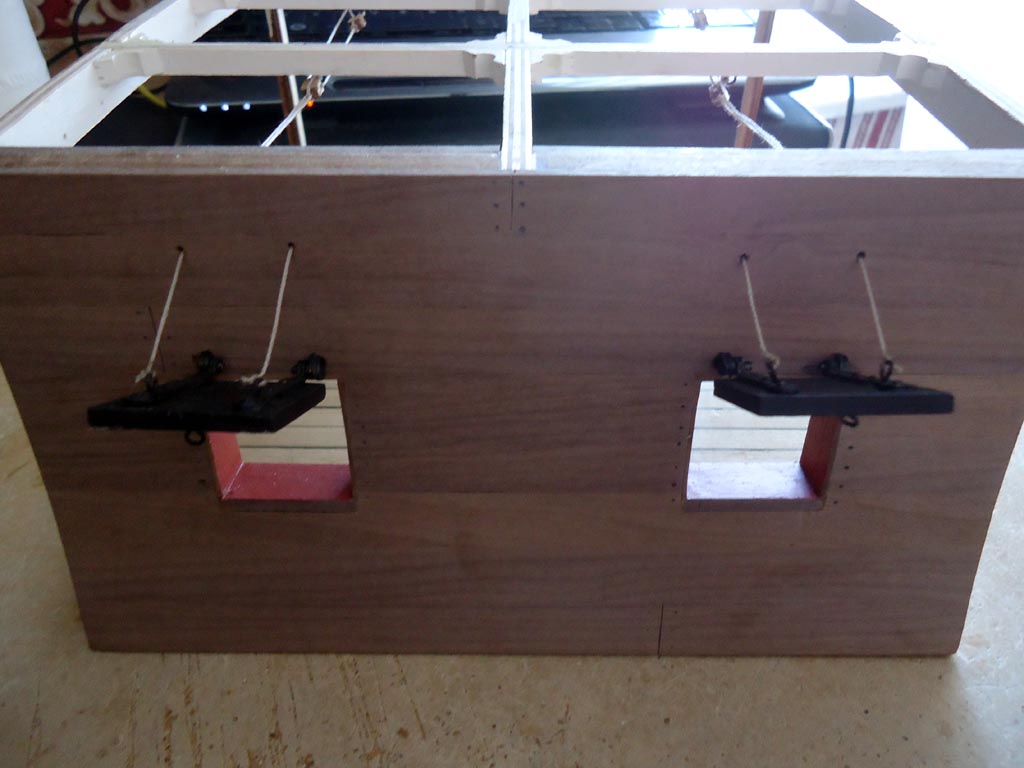
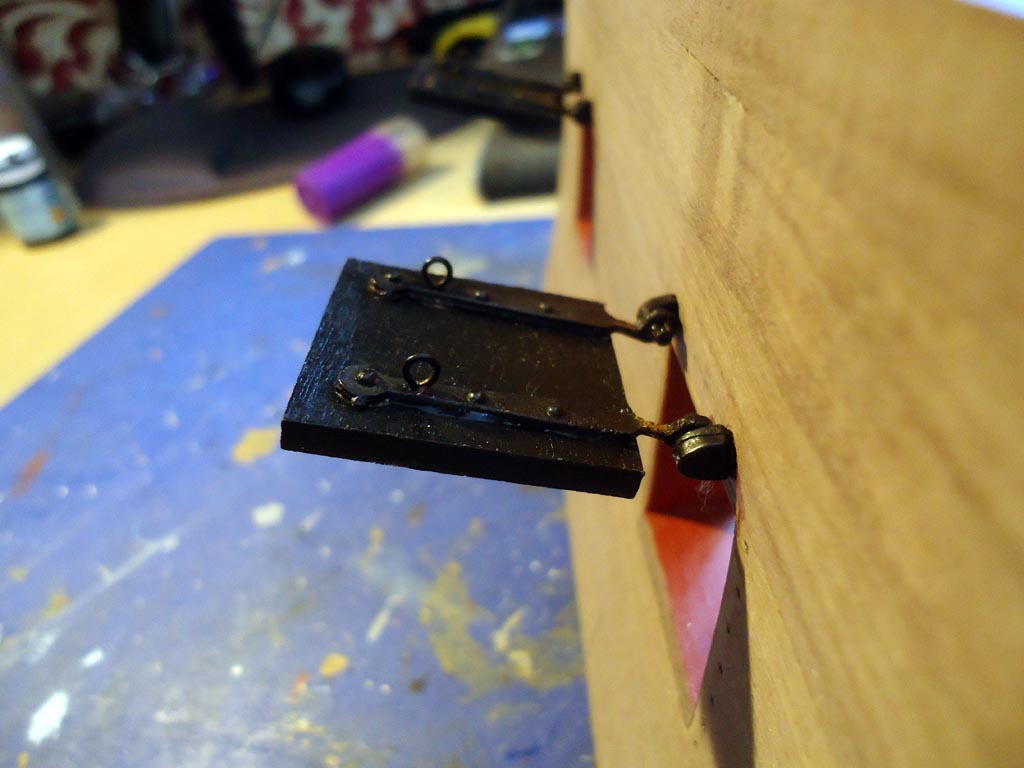
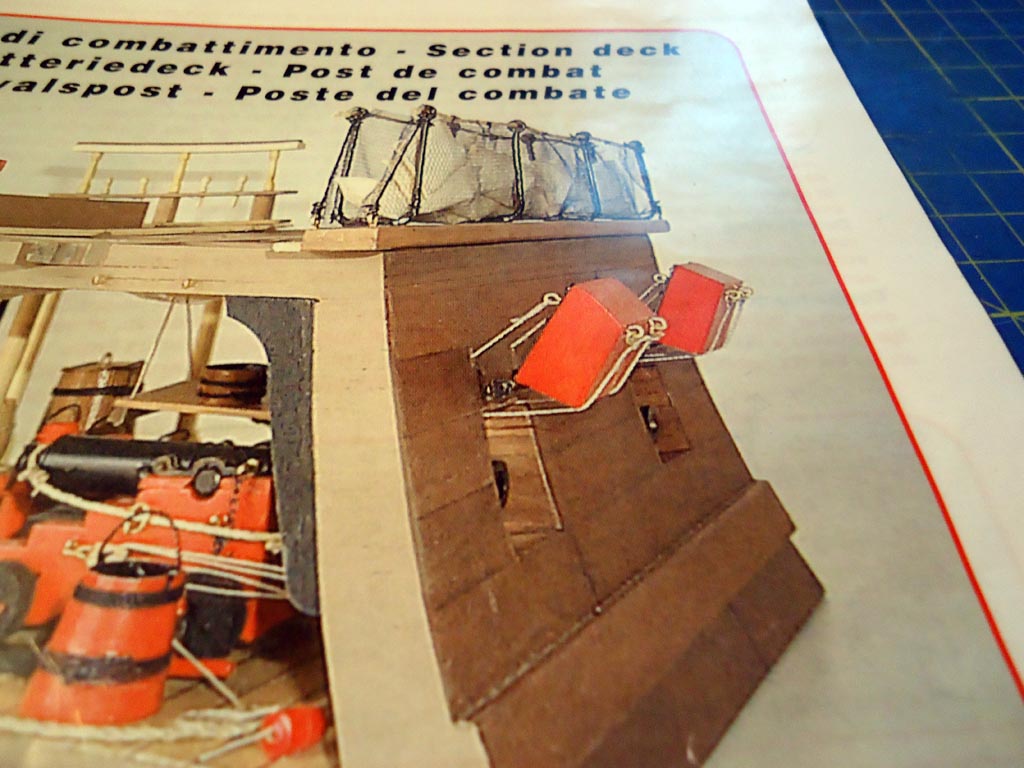
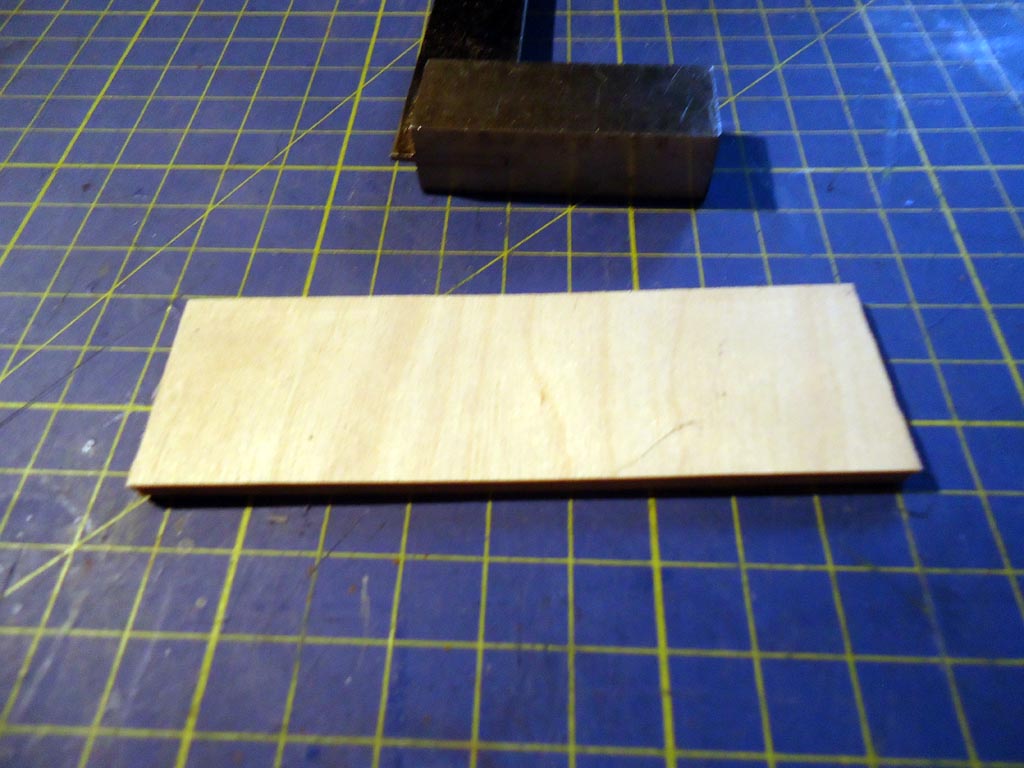
Time to do the gun port lids. The ones the kit says to make look way oversized to me far to thick. This is just my opinion, others may like the way they look
Kit lids

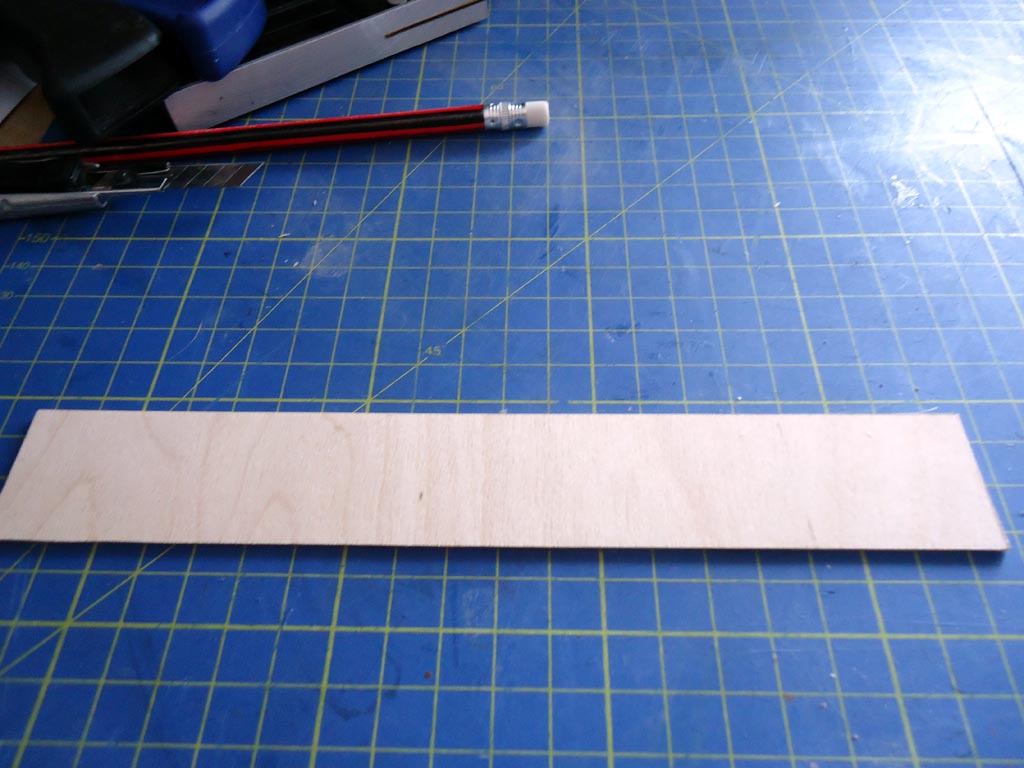
I decided to make mine 3mm thick. I cut out a 1.5mm x 30mm x120mm strip of ply

Then cut it in half and glued the two halves together to make a 3mm x 30mm x 60mm strip

Then i cut out 2 30mm x 30mm squares and once sanded they fit in the gun ports nicely


Just need to decide what colour to do them. I want to do black but that may hide the hinges as they are blackened brass but hopefully it won't matter
- slow2cool, Elijah, CaptainSteve and 8 others
-
11
-
Ian don't think of it as a sloppy job, it's called practice and when the end result is what you have achieved then all the practice is worth it
great result
- Elijah and Seventynet
-
2
-
Thanks Ian
And also thanks to all those who have liked and remarked on my build so far
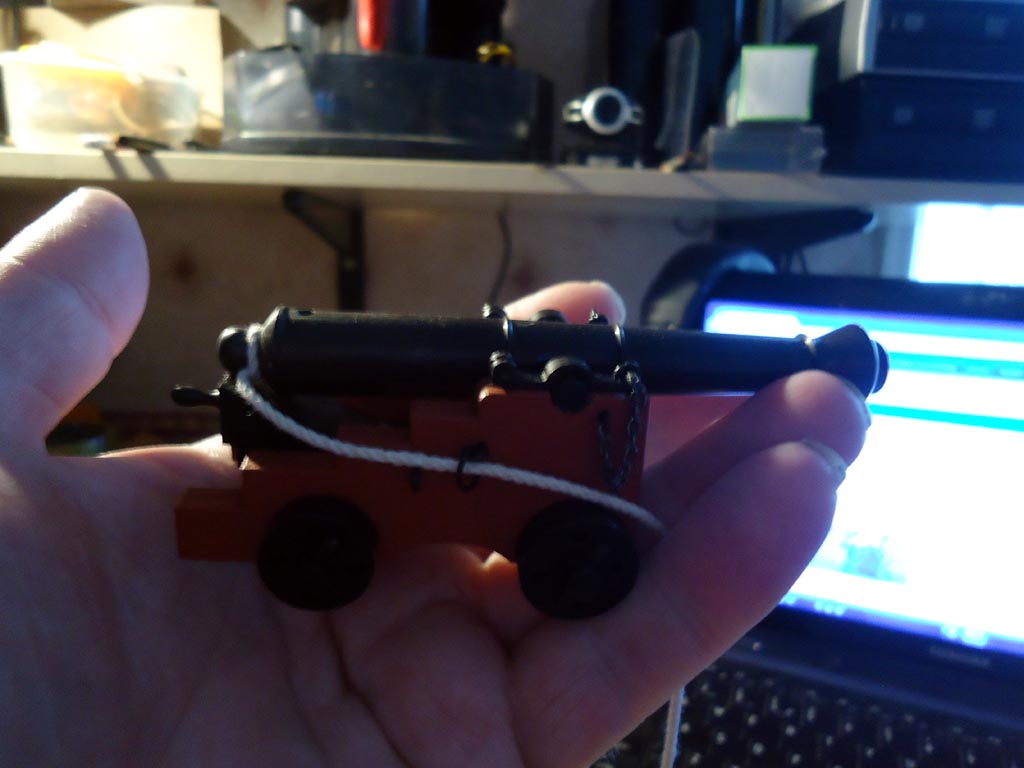
Cannon building method is just like the rest of the build. Assume everything in the instructions is wrong, take all the parts and dry fit everything and adjust until you are happy
Plus the large scale makes everything much easier. Following pic gives you an idea how big they are
Thanks to you too Elijah
Always room for more members of the anti sanding club
Pic to demo cannon size

- GuntherMT, mtaylor, Seventynet and 9 others
-
12
-
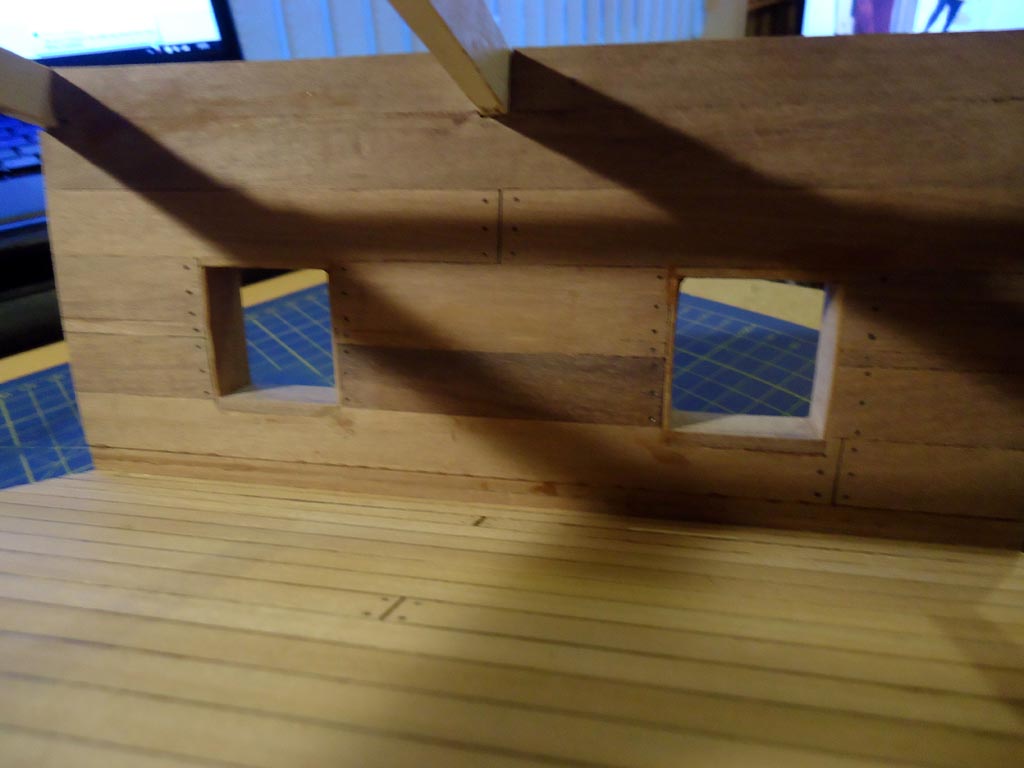
Finally i got the inclination to trim, fill and sand the gun port liners

If i get another bout of inclination i might make some gun port lids next


- Canute, slow2cool, Seventynet and 8 others
-
11
-
-
Hi Bob, Thanks for that. I originally was going to use balsa until I found out the price. When I went to the lumber yard the smallest piece they had was approximately 3"x4"x4' and it would have been over $100.00, although I must say it was nicely wrapped in plastic
. I decided to go with a 1"x6"x4'(unplaned) basswood board instead which cost $20.00) . I found it very easy to work with and it will have a better glueing surface versus balsa, not only that but I now have enough for several more builds Might be worth your while in future ordering some Balsa in from here, even with the import duty it's a lot cheaper than $100 http://www.cornwallmodelboats.co.uk/acatalog/balsa-block.html
- Canute, Elijah, Seventynet and 1 other
-
4
-
-
-
-
-
-
Thanks Per.
Yep sanding is a chore for me because the dust sets of my allergies and i end up sneezing all over the build, and once again it becomes a DNA sample
- slow2cool, Seventynet, CaptainSteve and 5 others
-
8
-
-
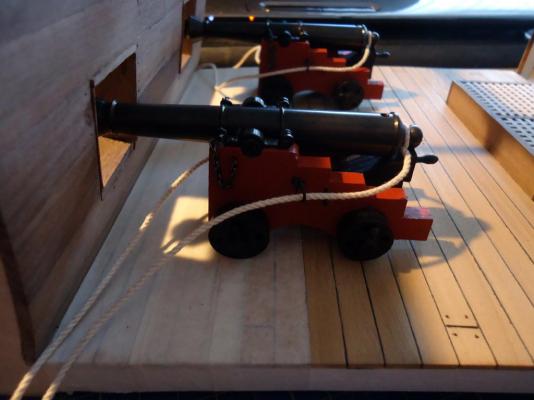
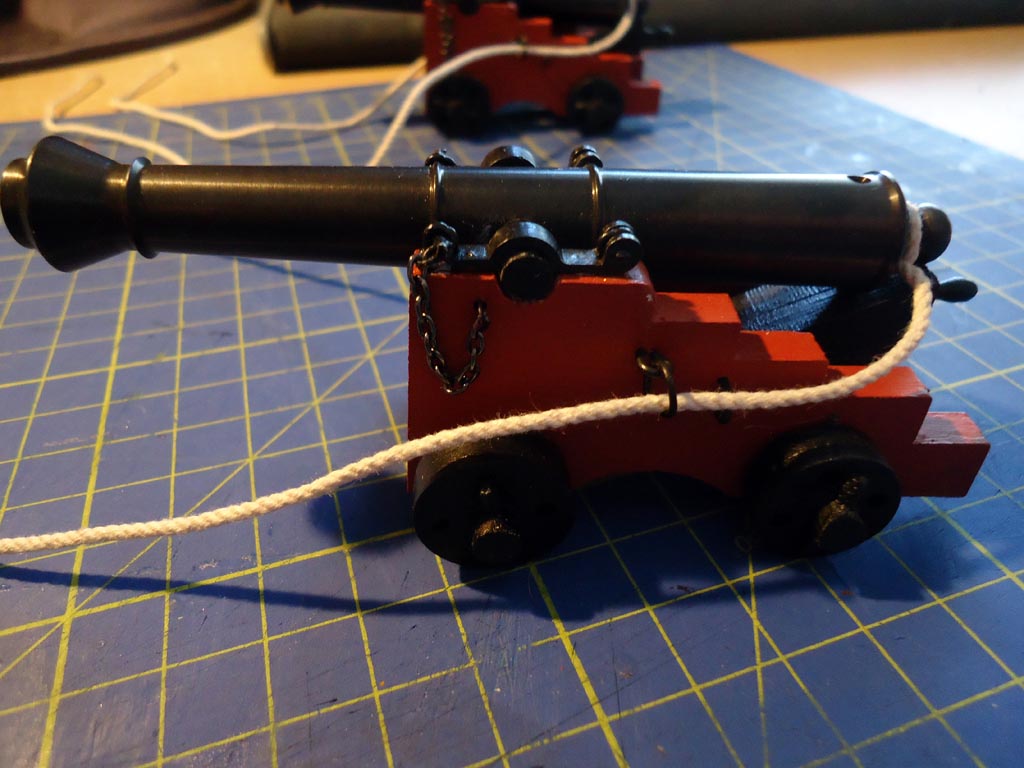
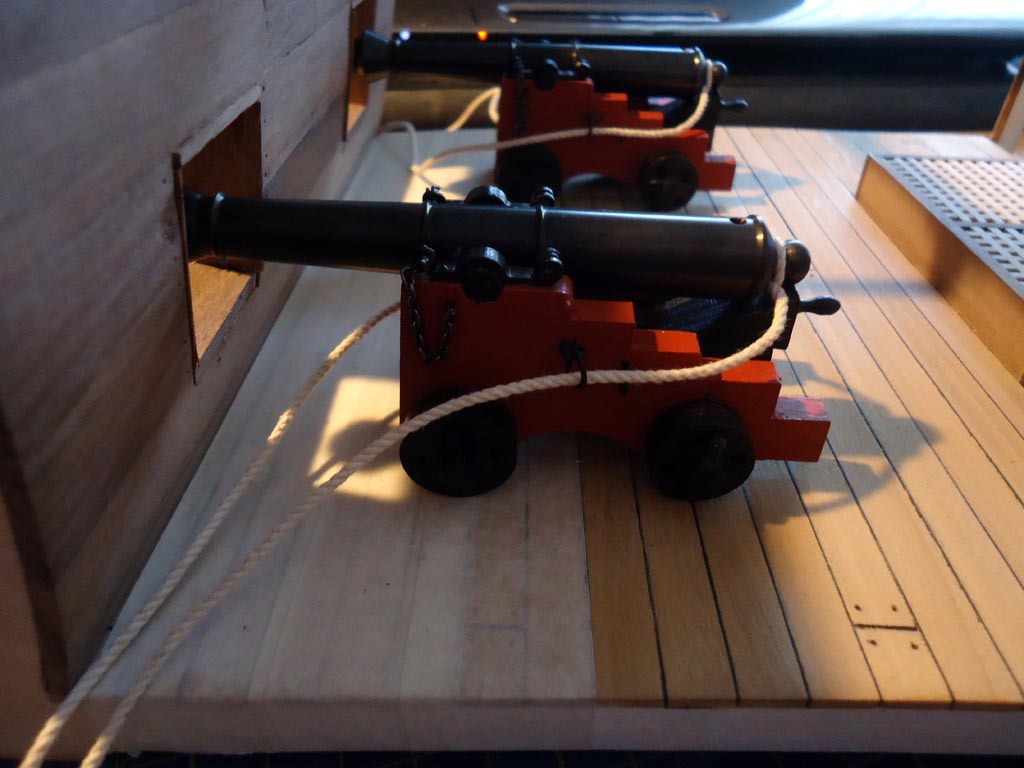
Cannons fitted out with all eyelets, rings and chains. Also i changed the kit supplied rope for some decent rope
They still need to be cut to correct length once i decide where the cannons will be positioned 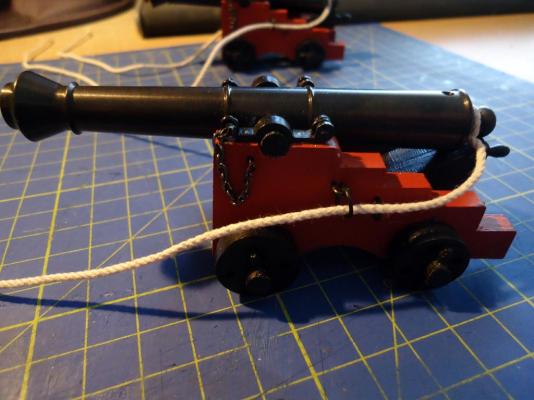
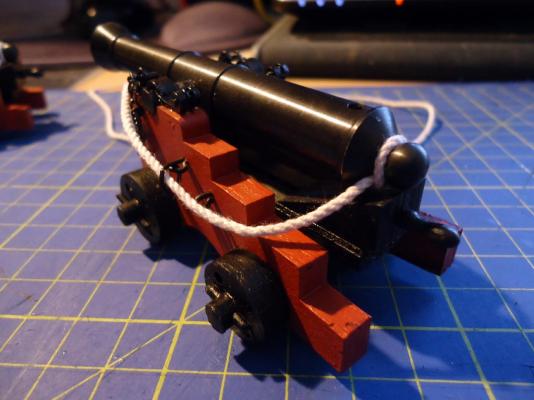
Placed cannons on deck just for the sake of it to see how they look
Masking tape on the deck planks is there so i don't mess up the planks when i can be bothered to sand the inner gun port liners, I hate sanding

- slow2cool, Elijah, zoly99sask and 13 others
-
16


HMS Victory 1805 by Robert29 - FINISHED - Caldercraft - Scale 1:72
in - Kit build logs for subjects built from 1751 - 1800
Posted
Nice planking Robert