
MORE HANDBOOKS ARE ON THEIR WAY! We will let you know when they get here.
×


MEDDO
-
Posts
1,871 -
Joined
-
Last visited
Reputation Activity
-

 MEDDO got a reaction from Boxbuilds in MEDDO first carving attempts with #11
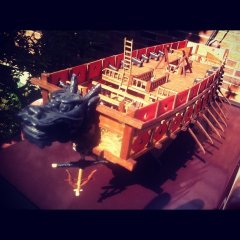
I also got a chance to see some real carvings today as my uncle from Sydney was in town visitng and wanted to drive down and see the Naval Academy. Of course I had to show him Preble Hall. As always very impressive.
Maybe future projects.......
Galley Washington and a Swan class
-
 MEDDO got a reaction from CaptainSteve in MEDDO first carving attempts with #11
I have both the xacto blades as well as scalpel and much prefer a regular scalpel handle. I can never seem to get the blades tightened down in the xacto handle. I do also have some "micro chisels" I bought a few years ago and will try them out when I get home. My concern would be learning how to sharpen them.
-
MEDDO got a reaction from CaptainSteve in MEDDO first carving attempts with #11
Thanks, I am going to try that on the next one. I was going to attempt the small one with a flower next. This is my first try at such a small scale and even seeing the grain is a bit tough. Maybe it's time to finally accept my fate as an aging middle aged man who needs to explore the wonders of bifocals/magnifying glasses...
-
 MEDDO got a reaction from Ras Ambrioso in MEDDO first carving attempts with #11
One thing is for certain, I need to work on the small tight curves. Once again the camera takes what appears nice with the naked eye and exposes all the flaws.
-
 MEDDO got a reaction from Duanelaker in MEDDO first carving attempts with #11
One thing is for certain, I need to work on the small tight curves. Once again the camera takes what appears nice with the naked eye and exposes all the flaws.
-
MEDDO got a reaction from CaptainSteve in MEDDO first carving attempts with #11
One thing is for certain, I need to work on the small tight curves. Once again the camera takes what appears nice with the naked eye and exposes all the flaws.
-
 MEDDO got a reaction from reklein in MEDDO first carving attempts with #11
I also got a chance to see some real carvings today as my uncle from Sydney was in town visitng and wanted to drive down and see the Naval Academy. Of course I had to show him Preble Hall. As always very impressive.
Maybe future projects.......
Galley Washington and a Swan class
-
 MEDDO reacted to Kurt Johnson in Model Expo hurray
I remember about 2 years ago there was a thread about kit quality and Model Expo was part of the discussion. I just received a Mayflower kit, I think my fourth. When they went from solid hull to plank on bulkhead the plywood was garbage, twisted, warped, hollow spaced, laser cuts over done. Complete garbage (this a family friendly forum, right?). They were always very quick to supply replacements, but they were the same quality. Trying to correct for this was a lot of frustrating work and ended in the trash. Well I figured I would give it one more shot. This time I purchased some beautiful 5 ply birch from Midwest to make my own bulkheads before I ordered my kit. Wouldn't you know it Model Expo has improved the plywood, it's straight and true (still 3 ply). I wonder if MSW had some impact? I still might make my own, as I have all this great 5 ply which is much better. Still and all, I'm impressed.
Kurt
-
 MEDDO got a reaction from Canute in MEDDO first carving attempts with #11
I have both the xacto blades as well as scalpel and much prefer a regular scalpel handle. I can never seem to get the blades tightened down in the xacto handle. I do also have some "micro chisels" I bought a few years ago and will try them out when I get home. My concern would be learning how to sharpen them.
-
MEDDO reacted to Hubac's Historian in MEDDO first carving attempts with #11
Of course, I'm offering this advice without having done much small-scale carving myself. All of my relief carvin has been for furniture projects with a few full-figure reliefs, in my mix of experience. I can well appreciate how much more difficult it must be to follow the grain, at small scales. The upside, it seems to me, is that very little material has to be removed, in order to achieve a nice effect. The trick is removing the right material. I will say, though, that the few times I have tried to use EXACTO type blades for smallwork - i have found it difficult to control depth of cut. The longer blade bevel, of even miniature carving gouges and chissels affords you more control over the cutting action.
-
MEDDO got a reaction from Canute in MEDDO first carving attempts with #11
Thanks, I am going to try that on the next one. I was going to attempt the small one with a flower next. This is my first try at such a small scale and even seeing the grain is a bit tough. Maybe it's time to finally accept my fate as an aging middle aged man who needs to explore the wonders of bifocals/magnifying glasses...
-
MEDDO reacted to Hubac's Historian in MEDDO first carving attempts with #11
Hi Meddo,
I'm not sure if you are doing this already, but one thing that I have always found helpful, with this sort of relief carving, is to trace in a center line throughout the length and all details of the carving. This gives you a reference line to carve to and makes it easier to smooth out and shape the surfaces. It should be said that this line isn't always an exact centerline; on a leafy scroll, for example, you may skew the line closer to the top of the scroll, in order to carve a more accentuated cove, on the other side of the line. Or, sometimes, the opposite would be more appropriate. Whichever you do, though, it's going to always be a constant back and forth with the blade edge to adjust to the ever changing grain direction, as you work your way through the carving's shapes.
-
MEDDO got a reaction from CaptainSteve in MEDDO first carving attempts with #11
Sorry about the iPhone pictures but I figure this is a better use of time than watching bad television here. I see where the cuts look a bit blocky and am going to try to clean em up.
-
MEDDO got a reaction from CaptainSteve in MEDDO first carving attempts with #11
I have been traveling a bit recently and just realized I could take this in my checked bags so I brought it on my current trip. To the unaided eye it looks pretty good. The magnified photo shows all the warts... I didn't bring any sandpaper or files with me but I plan to try to smooth it out when I get home.
-
 MEDDO got a reaction from mrjimmy in MEDDO first carving attempts with #11
Sorry about the iPhone pictures but I figure this is a better use of time than watching bad television here. I see where the cuts look a bit blocky and am going to try to clean em up.
-
MEDDO got a reaction from Canute in MEDDO first carving attempts with #11
I have been traveling a bit recently and just realized I could take this in my checked bags so I brought it on my current trip. To the unaided eye it looks pretty good. The magnified photo shows all the warts... I didn't bring any sandpaper or files with me but I plan to try to smooth it out when I get home.
-
 MEDDO got a reaction from Piet in HMS Agamemnon 1781 by Hennie - FINISHED - Caldercraft - Scale 1:64
Congratulations! Most impressive build.
-
 MEDDO got a reaction from mtaylor in MEDDO first carving attempts with #11
I have been traveling a bit recently and just realized I could take this in my checked bags so I brought it on my current trip. To the unaided eye it looks pretty good. The magnified photo shows all the warts... I didn't bring any sandpaper or files with me but I plan to try to smooth it out when I get home.
-
MEDDO reacted to tkay11 in Triton cross-section by tkay11 (aka Tony) - FINISHED
A VERY SIMPLE BASE
Because this model really was just to learn and is nothing special compared with the other Triton builds, and will, in any case, be kept just to show grandchildren what the structures looked like, I decided to make as simple a base as possible.
As usual, my road came in handy. A neighbour was having his floorboards discarded, so I just picked a couple up. One of them became a base for my wife's doorstep plants, while the other was converted to use as base for the cross section. I planed it flat (or as flat as I cared to) and drilled four holes for 5mm perspex rods.
As the wood was very light, I varnished it with a polyurethane varnish. The colour is not quite right, but it was declared satisfactory by my wife who is the judge in all matters aesthetic.
I worked out the angle for the tops of the rods by using my TurboCAD tracings of the frames, and sanded the tops to the correct angle.
I left the heights of the rods so that the keel would be just above the base.
Although I may still apply another coat of my made-up Danish oil to the ship (unlikely), I've decided to end this log and call the model completed.
While we're in the throes of selling (with luck) our house, I'll now just concentrate on planning the next build -- a toss-up between Le Rochefort, Naiad, Brixham Trawler Valerian and (outsider) La Jacinthe. I have the plans for all of these, but each has their attractions.
Thanks to everyone not only for their 'likes' and appreciation that have given me added motivation during this build and the Sherbourne, but also for the enormously kindly and generous advice which I've had in various ways to help me complete these builds. And yet again I congratulate those who designed and made the plans freely available for this really useful learning exercise.
Tony
-
 MEDDO got a reaction from mort stoll in HMS Agamemnon 1781 by Hennie - FINISHED - Caldercraft - Scale 1:64
Congratulations! Most impressive build.
-
 MEDDO got a reaction from Hennie in HMS Agamemnon 1781 by Hennie - FINISHED - Caldercraft - Scale 1:64
Congratulations! Most impressive build.
-
MEDDO reacted to Hennie in HMS Agamemnon 1781 by Hennie - FINISHED - Caldercraft - Scale 1:64
@Eric,
Thx Eric for your kind words
And finally an update;
I FINISHED MY AGGY!!!!!
She is not on her place yet. I ordered a mahogany shelf and 4 bronze dolphins to put her on. Those things have to come from Italy, so it will take a while. But when she is in het final place, I will take more pictures.
Hennie
-
MEDDO reacted to mikiek in US Brig Niagara by mikiek - FINISHED - Model Shipways - Scale 1:64 - First wooden ship build
Rigging hammocks is almost as tough as gun tackles. Talk about repetition. I've made 55 of the little guys and I'm not even finished with the port side yet. The forward stanchion assembly went in without incident. Now I just gotta fill it up. Pretty much as I figured, it will take about 75 per side. They look a little disorderly now as I have not glued them yet. I feel pretty confident that when I do I can get them lined up nicely.
So far I'm still glad I went with this approach.
-
MEDDO reacted to Gaetan Bordeleau in 74-gun ship by Gaetan Bordeleau - 1:24
Thank you Mauricio,
Finally the setup to begin to fit the frames to the keel is ready
-
MEDDO reacted to Beef Wellington in HMS Jason by Beef Wellington - Caldercraft - 1:64 - Artois-class frigate modified from HMS Diana 1794
Wow..Christian, Doug, Pat, Harvey, Carl, Tom, Wayne, VACorsair, Eamonn, and the likes, thanks guys for interest and the overly kind words. Narrative below will explain more, but think I've irrevocably stepped off the 'being happy with kit parts' ledge...this can only mean even slower progress...but perhaps more fun
I know I'm bouncing around a bit so apologies for that, but continuing foundational aspects which seem easier with the ship careened over on a towel.
Challenging Cheeks:
The kit supplied cheeks are hair rail are not that great. The cheeks themselves come nowhere near to fitting the hull, and I'm pretty sure the hull form is correct. The only option was to scratch my own cheeks. Aside from the fit, they are also seem rather undersized.
The next consideration was the hair rail and lower cheek, and decided to go whole hog and redo these as well. Given that there needs to be two of everything, I cheated and sparingly glued with PVA glue some 3mm sheet together and then cut to shape. The pieces were then separated using rubbing alcohol, and voila, 2 matching parts with the work of 1! These parts are still very slighty oversized to allow them to be fine tuned once other parts are made - necessary given I don't have any true plans to work from and that these pieces form quite a complex shape.
Photos below show hair rail prior to separation. The difference in dimensions is quite evident to that appearing in AOTS which I used as a guide for the scratch piece.
As a side note, the quality of the walnut parts are just not good, the main/false rail would need a lot a work to get presentable so suspect these will also be remade at some point.
The cheeks themselves took a long time (days) to get right due to the angled concave curve and lack of plans. Pretty happy with the results, though the parts still need some fine tuning as the rails are a little thick still I think. I'm hoping to use a scraper to give a profile to the edges, and a quick test shows that this should work OK even for a quick test. This also commits me to what will probably be my first simple carvings on the scrolls, but that's for another day.
Side by side comparison of scratch vs kit supplied pieces..