HOLIDAY DONATION DRIVE - SUPPORT MSW - DO YOUR PART TO KEEP THIS GREAT FORUM GOING!
×


Martin W
-
Posts
1,412 -
Joined
-
Last visited
Content Type
Profiles
Forums
Gallery
Events
Everything posted by Martin W
-
 Ron -- I really like the fact that you're relying on hand tools so much. The quietness of working wood by hand has always been one of the key attractions for me. And I can only admire your keen eye in spotting the table edge as the right curve -- marvelous! I believe I spotted the handle of a chisel in one photo, and a Lee Valley chisel in another, so I wonder why you're not using those to make the initial rounding and tapering shapes for your masts -- shavings are a lot easier to clean up than sawdust. I can't even begin to list the difficulties my own hawse holes gave me!!! Cheers, Martin
 -
Nothing boring here, Ron. It's always good to see the progress of a craftsman. Cheers, Martin
-
Nice work, Ron. I always admire the clean lines you're able to get on your work. And congratulations on your move: if the only thing you've lost is the one oar, then you should be relieved. Of course you'll never know what you've lost until you can't find it. Cheers, Martin
-
Hi Spy -- Your response came in right as I was submitting mine. It's great to hear from you. And I can't count the number of times I've bled over some part of the build. I keep a box of band aids at my work bench, and go through them apace. My own eyesight is terrible, and last summer I got an infection in a finger joint which left the whole finger almost unusable so that working on fine details has become even more of a challenge than before. Nonetheless, we endure. Cheers, Martin
-
Hello Everybody -- Thanks for all the kind comments, they always remind me that ship modellers really do form a community. And thanks to everyone who clicked the Like button. Mike -- Pegasus would be interesting to carve. There's lots of opportunities for working out details, and as I found out making that rocking horse some years back, there are some long-standing conventions that can guide you along the way. Best of luck with it, and I can't wait to see what you come up with. Toni -- As always your advice is really good. I hadn't thought of using a building board, because I'd become fixated on using a mounting board. But your suggestion sounds much more stable and protective. I still worry, though, about the fact that the models will be riding in the seat of an F-250, which has never been known for its smoothness (or quietness). And then there are my other two builds that are rigged -- with those I can only think that I'll have to make cases for them. Peter -- I would absolutely LOVE to spend the rest of my life in the Alps. I'd need to relearn both the German and Italian that I've long since lost, and I'd have to find resources well beyond those of a retired university professor. One reason I'm eager to get to a cooler region is because I miss ice skating terribly. My wife & I have been talking about a trip to Lugano -- which I haven't seen since 1988 -- and that's made me start thinking about the food, which I might miss even more than the skating. Cheers to all, Martin
- 467 replies
-
- 2
-

-
- fly
- victory models
- (and 1 more)
-
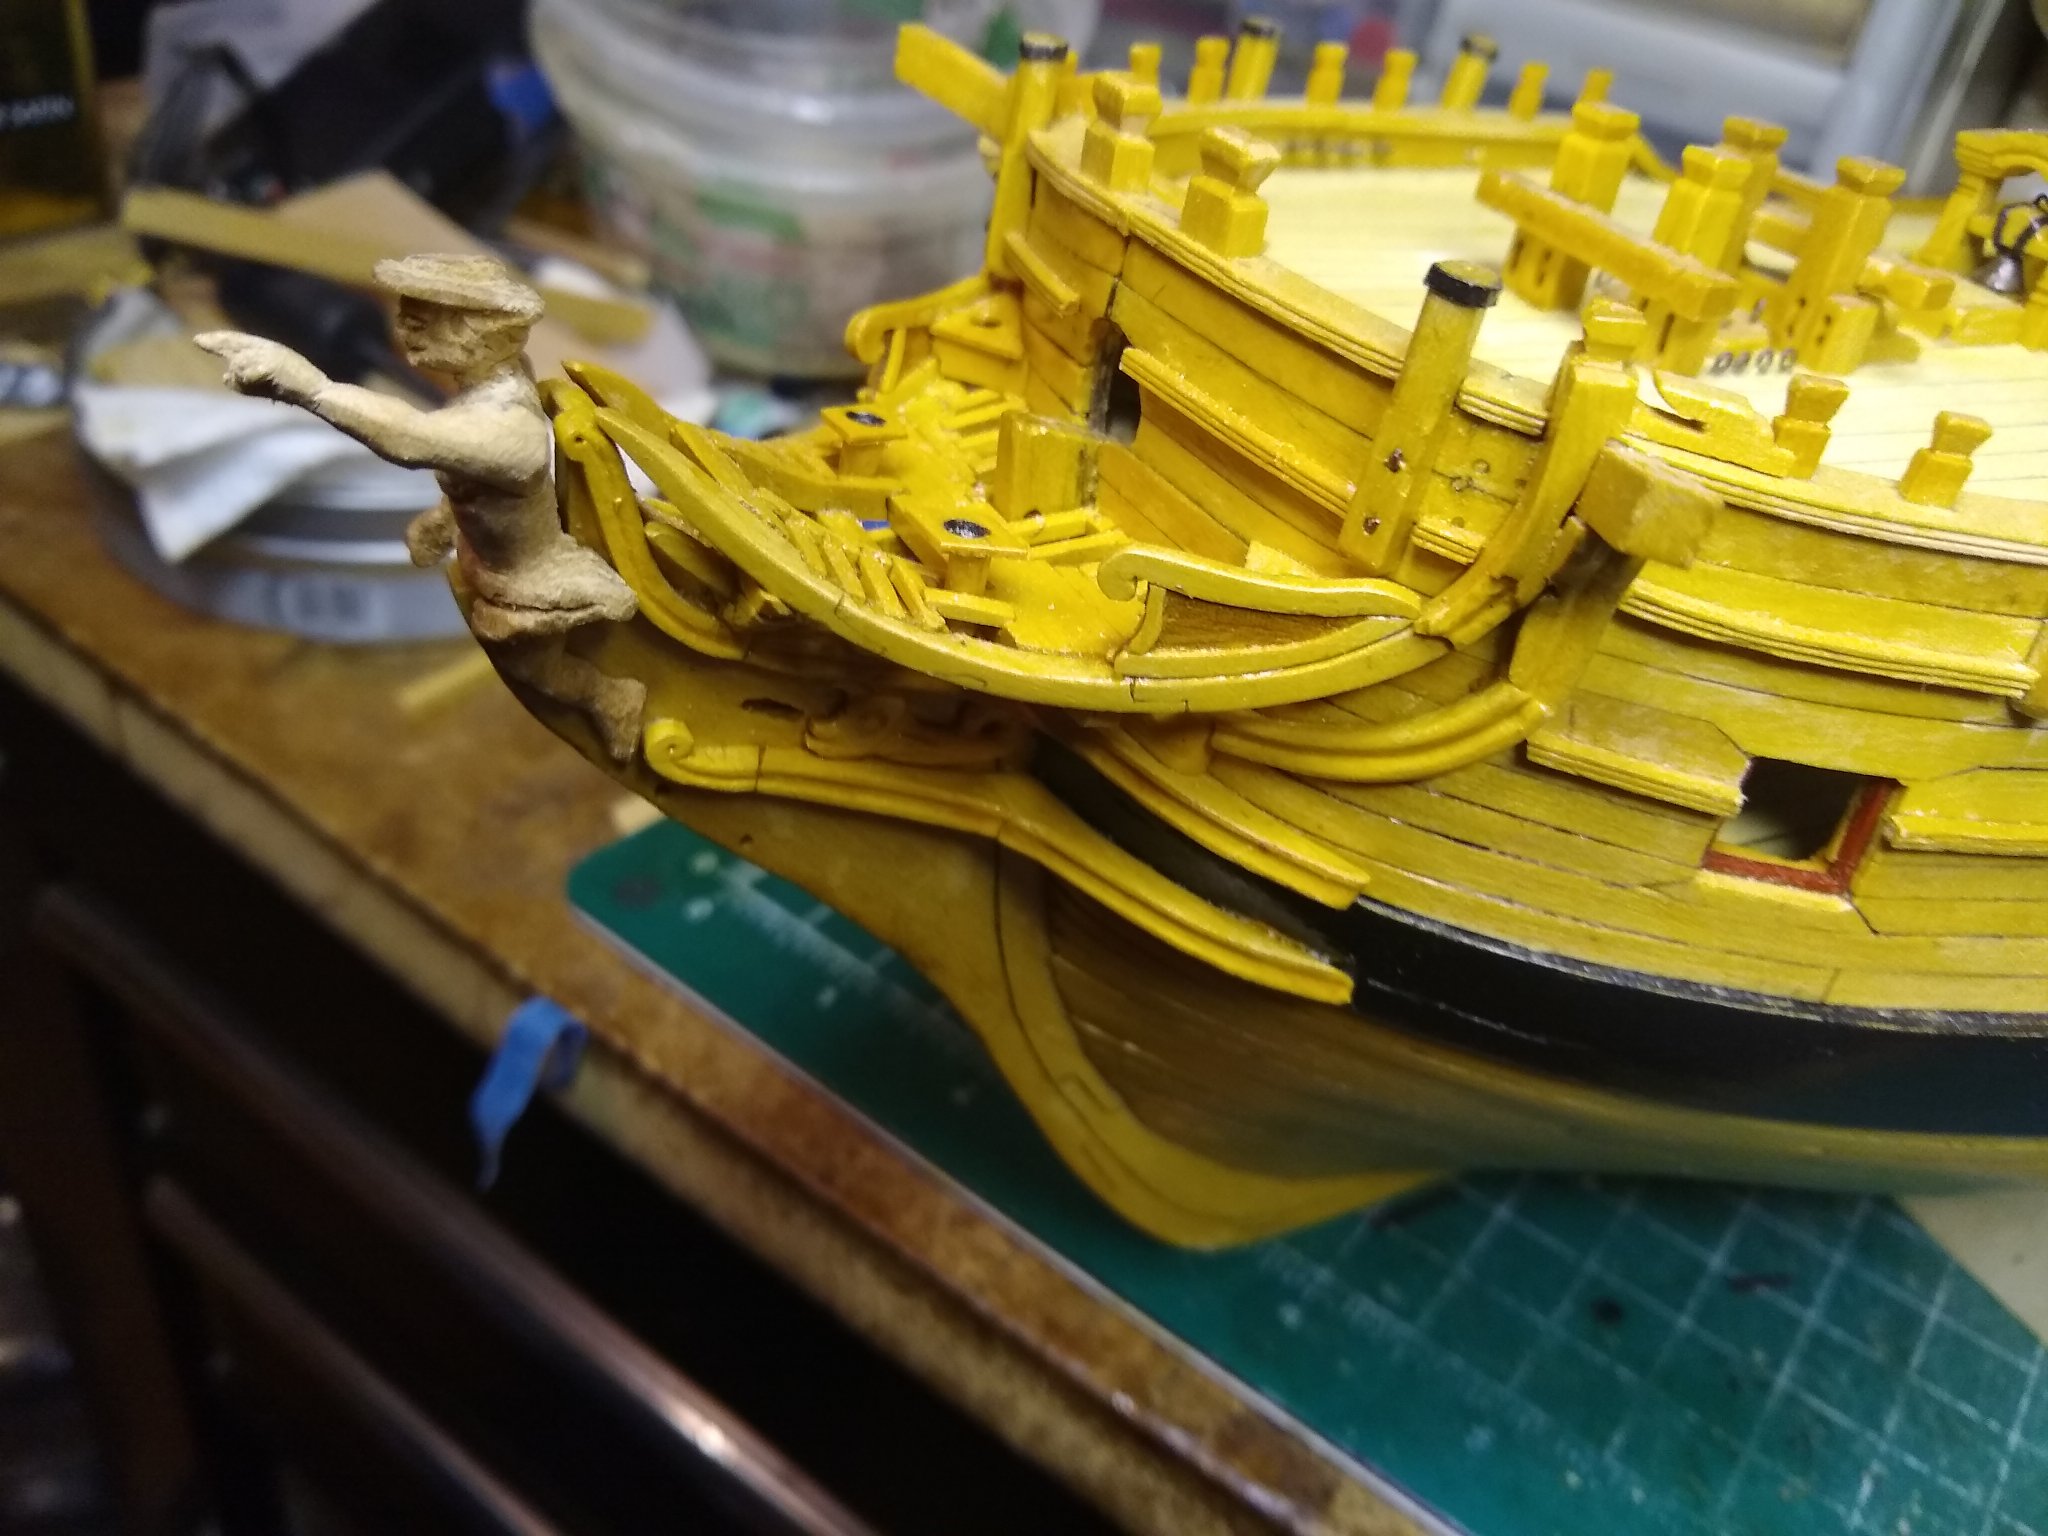
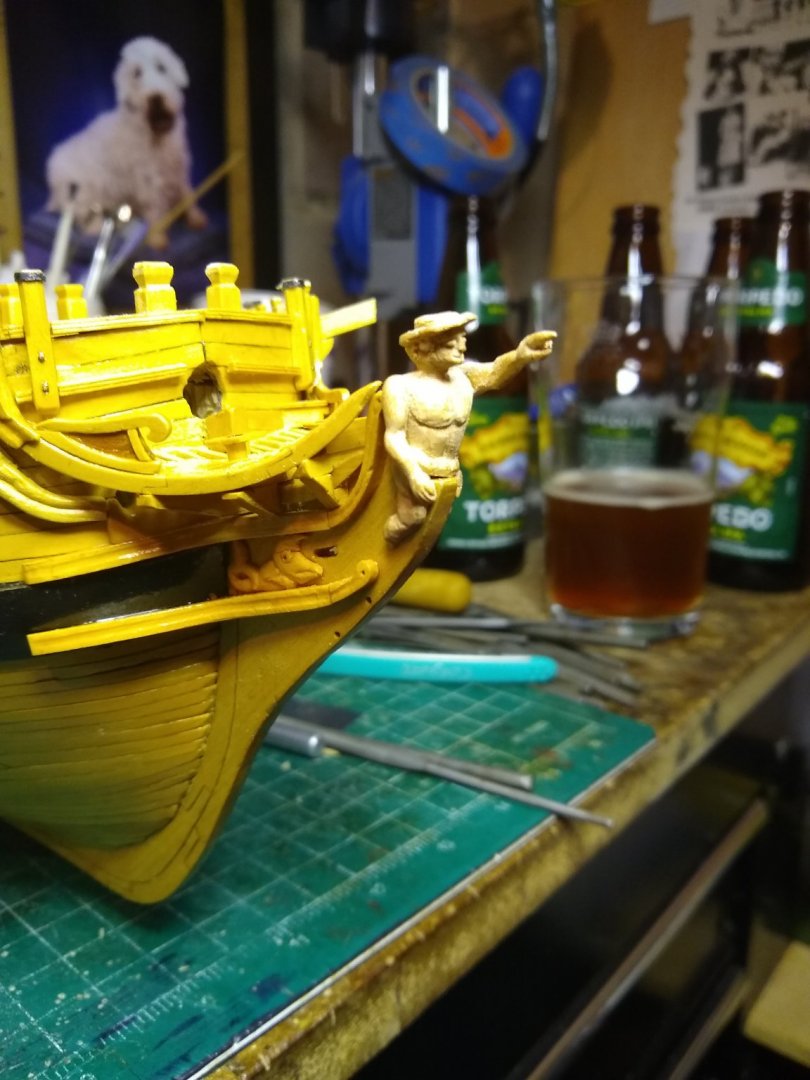
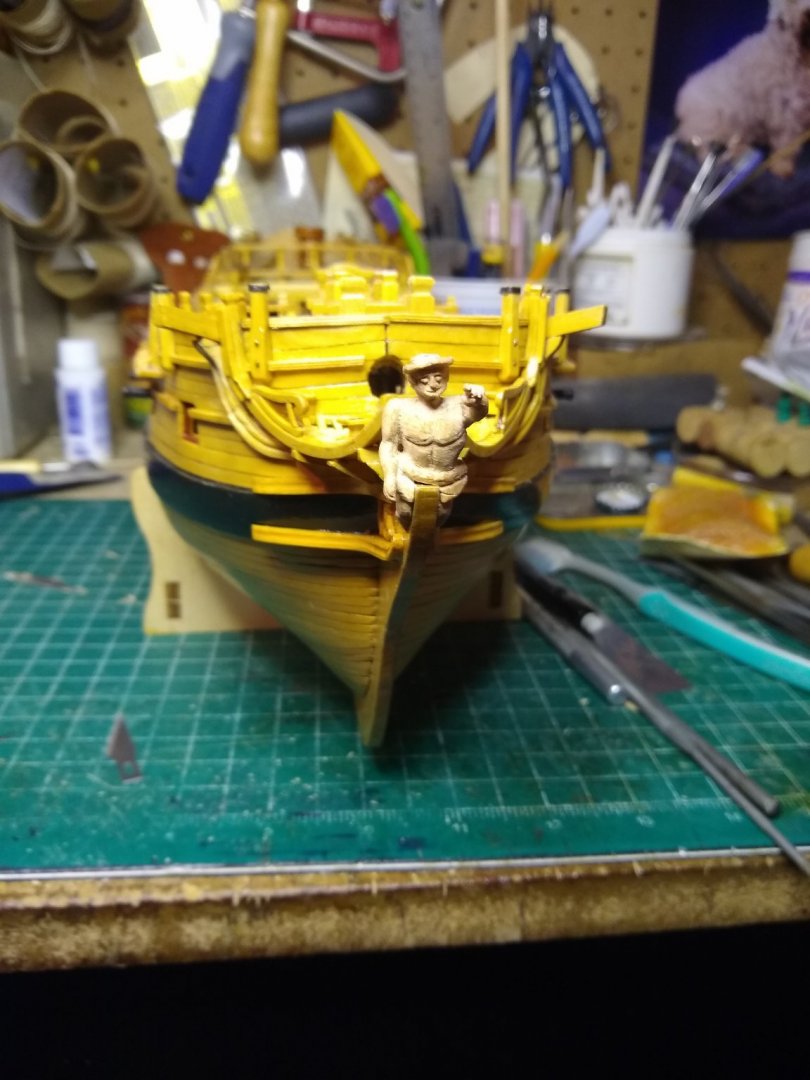
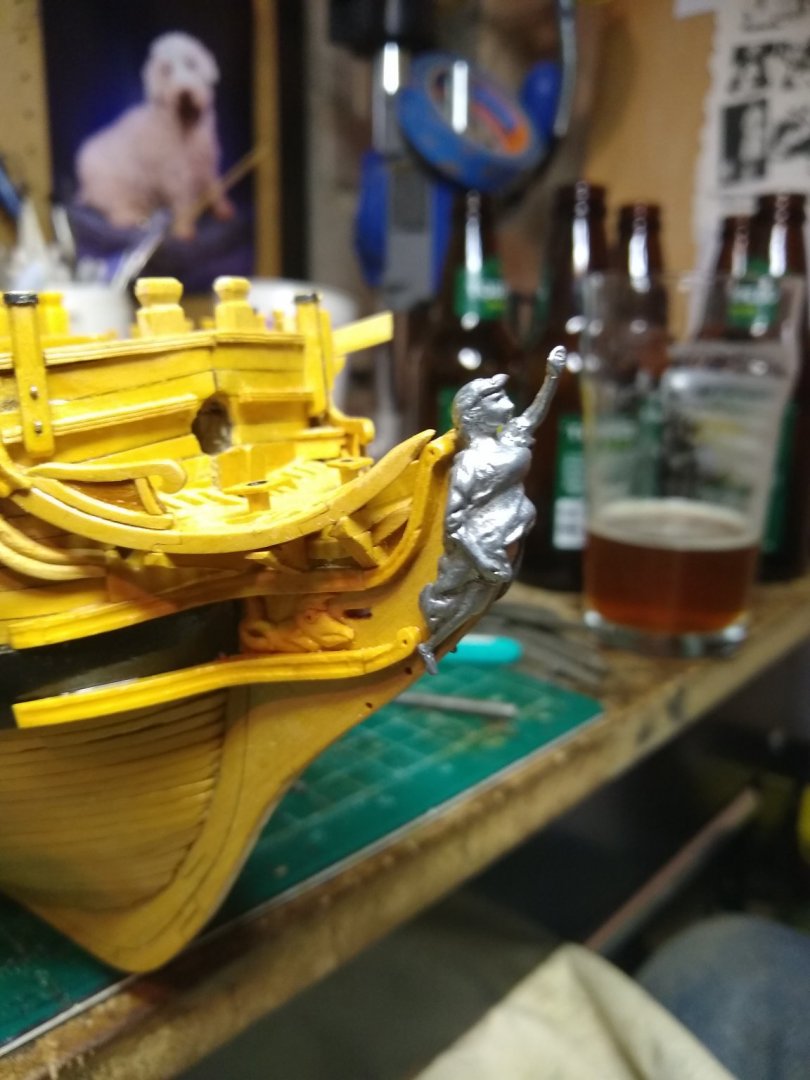
Hello Everybody, and Happy New Year! Checking the log I keep for myself in the boatyard, I see that it was 3 October that I started work on the Figurehead. I proceeded in a somewhat methodical fashion, but suffered several setbacks that made this little project longer and more involved than I'd expected, even for such a slow worker like me. One setback is that the Coolpix I've had for only about 9 years, and that replaced the old Nikkormat I bought in 1971 stopped working with any reliability. My sister and wife pressured me last summer into buying a smart phone, and I have just this morning figured out how to upload pictures from it to my laptop. Pictures of the steps in carving and the mishaps don't exist, I'm afraid, so I'll rely on verbal narrative. I began by working out a clay model that helped me understand the basic design issues. Setback #1 came when I wanted to study that model for some detail, and found it completely squished under the glue bottle. By that point, I was committed to the carving, so I didn't bother with resurrecting the flattened clay version. I decided to try carving in cherry rather than my usual boxwood (castello), just for a switch. One consequence is that the grain of the cherry is more obvious in the final carving than the boxwood's would have been, and it made the overall piece more fragile. I oriented the grain lengthwise, but still suffered two major breaks. The first was when the entire right arm (on the starboard side) broke at the shoulder. That was early enough that I could glue it back into place, and then follow the Roman technique of supporting the thin piece of the arm through connections with the body, one at the shoulder, of course, and one at the wrist. The second break came with the foot on the same side, because the back-bent angle of the legs meant that the calves and ankles were cross-grained. I left the feet outlined only as "boots" since any more detail would have led to more breaks. And when I glued the foot back on, it broke again almost immediately, so I've left it off until I put the figurehead permanently into place. So here are some views from different angles: The pointing arm on the port side, I carved separately, and then pinned on. It's a bit larger than the right arm, because I had to allow room for the hand and fingers. And here, by way of contrast, is the kit-supplied figurehead: Oddly, this version looks decidedly feminine, in contrast to the masculine Mercury figure of the plans (and in FFM). Her arm -- and the one on the plans -- is raised more vertically than mine. And in the plans (and FFM) Mercury is pointing a single finger upward. That struck me as slightly offensive, so I had my Mercury pointing the way Onward. I'll add a few coats of wipe-on poly, then store it away, with the detached foot, until the whole ship is done. I'm unsure what to do next, since I don't really want to add any fragile details for a while. Mrs W & I plan on pulling up stakes here on the prairie and establishing our retirement home in some cooler region. I have no idea how to move a ship model, and have already begun to dread the damage I'll inflict on this one and my other two. Cheers, Martin

- 467 replies
-
- 5
-
-
- fly
- victory models
- (and 1 more)
-
Hi Peter -- Your choices for the paint scheme for Bellerophon seem appropriate, bronze would have been too dull. And that weapon does look odd -- who knows. Maybe it's supposed to be a kind of curved short sword. As for the goat's head over the lion's, my guess is that the goat coming out of the back of the lion looked so ridiculous that Bellerophon cut it off to make the chimaera look more presentable. And I have to envy that heroically narrow waist! Cheers, Martin
- 366 replies
-
- 1
-
-
- bellerophon
- victory models
- (and 2 more)
-
Aha! And then I'm going to assume you painted them?
-
Hi Peter -- Nice work on the hardest area! You mention that the rails are cast -- what material are they cast from? They look just like hand-grooved and shaped rails. Cheers, Martin
-
I'm surprised, Peter, at how much of a difference the lower height makes. It does, and the difference is definitely an improvement. Cheers, Martin
- 366 replies
-
- 1
-
-
- bellerophon
- victory models
- (and 2 more)
-
Hi Peter -- I agree that it does look much better with a taffrail. I'm impressed as well that you were able to bend that piece of boxwood so nicely, as it looks pretty thick. How long did you have to soak it? Cheers, Martin
- 366 replies
-
- 1
-
-
- bellerophon
- victory models
- (and 2 more)
-
Hi Kenneth -- This is a nice build you have going. If you're still wondering how to do the rope coils, here's the simple trick: you just soak a length of rope in diluted white glue, then make the coil. It should take the shape you want while wet fairly easily (you might use tweezers to keep your fingers clean), and then it'll keep that shape when dry. Cheers, Martin
- 152 replies
-
- 1
-
-
- rattlesnake
- Model Shipways
- (and 1 more)
-
Hi Brian -- thanks for the kind words. And thanks to everyone for the Likes. Brian, I have actually gone back and added glazing to the various windows, using a product called Micro Kristal Klear. I'm about halfway pleased with it, since it does dry clear and glass like, but as glazing it's uneven. Maybe that's due to my own inexperience with it, or with the size of the individual lights that I had to fill in. Sorry to see that you've put down your tools. My outside shop is also unheated, and un-air-conditioned (which matters more here in Oklahoma). I found a small and supposedly efficient heater last winter, but by the time I installed it, the winter (always brief yet severe here) had passed. I'm hoping this winter it will warm the shop up enough that my tools don't feel like ice-cicles every time I touch them. Cheers, Martin
- 467 replies
-
- 1
-
-
- fly
- victory models
- (and 1 more)
-
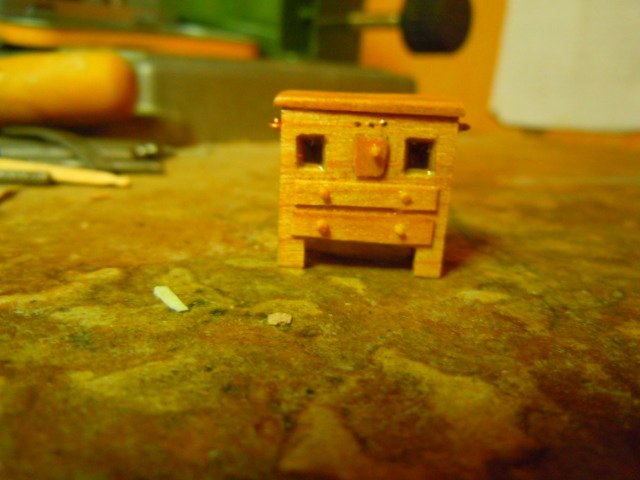
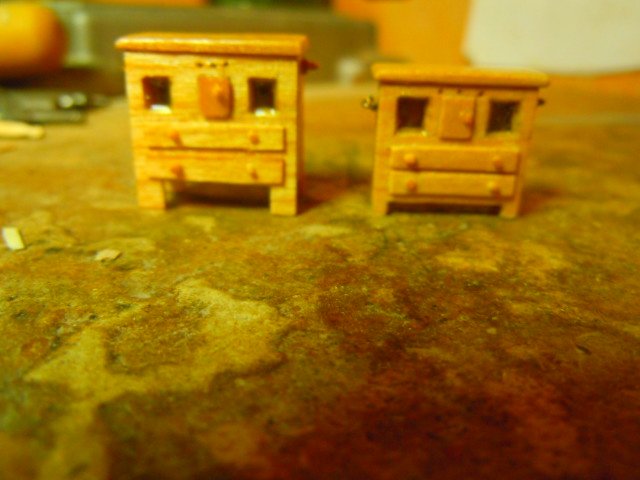
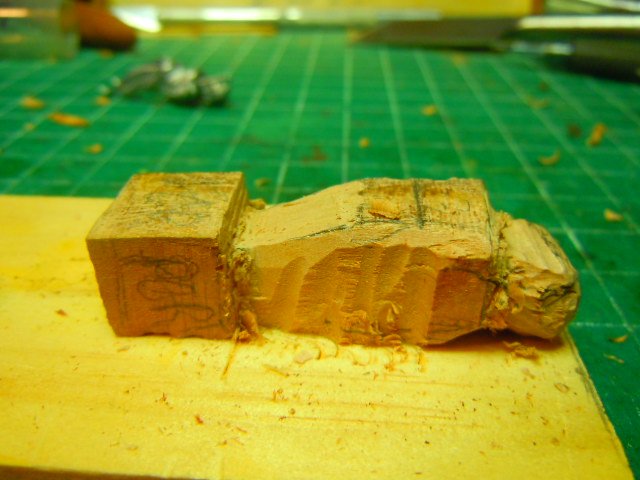
To make the binnacle, I decided to use some scraps from the cherry I'm building a tool chest out of. I basically followed the design in FFM, but chose to put legs on because they make sense in wet environment. I also put in 2 drawers, because you can never have too many maps on hand: As you can probably guess by looking, when I set it on the Quarter Deck, it proved to be much too big. So I made another, smaller version: Hmm, I didn't realize how bad the focus was, sorry. The reason there's a bit of a lean on the smaller version is that the legs have been adjusted to fit the slope of the deck. Next up, I've decided to work on the figure head. So far I've gotten through the roughest bosting-in stage where I just work out the different levels: Obviously there's a long way to go, and as with every other carving I find that all my tools are too, too big for such fine work. Mrs W has been dragging me off on various "pleasure" trips (the furthest I like going is out to my workshop), but I think there's a brief respite ahead, so I hope to move with some dispatch. Cheers, Martin
- 467 replies
-
- 5
-
-
- fly
- victory models
- (and 1 more)
-
Hi Nils -- It's been a while since I checked in, and I have to tell you that I'm mightily impressed with your workmanship, and with the many fascinating details you've added. Those coffee mugs made me laugh with pleasure. Wonderful! Cheers, Martin
-
Hi Peter -- Judging from the photo, it looks like you've filed off some details from the kit's pieces. Remind me if that was for historical accuracy or because fit. Cheers, Martin
- 366 replies
-
- 2
-
-
- bellerophon
- victory models
- (and 2 more)
-
That Captain does indeed seem to be lounging about while the work crew labors hard! And the Main Laborer is doing a fine job. That's a curiously square bow, isn't it? Cheers, Martin
- 366 replies
-
- 2
-
-
- bellerophon
- victory models
- (and 2 more)
-
Sorry to hear about the Skipper's mishap -- even Great Mariners often take a while to get their sea legs. Nice work, Peter, she's coming along beautifully. Cheers, Martin
- 366 replies
-
- 1
-
-
- bellerophon
- victory models
- (and 2 more)
-
Very kind words, Peter, thanks. I have to confess that my long term goal (very long) is to do a scratch build. I haven't quite gotten myself accustomed to retirement sufficiently to spend more than an hour or two in the boatyard, however, so I'm still a very slow builder. This build is already well over 5 years long, so an actual scratch project would probably take me into the next world. Cheers, Martin
-
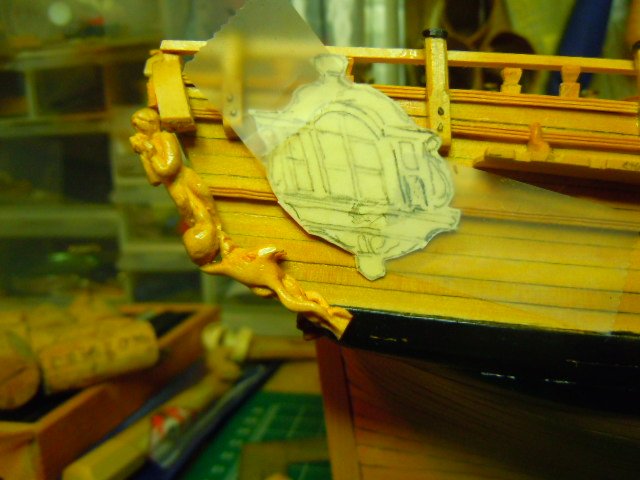
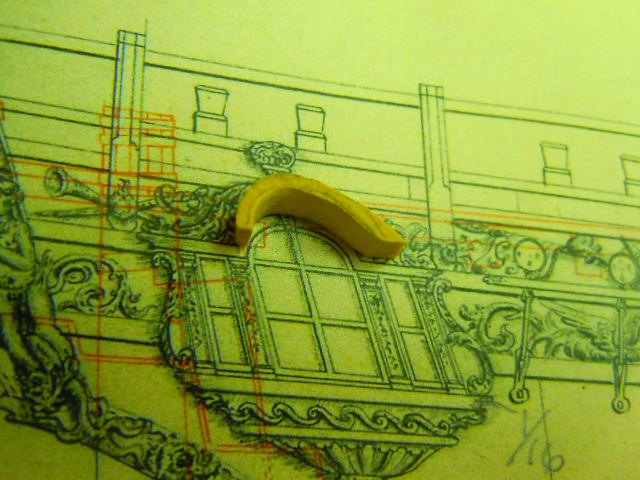
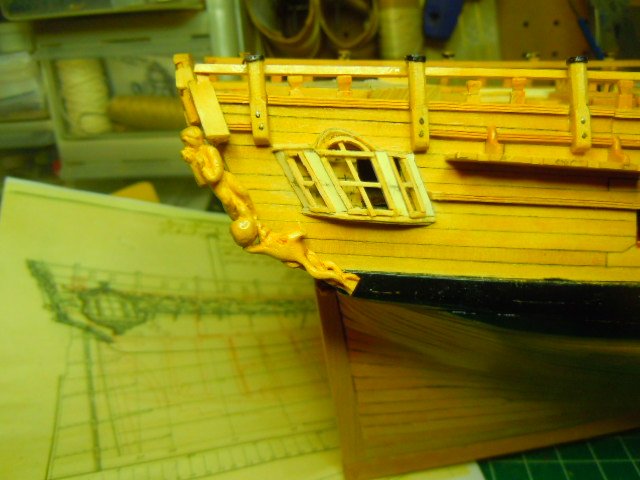
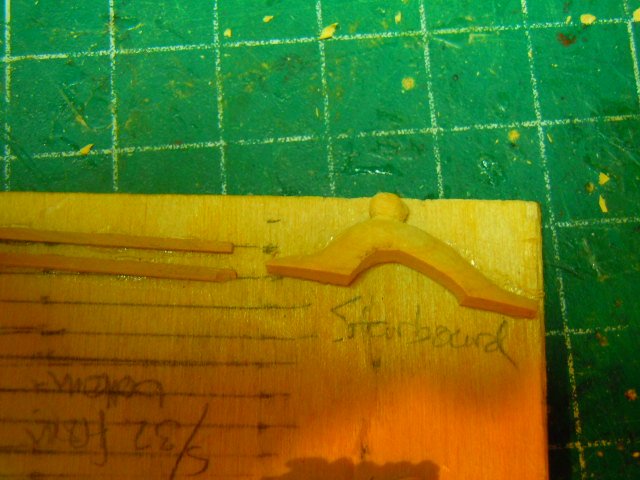
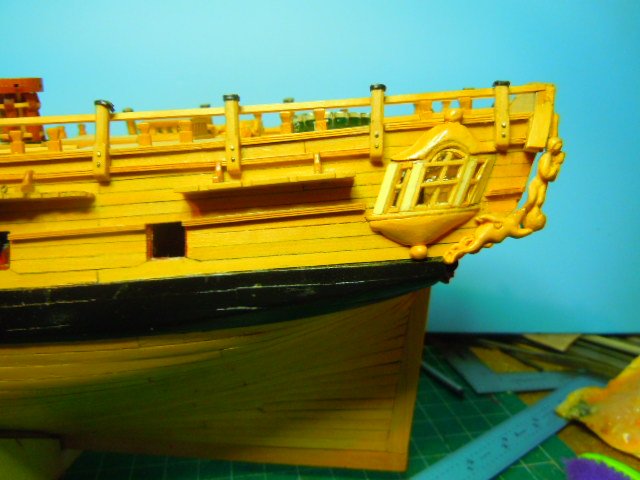
Following everyone's advice and encouragement, I embarked on the quarter badges, and have effectively completed them. I began by figuring out the placement, setting a tracing from the NMM plans where the badge would go. With that, I cut the pieces, again using tracings from the plans: In hindsight, I would have saved myself lots of headaches if I'd made the Upper Finishing first, and then cut the Upper Stool to fit it, rather than vice versa. Getting a tight fit between the stool & the finishing took half a dozen tries, because any deviation along the depth of the bell portion set the Finishing askew. At any rate, after getting the upper & lower stools in place, the next step was the munions and lights: Next I cut out the stools, once again by tracing the shape from the plans then gluing the tracing onto the stock and cutting it with the jeweller's saw (I gave away my scroll saw about 6 weeks ago and then came across an intriguing carving project that made me want it back ). Here you can see that I've glued the piece to a backing board that I used to shape it with chisels and files: In the end, this is where I ended up (this photo is of the port version, since it's the one I've actually finished): As for the decorations, well, I tried afixing some ribs in various configurations, but they all looked too big and clumsy. So I'm going plain here, even, at least for now, leaving off the decorative scrolls that go on either side. There's also the problem that I lost the pieces of the molded rail that I pulled off, and the scraper that I used to cut the molding broke. The chances of making another scraper that will fit the pattern at least closely are slim, but I'll give it a go. Thanks to everyone who encouraged me to take on the challenge of this piece. I learned quite a bit from doing it. Cheers, Martin
- 467 replies
-
- 11
-
-
- fly
- victory models
- (and 1 more)
-
Thanks for checking in Skip and Nils, and thanks for the nice words. Nils, everytime I check out your work, I get inspired to pay more heed to details, and maybe even figure out some innovative solutions to seemingly unsolvable problems. Skip -- the question of what to do when seems to arise every time I sit at the workbench. I've mostly been following the sequence laid out in FFM, but skipping a chapter here and there has led me to make a list of every thing I still have to do. As for carving, really, if your tools are sharp, and you're patient, you can surprise yourself. Cheers, Martin
- 467 replies
-
- 1
-
-
- fly
- victory models
- (and 1 more)
-
Hi Skip -- I do have a log going, though I'm very slow at posting updates. You can find it here:
-
That's a nice binnacle, Peter. And that second view along the deck is really impressive. Cheers, Martin
- 366 replies
-
- 3
-
-
- bellerophon
- victory models
- (and 2 more)
-
That looks pretty doggone nice, Skip. Now you won't have to worry about those pesky worms. Cheers, Martin
-
Hi Skip -- Your logic certainly seems sound. I think we all work out a basic idea of which position we want the guns to represent -- ready to fire, or simply secured against the seas -- and rig them accordingly. The main point here is that your work looks neat and realistic. Cheers Martin