Martin W
-
Posts
1,412 -
Joined
-
Last visited
Content Type
Profiles
Forums
Gallery
Events
Everything posted by Martin W
-
 Nicely done, Tim. There are lots of details there to look at and to draw any view into the inticacies of the build. I hope in your new house you find a place where you can admire your work. Cheers, Martin
- 164 replies
-
- 3
-

-
- fly
- Victory Models
- (and 4 more)
-
The two supervisors are doing a good job, because the one working seaman has tied those ratlines nice and neatly. Cheers, Martin
- 366 replies
-
- 3
-
-
- bellerophon
- victory models
- (and 2 more)
-
That is some tricky work with lots of problems to solve. Like you, I wish I had taken care of all that very early on, but there's no way of knowing for sure just how everything will line up. The shots of your process show a very handsome build, regardless of all the tooth-grinding you probably went through. Cheers, Martin
-
Nice work as always, Peter. Your Bosun looks like he's just about to haul the boat up by himself. Even for a strong-looking guy like him that would be a feat! Cheers, Martin
- 366 replies
-
- 1
-
-
- bellerophon
- victory models
- (and 2 more)
-
Nice work, Ron. I'm pretty much at the same stage and dreading the task of figuring out/ guessing at the angles of the lower plates. Most of all, I have to admire your clamps. You hint that you made them? Wow! How about giving us some background on those? I have long thought that miniature handscrews would be invaluable in all sorts of situations, and so I would love to see how you fabricated them. Are they beech? ash? Cheers, Martin
-
Some attractive developments, Ron. Your steps are very neat work, indeed. I like tung oil for lots of applications, but it takes a long time to polymerize if the weather is at all cool, and until it does it serves as a magnet for dust. But there's nothing like it for deepening the natural tones of wood. Cheers, Martin
-
Well done Ron. I have to admire your determination to work through a problem. To my mind, that's one of the key attractions to model building. Setting up, or designing a jig to get something done is very often the biggest step. But, if you're like me, in 5 months when you have to do something similar you'll look at that those holes and wonder how you ever got them done. Cheers, Martin
-
Thanks Peter, BE, and Mike. Peter, Winkie is probably a little too good with those small pieces, which go straight into his mouth. I'm not sure how longer screws will work, since I don't know exactly what they would screw into. I'm going to give that a try if I can find some longer screws that are still thin enough. They have to have the length to pass through the base and then into the keel and plywood. BE -- He hasn't encountered any bears . . . yet. He and the turkeys mostly ignore each other, but the herd of deer that passed through our woods a few mornings ago set him off growling and barking for an hour until I took him out and let him sniff their tracks. The Proxxon mill is definitely on my list, along with all the full-sized power tools I really, really need to make my life complete. Thanks for checking in, Mike. The work space is big, but I will probably manage to fill it up all too easily. Photos are on hold for a while, as the charging port on my phone has gone haywire. The repair shop says it might get a part in next week. Meanwhile, I've got the three lower masts shaped, and am finishing the cheeks for the foremast. I'm hoping to get the upper masts done this afternoon and tomorrow, and then I can start on the mast heads. I'm reviewing lots of build logs in hopes of getting the details right. Cheers, Martin
- 467 replies
-
- 4
-
-
- fly
- victory models
- (and 1 more)
-
Ahoy Nils -- Sorry to see that you've laid aside your build for a while. I think many of us have faced challenges we'd never expected before -- I've been following the difficulties in Germany with the vaccines, but I hope you & Marianne get yours soon, and that you find your way back to the Zeesboot. Cheers, Martin
-
Thanks to everyone who clicked "like" -- it's comforting to know I haven't been entirely forgotten. Great to hear from you, BE. I'm with you entirely on having as many electrical outlets as possible: I like to have them no more than 4 ft apart. My plan is to get two circuits wired at 120v (I'm still in the States) with 20 amps apiece to cover all the basic power tools, and two other circuits at 220/240 v dedicated to the saw and dust collector. Right now, though, I'm just trying to get my hand back into the build. Last night I was rooting around in my wood supply and found 2 masts I'd made in Oklahoma. I have no recollection of working on them. One disappointment came a few months ago when I was using my milling machine to cut a small mortise. As I began lowering it for the cut, the turning knob fell off. Then I noticed that the 3 knobs for the X-Y table were also badly bent. Who knows what happened, but I haven't been able to get it working at all. As long as I've had it, it's mostly been the cause of bad language on my part, but it did help with some delicate cuts. I've started looking at the Proxxon mill. Here is my young apprentice, Winkie: I'm off to cut cheeks. Martin

- 467 replies
-
- 3
-
-
- fly
- victory models
- (and 1 more)
-
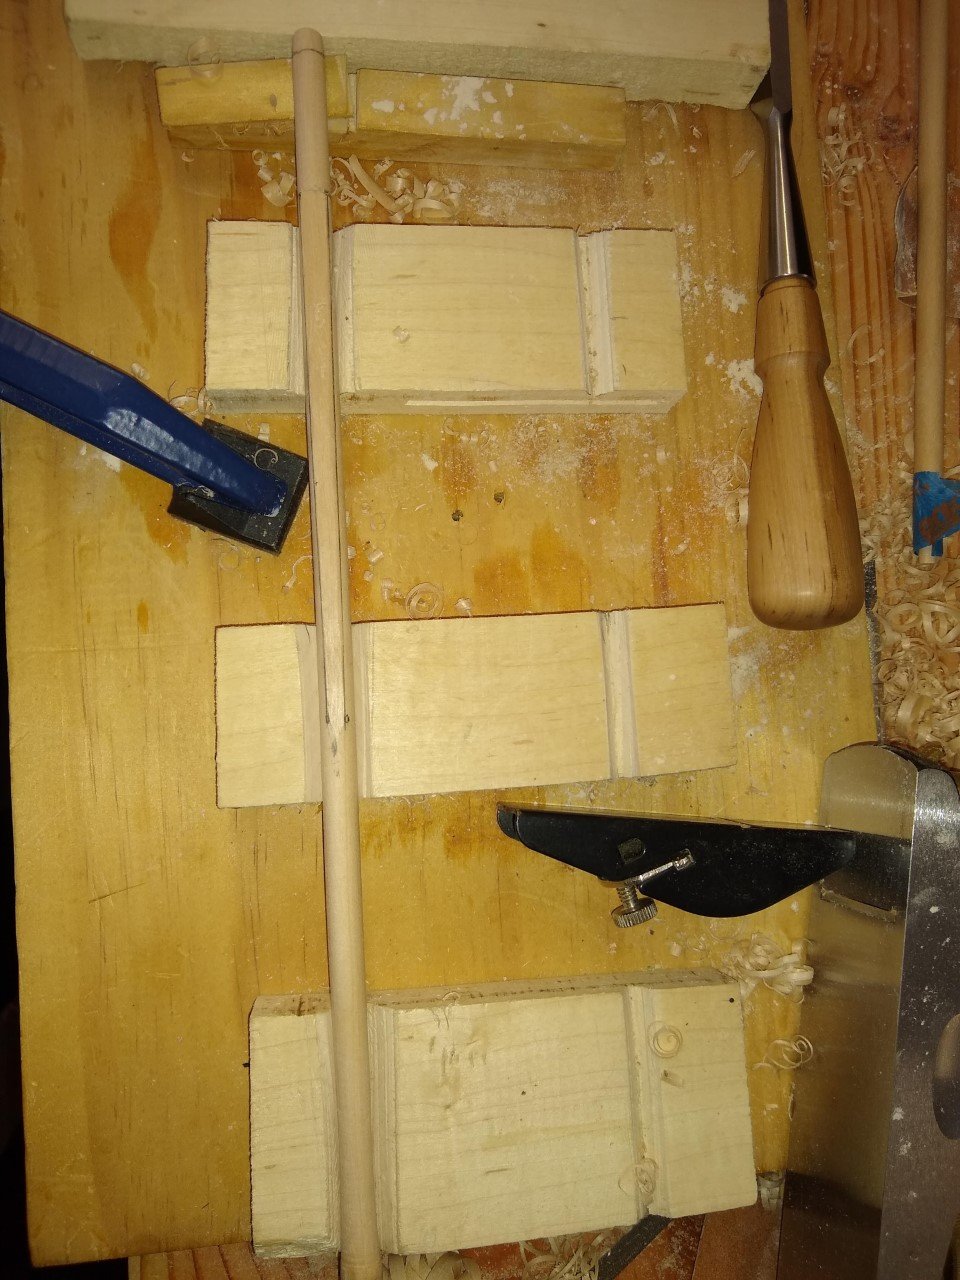
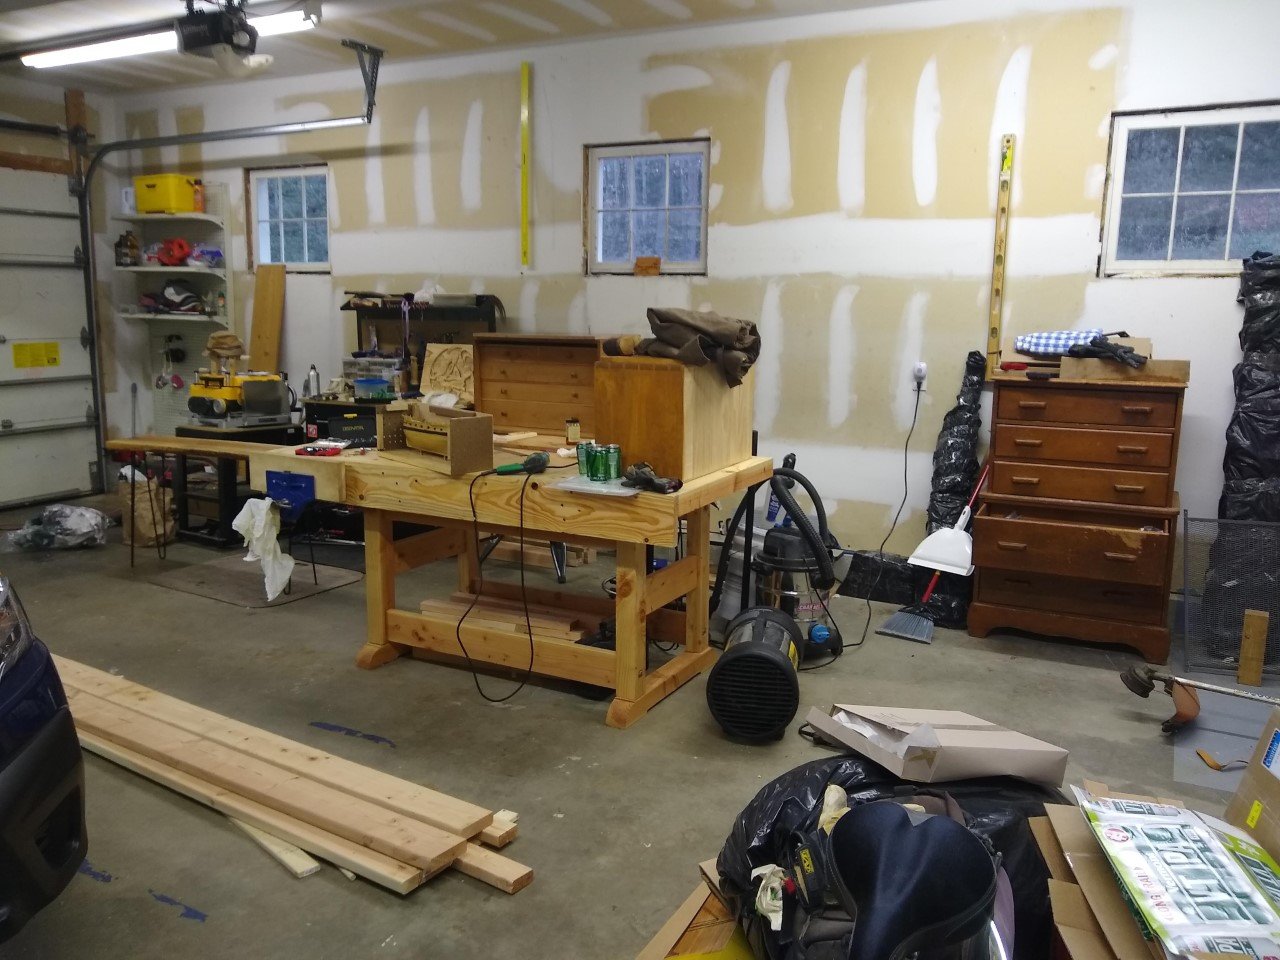
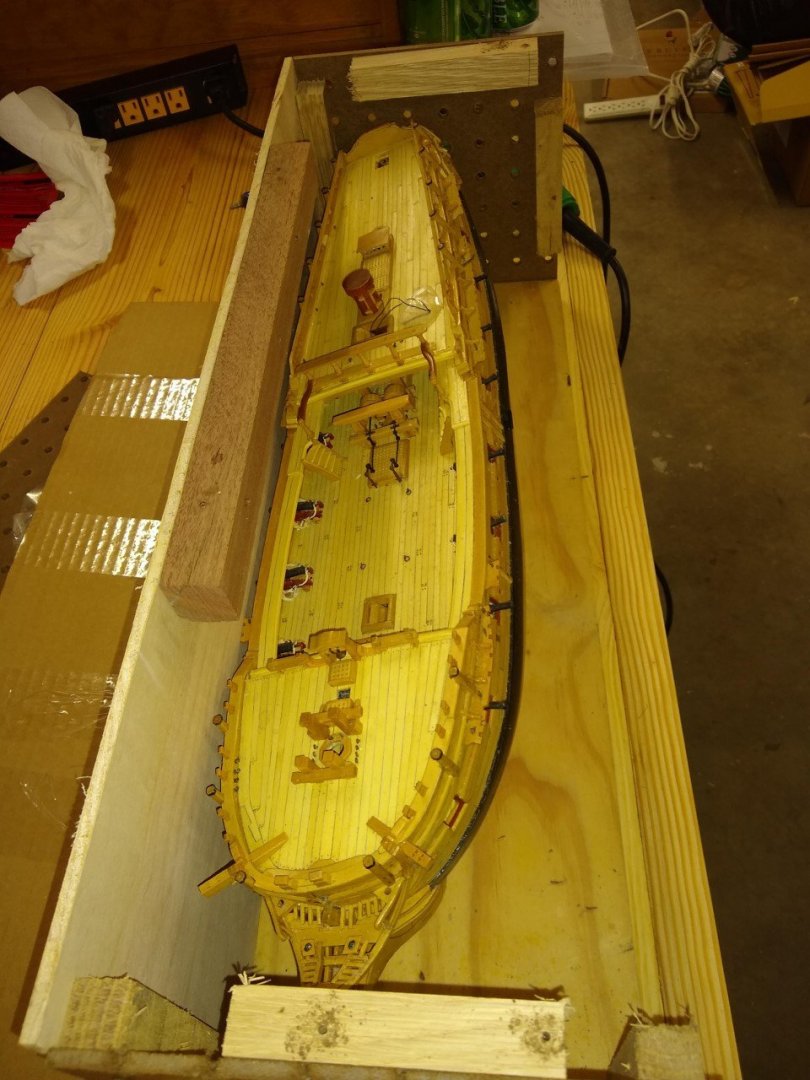
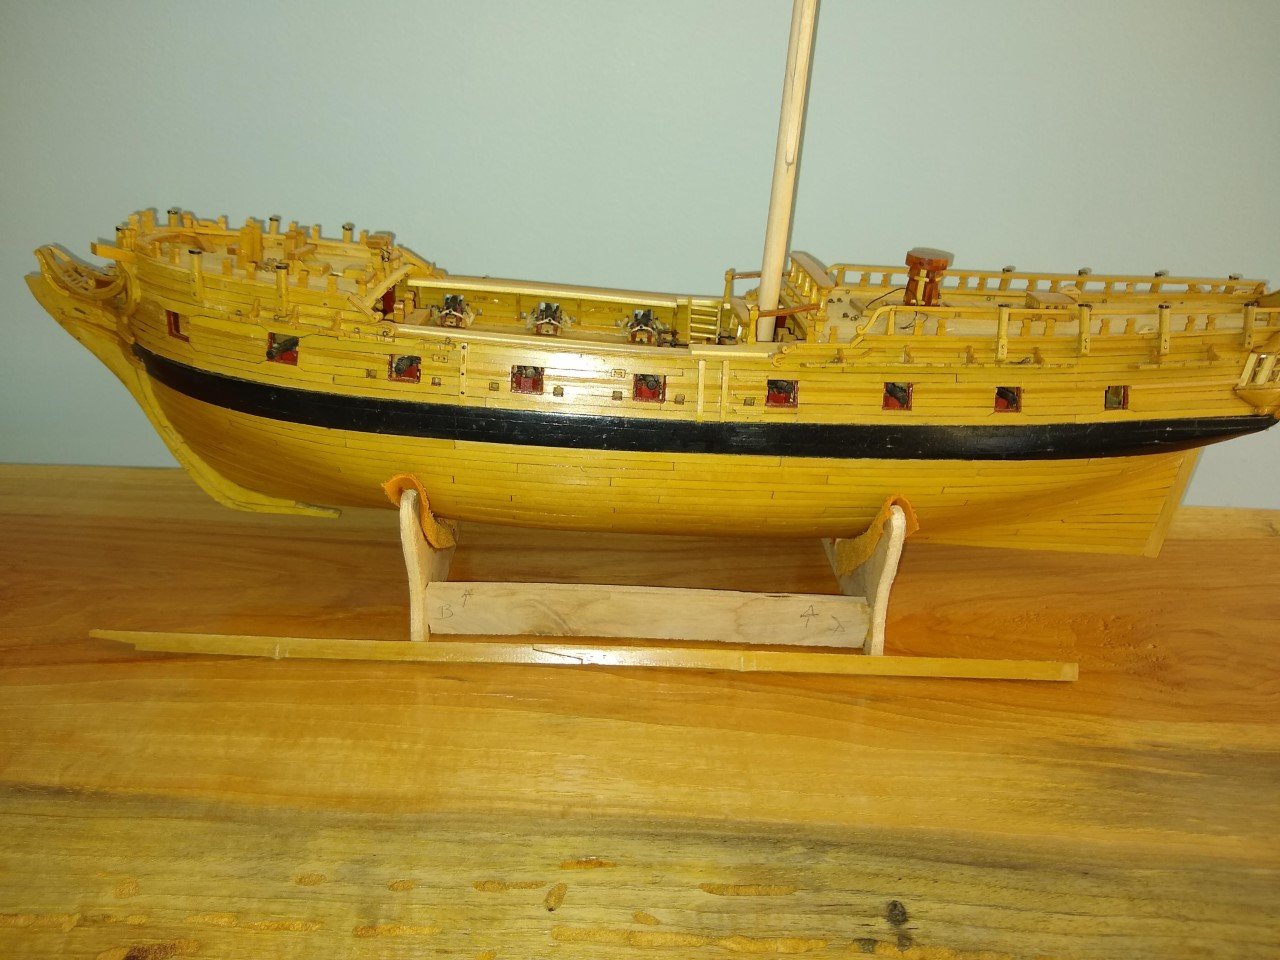
And here I am 8 months later. There was an unbelievable amount of work involved simply in getting the new house organized, and the pandemic hasn't helped. After I got to a point where I could begin to think about modelling again, I had to set up a shop/boatyard somewhere. This house has a large basement and a very large garage, but neither has adequate power. The garage is heated and insulated, it has better light, and in the warm weather I can open the door and let my dog (a rescue who is still afraid of just about everyone) hang out. That became my choice: The workbench I made in the autumn, it's just construction grade lumber but will do the trick for a while at least. I hope that over the next several months you'll see the overall area improve as I paint the walls and figure out something to lay over that hard tool-damaging cement floor. One setback came when I unpacked the Fly. Both it and the Rattlesnake made the trip just fine, but the Fly stayed in its shipping container until just about a month ago. I kept it in the basement thinking that it would be safe from all the jostling and re-arranging we'd been doing. My guess is that the crew who installed the central air system might have bumped into the crate, and the result was that when I carried the crate upstairs I heard a sickening rattling inside. Here's what I saw when I took the top board off: That's a serious list. Luckily, none of the delicate details were damaged -- it was only the keel that snapped off, and I can easily glue that back on, though I doubt I'll be able to use the mounting posts again to display it. Now to work: A few pieces of deck furniture remain to be constructed, but I think it's time to start on the masting and rigging. I have a bag of birch dowels, but they are all too short to serve as masts. So I got some birch from the Lumberyard which I can cut down to narrow square stock for the masts and spars. I've got the foremast shaped, and am now working on the mainmast. Here I'm cutting the area for the cheeks: I'd like to use my Proxxon lathe for these, but I don't have the extension bed, and the main mast anyway is too long for the regular bed. Once I finish the basic shaping of this mast, I'll move on the the mizzen, and then upward. Cheers to all, Martin

- 467 replies
-
- 7
-
-
- fly
- victory models
- (and 1 more)
-
Congratulations on a fine build, Jason. As I and others have already said, the quality of your work is most impressive for a first build -- it's even hard to believe that this is your first one! Your photos show off the many nice details that will give viewers lots to look at. You'll definitely want to get some kind of case, or the dust will coat the rigging in no time. Such a beautiful model deserves a proper display. (And if you find a place nearby to help you build a case, let me know!!) I can absolutely agree with you that the journey is the more enjoyable part. Figuring out how to solve the problems posed by each detail is a delight matched only by researching the 18th century when these magnificent ships really did get built and sailed. Do you have plans for the next build? All the best, Martin
- 800 replies
-
- 1
-
-
- snake
- caldercraft
- (and 1 more)
-
Very impressive, Jason. I think there's a good reason this detail gets omitted so much, and that is, as you say, it isn't easy to figure out how to get them done. Your detailed account solves that problem for the rest of us. Many thanks! Cheers, Martin
- 800 replies
-
- 2
-
-
- snake
- caldercraft
- (and 1 more)
-
Nice work on the bands. I always had a bad time with those, as the angle of the timber made fitting anything flat a challenge. You've worked it out well. Cheers, Martin
-
Your strategy of alternating sounds good, and if I ever manage to get back to work, I plan on following it. Those are nice boats, and they add quite a bit of visual appeal. Cheers, Martin
- 366 replies
-
- 1
-
-
- bellerophon
- victory models
- (and 2 more)
-
That's a great way to finish off the year, two builds completed and a glass of merlot! The clarity of your photos always brings out your meticulous work and provides a reference source for all future modellers. Really, there could be a whole MSG calendar of your work (I'd buy it). But, oh, I don't envy you taking on a bathroom remodel. I hope English plumbers, tilers, plasterers, et al work at a steadier pace than their peers over on this side -- how many times have I heard "two months tops" turn into six long months of dust and no-shows! Best of luck, and, yes, let's all hope for a better '21. Cheers, Martin
- 261 replies
-
- 5
-
-
- muirneag
- vanguard models
- (and 2 more)
-
Great to see you back at it, Ron. Frankly, I would be terrified, utterly terrified even to try painting letters. I love carving, but even there have only barely tried doing letters, especially since they require their own technique. But your work looks pretty doggone good to me. And with the eagle above the name, the overall appearance is handsome. That gap in the planking shouldn't be at all hard to fix -- you might even just slice a long sliver off some stock and set it in place. Since the transom is painted, it could blend in well. Cheers, and Happy Holidays! Martin
-
Hi there BE -- I definitely have to agree with you about the lovely lines of these boats, and your attention to detail large and small brings out those lines at their loveliest. Merlot, I find, is appropriate to any season. Cheers! Martin
- 261 replies
-
- 2
-
-
- muirneag
- vanguard models
- (and 2 more)
-
Wow! It all looks really good, Jason. I'm jealous! Cheers, Martin
- 800 replies
-
- 1
-
-
- snake
- caldercraft
- (and 1 more)
-
Hi Sooty -- I just came across your build. It's always good to see a Fly/Pegasus build getting started. It's a lovely ship to watch taking shape, and these kits provide lots of learning opportunities. I recall that Nils (aka Mirabell61) put the full panoply of sails on his build, and you can see how it looks here: You're making fine progress, and I'll be eager to watch how you go from here. That's a very nice Man Cave! Right now, I'm trying to decide between my basement and the garage. Cheers, Martin
- 59 replies
-
- 1
-
-
- Fly
- Victory Models
- (and 1 more)
-
That's a very intriguing jig. Do you run the trim router and the lathe at the same time, or is the lathe simple holding the stock that you mill with the router? Cheers, Martin
-
BE -- I just to have to comment on your phone call -- the thought that someone would actually answer nowadays, and that two strangers could have a talk about a shared interest is deeply gratifying. Maybe a bit of civility still exists in the world, at least among ship modellers! Cheers, Martin
- 261 replies
-
- 3
-
-
- muirneag
- vanguard models
- (and 2 more)
-
Trigonometry? Yikes! That takes me back to the traumas of high school. But your very practical explanation of the procedure is helpful, Peter, and when/if I ever manage to get my new shipyard set up I'm going to keep it in mind. It's the masts & spars that I need to start on, and I've got the wood, I'm just waiting, waiting. Cheers, Lento Martin
- 366 replies
-
- 1
-
-
- bellerophon
- victory models
- (and 2 more)
-
It's great to see how everything is coming together. I really like your work on the bowsprit netting, it's a delightful detail. Cheers, Martin
- 800 replies
-
- 1
-
-
- snake
- caldercraft
- (and 1 more)
-
One of the most delightful and entertaining aspects of following your logs, BE, is your unmatched talent in finding uses for those little pieces of detritus that litter builders' lives and workbenches. My word, a screw head! That's just as good as the bristle from William's brush. Wonderful. Martin
- 261 replies
-
- 1
-
-
- muirneag
- vanguard models
- (and 2 more)