HOLIDAY DONATION DRIVE - SUPPORT MSW - DO YOUR PART TO KEEP THIS GREAT FORUM GOING!
×


Martin W
-
Posts
1,412 -
Joined
-
Last visited
Content Type
Profiles
Forums
Gallery
Events
Everything posted by Martin W
-
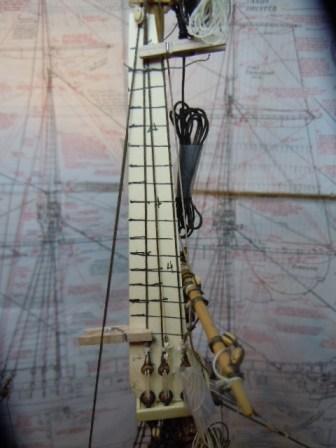
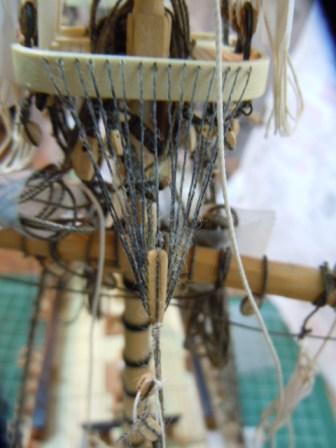
 Oh, and I thought I'd add one last image. David Antscherl makes a very, very useful suggestion for keeping the ratlines spaced evenly. As you can see here, it entails marking the ratlines from the plans onto a piece of card stock that is then clamped onto the shrouds. Every fourth ratline is tied first, to give the proper spacing, then the ones in between. I found this strategy to work well, and it's quite simple. Cheers, Martin
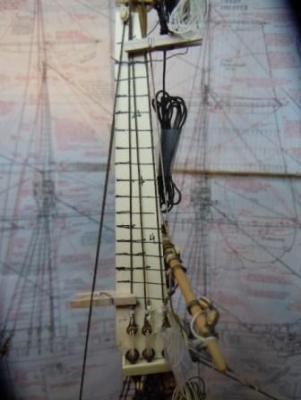
-
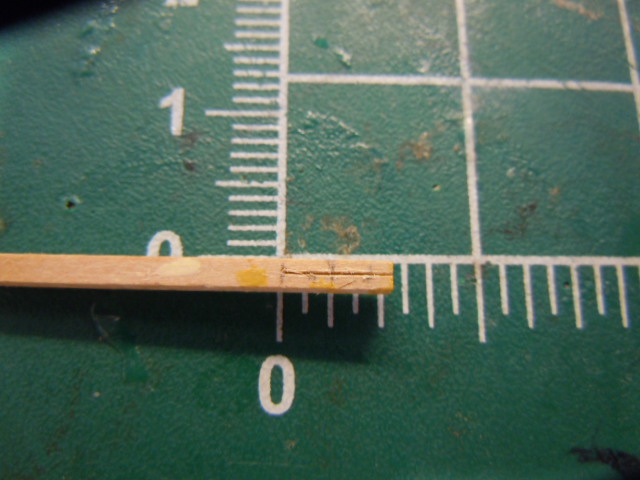
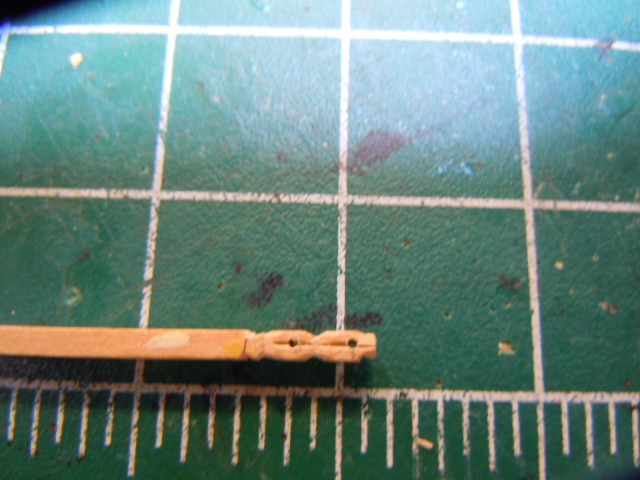
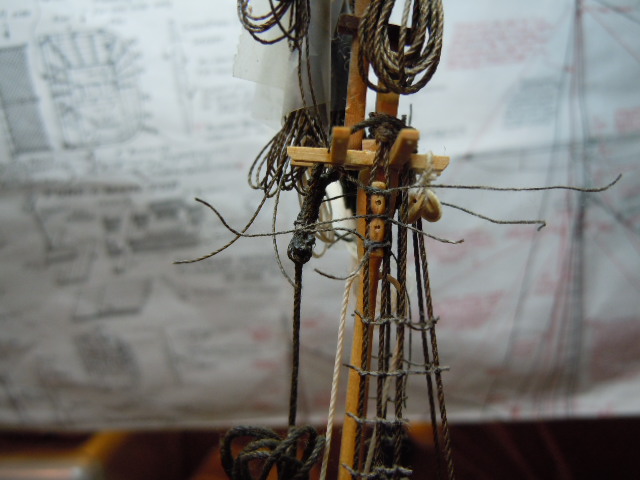
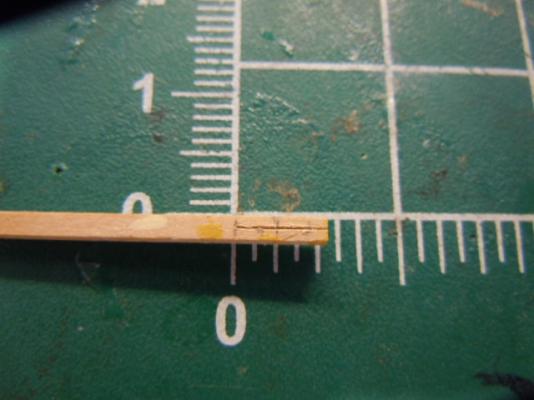
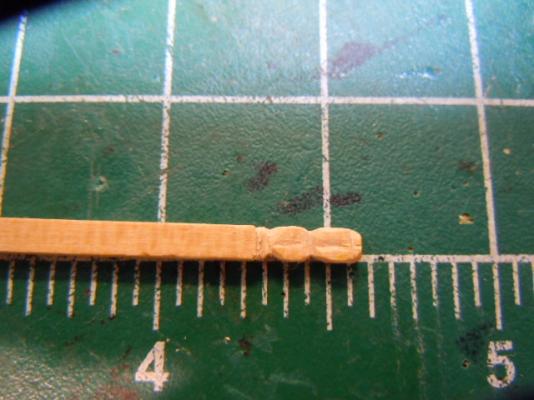
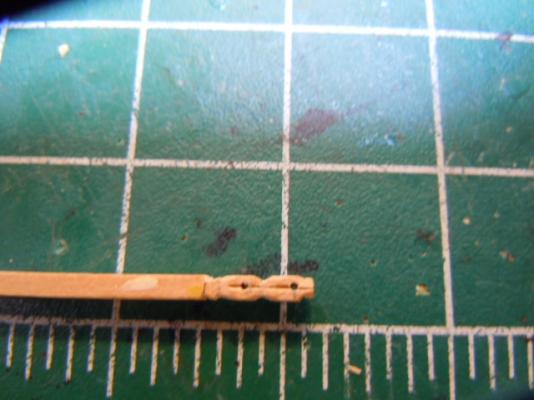
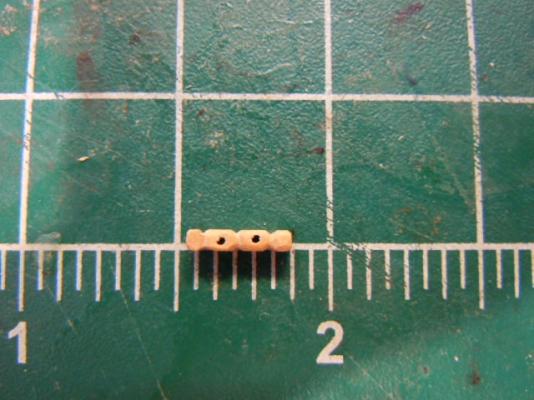
Hello again -- It's been a long, long time since I've updated this log. I've spent just about all my time admiring everyone else's work and haven't tended to my own. So I thought I'd do a quick and hasty post, just to record one or two details (apart from the ratlines, which have taken up endless days and nights). The first is the crowsfeet, which I'd long ago promised myself at least to try, since I think they add a beautiful detail to a build (at least when they're done well). I've done them for the mizzen and the main mast so far and the results are, well, ok. Since I put the sort of rail around the top, that's where the holes for the crowsfeet had to go. I had to drill them by hand, and on a surface that is slightly curved, and so -- as is painfully visible in this photo -- the alignment isn't at all straight (and I hadn't even noticed how far off it is until looking at this). The line itself is .2 mm cotton, dyed. It has a kind of gungy look to it here as well, which could be from the wax I put on it. But, again, that's not visible, unless you get right up to it with either a camera or an opti-visor. Oh, and in this picture, the lanyard is flopping, but in reality it's taut (I fixed it after shooting the picture). Next I had to cut some sister blocks to go in the topmast shrouds. These don't come in the kit, and I still don't have my new mill set up (another, and very long, story there), so I cut them out with an exacto knife, beginning with some pencil marks that just delineate where the curves of the blocks themselves should go: Next I rough cut them: And then I cut it off the stock. And then here it is in place (with all the threads yet to be trimmed): Now back to more ratlines. Cheers, Martin


-
Help. Need 4 5mm deadeyes.
Martin W replied to Ulises Victoria's topic in Masting, rigging and sails
Hi Ulises -- Here are the deadeyes I got -- they're not from ME, but they are Model Shipways, which is the same brand I believe that ME distributes. These are 5/32" walnut. They don't look as nice as those in your photo, but that could have something to do with size. Anyway, I hope the picture helps you choose. Cheers, Martin
-
Hi Jon -- That's a lot of custom cutting and fitting, not to mention waiting for the glue to dry. But the results look very promising indeed. They make me begin to rethink the possibility of doing something like this for my own build, though I'm about to fit the jib in place, so I'd better decide fast. Your cat looks more than content -- that look could even be seen as a warning: THIS IS MY CHAIR NOW! A handsome fellow, though, and surely seaworthy. Cheers, Martin
-
Nice painting -- the contrast between the white & black, along with the red gunports, really bring out the lines of this ship. Great!! Martin
-
Nice photos, JPett -- all the different angles consistently show her to be pretty doggone true. The Rattlesnake is a pretty ship, and your build is doing her justice. Cheers, Martin
-
Help. Need 4 5mm deadeyes.
Martin W replied to Ulises Victoria's topic in Masting, rigging and sails
Thanks for that Tom. I did order some from another source, and the brand is Model Shipways. They're ok, but nothing compared to those in Ullises' photos. I'll order some from ME just for comparison. Cheers, Martin -
I'll be looking forward to your decision of how to handle those next details. I still haven't tried doing the seats of ease, since I'm tangled up in rigging (carving sister blocks -- also left out of the practicum), but I'm kinda of the mind that they wouldn't be too hard. It's the grating that still plagues me. Pasi's photos show that he cut the notches for the grating before installing the top rail. I don't know how easy it would be to go back and cut them with the rail installed. And logically there has to be something for the men to set their feet on while "at ease" on the seats. Your work is lovely -- the carving is very nice. Cheers, Martin
-
Help. Need 4 5mm deadeyes.
Martin W replied to Ulises Victoria's topic in Masting, rigging and sails
This raises a big question for me . . . and possibly answers one. The deadeyes in my kit aren't very good, in that the holes aren't placed consistently, and sometimes all three of them come close to being on a single line. So has anyone actually dealt with the Ship Models site who would vouch for them? Is that now the only place to get consistently good deadeyes? Has anyone made their own? cheers, Martin -
Ahoy back to you, mate -- good to hear (read) your voice back in the mix. As always, your struggles are edifying and bring up some valuable details in technique. As for the standard of "square" on a structure that simply is not square, I think you hit on the solution when you referred to the need for a "graceful flow." Square is an unobtainable ideal, but graceful flow will always please the eye! Cheers, Martin
-
Hey, that looks really, really good, Jon. It actually even looks as through it had been carved into the holly. Well done. Martin
-
Nice colors on that 1st mate, and terrific ears! Ahoy, (arf to you) Martin
-
Four hours -- whew! I'd have been screaming bloody murder by then. Your patience has served you well, and I must also admire your steady hand. I had a slight and very brief ambition of doing something like this and realized that the letters would end up looking like they'd been painted by a drunken crew. What's this about your dog? I'd say the one thing more important than a big work bench and a fridge full of beer is a dog. Cheers, Martin
-
Jon -- this is looking really good. Your strategy for keeping the measurement of the rails exact is very interesting, and clearly effective. I wasted several pieces that were consistently too short, so I wish I had your geometrical sense. I also like that full shot of your build. The contrasts in the different woods comes out well. Cheers, Martin
-
Thanks Jon. I'll try to post some photos, along with the notes I've been taking on thread diameters and so on. Cheers, Martin
-
Hey thanks for saying that. But I gotta tell you that I get myself tangled in knots that I have to undo plenty of times. Cheers, Martin
-
Hey Eric -- I posted an answer to you on JSG's log (hope he doesn't mind too much), but here's a link to the log I started back in the spring, added to a few times in the summer, and haven't done much to since: http://modelshipworld.com/index.php?/topic/1048-rattlesnake-by-martin-w-mamoli-kit-bashed-164/ Rigging goes SO slowly that once I got involved in basic knot-tying, it seemed like putting up new posts would get very repetitious very fast. But I definitely agree with you that seeing other Ratt builders at work, and talking about familiar details helps keep up the inspiration quotient. Cheers, Martin
-
JSG -- I hope you don't mind if I respond to Sport briefly: Yes, i do have a build and a much-neglected log somewhere. I'm struggling through the rigging, but since I only get about an hour each night to work on it, I haven't posted very many photos. I've followed the same practicum as JSG, but have departed from it once starting the rigging. Now back to THIS build: You're right that those hawse holes & pieces are fairly easy and straightforward. And what a relief, too, after all that tricky stuff. Cheers, Martin
-
Actually, I didn't know you had called it a wolf. I remember Bob Hunt calling it that, which makes no sense, because it's a standard emblem taken from hunt & ecclesiastical design, neither of which would ever have a wolf. And I've looked at that detail in Hahn's plan, it's just that I haven't figured out what to squeeze into that VERY narrow space. I'm off to my own shipyard! Cheers, and will be looking forward to seeing more of your progress, Martin
-
Man, I wish I could help you out with the lettering. I'd really like to do something like that myself, and have thought of carving a raised plate but a) my actual handwriting is so bad that I don't think any lettering I fashioned would be legible, and the wood that the carving went on would probably have to be too thick. Maybe there's some sort of stenciling you could use? But I do like your molding. You're right that it adds a good effect, especially with the paint (is that color "ochre"?). Cheers, Martin
-
Nicely done, JSG. The figurehead has some good detail, and I like the fact that you found some way to fill in the gap between the running fox (NOT a wolf!!!) and curlicue supporting the figurehead's foot. Bravo! Martin
-
I can't say that I yell at the kids, because their parents usually hustle them indoors when I bang my finger with a hammer or something and let out a few sailor-type expletives. As as for the gas, ahem, I worry increasingly that I might have reached that stage. And I don't know how many builds I have in me. When I look over my skills, I hope I have enough builds to get at least one where I notice something other than flaws, mistakes, total screwups. But I worry that buying tools, wood, nice rigging might be anticipating a longer modelling career than I actually will have. But who cares -- it's fun and a lot safer than using a full-sized table saw to cut plywood sheets (which I actually spent the weekend doing). And as long as the cat doesn't complain, you've got every right. Cheers, Martin
-
Nice work. I can't help being impressed by the dispatch with which you advance. Cheers, Martin
-
That's a very intriguing set up, and the results are impressive. I'm going to have to study your photo to see how I might replicate the arrangement. And congrats on the new camera. I keep telling myself to invest in something better -- and I spilled beer all over my Coolpix this weekend, so maybe now's the time. Cheers, Martin
-
What do you use your mill for ?
Martin W replied to captainbob's topic in Modeling tools and Workshop Equipment
Richard -- you might just take a look at Blue Ensign's log of his build of the Pegasus -- he uses his mill for some very nice results. And, well, I'll even admit that on the basis of what he's done I sunk some hefty cash into a mill of my own. Cheers, Martin