HOLIDAY DONATION DRIVE - SUPPORT MSW - DO YOUR PART TO KEEP THIS GREAT FORUM GOING!
×


Martin W
-
Posts
1,412 -
Joined
-
Last visited
Content Type
Profiles
Forums
Gallery
Events
Everything posted by Martin W
-
 Hi Mike -- I just found your log and read it through. You're doing some good, careful work so far, making sure everything lines up. These early steps are really important, since they will affect almost everything you do later on. The other Rattlers around are a good crew. And this is a nice model with some pretty lines, so I think you'll get lots of joy from your build. I'm almost finished with my own Rattlesnake, and only started my log with the rigging (and have added to it in the most desultory way). But I'll follow your build with interest. Cheers, Martin
 -
That's the spirit, Jon! Keep going. I also learned more than I can say from Bob's practicum. But it seemed to me then, and now, that his rush was self-imposed, and once his deadline had passed he could have gone back and made corrections to help those of us blindly following his lead. It's too easy to gripe about Bob, though, and I'm going to stop doing it! I've only got one or two lines of running rigging to tie off, and then I'll mount my Rattlesnake and find her permanent berth. Cheers, Martin
-
Sorry to hear about the mixup, Jon. I seem to recall noticing that Bob's dimensions didn't work, but since I'd already departed from his very complicated strategy for the tops, they didn't interfere too much. This is one more example of Bob not proofreading adequately, or giving a description that simply does not work. It's frustrating. After I made the tops with holly to match the deck, I spent time looking at other examples of tops, and realized that the tops don't need planks, and probably shouldn't even have them. Most tops are of a solid looking piece of wood (thin plywood) with strips radiating from the center that would serve as joists. Once you get all the deadeyes and other bits of rigging in there, you won't see much of the tops anyway. Keep at it. Cheers, Martin
-
Hi Peter -- I can't help but admire your work on the sails and the flag, but most of all on the rigging. It all looks neat and smooth. Your photos also show up plenty of detail to help newbies like me understand the placement and dynamics of running rigging. Cheers, Martin
-
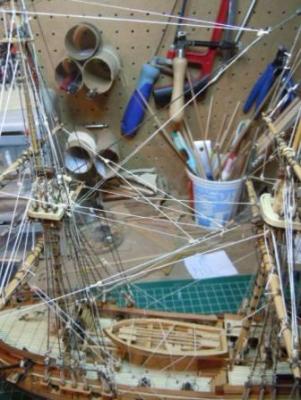
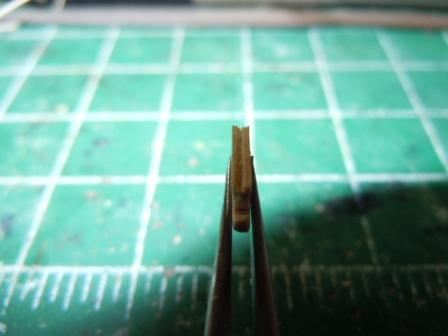
Thanks for checking in, guys. Scott, that rudder post represents my discovery of just how easy it can be to carve boxwood, especially while wearing an optivisor. Thanks for the hint about the false splice, BE -- I'll go hunt down Gil Middleton's build log toute suite. Since I have only 2 sets of braces left on the Rattlesnake, though, I'll have to make a note of his strategy in my written mnemonic guide so that it will be available in, oh, maybe 4 or 5 years. That clutter is always a nuisance, and has led my true wyfe to call me the nuisance, since it seems to follow wherever I go. I've found a black screen that I thought of trying, but it's far too big and awkward for that little workspace (I had a nightmarish vision of the screen falling on the ship, and promptly decided to look for another solution). I'll be looking to see how your blue background brings out both the tarred and untarred rigging. When I went hunting for beads, I had hopes of finding tiny wooden ones. Nothing doing. Then I lowered my sights to getting beads that weren't shiny. Seems I struck out there as well. Once the temperature gets up above 20 here, I might go out and start setting up my micro mill, and try to make some actual Trucks and Parrels. At this scale, I fear they might be pretty tiny, but that's part of the sport, right? Cheers, Martin
- 104 replies
-
- 1
-

-
- rattlesnake
- mamoli
- (and 1 more)
-
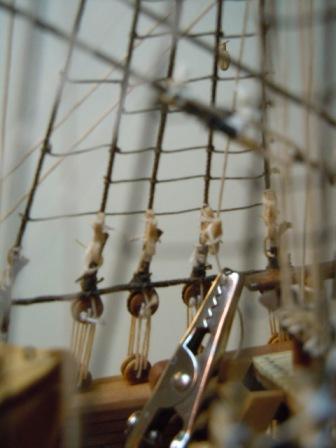
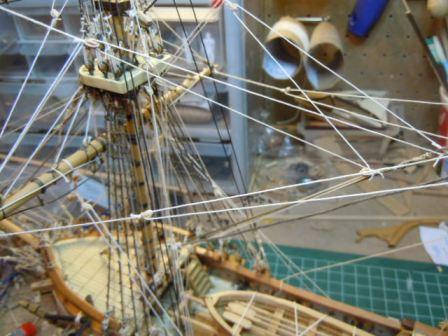
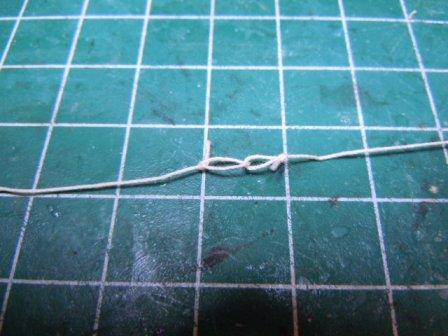
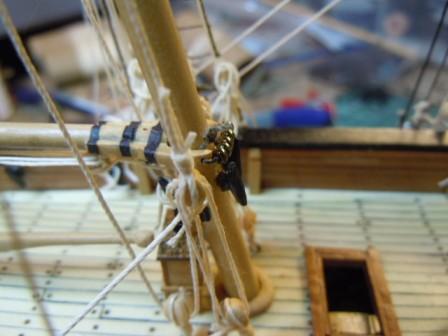
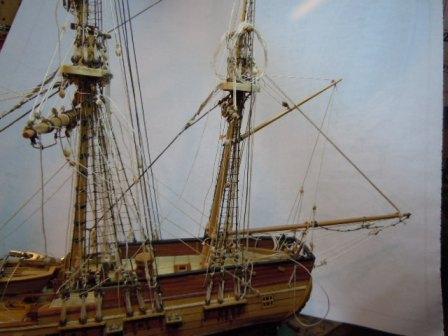
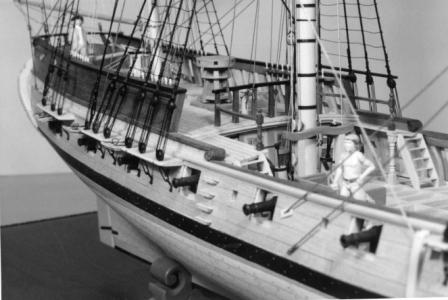
Well, I have slowly made my way toward the stern, with the mizzen and booms. I've taken photos along the way, but have found that rigging gets hard to see in the better photos and looks utterly confusing in the worse photos. I'm going to have to study the photographic techniques of other riggers so that on my next build I might find a better angle or distance from which to capture the way the different lines move in countless directions. Suggestions here would be more than welcome. Here is what I've done. I finished off the Fore Mast by securing the Braces. These belay onto various parts of the Main Mast or MainMast rigging. Here are the Fore Braces that start from the Main Fore Stay then pass to the Pendant Blocks on the Fore Yard. You can also see the Fore TopMast Stays running in pretty much the same configuration. And here you can see all the Fore Braces running back to the MainMast rigging. Never mind the clutter in the background, please. Since I could only muster up sheets of paper that were white, anything that would conceal my slovenly work habits tended to cancel out the lighter rigging. I might mention that there is a discrepancy between the Mamoli and Model Shipways rigging plans here. Mamoli shows the ForeBraces going from the Pendant Blocks back to a block on the Mainstay, while MS shows them passing to blocks under the Main Top. I chose the latter option, since my Crowsfeet set up an obstacle that I'd already had to work around. The reason I rigged the Braces of the Foremast is that I was pretty much done with the Midships area, and wouldn't need to reach in any more. In other words, I completed the rigging for both Fore and Mainmasts (the lifts, clews, etc), and then took care of the braces. Similarly, I am putting off the braces for the Mainmast until I finish the yards and booms on the Mizzen. First step on the Mizzen was the Jeers. Sorry, I don't have a photo for this, and probably because it was too painful an experience. I had neglected to attach the Jeer Blocks to the eyebolts in the deck (hmm, didn't I go through something similar with the Main Mast?), and so I had to take that back step first. I used 5mm blocks, since the rigging line for the Jeers is pretty heavy -- .6 mm. The Mizzen sheets, like the topmast sheets for the Main and Fore, connect to the Clews without any blocks, but with a knot. I chose to use interlocking bowlines. One problem I have had is that the tails of a lot of knots & seizings hang in gravity-defying directions. I've been trying to add glue to them to make them hang down in adherence to the laws of Newton, but haven't had much luck. I've also been trying just to wrap them around the main stem in various configurations, just to hide them a bit better. Again, hints from experience riggers would be invaluable. The Topsail Halliard Tye is something I couldn't get a decent picture of, since it's a long configuration. The halliard itself (this is the same for all 3 masts) ends in a single block through which passes a line with a double 4mm seized to each end. Through each double block there passes the lanyard that begins from the becket on the 4mm block seized to the eyebolt on the channel. The lanyard goes up to the double block, down to the single, back up to the double and then is belayed on the kevels. Now back to photographs. The Boom came first, and also required some blocks on the deck for the Topping Lifts. In this photo you can see the Jaws of the Boom, and the "Parrels" for which I used some beads from the local hobby store. I don't care for the shininess of these beads, but after staring at packages of several species for nigh on half an hour, I chose what seemed the darkest and the best size. You can also see in the above photo those accursed deck blocks. Halfway to the end of the Boom, the Boom Sheet belays onto a block seized on the Iron Horse. In this last shot, you'll see that I've attached the Gaff Boom. The jaws of the Gaff are a bit lower than I'd like, but that is where they insisted on going as I focused mainly on getting the Peak Halliard as horizontal as possible. You can also see the double Horses (the rope breed, not the iron) running out the back end of the boom. And you can see the Vangs coming down from the end of the Gaff -- the rigging of these is very similar to the Topsail Halliard Tyes (which are just barely visible here). The large coil of rigging line hanging from the Mizzen Top is one of the Braces. Since I've completed the running rigging for the Mizzen, I'll take care of the Main & Mizzen Braces this week, which should wrap up the rigging. Cheers, Martin
- 104 replies
-
- 1
-
-
- rattlesnake
- mamoli
- (and 1 more)
-
Good to see your steady progress. As for the stern decoration being level? It actually looks to me as though it is, but that the piece itself is slightly off, so that no matter how level you got it, it would still look just a tiny bit unlevel. But then that's only apparent because you pointed it out. Cheers, Martin
-
Hi Scott -- I just came across your build log, and had to check in as one Ratt builder to another. You're making some great progress there, and, best of all, you seem to be enjoying the process. Keep up the steady work -- I'll be looking forward to seeing more! Cheers, Martin
-
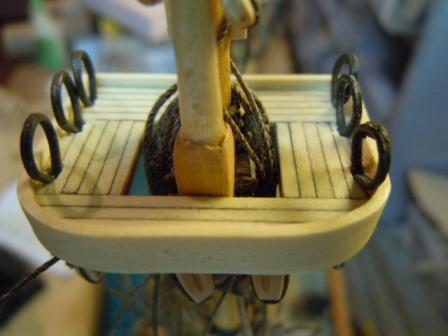
Hi Jon -- I recall struggling with the tops, and having all the same frustrations you're experiencing now -- so you have my sympathy. You might take a look at David Antscherl's description of building tops -- instead of lining up the strips of wood (holly in the case of Bob Hunt's Ratt Practicum), he uses a sheet of ultra thin plywood -- I think it's called something like airplane plywood, and it's available at most hobby stores. I did a variant, which you might find helpful: I took some of that ultra thin plywood, and used it as the base to glue on the holly planks on both sides, and then I bent a wider piece of holly around the edge to serve as a rim of sorts (and to hide the 3 layers). It resulted in a pretty thick top, but serves the purpose, and let me match the holly planking of the decks, and have a strong set of tops. You'll be doing quite bit of drilling and tugging on them as the rigging progresses, so you'll want them to be sturdy and reliable. Here's what one of the finished tops looks like: Just a suggestion. Cheers, Martin
-
I like that 2.0 version. And I'm impressed you were able to fashion an entirely new version so quickly and well. Cheers, Martin
-
Hi Bob -- I just read through your log, and felt like I was reading an old novel about Overcoming Adversity to Win the Prize! My jaw dropped at the sight of the cabin furniture, and I have to express my great admiration for your overall skill. Can't wait to see more. Cheers, Martin
-
It's looking good so far, Jon. Since you've just come off from the hull of the Ratt herself, you'll have a pretty good body memory for planking and plank bending. And you probably won't encounter any difficulties like those sharp curves on the Ratt's bow and stern. Good luck -- your skills will carry you through, I'm sure! Cheers, Martin
-
Thanks for the nice comments guys. I should remind you, BE, that it ain't the space but the skill in using the space that matters. You'll be happy to know that so far Bounce has spent her birthday eating and sleeping, and it looks like that will be the mode all day. She flatly refused to go for a walk this morning: Birthday Girls are entitled to say NO! to 15 degrees and crunchy snow. I went without her. Cheers, Martin
- 104 replies
-
- 2
-
-
- rattlesnake
- mamoli
- (and 1 more)
-
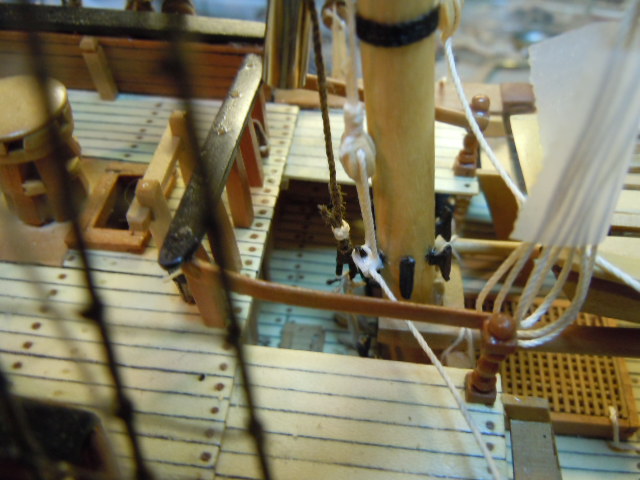
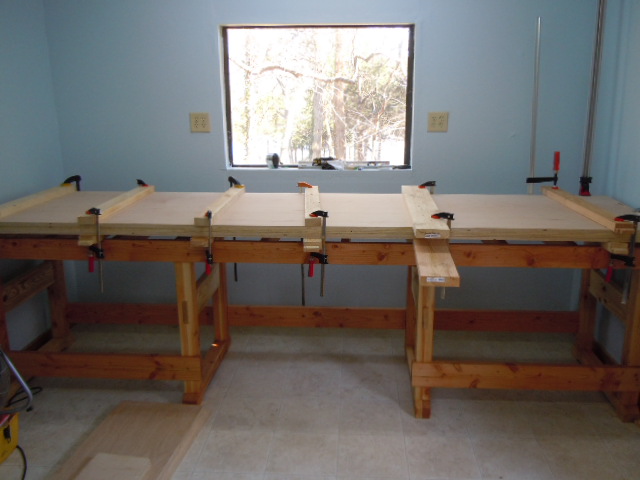
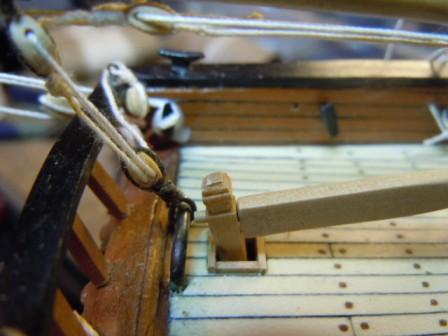
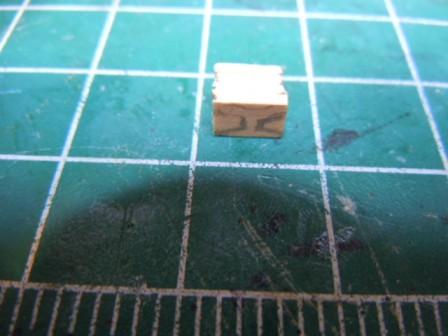
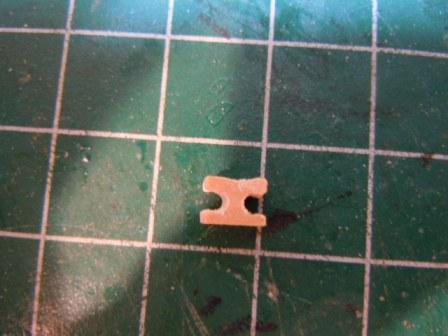
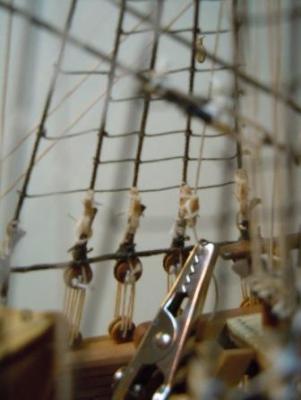
After some discussion with Blue Ensign on his Pegasus log, I thought I would make at least a short update on my own rigging log. I have to apologize first off for my slackness in keeping this log to date: what I have learned is that it takes almost as much time to maintain a log as it does to build a model ship! To start with here: Blue Ensign noted that he had the insight to make advance preparations for rigging. This is an especially valuable lesson for us Rattlesnake builders, since it become virtually impossible to access the ring-bolts and eyebolts that are in the deck around the base of the Main Mast. This picture should show something of what it's like to try to see down there. What this picture shows is that I had to belay the Jeers line directly to the mast cleat, since I simply could not access the blocks on the deck to create halyards. Mea culpa. Now for some happier activity. As I've mentioned a few times, I bought a Micro Mill last summer, but have been unable to use it because I don't have a bench for it yet. Well, here's a shot of the bench nearing completion: The clamps are holding the layers of plywood that I'm laminating to make a heavy top. When it's done, this bench will be long enough to hold my mill, my Byrnes saw, and the usual detritus that I tend to surround my work space with. The window has a nice view of some trees and the lake beyond. When I've finished the bench, I will be able to say that I have built exactly twice as many ship models (2) as I have workbenches. Until that's done, I'm left to fabricating little pieces by hand (which I don't mind at all, except for the times when the most beautiful version of a piece suddenly flies up, up, and away; then I use sailor language). And here is what I've done out of necessity, since the topsail lifts are belayed on Shroud Cleats. Following Antscherl's method, more or less (he uses a mill), I glued 4 pieces of 3/64x3/16 boxwood cut to 3/8 inch (in an earlier effort, I cut them to 1/4 inch lengths, and found them much too long). Then I drew a rough outline on the top piece: Then I simply cut out the waste with my Dremel tool, soaked the pieces in alcohol to dissolve the glue, and ended up with shroud cleats like this: Here you can see the groove I cut on the bottom of the cleat so that it can lie flush against the shroud. I neglected to take a picture of how I glued 2 pieces of .2 mm white cotton line to each leg of the shroud, so I ask you to turn to the photographic gallery in your mind. These lines simply enabled the cleat to be lashed to the shroud just above the lanyard -- I chose this height based on no authority whatsoever, but just figured they would need to be within reach of a sailor. Finally, here is a shot of a shroud in place with some rigging tied on. This picture is a bit unclear because my camera always wants to focus on something other than the cleat itself. Ok, just one more. Tomorrow is my dear Bounce's birthday, so I wanted to finish with a shot of that coy little girl. In her view, this whole enterprise of rigging, planking, poring over plans and books does little more than keep me from serving up her dinner. There's the bell! Cheers, Martin


- 104 replies
-
- 1
-
-
- rattlesnake
- mamoli
- (and 1 more)
-
Hi Jon -- I really think you're going the right way. I used the kit-supplied boat -- trying to spruce it up a bit with some detailing. But it still looks like a basswood shell. Whatever you do here, though, please, please don't make me feel inspired to try out that kit!!! Cheers, Martin
-
Very interesting, Jon! A well-built boat will make a terrific addition to your build. I'll be looking forward to your progress. Cheers, Martin
-
The cabin furniture is great! I can just imagine Jack Aubry gorging himself in there on toasted cheese, or spotted dog. Cheers (or perhaps I should say, Sir, the bottle stands by you!), Martin
- 218 replies
-
- 1
-
-
- victory models
- fly
- (and 1 more)
-
Hi Jon -- I just took a peek at Hahn's photos of his Rattlesnake, and the bands there look pretty much the same as on the plans, ie, narrow black bands. It's impossible to tell whether they're metal or rope, but since they look solid, I'd lean toward the former. I'm including the photo here, since I think it's acceptable to do so: You always have to admire Hahn's work! Cheers, Martin
- 974 replies
-
- 1
-
-
- rattlesnake
- mamoli
- (and 1 more)
-
Congratulations, Eric, that's a good-looking q-deck! Cheers, Martin
-
Looking good, Jon. It's probably a good strategy to complete all the masts and spars before moving on to the tops, just so you'll get a good rhythm going. You might also take a look at my rigging log to see that I used dark "rope" for the wooldings on the mast. James Lees seems to suggest that iron only came into common use after 1800. I'm envious of your lathe. Cheers, Martin
-
Hi Russ -- Great to hear from you again, I've missed your updates. Your work here shows, as always, your fine eye for detail. Cheers, Martin
-
The moon is on the wane, Ron. I think we all feel sluggish.
-
That Captain runs a tight ship, and the results show up beautifully! Bravo! Martin
-
Hi Peter, thanks for checking in, and for the nice words. Bashing, I have learned, adds to the appreciation of the ship we're modelling. Oh, and it challenges skills that I keep finding I don't really have!! Cheers, Martin
-
Fantastic work! That arch is my favorite detail, along with the handles on the pots, and the mortar between the bricks, and . . . and . . . Martin