HOLIDAY DONATION DRIVE - SUPPORT MSW - DO YOUR PART TO KEEP THIS GREAT FORUM GOING! (Only 20 donations so far - C'mon guys!)
×


Jack12477
-
Posts
5,665 -
Joined
-
Last visited
Content Type
Profiles
Forums
Gallery
Events
Everything posted by Jack12477
-
 Thanks, Ken I have the larger Xacto one also. The mini came from MicroMark http://www.micromark.com/micro-miter-box,11565.html Buy the saw and blades separately. The blade is a double edge razor blade cut with micro-fine saw teeth.which cut with little effort. But if you get one, make yourself a small jig to hold it.
- 203 replies
-
- 3
-

-
- artesania latina
- marie jeanne
- (and 1 more)
-
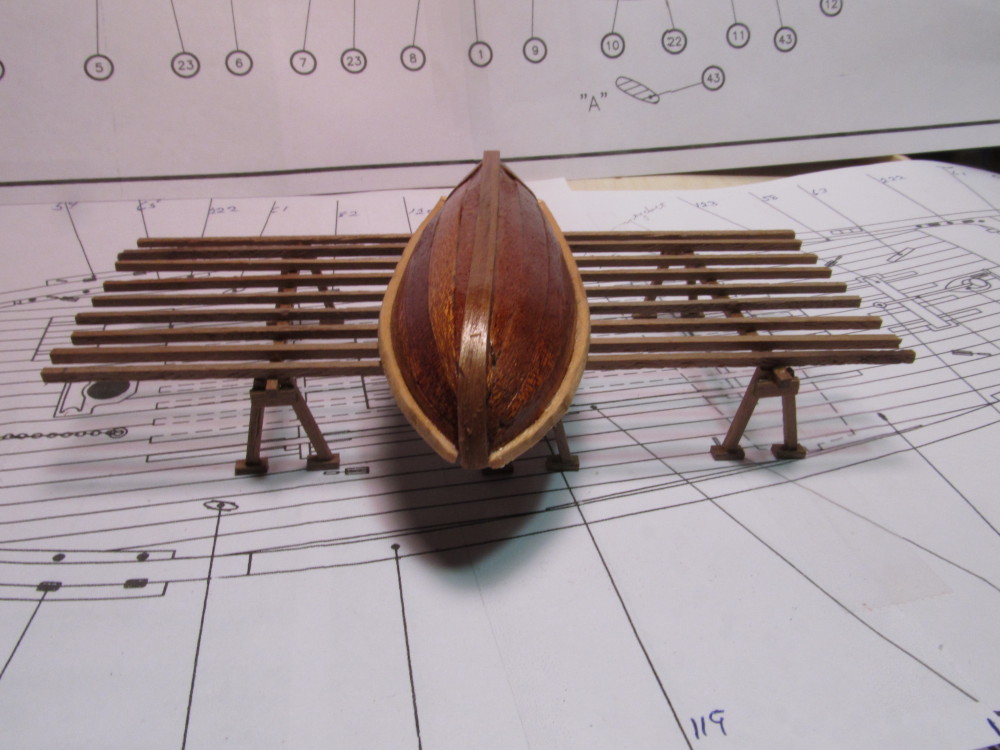
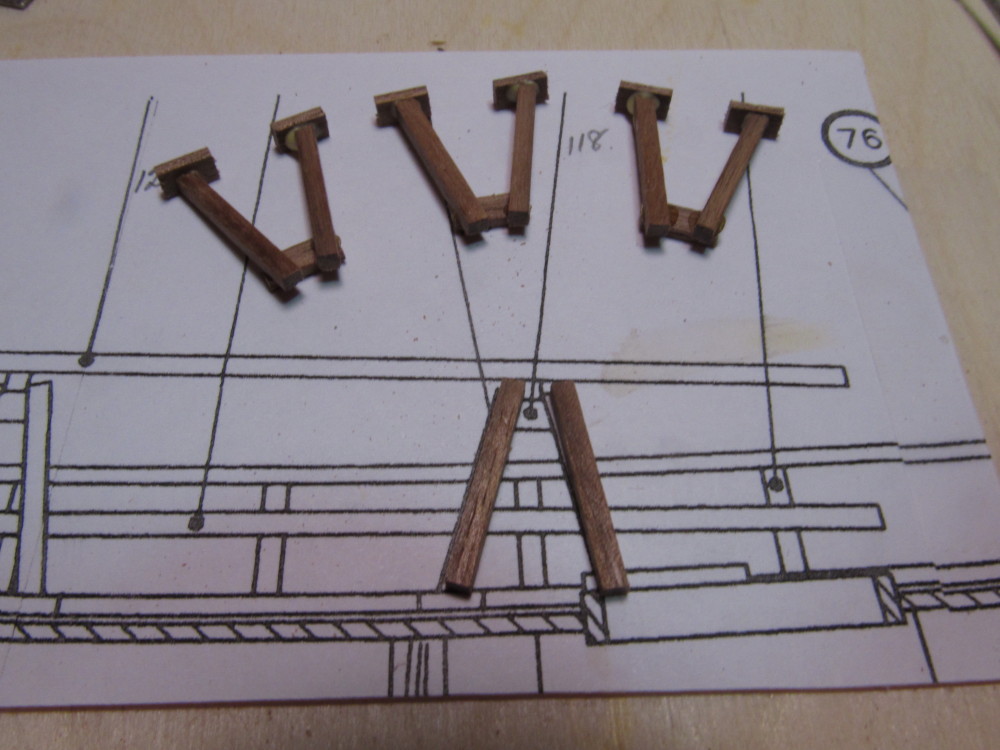
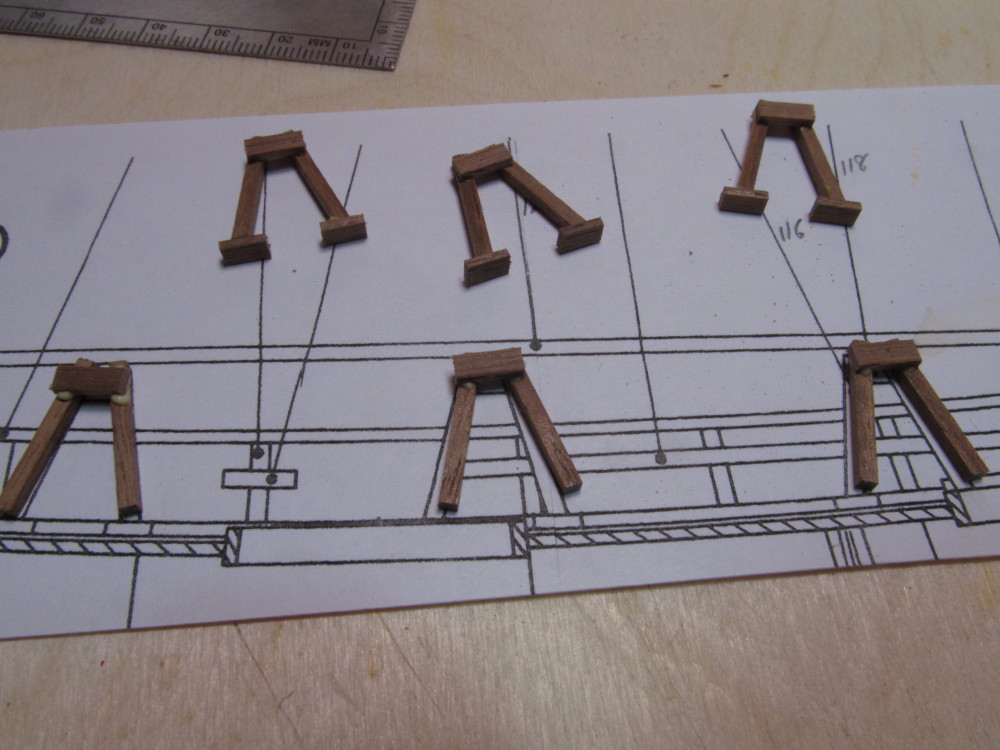
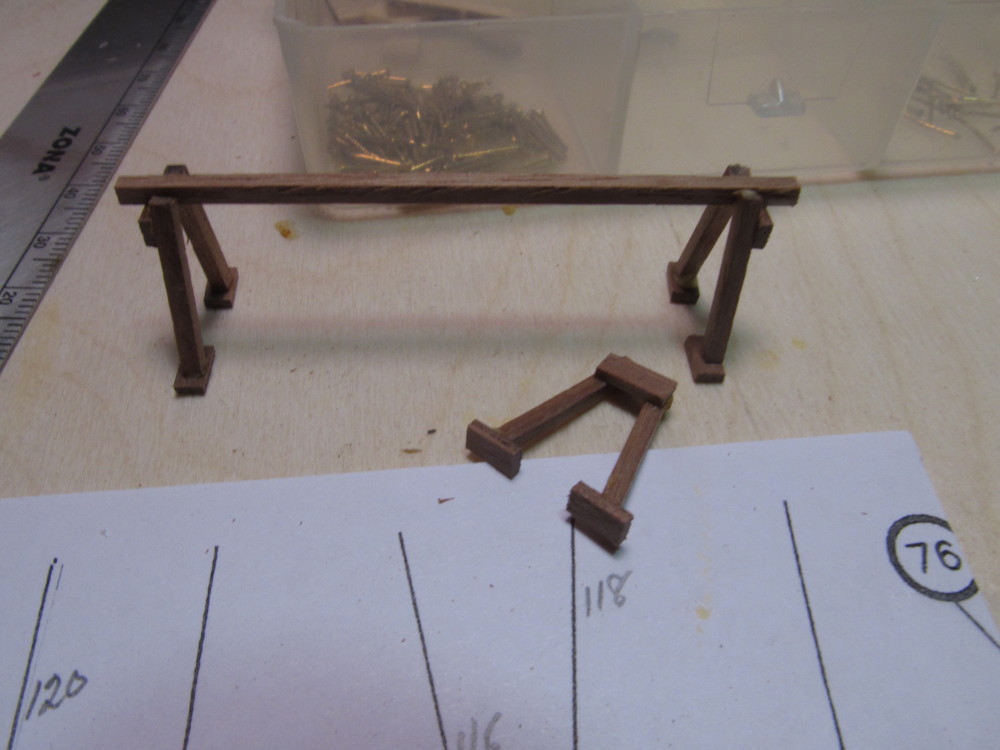
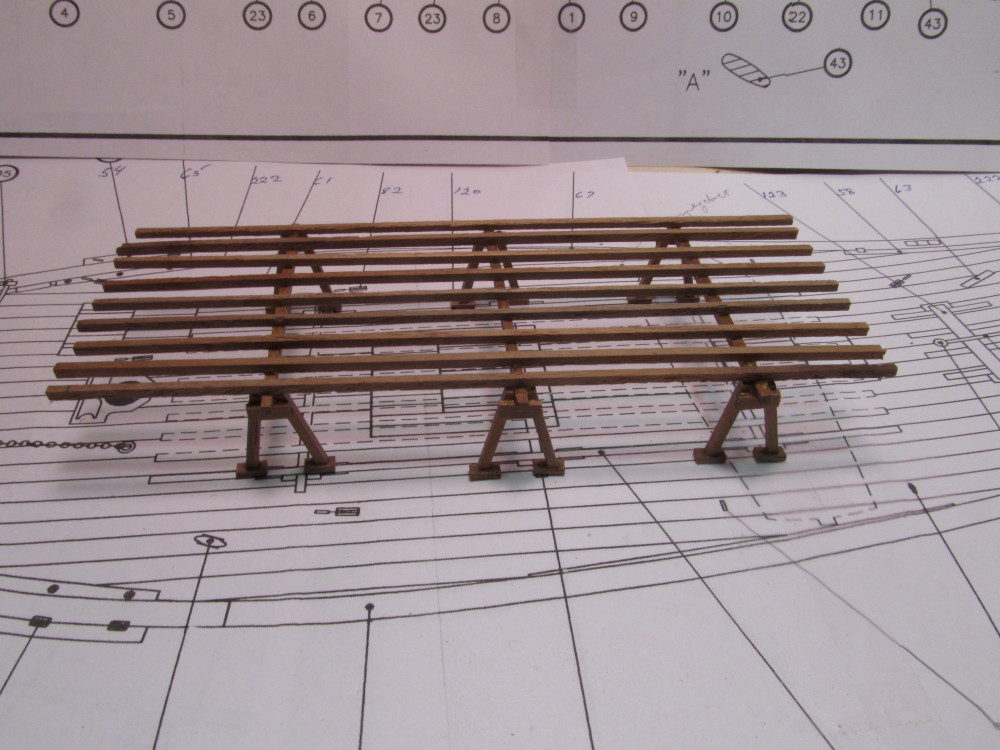
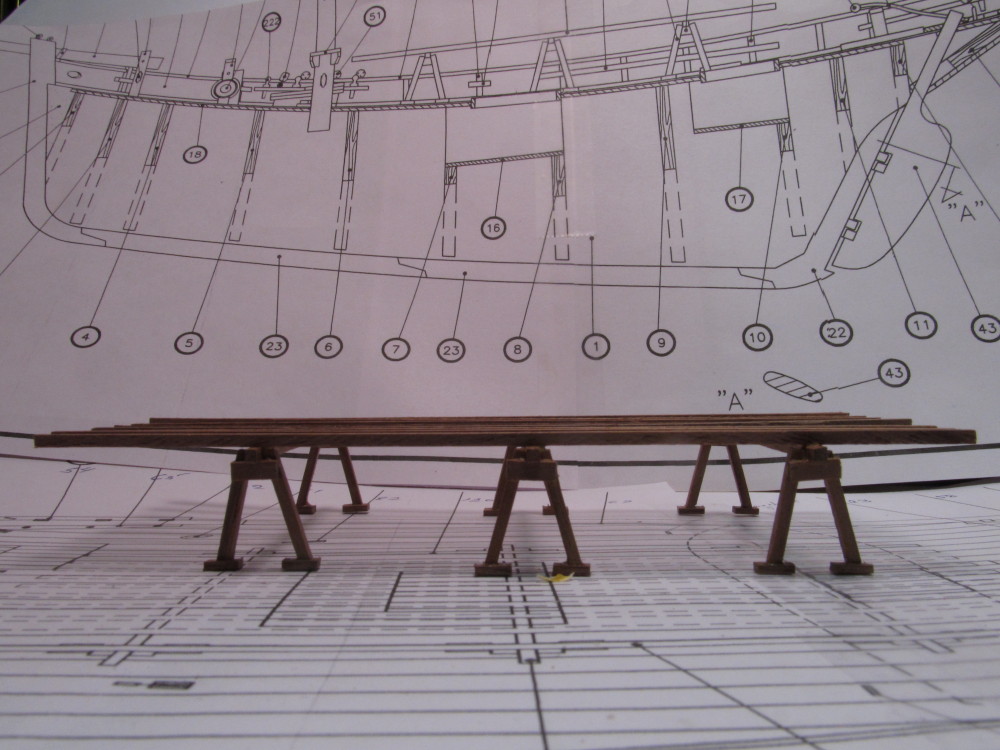
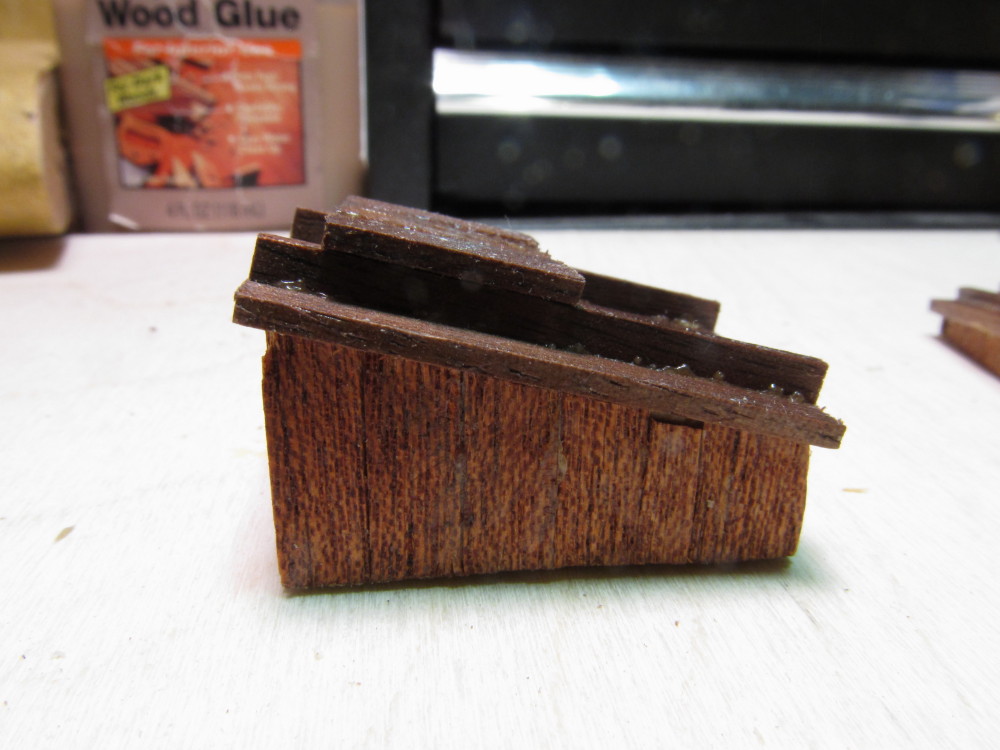
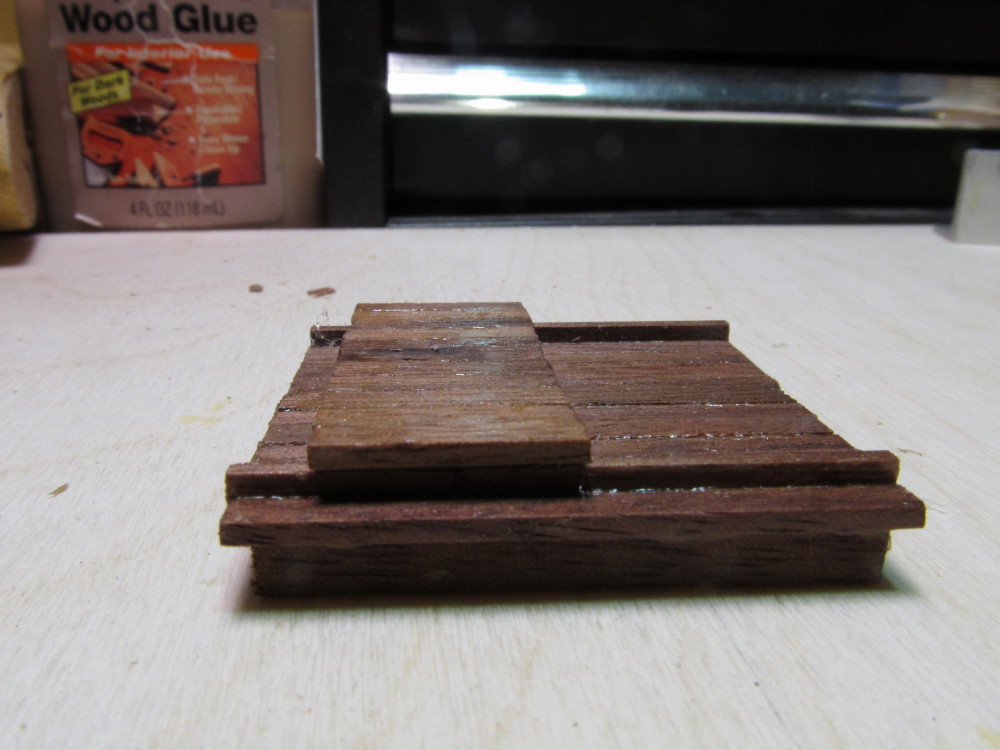
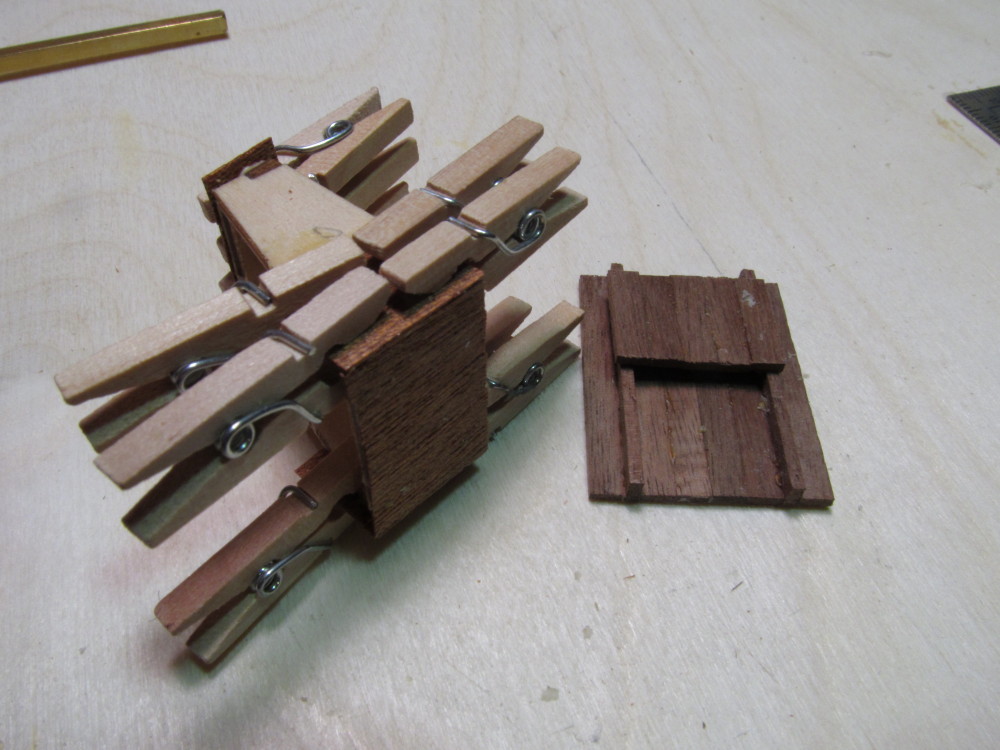
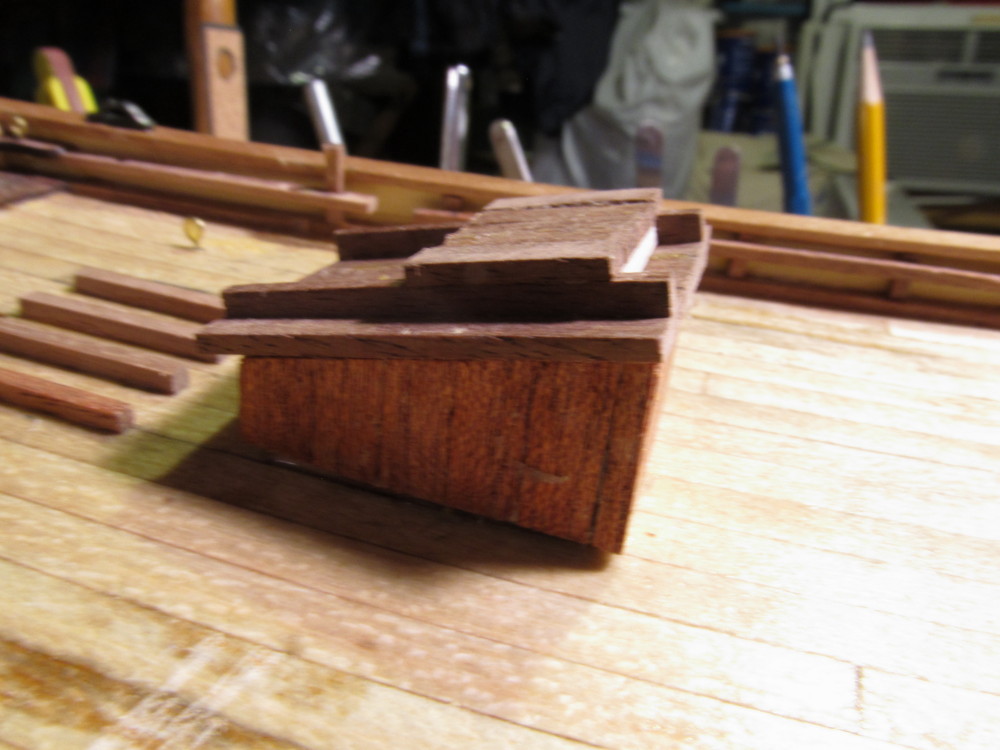
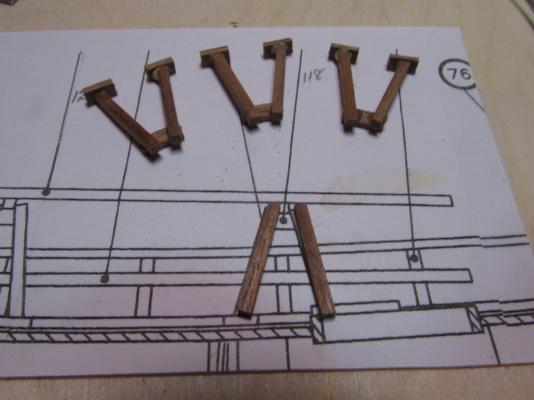
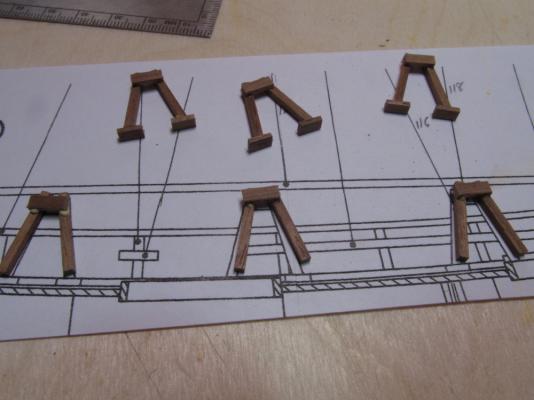
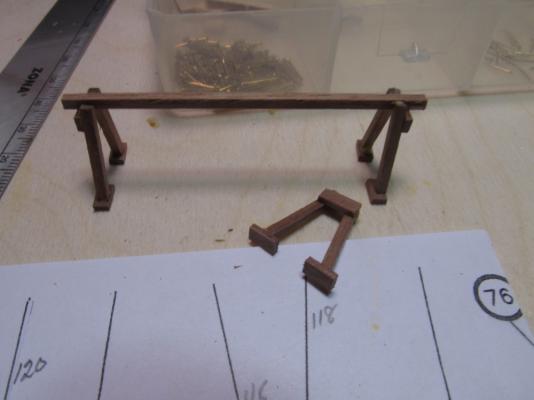
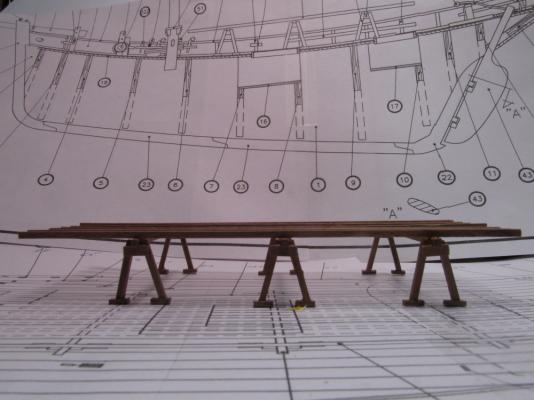
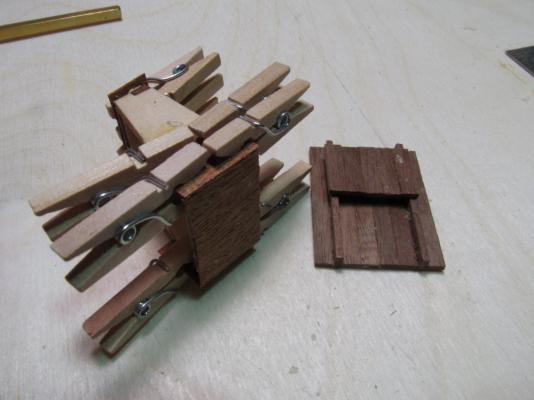
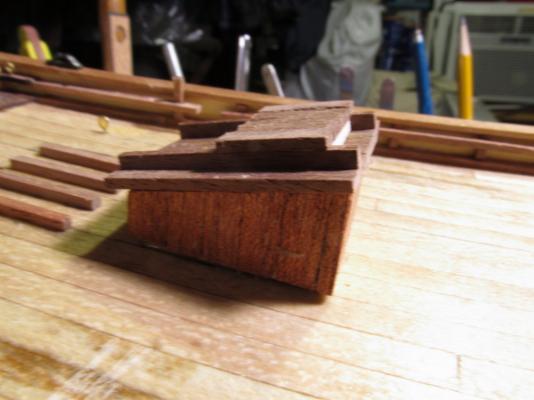
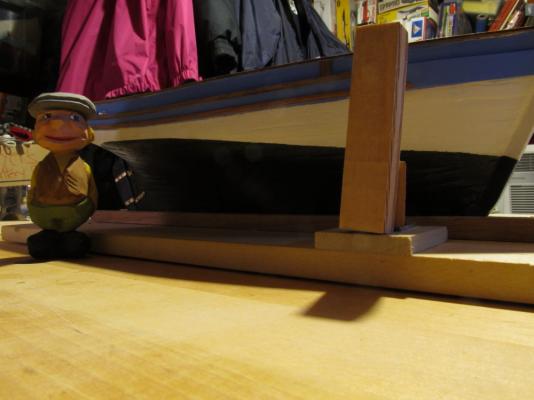
Small progress: Constructed the rack to hold the small boat. Was really glad I had the miniature miter box (shown in previous post) for this step. It made the job of repetitively cutting the leg brace elements very easy. Photos follow:


- 203 replies
-
- 10
-
-
- artesania latina
- marie jeanne
- (and 1 more)
-
Ofencer29350: Thanks for the photo and clarification
- 203 replies
-
- 3
-
-
- artesania latina
- marie jeanne
- (and 1 more)
-
Yes, one should not say that too loudly in an airport !
- 203 replies
-
- 3
-
-
- artesania latina
- marie jeanne
- (and 1 more)
-
Welcome to the party Mobbsie. Pepsi is fine - I tend to drive them also (perhaps too much).
- 203 replies
-
- 3
-
-
- artesania latina
- marie jeanne
- (and 1 more)
-
Erik, guess I'm the first at the table to watch.
-
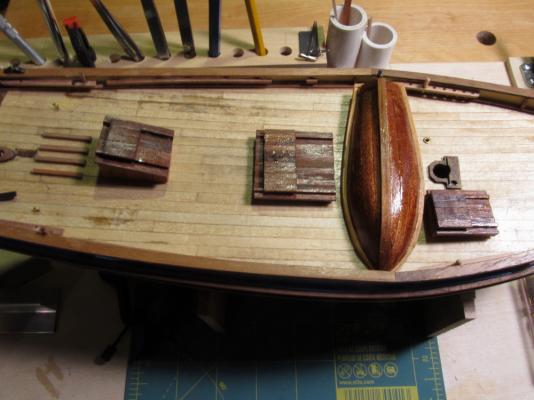
Captgino, Greg (Burroak) Thanks. Ofencer29350, thanks for the info. The kit plans call for the boat (challoupe) to be mounted above the deck on an overhead rack which I have not constructed as yet. Since this boat is metal and weighs about 3 oz (or about 82g) I think hanging it off the stern would make balancing the model on its stand a little difficult, centering it above the deck and over the keel would probably make for a better center of gravity for the finished model.
- 203 replies
-
- 3
-
-
- artesania latina
- marie jeanne
- (and 1 more)
-
Hi Mobbsie, just discovered your build log. Think I will pull up a stool or barrel and join the others. Looks like an interesting launch.
- 129 replies
-
- 4
-
-
- armed launch
- panart
- (and 1 more)
-
Congratulations Dan on completing her. She's a magnificent model. Glad I got the opportunity to see it up close at NRG Mystic.
- 108 replies
-
- 5
-
-
- andrea doria
- ocean liner
- (and 1 more)
-
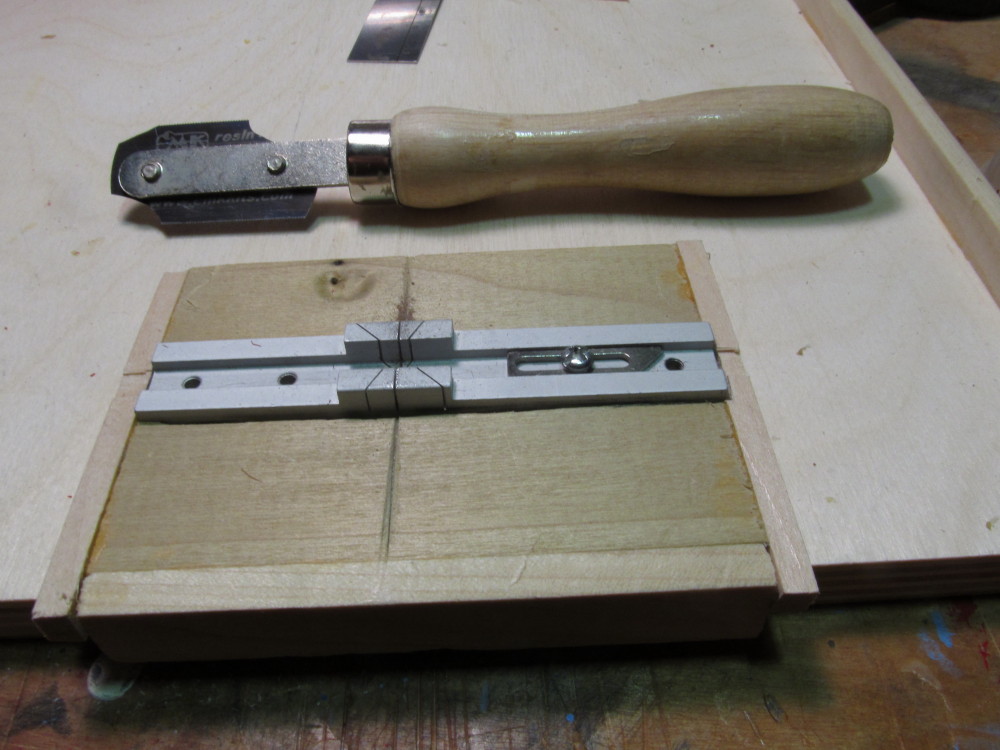
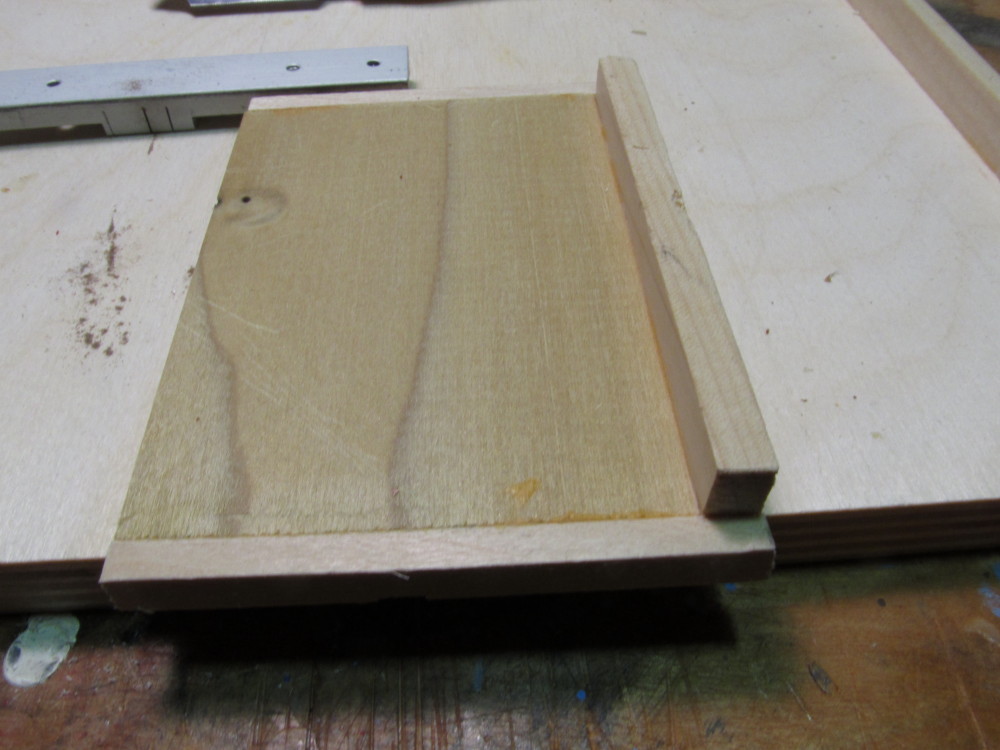
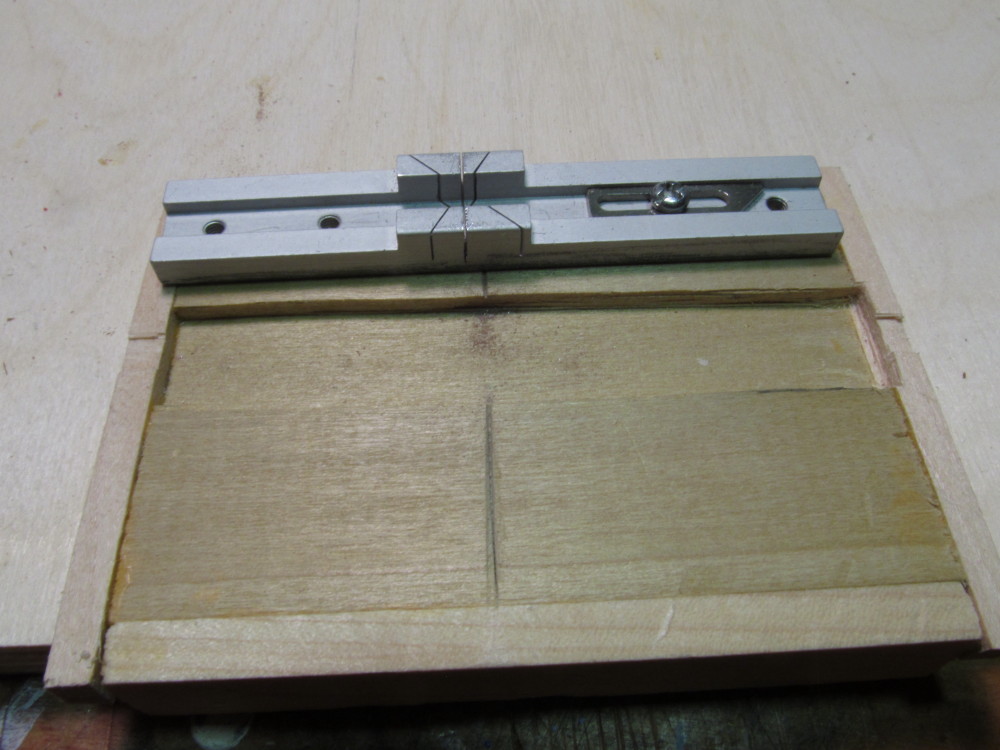
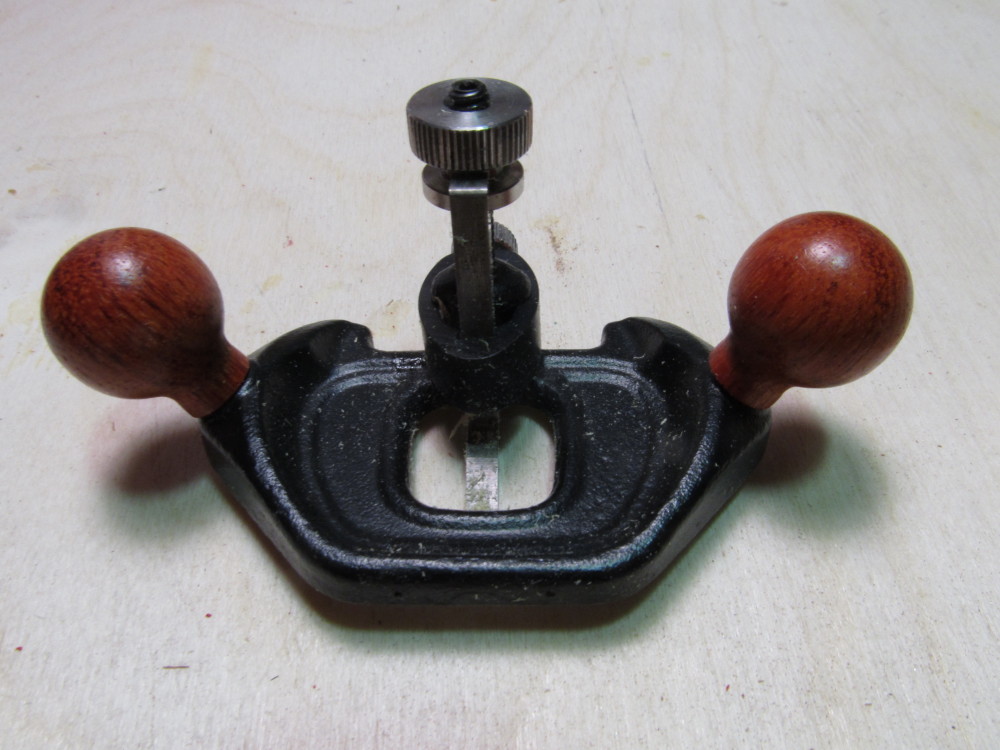
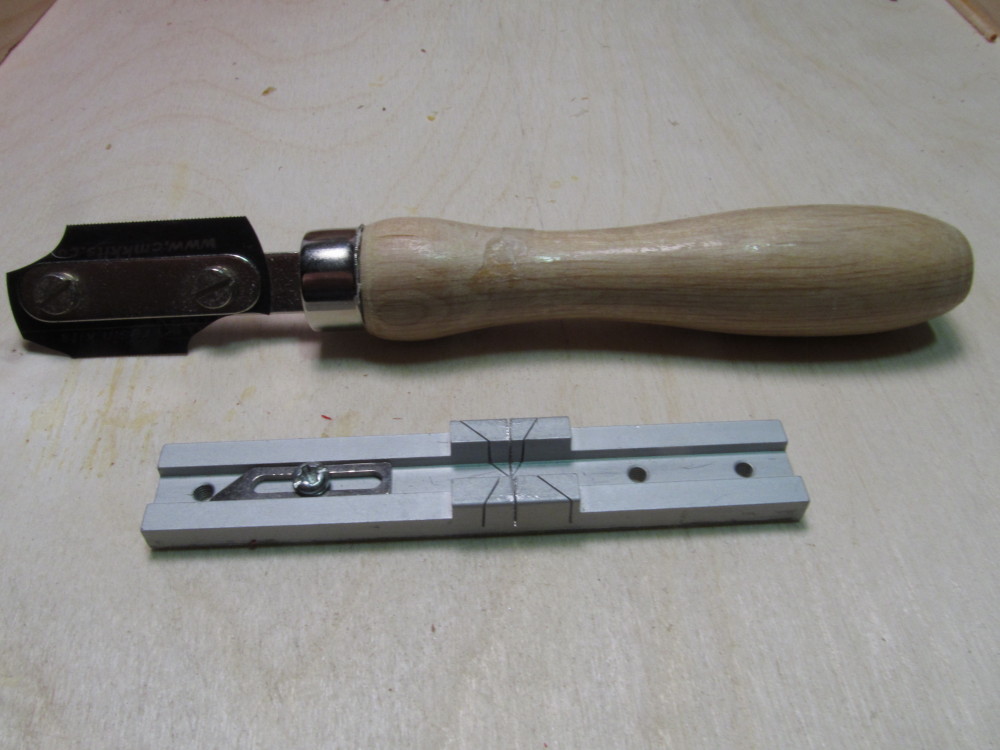
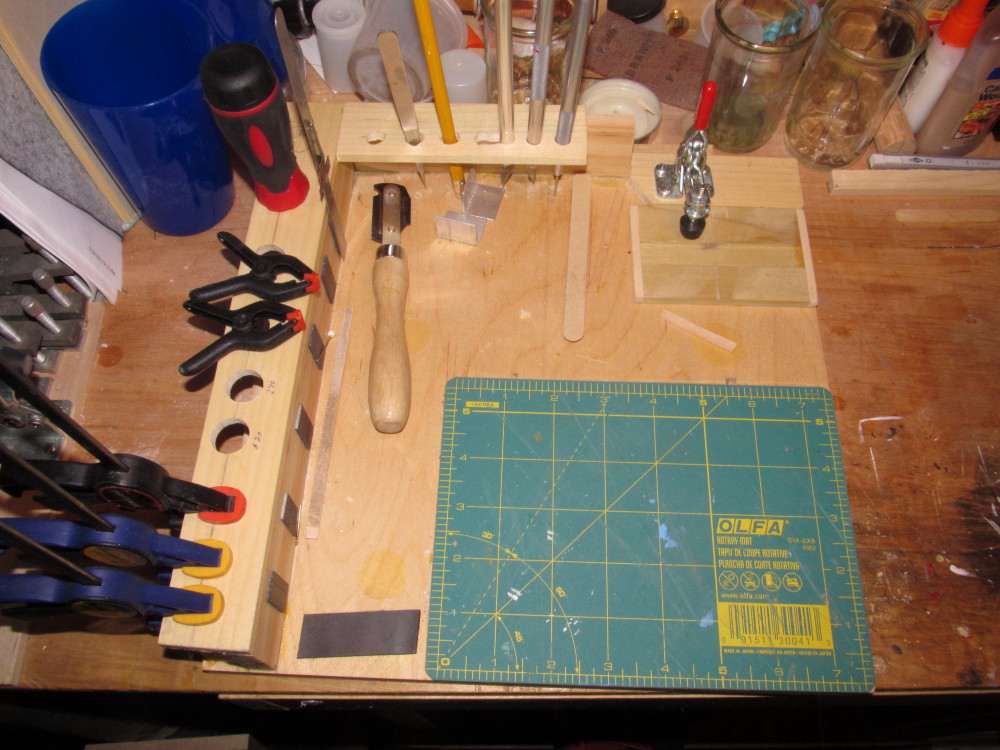
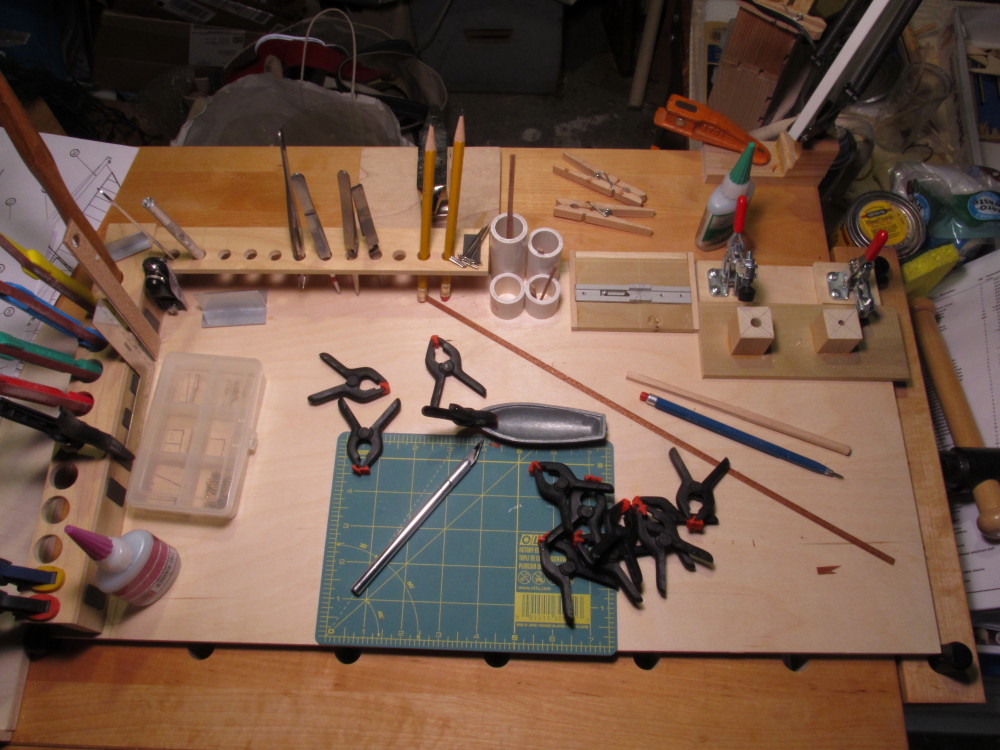
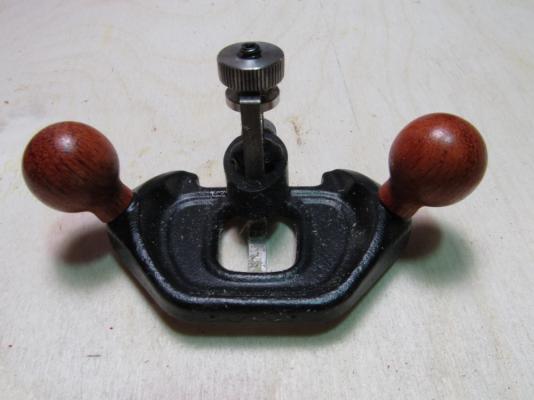
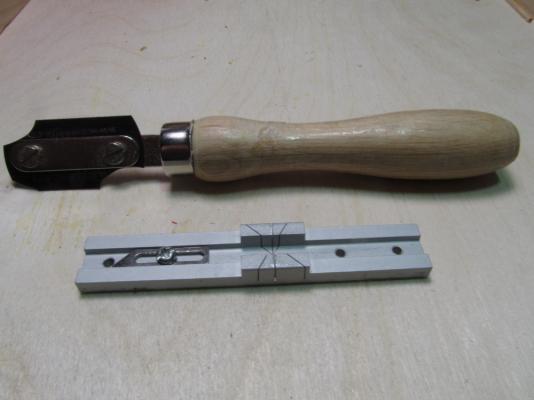
In the Captain's Lounge Questions/Instructions section someone started a Tips on Photographing Models topic. One of the posters, Maturin, posted a "refreshing viewpoint" as one responder phrased it. So in keeping with Maturin's request, I will digress a bit and post some photos of my work area and jigs. I picked up this nice razor (blade) saw and micro mitre box from MicroMark some time ago. Works nicely except the mitre box is so tiny it is difficult to hold while also holding down the wood to be cut. I find the tool is great for making repetitive cuts. (and yes in spite of the "broken" blade pieces it cuts just fine - the saw blade is a razor blade with saw teeth). So I decide to build a jig to hold the mitre box. I picked some 1/4" x 3" poplar cut to the exact length of the mitre box (came out to a piece 2 1/2" x 3 1/2"), then using my Veritas (Lee Valley) micro router plane I slowly made a dado to hold the mitre box. Once the depth and width were cut I capped of the ends with 1/4" x 1/4" basswood strips to lock the mitre box into the dado (side to side). Then I added another piece of 1/4" poplar cut-down to just over 1" in width and to the length of the entire jig with end caps. Clued it to one edge to act as a "bench hook". Now it locks onto the edge of the table without resorting to clamps which get in the way with such a small tool. I also decided to make a couple of small portable table tops, borrowing on one I saw in a previous post by Jay Modeler12 (at least I think that's where I got it - I downloaded his photo but lost the back link to where it came from). At any rate I made a few embellishments to his design. I made two tables - one is 12" x 12" and the other is 12" x 24", both are made from 1/2" Nordic birch plywood pre-cuts I picked up in Michaels craft store (I find the pre-cuts cheaper and easier that cutting down a larger piece). I added a couple of hold-downs to both. The magnets are strip magnets with a peel-off sticky I got in Lowes. Also added some short pieces of 3/4" PVC plumbing pipe to act as holders for small scraps of wood. The green pad you see in the photos is one of those OLFA brand rotary cutting mats you can purchase in JoAnns or Michaels or most any craft goods store The smaller table: The larger table: I find both sizes useful, the large one has the advantage of more work space laterally. Both fit nicely on my two workbenches. I hope some of our newer members find these useful in their modeling efforts.


- 203 replies
-
- 10
-
-
- artesania latina
- marie jeanne
- (and 1 more)
-
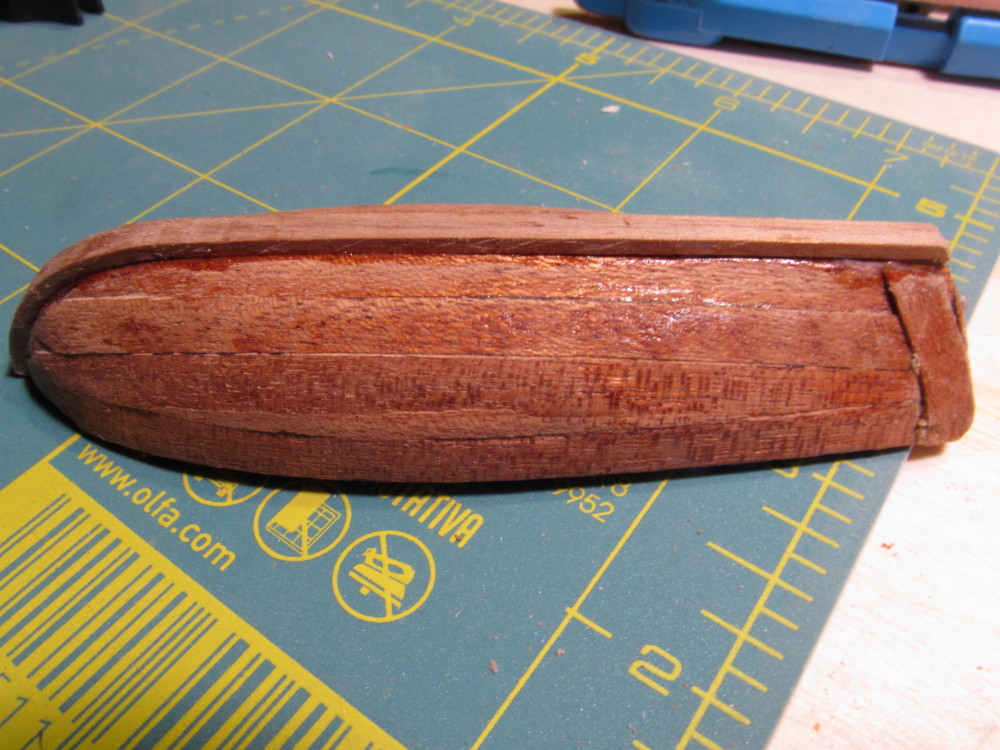
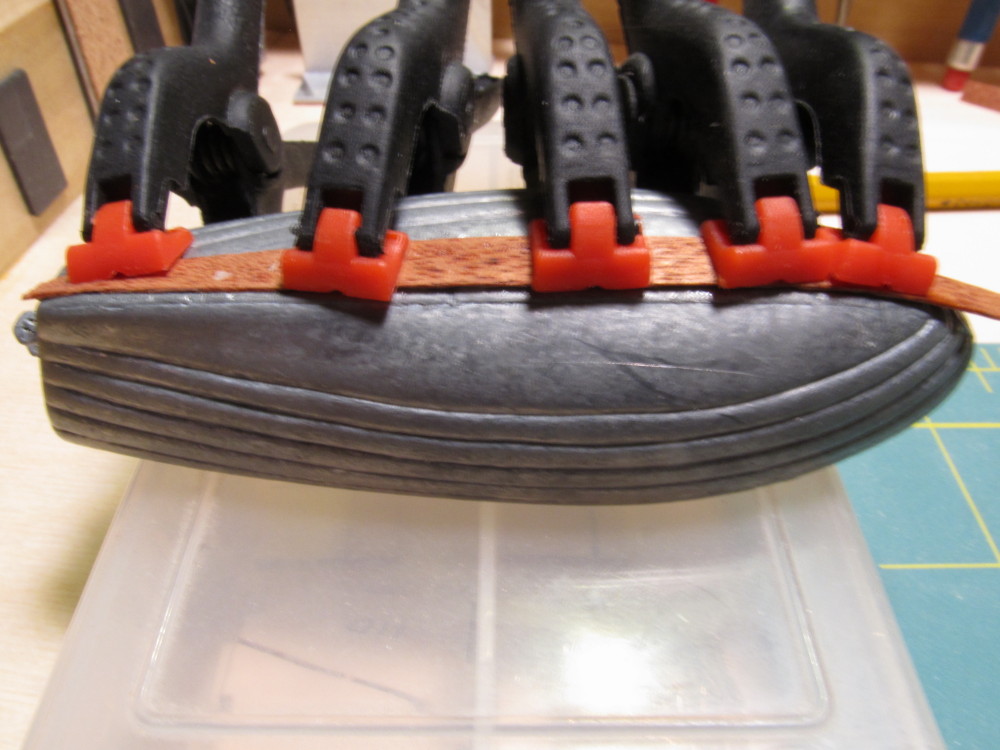
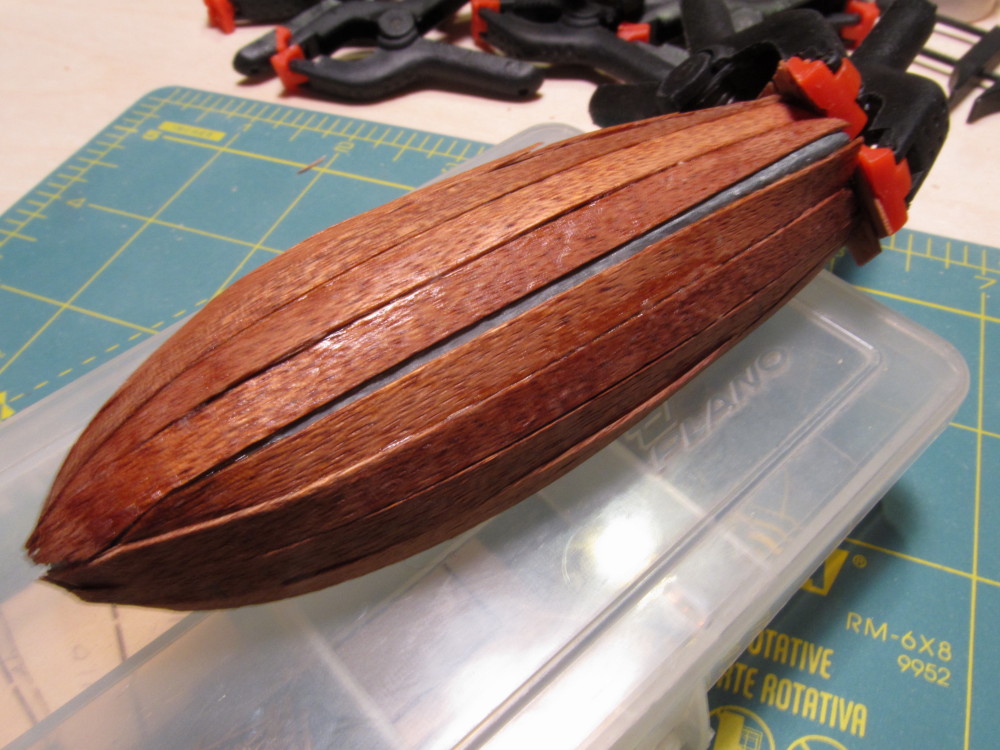
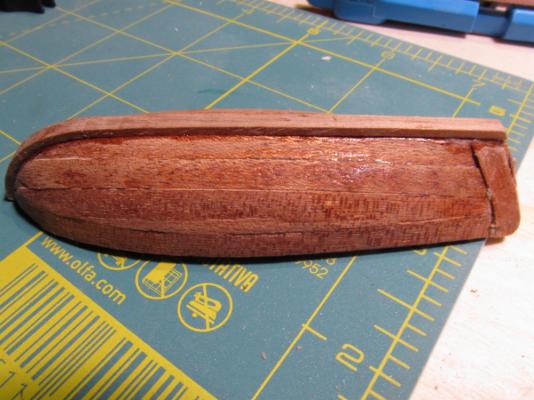
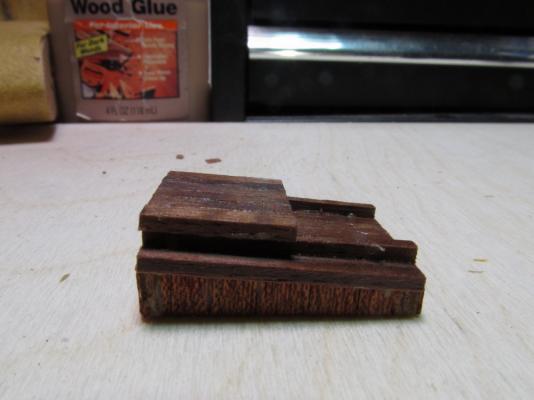
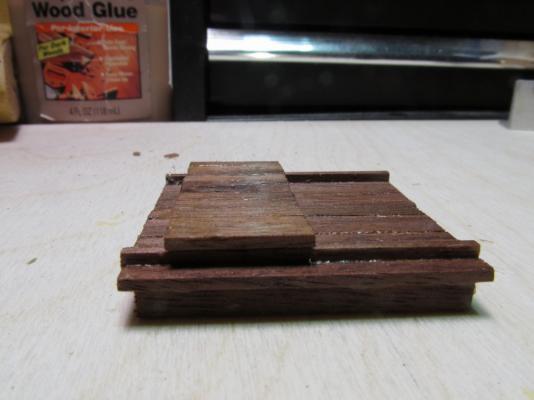
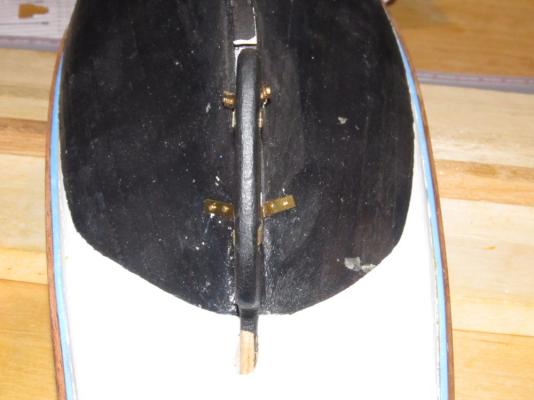
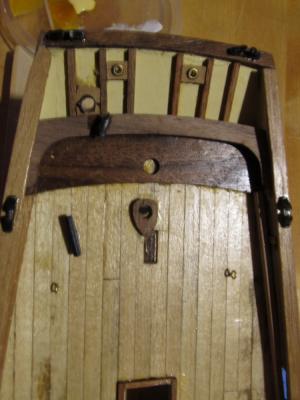
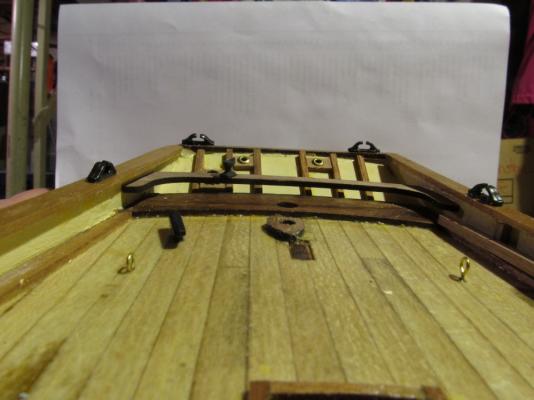
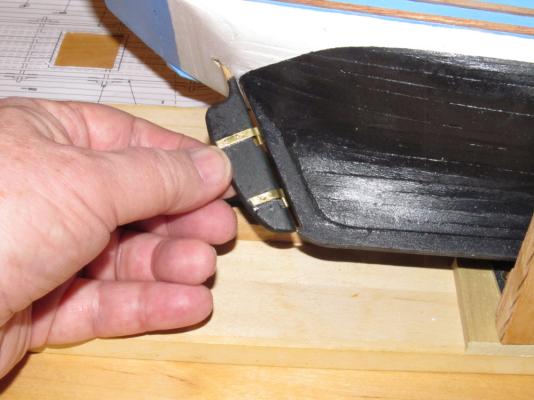
Update: Moving on, I decided to skip the numbered steps and do things out of sequence. The small boat that sits above the deck was next - the parts list said it was wood preformed boat to be planked with 0.6 mm walnut/mahogany veneer - turns out the made some changes without updating the parts lists - the preformed boat is diecast white metal and quite heavy. In 20-20 hindsight I should have grabbed the cans of model spray paint and just painted it but I followed the plans and planked it. Had to used Medium gap filling CA. Photos follow : Of course it also came with a pre-cast metal rudder assemby and the pivots were pre-cast on the boats stern so some of the wood trip, like the stern post, could not be added. After completing the deck boat, I moved on to the hatches, which seemed like a simple task at first. But trying to read the "picture book" was challenging. After cutting out the 4 pieces that made up the front, back and sides, the challenge was to determine if the sides go inside the front and back strips or outside the front and back strips. Well made a mistake twice and had to get out the isopropyl. Also determining where to place the roof rail(s) was a fun challenge. Old eyes don't focus too well on picture that show the item at an angle rather than straight on. Pictures of the finished hatches follow Temporarily installed on the deck - not glued down


- 203 replies
-
- 10
-
-
- artesania latina
- marie jeanne
- (and 1 more)
-
Nigel, beautiful model. Congratulations on completing it.
- 270 replies
-
- 2
-
-
- red dragon
- artesania latina
- (and 1 more)
-
Michael, clever ! Nice little steam box. I will have to file this away for future reference.
-
Brig Eagle by robnbill - 1:48
Jack12477 replied to robnbill's topic in - Build logs for subjects built 1801 - 1850
Thanks, Bill. I am amazed at the quality pictures those small phone/iPad cameras can produce. -
Brig Eagle by robnbill - 1:48
Jack12477 replied to robnbill's topic in - Build logs for subjects built 1801 - 1850
Bill, glad to see you back in the shipyard. Your model is outstanding. What are you camera (and accessories) are you using to photograph your model. The photos are as impressive in their detail and depth of focus as the model is in its construction. As an amateur photographer of some experience I am always interested in what others use. -
George, yes, I find on this build when I can't get a reliable measurement off the plans that I'm relying heavily on Jack's Relativity Principle to locate the part on the ship - you know that one ! Plans and parts list called for part # 55 to be 2x2x7 mm - after I cut the piece out I found that it would not fit under the caprail and deck - so I had to trim it to 2x2x5 mm to make a snug fit.................. Ah yes ! Fun !!!!!!!!!
- 203 replies
-
- 3
-
-
- artesania latina
- marie jeanne
- (and 1 more)
-
Ofencer29350, thanks for the info and link - any chance there's an English language version, I can't read or speak French.
- 203 replies
-
- 3
-
-
- artesania latina
- marie jeanne
- (and 1 more)
-
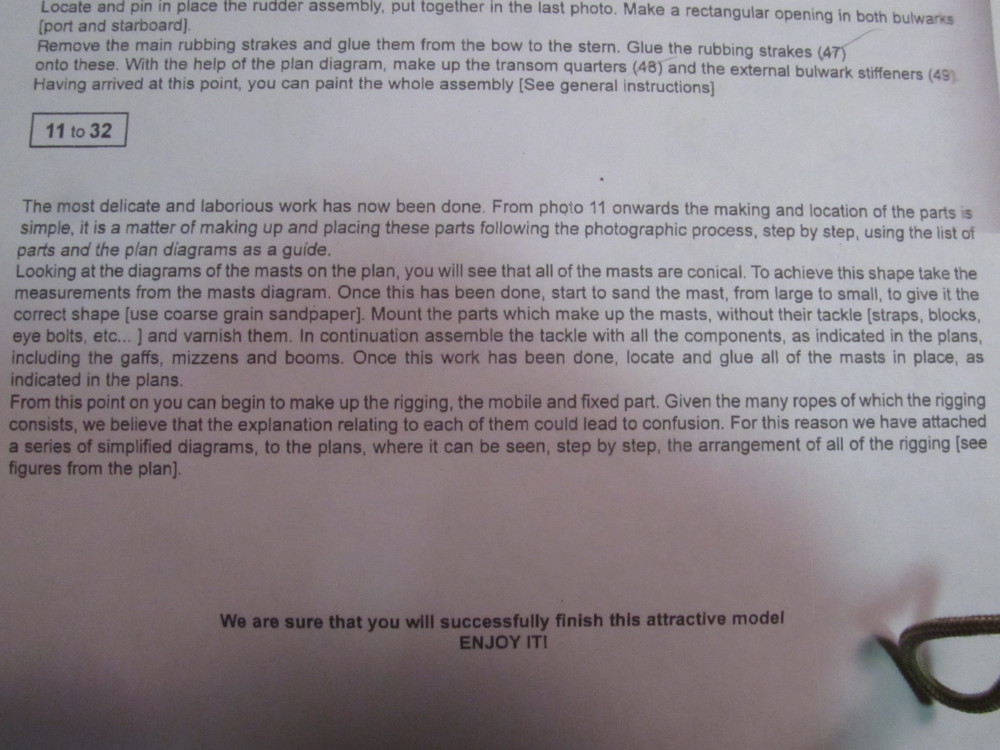
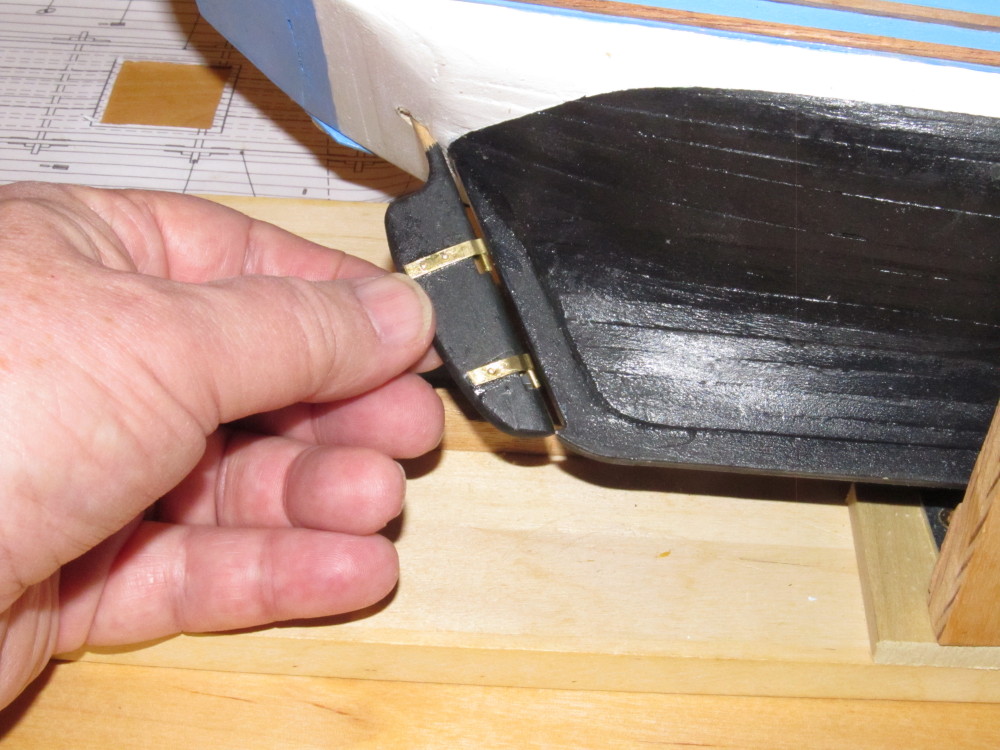
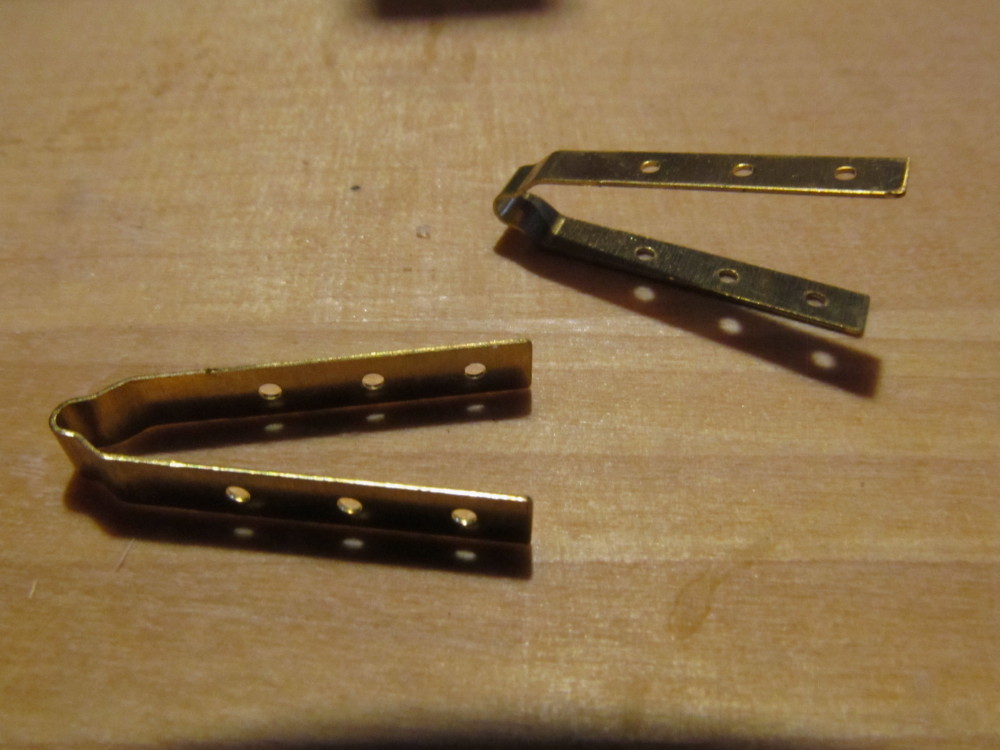
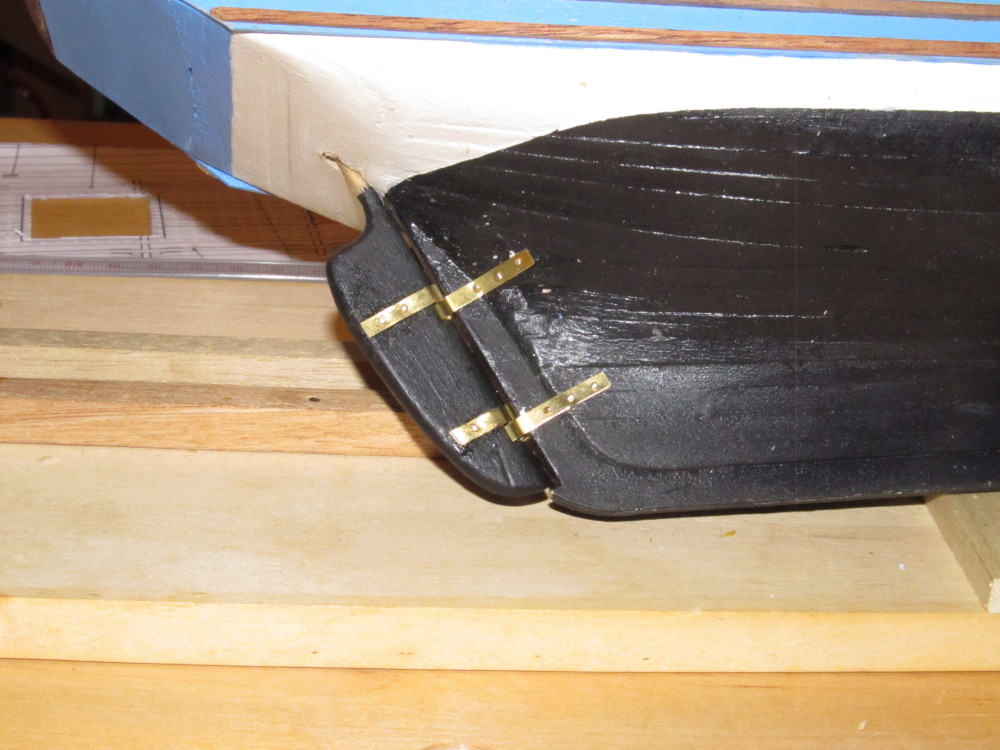
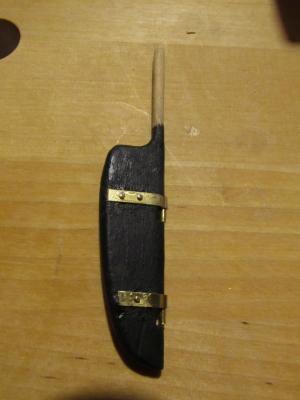
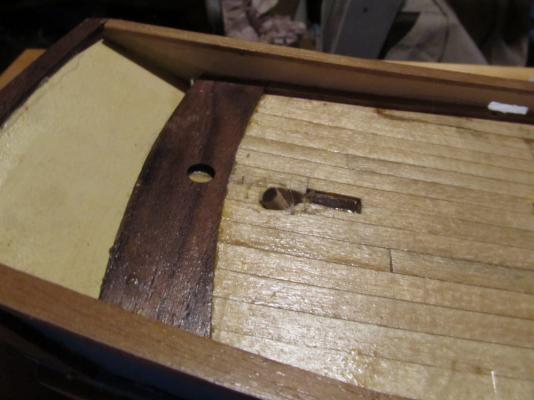
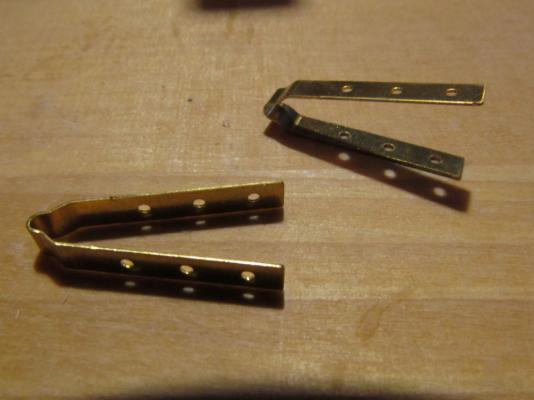
Happy New Year All ! Hope everyone had an enjoyable holiday. Got in some shipyard time over the long holidays. Worked mostly on getting the rudder installed. Fabricating the actual rudder was simple, even the gudgeons and pintals were simple since AL supply the straps already formed and drilled out. The major challenge was drilling the hole thru the deck and ship for the rudder shaft. I made a photocopy of the deck plan layout, cut it to size to fit inside the gunwales, located the exact center for the hole, and using a sharp awl marked its location. BUT and this is the big BUT ! There is no mention of the angle to be drilled and the position (I found out while drilling) goes right thru the backbone (aka false keel) plywood. First I started the hole with a 1/16" drill bit, trying to eyeball the angle. Came close enough on the first pass. Then using successively larger diameter bits I enlarged the hole, except the backbone forced one of the bits slightly off angle. Using several different diameter round files I finally got the whole thing lined up with the stern post. Affixing the rudder to the hull was a cake walk thanks to AL's preformed parts. However the rudder post in the drawings and photos sticks up above the deck by some amount (no measurements - just pictures) and mine ended up flush to the deck. So a little improvisation will be necessary later down the road to get it high enough to attach a tiller. Photos follow: Now that I have completed steps 1 to 10 of the printed instructions the remaining instructions are these I like the comment about "most delicate and laborious work" ! So now it's picture book time And I have a feeling that some of the measurements for placing things is going to be done by the "looks about right" yardstick ! Oh and my new assistant keeps standing around the yard with his hands in his pockets, looking lost. More photos and updates to follow shortly


- 203 replies
-
- 9
-
-
- artesania latina
- marie jeanne
- (and 1 more)
-
Mike, a suggestion: When you mention the USS Confederacy tell them it is the "sister ship to the USS Constitution" ! Whether true or not, they are probably too uninformed to know the difference. Go build the model and have fun building it !
-
Michael, how about this for "canopy" glue ! Some call it "watch crystal" glue. I have found it locally in Michaels or JoAnns stores. Works nicely . I use it mostly for cementing the knots on my rigging - dries flexible. It's called G-S Hypo Cement.
-
Gary, I'll be following along also.
-
Tom, very nicely done. I especially like the set of the sails. Excellent job. Congratulations on finishing it. I will definitely be using your build as a reference when I start my AL Constellation.
- 212 replies
-
- 2
-
-
- constellation
- artesania latina
- (and 2 more)
-
Great job Erik. Lovely looking model.
- 222 replies
-
- 3
-
-
- 18th century longboat
- model shipways
- (and 2 more)