HOLIDAY DONATION DRIVE - SUPPORT MSW - DO YOUR PART TO KEEP THIS GREAT FORUM GOING! (Only 75 donations so far out of 49,000 members - C'mon guys!)
×


Jack12477
-
Posts
5,666 -
Joined
-
Last visited
Content Type
Profiles
Forums
Gallery
Events
Everything posted by Jack12477
-
 Thanks Carl. Maybe it is good they are not visible - they are installed on a bit of an angle - not aligned perpendicular to both sides. At least we can "bury" our mistakes
- 250 replies
-
- 4
-

-
- willie l bennett
- model shipways
- (and 1 more)
-
Not brass George, they are magnetic - I stick them to my magnet strips on my work table - the threaded rod is 3/32 inch in diameter - it strips where it passes thru the clamp itself - the threads are very very fine
- 250 replies
-
- 3
-
-
- willie l bennett
- model shipways
- (and 1 more)
-
These are the ones, George. http://www.leevalley.com/US/wood/page.aspx?p=68938&cat=1,43838,47843
- 250 replies
-
- 5
-
-
- willie l bennett
- model shipways
- (and 1 more)
-
Those are from Lee Valley - do a search under "Machinist clamps" - they come 2 to a package - just received another shipment this week of 5 packages (10 total) - they work great but be careful not to put too much stress on the screw threads when clamps, I've stripped two of them already. There metal but the threads are real tiny.
- 250 replies
-
- 3
-
-
- willie l bennett
- model shipways
- (and 1 more)
-
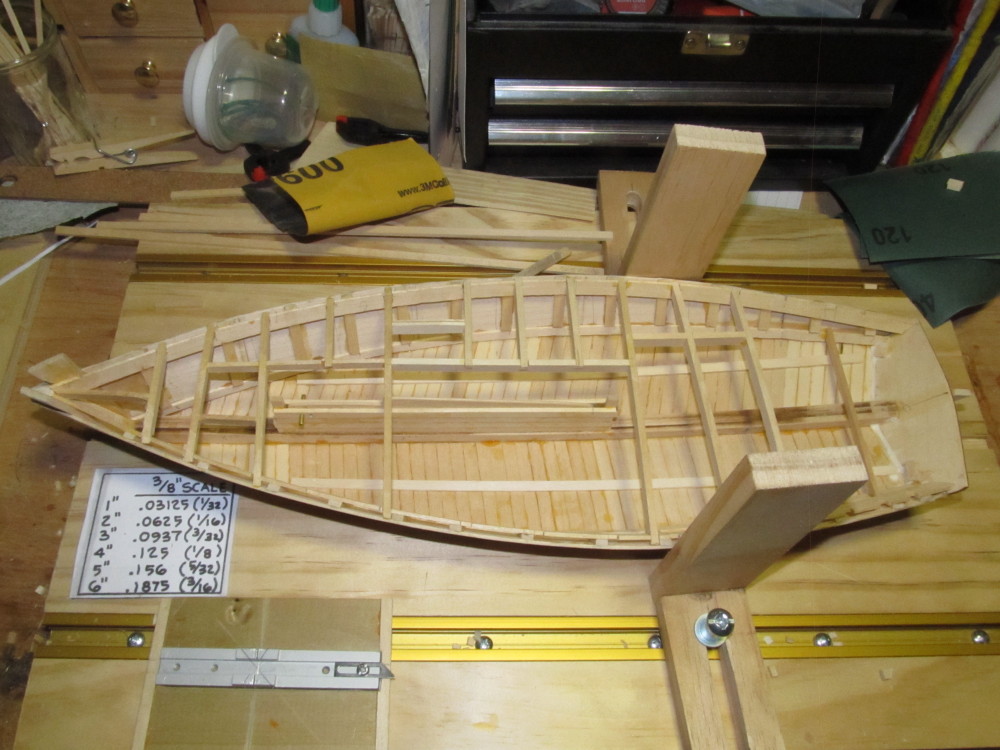
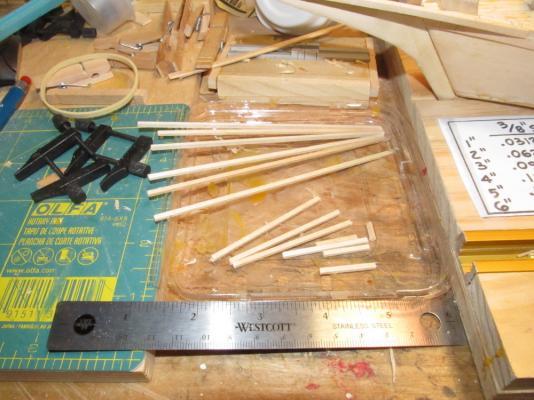
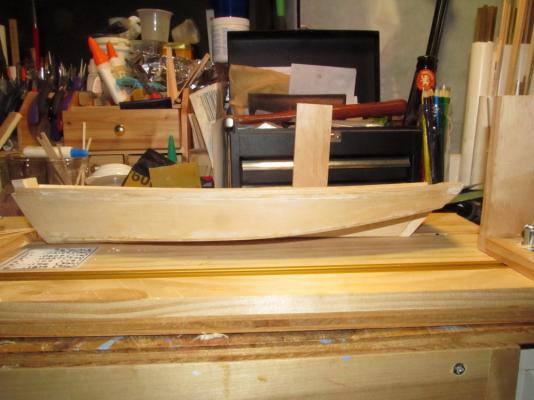
Small Update: I finished planking the deck and as I had feared ran out of wood strips just before completing the entire deck. I anticipated this so I left the section over the center board unplanked - for now - since I may be able to hide most or all of it with the deck houses, cabins, structures, etc. The second photo below shows the amount of scrap planks I have left to work with. For now I will move on to the deck structures and come back to the deck planking after I have a better feel for how and where the structures will sit. Of course I had to hunt thru the clutter on the plan sheet with a hi-liter pen to find the layout and dimensions for these various structures. Photos below:

- 250 replies
-
- 16
-
-
- willie l bennett
- model shipways
- (and 1 more)
-
Likewise - I have this model kit in my to-do pile. Pulling up a hay bale to watch also.
-
Beautiful, Druxey. Absolutely beautiful. I love the roof color. Really makes it stand out.
- 641 replies
-
- 2
-
-
- greenwich hospital
- barge
- (and 1 more)
-
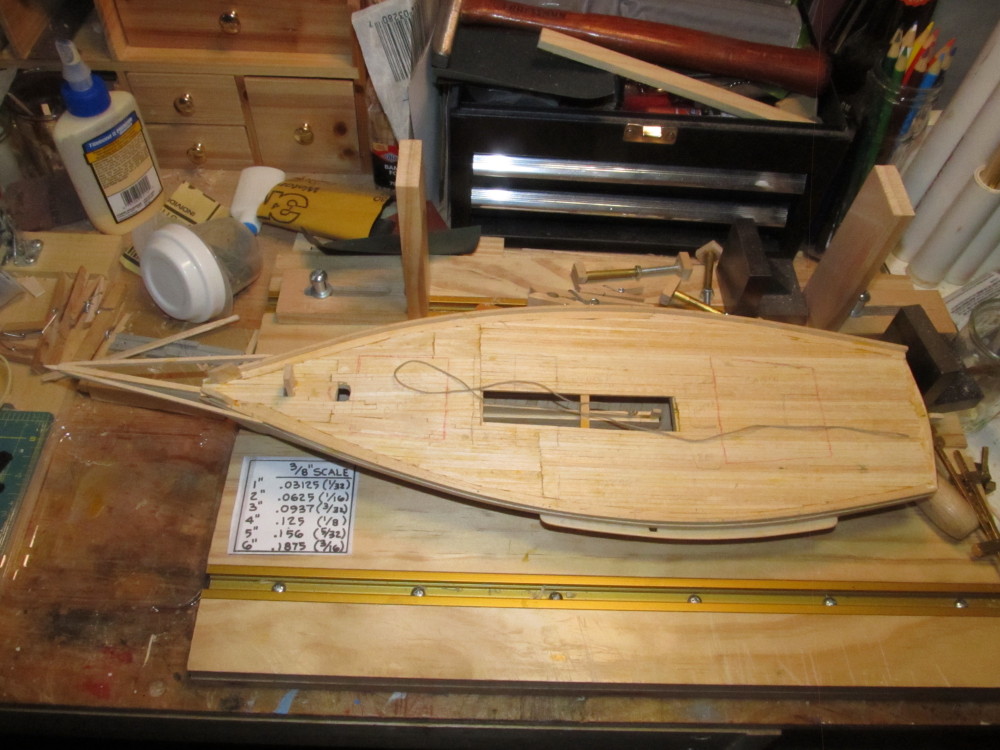
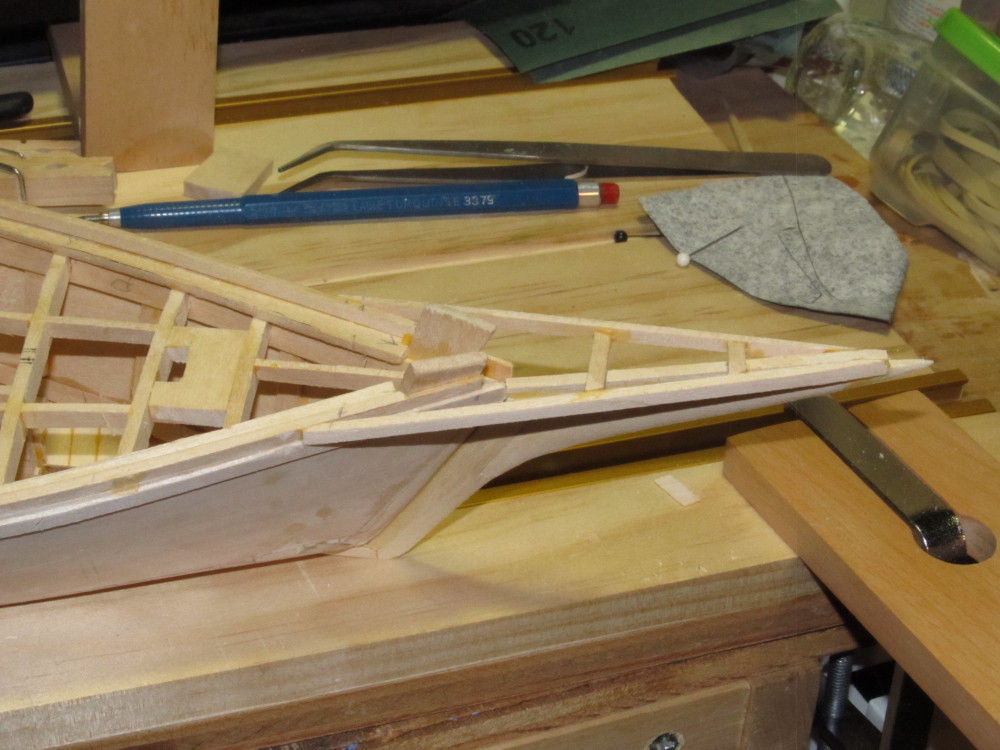
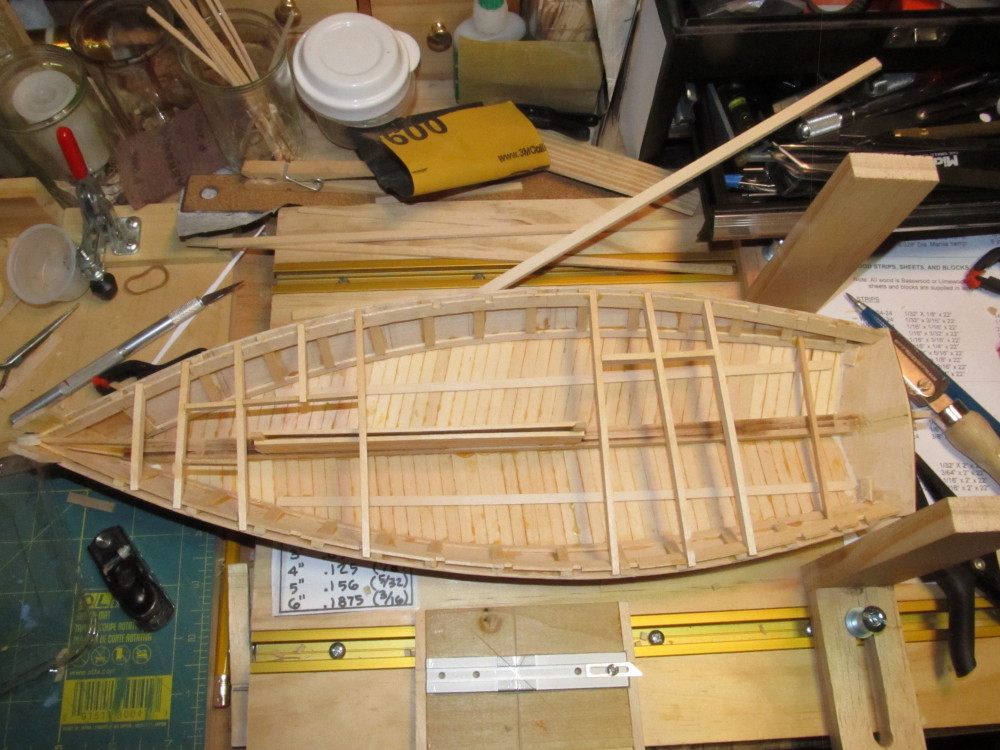
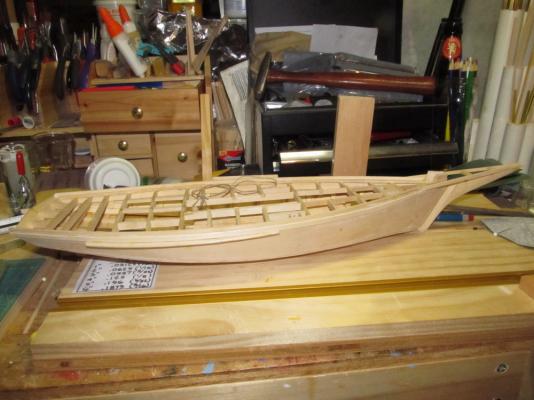
Hi everyone. thanks for the comments and likes. Yes Elijah it is a bit of a challenge dealing with these plans Small Update: Installed the samson post - worked on the bowsprit - needs a little more work I think - as many times as I've read tutorials and watch videos on how to cut an octagonal post I still can't get my mind to visualize the steps and do it right. Installing the decking - feels like I'm building the deck from matchsticks - these "scale" Planks measure 1/16 x 3/32 inches x 22 inches long - progress is sloooow - I'm also having difficulty keeping the planks from skewing off to one side or the other requiring a "wedge steeler" plank to get them back in alignment. Pictures follow: The "string" in the photo is to keep the dagger-board aka center board from dropping down and getting broken while I'm moving the model around.

- 250 replies
-
- 14
-
-
- willie l bennett
- model shipways
- (and 1 more)
-
A question for al you users of scroll saws
Jack12477 replied to michael mott's topic in Modeling tools and Workshop Equipment
Happy Birthday Michael !
-
Don't know about "mastering" them George. I feel like I'm still groping around in the dark. The 3-in-1 printer/copier is getting a lot of workout making copies of small sections. Once I get to the decking I should be able to move along a little better.
- 250 replies
-
- 5
-
-
- willie l bennett
- model shipways
- (and 1 more)
-
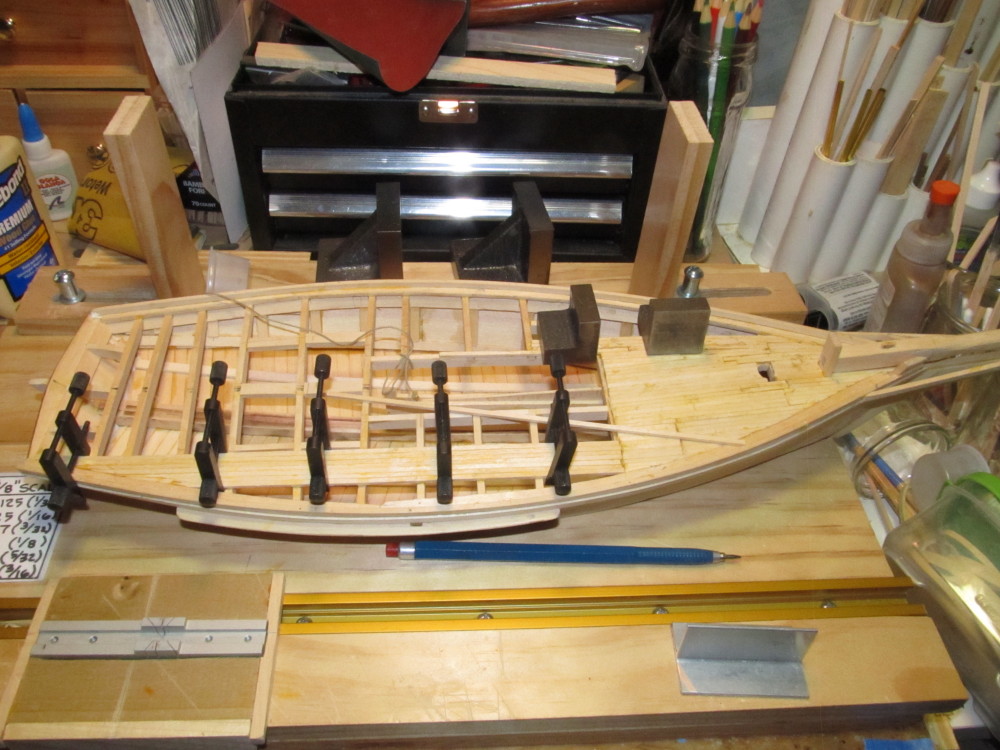
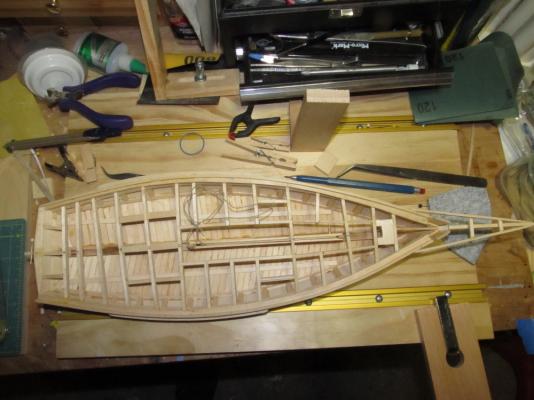
As promised some pictures of the small progress. Installed the side guards - to bend them I soak them in water for about 12-18 hours then bent them to the hull using a hair dryer for assistant and some screw clamps, left them to sit for 24 hours before I glued them in place. Installed the cut-water, then the head rails. Had to wing it on the trail board cross piece supports. I guess the next thing to install is the bowsprit.

- 250 replies
-
- 12
-
-
- willie l bennett
- model shipways
- (and 1 more)
-
Hi Lawrence, thanks for stopping by. Yes, progress has been a bit slow - I seem to keep losing my way in the clutter of the plans -Had to deconstruct and reinstall the head rails for the cut-water. Now I need to find the cross braces for the trail boards in the plans and build them. More pictures to follow shortly.
- 250 replies
-
- 5
-
-
- willie l bennett
- model shipways
- (and 1 more)
-
Mobbsie, yes, eye strain is a very definite hazzard with these plans Thanks for the comments and likes everyone.
- 250 replies
-
- 4
-
-
- willie l bennett
- model shipways
- (and 1 more)
-
Hi Mobbsie, just catching up on your build. I really like the way the wood colors came out. Very nice planking. Also like the interior equipment. How did you make the small barrels for the rope and rocks (??? - I think ??) ?
- 129 replies
-
- 4
-
-
- armed launch
- panart
- (and 1 more)
-
George, Mark J, Al, Joe, Mark, Ken, Gerty, welcome to the build log. And all those who hit the like button. Yes, the cluttered plans are presenting a major challenge to me and a source of many mistakes and re-do's but I will muddle thru. Gerty I have been referring to your excellent build log and photos a lot trying to figure out how the pieces fit together. After a lot of hair pulling I managed to get the planksheer cut to shape and installed, messed up the scarf joints a bit (didn't a lot of wood pieces to spare), the log rail went on with no problems. Found I had some gaps to fill in between the hull side and the planksheer which I took care of with some extra wood scraps planed down to thickness, and some good ole white model filler. Since it will be covered by paint it won't show. Here's the latest progress photos:
- 250 replies
-
- 16
-
-
- willie l bennett
- model shipways
- (and 1 more)
-
I'll be following along as well - my great-grandparents on both sides of the family emigrated to America from Ireland during the time of the Famine - not sure what type of ship transported them here.. This will be an interesting build to follow.
- 649 replies
-
- 4
-
-
- dunbrody
- famine ship
- (and 2 more)
-
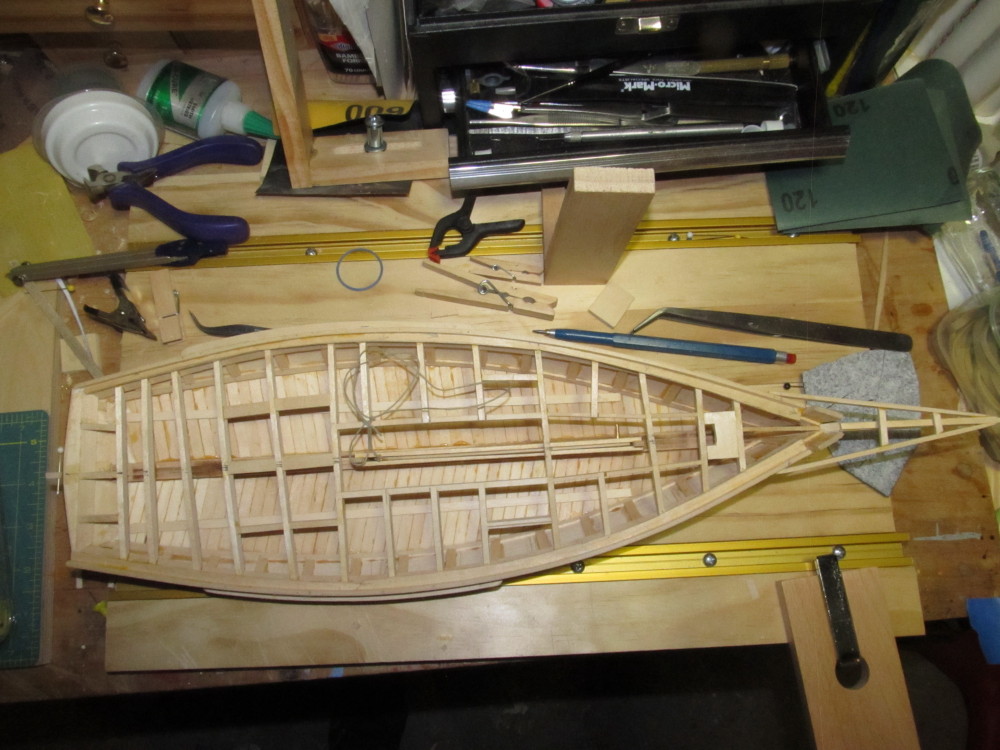
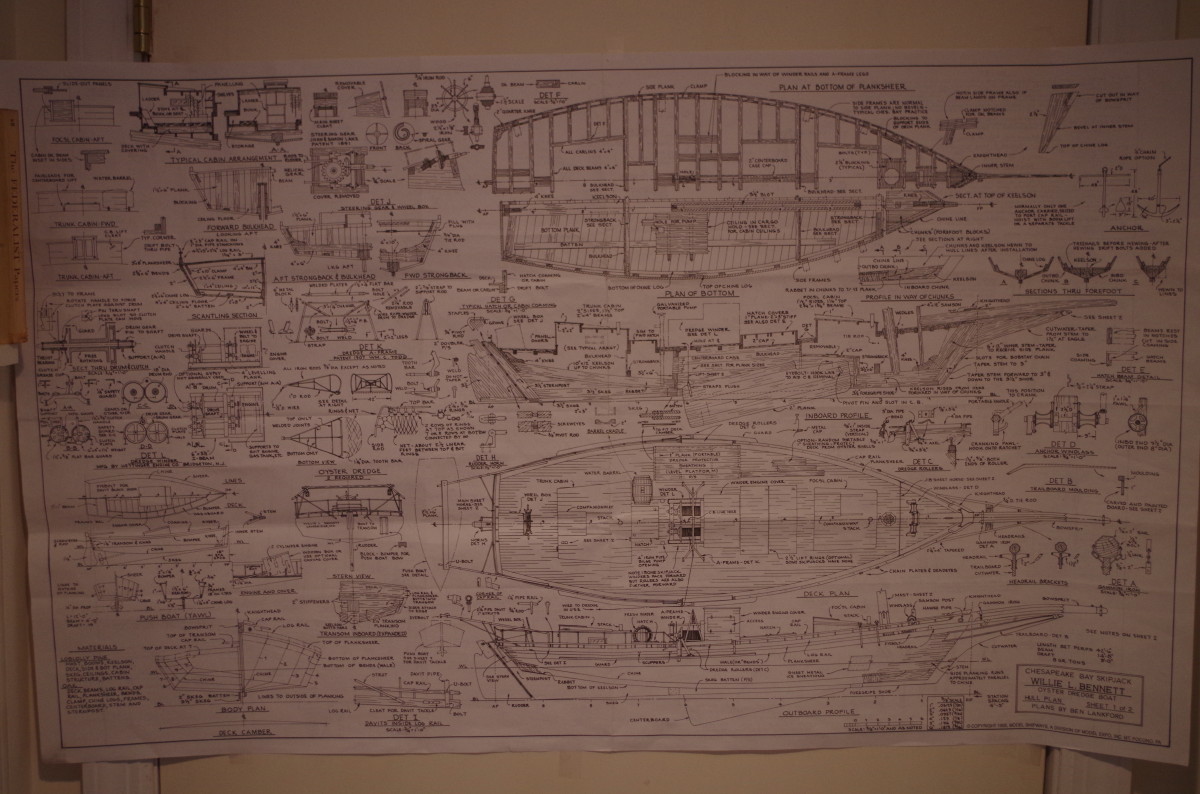
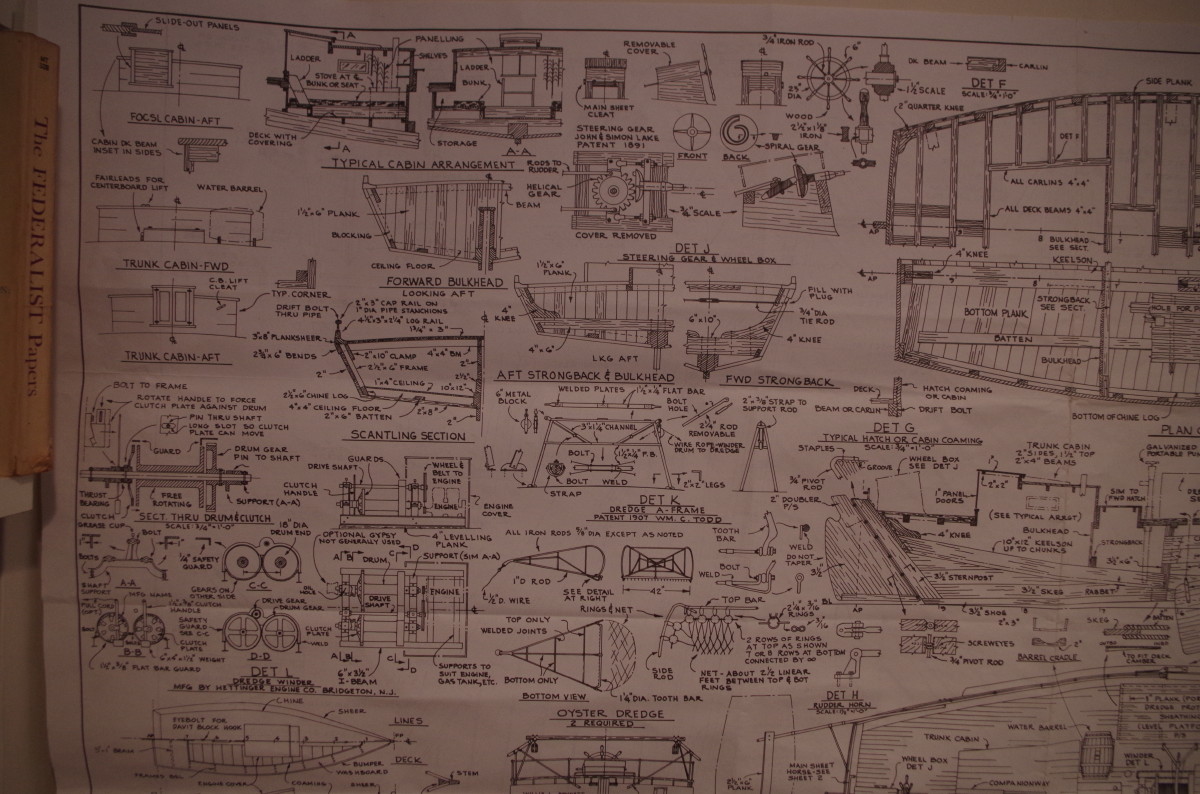
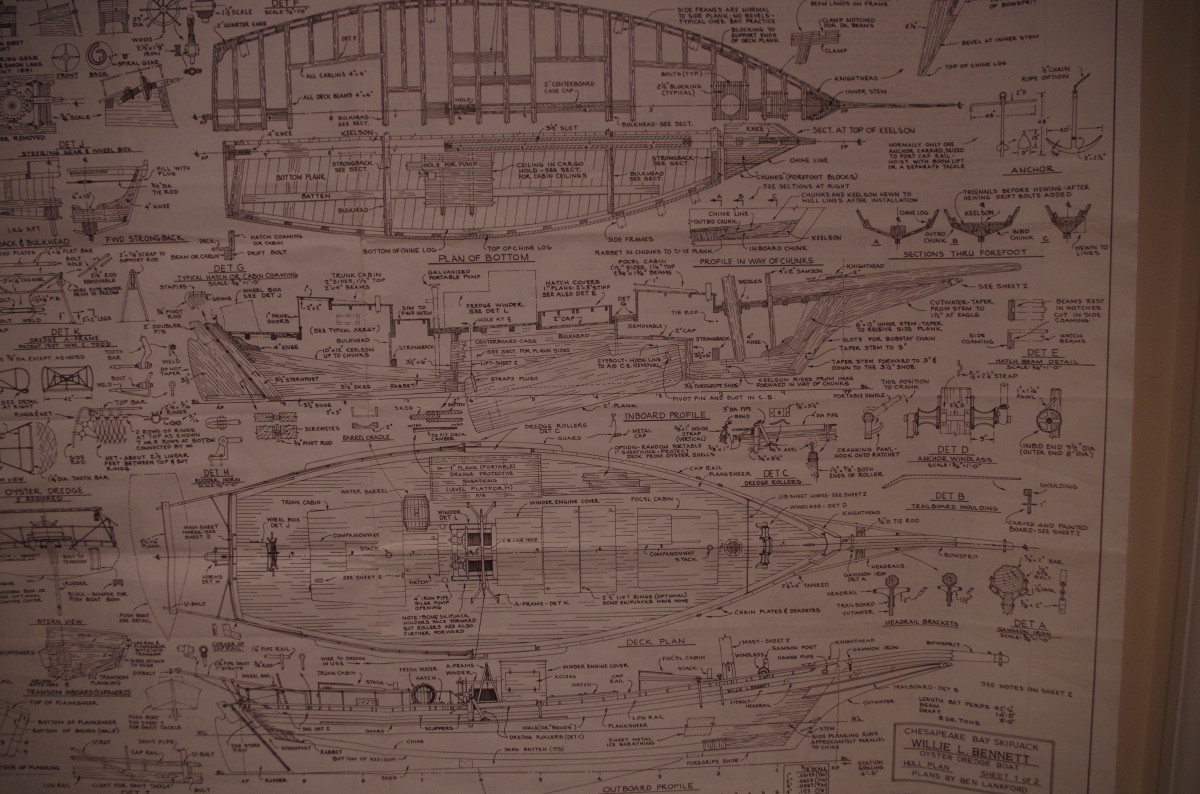
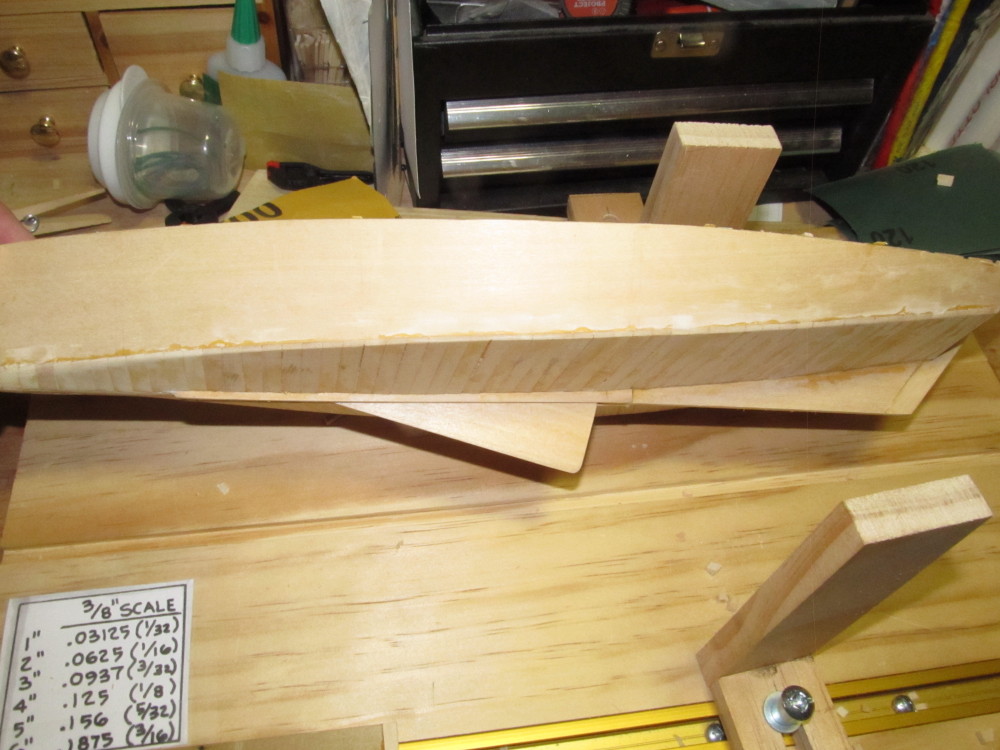
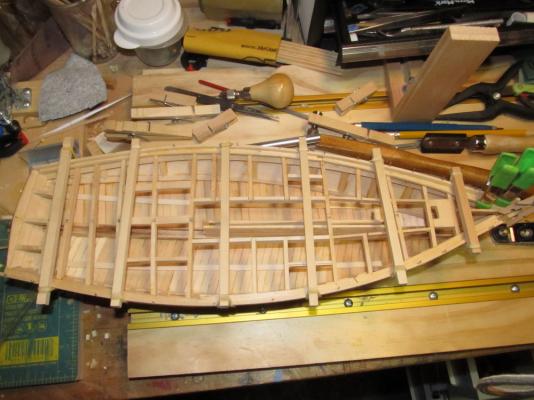
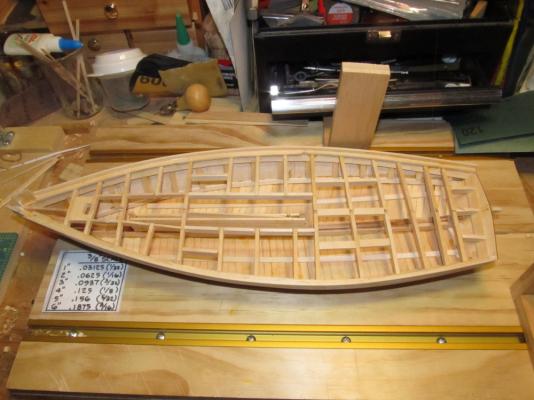
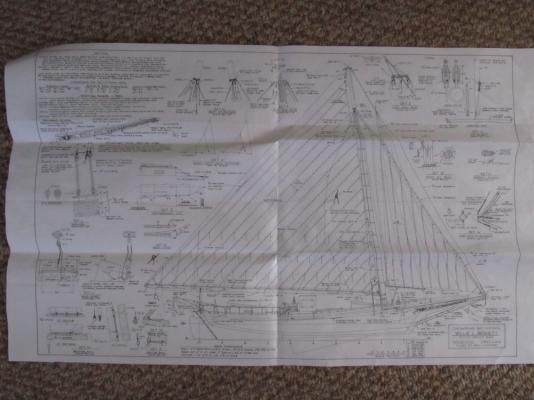
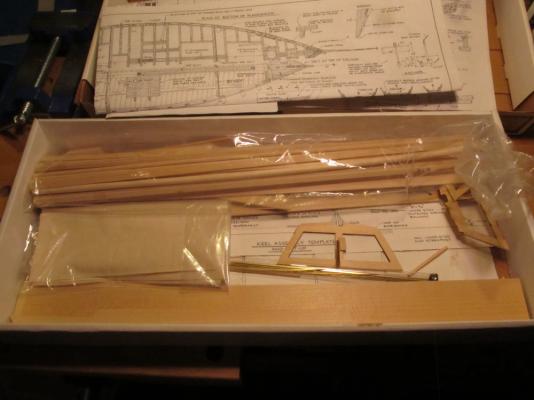
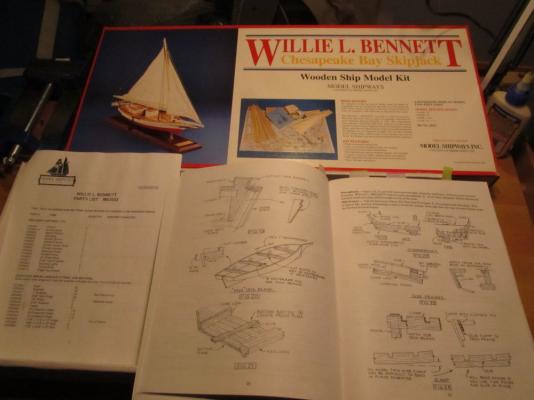
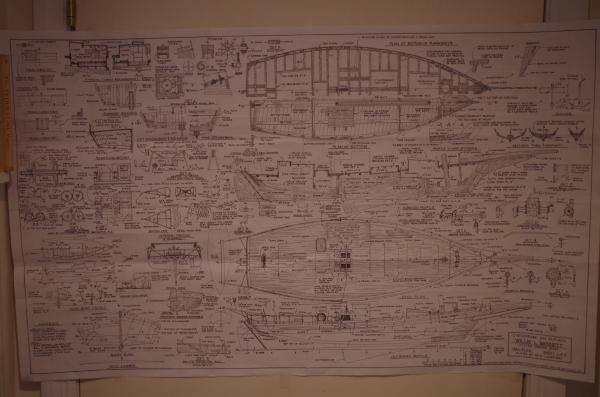
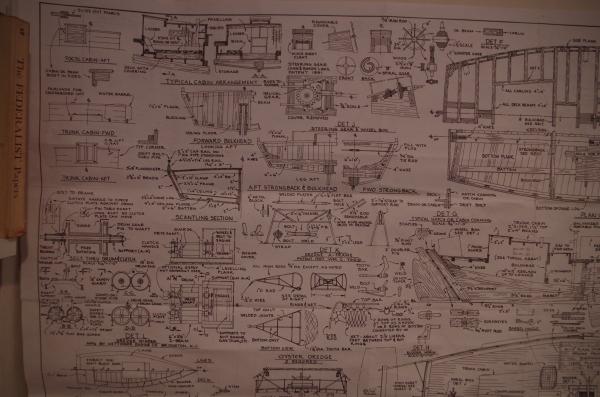
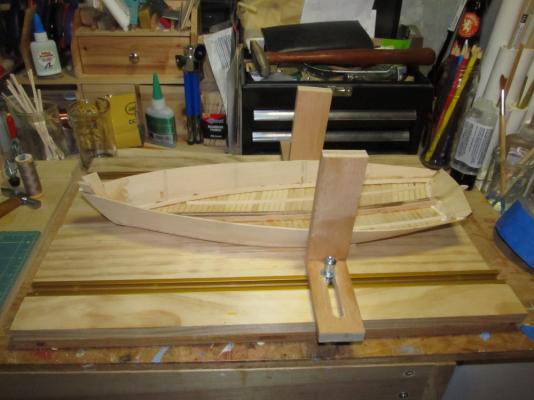
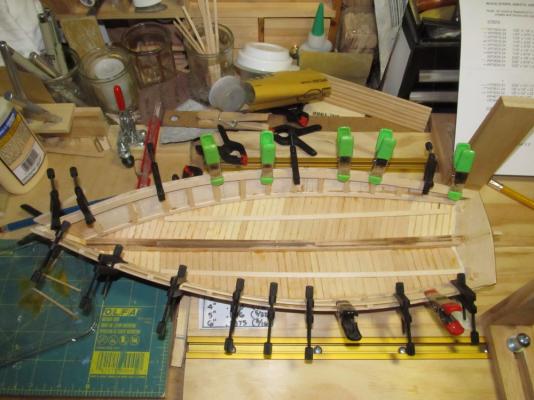
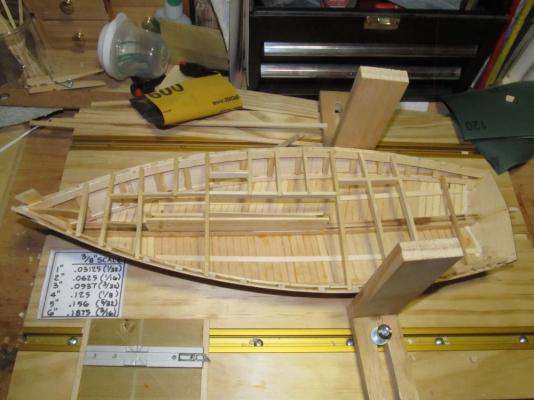
For my third build I've decided to resurrect the kit I started about 3 years ago, but gave up on because I found the plan sheets so cluttered and confusing that frustration took the fun out of the build. So after completing the basic hull structure on the inverted skeleton I packed the entire boat up in the box and went on to do Chuck's 18th Longboat and the AL Marie Jeanne instead. Now that I have several excellent Willie Bennett build logs to use as references, I've decided to give it another try. I've wanted to build a Skipjack model after taking my granddaughter to the Chesapeake Maritime Musuem on St Michaels MD several years back and seeing several examples of these fine Chesapeake Bay work boats. First the box with contents and ship's plans (if you enlarge the photos - last 3 photos below - you'll see what I mean by cluttered). This is where I left the model when I decided to suspend the build This is the status so far. Since the below decks structure will be completely covered I chose to not spend a lot of time detailing it and instead installed just enough to strengthen the model. This kit has a tendency to paint one into a corner if not careful. Installing the centerboard was a bit tricky and drilling the holes for the pivot was even more tricky given the side to side clearance and the length of the drill bit. I had to hold the bit in my fingers and rotate it slowing without the aid of a chuck. And, yes, a few of the deck planks are skewed and not completely perpendicular. I cut the notches in the clamp plank off the model after bending to shape using Chuck's hairdryer heat method and letting the planks sit clamped for about 36 hours. In some instances I am using butt joints and in others I'm notching the ends to fit into the pre-cut notches in the clamp plank. ("Clamp" is the term used in the plans) So pull up a barrel, bench, chair, box or whatever and enjoy some popcorn from Sjors popcorn machine (Thanks Sjors ) and join the build.


- 250 replies
-
- 24
-
-
- willie l bennett
- model shipways
- (and 1 more)
-
My son is a professional painter (fine art and houses) and says paint generally will not dry/cure properly at or below 40 F but your 17 C is about 63 F so almost room temperature (68 F ) - maybe the humidity is too high.
- 7 replies
-
- 3
-
-
- paint
- drying time
- (and 1 more)
-
Beautiful, Pete. Really nice. Congratulation on finishing her.
- 258 replies
-
- 5
-
-
- buzzards bay
- herreshoff
- (and 1 more)