HOLIDAY DONATION DRIVE - SUPPORT MSW - DO YOUR PART TO KEEP THIS GREAT FORUM GOING! (Only 27 donations so far out of 49,000 members - C'mon guys!)
×


Jack12477
-
Posts
5,665 -
Joined
-
Last visited
Content Type
Profiles
Forums
Gallery
Events
Everything posted by Jack12477
-
 Nice improvisation Sal. Merry Christmas and Happy New Year.
- 659 replies
-
- 5
-

-
- syren
- model shipways
- (and 1 more)
-
Thanks Per. Yes, I probably dry fit that piece half a dozen times before finally gluing it in place and it still wasn't right. Pull up a barrel and join the party. Have a Merry Christmas and Happy New Year.
- 203 replies
-
- 2
-
-
- artesania latina
- marie jeanne
- (and 1 more)
-
Nicely done. I like the results, especially the added tools.
- 105 replies
-
- 2
-
-
- picket boat
- model shipways
- (and 1 more)
-
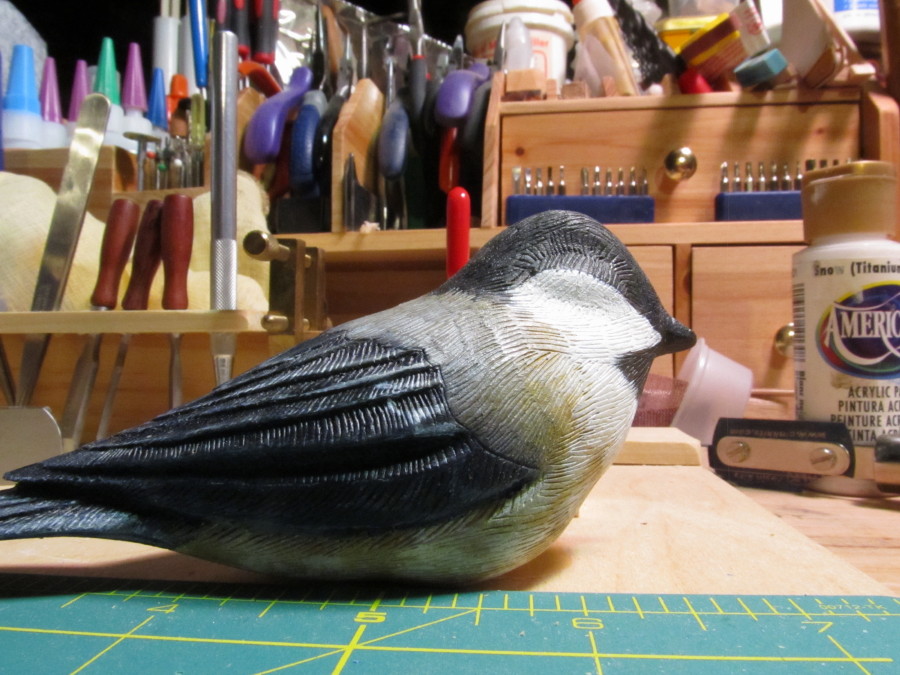
Hi Nigel, thanks for the compliments on the boat and bird. I've used Testor's ModelMaster series paints for years on my plastic models. It's an excellent paint; their other series (ones you see in the teeny tiny jars) is fair; but the ModelMaster series is excellent. Of course, the best paints were the Floquil and PolyS paints but they've gone out of existence altho some hobby stores still have some in stock. For my woodcarvings, I've pretty much stuck to water based acrylics which I've now applied to boats. I have not tried ModelMaster paints on wood yet but have no reason to think they would not work well on wood. Probably need a different primer for wood than the Gesso I've been using. ModelMaster goes on well with a brush and is easily used (with their airbrush thinner) in an airbrush. Coverage is excellent with either method. I've used it in an airbrush to paint camouflage pattens with great results. The bird's feathers were burned/carved into the wood first using a Colwood Cub woodburner with the "B" tip, then they were painted using acrylics. Takes as much patience as tying ratlines. I haven't tried the woodburner on wooden ships but it would probably work fine.
- 203 replies
-
- 7
-
-
- artesania latina
- marie jeanne
- (and 1 more)
-
Nice planking Mark. Also like the new stern coat of arms . Is that going to be further carved into a bas-relief or left as is? In either case it came out very well.
-
Nigel, very nice job on the sails and lines. I assume from your comments you are hand sewing the sails? Correct ?
- 270 replies
-
- 3
-
-
- red dragon
- artesania latina
- (and 1 more)
-
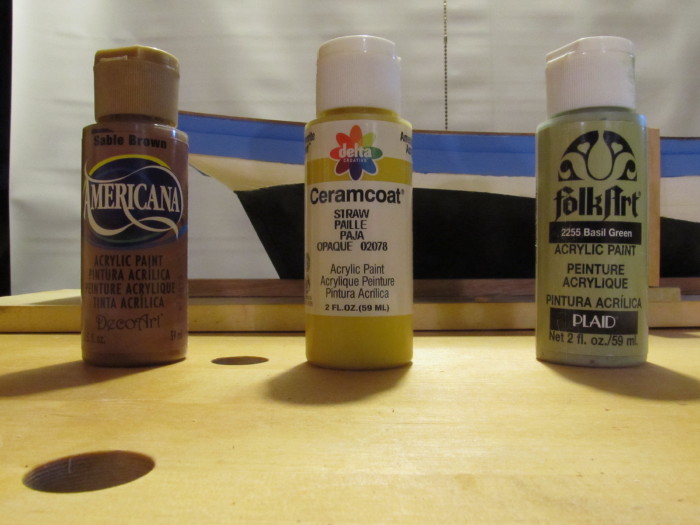
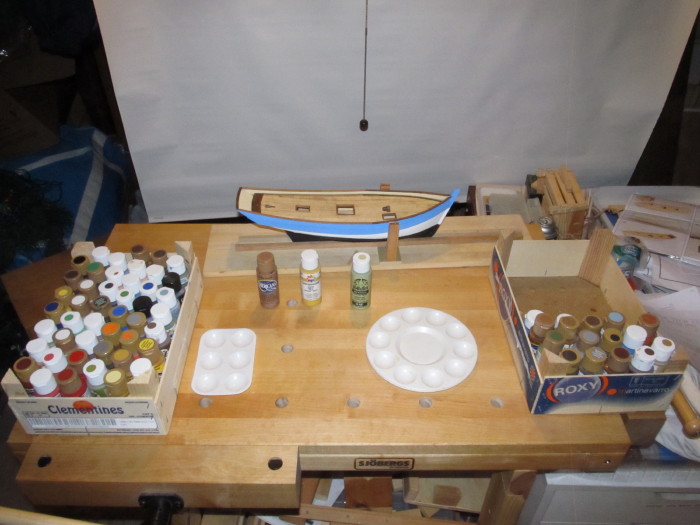
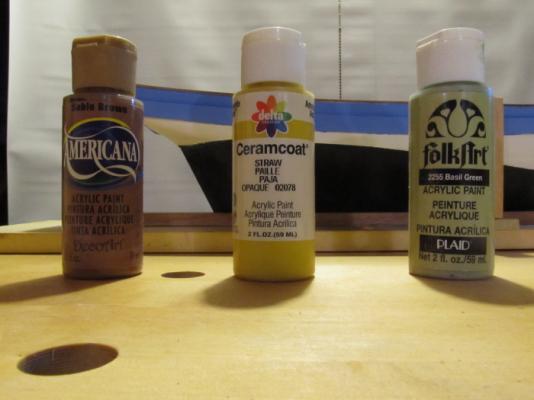
The shipyard's paint department. Representative sample of the paint "brands" used. I use the white painter's palette for mixing the colors. they're plastic, inexpensive, available in Michaels and are easy to clean.

- 203 replies
-
- 9
-
-
- artesania latina
- marie jeanne
- (and 1 more)
-
Thanks Ken, Pete and everyone who clicked LIKE. Yes, Ken, for the most part Ceramcoat. Also Americana, another brand sold by Michaels. Actually the blue isn't that translucent. It was just easier to work from top to bottom. In addition if you look closely you will see a "rub" strake bow to stern. It's a strip of thin plywood cut to a curve that goes over the hull, so I painted it separate from the rest then glued it over to hide the blue/white demarcation line. Clamping it was a bear tho. The only Liquitex brand I used was the Gesso and Cobalt blue to darken the Ceramcoat blue. 99% of the acrylics I use are either Ceramcoat or Americana brand from Michaels - also used for my woodcarvings.
- 203 replies
-
- 5
-
-
- artesania latina
- marie jeanne
- (and 1 more)
-
It's the aluminum foil used in the packages of Mucinex decongestant. Cut the little sheets up and you have scale aluminum strips.
- 396 replies
-
- 4
-
-
- Idea
- Bright Idea
- (and 1 more)
-
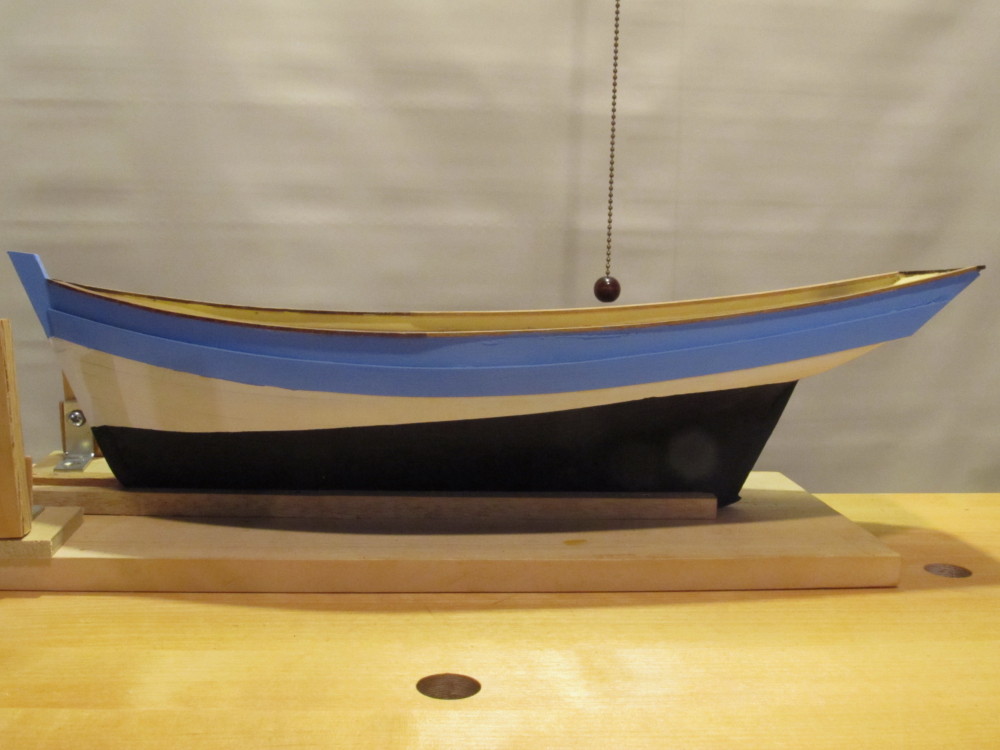
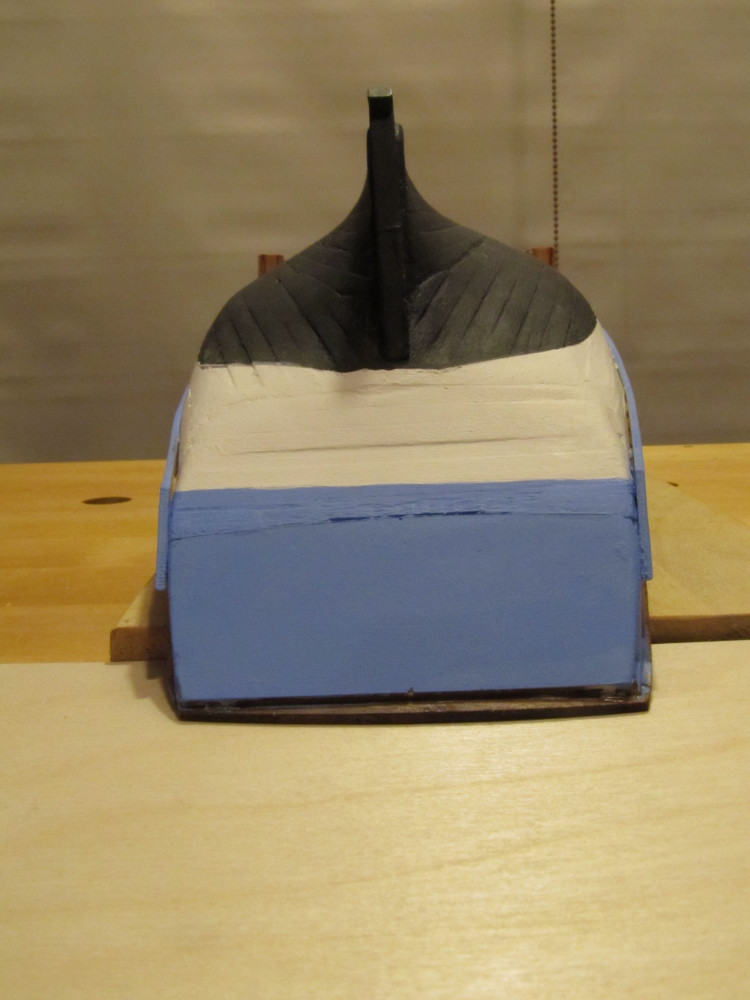
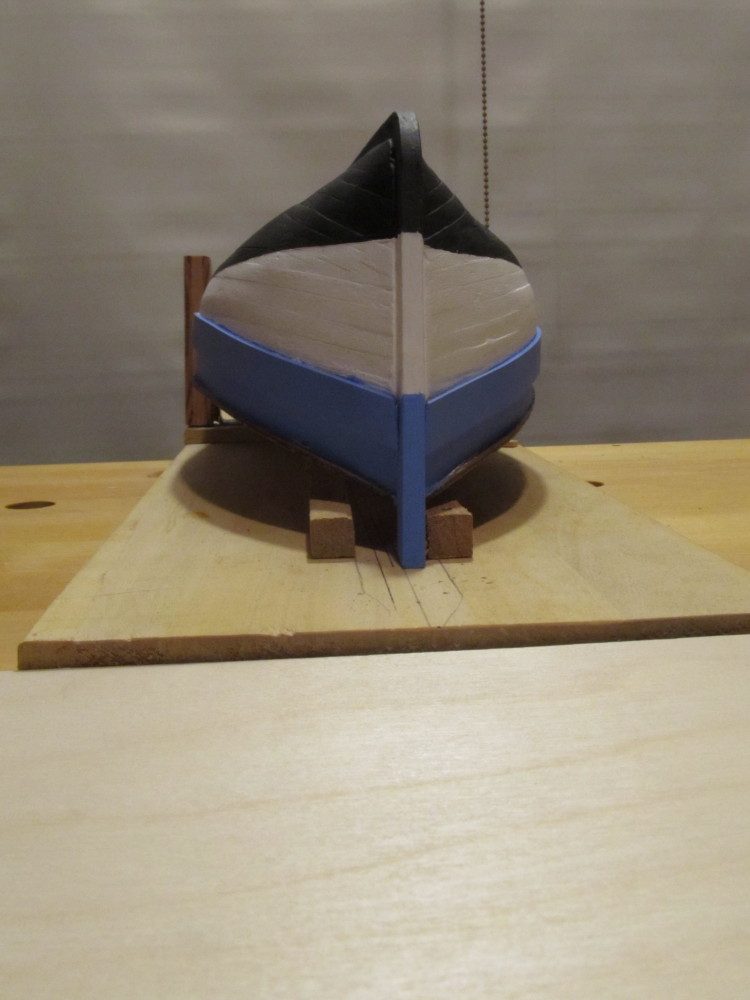
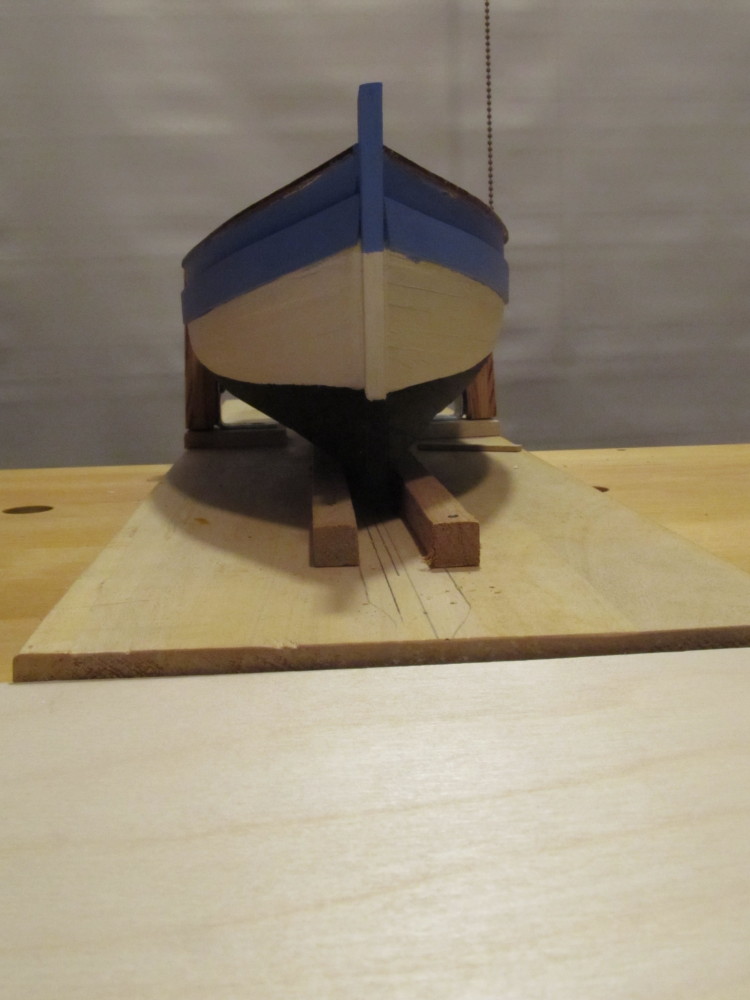
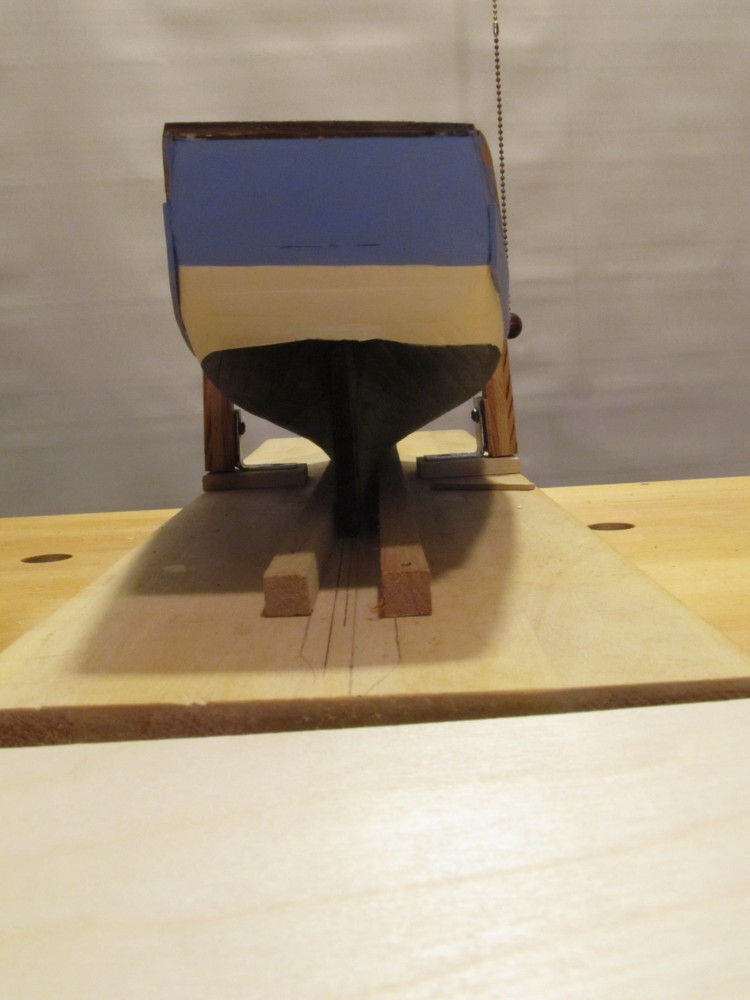
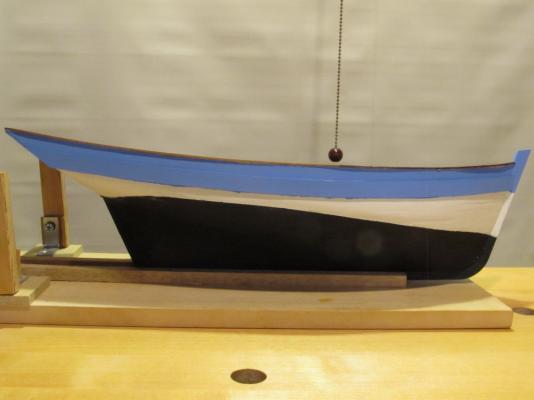
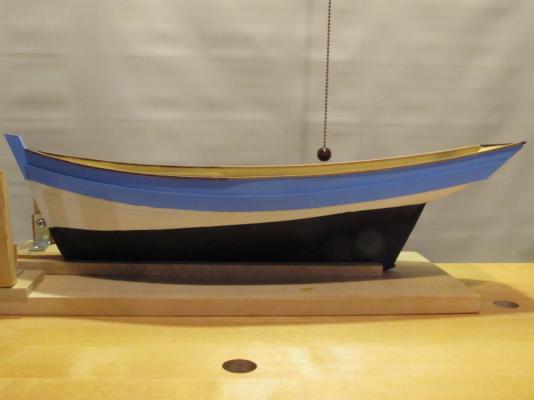
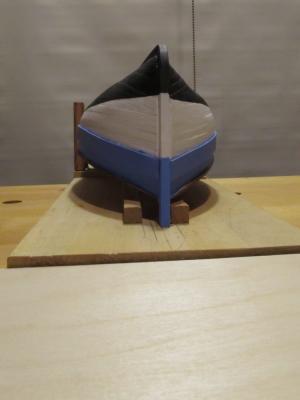
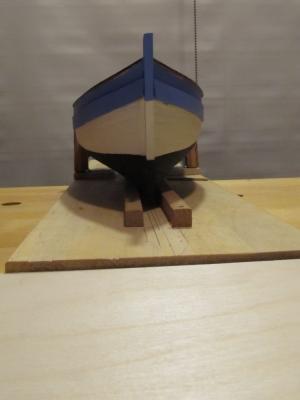
Update: Painting of the hull is complete, except for a few touchups here and there. The entire external hull was coated with 1 coat of artists Gesso - after it dried for 24 hours I lightly (emphasis on lightly) sanded it with 400 grit sandpaper (Gesso comes off easy if you sand to hard). I then proceed to mask the ship, starting with the deck area and then working to the outside. The blue coat was applied first, followed by the white band and lastly the black hull bottom. The paints are all water based acrylics, Michael's store brands. I described the color blending in post #42 above. Four coats of blue and four coats of white were applied; but only two coats of black (Lamp Black); the white is Titanium white (snow white).. The deck got 1 coat of WOP. Close-up photos certainly reveal the spots needing touch-up I notice there's some circular spots on some of the photos - it's either on the lens or something to do with the lighting - but it is not on the model itself.


- 203 replies
-
- 10
-
-
- artesania latina
- marie jeanne
- (and 1 more)
-
I get all my acrylic paints in Michael's Craft stores, store brands like Delta Ceramacoat or Americana. Also use some Liquitex. For a "primer" I use artist's Gesso - all are water based. I've used them for years with my woodcarvings and am now using them on my boats. I apply them with an artist brush, Michael's brands. Have not tried them in an air brush as yet.
-
Pete, welcome to my build log. Thanks for the compliments. George, thanks. Yes, my son suggested using Gesso for my woodcarvings and now I'm trying it on the boat. It does raise the wood grain a tad but a little pass with 400 grit works nice. He has to sand his canvases after he applies the Gesso. Yea the bird needs finishing - this is the 2nd carving I did of him the 1st one is already sitting on a tree branch with eyes and legs - just been lazy about finishing this one. The "feathers" were done with a woodburning knife - almost as bad as doing ratlines. Okay, "W.C.Fields" - have some popcorn And thanks to those who clicked the LIKE button.

- 203 replies
-
- 4
-
-
- artesania latina
- marie jeanne
- (and 1 more)
-
Spent a good part of the weekend masking the ship off for painting. Today I got a few tips from my artist son on the subtle fine points of blending paints to get the desire color. We were trying to pick a blue to match the box art. The formula he came up with was 1 big puddle of Delta Dreamcoat Blue Jay, then add 3 brush tips of Liquitex Ultramarine Blue (close to Cobalt blue), mix with brush and apply. (paint is water-based acrylic). Now I can hear the collective "hmmmmmmmmm" , remember artists don't work in precise measurements . Anyway I was able to duplicate the color in 3 separate batches for 3 coats. "Primed" the hull area to be painted first with artists Gesso (for those not familiar it's what artist coat their canvas with prior to painting), let it dry 24 hrs then lightly sanded, and painted. Got a pretty close match to the color in the "picture book instructions". So the interior bulkheads got 2 coats of paint (sand color) and the exterior got 3 coats of blue. Removed the masking tape and had to do a little touch up. The rub strakes also got 3 coats of blue before I install them on the model. Managed to keep the nice walnut strips clean of paint, they will get a coat (or two) of WOP. Photos will follow in next post. Oh, I had a visit from a little friend, came over from the woodcarving shop. Guess he wanted to know when I was going to give him a pair of eyes and legs black-cap chickadee

- 203 replies
-
- 11
-
-
- artesania latina
- marie jeanne
- (and 1 more)
-
Mark, this is not the Admiral's flagship. It's the lowly Captain's fishing boat ! But then I guess "she who must be obeyed" should at least be consulted I'm not too fond of the black bottom for the hull. I'm leaning toward walnut veneer which would be a 2nd partial planking. But yes 2nd planking not needed if I paint the whole hole like the box art.
- 203 replies
-
- 4
-
-
- artesania latina
- marie jeanne
- (and 1 more)
-
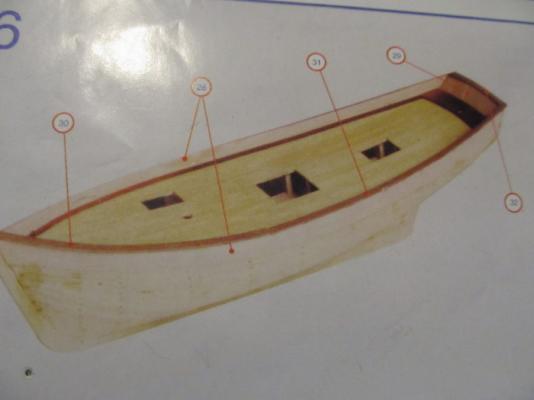
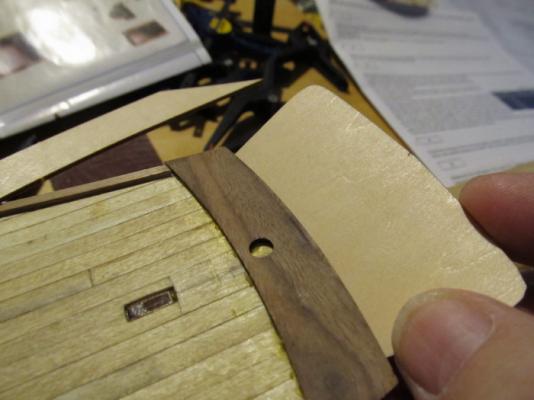
Hi Wayne, welcome to the party. Please have a virtual beverage at the bar Ken, Mark, thanks - yes, I finally got the transom figured out, and you're right, Mark, on all of my AL kits I've had problems with the stern/transom area. A simple diagram would suffice. And thanks to all who clicked the LIKE button. I think I may have jumped the gun on the double planking. When I inventoried the kit, I saw the nice 0.5 mm walnut veneer AL uses for the 2nd planking and assumed 2nd planking but after reading thru the "picture book" more it appears this is to cover the deck/hatch structures and the die-cast metal row boat that came with the kit. The pictures show it painted a blue-white-black hull pattern and I think I need to stop here and start deciding on a paint scheme because if I continue on then the painting of the interior of the sheer/gunwale area will be impossible; ditto some of the exterior. I'm not sure how much walnut veneer will be left for 2nd planking but I do have some in my stash from a previous AL kit so a 2nd planking is still a possibility. Back in post #23 the last two photos show the color scheme on the book art and "picture book" but I'm not sure I want to do it that color or choose a different color, say dark green or red, or ???? with maybe the walnut veneer in place of the black bottom paint. I took a piece of the plywood the sheer plank was cut from and am running some paint "chips" to see what I like. I'm open to opinions, suggestions, comments on painting/color scheme! So fire away !
- 203 replies
-
- 4
-
-
- artesania latina
- marie jeanne
- (and 1 more)
-
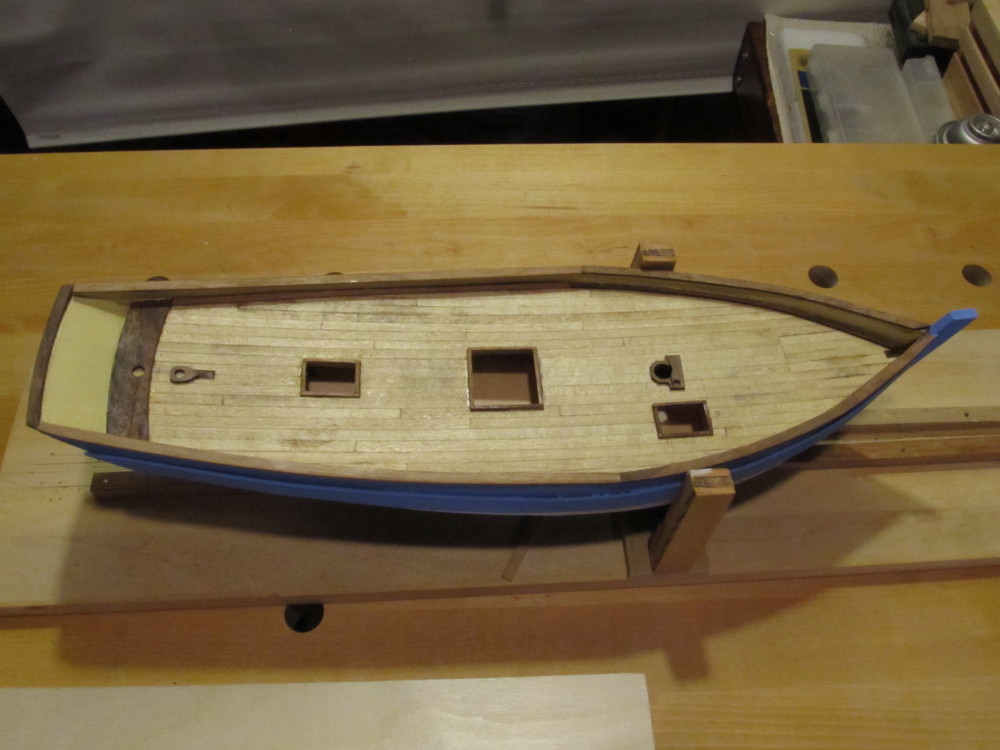
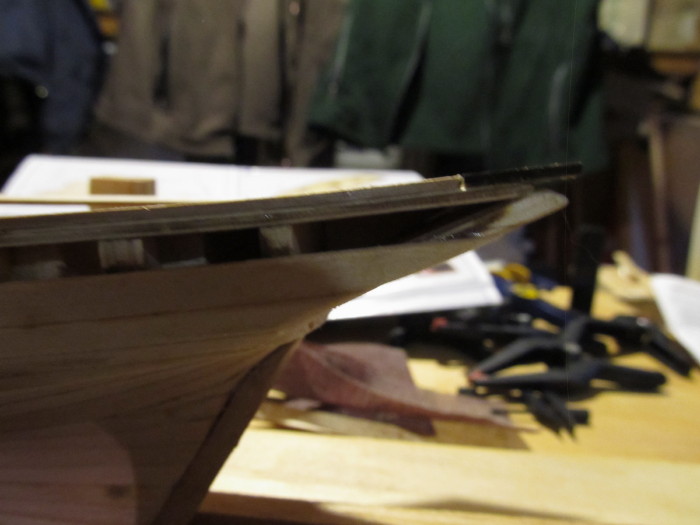
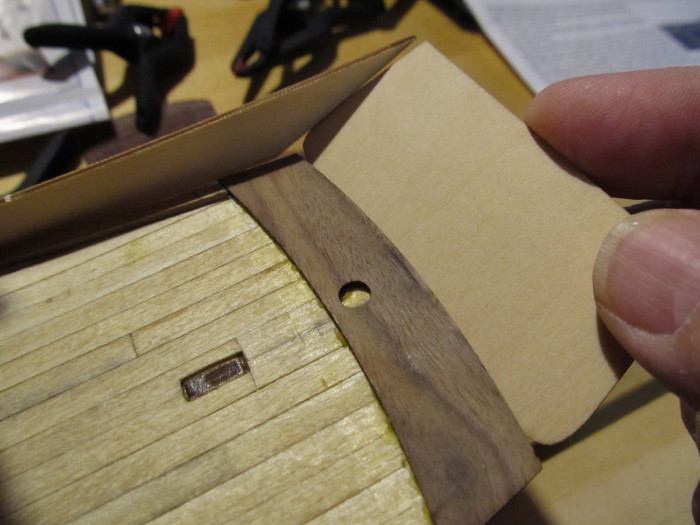
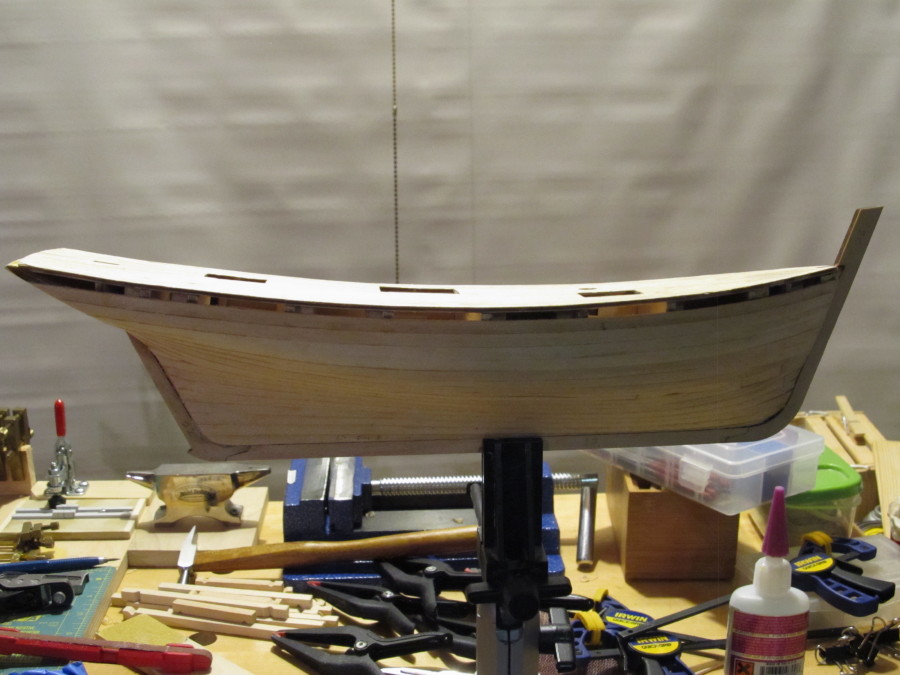
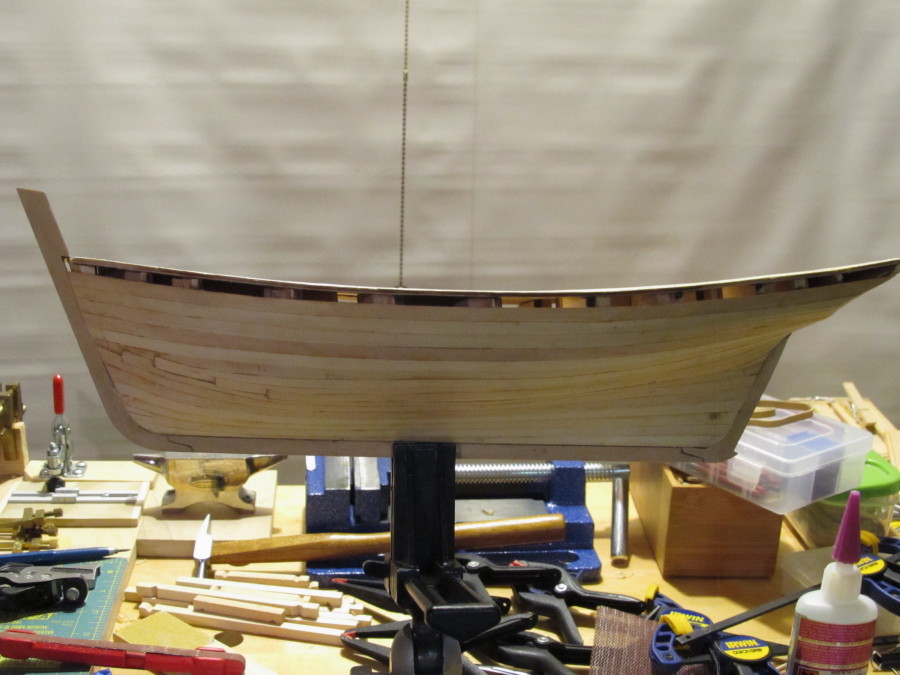
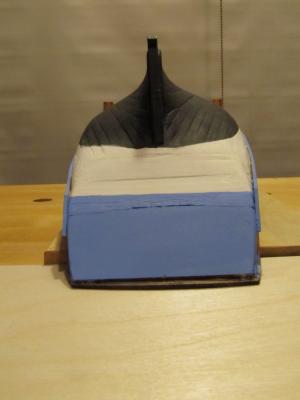
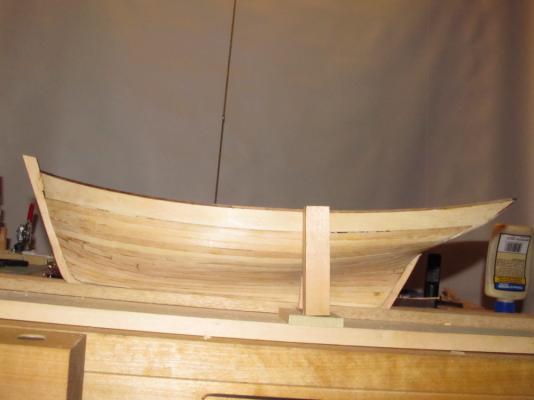
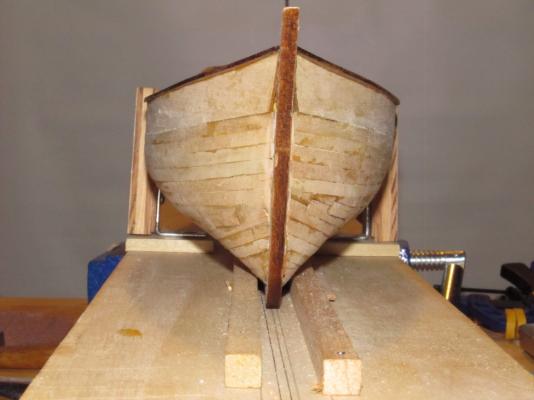
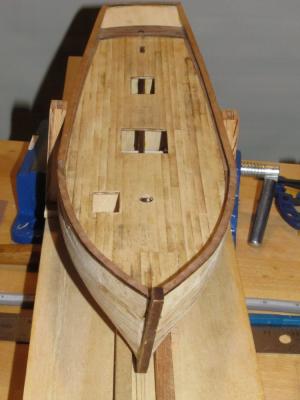
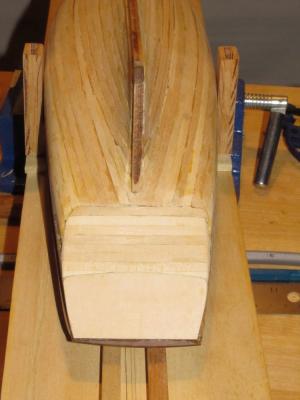
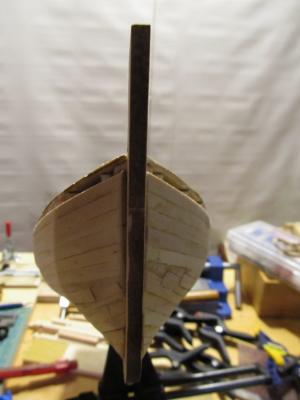
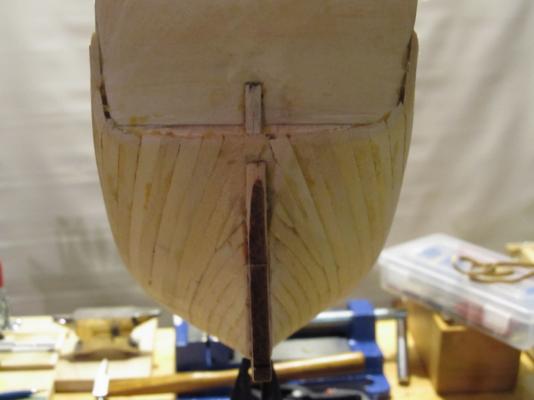
Thanks everyone for the comments and likes. After spending many frustrating hours dry fitting the stern pieces and trying to decipher poor instructions and equally poor photos supplied with the kit, I finally got the stern assembled - not quite the way it was supposed to be but enough that a little improvisation could remedy the screw-up. Side sheers and cap rails installed. My solution to the screw-up was to horizontally plank the stern (big gap) with the same planks as the hull and then feather sand them into the hull. There's another thin plywood piece that goes over the sheer as a rub rail/strip which hasn't been called out it the instructions yet but it will cover some of the small gaps. First the vague and misleading picture - note the stern area Model Which way does it install ? Up or Down ? Final solution Next comes the deck structures.


- 203 replies
-
- 15
-
-
- artesania latina
- marie jeanne
- (and 1 more)
-
Ryland, thanks for the info. I'll check them out - also the one David B mentioned. I need to replenish my rapidly drying up supply of Floquil/PolyS paints.
-
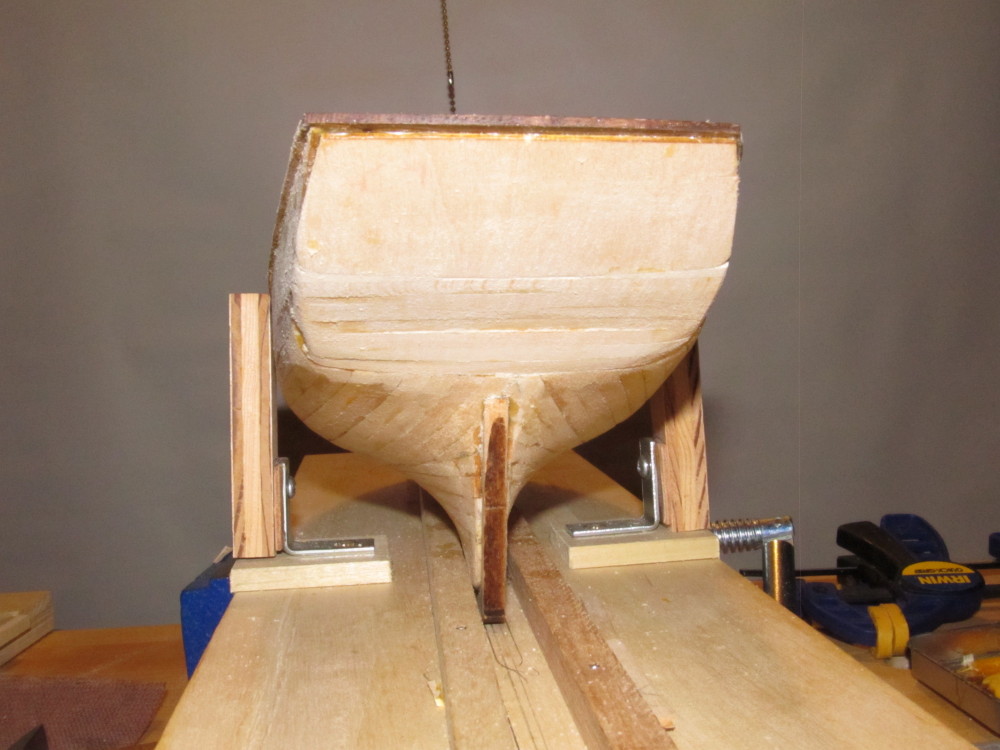
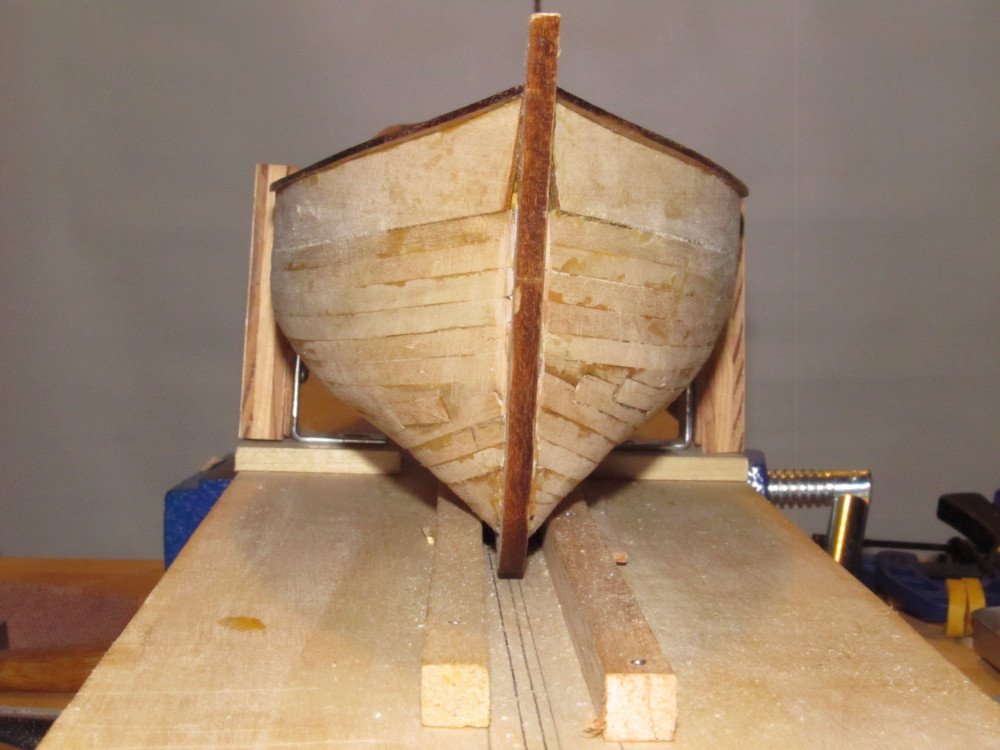
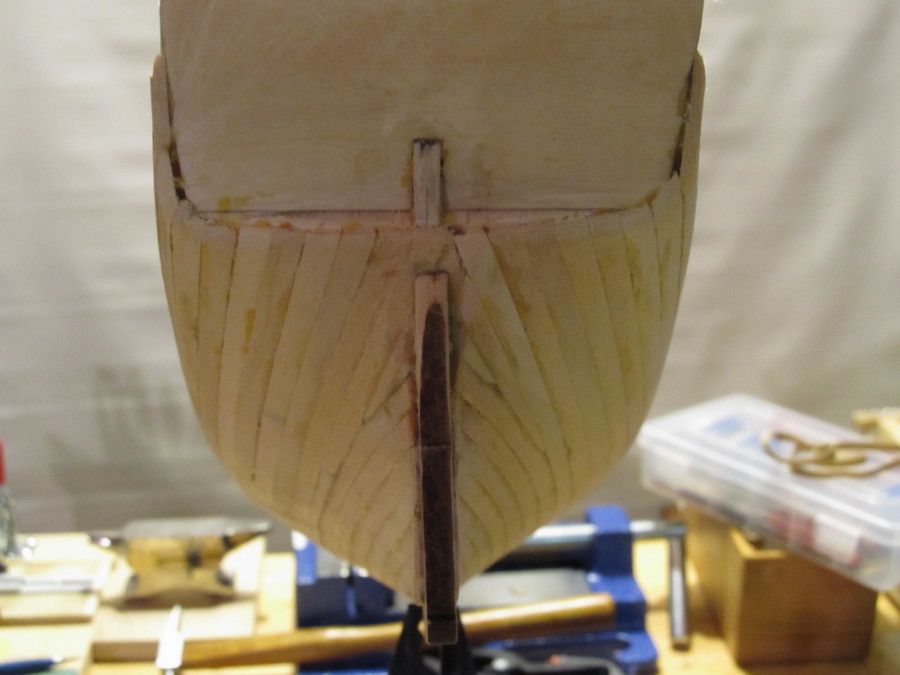
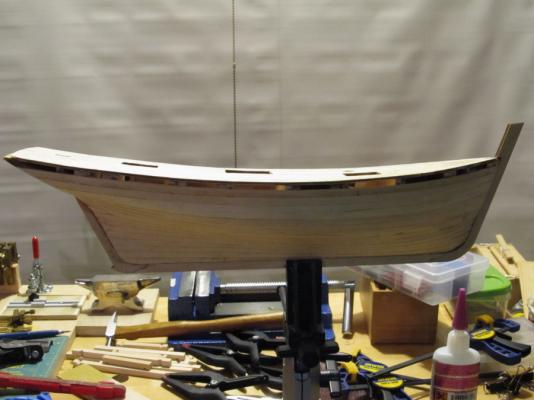
Update: The planking of the hull is now complete. Installed the keel, bow stem and stern post. Surprised myself - the keel, stem, stern posts all fit nearly perfectly with only a minimum of sanding - usually with these types of kits I spend hours sanding and shaping to get the pieces to fit the planked hull correctly. Hull is completely sanded - the Lee Valley miniature planes did a nice job of knocking off the high points of the planks.

- 203 replies
-
- 12
-
-
- artesania latina
- marie jeanne
- (and 1 more)
-
Ryland, where do you buy your Badger paints? Local store or online?
-
Harbor Freight Mini Wood Planes
Jack12477 replied to grsjax's topic in Modeling tools and Workshop Equipment
Re; Sharpening blades. My two mentors in my woodcarving club tell me that once a blade has been well sharpened on a stone it should not need resharpening on a stone unless you knick the blade. Instead they say to periodically strop the blade on a good leather strop using a good quality rouge; in the case of our woodcarving knives and chisel/gouges they recommend stropping before each carving session and again after about an hour of carving. In the case of the wood planes, I'd say periodic is probably based on frequency and duration of use. But then I don't have a lot of woodworking experience so working with planes is somewhat new for me.