HOLIDAY DONATION DRIVE - SUPPORT MSW - DO YOUR PART TO KEEP THIS GREAT FORUM GOING! (Only 13 donations so far - C'mon guys!)
×


Jack12477
-
Posts
5,663 -
Joined
-
Last visited
Content Type
Profiles
Forums
Gallery
Events
Everything posted by Jack12477
-
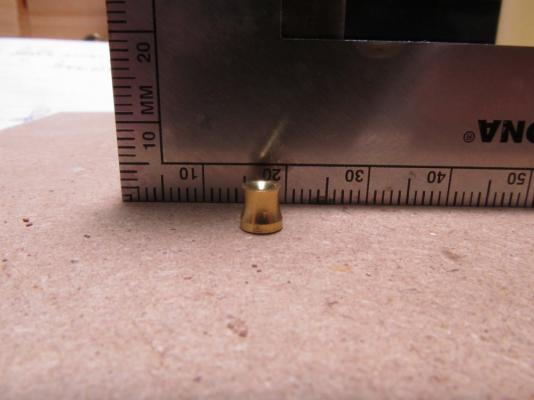
 Ken, I found out what that brass piece was. It's the flagpole cap - goes on the top of the main mast.
- 203 replies
-
- 3
-

-
- artesania latina
- marie jeanne
- (and 1 more)
-
Thanks George, Ken, Sal and all those who clicked the Like button.
- 203 replies
-
- 3
-
-
- artesania latina
- marie jeanne
- (and 1 more)
-
No nothing like that at all George. After thinking about it, I would say it would be a bit difficult to scratch build from these plans.
- 203 replies
-
- 3
-
-
- artesania latina
- marie jeanne
- (and 1 more)
-
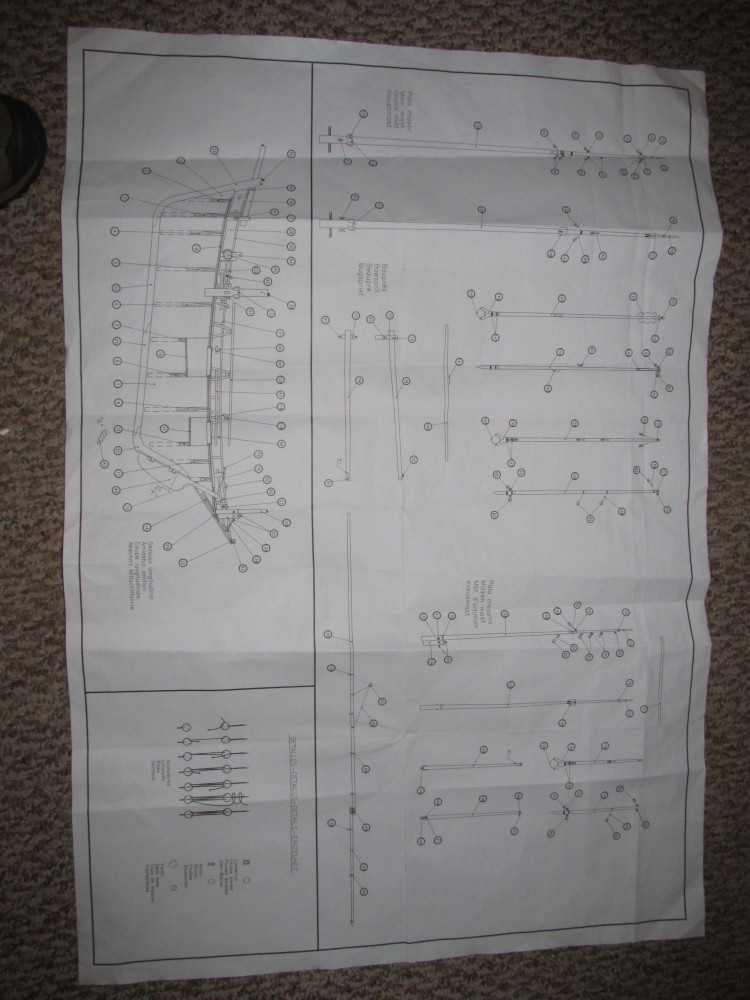
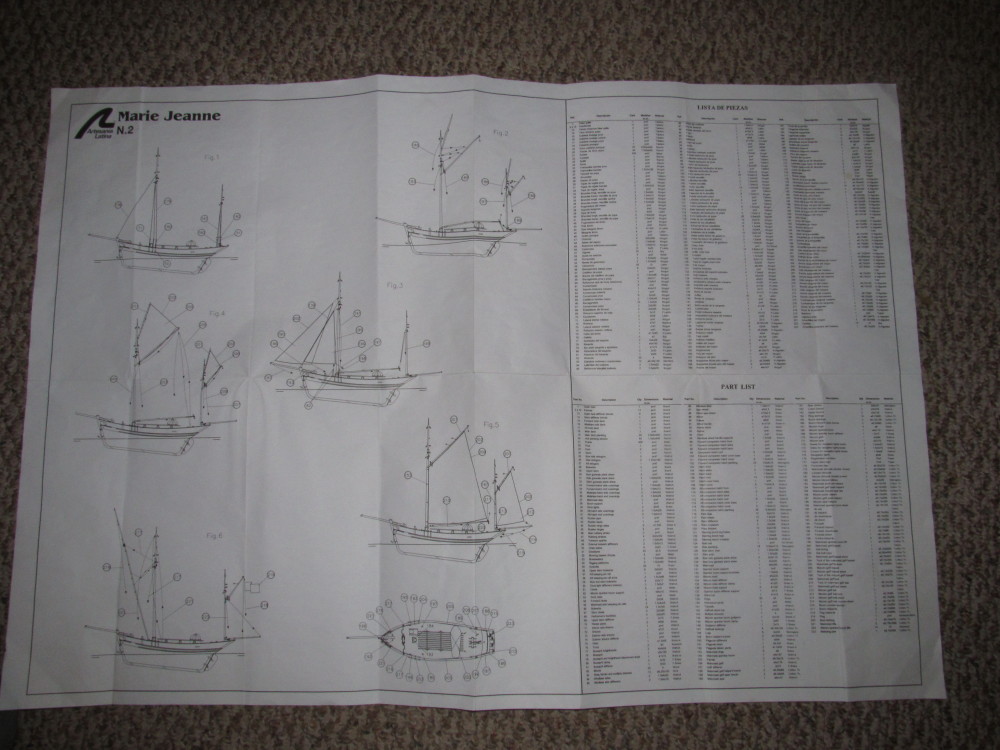
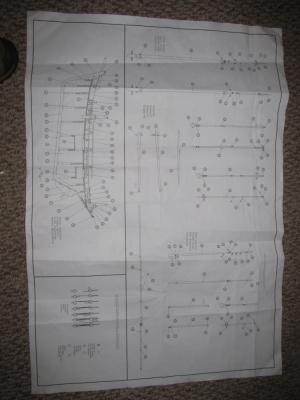
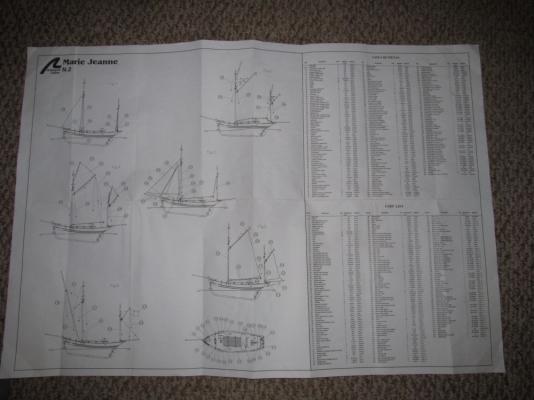
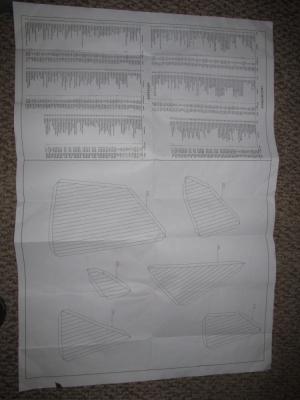
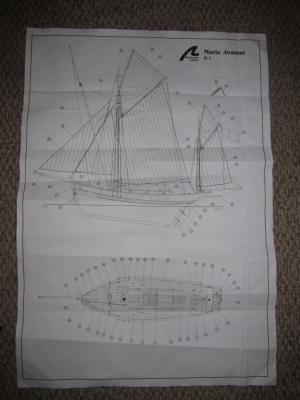
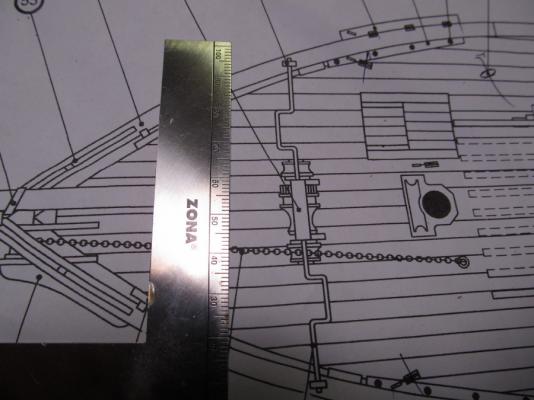
One correction - the parts list is in 4 languages - Spanish being the fourth. George, here's a couple of pictures of the overall plans.
- 203 replies
-
- 5
-
-
- artesania latina
- marie jeanne
- (and 1 more)
-
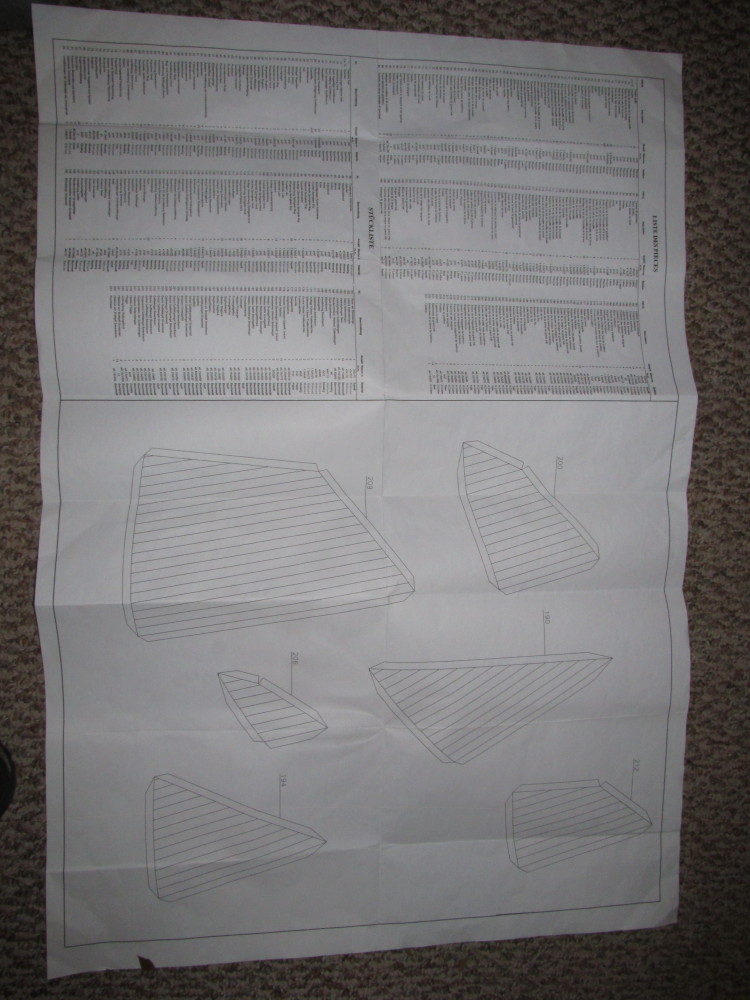
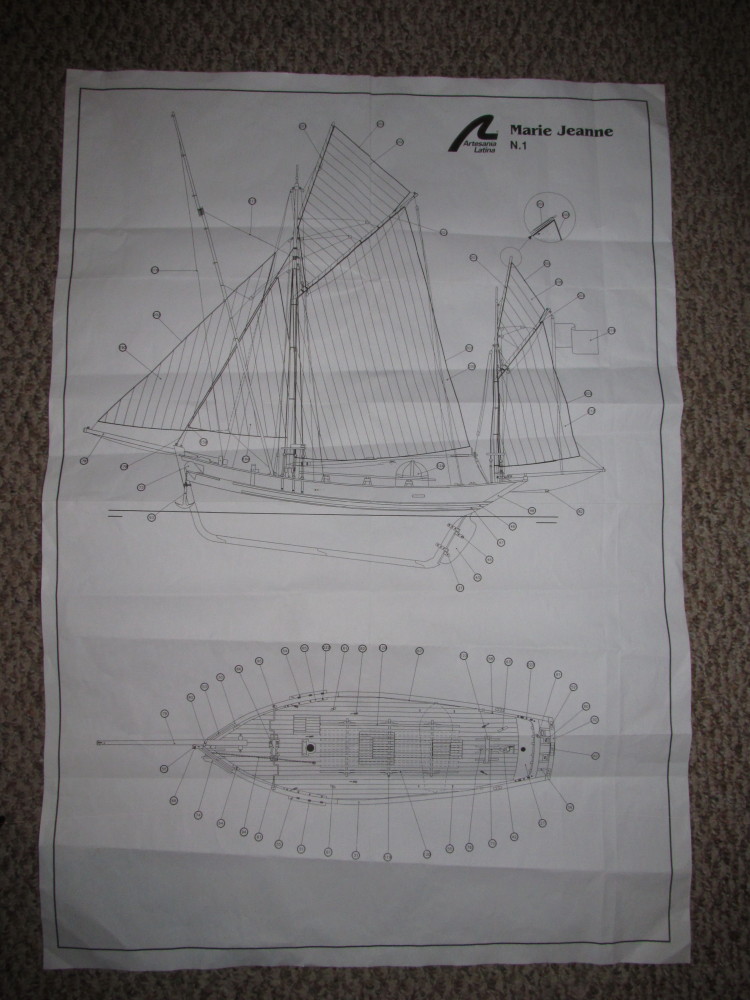
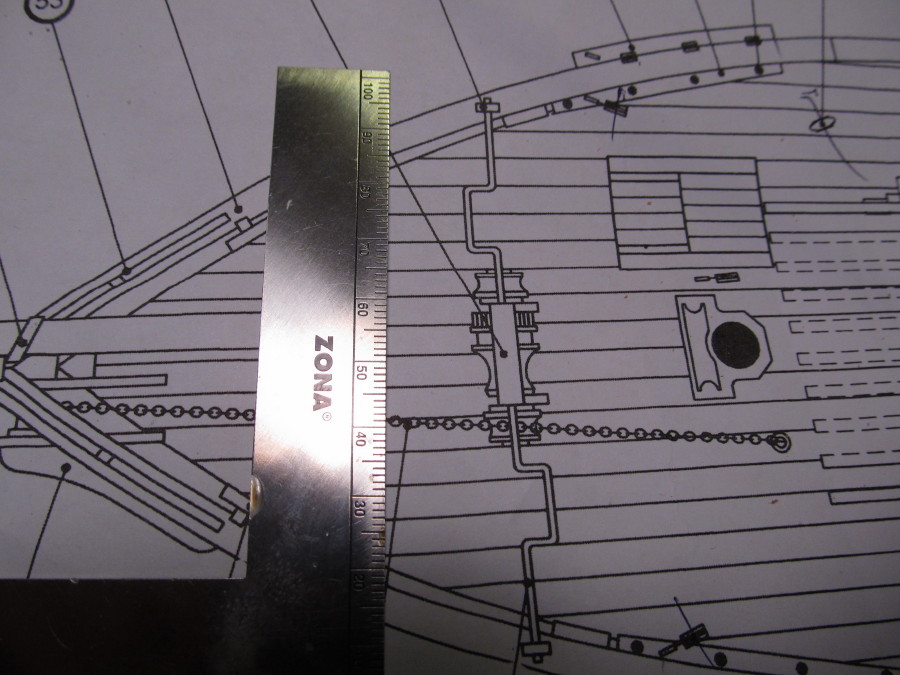
The paper plans are 1:1 so yes I have been using them to pull measurements, But they don't show all the views I would like. They're on two sheets of paper printed on both sides - a good portion is waste by the parts list printed in English, French and German. Then another part is wasted with complete layout of each sail - as if you were going to cut them out and sew them yourself, except they're in the kit. The top down deck view is pretty good for measurements, the side view is only the port side - no starboard view (which is not a mirror image of port) There's a whole section 1:1 for the masts, spars etc. The first picture of the capstan is a partial view of the top down deck plan view 1:1.
- 203 replies
-
- 3
-
-
- artesania latina
- marie jeanne
- (and 1 more)
-
I probably should step back a moment and clarify my remarks about the instructions. First let me say that this kit is fantastic and right up to the standards I've come to expect from AL. The wood is excellent, the brass parts are excellent, well machined, etc, The sails, which I have not shown, are excellent, all sewn with a bolt rope around all edges, seams sewn into the sail in prototypical fashion. The model is very attractive. There is no shortage of wood, or brass or nails (I'm inundated with little nails), rope for the rigging, blocks, etc. In fact I will probably have some left-over stock to add to my stash. The gripe I have is with these [what I will call] picture book instructions which show the step from a poor angle, with poor detail, and little to guide you other that a numbered balloon with a line point to a part. Even the parts lists does not accurately describe the dimensions of the part. The least they could do is show 2 angles [view points] for some of the more complex assemblies, like the capstan as an example. I would recommend the kit to anyone but just be aware that you may have to wing it with some of the assembly steps. Except for the frustration with the poor pictures I am enjoying this build a great deal.
- 203 replies
-
- 4
-
-
- artesania latina
- marie jeanne
- (and 1 more)
-
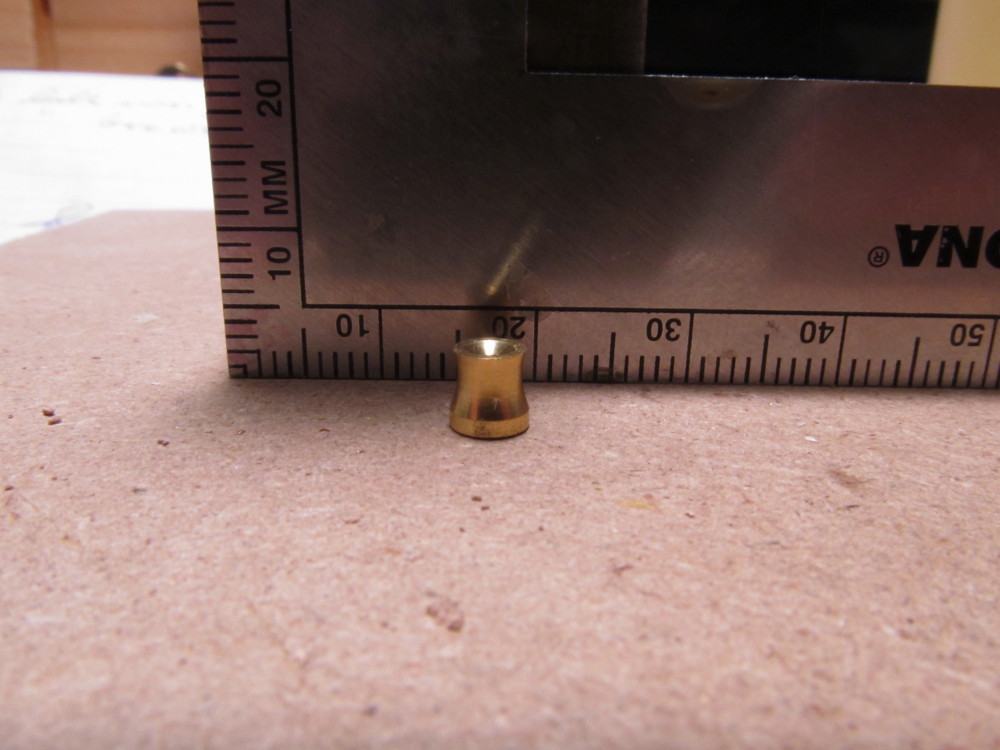
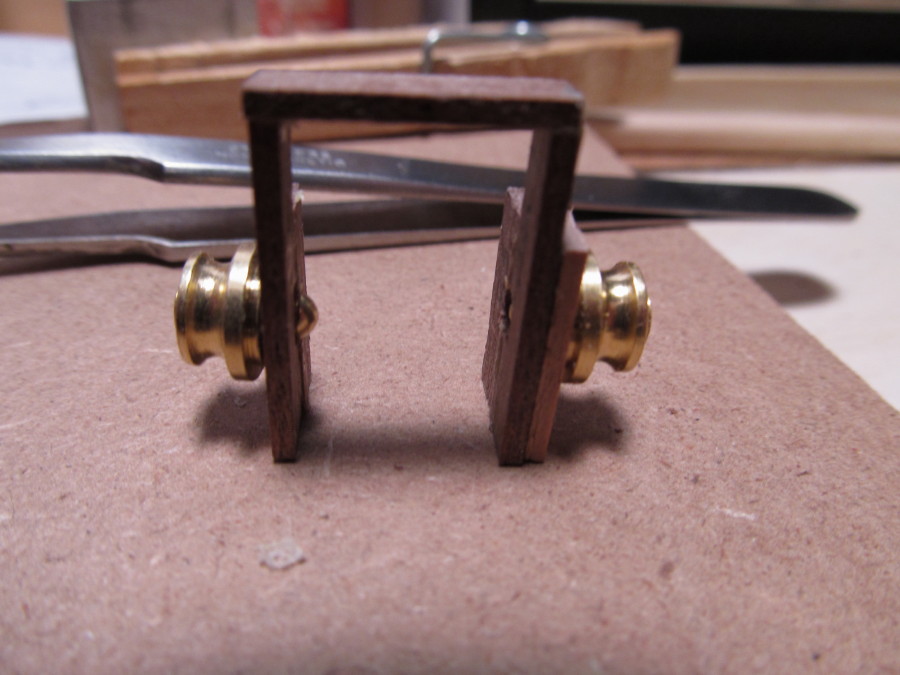
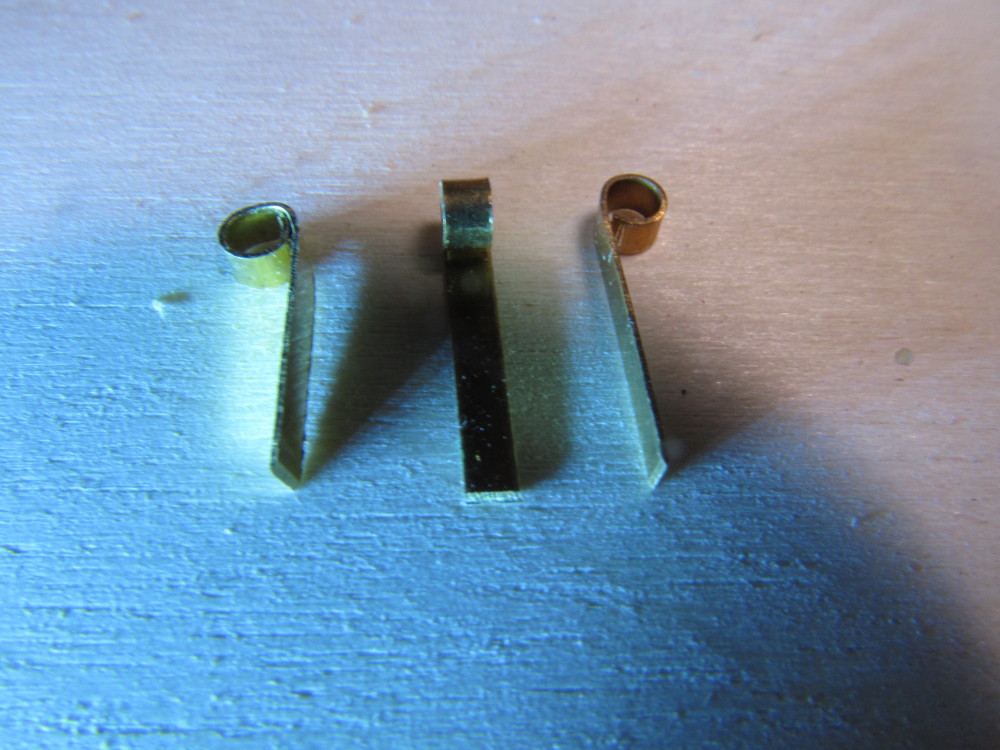
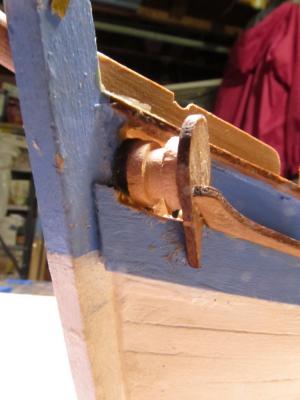
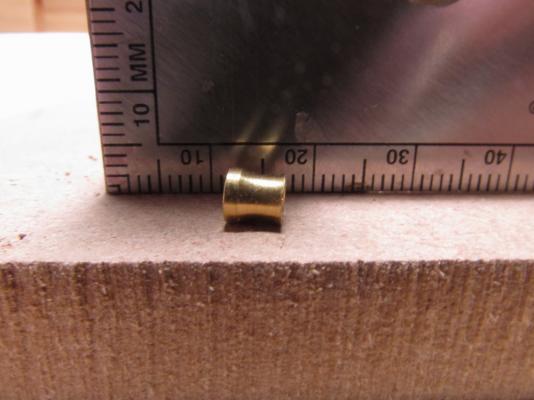
Don't think it is a ship's bell, Ken. The hole goes all the way thru and it appears to be shaped like a capstan the one side is flush the other side has a cone shaped recess. Some close up pictures. It measures 5 mm long by 4 to 5 mm in diameter. Forgot to add a close up of the chain roller in the bow (another fun sub-project) - there was no information on how big or small to make the cut out in the bow wall. Had to dry assemble the piece and get measurements off it then transfer to bow, drill a series of small holes to form a rectangle, cut out with small saw (#11 saw blade), then file, file, file, file until it all fit. Some touch up of the paint job will be necessary.

- 203 replies
-
- 8
-
-
- artesania latina
- marie jeanne
- (and 1 more)
-
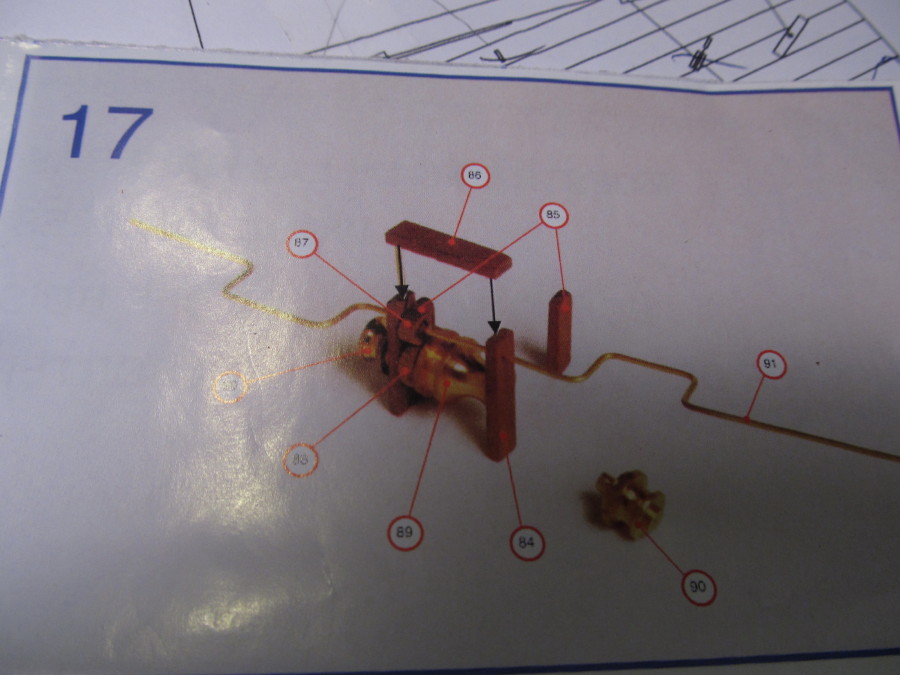
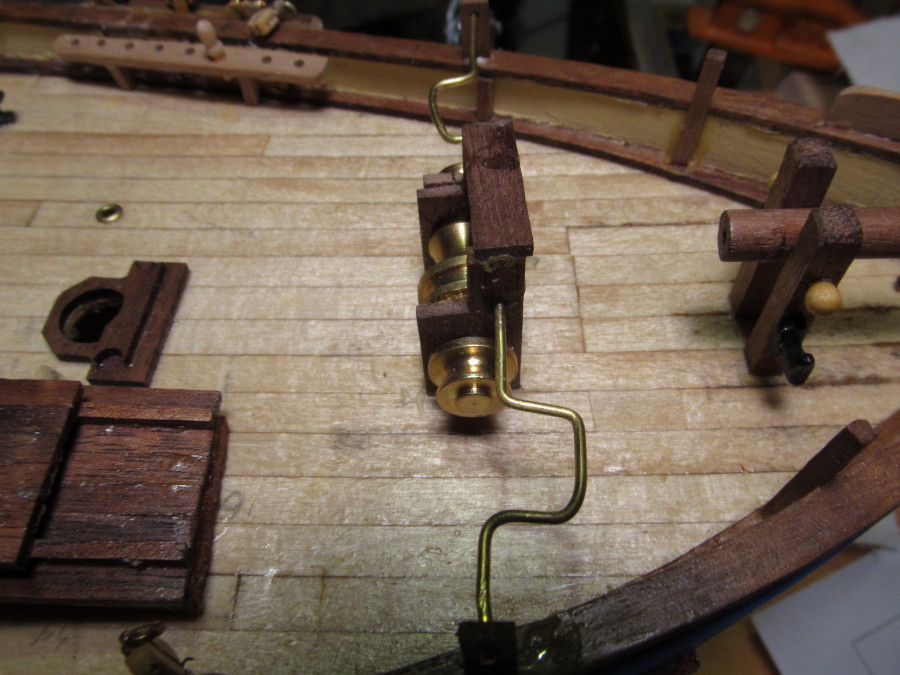
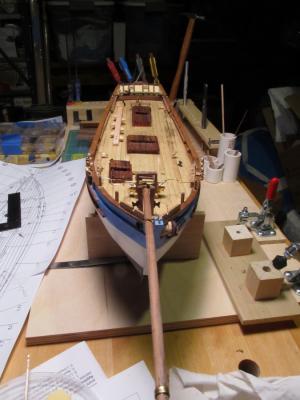
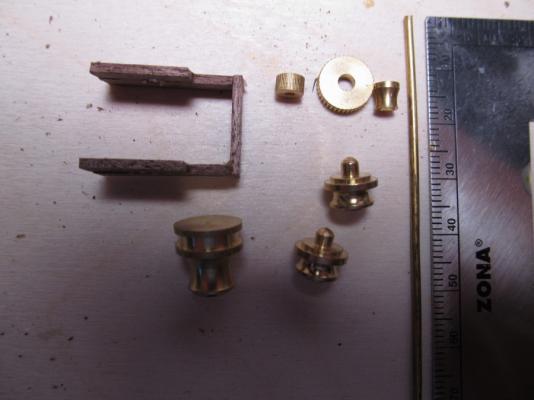
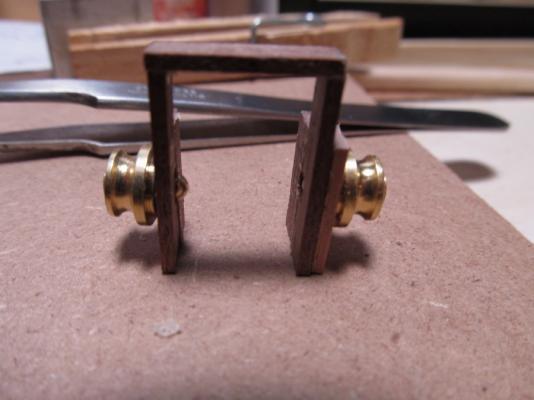
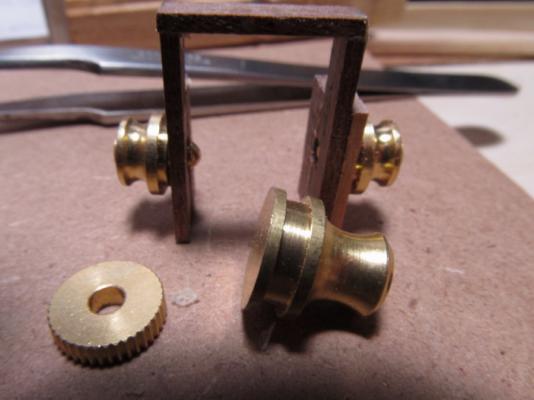
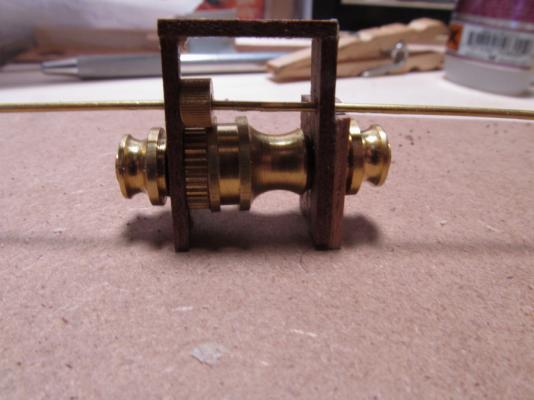
Another update: First challenge was interpreting the pictorial instructions The very clear instructions for the capstan: Then sorting out the parts and assembling them. The parts list called for a 1 mm diameter brass wire 150 mm in length to be used as the hand crank - searching thru the kit all the brass wire was 100.xx mm in length, none was 150 mm. The two end pulley drums each had a nipple on one end - okay one fit into the gear but the large center drum did not have any holes drilled into it , hmmmmm???? After some fiddling we finally got it together. Don't like the bends in the crank handle but it had to be bent installed because it would never snake its way thru the assembled pieces pre-bent. Must get myself a better set of bending pliers. Parts laid out for identification - note the small pulley in the upper right corner between the gear and the brass wire, never could identify it - the hole bored thru it was too small for the wire specified and I could not located it in the step 17 photo. Turning the bowsprit was interesting. Some time ago one of my woodcarving club members gave me a old Dremel lathe (free - he'd gotten it free also) so I decided to try tapering the bowsprit on the Dremel. WRONG ! First the bed barely took the length of the dowel I had cut for the bowsprit and then as soon as I applied the least pressure with a sanding stick the Dremel stopped turning the dowel. So we went to Plan B, which was get out the Lee Valley Veritas low angle miniature hand plane and slowly plane the dowel into a taper. Worked fine ! Slow ! But fine ! Bow on shot of the current status. Back to the "picture book" for the next step in the construction Stay tuned !


- 203 replies
-
- 9
-
-
- artesania latina
- marie jeanne
- (and 1 more)
-
Bob, here's the link to the Coast Guard Historian's web page where I found the information. And here's a link to a PDF file listing all the hull numbers including your boat. Their site says the W designation started in 1942, but not sure how long it took to implement fleet wide. Nice photo of her in 1944.
- 348 replies
-
- 6
-
-
- pequot
- cable ship
- (and 1 more)
-
I get mine in the local Michaels craft store and none of the pieces I looked thru were warped. The had them down to 1/8 thickness. Saw a couple pieces of 1/16 "airplane" plywood but wasn't too impressed with it. Most of the sheets were 8 x 8 or 12 x 12 with some 4 x 8 (all inches not feet).
-
I've used it a lot but only in the 3/8 and 1/2 inch thicknesses. Works fine for jigs and portable work tables for me. Haven't used it for model keels or bulkheads tho.
-
Since you are talking about Herreshoff designed boats, are you aware of his Ice Yacht Slipper? The only ice yacht (boat) he designed. I had the pleasure of seeing it under sail on the Hudson River in March 2014. I have pictures if you want me to post them. Also Wooden Boat magazine did an article complete with plans on it in their January/February 2005, Number 182 edition. The tiller/rudder is unique in that it has a sprocket and chain drive. It is presently owned by someone in CT.
-
Bob, in addition to the color scheme, all USCG boats 65 feet or longer are called Cutters and given a name as well as a hull number. Boats less than 65 feet in length are just given a hull number and the first two digits of the number give you the hull length, e.g. 44nnn is a 44 ft, 36nnn is a 36 ft, etc. Starting in WW II all Coast Guard cutters were designed with the letter W followed by a alphanumeric scheme to distinguish them from US Navy vessels. This applies to both black hull and white hull boats. Some of the newer special purpose boats have orange hulls but these are generally less than 30 ft boats, example, the Rigid Hull Inflatables used for harbor security and similar functions. Hope this helps
- 348 replies
-
- 4
-
-
- pequot
- cable ship
- (and 1 more)
-
Bob, according to my friends at our local USCG station, today's color scheme is black hull with white cabin for "working" boats, e.g. tugs, buoy tenders, ice breakers, etc and white hull with white cabin for Search & Rescue (SAR) and Law Enforcement boat. The Polar Ice Breakers are a red hull.
- 348 replies
-
- 3
-
-
- pequot
- cable ship
- (and 1 more)
-
Grant, start here and follow down thru Michael Mott's post. This might work with the channel's you've already made, which by the way look fantastic.
- 456 replies
-
- 5
-
-
- finished
- bomb ketch
- (and 2 more)
-
Okay I understand. It's like a boarding ladder (échelle d'embarquement). I may add one to my model.
- 203 replies
-
- 3
-
-
- artesania latina
- marie jeanne
- (and 1 more)
-
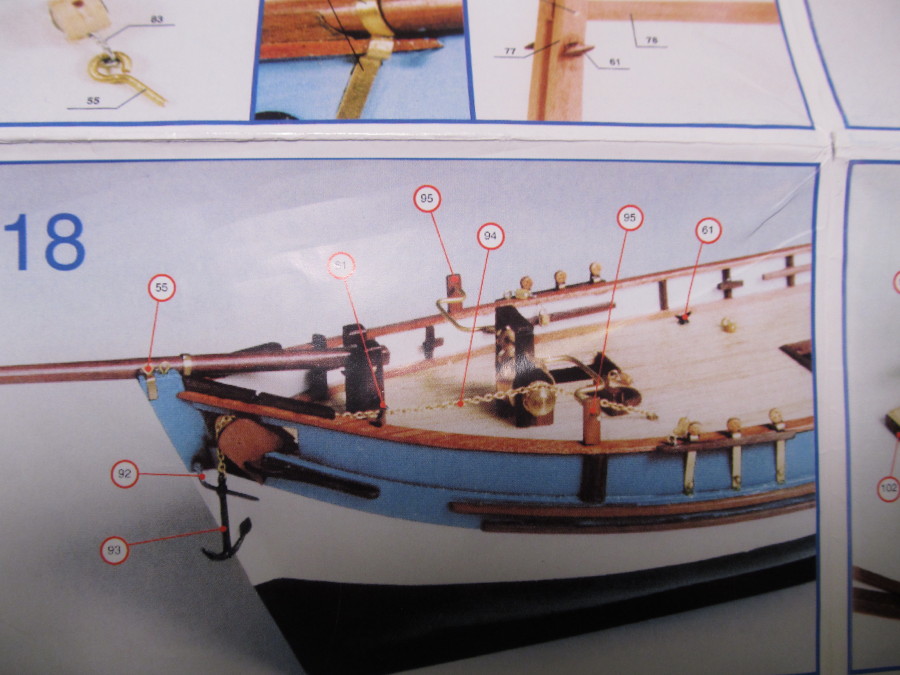
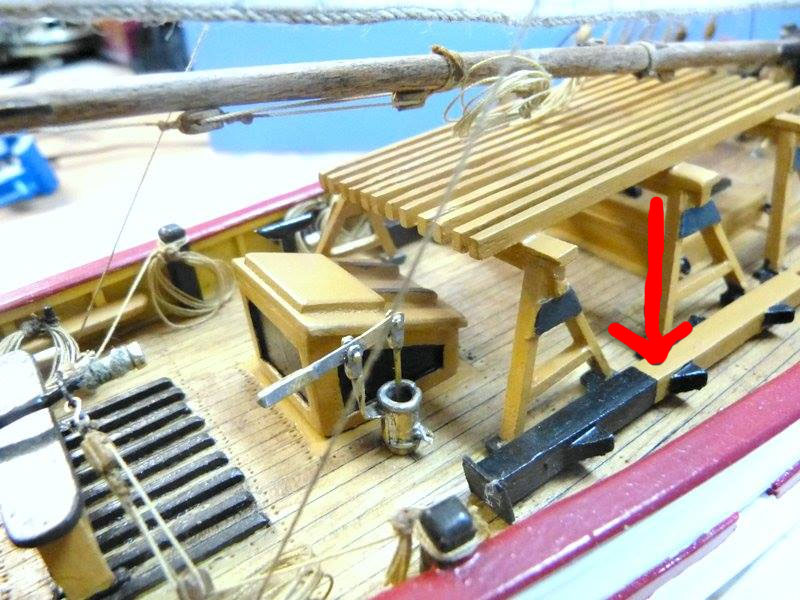
Thanks for explanation. In the photo below what is the beam (red arrow) used for? Dans la photo ci-dessous ce qui est le faisceau (flèche rouge) utilisé?

- 203 replies
-
- 4
-
-
- artesania latina
- marie jeanne
- (and 1 more)
-
Ofencer29350: Thanks for the photos - those are very impressive models. I notice that only some of the sails are colored. Is there a "pattern"/standard for which sail(s) are colored and which are white or natural. Also in the next to last photo above there is a black/ochre colored square beam with triagular "steps" (??) laying on the deck next to the rack. What is that beam used for?
- 203 replies
-
- 3
-
-
- artesania latina
- marie jeanne
- (and 1 more)
-
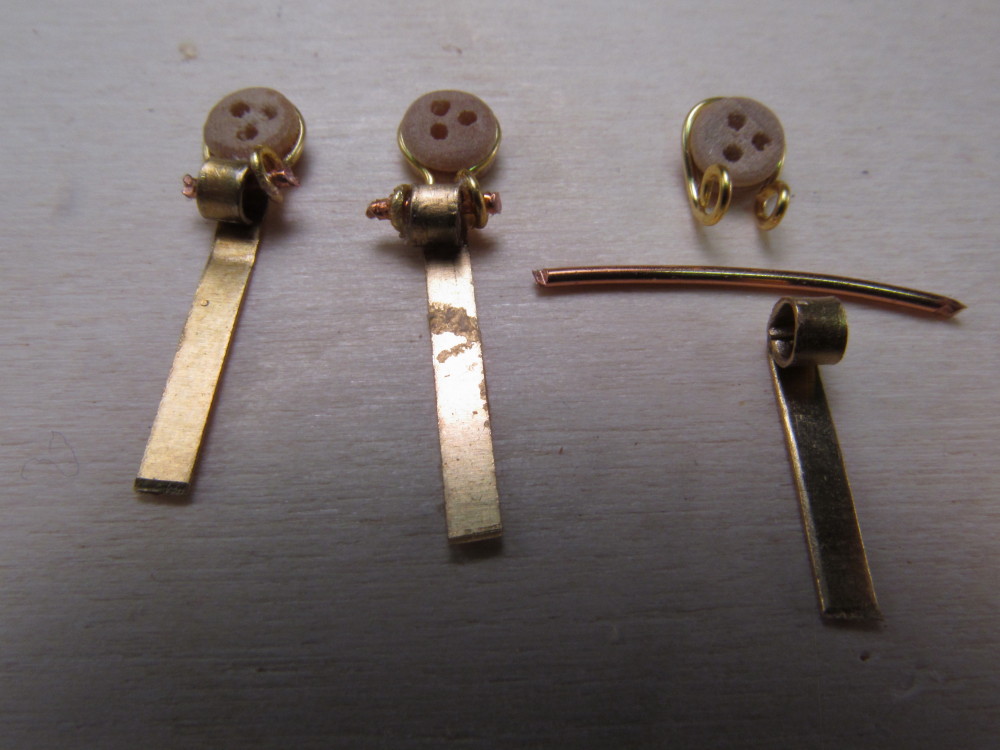
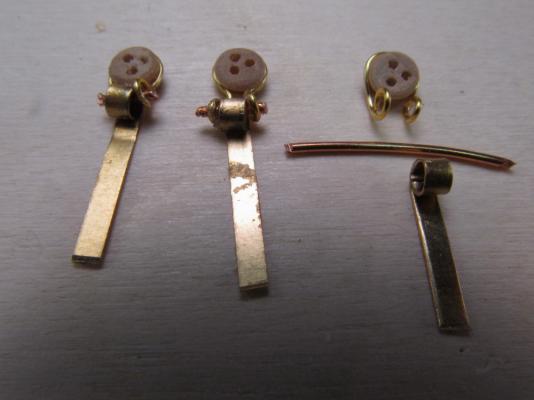
Update: Thanks Mobbsie, David and Michael for the advice and especially Michael for the photos. Don't have quite the narrow brass bands shown in Michael's photos but do have some 24 gauge and 26 gauge brass wire I can use as a starter. I used the heavier gauge wire to simulate the bolt(s) and the thinner for the strop. Bending the loop in the strop was done with a jewelry making pliers I picked up in one of the craft stores. The chainplate on the left in the photo below needs a little adjustment and all need a little cleanup with a Dremel or something. I used medium CA to cement them in place (haven't gotten a chance to practice soldering yet so I didn't want to risk it on this piece). First attempt: Current progress - nothing is glued down, just set in place to gauge overall appearance.

- 203 replies
-
- 12
-
-
- artesania latina
- marie jeanne
- (and 1 more)
-
Thanks, Michael. A picture is invaluable. Yes that may work for me.The deadeye on mine is 3.5 mm so I may have to find some thinner brass but I see how it works now. Thanks again.
- 203 replies
-
- 5
-
-
- artesania latina
- marie jeanne
- (and 1 more)
-
George, Mobbsie, Thanks ! George, yes the original is not much clearer than the scanned copy I posted - the detail is unreadable. Mobbsie, I think your solution will work. I've probably been over thinking it.
- 203 replies
-
- 5
-
-
- artesania latina
- marie jeanne
- (and 1 more)
-
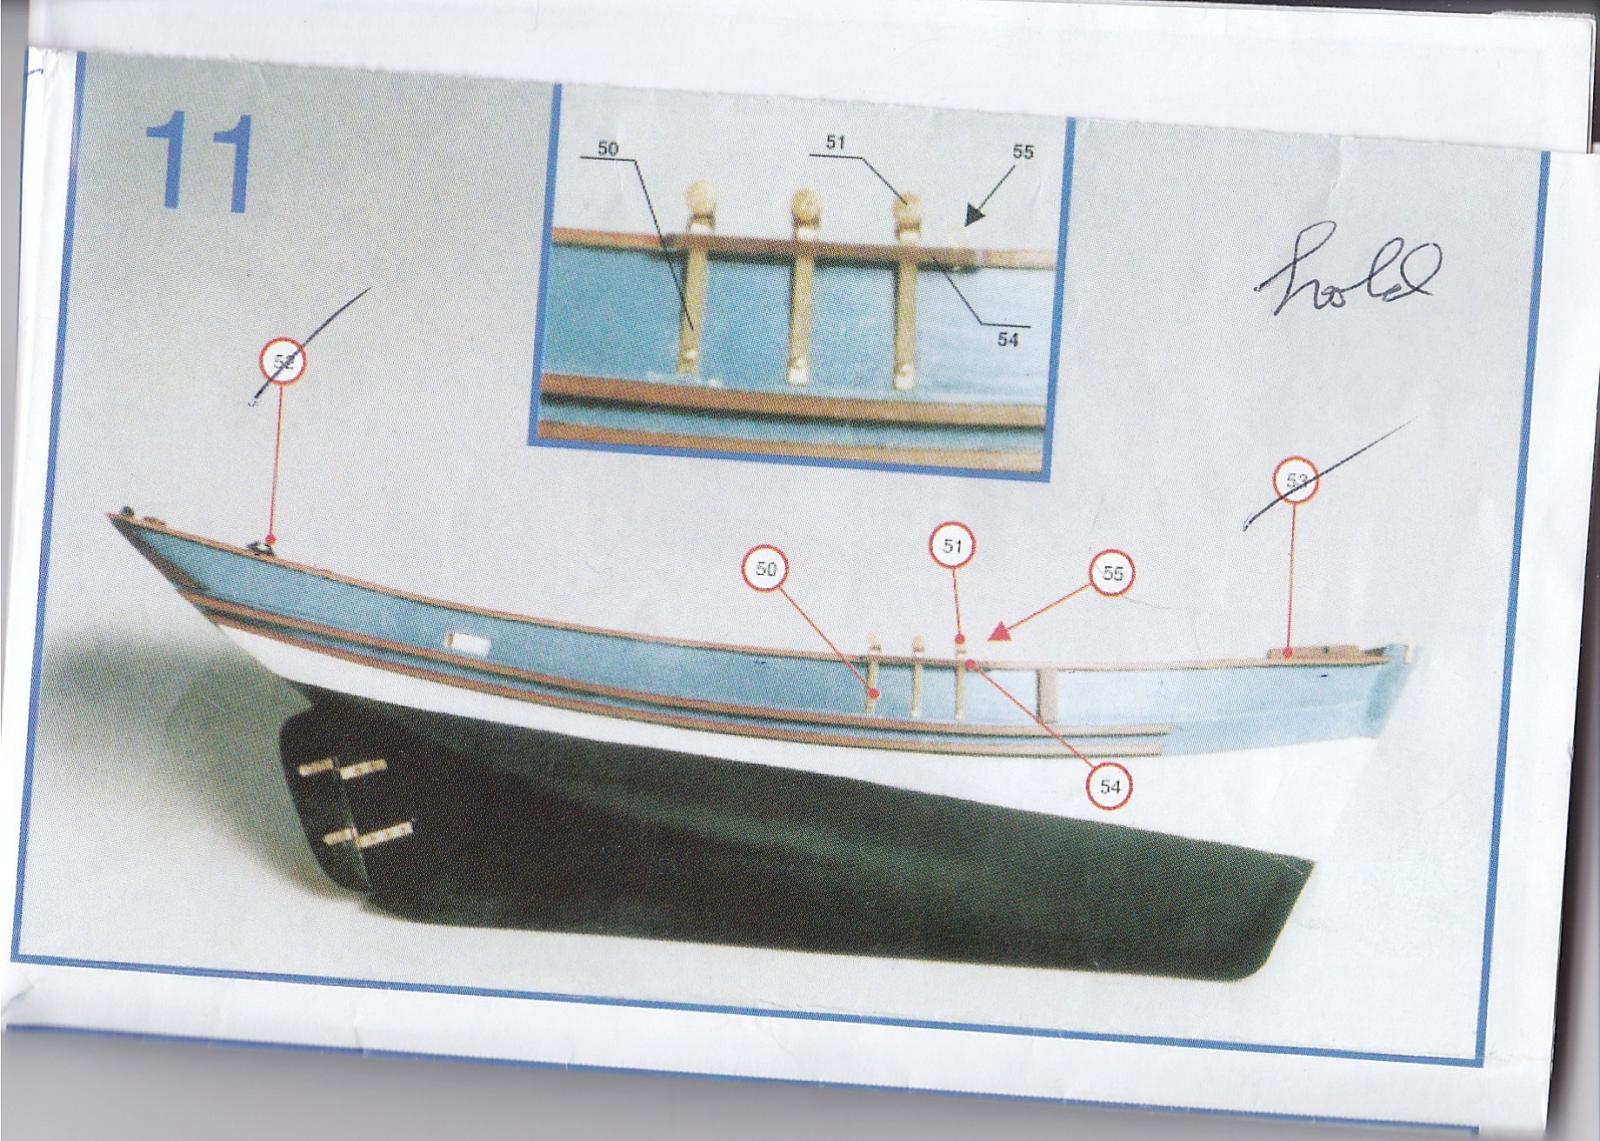
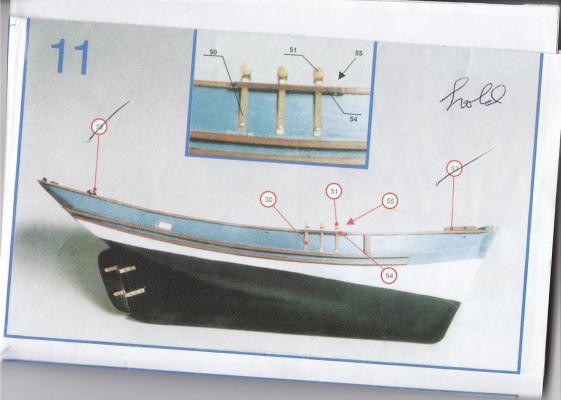
Update: I've run into a small snag on the build. The only instructions on the chain plates is the following photo; the plans do not show how the deadeye and chain plate are attached to each other, they only show placement of the chain plate/deadeye on the model. The parts list calls for a 0.3mm thick x 2 mm wide x 20 mm long piece of flat brass (part 50) and a 3.5 mm deadeye (part 51). I tried putting a loop in one end of the brass plate but still can't figure out how to attach the deadeye. Photo of picture book instructions: The "detail" [if you can call it that] is in the small inset at the top of the larger photo. [ignore the strike outs that just my way of keeping track of what's been installed] My interpretation: Any suggestions ?

- 203 replies
-
- 8
-
-
- artesania latina
- marie jeanne
- (and 1 more)
-
Thanks, Ken I have the larger Xacto one also. The mini came from MicroMark http://www.micromark.com/micro-miter-box,11565.html Buy the saw and blades separately. The blade is a double edge razor blade cut with micro-fine saw teeth.which cut with little effort. But if you get one, make yourself a small jig to hold it.
- 203 replies
-
- 3
-
-
- artesania latina
- marie jeanne
- (and 1 more)