HOLIDAY DONATION DRIVE - SUPPORT MSW - DO YOUR PART TO KEEP THIS GREAT FORUM GOING! (Only 27 donations so far out of 49,000 members - C'mon guys!)
×


Jack12477
-
Posts
5,665 -
Joined
-
Last visited
Content Type
Profiles
Forums
Gallery
Events
Everything posted by Jack12477
-

Harbor Freight Mini Wood Planes
Jack12477 replied to grsjax's topic in Modeling tools and Workshop Equipment
Marc, I have that honing tool Christmas present to myself several years back Yes, toolholic is tough ! -
Harbor Freight Mini Wood Planes
Jack12477 replied to grsjax's topic in Modeling tools and Workshop Equipment
Mike, this is the honing guide from Garrett Wade I'm using. http://www.garrettwade.com/kell-british-made-deluxe-honing-guides-gp.html As you can see the blade clamps underneath the guide. I had no problems with the blades from the Rosewood/Brass planes clamping at the right angle. I have not tried it with Lee Valley as the blades are still sharp. -
Harbor Freight Mini Wood Planes
Jack12477 replied to grsjax's topic in Modeling tools and Workshop Equipment
Mike, to answer your question; so far I have not had a need to resharpen the Lee Valley planes. I do have a version of the planes shown in the OP. I have tried unsuccessfully to get these planes to work to my satisfaction, in spite of numerous attempts to sharpen and hone them. The blade is sharp enough to cut a sheet of paper with just the weight of the blade, but I can't get the planes to work. So I gave up and went with Lee Valley. Garret Wade sells a British-made honing guide which I have used to sharpen a number of chisels, blades, etc. It will accept these small plane blades. It's listed in their catalog as 62J02.12 $59.95. It accepts chisels from 1/32 to 1 1/8 inches wide and will work on the small blade shown on the rosewood planes in OP. -
Harbor Freight Mini Wood Planes
Jack12477 replied to grsjax's topic in Modeling tools and Workshop Equipment
I agree with Bob on the Lee Valley miniature planes. I have the complete set and out-of-the-box they are sharp and ready to use. They work really well. -
Nigel, I like the sails, especially the color. Nice job on the battens also. Ship is looking good.
- 270 replies
-
- 4
-

-
- red dragon
- artesania latina
- (and 1 more)
-
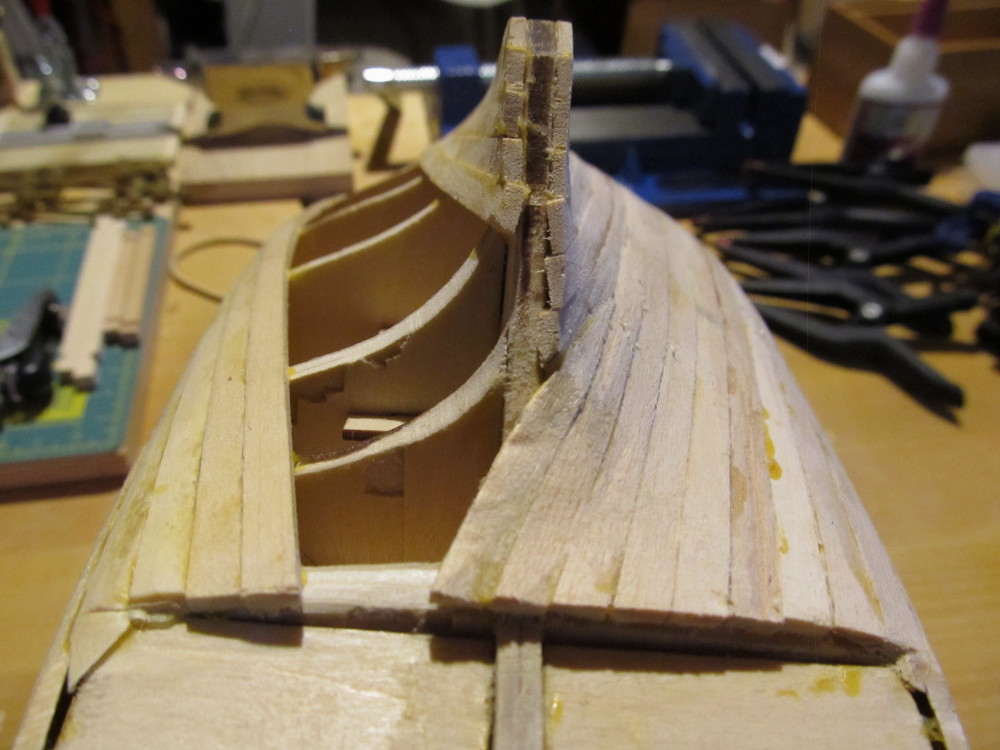
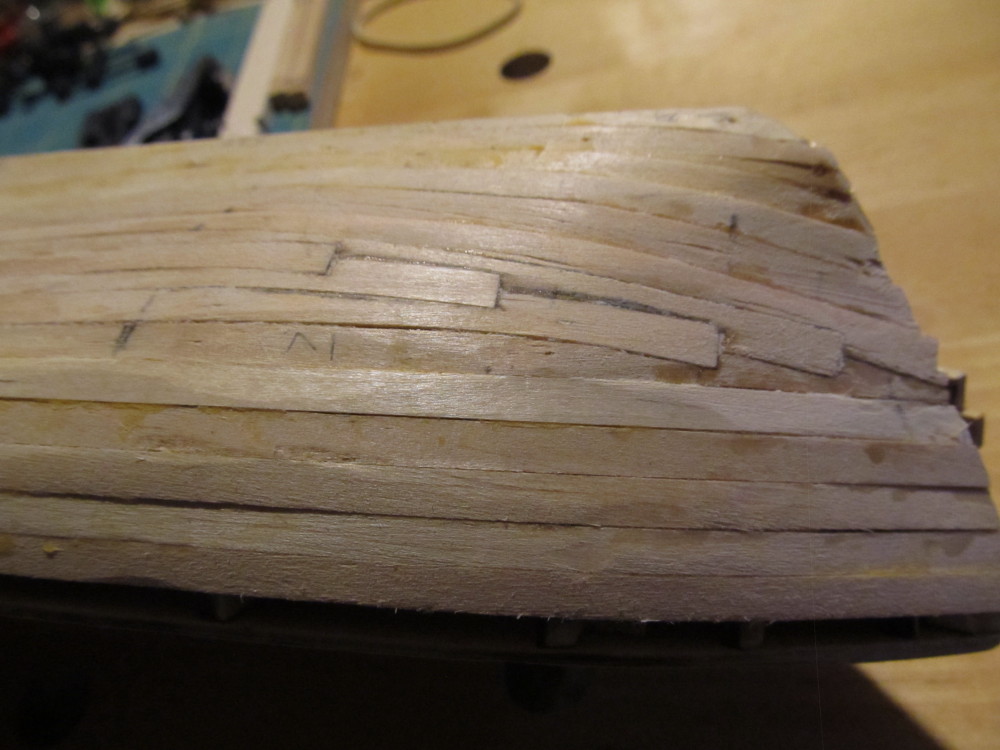
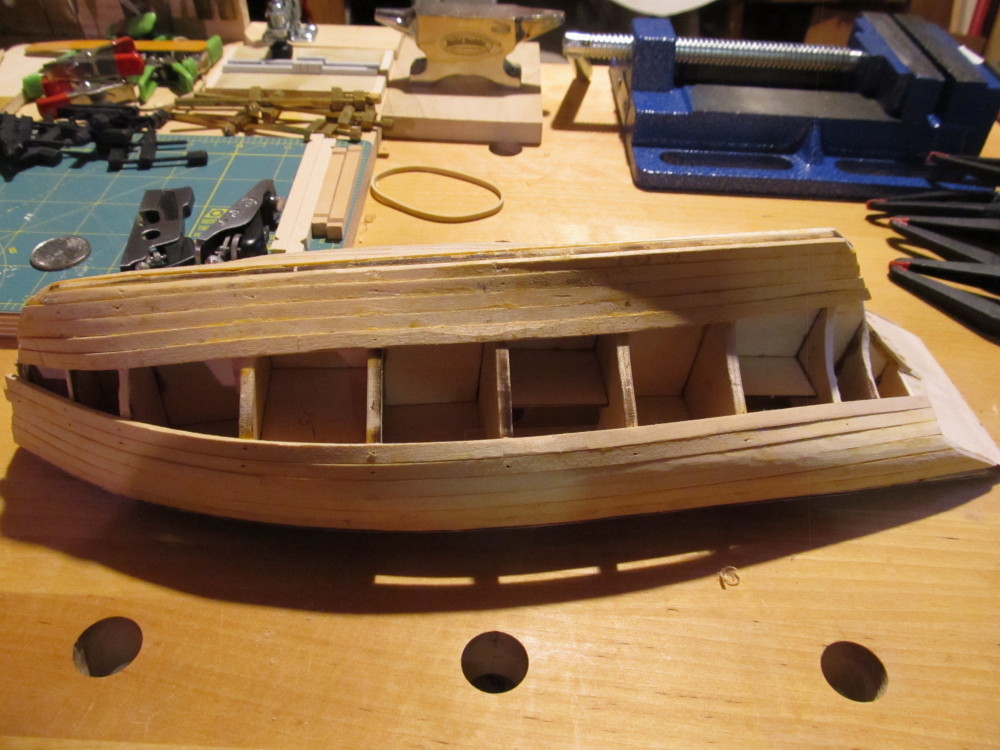
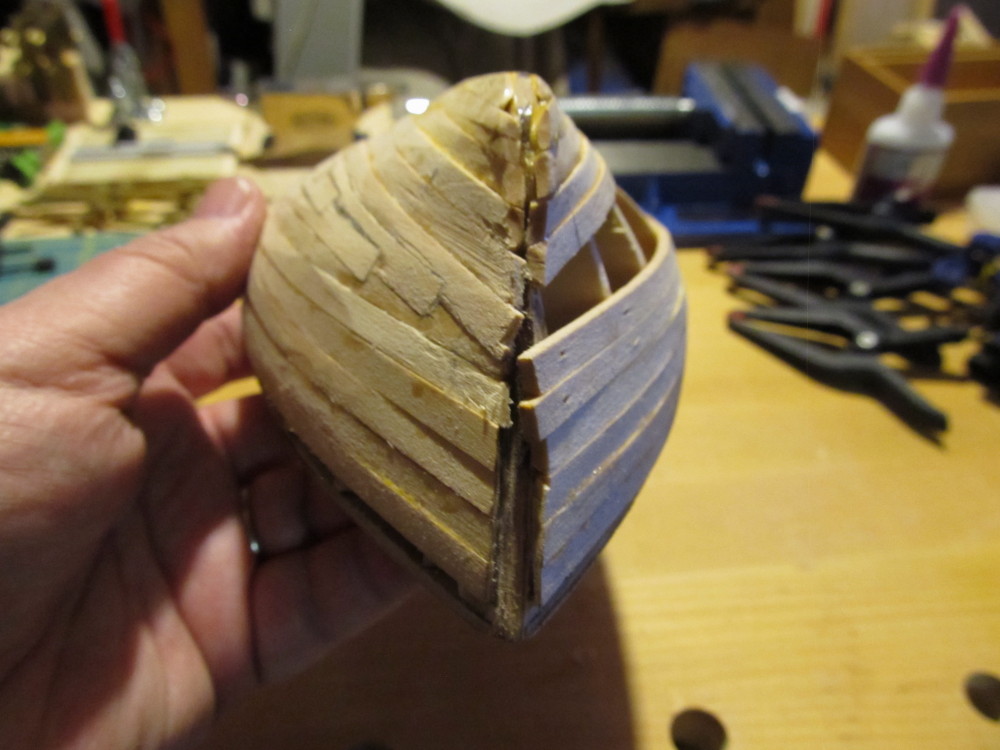
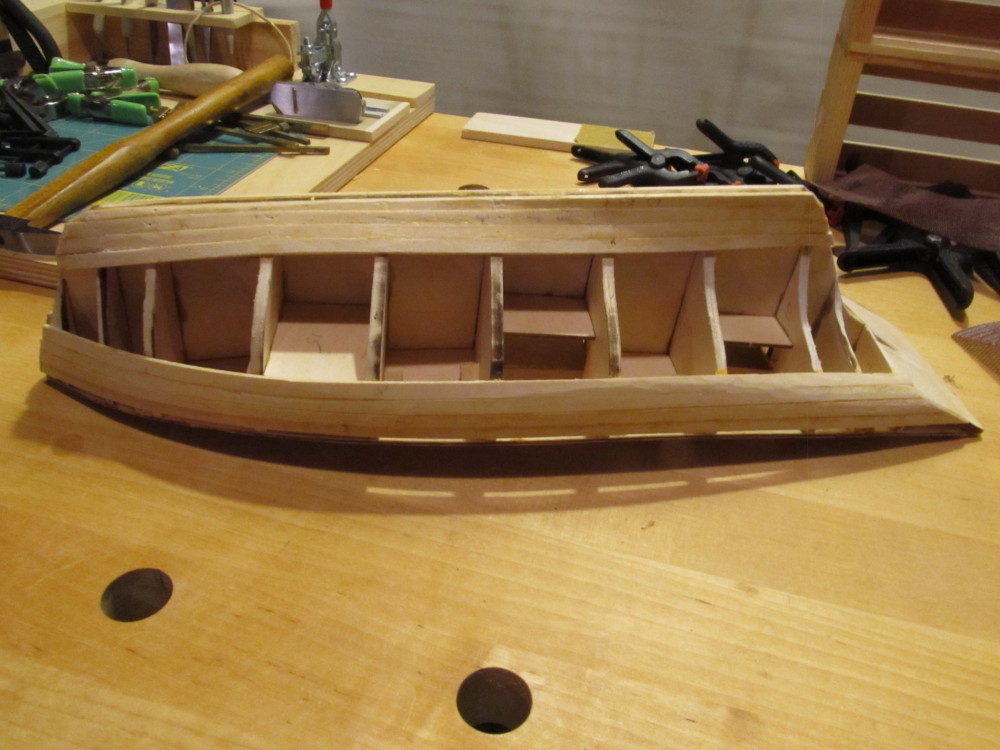
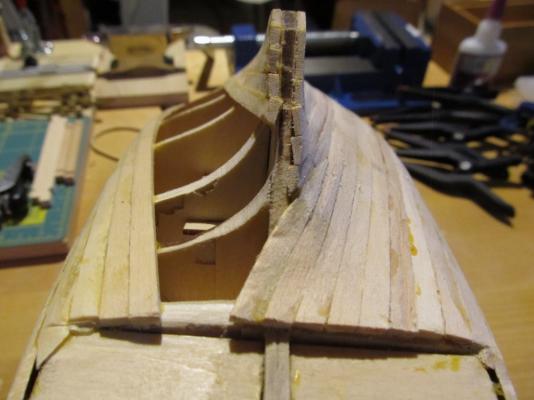
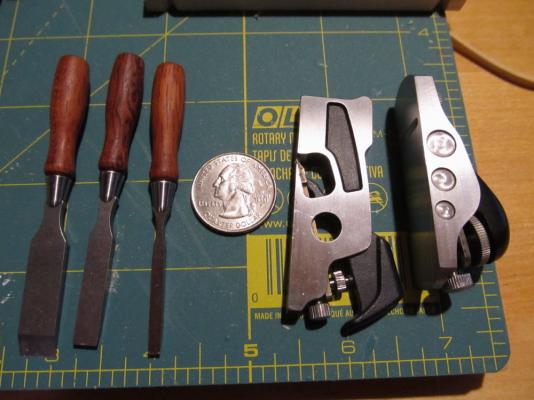
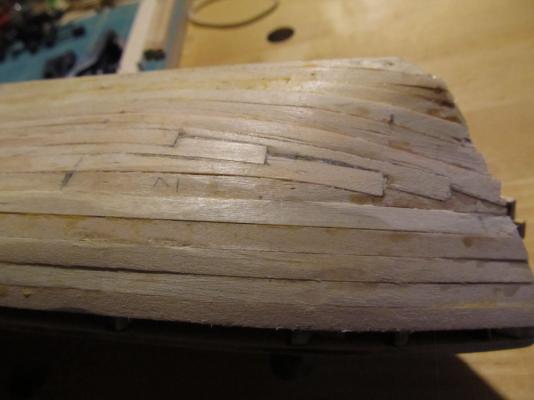
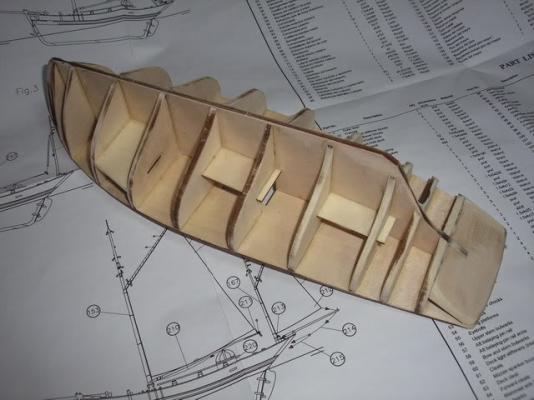
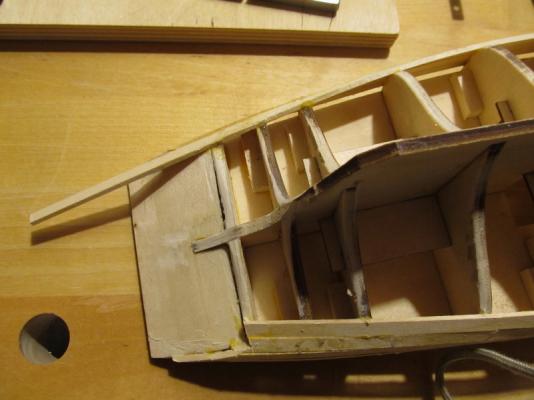
Update: Still not sure how the stern is supposed to look when finished but so far it seems to be coming out okay. Completed the planking on one side - partial planked the opposite side. Directions called for "strakes with sharpened points" mid-way up the hull". Well, there are only two planks with "pointy ends". Was able to scarph most of the planks into each other at the bow, using my miniature chisel set and miniature Veritas block and shoulder planes (from Lee Valley tools) to do most of the tapering. Hull is rough sanded to smooth out some plank edges. Will give it another more complete sanding once the opposite side is planked. Photos below: The Lee Valley Veritas miniature tools: Planking: The bow and stern planks are left a little "rough" to leave enough extra so the stern post and stem posts can be installed last.

- 203 replies
-
- 7
-
-
- artesania latina
- marie jeanne
- (and 1 more)
-
Jazzchip, there's an old expression "the only stupid question is the one you were too embarrassed to ask " - here on MSW there are no stupid questions. There are all levels of modelers here and as everyone has said the whole community is very willing to help. So as John and others have said, start a build log, post your photos and ask questions. Someone will be able to provide answers and guidance.
-
in my opinion the company with the most helpful and complete instructions is Midwest Models - their beginner and intermediate kits are very well done with very well written instructions - all the others, Artesania Latina, Model Shipways. et al leave a lot to be desired in terms of written instructions. The quality of the kits is not in question - it's all very good - it's the assembly instructions that have been going downhill for the last decade or so.
-
Oh as in this instruction " use would (sic) glue"
-
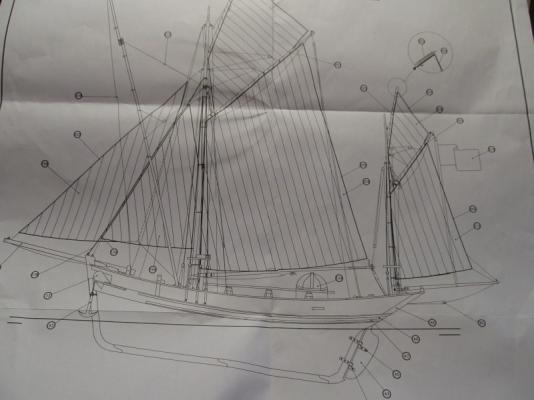
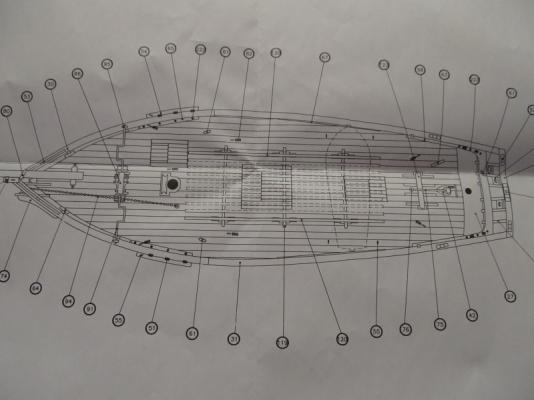
How many languages is that written in? Looks about as comprehensive as the 2 page (1 sheet) of instructions I got with my AL Marie Jeanne, except yours actually has a planking diagram which mine doesn't. Seems the kit companies are getting pretty skimpy on instructions.
-
I echo everyone else comments. And Happy Thanksgiving Chuck
- 1,051 replies
-
- 3
-
-
- cheerful
- Syren Ship Model Company
- (and 1 more)
-
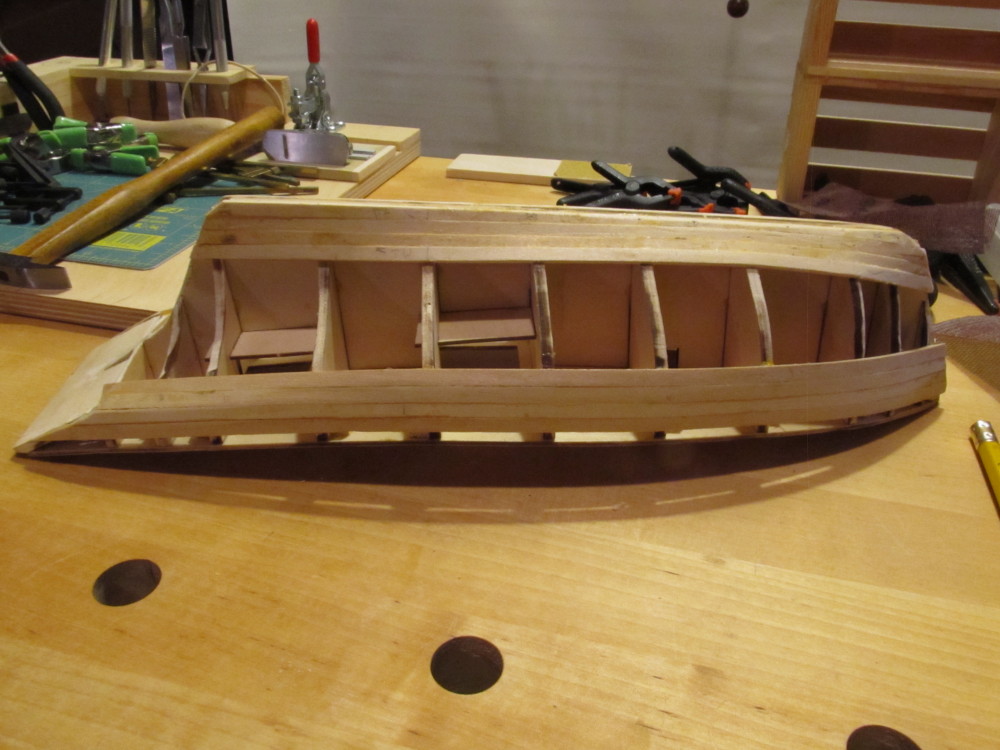
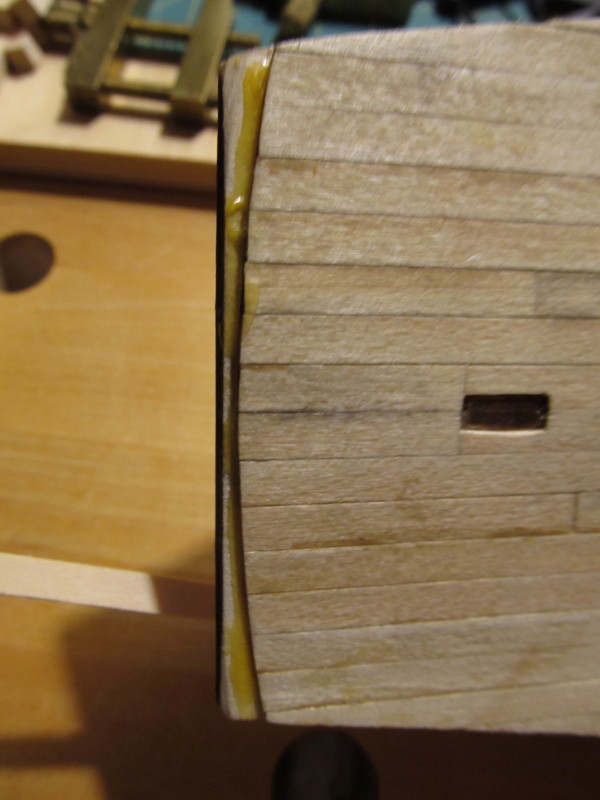
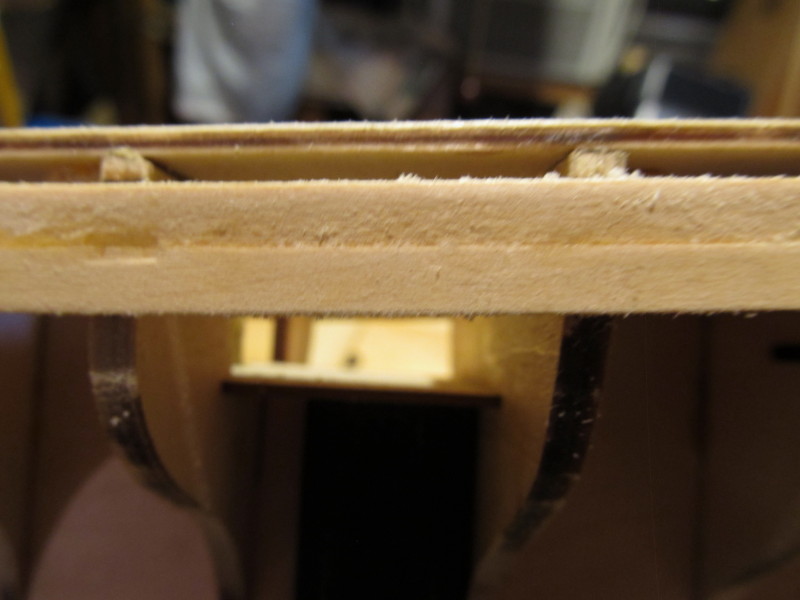
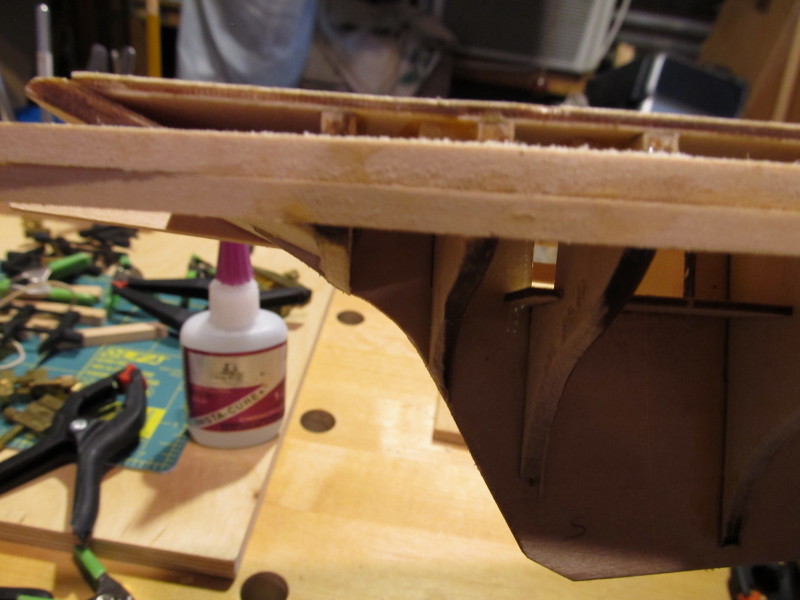
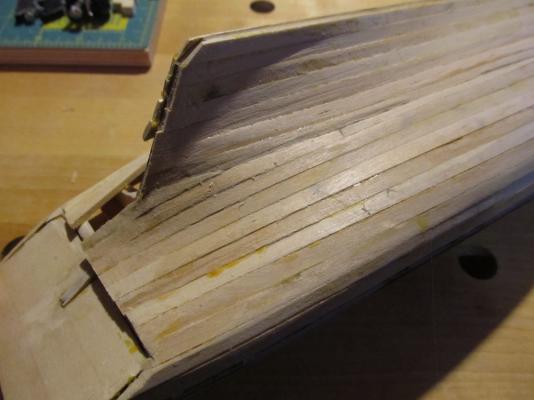
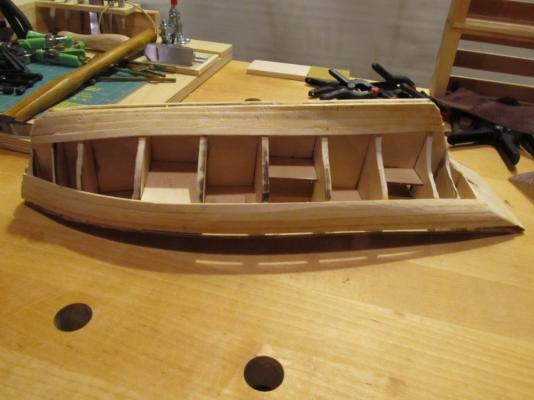
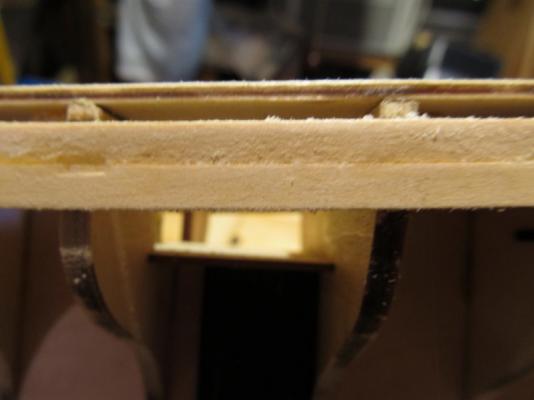
Just a quick progress update before I take time off for that great American bacchanalian feast, Thanksgiving; otherwise known as "Turkey Day" Planking is coming along smoothly - lots of edge bending using Chuck's hairdryer method, works pretty good I must say. Thanks Chuck for the advice. Kit directions call for me to plank from the deck downward and from the keel upward meeting in the middle "where planks with pointy ends will be needed" (Their words not mine)..... I don't think pointy ends will be needed tho. If you're wondering about the gap in the planks at the bow; it's were the pre-formed stem piece goes so I had to leave some room to slide it in. I have to keep test fitting it as I go along. Marc, I took your advice and laid some battens across the hull at various points and they all appear to terminate at the last bulkhead - maybe curving down to the stern piece - I didn't try bending them yet, I'll do that as I hit that point in the planking. So far I've been able to keep the planks tight against each other in spite of the difficulties in finding ways to clamp them. I'm using gap filling slow cure CA to attach the plank at the bow and PVA carpenters yellow glue for the rest. Here's some progress photos: Happy Thanksgiving everyone. Hope you all have a great time with family and friends. And as my Admiral would say "Get Stuffed !".

- 203 replies
-
- 10
-
-
- artesania latina
- marie jeanne
- (and 1 more)
-
Welcome aboard Sal. Yes, challenging indeed!
- 203 replies
-
- 3
-
-
- artesania latina
- marie jeanne
- (and 1 more)
-
Hmmm ! Simple !?!?! Hmmm ! I believe a consultation with the Three Philosophers is advised ! Maybe even a couple of consultations

- 203 replies
-
- 5
-
-
- artesania latina
- marie jeanne
- (and 1 more)
-
Cutty Sark by NenadM
Jack12477 replied to NenadM's topic in - Build logs for subjects built 1851 - 1900
Nice !
- 4,152 replies
-
- 6
-
-
- cutty sark
- tehnodidakta
- (and 1 more)
-
Going to try that next, Mark. Still fiddling ! I want to get the 4th sheer plank on first so I have it "balanced" port to starboard, then I'm going to fiddle with various batten to figure out how they run. After a couple of test fits I'm not even sure how the gar plank runs (I know in theory how it should run but this one's a mystery). Stay tuned ! Enjoy a beverage in the meantime
- 203 replies
-
- 3
-
-
- artesania latina
- marie jeanne
- (and 1 more)
-
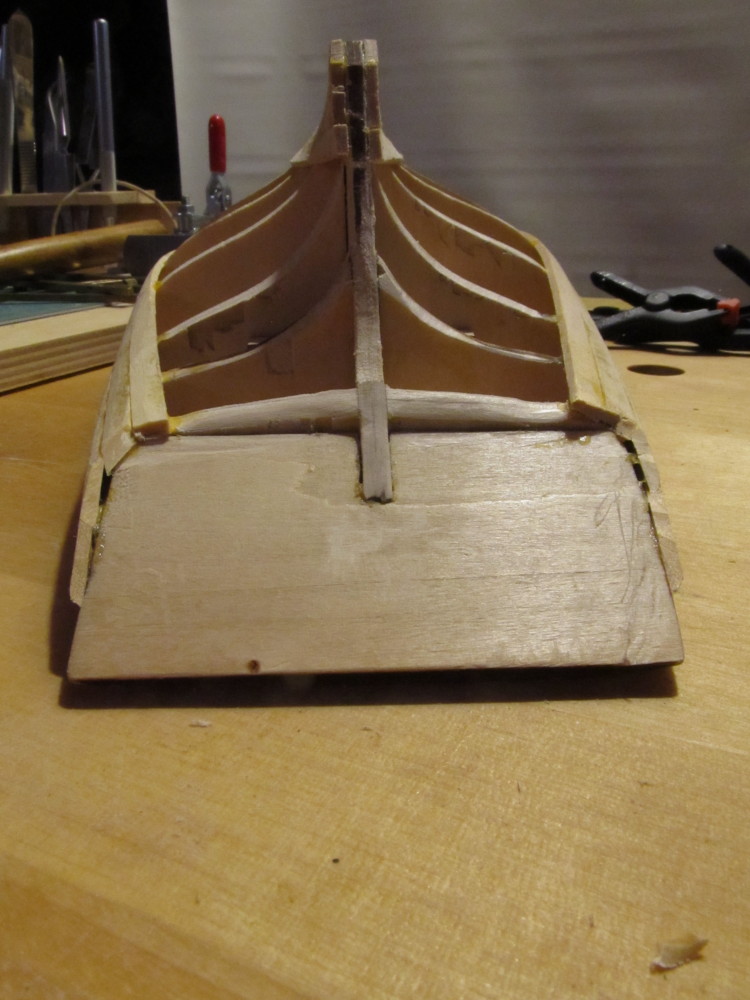
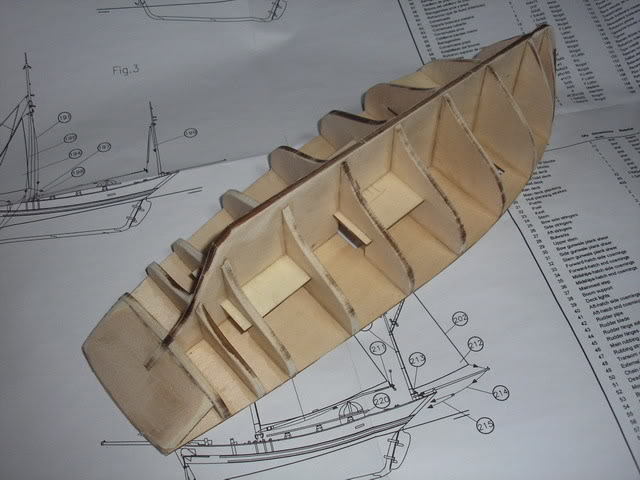
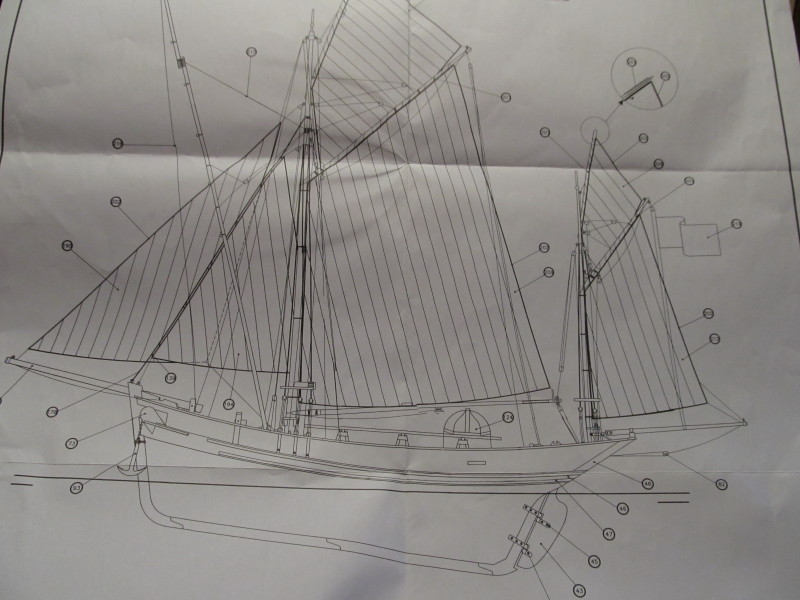
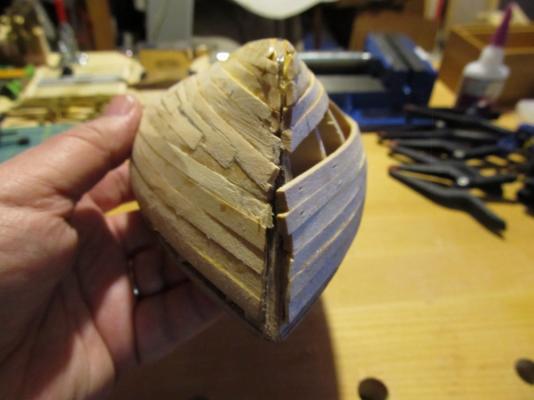
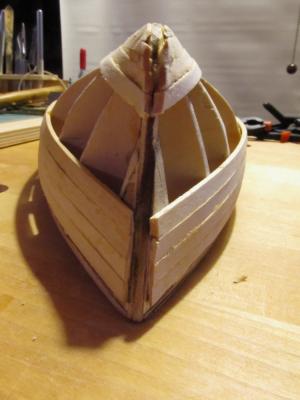
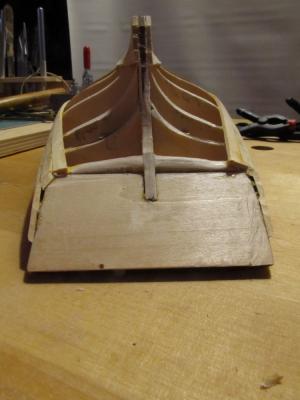
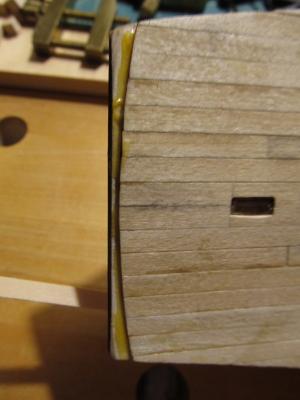
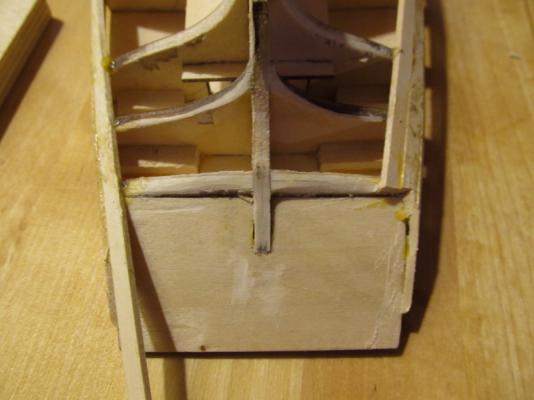
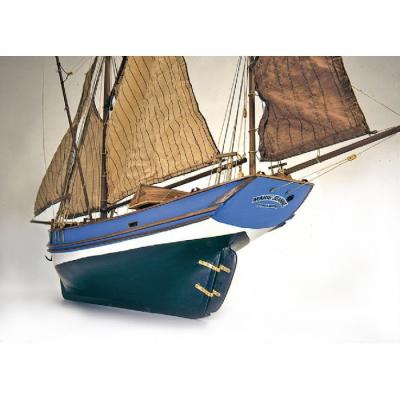
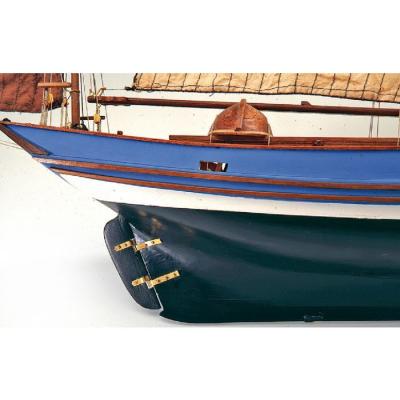
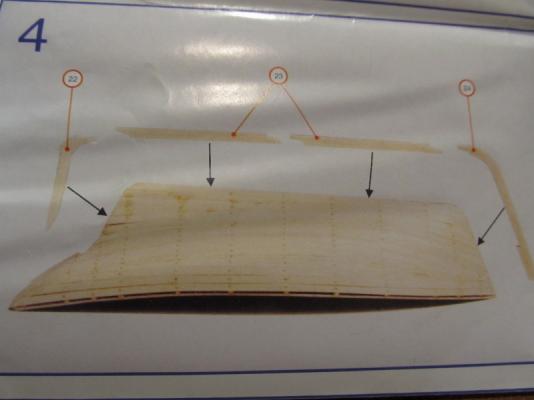
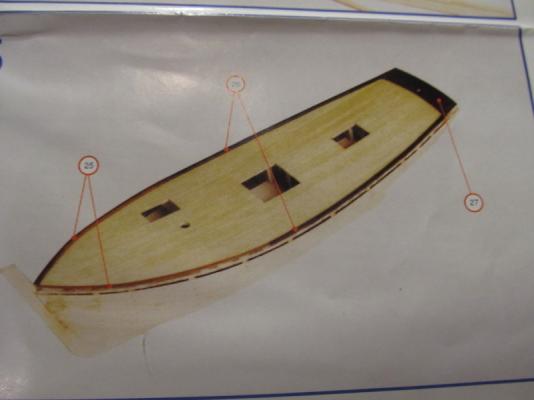
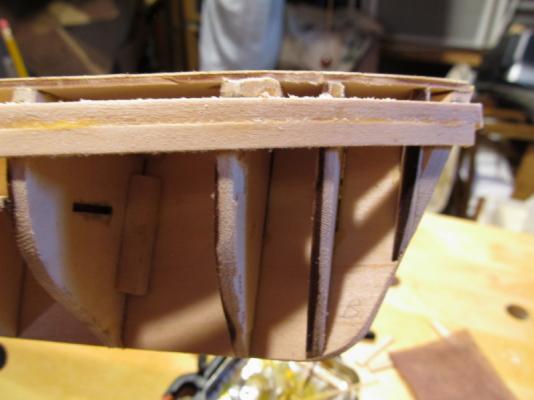
The only photos that came with the kit, Mark, are the ones in the photos above. I did Google the kit for additional photos (besides getting a gazillion "girlie" photos ) I came across these by a Russian modeler but no photos of the actual planking (he went from these to the finished/painted model). When I installed the stern piece as shown in his photos the deck would not clamp down to the backbone/former at the stern, so I had to remove it, install the deck and then reinstall the stern piece but it does not install as shown in his photos. Not sure at this point if it makes a ton of difference. But it's aggravating ! See below If you look back at post #9 photo 2 and post #12 photos2, 6, and 7 you will see the attachment point (photo 6 just above the red clamp). It's supposed to fit flush against the notch and against the upward slope of the former. But the deck prevents it from getting the right angle to the rest of the stuff. GRRRRRRRRRRRRR ! What I really would like to see in the plans is how the planks terminate at the stern. I think the terminate at the last bulkhead and not on that sloping back piece. The finished stern looks like this (from AL's website) Oh well, more fiddling and sanding. Going to install the 4th plank on the other side, then try installing the gar plank and work up and down till I get it right


- 203 replies
-
- 11
-
-
- artesania latina
- marie jeanne
- (and 1 more)
-
Welcome to the party, Ken. Yes, disheartening but more like frustrating - I just figured out that the stern piece which I had to remove and re-attach to get the false deck glued down is still not right - I'll have to post pictures later. Also can't see how the planking is supposed to terminate at the stern. Looks like I may have to improvise once the hull is planked and I can see how the stern looks. That's okay ! It's the challenge that excites !
- 203 replies
-
- 3
-
-
- artesania latina
- marie jeanne
- (and 1 more)
-
I agree with Chuck and Erik, the natural look is great. The red sets it off nicely.
-
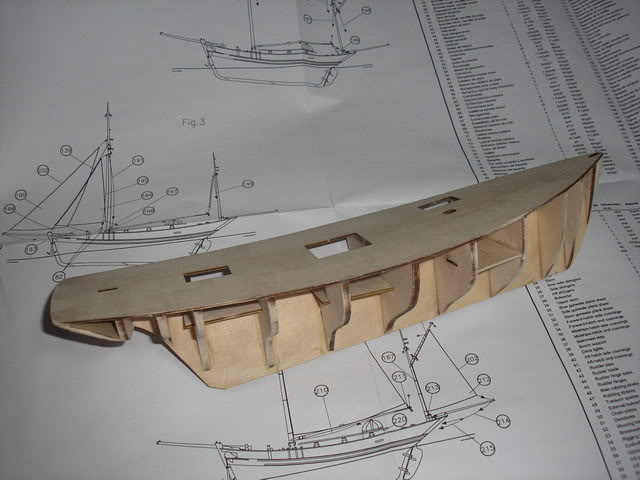
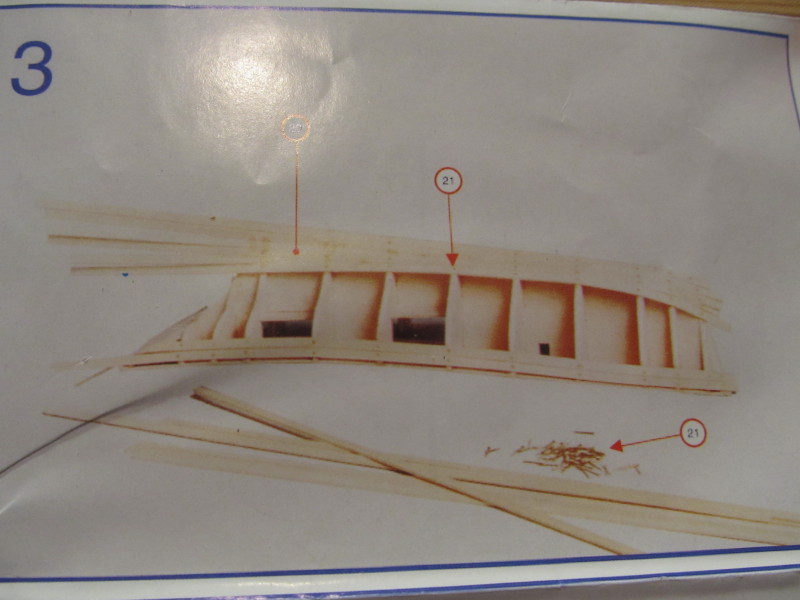
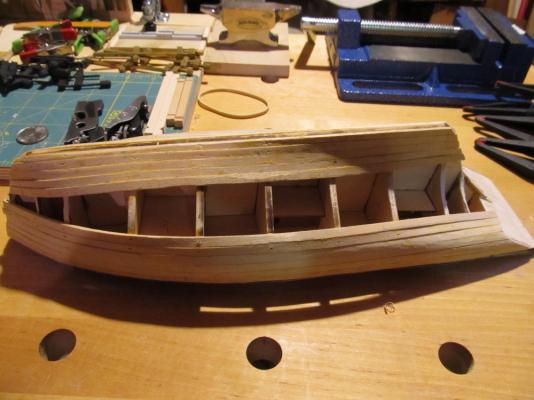
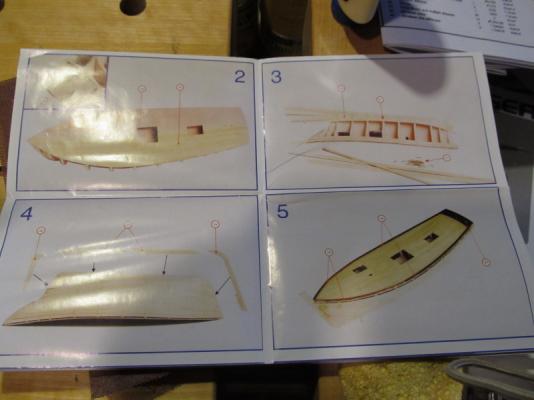
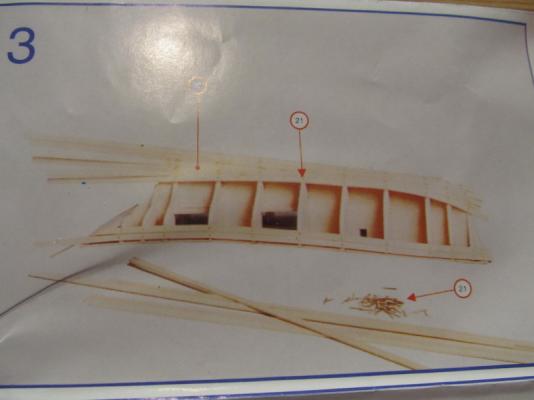
Brief Update: Planking this model is a real challenge. The plans do not show much detail regarding the planking other than the small pictures below; The instructions call for the planking to start 3 mm below the top of each bulkhead bow to stern with each succeeding plank tight against the previous. Installation of the gar plank is somewhat obscure but it would appear from the written instructions (very sparse I might add) and the small picture that it is installed straight across bow to stern with no curvature. At any rate the first two planks have been installed on both sides. I've been using Chuck's method of edge bending using a hair dryer bending it edgewise and length wise. Slow and tedious but so far so good. The plans: Planking the first two planks: There are some light refreshments over on the side bar for those in need of nourishment during the intermission. Stay tuned

- 203 replies
-
- 15
-
-
- artesania latina
- marie jeanne
- (and 1 more)
-
Hi Mark, welcome to the party, pull up a barrel. We're taking a brief intermission while I fair the bulkheads and figure out a few other things
- 203 replies
-
- 3
-
-
- artesania latina
- marie jeanne
- (and 1 more)