HOLIDAY DONATION DRIVE - SUPPORT MSW - DO YOUR PART TO KEEP THIS GREAT FORUM GOING! (Only 27 donations so far out of 49,000 members - C'mon guys!)
×


Jack12477
-
Posts
5,665 -
Joined
-
Last visited
Content Type
Profiles
Forums
Gallery
Events
Everything posted by Jack12477
-
 Thanks George. The weathering was an "OOPS" - the machinist squares I was using to weight the planks down had rust forming on them which I did not see. Took me a while to figure it out. Saves me getting out the paints and chalk tho. The clamps are Lee Valley - they work well.
- 203 replies
-
- 4
-

-
- artesania latina
- marie jeanne
- (and 1 more)
-
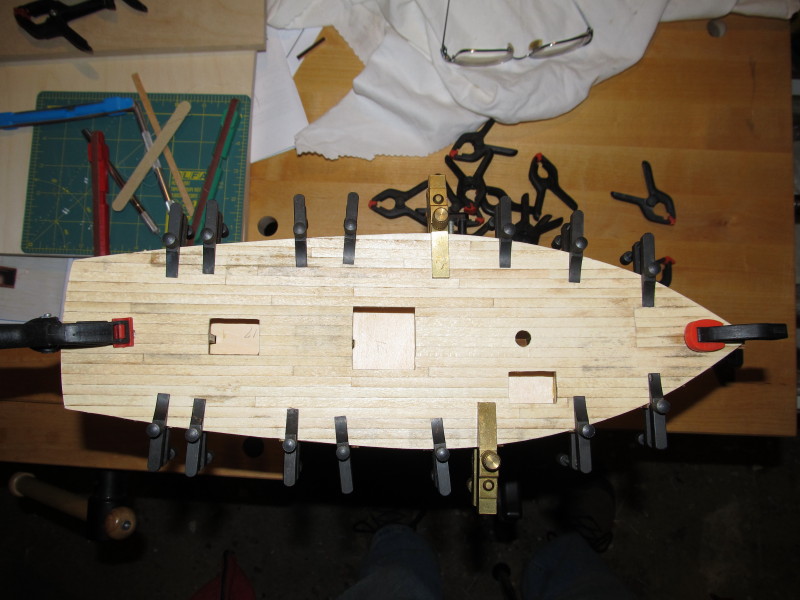
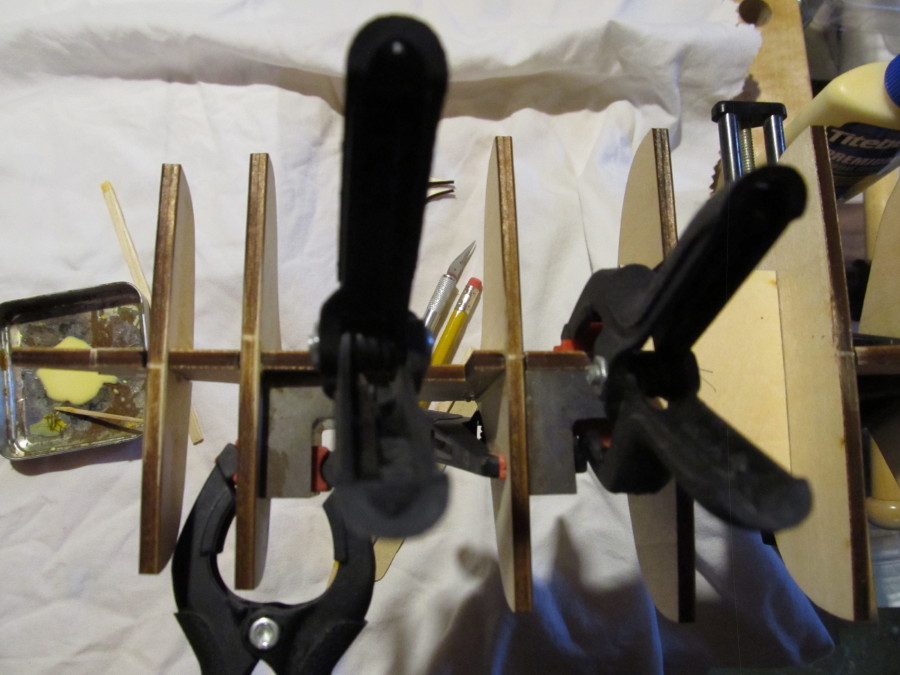
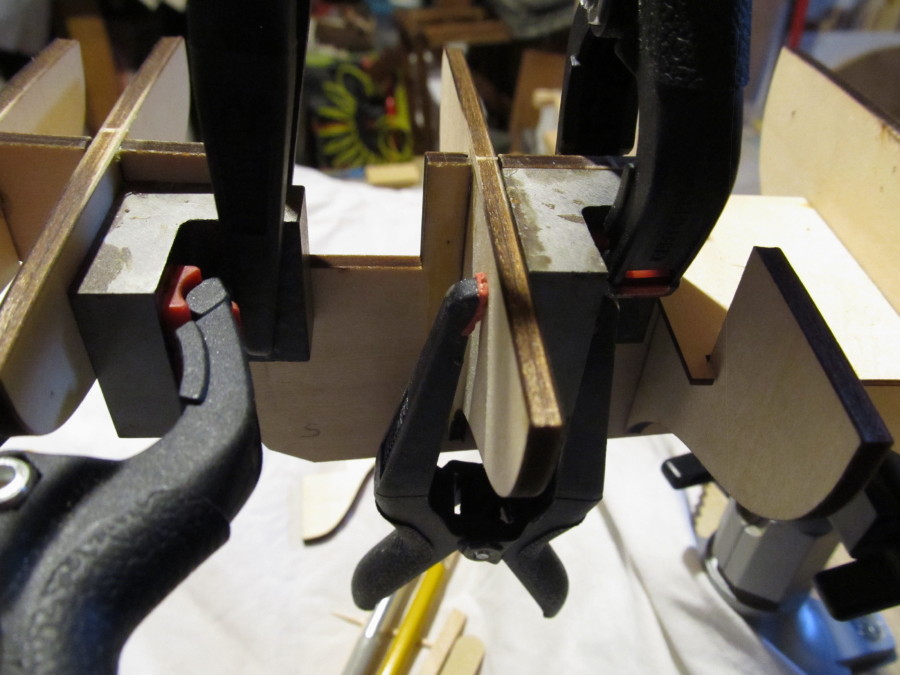
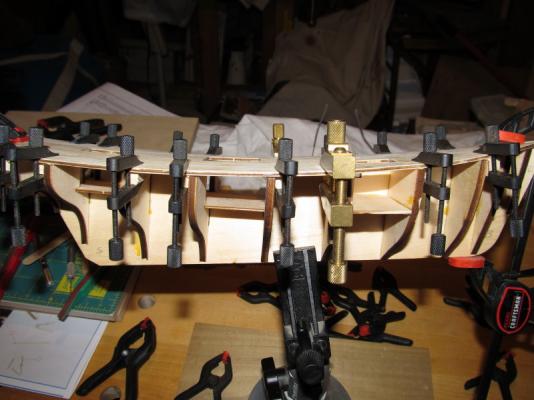
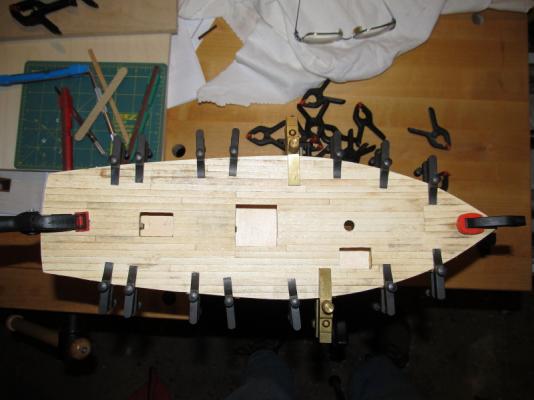
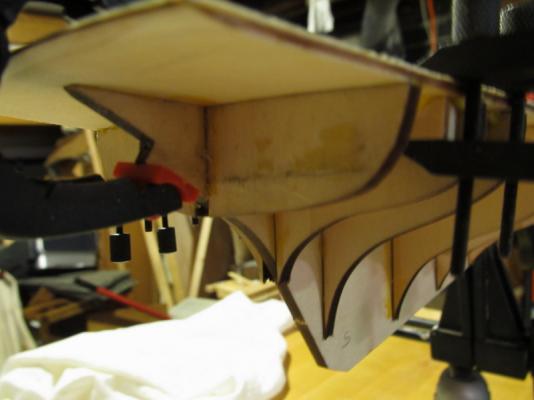
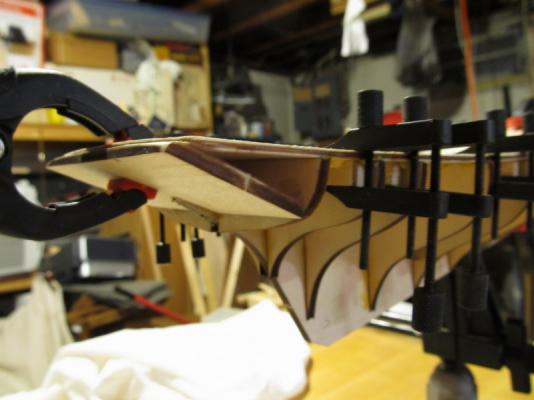
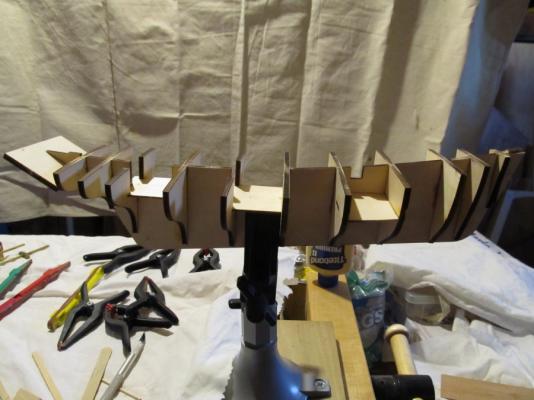
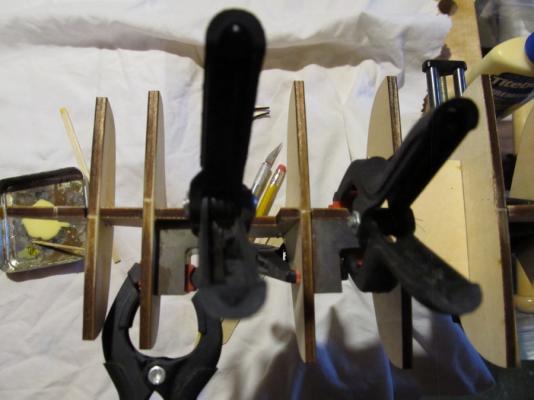
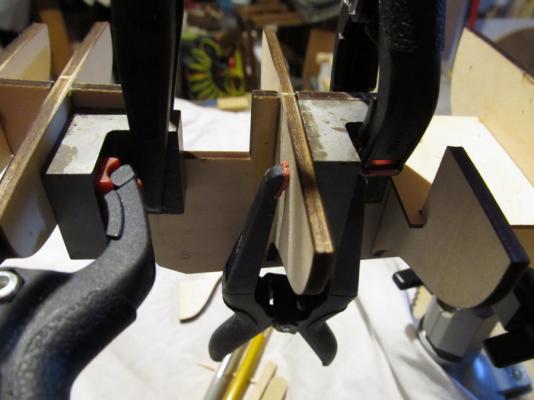
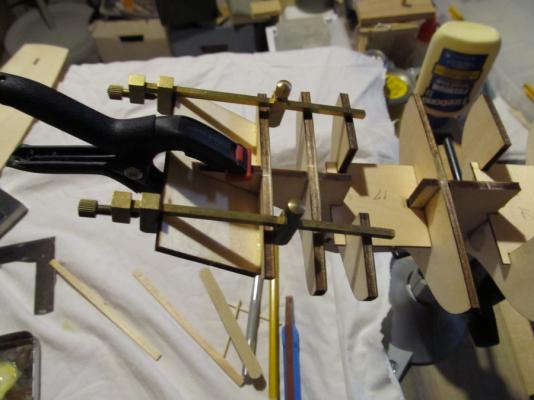
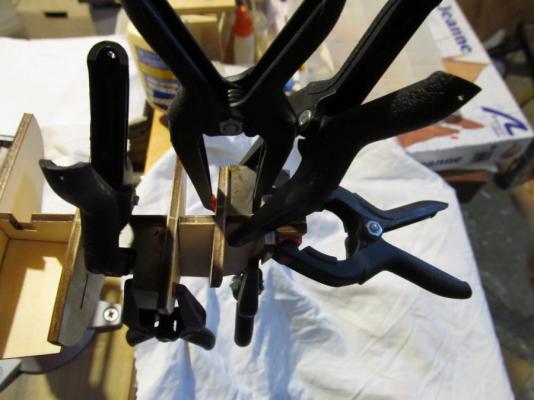
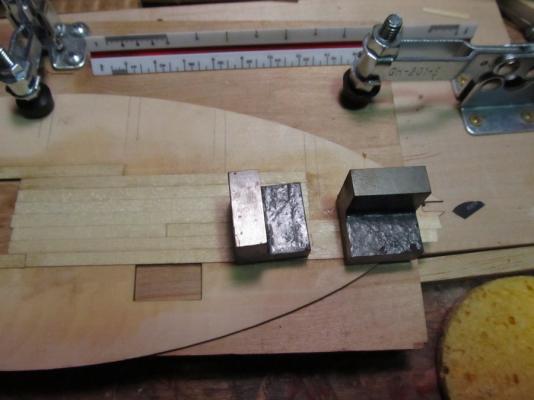
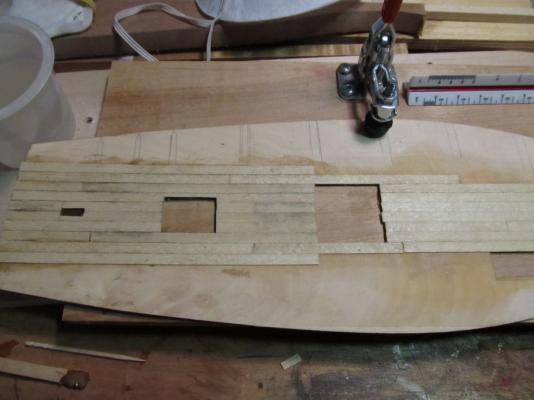
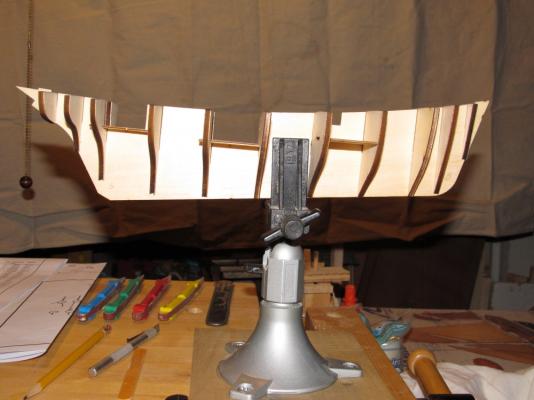
A brief update: Planking of the false deck is now completed. However, when I went to install the false deck to the former and bulkheads the design of the stern piece (see post #9 photos 3 and 5 above) prevents the deck from sitting flush to the former and engaging the slot in the stern deck with the post on the former. The deck has a concave curve bow to stern and convex curve port to starboard; with this stern piece in place (triple checked for fit before gluing) the deck would not align correctly - so out came the isopropyl, Q-tip, knife and some deconstruction took place. See the last two photos below for the stern re-do. Second issue was the lack of clamping ability due to the shape and curvature of the bulkheads. More improvisation needed. Took a long piece of 1/4 inch sq basswood, cut it into short blocks, then glued the blocks to the top of each bulkhead, flush to the top edge and back from the outer edge. Let them set up for about 36 hours. My usual spring clamps didn't have enough clamping power to pull the deck down tight to the bulkhead outer edges, so the black machinists parallel screw clamps were used to pull the deck down tight. You'll notice the already "weathered" look to the deck planking (this is a working tuna fishing boat) ! That's my new "innovative design" The deck is now secured to the former and bulkheads. The stern piece is temporarily attached with a clamp, when the glue cures I will re-glue it in place.

- 203 replies
-
- 12
-
-
- artesania latina
- marie jeanne
- (and 1 more)
-
ModelExpo is moving to a new location - should be completed by end of November according to their website.
-
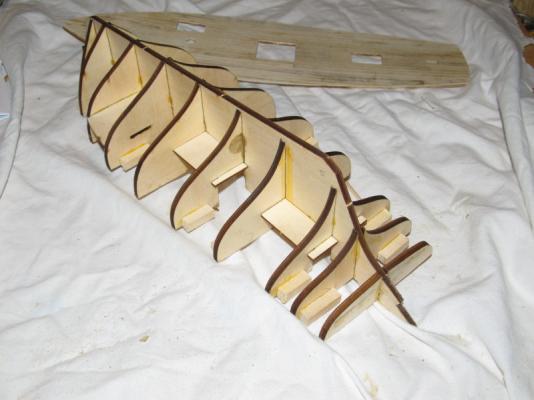
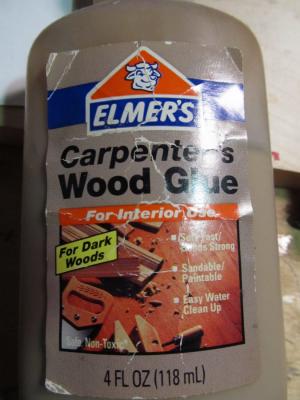
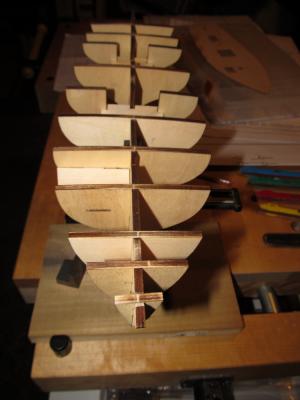
A brief update: All of the bulkheads are now glued in place. I use small 1" square machinist squares I got from MicroMark to get the bulkheads square with the backbone. Next step is glue the planking to the false deck - the decking material is 0.6 mm thick x 5 mm wide ramin veneer. Too thin to edge bend so I plank in a straight line and trim the excess. I have not been successful using a pencil along the edge to simulate the between planks caulking so instead I use Elmers glue for dark woods (shown below) which seeps up thru the joints, it also has a tendency to randomly darken the planks for a somewhat weathered look. I put the glue down with a small stir stick in very thin coats. Once the false deck is planked it is then glued to the bulkheads. I think while I have the deck flat on the workbench I will jump ahead and add the walnut coaming around the open hatches as well. After the false deck is glued to the bulkheads I can start fairing the edges to accept the hull planking.
- 203 replies
-
- 12
-
-
- artesania latina
- marie jeanne
- (and 1 more)
-
Cabbie, George, Nils, Michael, and those who clicked the LIKE button, welcome to my build log.
- 203 replies
-
- 6
-
-
- artesania latina
- marie jeanne
- (and 1 more)
-
Yes, George, you plank the hull first then add the keel, stem, and stern posts. My other 4 AL kits had the same construction technique. Personally I find this a little harder to do than if I had to cut a rabbet and install the keel first. Also this kit is double planked, there is some very nice walnut/mahogany colored super thin veneer wood in the kit for the 2nd planking, as was the case in the other 4 kits..
- 203 replies
-
- 5
-
-
- artesania latina
- marie jeanne
- (and 1 more)
-
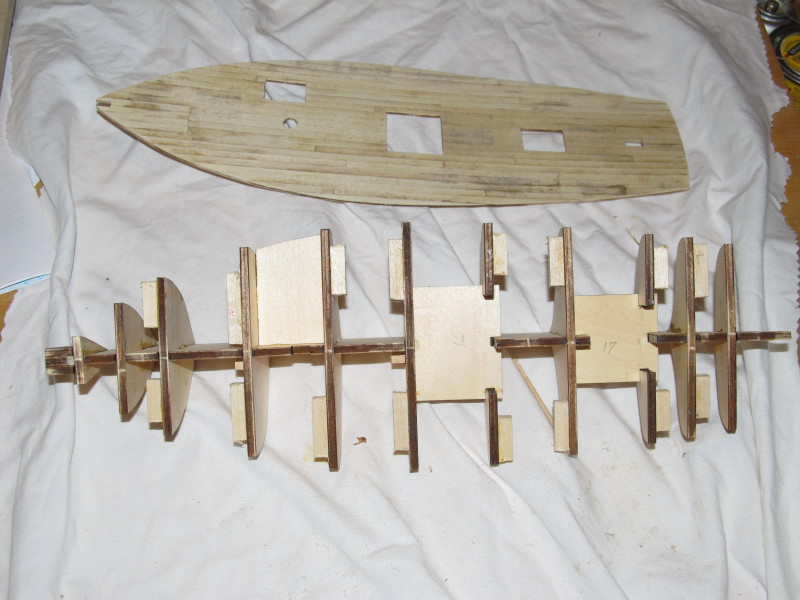
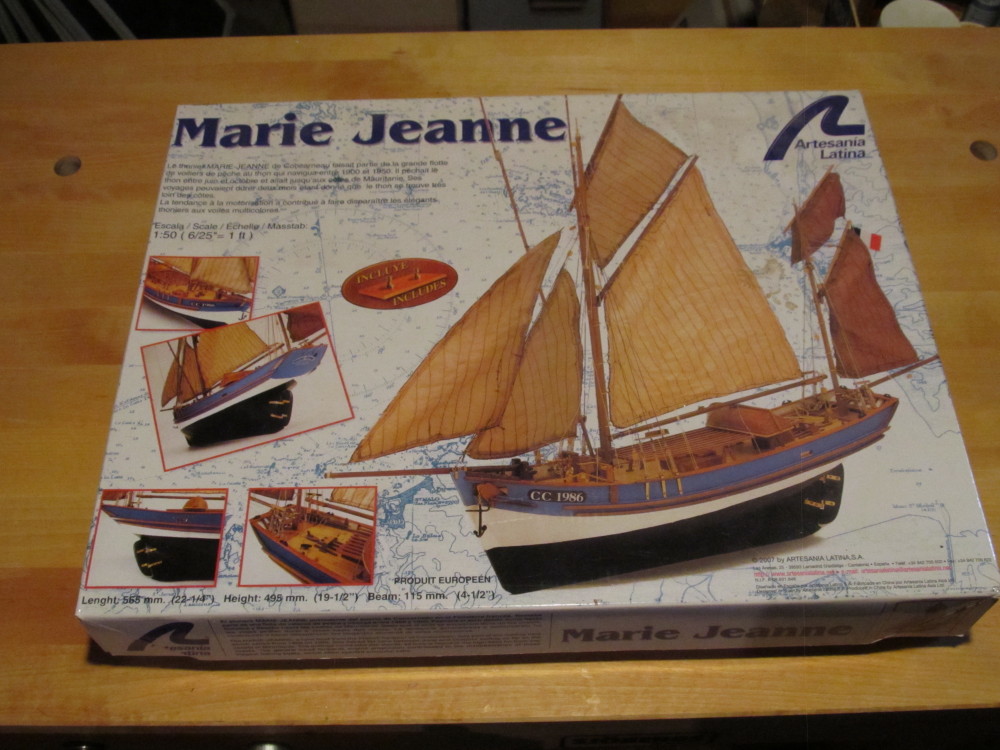
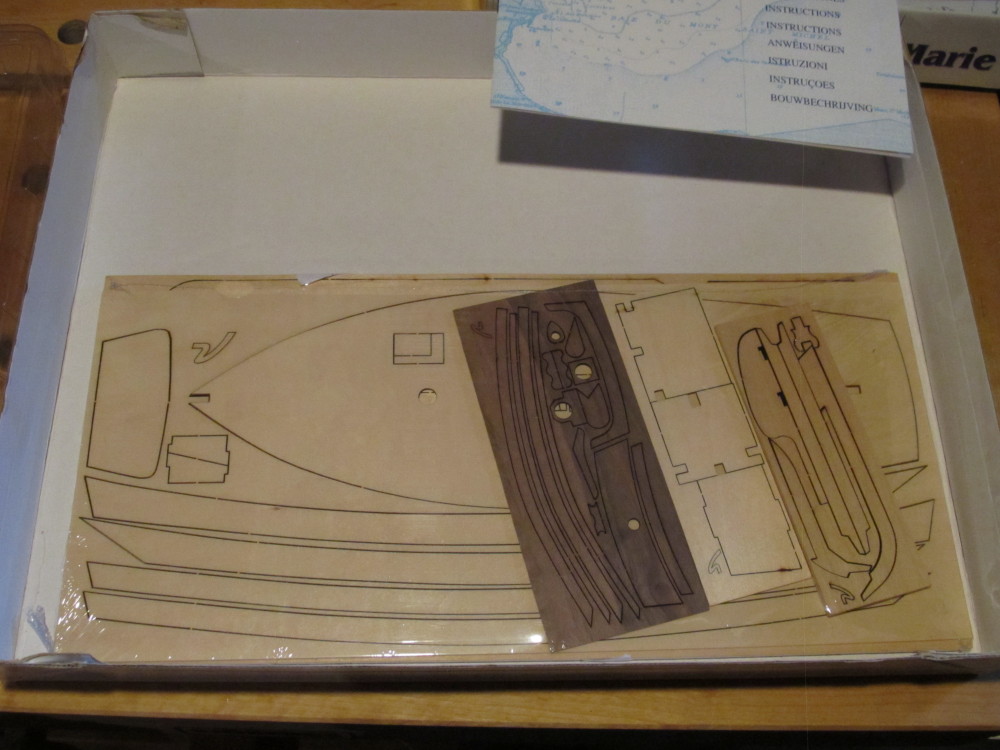
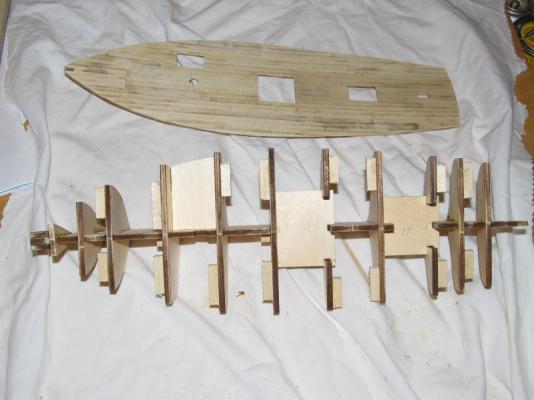
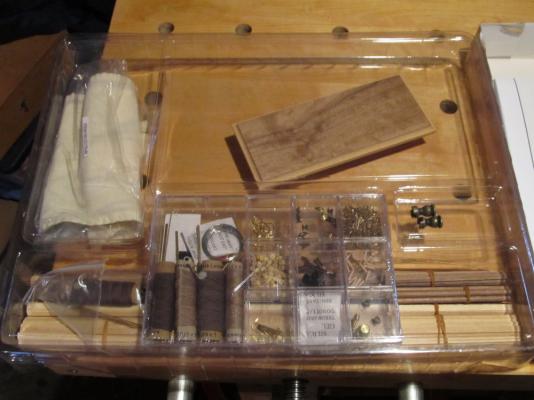
Guess it is time to stop procrastinating and get into the shipyard for some serious ship building. I was debating all summer which of my Artesania Latina kits I would build next, Marie Jeanne or Constellation. I decided on the Marie Jeanne for a couple of reasons, first, it is the kit that I have had the longest, and second, its overall size of approximately 22 inches would allow me to display it alongside my other completed Artesania Latina kits, Swift, Armed Virginia Pilot, Morgan Whale Boat and the Santisima Trinidad Captain's Launch. The Constellation will be done at a later date. Some background on the Marie Jeanne: She is a tuna boat from the French harbor of Concarneau, was part of the fishing fleet which sailed from 1900 till 1950.. She fished for tuna between June and October sailing as far as the coasts of Mauritania.. The outings could take two months, as tuna is found in the high seas far from any coasts. The general trend towards engine propulsion contributed to the disappearance of these elegant fishing boats, which often sported colorful sails. So we will begin with the traditional views of the kit box and contents. After cutting the backbone/false keel and bulkheads from their laser cut sheets, I have dry fit them in place for now, so I can check the fit and placement of the false deck, which according to the instructions is planked and installed before the hull planking. I also have to determine whether the open hatch floor(s) (lower decking) is visible once the deck hatches are installed. So once I get that all figured out I will start gluing things in place. Since the bulkheads extend to the keel itself I could not use my normal keel clamp, otherwise the bulkheads won't seat properly. As an aside: I'm a little disappointed with the instructions in this kit compared with the instructions AL provided with all of my previous AL kits. The instructions are pretty skimpy - 2 sides of a single page and a rather large souvenir-postcard-style color fold-out with lots of pictures and part #s but no text. However, the rest of the kit is high quality like I've seen in all my previous AL kits. The plans are large and very detailed. So a lot of "read-ahead" and dry fitting is in order on this build. So pull up a chair/barrel/bench !


- 203 replies
-
- 16
-
-
- artesania latina
- marie jeanne
- (and 1 more)
-
Nice fit Ryland.
-
Hi Ken, pulling up a seat to watch also. Great start on the "little boats"
-
Congratulations, Brian ! Well deserved.
- 831 replies
-
- 5
-
-
- Armed Virginia Sloop
- Model Shipways
- (and 1 more)
-
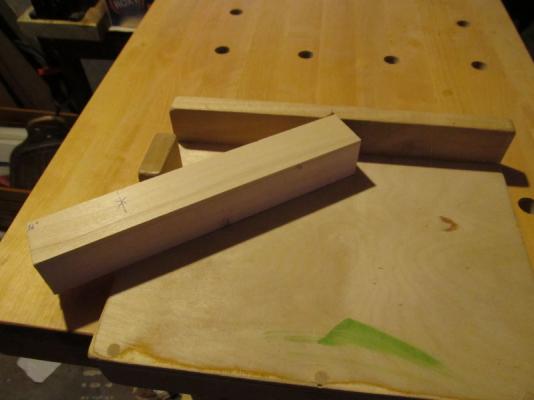
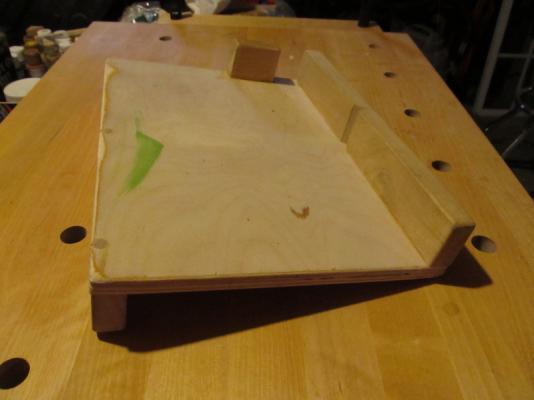
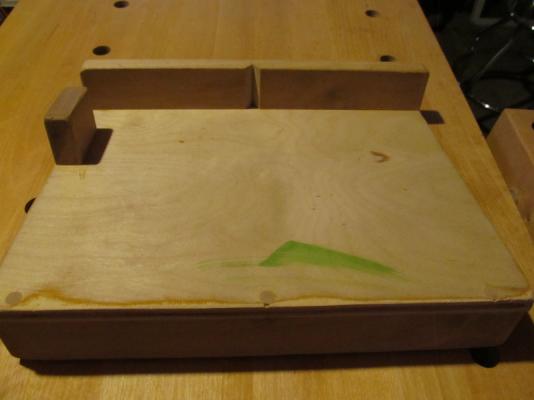
Last post from me on subject: Here's the bench dog/stop I made and use for holding piece being carved. The V slot acts as a stop. There is no 90 degree corner so the wood chips don't accumulate in the corner. It's made of 1/2 inch birch plywood with maple for the rest. By "last post" I mean I have nothing more to post; but if anyone has questions fire away I will do my best to answer them;
-
Likewise from me ! Happy Birthday Augie. And a speedy recovery from your health issues
- 2,191 replies
-
- 4
-
-
- confederacy
- Model Shipways
- (and 1 more)
-
In the carving classes our experienced carvers give to newcomers, they teach that you should carve from your wrist not your forearm (elbow to wrist) or arm (shoulder to wrist) - using the full power of your arm or forearm to power the blade thru the wood can result in injuries and loss of control. But using only the power in your wrist to power the blade gives more control over the cut. If you have to use the forearm or arm then as Druxey pointed out above, make sure you are cutting away from the body and that no one is standing in front or alongside of you. For even more control, use the power in your fingers (i.e grip) to pull the blade thru the wood, but make sure you wear a thumb guard and know where the thumb is in relation to the blade. And keep the blades razor sharp - a dull blade causes more injuries than a sharp one - and I know that sounds like an oxymoron but it is not.
-
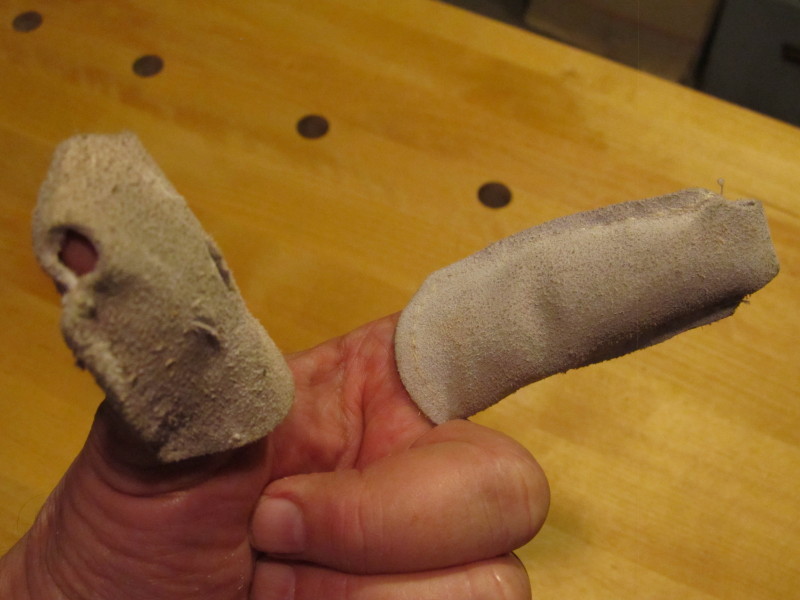
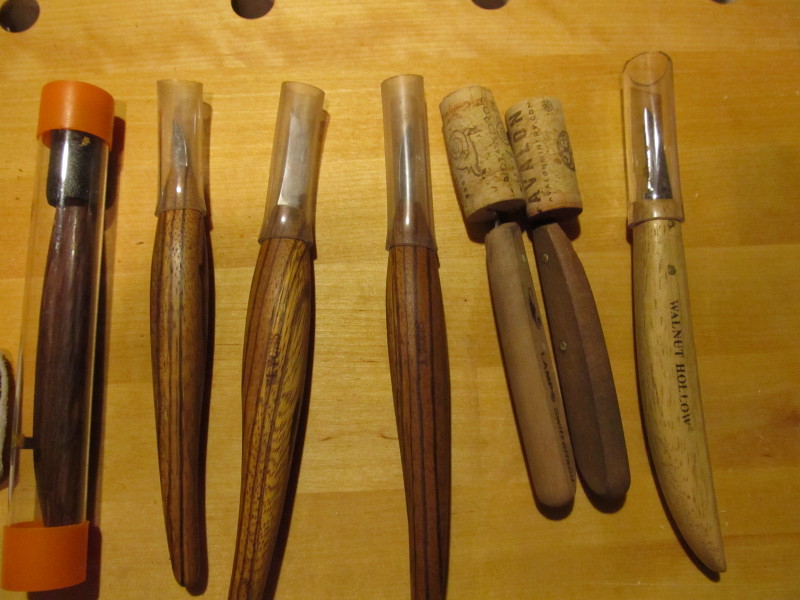
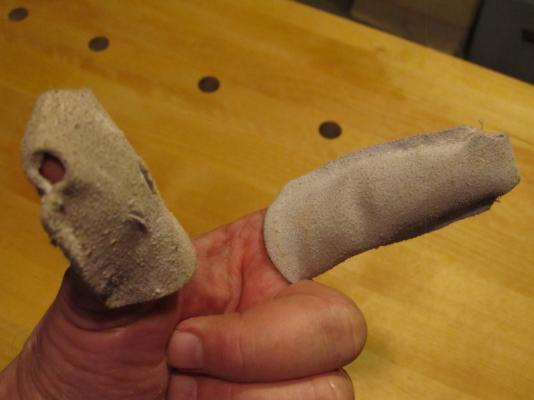
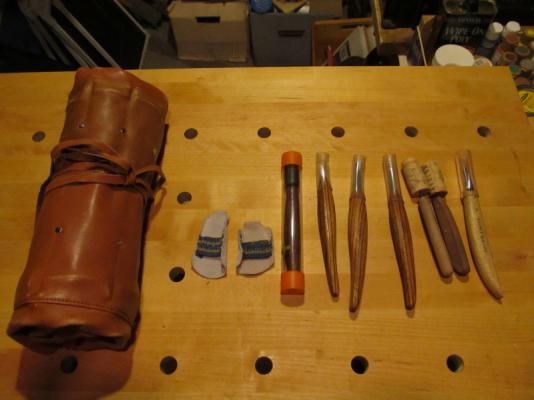
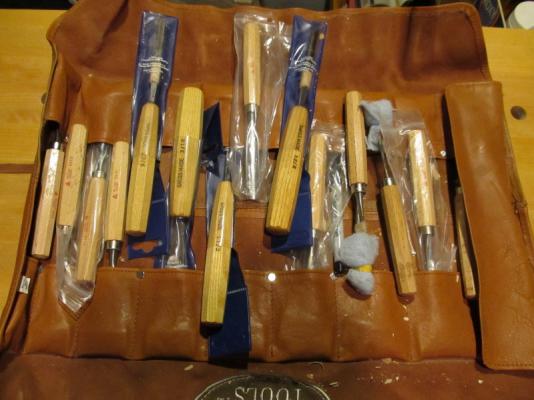
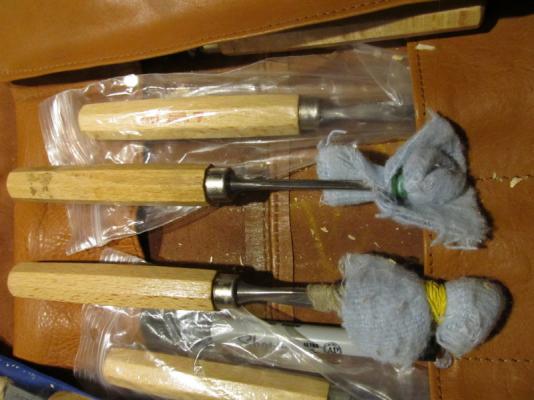
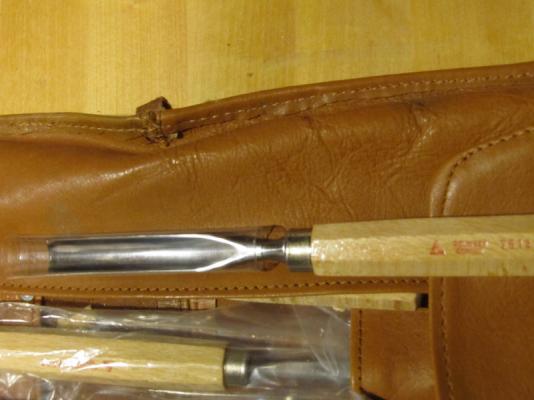
Druxey, it seems that all of the experienced (> 20 years) carvers in my woodcarving club including me violate your rule #2 as well as rule #3. Most of them are doing figure carving, i.e. caricatures. Me ! I wear a leather thumb guard on the hand that's holding the knife and a cut resistant glove on the other hand. But we keep the thumb on the underside of the wood carving well away from the blade. Jazzchip, one thing I forgot to mention is that all my carving knives have a plastic tube covering the exposed blade and all the chisel.gouge tips are wrapped in a piece of soft cloth or are stuffed into a plastic tube. This is more to protect the blades from chipping (devil of a time to regrind one) but it has the added side effect of protecting hands from cuts. You can buy the plastic tubing in Lowes/Home Depot in different diameters and cut it to length - look in plumbing On another note: Old wine corks (either the real McCoy or the fake plasticy ones) make a good guard for both gouges and knife tips. Just plunge the blade/gouge into the cork. It doesn't dull the blade. All of my woodcarving buddies use them. Some photos to demonstrate: The gouges are stored in the leather roll on left - knifes are in cork or plastic tubes - Gouges Finger guards (long one is for index finger - short one for thumb)


-
How Realistic Can One Make Sails?
Jack12477 replied to Julie Mo's topic in Masting, rigging and sails
I used very thin brass wire inserted into the bottom seam of the sail and clipped to the bolt rope loop (hidden) to form the sail. See example in Completed Model Gallery for example of the effect. -
Mine (knives and chisel/gouges) are in leather roll wraps which I keep out of sight where the children/grandchildren can't see them - also out of reach as well - but not under any kind of lock. I think it depends on the child's age - older children can be taught to respect sharp tools and not play with them - it's the toddlers I worry about. Out of sight and out of reach seems to be a good safety rule. Also mine are all kept in the basement which the kids only go to when an adult is there to supervise.
-
I have a cut resistant glove like the one in GUNTHERMT's post above. I wear it mostly for woodcarving and not so much for model shipbuilding. I wear it on the hand that is holding the carving I'm working on. When using the chisels/gouges I use a bench dog and place the carving on the bench dog/bench stop, likewise when I am using the chisels on ship parts. The only drawback to the glove is they don't protect against puncture type wounds, but do provide good protection from slash type wounds. Protective eye wear is a must around any "spinning" type tool.
-
Brian, great job on the ship - outstanding model - Photography is outstanding also.
- 831 replies
-
- 7
-
-
- Armed Virginia Sloop
- Model Shipways
- (and 1 more)
-
Actually the Veritas planes and chisels are ready to go right out of the box. All they need is an occasional strop on a piece of leather. I have yet to put them to a "stone".
-
I have the same set of planes plus the chisel set from Veritas/Lee Valley and am very satisfied with their performance. I use them all the time