Jack12477
-
Posts
5,676 -
Joined
-
Last visited
Content Type
Profiles
Forums
Gallery
Events
Everything posted by Jack12477
-

White Paint Issues
Jack12477 replied to rynmss's topic in Painting, finishing and weathering products and techniques
Gesso ? Ken ? Brush application - no airbrush - it's used by artists to prep their canvas for painting -
White Paint Issues
Jack12477 replied to rynmss's topic in Painting, finishing and weathering products and techniques
Did you try using artists Gesso to prime the wood first before applying the paint? Works well for me regardless of color or paint brand. You can get Gesso in any Michaels store or any art supply store. It's water based. -
Sal, thanks for the tip. I had not thought of using a gin pole to brace them. Will use that on my model. Model is looking great. BTW What mess ? Looks very well organized to me
- 659 replies
-
- 4
-

-
- syren
- model shipways
- (and 1 more)
-
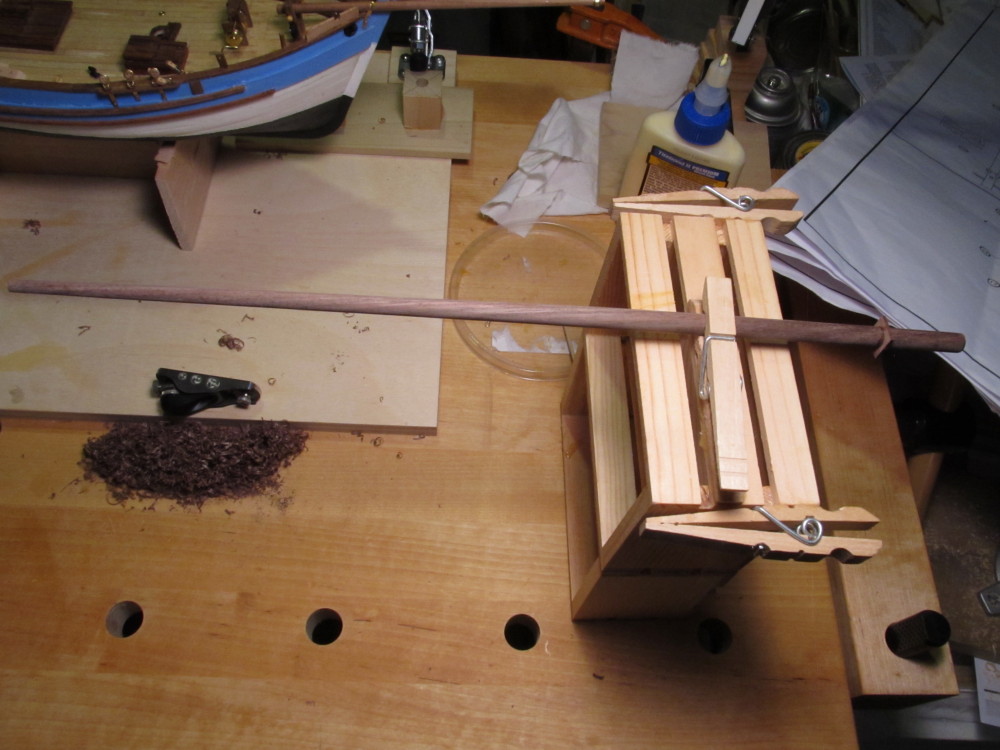
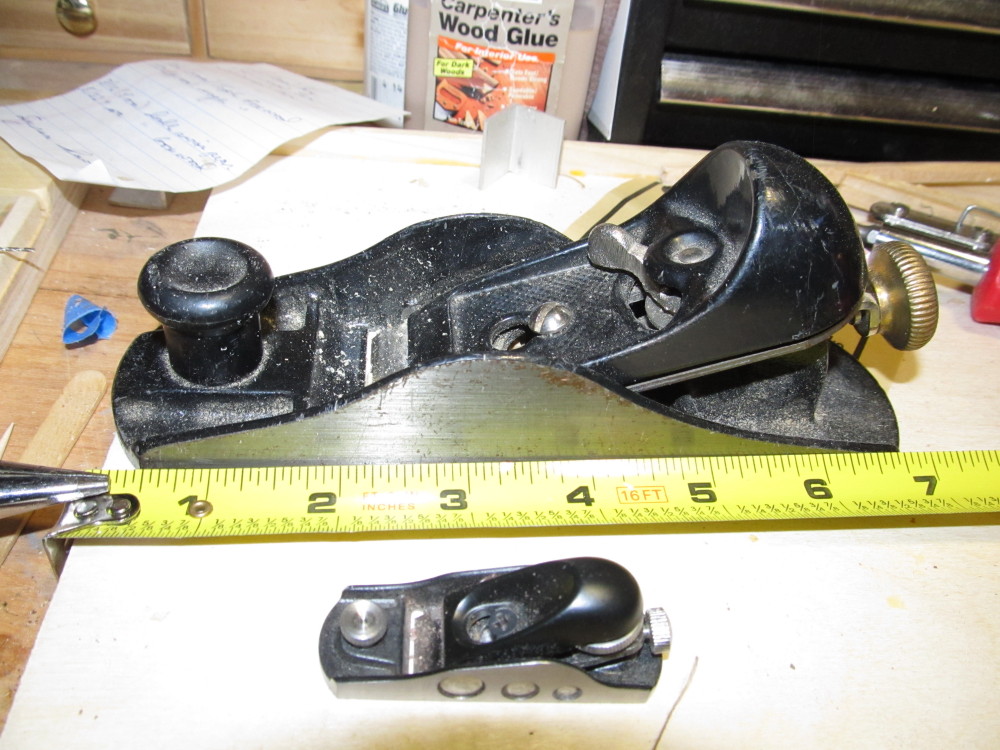
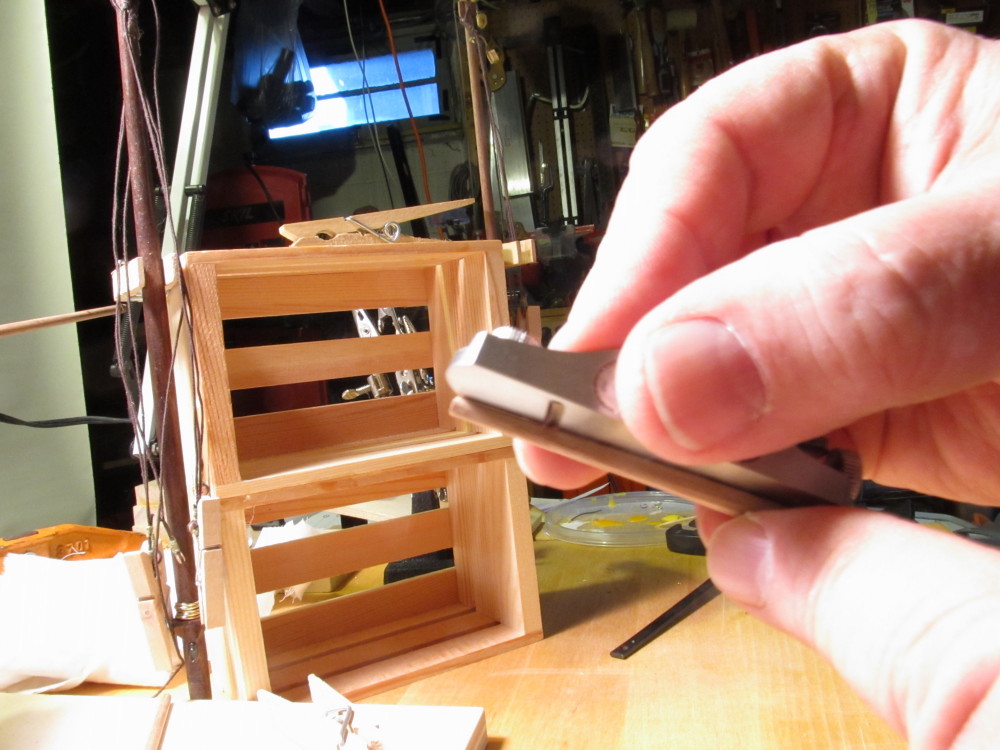
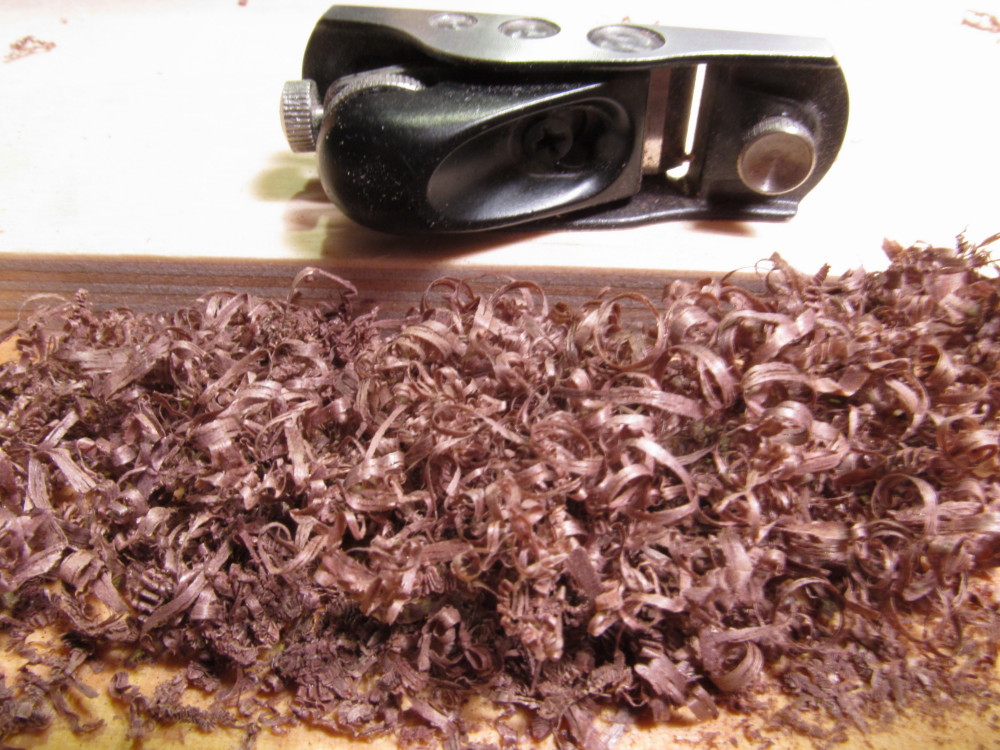
Thanks George, Mark, Pete, Nigel, Sal, and Michael for the comments and all those who clicked the LIKE button. George, yes, they are very tiny compared to their big brother but they work amazingly well. The masts etc are all walnut dowels and the plane cuts very thin ribbons with ease. Actually I have less trouble using the micro plane that I do with the full size one - never can get the blade exposure set right on the big one. Took me less than 2 minutes to get the micro plane working right. And I used it straight out of the box, no honing or anything. I'm very impressed with them, it was a good investment for me. Michael, yes, I'm slowly mastering the metal work. I've been substituting craft beading wire for the kit wire in some instances as it is easier to shape. Next to do is teach myself how to solder and blacken the brass, but for now I'll leave it shiny. Sal, I borrowed that design from someone here on MSW way back when I first joined so I can't claim credit for it - I picked up a couple of miniature wooden crates (decorative craft item I guess) in our local Michaels craft store, epoxied them together, ditto the clothespins which I took apart and reversed. I have another one with the "crates" epoxied end to end to make it taller. I can either clamp the crates down or weight them.
- 203 replies
-
- 5
-
-
- artesania latina
- marie jeanne
- (and 1 more)
-
Tool for Shaping Brass Strip
Jack12477 replied to mikiek's topic in Metal Work, Soldering and Metal Fittings
Me too. I have the book also. Bill's right -
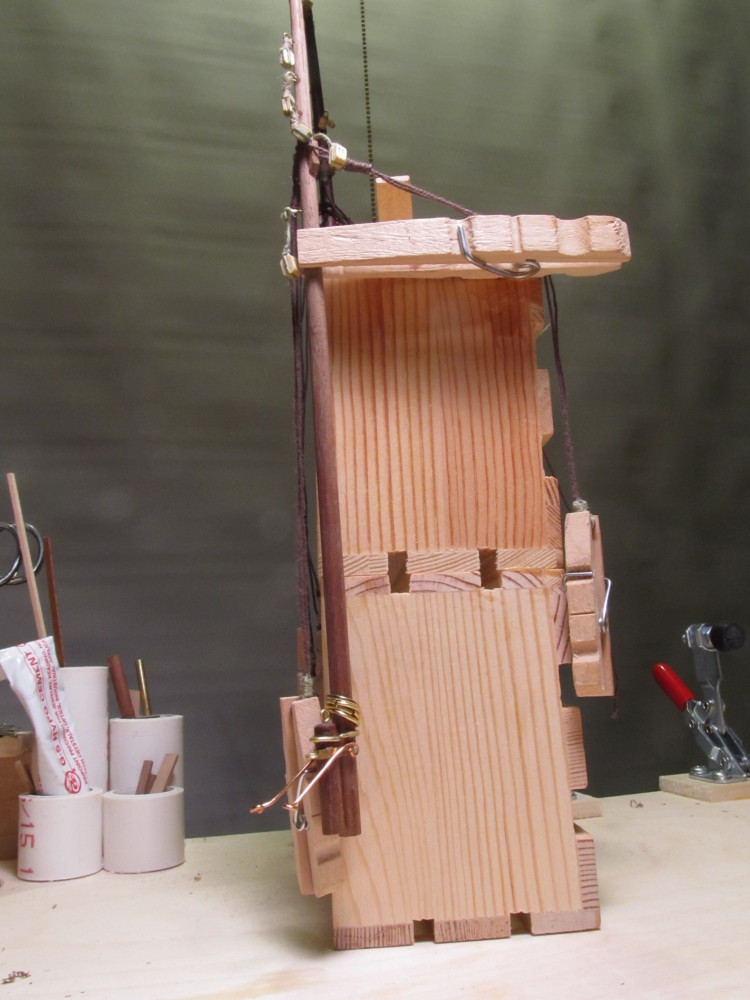
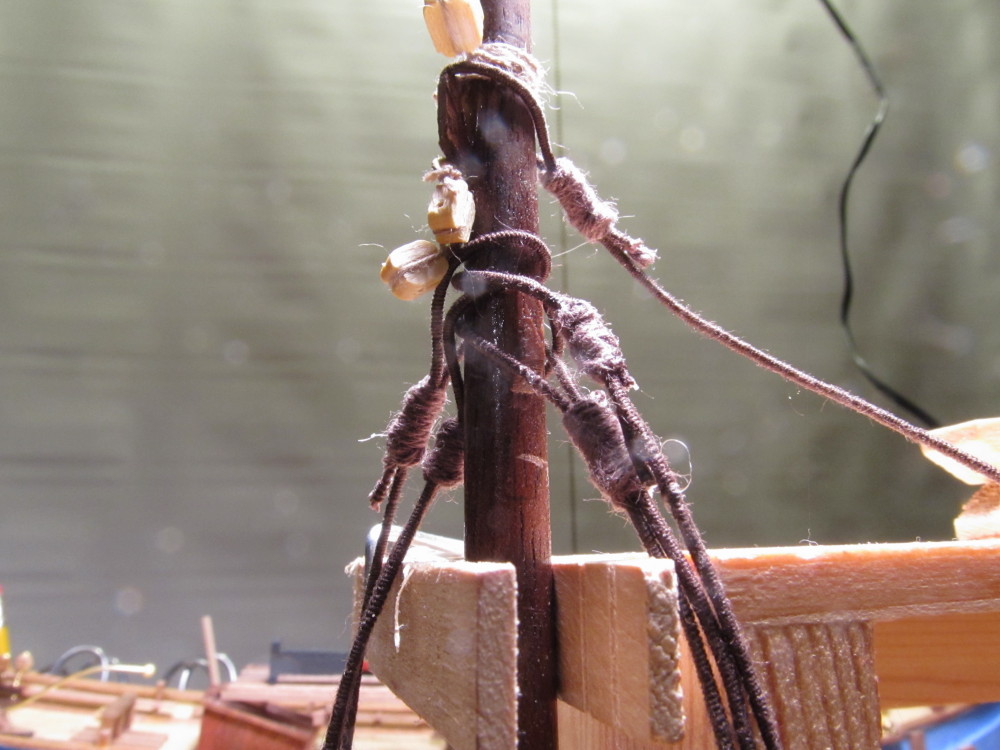
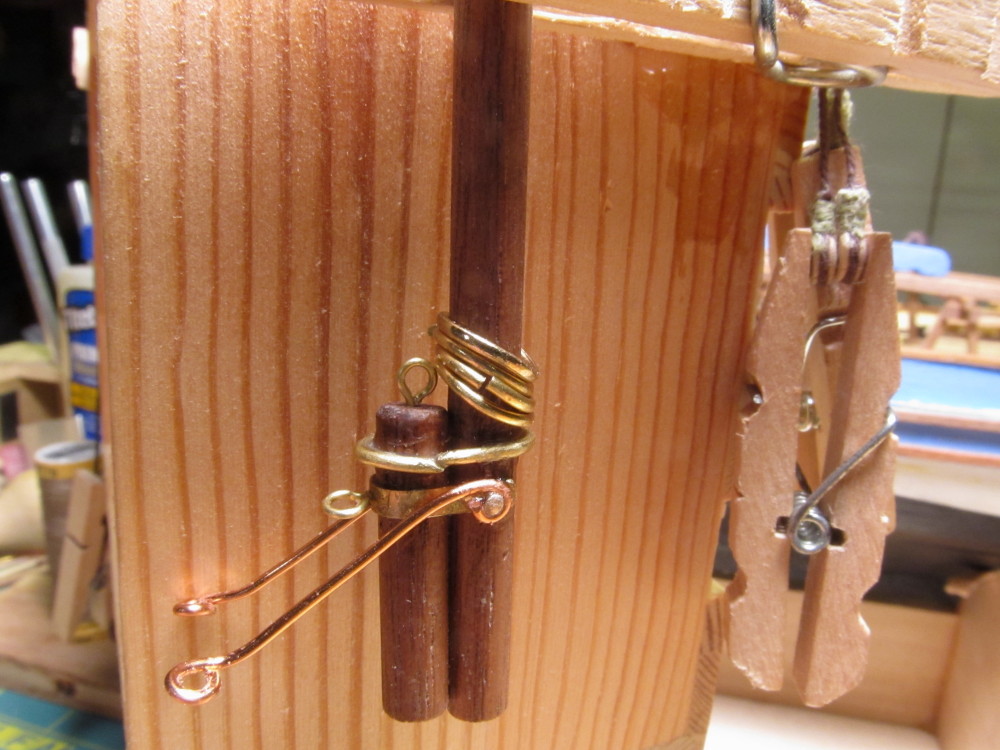
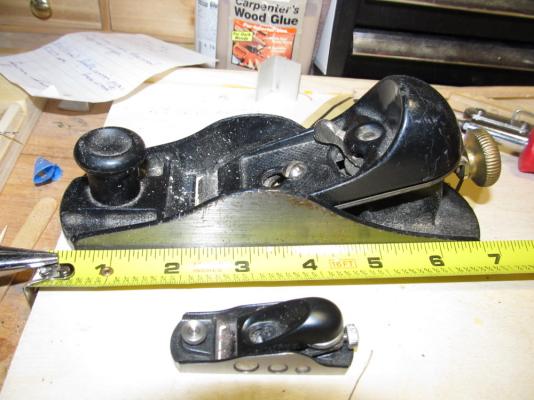
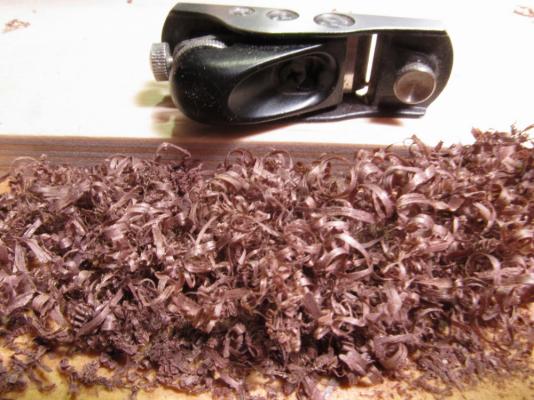
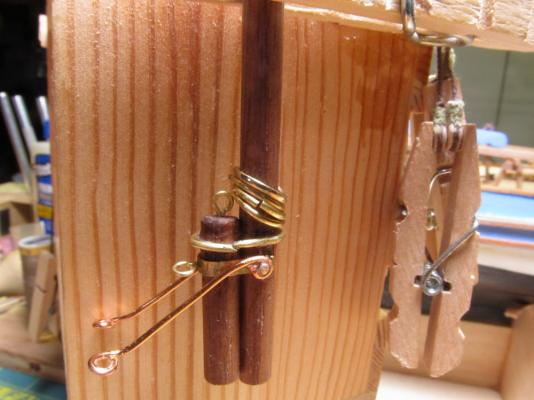
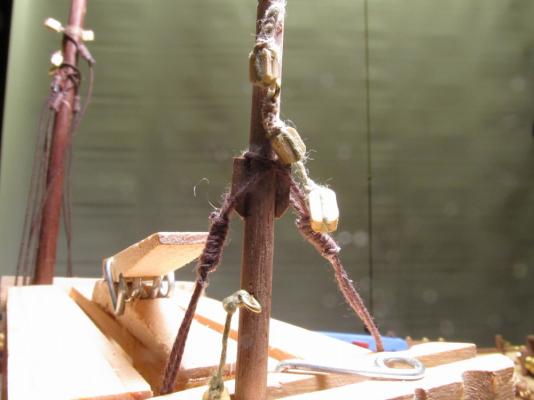
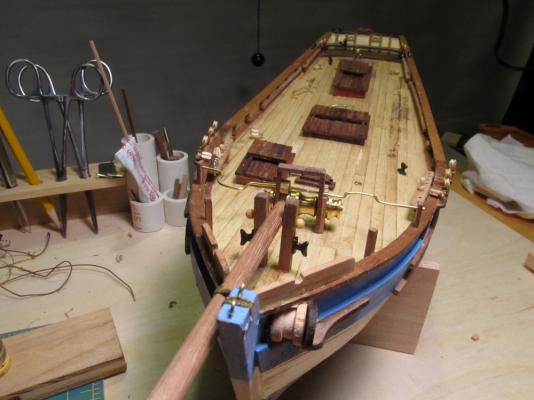
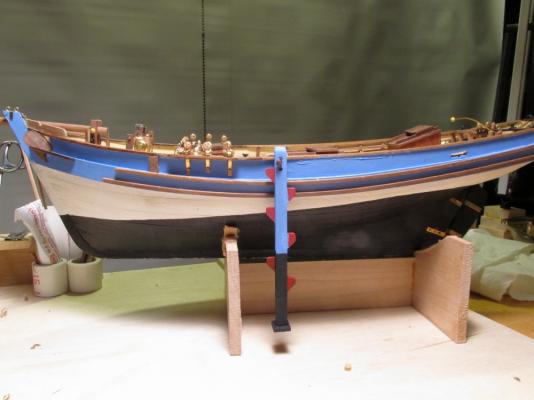
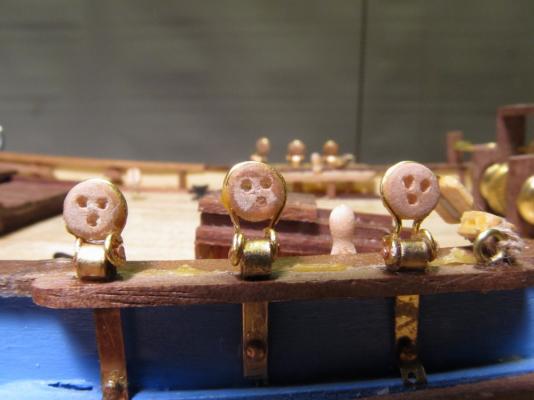
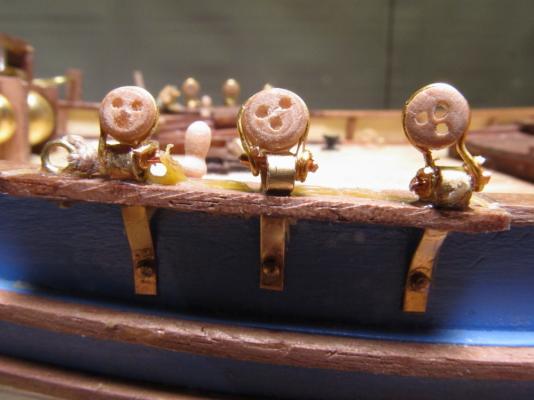
Moving right along I started working on the masts, gaffs, booms, and spars. Working with the picture book (steps 24 - main mast - and 25 -mizzen mast) and the plan diagram shown in post #113 (bottom left photo) as a reference I shaped the main mast using my Veritas miniature plane Picture book steps 24 - 27 - sorry they are not rotated - blame the scanner software Steps 24-27.pdf size comparison between full size and miniature plane finished main mast before adding blocks etc The pile of shavings left behind by the main mast Main Mast - the mystery barrel - flag pole "lanyard" Main and Mizzen shrouds Mizzen mast After looking at the photos of Brittany boats supplied by Ofencer29350 in a previous post I decided to add a boarding ladder. I had to guess at the dimensions based on the photos but I think it is pretty much in scale Deadeyes - port and starboard and stern Overall shot of model to date - some deck structures have been left off to avoid damaging them Now on to the remaining spars, gaffs, booms, etc.


- 203 replies
-
- 17
-
-
- artesania latina
- marie jeanne
- (and 1 more)
-
Marc, my 2 cents on rigging thread - until I found Chuck's Syren thread, I was replacing the horrible thread in your kits with thread I got from Artesania Latina via Tower Hobbies in Chicago. It's cotton I believe but much easier to work with than that which comes in MS kits. Find out who supplies AL with their thread, is my suggestion. Now I use both Chuck's Syren and AL's, depending on the model, until my AL supply is exhausted then it will be Chuck's for sure.
-
Guess I'm the 1st to pull up a crate to watch - looking forward to following your build, Bob.
-
Send me a PM if you decide to venture north
-
Dan, don't know where in Central VA you are (not necessary for you to say here) but for reference - I'm 10-15 miles from HRMM and a drive to Annapolis MD is about 5 hrs for me - maybe 6 to Richmond, in case you want to visit and maybe look in their archives.
-
Dan here's a video of a model of the Mary Powell's walking beam engine. Also see if you can find the book Mary Powell by Donald C Ringwald.
-
Why don't you try contacting the Hudson River Maritime Museum I'm sure they would be more than happy to help. They have a lot of Mary Powell artifacts and probably a lot of data in their collection(s).
-
Ken, thanks for the tutorial. Nicely done.
-
Copyright - beware
Jack12477 replied to dvm27's topic in Using the MSW forum - **NO MODELING CONTENT IN THIS SUB-FORUM**
Per, in an earlier post [now deleted] you described an issue you had with a photo processing lab's clerk refusing to print digital images from a memory card you had, even tho the photos were your own. My Pentax DSLR has a feature that will store a Copyright in the Properties section of the digital image, it clearly shows the word COPYRIGHT followed by my name. See if your digital camera has that feature; some of the smaller point-and-shoot digital cameras do not have it {my Canon Powershot is one]. It will prevent a similar issue in the future. The information stays with the digital image even when transferred from camera to computer or Thumb-drive. -
what is the ship at the backdrop of the forum?
Jack12477 replied to Eibwen's topic in Nautical/Naval History
Wow, I missed that one! It's barely visible on my screen and I'm using the default theme. Had to look hard to see it. Clever, Chuck -
I got tired of shoveling my driveway out every time I came home from NYC at 8 PM, so I went out the next summer ('96) and bought a snow blower - didn't snow a flake for the next 4 years and since then I've used it maybe a dozen times. So hang onto it, Dennis, NH can get some pretty good snow dumps. Boat's looking great !
-
Copyright - beware
Jack12477 replied to dvm27's topic in Using the MSW forum - **NO MODELING CONTENT IN THIS SUB-FORUM**
Shiloh, see this link on length of Copyright Protection -
Copyright - beware
Jack12477 replied to dvm27's topic in Using the MSW forum - **NO MODELING CONTENT IN THIS SUB-FORUM**
That applies very heavily to Trademarks and company logos are generally Trademarks which is a different protection under Copyright. And yes they must be vigorously defended. Famous case is Refrigerator - lost it Trademark protection. That's why Xerox keeps publishing ads telling people not to say I'm going to xerox something but rather say make a Xerox copy or photocopy something. I'm not sure if mere Copyright is that vigorous but I'm way out of my league on that nuance. -
Copyright - beware
Jack12477 replied to dvm27's topic in Using the MSW forum - **NO MODELING CONTENT IN THIS SUB-FORUM**
Dan, get a copy of the Fair Use Act and wave it under their nose and tell them it falls under that. The key test under Fair Use seems to be 1.) is it a reasonable number of copies requested, 2.) is it for your own use in research, or critiquing an article or work of art, making a model, 3.) are you the purchaser of the copyright piece (e.g., book). But as Jim Lad points out this is an international forum and international copyright law may differ from US Copyright law - so be careful and when it doubt get legal advice from a Copyright lawyer. -
Copyright - beware
Jack12477 replied to dvm27's topic in Using the MSW forum - **NO MODELING CONTENT IN THIS SUB-FORUM**
Peter, simple answer is it falls under Fair Use Act - Do a Google search on Fair Use Act Copyright Law - it's complicated but you are allowed to make copies for your own use to critique a book, or do research, etc. Example closer to home - you buy a set of ships plans that you intend to use to build a model. You take the original plans and make two copies. You place the original in protective package, you take 1st copy and glue it to build board, you take 2nd copy and cut-out various parts to use as templates. That's permitted under Fair Use. It's for your personal use (note emphasis). BTW I am NOT a lawyer this is a layman's understanding - As an amateur photographer who did publish my photos I did study the topic. On other note I'm talking about United States Copyright Law - other countries are signatories to International Copyright Law and I don't know how it applies outside the United States. For more information on the US Fair Use Act under Copyright Law see this Columbia University link -
Copyright - beware
Jack12477 replied to dvm27's topic in Using the MSW forum - **NO MODELING CONTENT IN THIS SUB-FORUM**
Crackers, many years ago I had the opportunity to attend a employer sponsored week-long R&R type seminar. One of the many speakers was the Chairman of the Copyright and Patent Law department at Columbia University Law College. His talk was on Copyright and Patent law. He started his talk by giving us the legal definition of Copyright; then to help us understand it better he gave an example. The example was this: "You're a teenager at summer camp,. You go to the camp store, buy a postcard and stamp; on one side you place the stamp and your parent's address, on the other side you write 'Hi Mom and Dad, having a great time at summer camp. Food is great. Love Joey" and you mail the card to your parents." He then explained that what had been written on the postcard was Copyright because it met the definition. To further illustrate he gave a second example "You go on vacation with your family to one of the National Parks and while there take lots of photographs. When you come home, you take your film (this was pre-digital photography) to the drug store to be developed and printed" Your printed photographs are now Copyright. He further explained that the circle-C symbol or the word Copyright does not have to be emblazoned on the work - all tho it enhances the protection. The protection exists from the moment you place the work into a media and publish it. And the work does not have to be registered with the US Copyright office - altho that is the best protection - to be Copyright. By his explanation, every photograph, every note to Mom & Dad, every finger painting your kids ever did - all are immediately protected by Copyright. Now I've given a very simplistic example of Copyright but be wary - someone somewhere owns the Copyright - even our own build logs and photos of our models are protected by Copyright - ever notice that Dirk (Dubz) explicitly stamps his photographs with "Copyright Dubz 201x" Now there is the Fair Use Act under Copyright law but that I will leave that to the members to research for themselves.- 26 replies
-
- 11
-
-
Hi Nigel, pulling up a bench to watch your build also.
-
Altduck, see last photo in post #108 above, that's the bow chain roller - all wood.
- 203 replies
-
- 4
-
-
- artesania latina
- marie jeanne
- (and 1 more)
-
Ken, I found out what that brass piece was. It's the flagpole cap - goes on the top of the main mast.
- 203 replies
-
- 3
-
-
- artesania latina
- marie jeanne
- (and 1 more)