HOLIDAY DONATION DRIVE - SUPPORT MSW - DO YOUR PART TO KEEP THIS GREAT FORUM GOING! (Only 27 donations so far out of 49,000 members - C'mon guys!)
×


Jack12477
-
Posts
5,665 -
Joined
-
Last visited
Content Type
Profiles
Forums
Gallery
Events
Everything posted by Jack12477
-
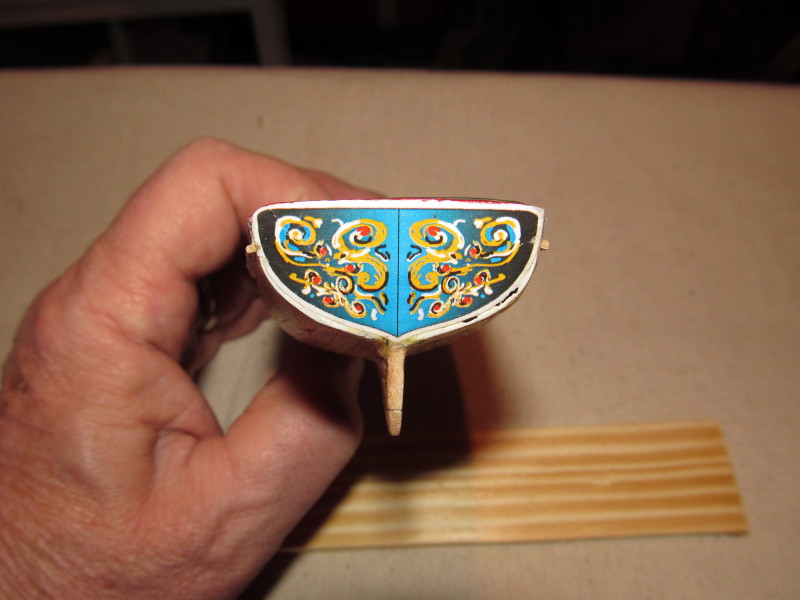
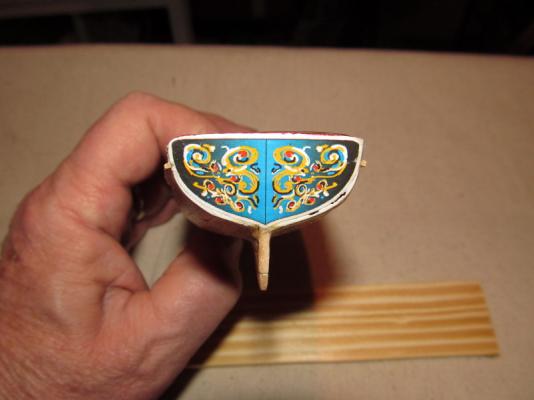
 Carl, thanks but no it's an applied paper decal - comes with the kit. The side friezes are also a paper "decal"
 -
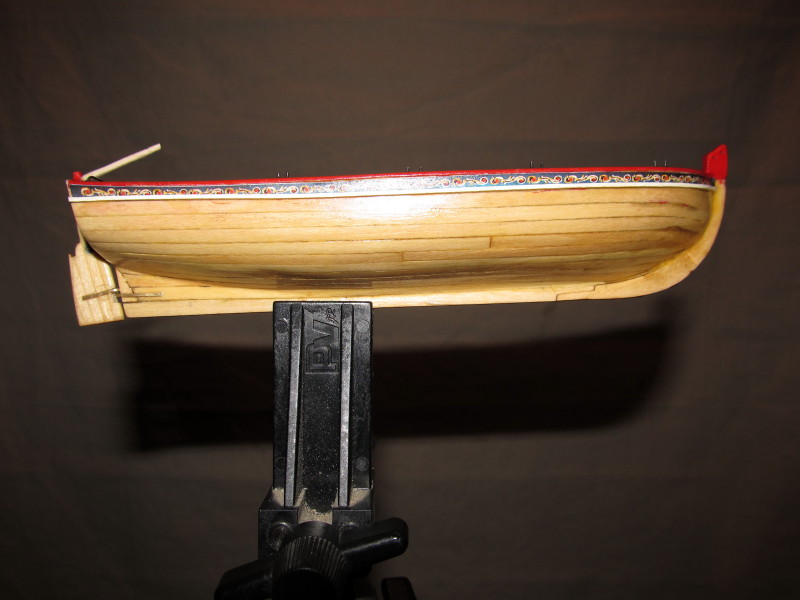
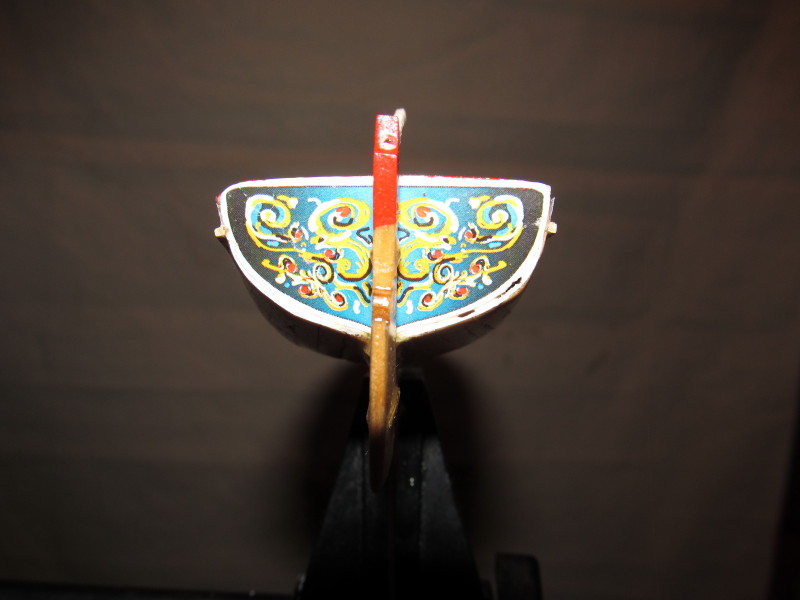
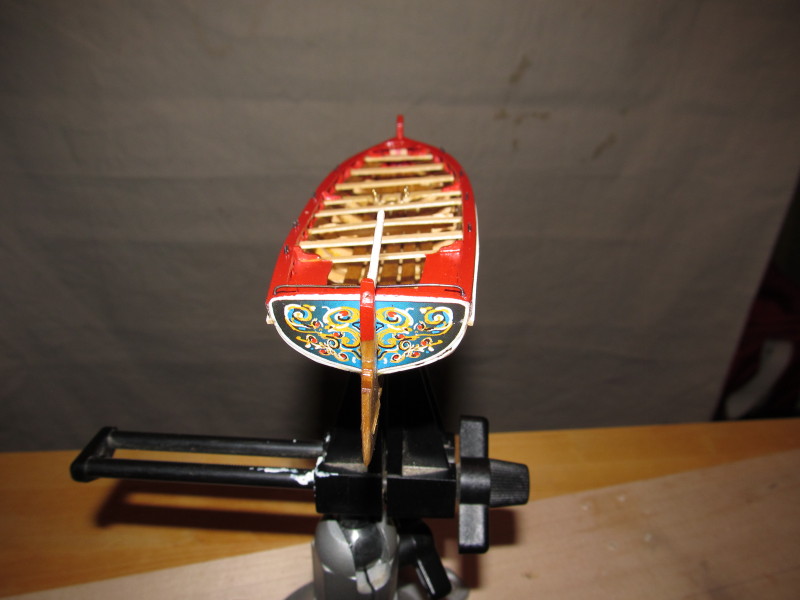
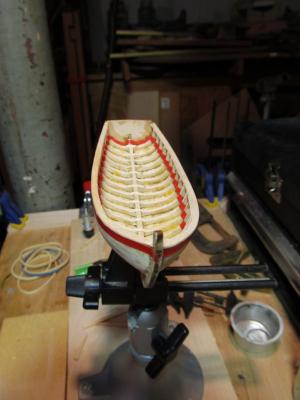
Well, I finally got back into the shipyard after taking some time off for the holidays to be with children and grandchildren. And also take part in the Ice Yacht Expo at [President] Franklin Delano Roosevelt's Home and Library in Hyde Park. Our ice yacht club (Hudson River Ice Yacht Club - HRIYC) has the largest collection of historic stern steering ice yachts in the world, and they are actively sailed when ice and weather permits. But back to the build. Made some progress in spite of the time off. Had a helluva time with the rudder spindles; those little wires pins wouldn't adhere to the brass even with CA and Accelerator, but I finally succeeded in getting the attached. Pictures follow:


- 41 replies
-
- 2
-

-
- 18th century longboat
- model shipways
- (and 1 more)
-
Nicely done, Michael. Very impressive! Nice informative video as well.
-
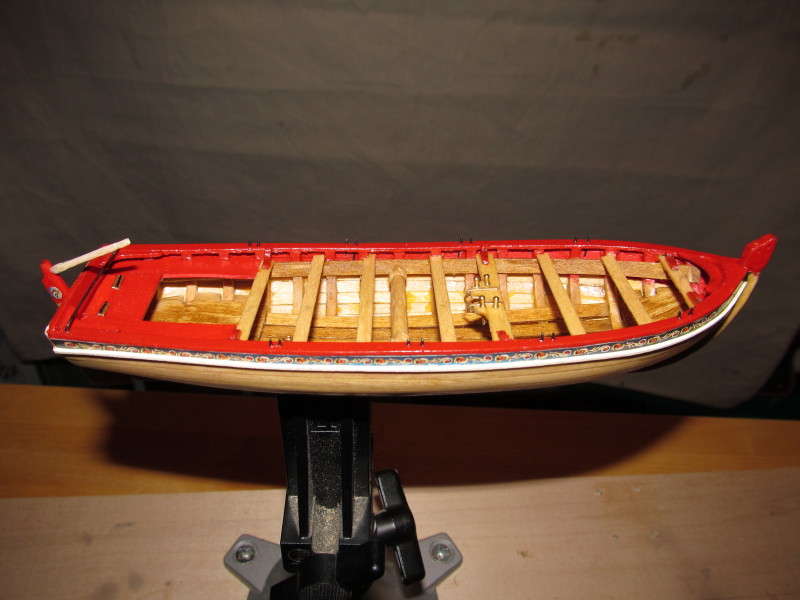
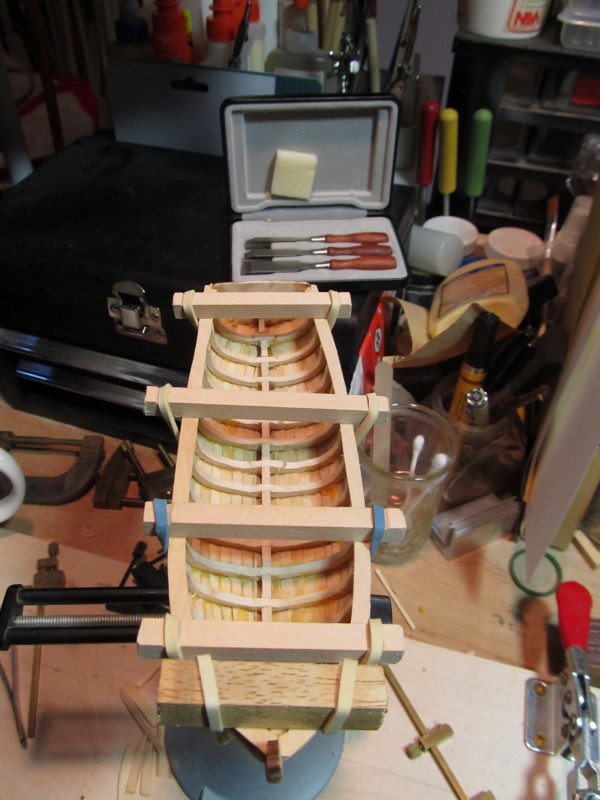
Here's a better shot: At my advanced age it takes quite a while for the neurons to bring the "learned photography tricks" out of archival storage and into current active memory . In the old days of film photography when you needed to cut the light output from the electronic flash you could use a white handkerchief and drape it over the flash unit. In the case above I folded the handkerchief twice so I had two layers of cloth to diffuse the light output. Worked pretty good.
- 41 replies
-
- 3
-
-
- 18th century longboat
- model shipways
- (and 1 more)
-
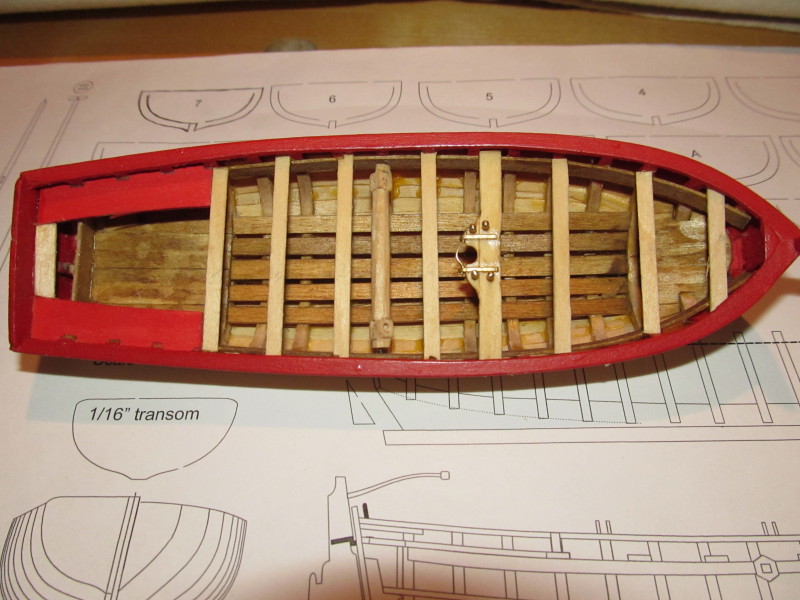
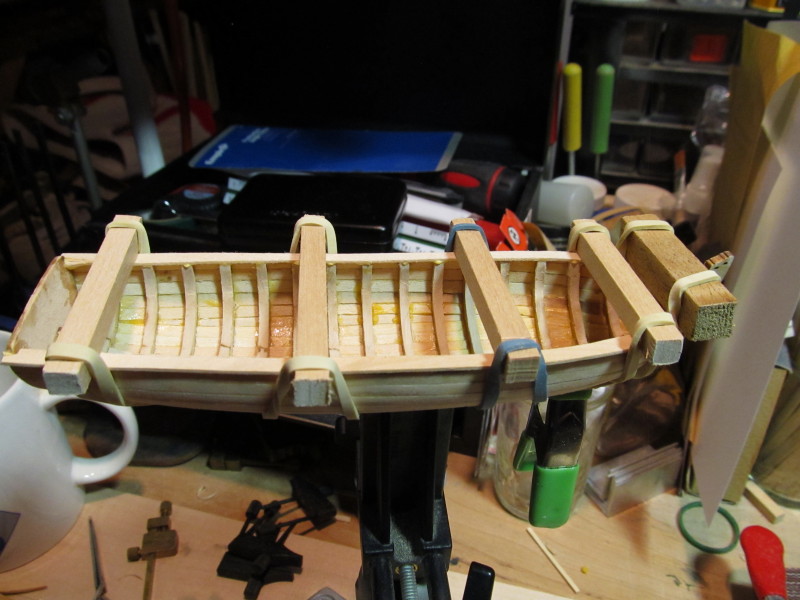
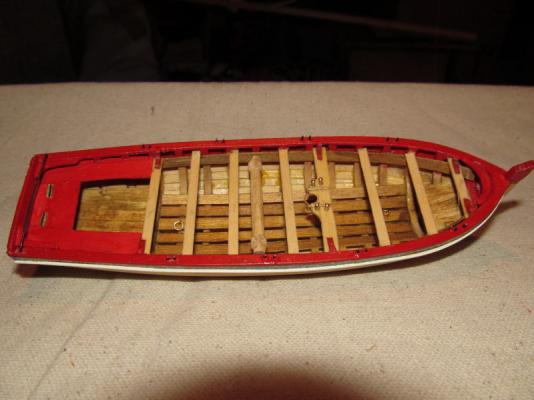
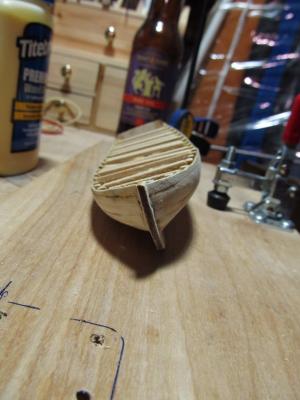
Well, some progress. I decided to leave the thwarts as specified in the instructions but enlarged the mast thwart a little. Sorry the lighting is dark, these point and shoot digital camera don't have a way of cutting the flash output. When I use the built-in flash at this close range it completely washes out the image.
- 41 replies
-
- 3
-
-
- 18th century longboat
- model shipways
- (and 1 more)
-
Per, I think the instructions are incorrect. When I lay the individual strips of wood on the drawings, the 5/32" fit exactly while the 1/8 is too narrow. I guess I will fiddle with it and see which is visually more acceptable.
-
I've run into a bit of a quandary in my build. I'm at the point of constructing the thwarts and I am finding a discrepancy between the printed instructions and the plans. The instructions call for 1/8 x 1/32 for 7 of the thwarts and 3/16 x 1/32 for the mast thwart. The plans show the thwarts as 5/32 wide with the mast thwart 1/4" wide at the widest and 5/32" at the narrowest. Has anyone else encountered this discrepancy and if so how do you solve it? Are the instructions wrong or is the plan drawing off ?
-
mini drill chuck for those small drill bits
Jack12477 replied to AON's topic in Modeling tools and Workshop Equipment
It's not a Dremel chuck you need but the interchangeable collets that go into the chuck. I have a Dremel 395 and 3001 and both fit the Workstation. They "clamp" in via threading on the "nose" of the drill. A ring is unscrewed and the dremel is then screwed into the workstation and router/shaper station. I have both the "old" Dremel and the new Dremel and use them both interchangeably The collets look like these http://www.dremel.com/en-us/Accessories/Pages/SubCategories.aspx?catid=2005&catname=Chucks+%26amp%3b+Collets and are not that expensive. -
mini drill chuck for those small drill bits
Jack12477 replied to AON's topic in Modeling tools and Workshop Equipment
I use the Dremel Workstation as a drill press. It's available thru MicroMark http://www.micromark.com/dremel-workstation,8556.html Dremel has collets that take even the smallest drill bits. Mine works fine for model work. -
I have to echo EdT's words. Michael, superb ! And the video is very informative, thanks for including it.
-
When I started airbrushing plastic models several decades back, I purchased a middle of the line Badger single-action airbrush and several cans of compressed air. As I got better at painting with the Badger I bought an inexpensive small hobby style compressor. I still have the Badger (haven't used it in quite a while now) but the small hobby style compressor burned out from overuse (by my son) and now I use a 3 gallon Sears brand compressor. I never had any problems using the single-action brush, as opposed to a double-action brush. I'm not sure I could master the double-action. I painted over 40-45 1/35 scale model armor vehicles including elaborate camouflage patterns with the Badger and it worked like a charm. Mine took an external cup or jar of paint, had two tips for coarse and fine work. So as a starter brush I would recommend the Badge. The secret to any brush is thoroughly cleaning it after each use.
-
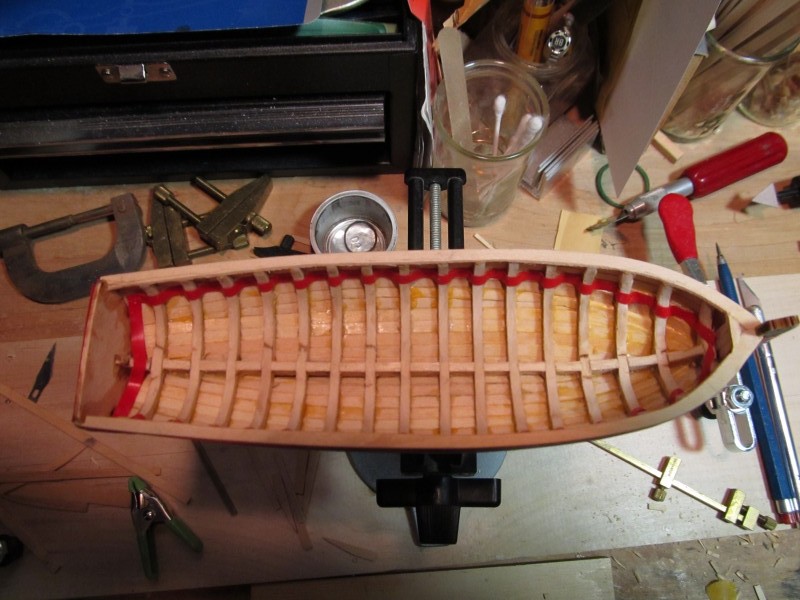
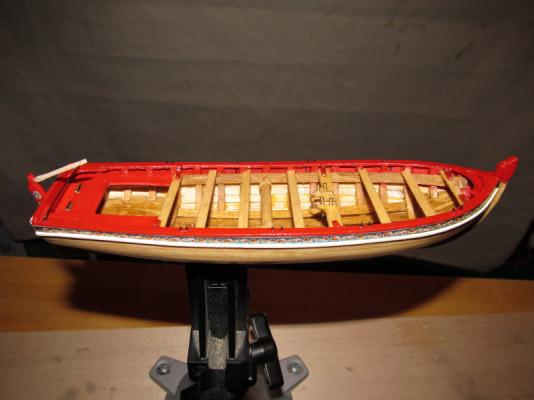
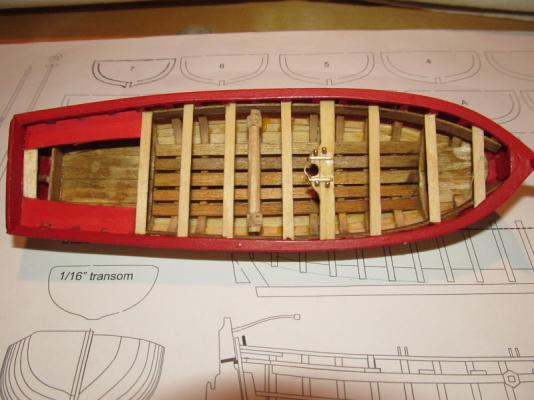
Ryland, Floyd, Divarty, thanks for the likes. Updates: Painting of cap rail and interior completed; I stained the interior and exterior hull with Minwax Natural, while the floorboards are stained slightly darker with Miniwax Golden Oak. The lighting doesn't bring out the color too well. Using the flash at this close distant totally washes out the photos. Gluing the floorboards in place:

- 41 replies
-
- 3
-
-
- 18th century longboat
- model shipways
- (and 1 more)
-
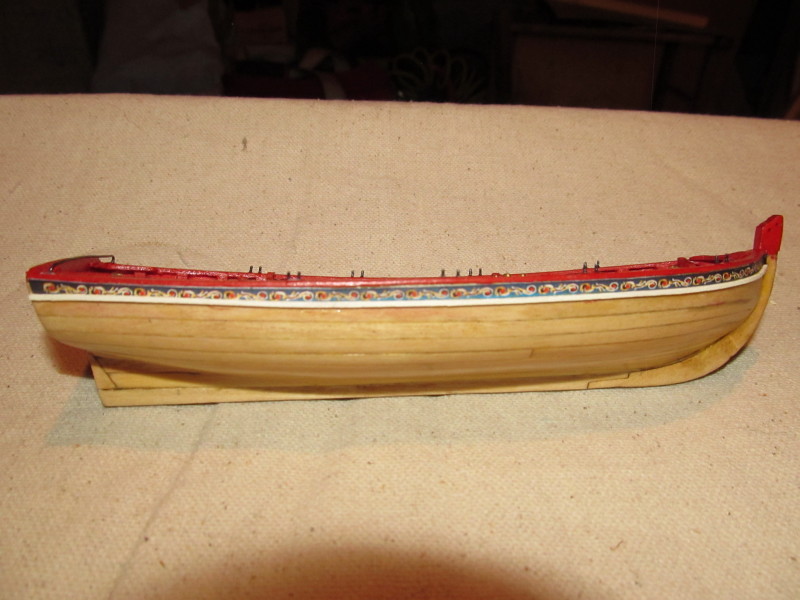
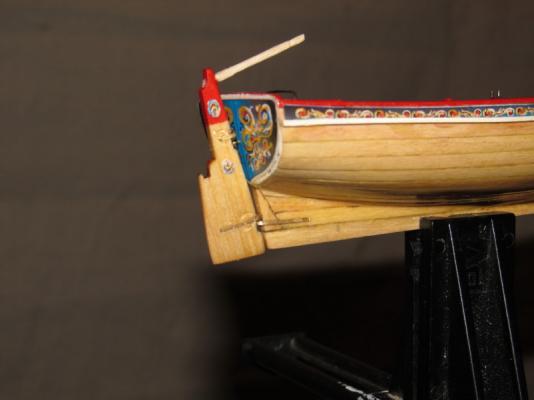
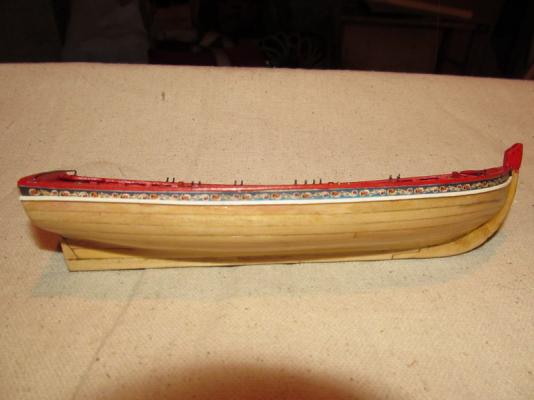
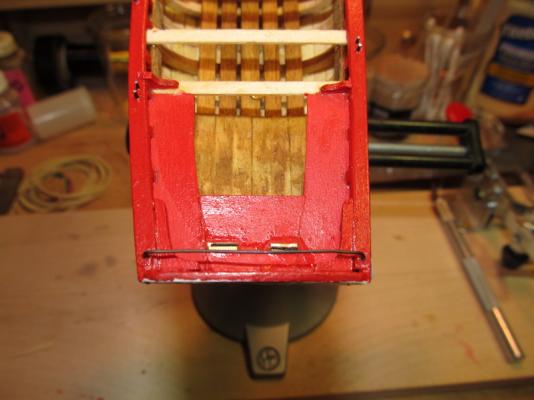
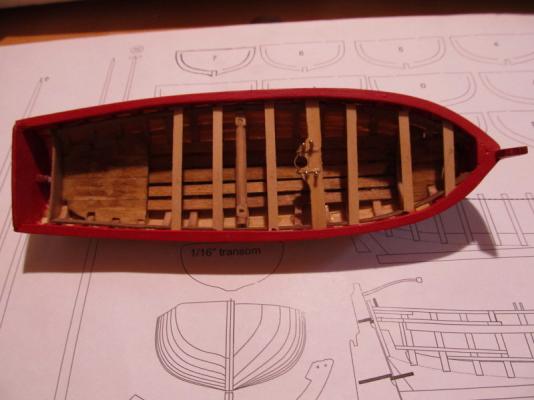
Update: Bow stem repaired. Temporary braces removed, Cap rail installed and sanded. Red tape applied to mask off areas to be painted. I'm going to paint the cap rail, inside and stern red as the others. Interior I think I will stain (not sure which color yet). Have not decided whether I will paint the lower hull white or leave it "natural". The red "masking" tape I'm using is Great Planes brand 1/8" EZ-Mask Flexible Masking tape. I started using it when I was building the plastic Tamiya armor kits. It's very flexible, low tack and applies easily.


- 41 replies
-
- 4
-
-
- 18th century longboat
- model shipways
- (and 1 more)
-
Michael, very impressive work !
-
Now that's a machine ! Impressive ! Would be super nice to have that one in my garage. Haven't kept up with my home town companies since I left there in 1968 even tho I still have family there - Dad, 2 brothers and 1 sister. Dad is 99 and going strong. He's very knowledge about Gleason's history. He told me once that Gleason was the only American company that was NOT affected by the Great Depression of 1929-1930. Gleason offered me a job as a programmer when I got out of the Army but I didn't accept it because I took a more challenging programming job with "Big Blue" down here in the Hudson Valley and stayed for 40 years. We used to say we were on the "bleeding edge" of technology advances. My only experience with machine shop was as a college freshman I was required to take a two semester Machine Shop course where our project was to machine a working micrometer from scratch. I still have the micrometer tho I don't use it much. I'm really enjoying the engine build.
-
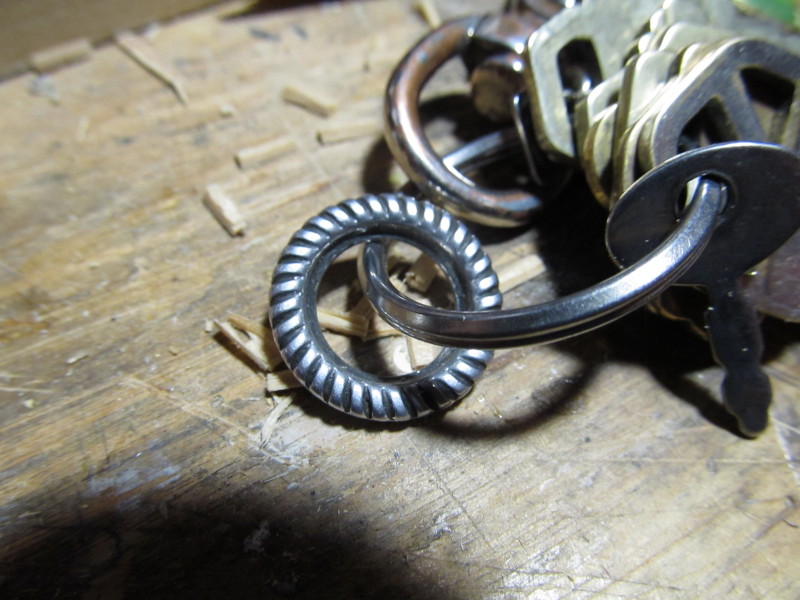
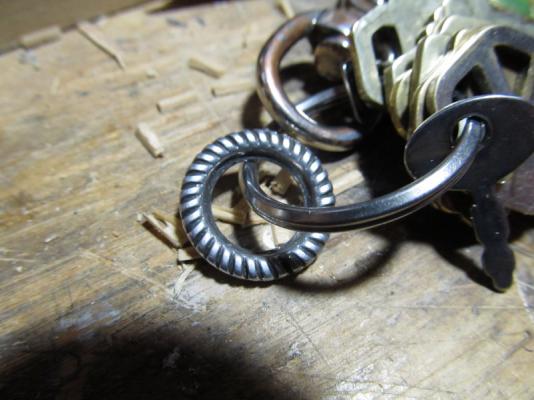
What !? You don't have a Gleason Gear Cutting Machine in your garage, Michael ! (Just kidding of course). Many (and I do mean many) years ago, I was shopping in a department store in my home town of Rochester NY where Gleason is located and on the main shopping floor Gleason had set up one of the smaller gear cutting machines and was giving a demonstration. The machine was cutting the beveled ring gear for a Sears Sewing machine. When the machinist finished cutting the gear he gave it to me. I have it on my key ring - well worn. It was interesting to see exactly how the machine worked - it did not cut each slot sequentially but rather stepped about 15 degrees (or so) and cut another slot then another step of about 15 degrees and another slot; when it finally finished cutting the final slot was adjacent to the first slot cut. Photo attached below: I am really impressed and envious of your machining skills. The engine is magnificent !
-
Nice job, Rich. I like the "tablet paper" as a template/guide !
- 1,756 replies
-
- 1
-
-
- constitution
- constructo
- (and 1 more)
-
Thank you everyone for all the Likes. I appreciate them. I took a few days off from the shipyard to travel to Mystic Seaport with some friends for their annual Lantern Light Tours. Of course, the night we had booked for our tour (Saturday) just happened to be the day the East Coast got hit with an all-day heavy rain storm and the Seaport does not cancel their tours due to inclement weather. So we donned the foul-weather gear and shouldered on. Our tour departed at 8:15 PM, lasted a little over 45 minutes and is literally conducted via lantern (oil lamp), making it difficult to dodge the puddles. We also took a side trip to Newport RI to tour the Mansions - the Elms, Marble House, and Breakers - the latter two belonging to the Vanderbilts (of New York Central RR fame amongst other industries). They said that at his death Cornelius Vanderbilt ("The Commodore") was worth in today's US dollars over $180 Billion (USD) making him the richest man who ever lived. The Mansion of Newport were their Summer "Cottages". Here's a piece of history trivia: All of the ships at Mystic Seaport, including the Charles W Morgan, had a small Christmas tree strapped to the very top of the Foremast. Does anyone know what this maritime tradition signifies? Answer on my next post. Well, it's back to the shipyard to continue the build. More postings will come shortly.
-
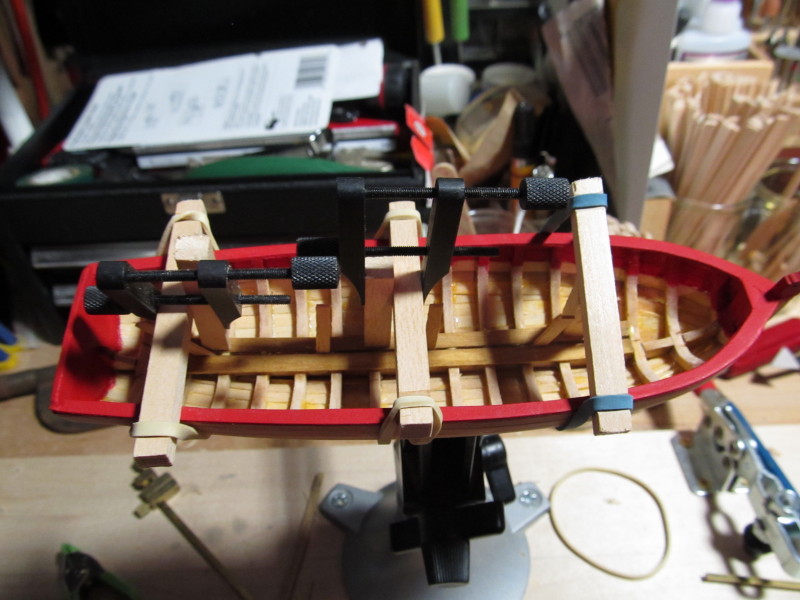
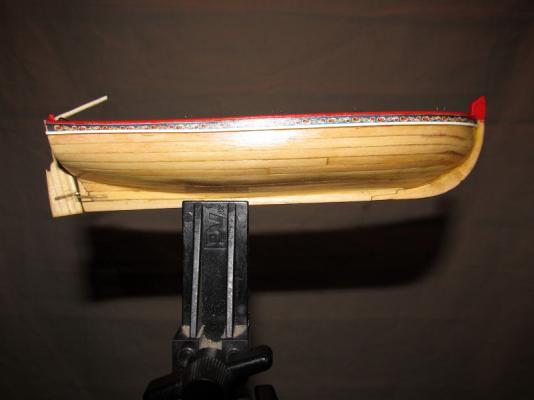
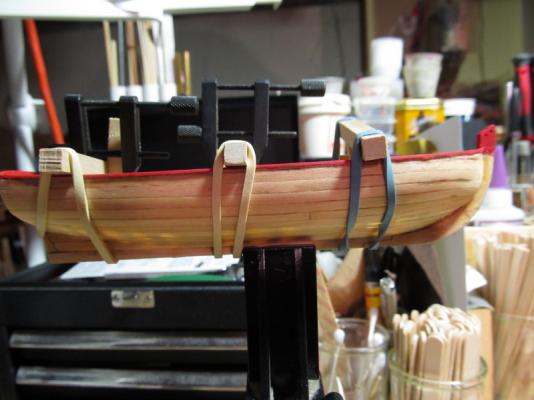
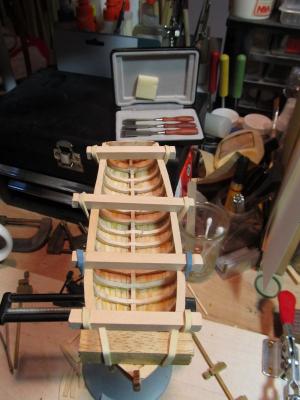
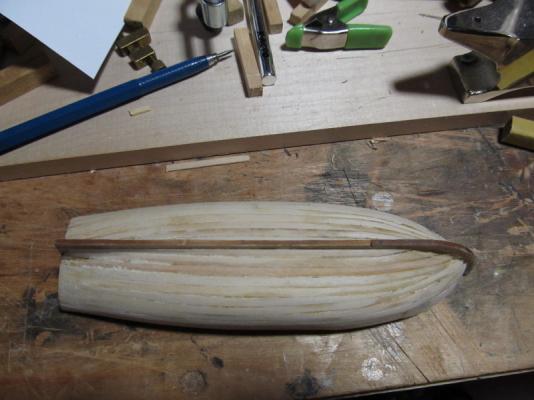
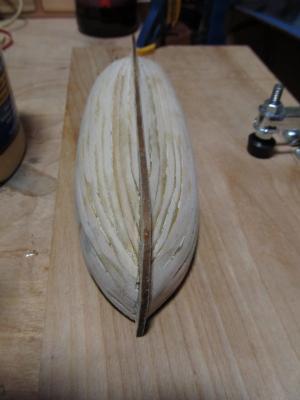
Okay, I'm finally back to square one. The "restoration" is complete. Planks didn't fit as nicely into the rabbet at the bow as originally but it's passable. In the process I broke off the top of the bow stem, so I have to either fabricate a new piece or use the "spare" stem that comes with the kit to graft a new top piece onto the existing but broken stem. I'll work on that next week. And I have to remove the frame braces I installed to protect the frames while I was trying to reattach the planks. For now, here's the results: Ryan: The Admiral gladly contributed the sponge to the shipyards tool chest
- 41 replies
-
- 8
-
-
- 18th century longboat
- model shipways
- (and 1 more)
-
Superlative job of machining, Mike. Looks really good. I'm really enjoying your build.
-
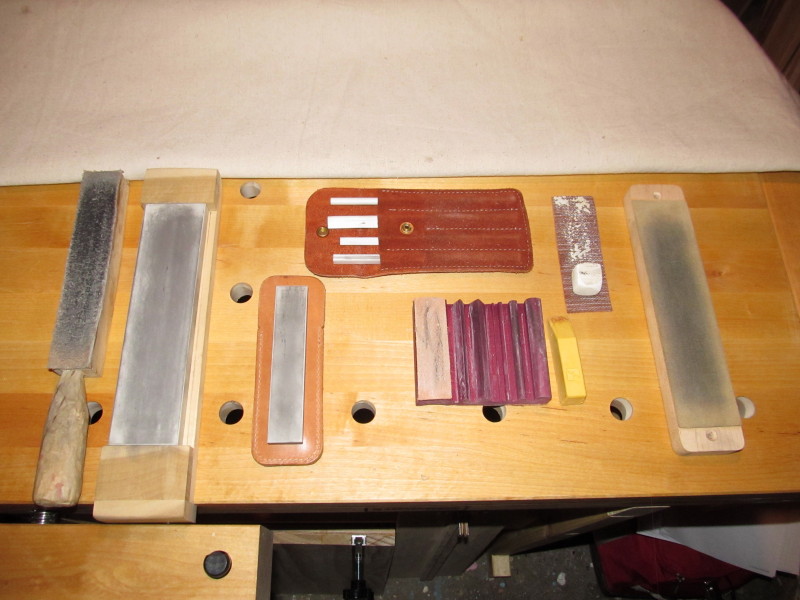
In addition ship modeling, I also do woodcarving so I have a variety of knives and chisels/gouges that I must keep sharpened.. The picture below shows the assortment of sharpening "stones" and strops which I use: On the left, in the bench-hook, is a ceramic stone which I use for 90% of my sharpening. I find the ceramic stone does a better and faster job of sharpening that do the various Arkansas stones I have. Most of the time I simply hone the blade/chisel/gouge using the leather strop stick shown to the left of the ceramic stone. This is a piece of scrap leather I picked up from a leather-goods maker, hot-glued to a stick, and whittled a handle on it. This is used 90% of the time. At the top center (in the leather pouch) are ceramic sticks in 4 geometric shapes; below that to the left (also sitting atop a leather pouch) is a smaller two-sided ceramic (coarse/fine) stick; to the right is the Flex-cut brand honing tool. The strop on the far right can be fastened to the workbench. The White "chalk" on the "swiss-cheese cutter" sanding mesh is the sharpening powder I prefer to use. I use the "cheese cutter" mesh to grate some powder onto the leather strop on the far left and simply home the knife blade (or chisel/gouge) before I begin my woodcarving and then about once an hour after that. I'm not too keen on the yellow sharpening powder which comes with the Flex-cut strop. I find that the ceramic stones get used very infrequently, usually when I've nicked the edge and have to fully re-sharpen the tool.

-
You can also use the cardboard from a paper tablet (the real tablet not the computer type) to hone a knife blade. Works even better with some sharpening compound dusted onto the cardboard.