HOLIDAY DONATION DRIVE - SUPPORT MSW - DO YOUR PART TO KEEP THIS GREAT FORUM GOING! (Only 75 donations so far out of 49,000 members - C'mon guys!)
×


Jack12477
-
Posts
5,666 -
Joined
-
Last visited
Content Type
Profiles
Forums
Gallery
Events
Everything posted by Jack12477
-
 Likewise from me OC.
 -
No, hubby and she both got job transfers which gave her the opportunity to get her Doctorate degree.
-
My #2 daughter lived in NH for 7 years, loved it.
-
Yea, Lou, I've been seeing the weather news about the "atmospheric river" pummeling you guys. They say it is moving cross country toward us east coasters. Tonight's News is forecasting a potential northeastern hitting us Monday / Tuesday. Too much snow on ice will wreck our sailing.
-
We're in for several days of sub-zero or near zero Fahrenheit temperatures at night, saying we might reach a daytime temperature of 20 F on Monday. So conditions are good for thickening any ice already on the lakes, river could take a little longer, but historically we've had good ice on river around Valentines Day (Feb 14th here) or 1st week in March. 🤞
-
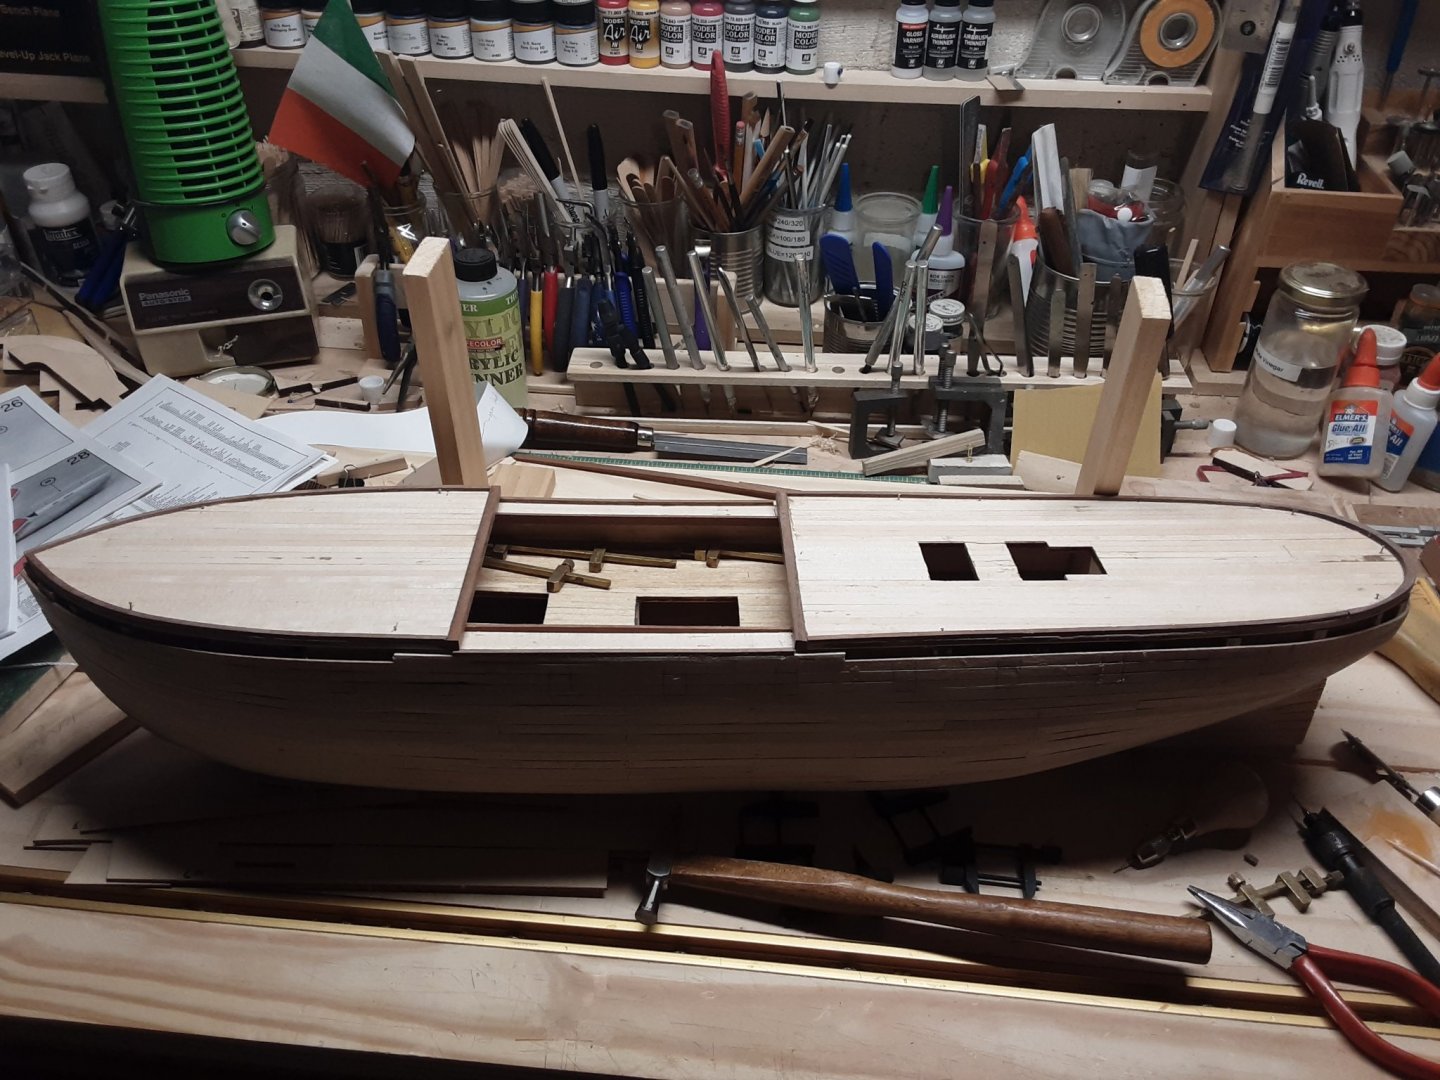
Update : Late breaking News ! Reports are coming in of suitable ice forming on several of our local lakes. Some hard water sailing is definitely looking promising. Some club members took their smaller Arrow class ice boats up to Saratoga Lake for some sailing (missed the memo on that one 😪) The river still has a lot of open water. In the meantime, the bending of the newly purchased basswood is proceeding well.
-
Instead of snow we got frigid weather. At 0600 today temperature at my house was 10 F (-12 C) with windchills ranging from -3 F to -26 F. Supposed to stay with us thru Sunday or Monday.
-
That's the 44 ft motor lifeboat, self righting, which I believe replaced their 36 ft MLB (36500) featured in the movie The Finest Hours based on the true story of what is still considered the US Coast Guard's greatest small boat rescue, Bernie Webber Station Chatam Mass Feb 1952. The current boat is the 48 (49??) 47 ft MLB. [Correction] A good friend of ours was one of the CGC Tamaroa crew featured in the movie Perfect Storm, later commanded an East Coast station with 2 of the 47 ft MLBs. Admiral and I watched that movie with him and his wife when it first came out. After we left the movie theater, his wife commented to him "you never told me it was that dangerous!" After the movie came out the Coast Guard decided to award him the Coast Guard Medal.
-
Growing up in the Lake Effect Snow region south of Lake Ontario (actually due south 60 miles from Toronto, Canada aka Rochester NY) averaging 100 plus inches per year (record was 161.9 inches in 1959-1960, all time record was Buffalo at 199.4 inches in 1976 - 1977) I kind of miss the snow. Even the western NY regions are experiencing a much reduced snowfall rate the past couple of decades. In the 25+ years my daughter has lived in Buffalo, she has gotten two epic Lake Effect snow storms, the first occurred when our granddaughter was about 3, got 7 Feet, yes Feet, in 24 hours; the 2nd occurred when our granddaughter was in her last year of High School, that dumped 8 feet over a 48 hour period and gave her the first and only snow day school closure over her 12 years in school. re: AYC - yes I picked up a couple of 2" x 2" x 3" blocks from Chuck some years back at one of the Northeast Shipmodelers Conferences to try out for woodcarving. It is as good or better than the Wisconsin Basswood we normally use for carving.
-
@CDW @mtaylor Success! I picked up some 2" and 3" wide x 24" long pieces of basswood that are close enough in thickness to work, and they can be planed or sanded to match the other pieces. Also picked some sheets of thin plywood. Basswood is similar to Limewood so it should bend easily. It is also the same wood I use for woodcarving. @Edwardkenway I'm still thinking about getting some AYC from Chuck. Just have to figure out what sizes to get. Oh! BTW the snow storm was a disappointment, less than 3 inches accumulation 🤨
-
True! And I can also sand down any difference in thickness where it meets the planking Had not thought of his wood, since I don't do any scratch building, but that is an excellent alternative. I usually replace all the kit supplied rope and blocks with his as his is far superior in looks and quality. Thanks for reminding me.
-
Thanks Mark !
-
Ok, thanks! Will get back to you later.
-
The strip is about 2.5 in by 13 in. The actual thickness is 1.75 mm or 9/128 inches. 5/64 is closest approximation. Hold off on doing anything, I should be able to get to local hobby store in Poughkeepsie by end of week. I will get back to you on your offer. Since this is a Spanish made kit everything is metric, fortunately my Venier caliper converts to either
-
Thanks Craig. I will keep that in mind
-
I was thinking same thing. Except the hull planks are a bit thicker than the ply. And not sure if I will have enough extra to do it. Gotta think about it some more. Once this snow storm blows past us I will make a trip down river to only brick and mortar hobby shop in valley, if he doesn't have any ply in stock then Plan K may be a solution. (Pun intended 😉)
-
Nearest one to me is Springfield Mass 2+ hour drive one way, Norwalk CT ( same travel time) or Wilmington DE about 4 hours drive. Great stores but none close by, catalog is only option for them.
-
That was the first store we went to. Nothing ! Then Home Depot, Lowes, "Wally World", et al.
-
Well what I feared would happen, and what I have been trying hard to avoid, happened anyway. After successfully heat bending the starboard bulwark pieces (3) to fit, I started bending the port side pieces, except as I was bending the stern piece around the mold I had made the piece snapped about 2 inches from the end. Piece is laser cut from a 5/64 inch thick piece of 2 ply, maybe 3 ply, plywood. Spent the afternoon visiting 5 local stores trying to find a replacement with no luck. 😒 Of course! There is a pandemic ! No one is restocking shelves ! 🙄. So now it's road trip time to a neighboring city to see if I can find a brick and mortar hobby store that has some in stock before I resort to mail order which could take 6 months for the "Express Rider" to deliver it to me. 🤨 🙁☹
-
Small update : Progress at the speed of a glacier. As you can see from the protruding nails, the two decks are just tacked in place until I can get the guns installed on the lower deck. Next up is installing the bulwark without getting the glued to the decks.
-
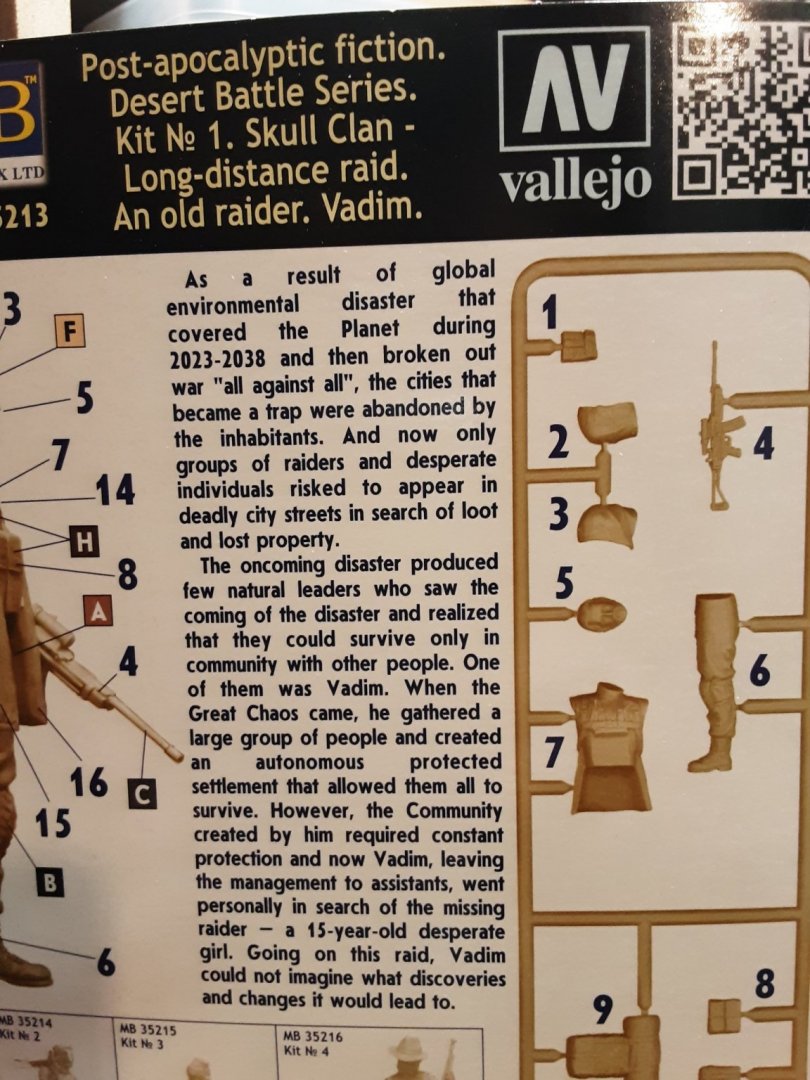
@lmagna Lou did some Google searches and came up with these 3 additional kits in the series. Looks like the kit origin is Ukraine. Have not seen the others offered in any of my online hobby stores, only the 1st in series. All are 1:35 scale.


-
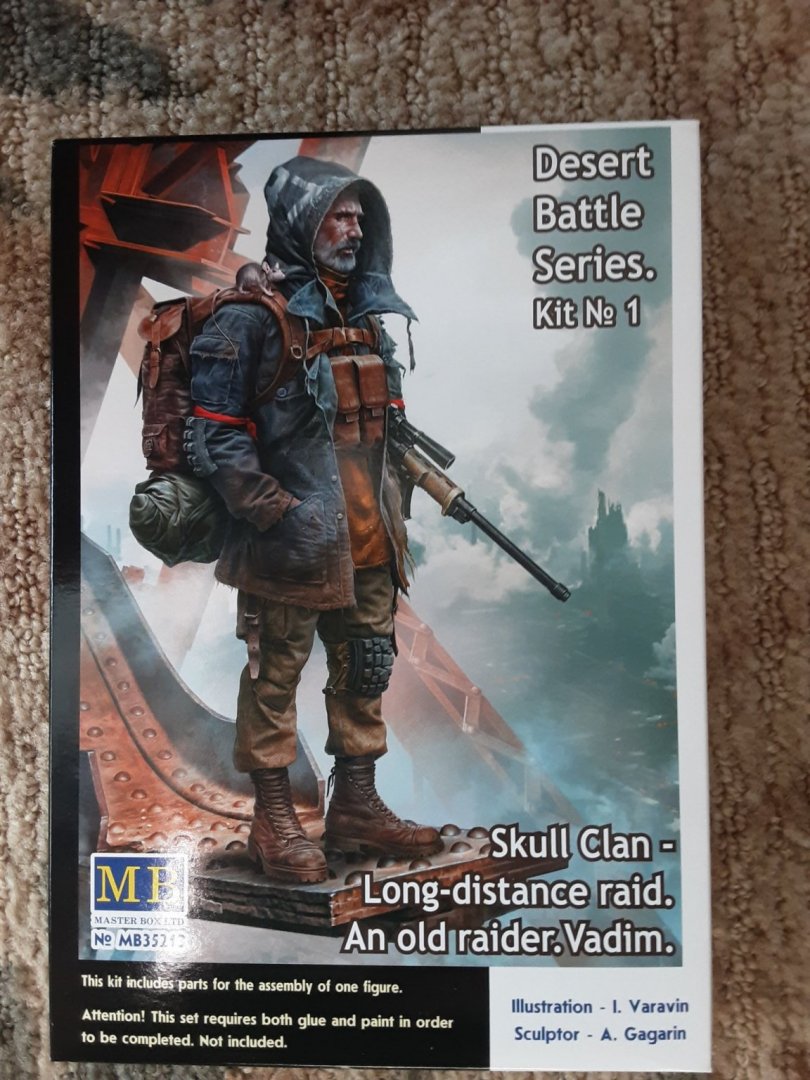
Don't know the origin. Just a cool looking figure, challenging to paint, not expensive either. So I bought it. He's supposed to be from some futuristic war. Box shows 3 additional figures in series. Update: Lou, here's the back story that appears on the box. I've never heard of this series before but I do like the challenge of painting this figure.
-
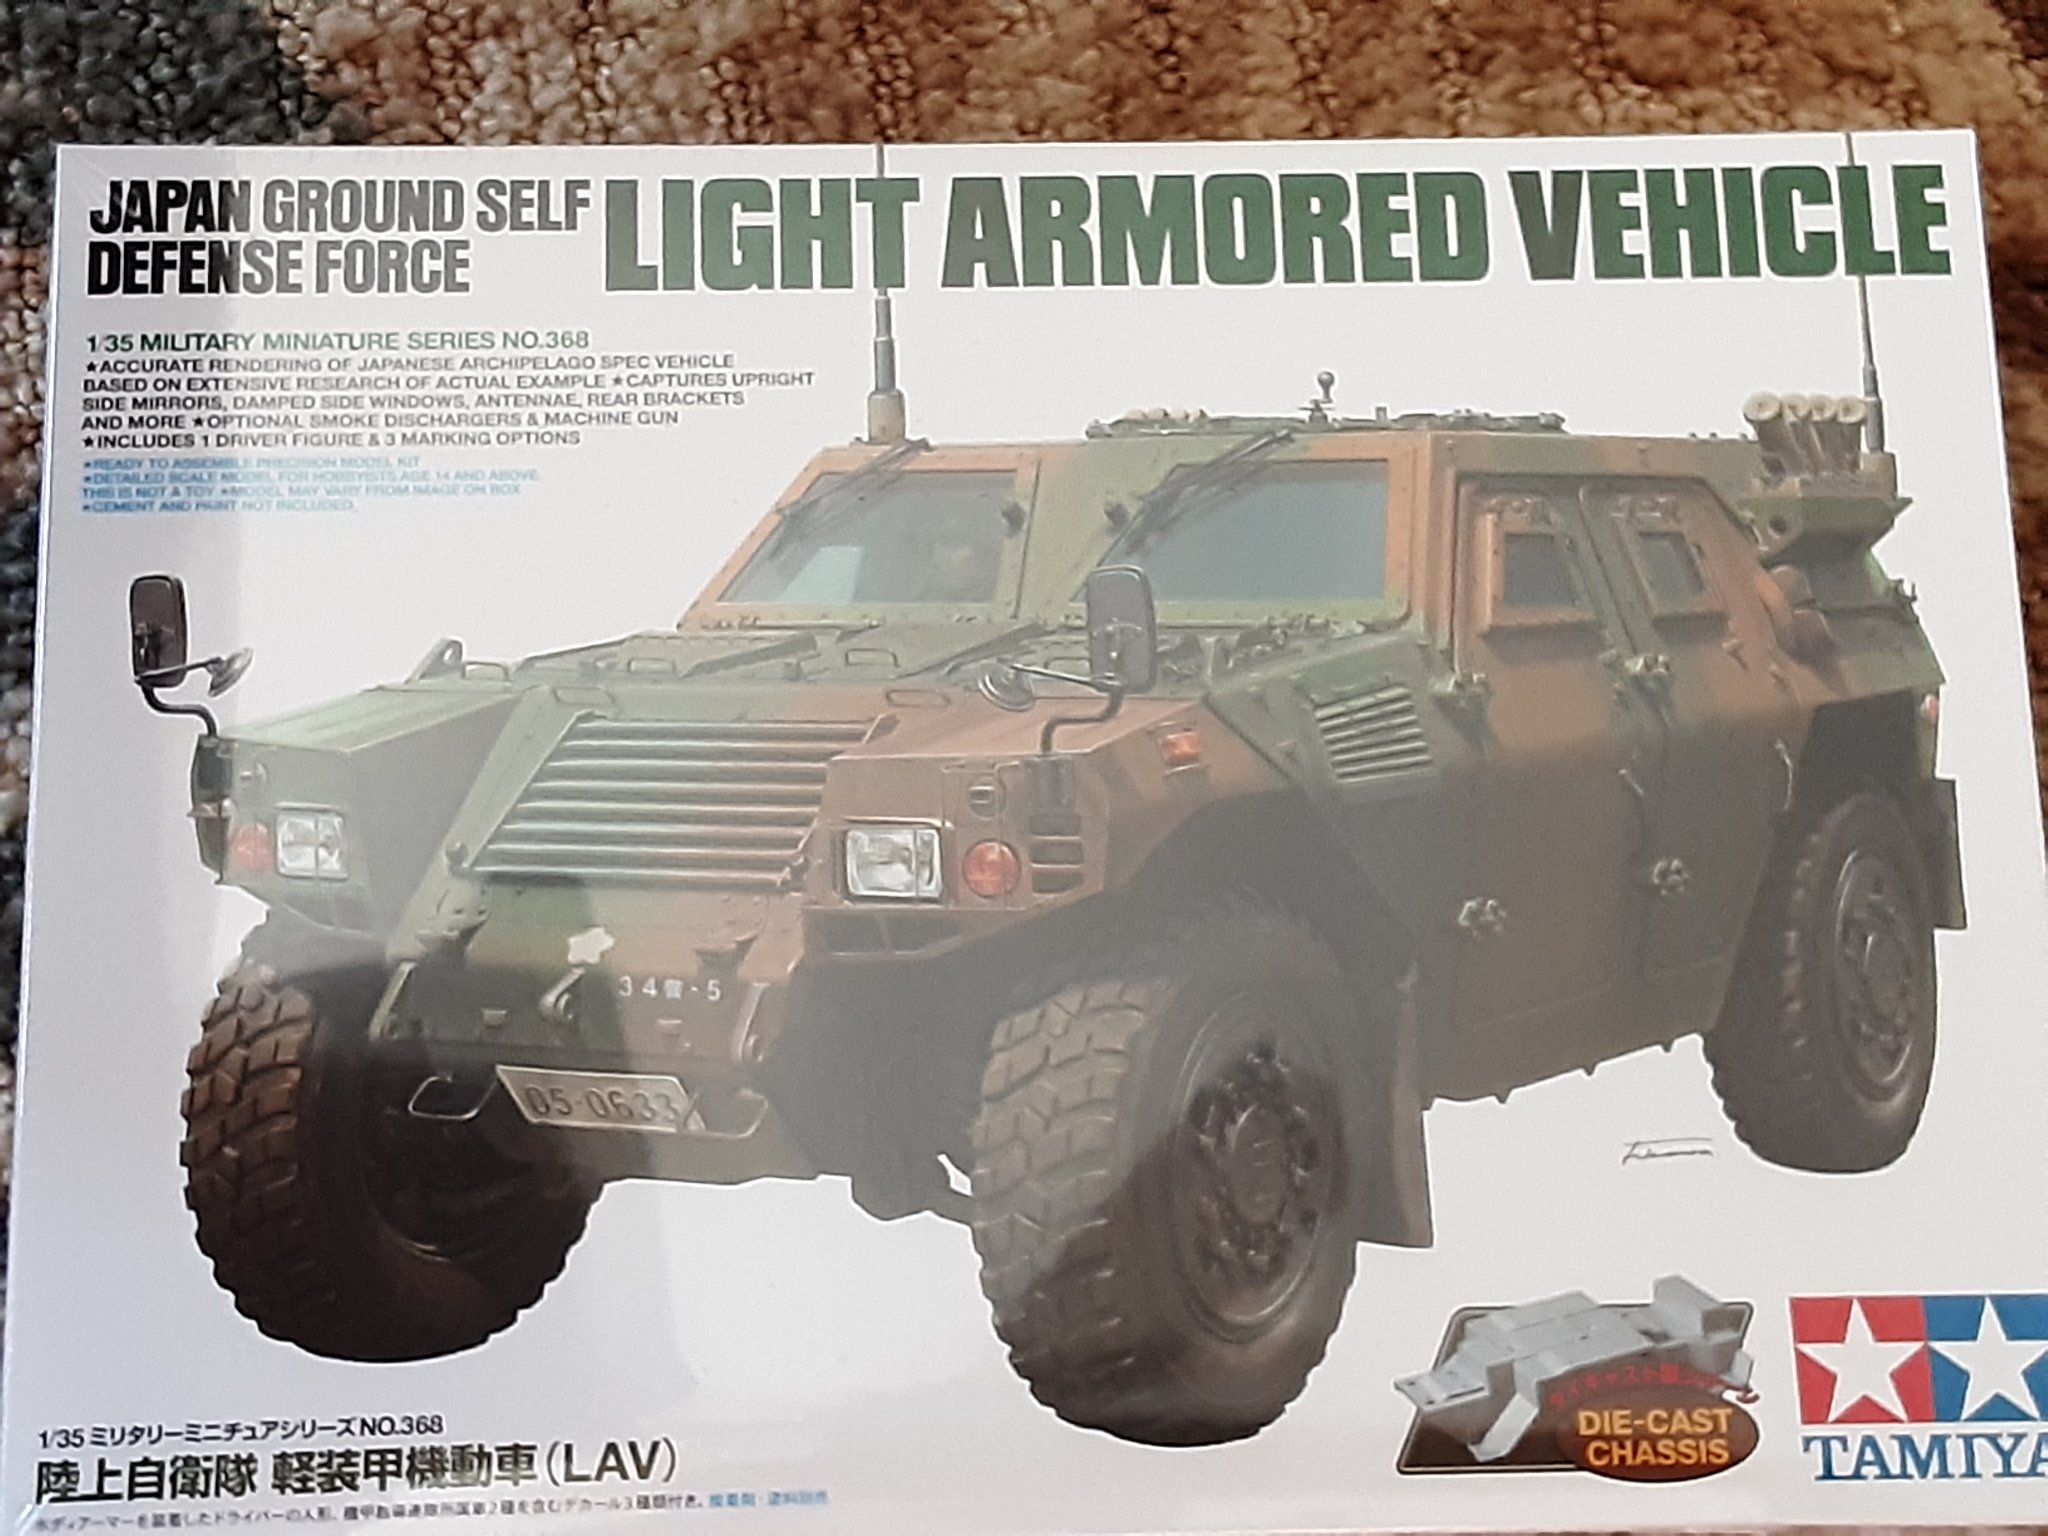
In today's mail came the following goodies So at some future point when I again get bored with the Constellation build I will more choices in the stash. BTW the figure is 1:35 scale about 2 inches tall, should be fun painting him. 🙂 I am back working on the Constellation, I will post updates in that build when I make a little more progress on it.

- 71 replies
-
- 10
-