HOLIDAY DONATION DRIVE - SUPPORT MSW - DO YOUR PART TO KEEP THIS GREAT FORUM GOING! (89 donations so far out of 49,000 members - C'mon guys!)
×


DaveRow
-
Posts
691 -
Joined
-
Last visited
Content Type
Profiles
Forums
Gallery
Events
Everything posted by DaveRow
-
 Stern window detail looks good Chris. Are you planning shutters over them ? Dave R
 -
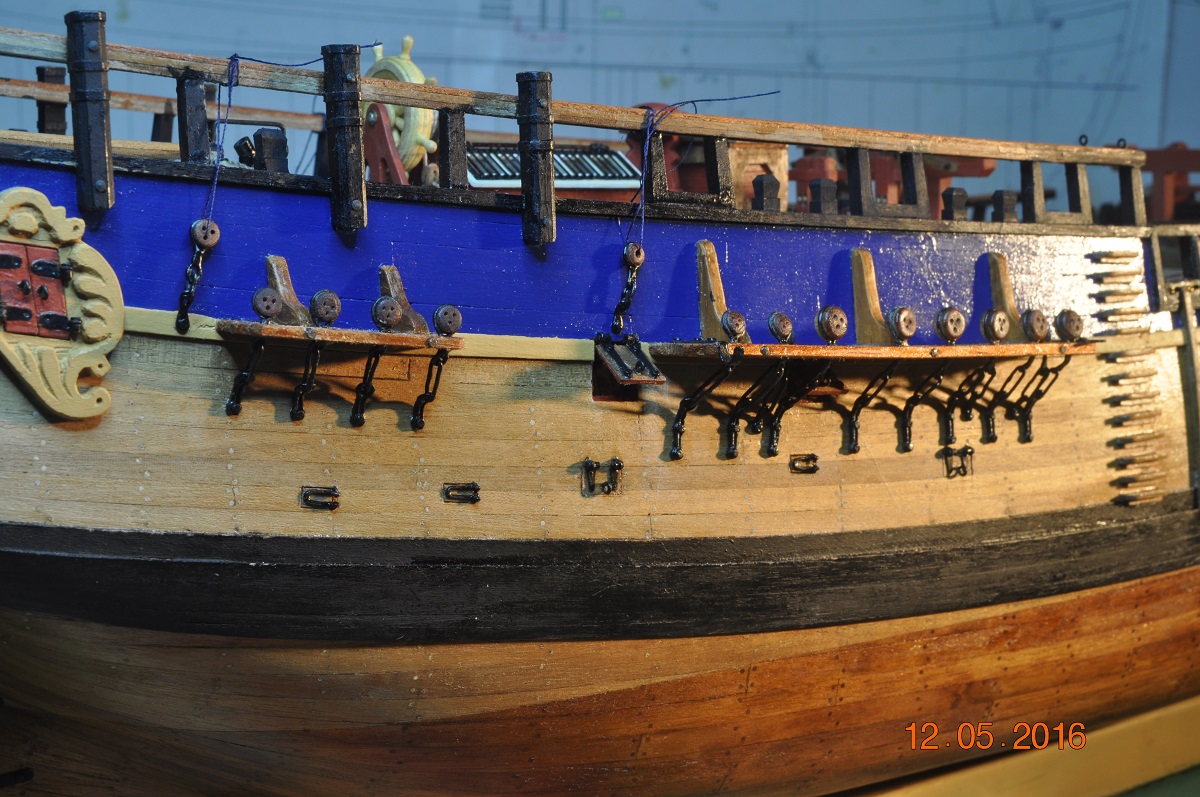
Quick Shipyard Update. Added the 5 smaller Airing Ports to both Port and Starboard sides of the hull. Fiddly little items("U" shape ones), been dreading making them and I was right(so fiddly). Starboard Side: Dave R

-
Looking fantastic their Ron. Will seem all worth it soon, when the final touches are added. Dave R
-
Someone has crafty hands. Excellent workmanship. Dave R
-
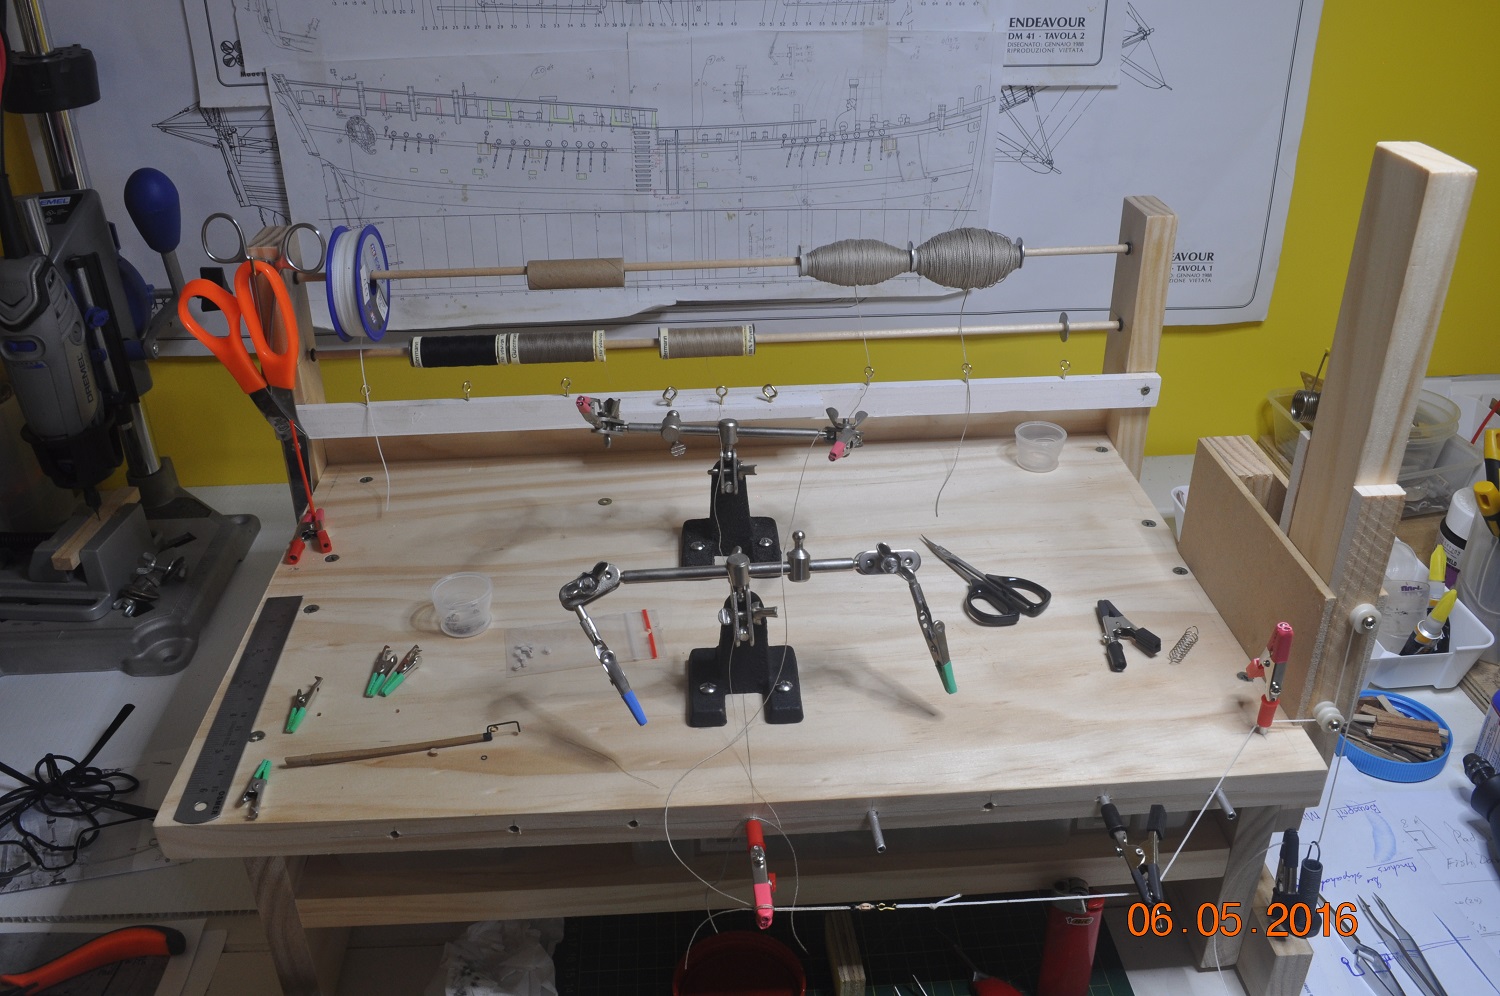
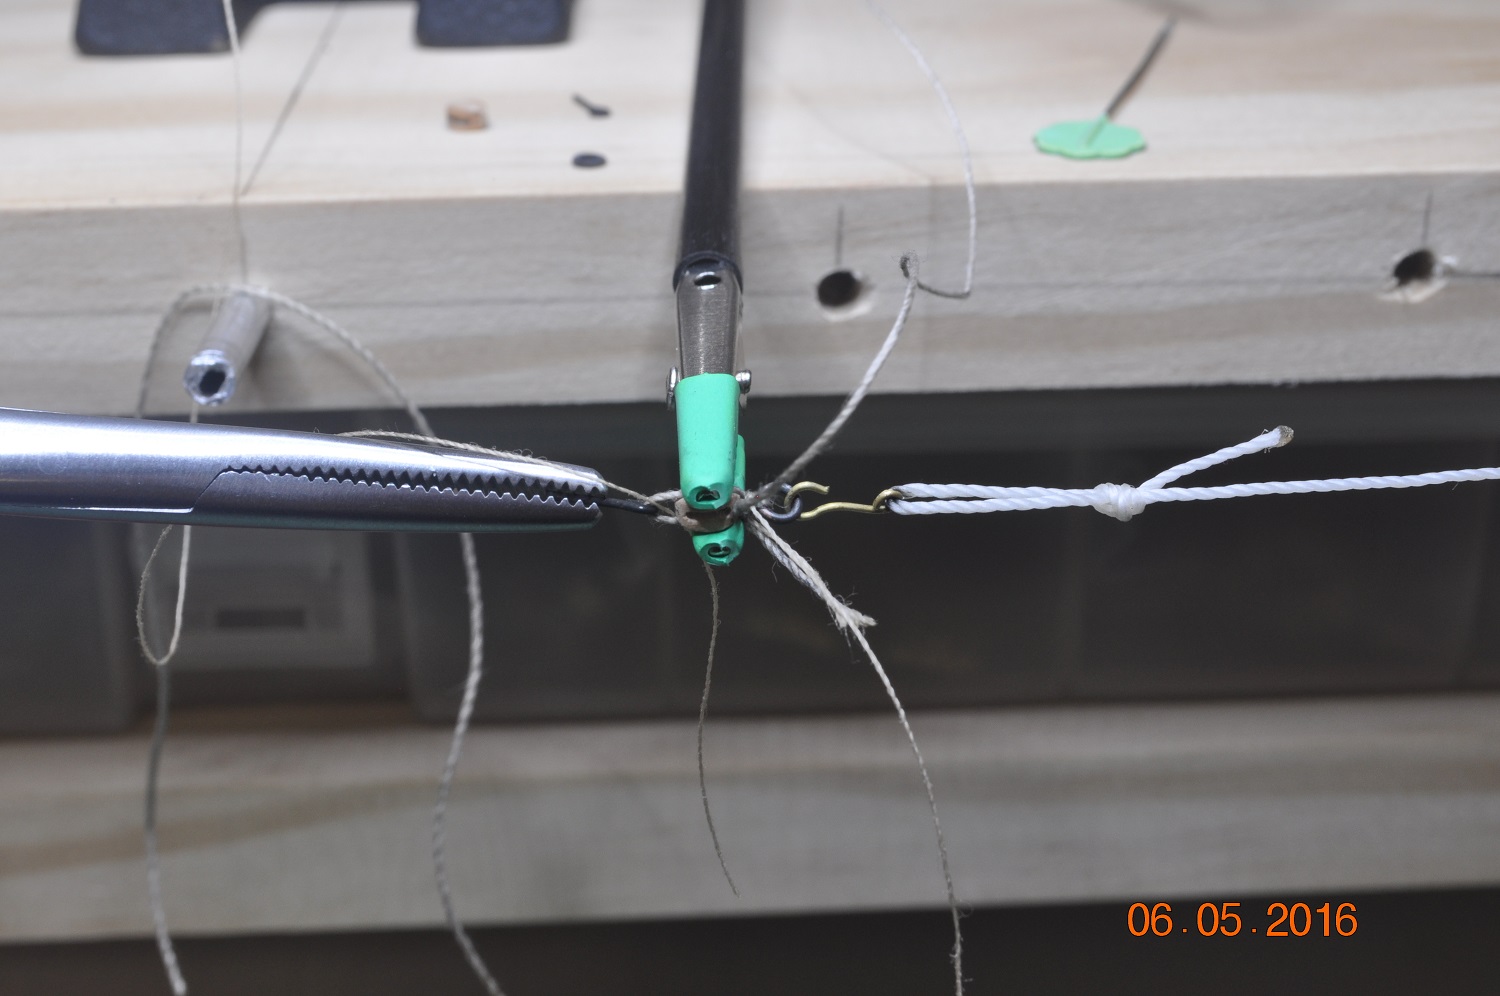
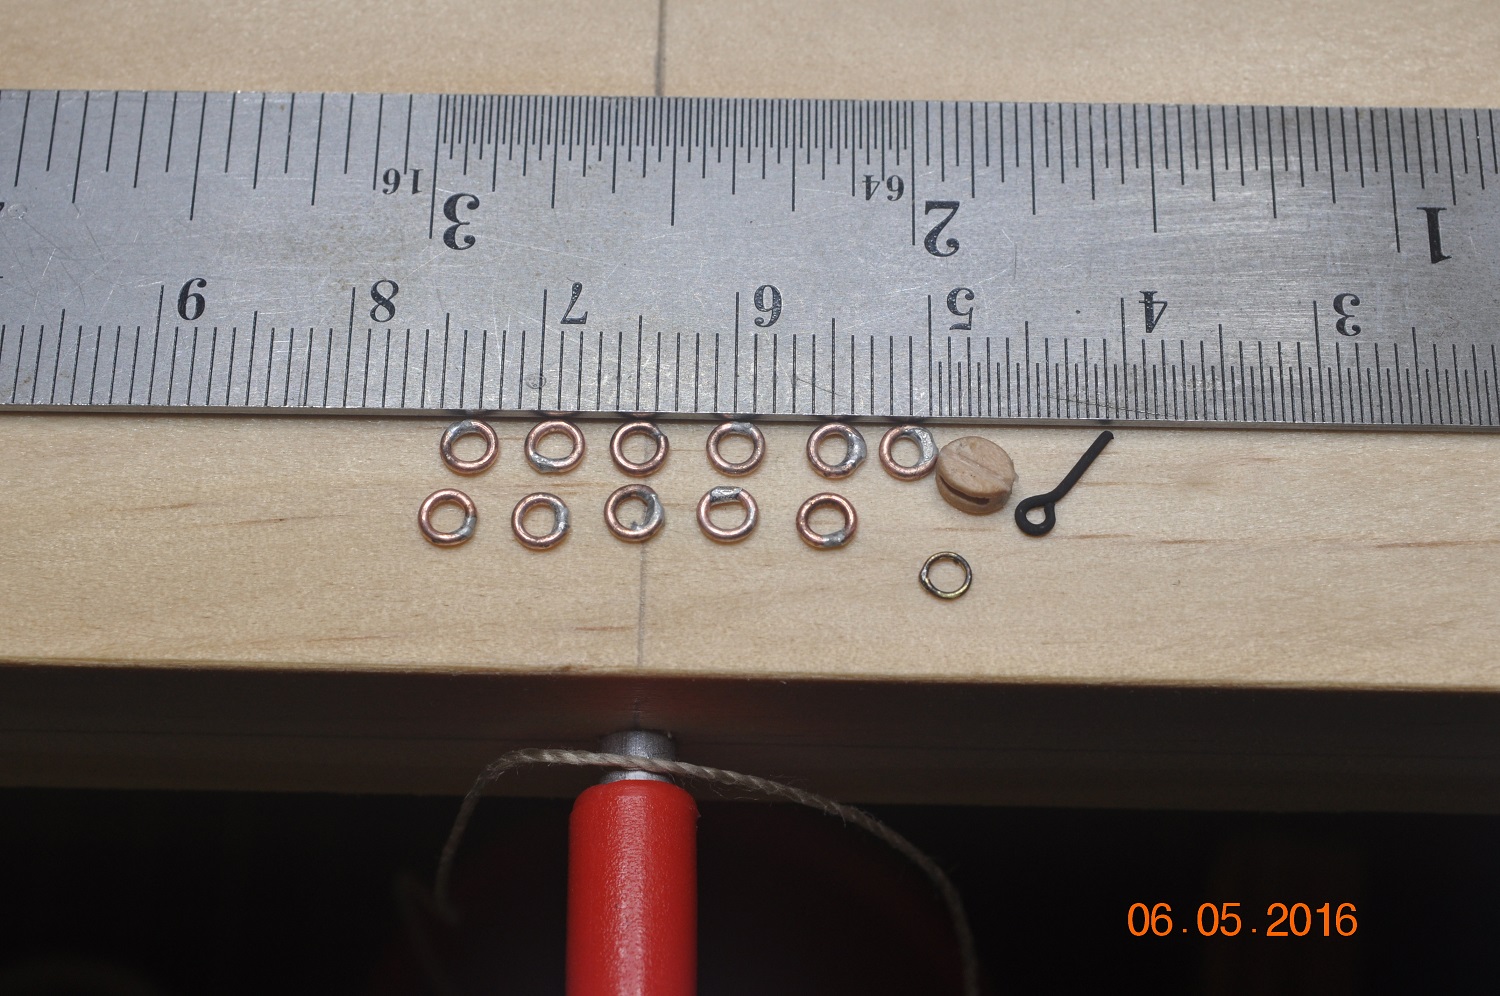
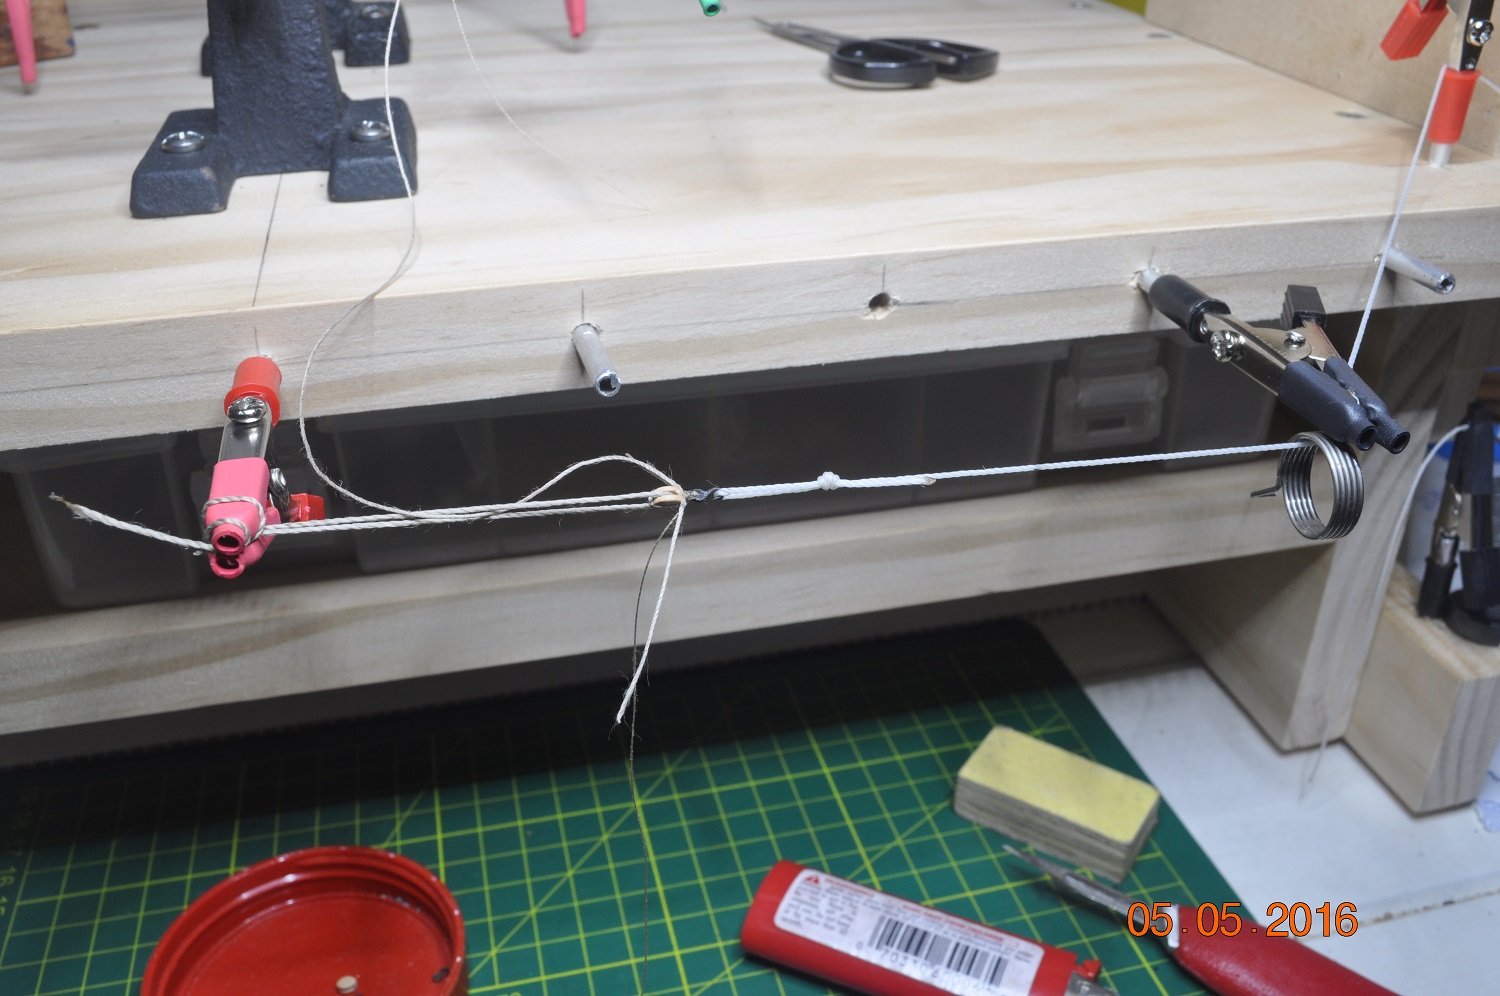
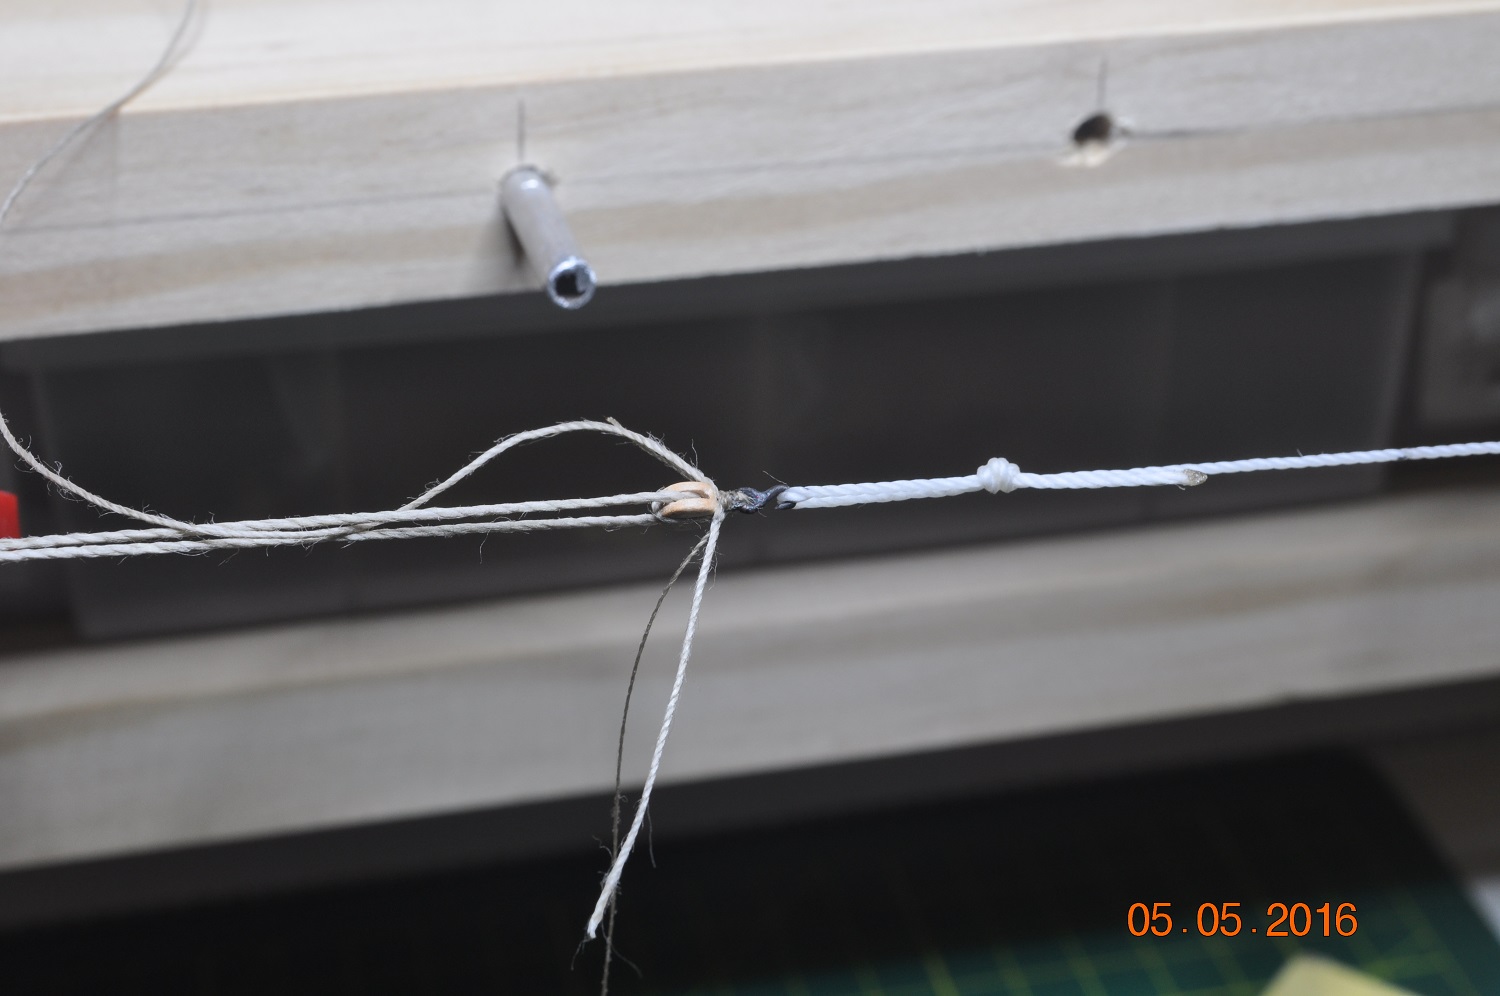
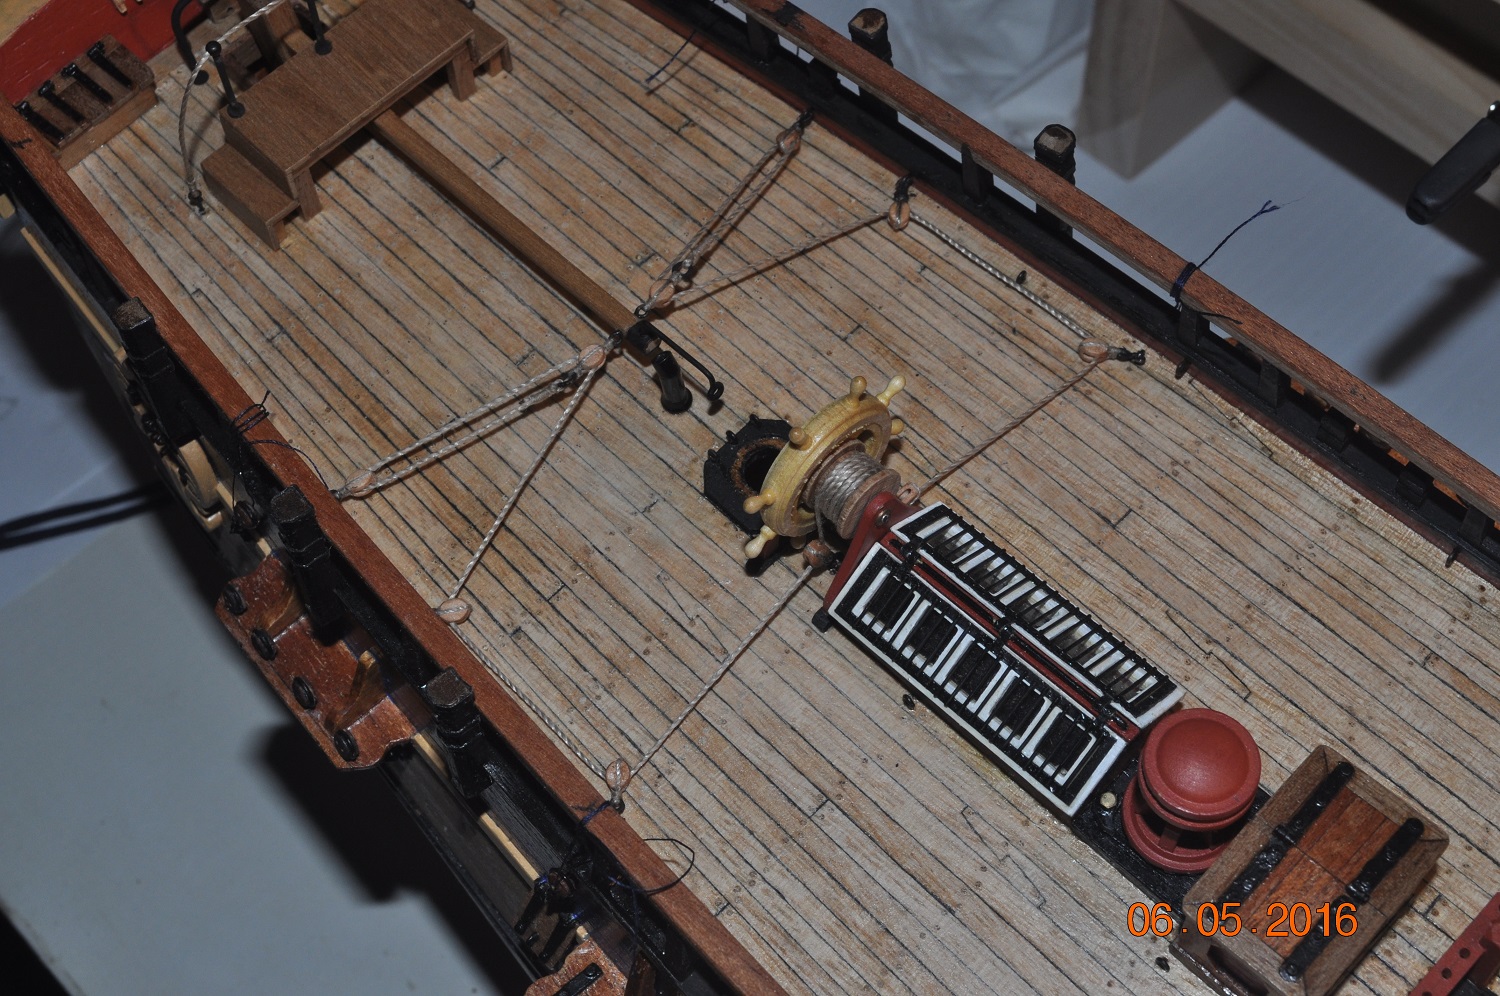
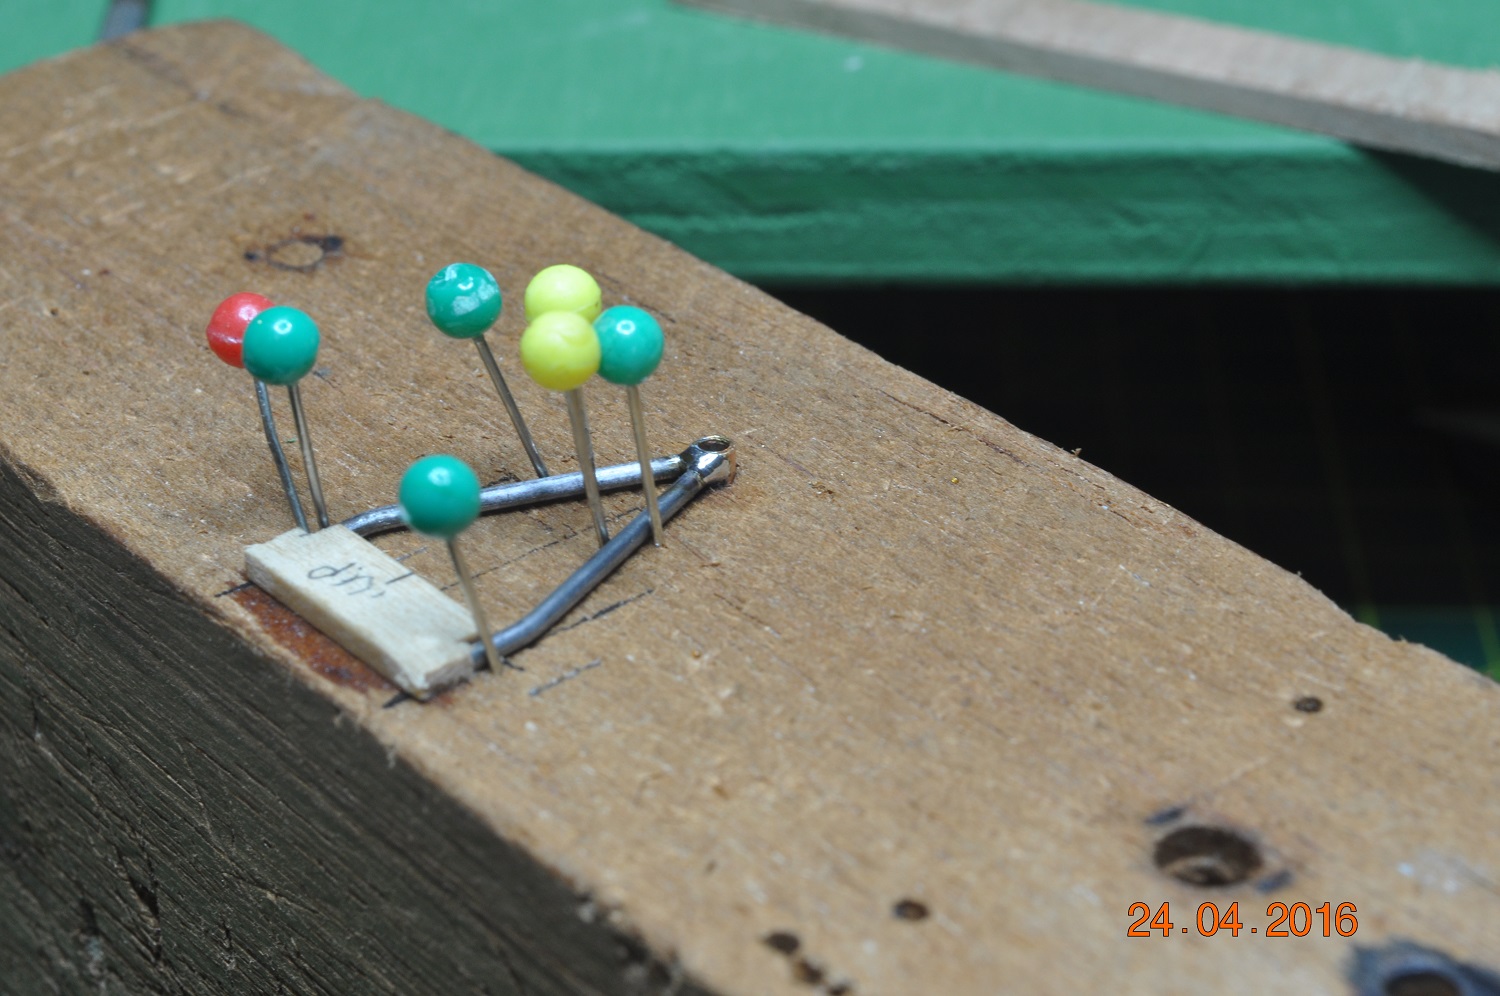
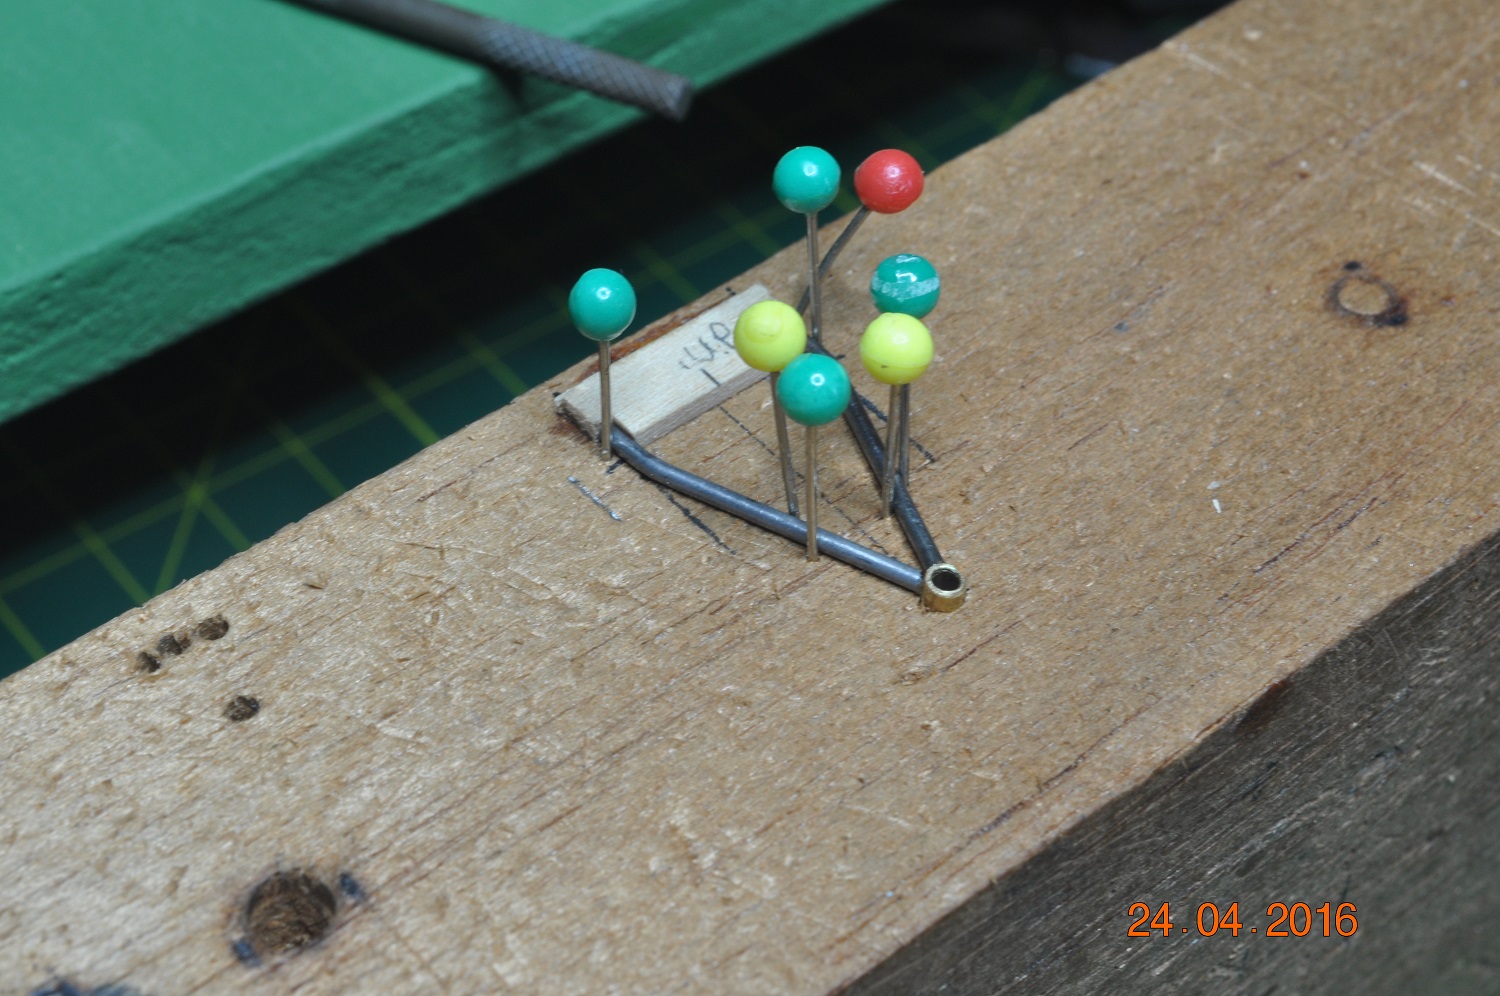
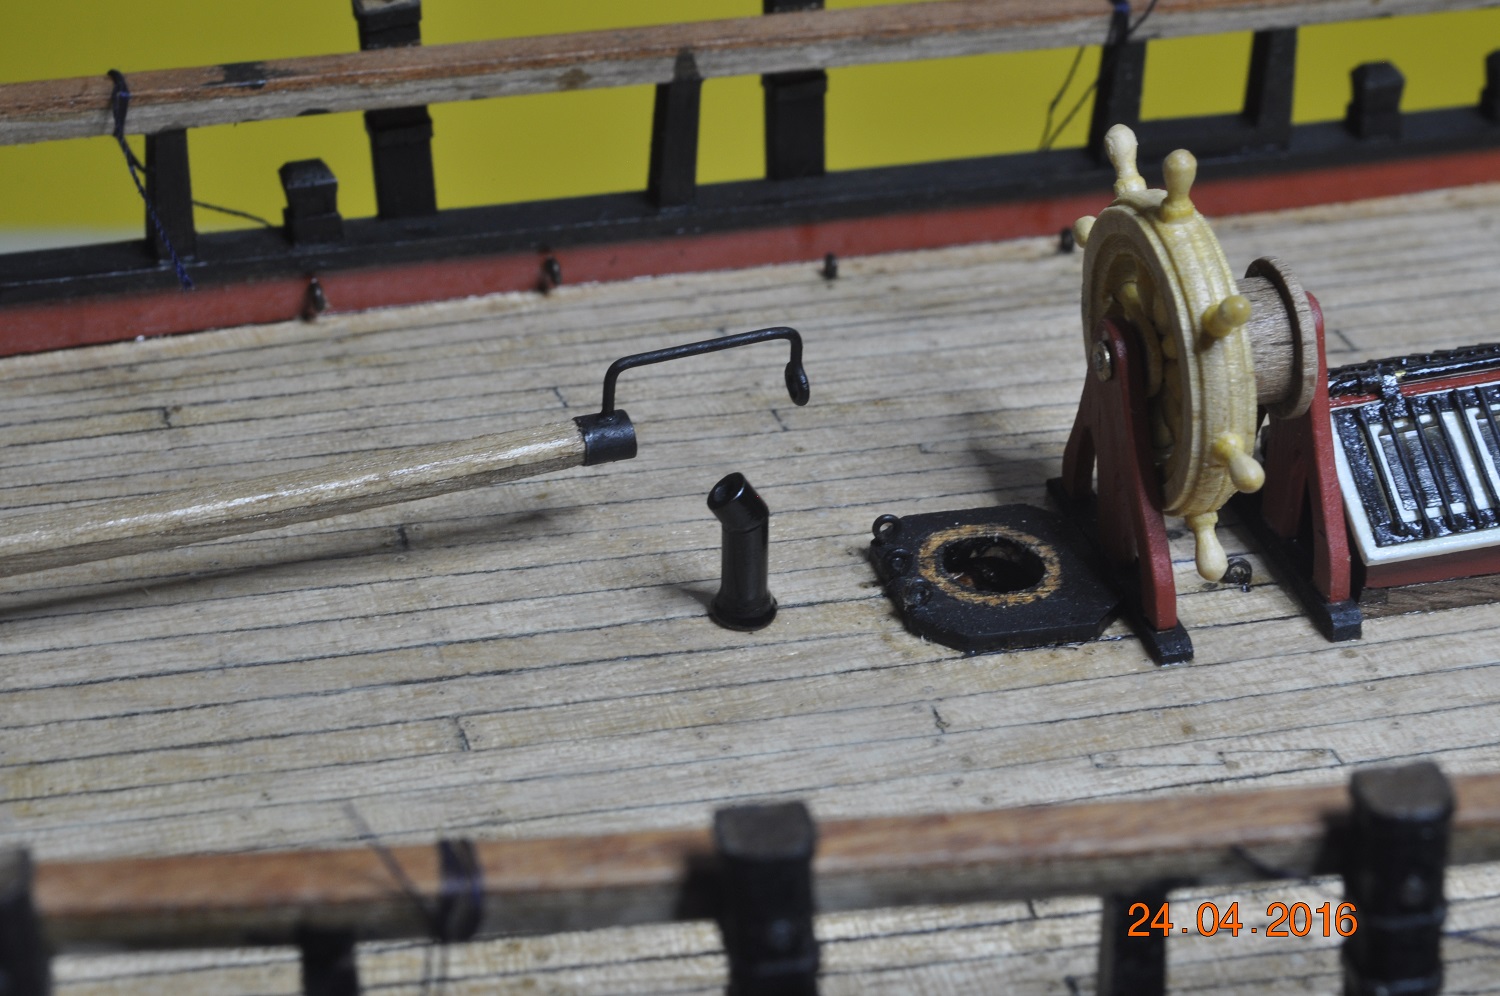
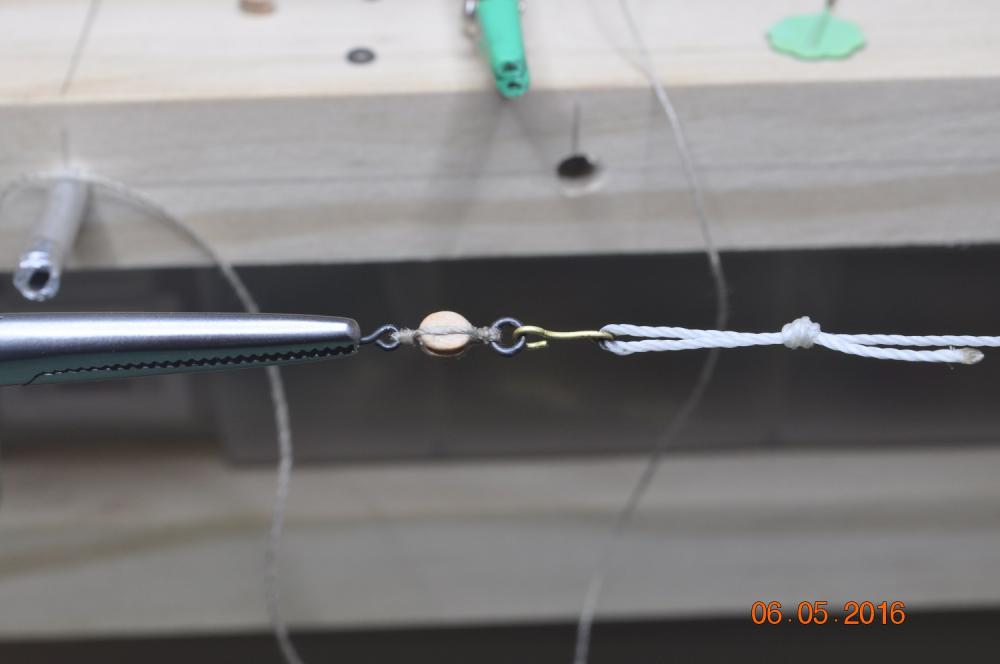
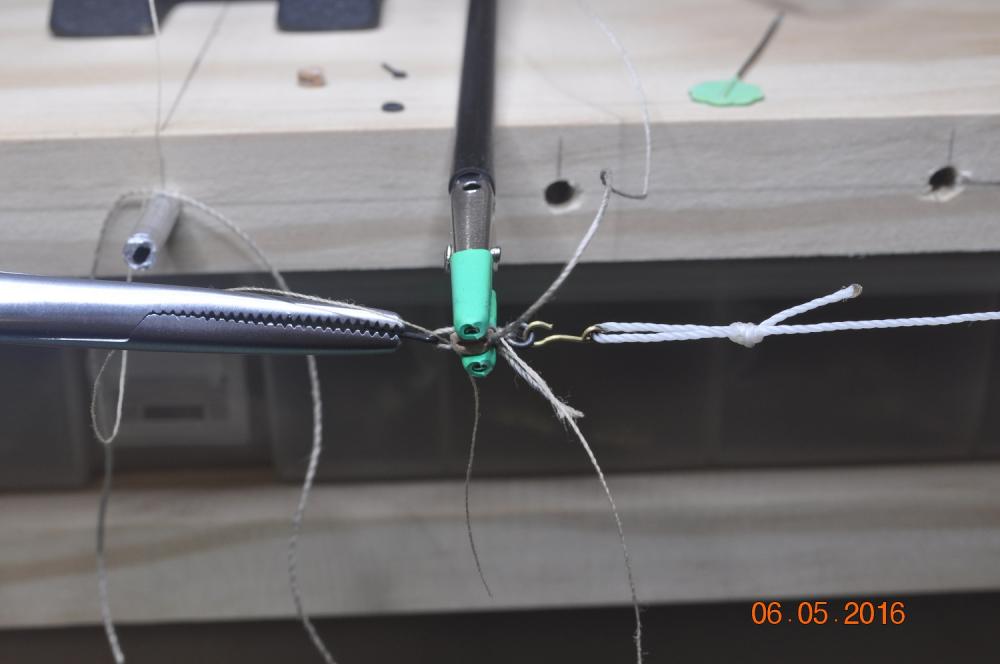
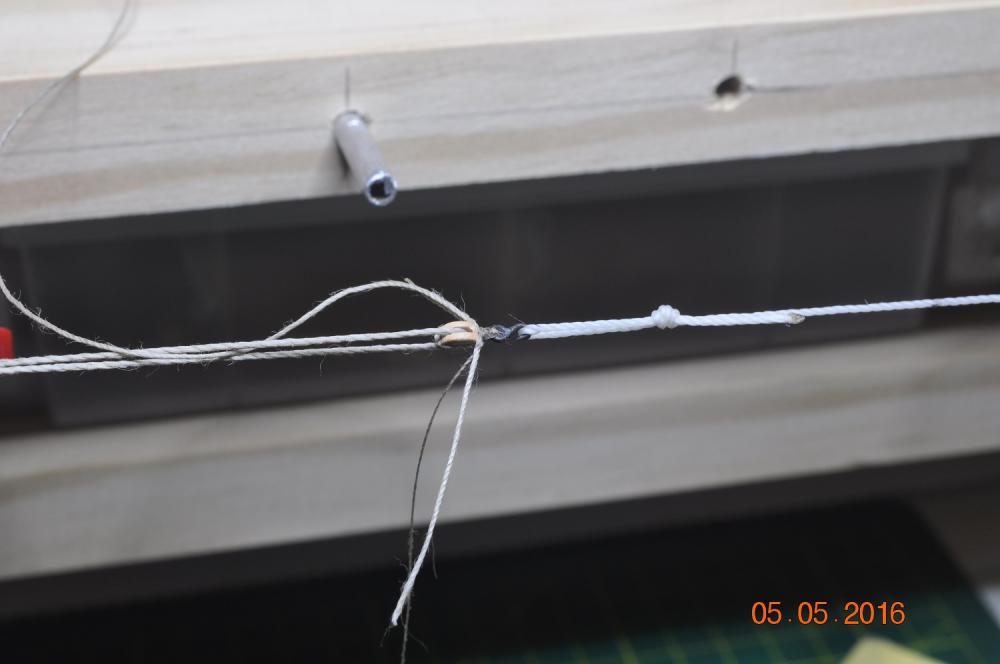
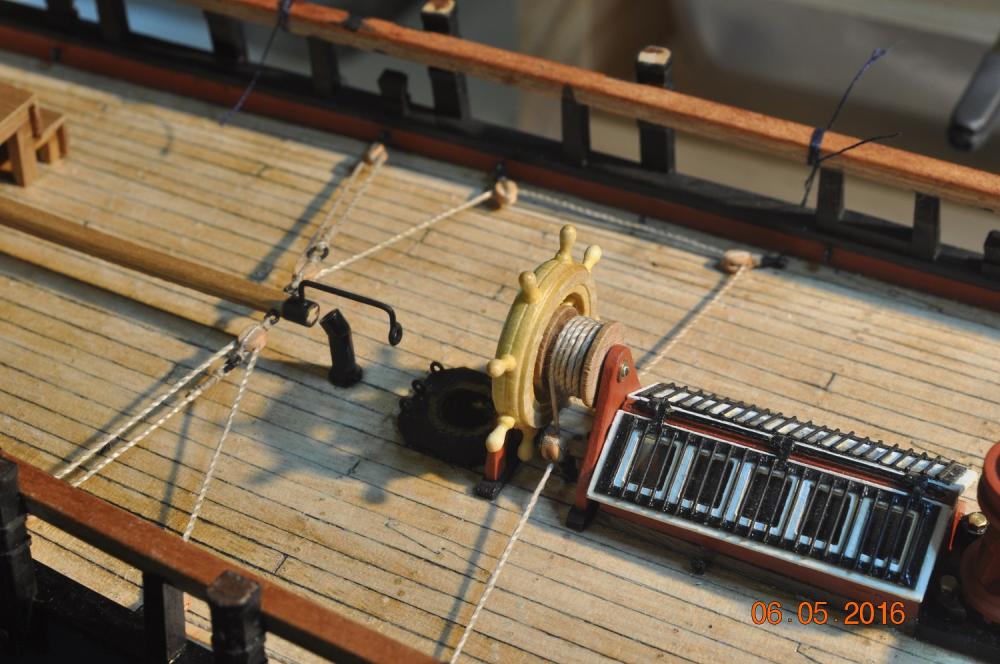
Back in the Shipyard. I started assembling the Rudder tackle, just by fingers, and the first 3 pulleys took me hours to complete. So I decided to construct a Rigging Station. I must thank Pat(Banyan) for showing us all his station in his log, as it has provided me with inspiration and ideas for my own. It enabled me to quickly assemble my blocks for the rudder steering tackle. I was planning on using some small rings I had purchased, but when I tried to weld them closed, too thin and not a good result(only managed 1 good one out of 4 so gave up). So I made my own out of copper wire(I will use the best circular ones, a couple not the best) The completed assembly of the rudder steering tackle on my Endeavour. I have gone away somewhat from the AOTS, in so far I have attached the tackle back from the raised tiller. I believe the steering tackle is best behind the chimney stack to ensure it does not fowl such. The raised arm on the end of the tiller,(as indicated on the drafts) existed, however was probably their for the crew to manually assist the rudder(to push or pull as it is at a height to do so) movement. I also added extra purchase on the rear line. This would, IMHO "ease" the load on the steering wheel, via the pulley purchase. Dave R


-
Hi Clogger, I have enclosed a document on the planking on the Australian replica Endeavour. Probably too late for your planking, but you can see how traditional 2nd planks were run. As Allan has mentioned, there are great planking tutorials on this site that will help you as you gain experience. Also search on this site through the logs, and have a look at how other Endeavour builders have done there planking. Before I do any design/building, I search to see how others have done things, decide if I will do similar, or alter for my own design. Dave R Bluff Bow Planking.pdf
-
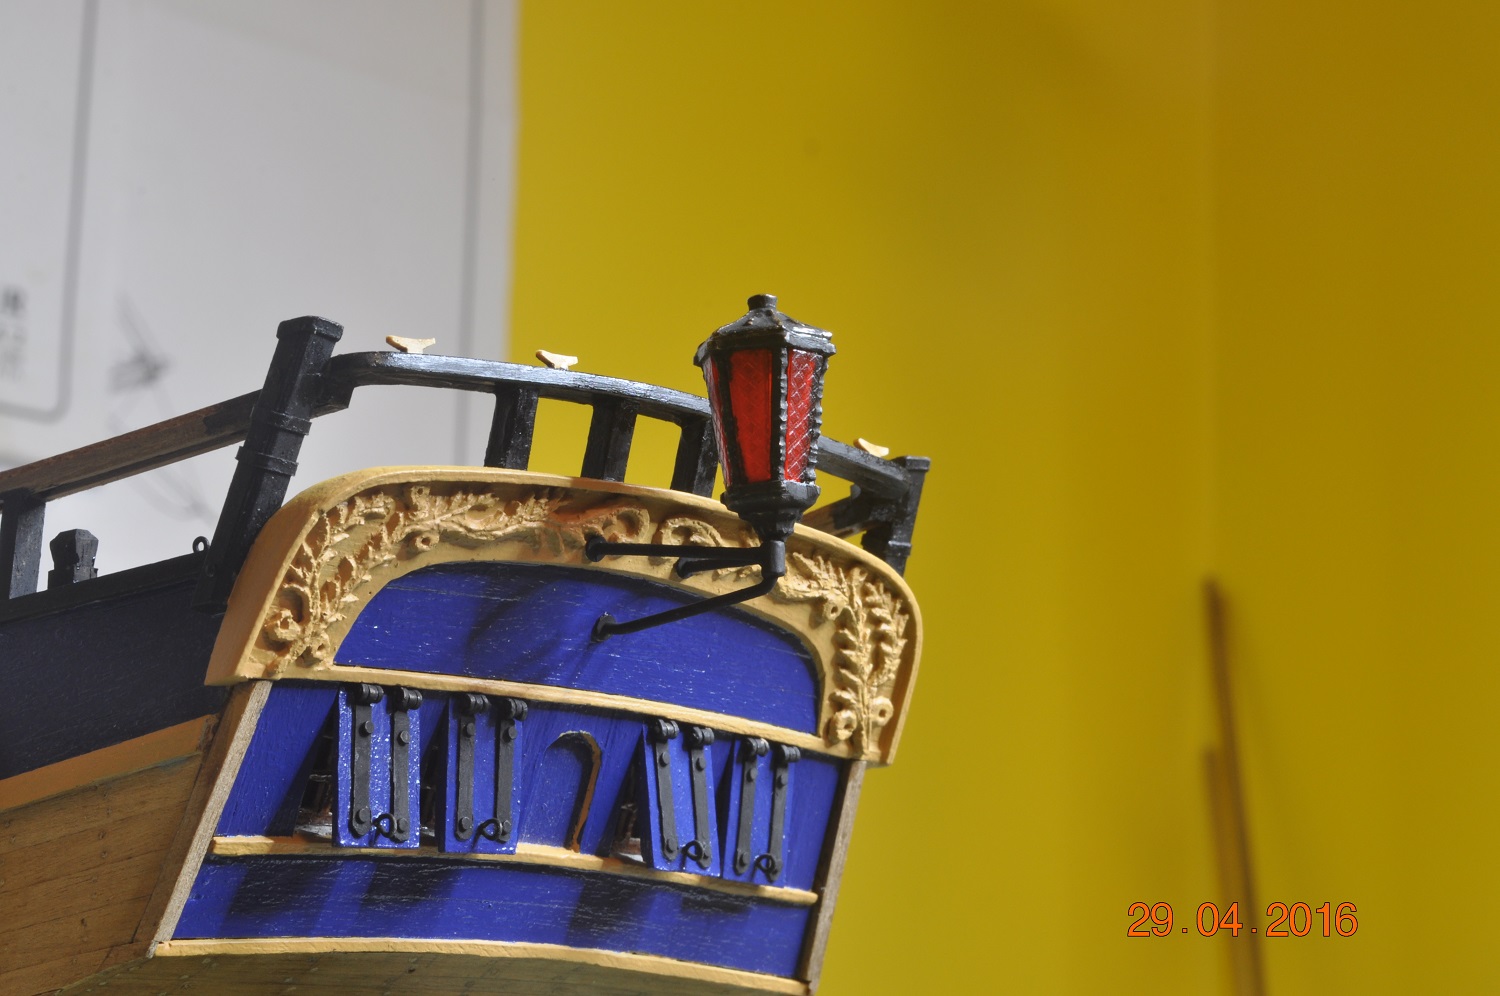
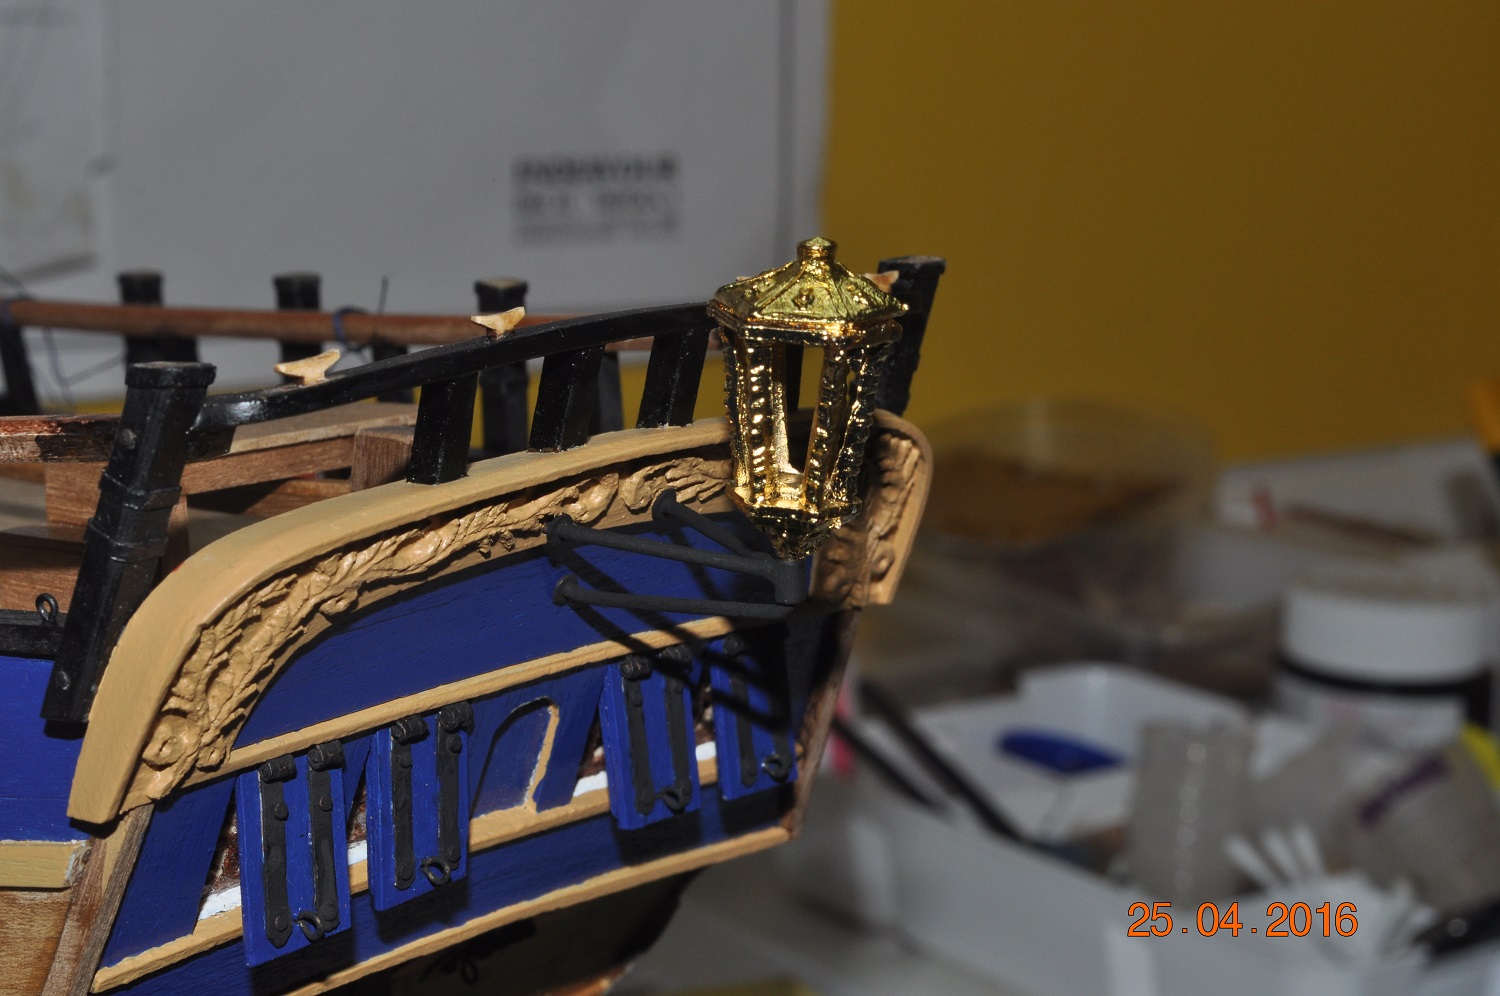
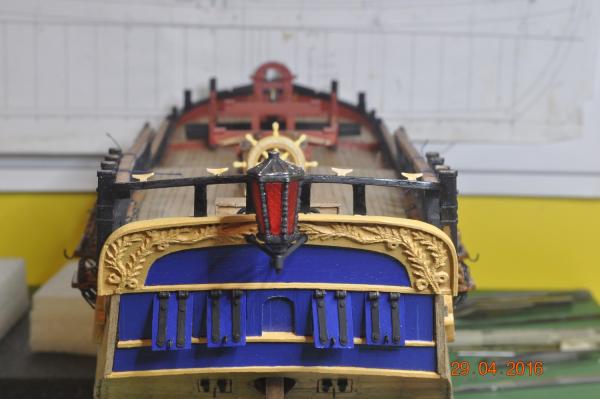
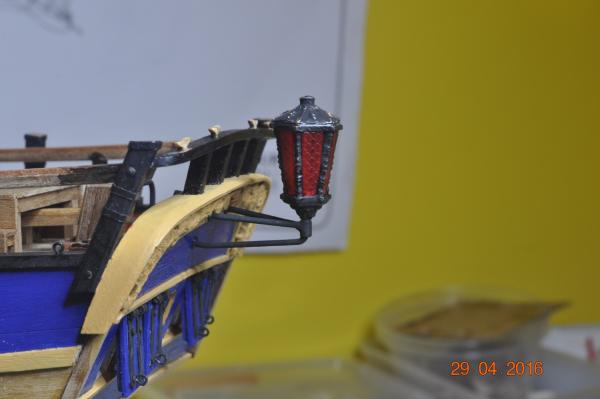
Stern Lantern, My Endeavour's Lantern is going to be black with red light panels. To carry on from the previous Lantern post. Over the last couple of days the shipyard cleaned up the "gold" kit lantern by filing off as much of the gold plating as possible(very fiddly and took hours), fitted the 6 red light panels(each was different as the casting was not consistent) and re-aligned the top hat piece(that was glued on lop sided). Some touch-up paint at a later stage required. Another item out of the way. It has been just on 2 years since the laying of the keel. I had aimed to have the "hull" completed in this time frame, however close, there remains a few more features for the shipyard to complete before the rigging begins. There seems to be no end of "things to make". As the avid model boat builder will know, time is of no consequence when the attention to detail and scale is paramount to the end product. I hope I am achieving this. I was gifted a birthday present(that my captain/wifey) of Lennarth Petersson's "Rigging Period Ship Models", which I am sure will aid in the tasks ahead. Back to having fun. Dave R

-
Exactly. Although "in the block" they were pretty good blackened, I painted with enamel. So to be consistent, I will enamel paint all the metal on my Endeavour, earlier items and those to be made. Dave R
-
Hi Chris, Blackening: Same process that I have seen here in MSW by others. I clean up the metal with Hydrochloric Acid(50% pool acid). Sometimes I use a small file to clean up glue or rub off other paint etc to a bare metal surface. I dip the metal item/s into a small amount and roll them around. Let them sit for a couple of minutes. Wash in water and dry. Then dip in the Birchwood Casey Brass Black for a few minutes. Clean the item up and dip again few a few more minutes. Sometimes if first dip is good enough, I touch up with a cotton bud the areas not transformed so well. Clean up in water and rub the blackened areas bets as you can. However even though all the above may work well ?; - sometimes a soldered area does not take the blackening well. - I get pitted or small areas that does not take the blackening(probably not originally not cleaned well enough) - due to fitting an item, it gets scratched. So I usually thin some Matt Black Enamel paint, and apply over the blackening with an even coat as best as possible. If I miss a bit, hardly shows up, as blackening is under it. Good thing is, any fine edges that are blackened, I don't paint and get a pretty good finish overall. Cheats way ? Some of my early blackening, I just did one dip and is shotty. Slowly going over these with the enamel method. Recent blackening is getting better. The last lantern frame was pretty good, except the brass washers didn't take the blackening(probably because I CA tacked them on the rod, and glue doesn't take to the blackening at all - surprised not). And the rod I used was piano wire, that took the casey's brass black really well, but I painted it over to give it a good cover being ferrous iron metal, not brass. Sins I hide. Sometimes I think making it all evenly black, it is fake, should of left it just blackened and slightly varied. Time will tell if the enamel will flake off, hope blood..y not ? Bit of a ramble, but fessed up to what works and not for me. Sleep time. Dave R
-
Thanks Greg, Still getting the hang of working the resistance welding kit. Though I am happy I can get a decent metal to metal joint now. Flame and hand soldering wasn't cutting it. Dave R
-
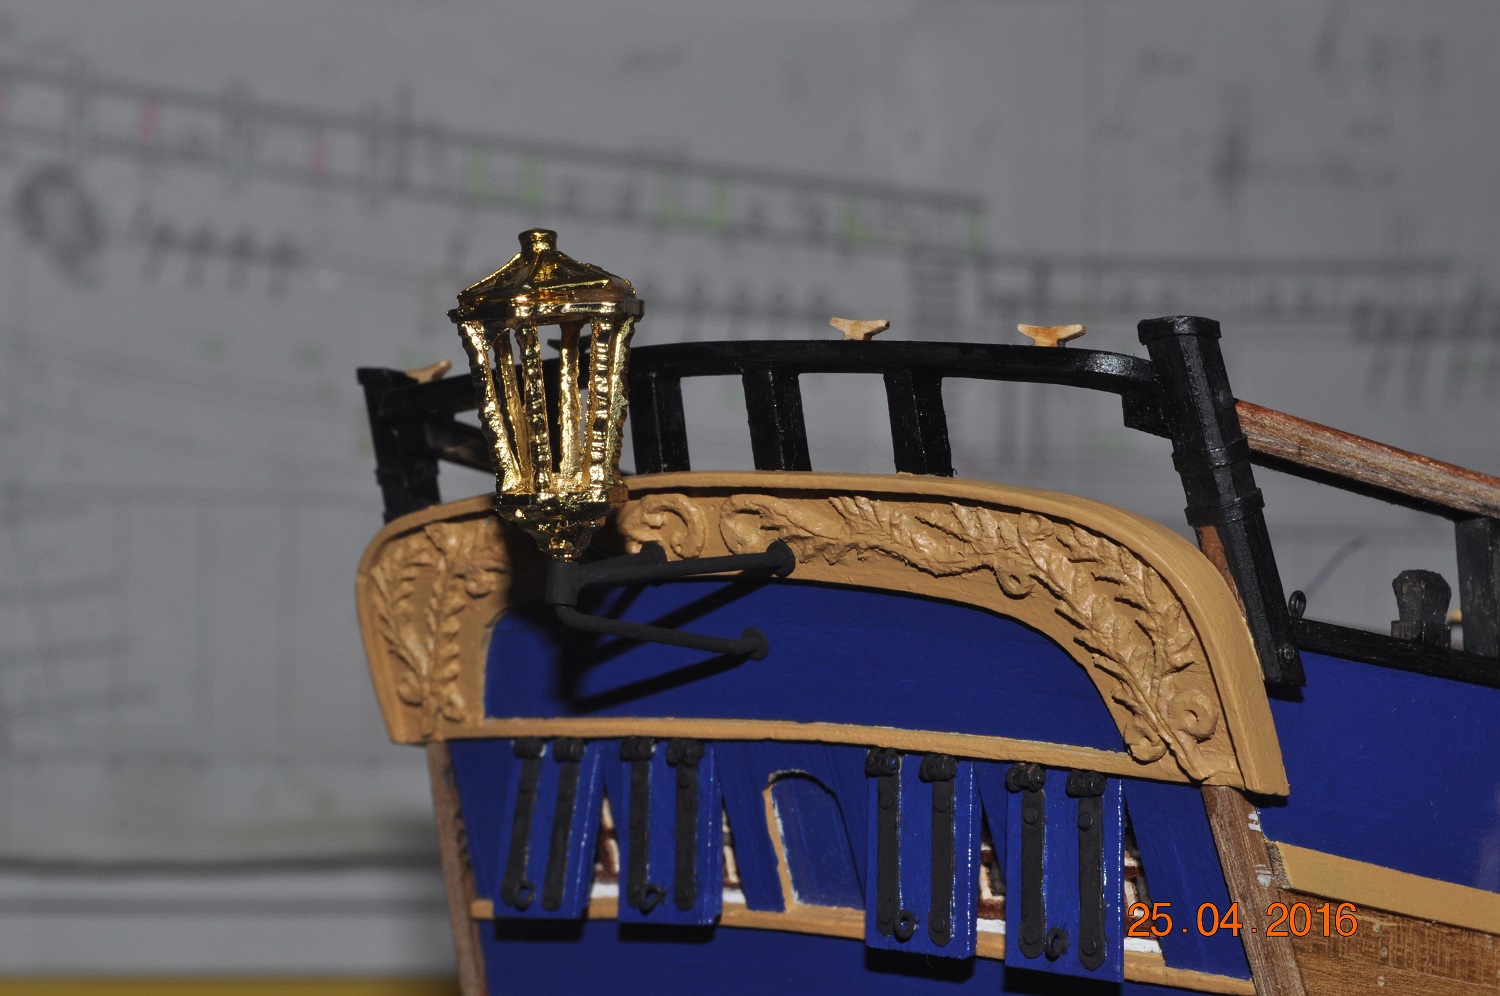
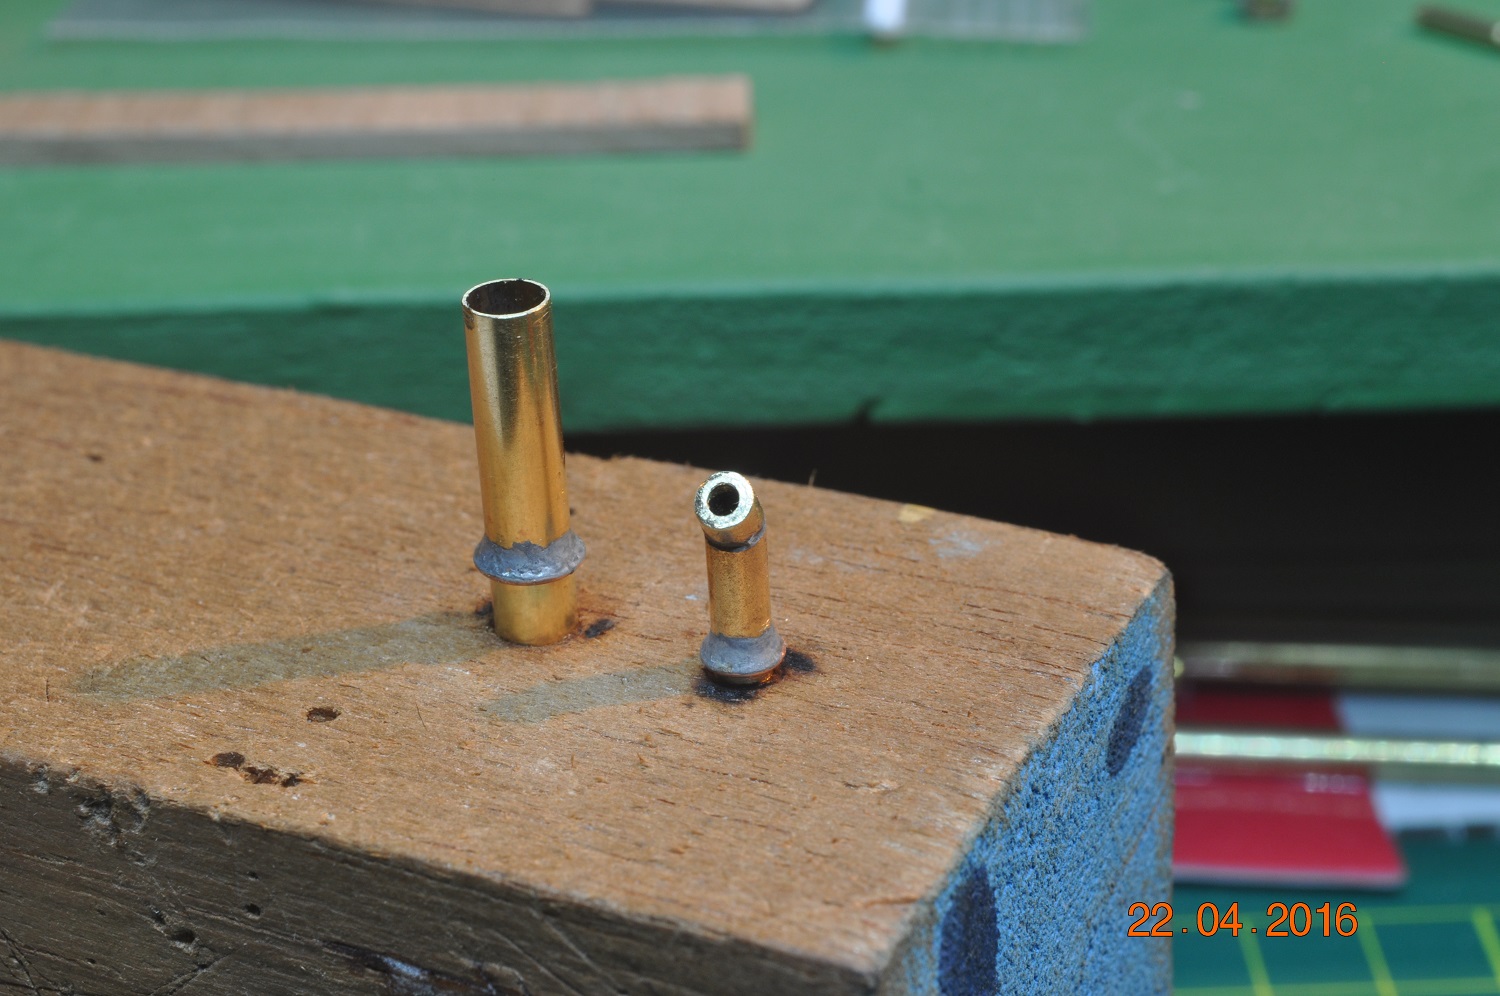
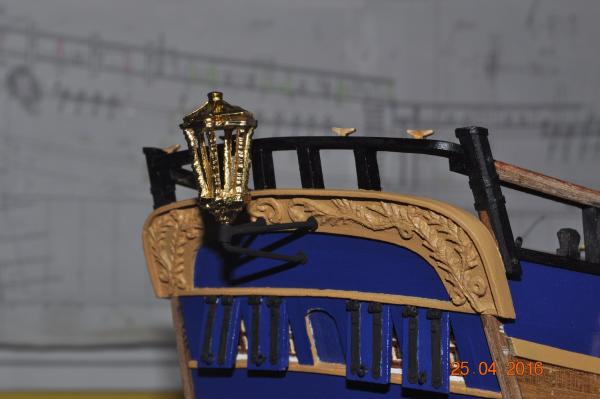
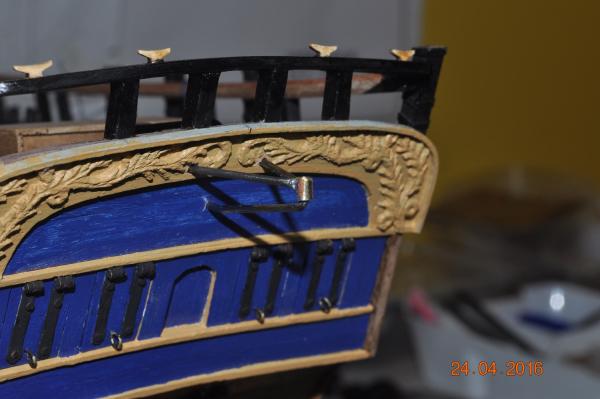
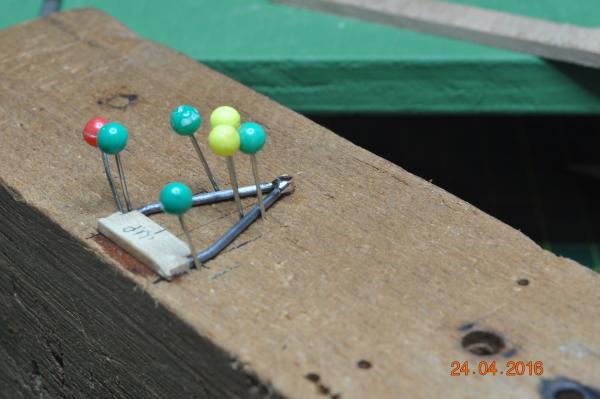
Today, Maybe not the place here(sorry Admin), however here in "Aussie"(and New Zealand), it is ANZAC Day, to commemorate the day the Australian and New Zealander's landed on the Gallipoli Peninsula on a small beach we now call ANZAC Cove. The day is also a time to remember all those who have given the ultimate sacrifice to afford the freedom we today live under. Lest we forget. After attending a couple of services this morning, my Shipyard is back at it. Been working on the Lantern support frame, > has been forged at the foundry, some rod and tubing to make a frame to mount the Lantern from the Kit. Not sure the 'Kit' Lantern is the right one too use, as I see many different types on the Endeavour models. Started out with a set-out of the upper arms welded to a tube(to house the Lantern) Set-out: Welded: Forgot to take more pictures.... Trial fitting to see how the frame looks in position: Blackened and painted frame with Lantern to see how it all looks. Just not to sure if I have it all right though. May of made the frame hang too far back? The supplied 'Kit Lantern' is: - pretty big, but seems to be comparative to the AOTS size. - the Lantern is a different design(hexagon not octagon) to the AOTS and has "red glass". - and the lantern cap/top is at an angle(if you look close). Typical of a lot of the kit supplied items, rough as... May need to bash it about to see if I can make it look half decent ! Some things to sort out. Dave R


-
Pat, I'm still learning the art of Resistance Welding. Main thing is to have clean, very clean tips to make the metal contact. Then the surfaces to be clean. Working on the solder to use. Dave R
-
Hi Chris, Nice, really nice work on the planking. No painting below the wales, I didn't on mine, comes up good with clear and shows the those joints that took so long to 'cut in'. Keep up the great work. Dave R
-
Hi Pat, Those spares look really good mate. Something for us other boat builders to go by. With winter coming on, plenty of time for 'indoor' work on the boat. Dave R
- 517 replies
-
- 2
-

-
- Endeavour
- Artesania Latina
- (and 1 more)
-
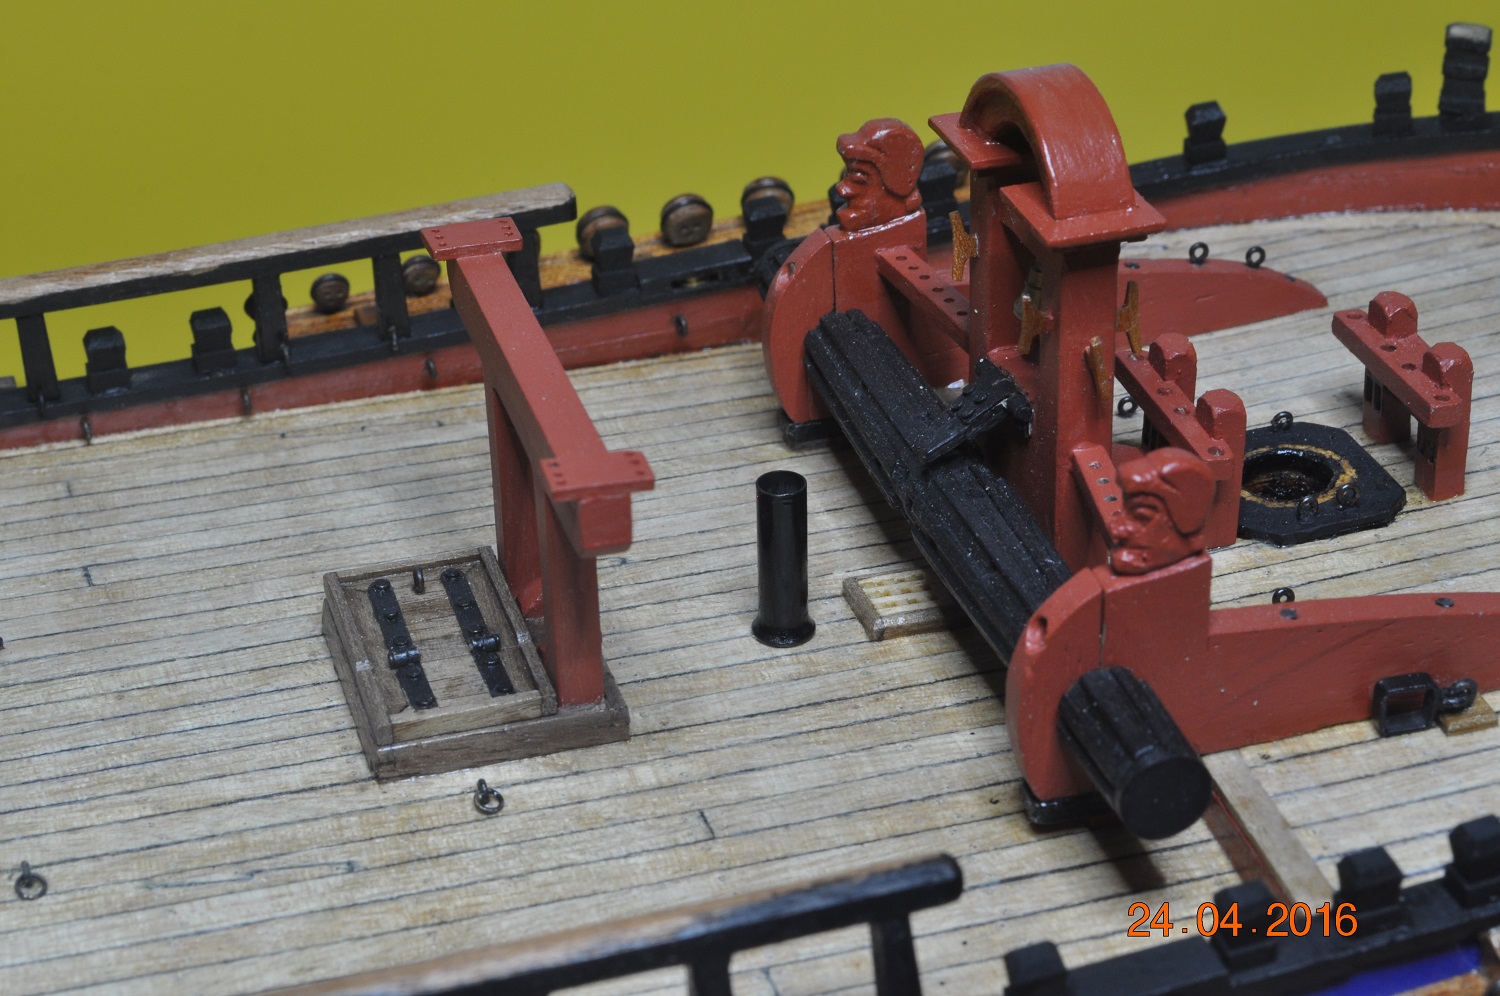
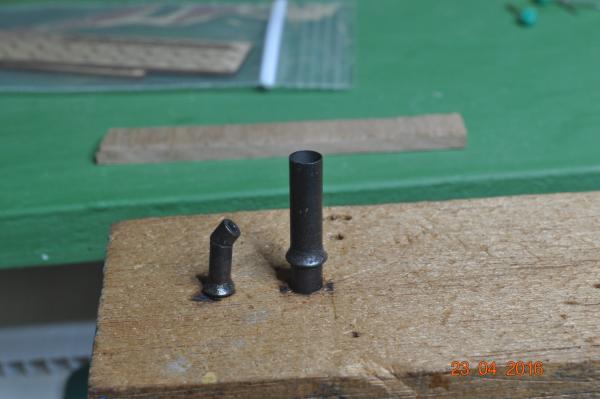
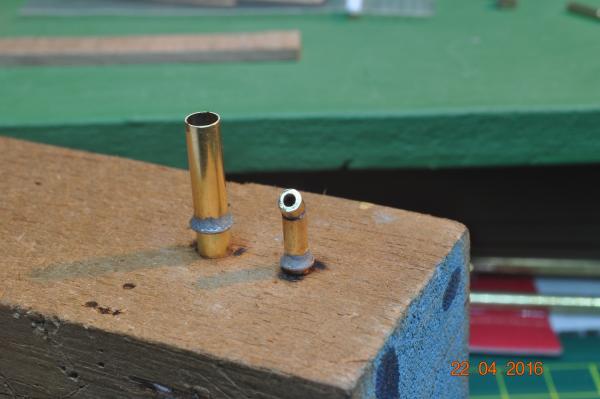
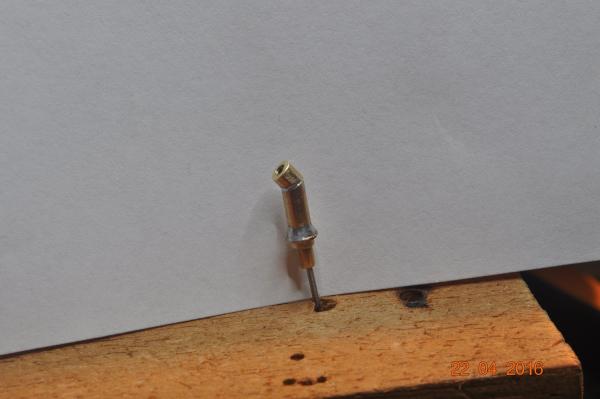
Back in the Shipyard, Fire place(rear) and Oven(front) Flues. I used 3 sizes of brass tubing. The Fire Place flue has double walls(tubes), helped in welding the angle joint and 'holding' the small item. The Oven Flue 1 piece. For each I added a collar(ring of copper wire) at deck level, with another ring on top of solder wire, that when melted gave the 'fillet'. Blackened each, that wasn't too bad(but my blackening methods not the best), however I painted black as I have done with most of the metal on the boat. Fire Place Flue in place. Oven Flue in place. Dave R


-
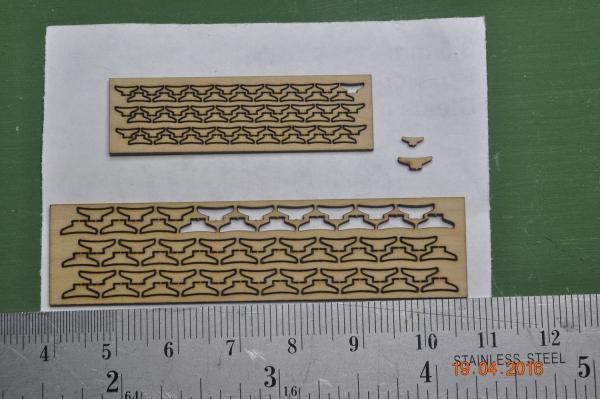
Back in the Shipyard, Little things. A few of the stern cleats attached to the stern rail and inside. I purchased some of chuck's cleats, a bit of sanding and they come up good for this scale. I used 5mm cleats, at 1:60 makes them ~300mm long in actual. Chuck's 3.5mm and 5mm cleats. The 3.5's are very small. Dave R
-
Very Impressive Ron. On blue carpet would look even better. !! Have I got all that rigging to look forward too ? Dave R
-
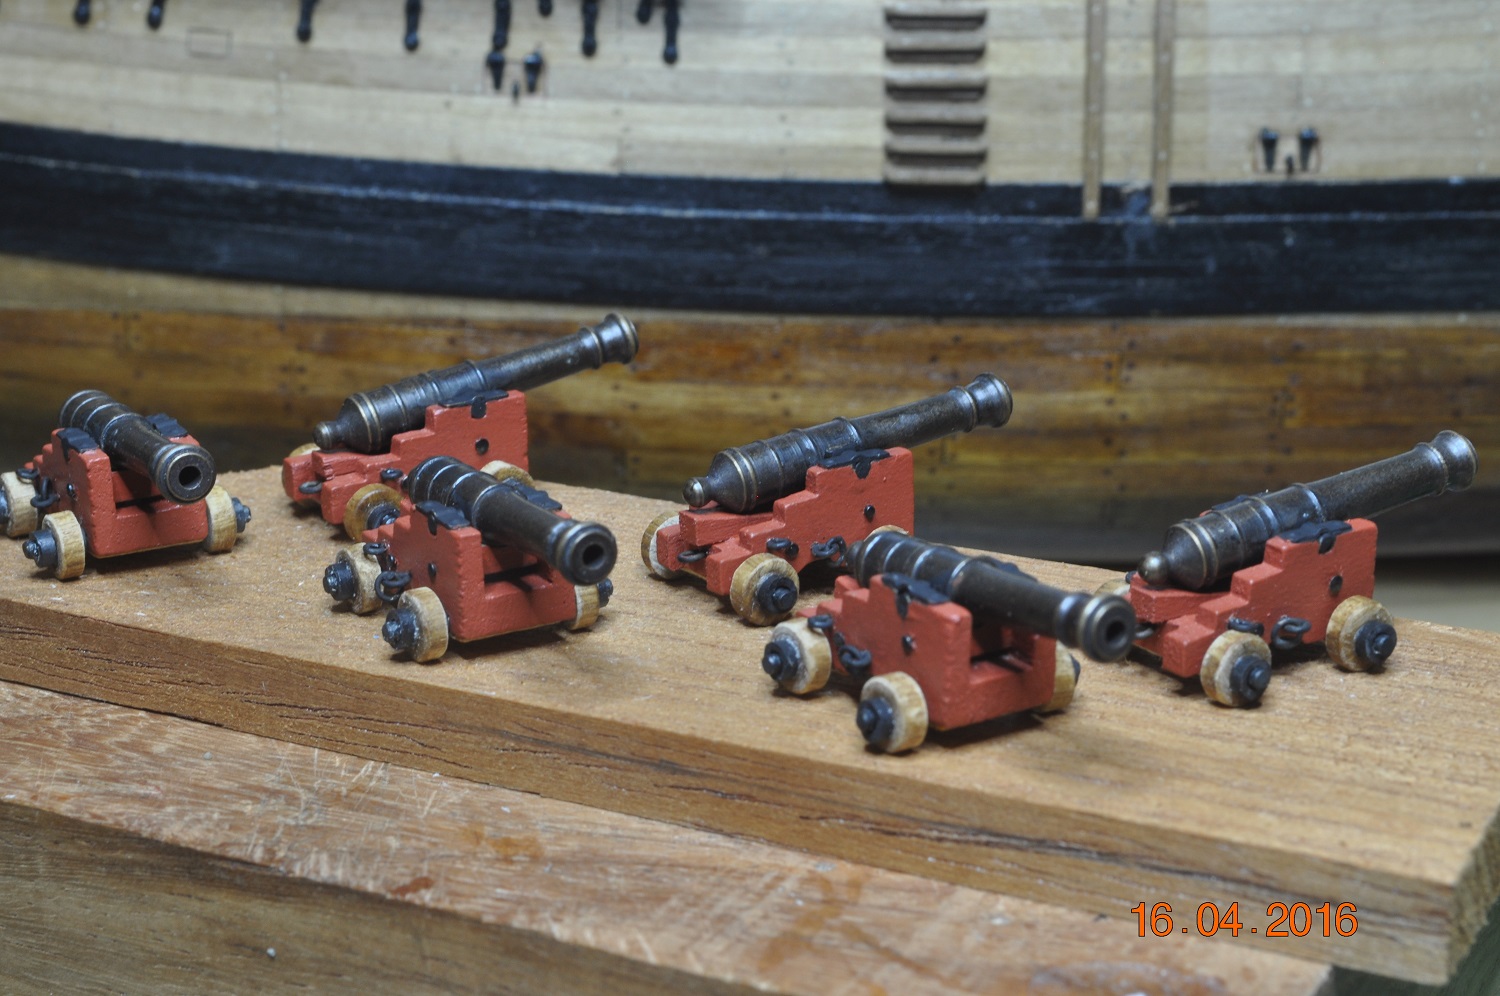
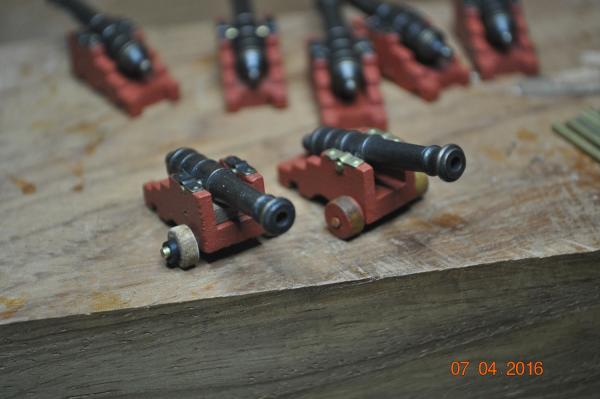
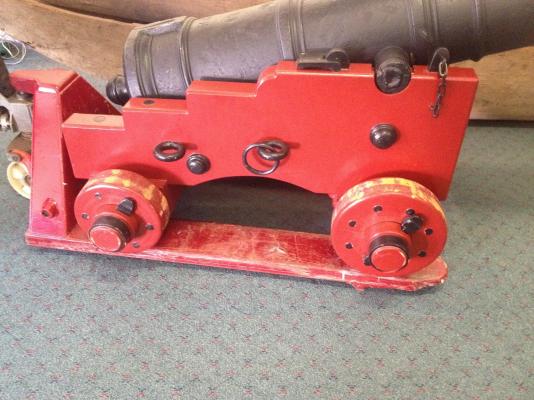
Update on Cannon Carriages. It has been a bit slow in the shipyard, with my sister visiting(not much time for the Endeavour work). Finally put all the parts together for the 6 Carriages. This will have to do(as they are), spent a lot of time just getting this far, and tackle still to go for all 6. Dave R

-
Good start Trim, I haven't started on the small boats for my Endeavour build yet. Dave R
- 7 replies
-
- 2
-
-
- longboat
- artesania latina
- (and 1 more)
-
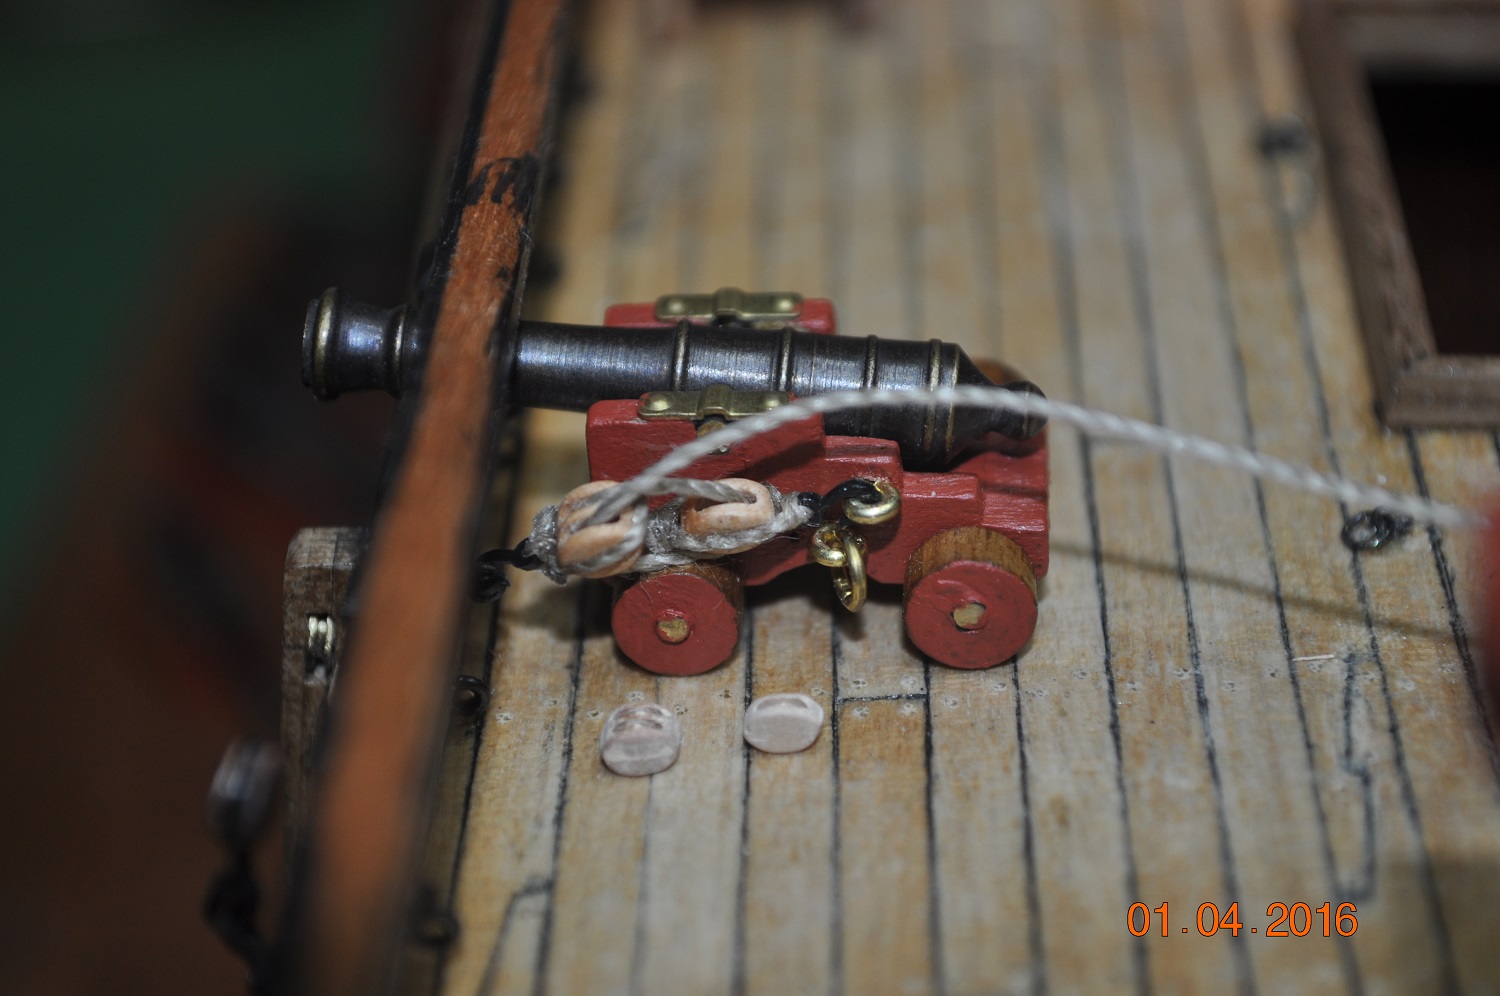
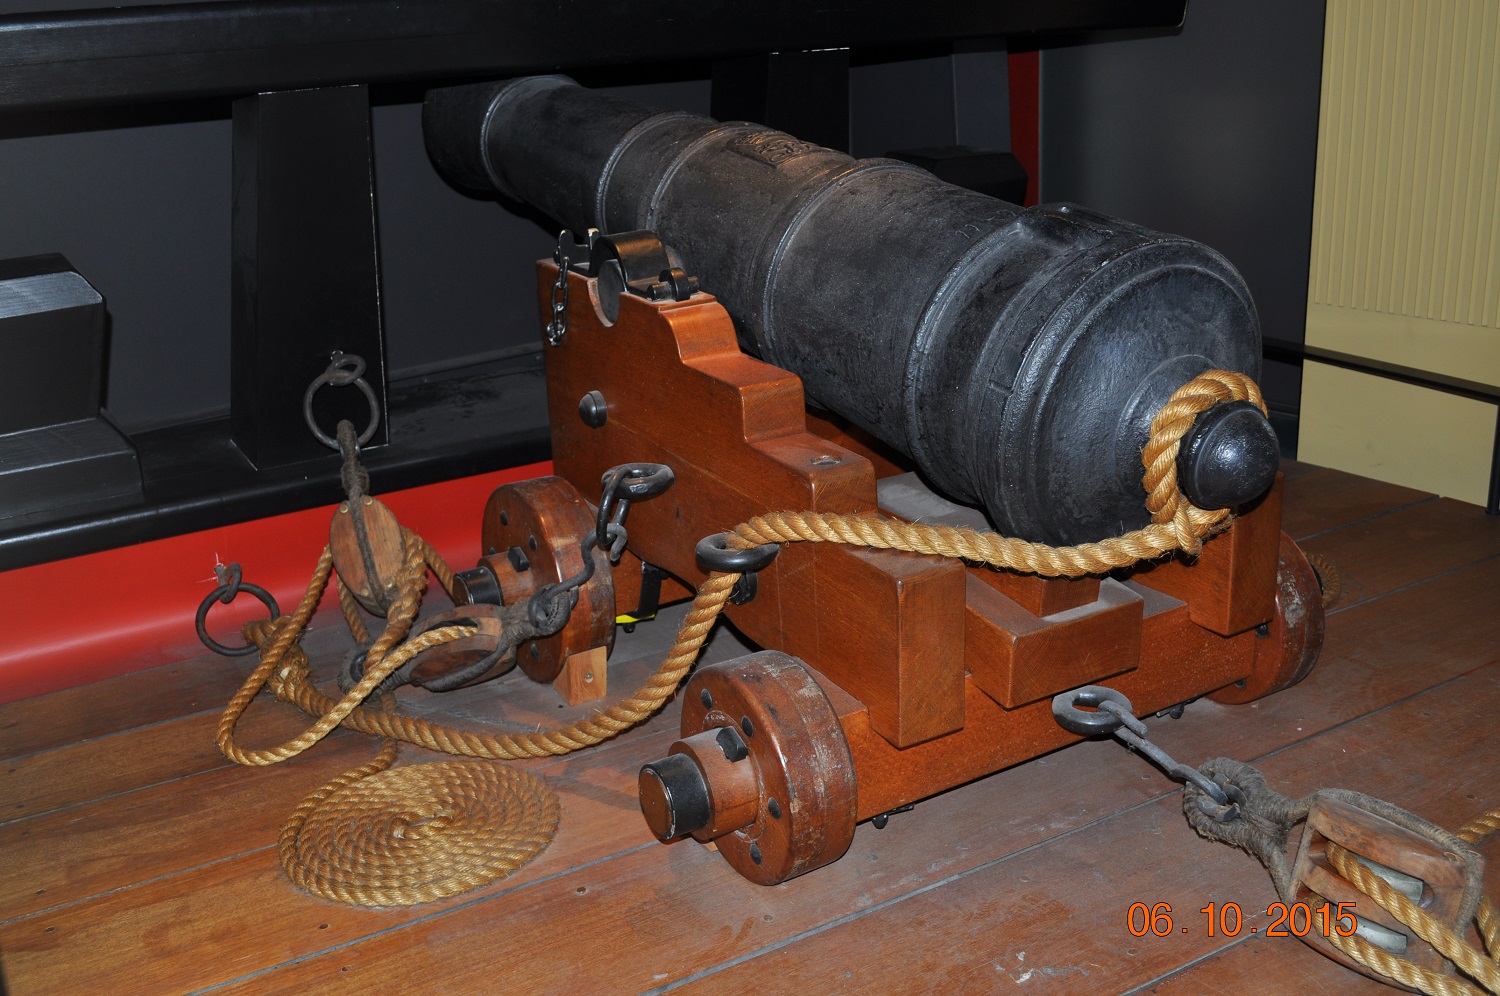
Hi Steve, I picked up the ropes on the AMM are about faced. The 3mm tackle Pic has the ropes in the right places. I'll add another Pic of the cannon/carriage in the previous post #363, of the carriage in the Qld Maritime Museum. Dave R
-
Hi Greg/Pat, Thanks for looking in. I don't mind taking the time to sort out what bits and pieces, sizes(proportions), what goes where etc., retro fitting the "kit" carriage is my issue. If I go by the AOTS and Replica at AMM, then the kit is wrong is so, so many ways. Maybe I should of just built my own carriages.? Dave R
-
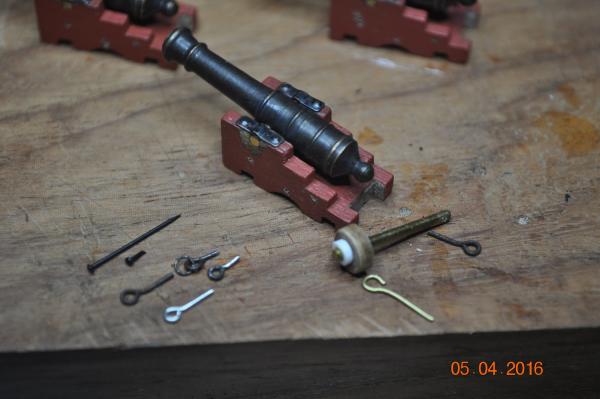
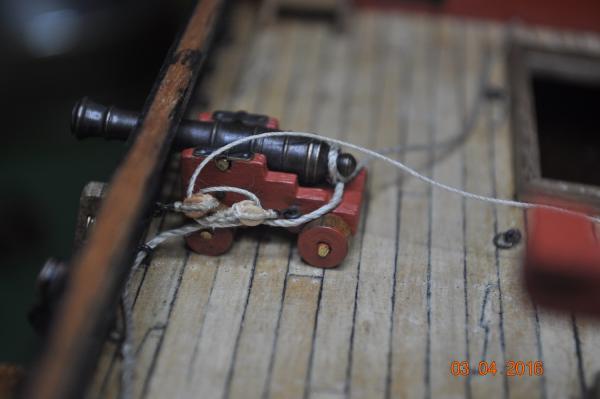
Progress on the Cannon/Carriages. As I had mentioned I am using the "kit" supplied carriages and cannons. Got to use some things from the kit I paid for. I had fitted the kit wheels and carriage some time ago, and now wanted to see how they looked with some ropes on them. I rigged the side pulley system with 4mm blocks on the “kit” carriage – not happy with the blocks size, too big. The 4mm blocks take up too much room along the carriage. So went to 3mm blocks and smaller rope and eyebolts, hook etc. this looks a lot better I reckon. However: Was not happy with the wheels, look too big. I have this picture of the one of the raised cannons from the Endeavour which has been mounted on a carriage, at the ANMM(but as Steve points out in log #368 , the recoil rope and takle are about face). This is another of the carriage/cannon in the QLD Maritime Museum I have thinned the wheels and mocked up the carriage with a collar. Taken with the old setup beside. I am pretty happy with the collar design. And have been making the "bits" that attach to the carriage. Eye bolts and pins. I also cut the back out of the carriage, an attempt to make the carriage not so boxy.? for want of a word. So with all the changes, I have some work for the shipyard to make all the pieces and assemble. Dave R


-
Hi Steve, I decided to go for dark blocks all over the rig. Standing and running, mainly so I didn't have to have two(2) color blocks to buy. I have some lighter ones for the deck guns, and other deck items. I can always darken these up. Dave R
-
Hi Greg, I saw you got the Classic Model blocks, later in your build. As you say, time vs money, plenty of other things to make. I worked out they cost me average 45 cents each, no way I could make them for that. Dave R
-
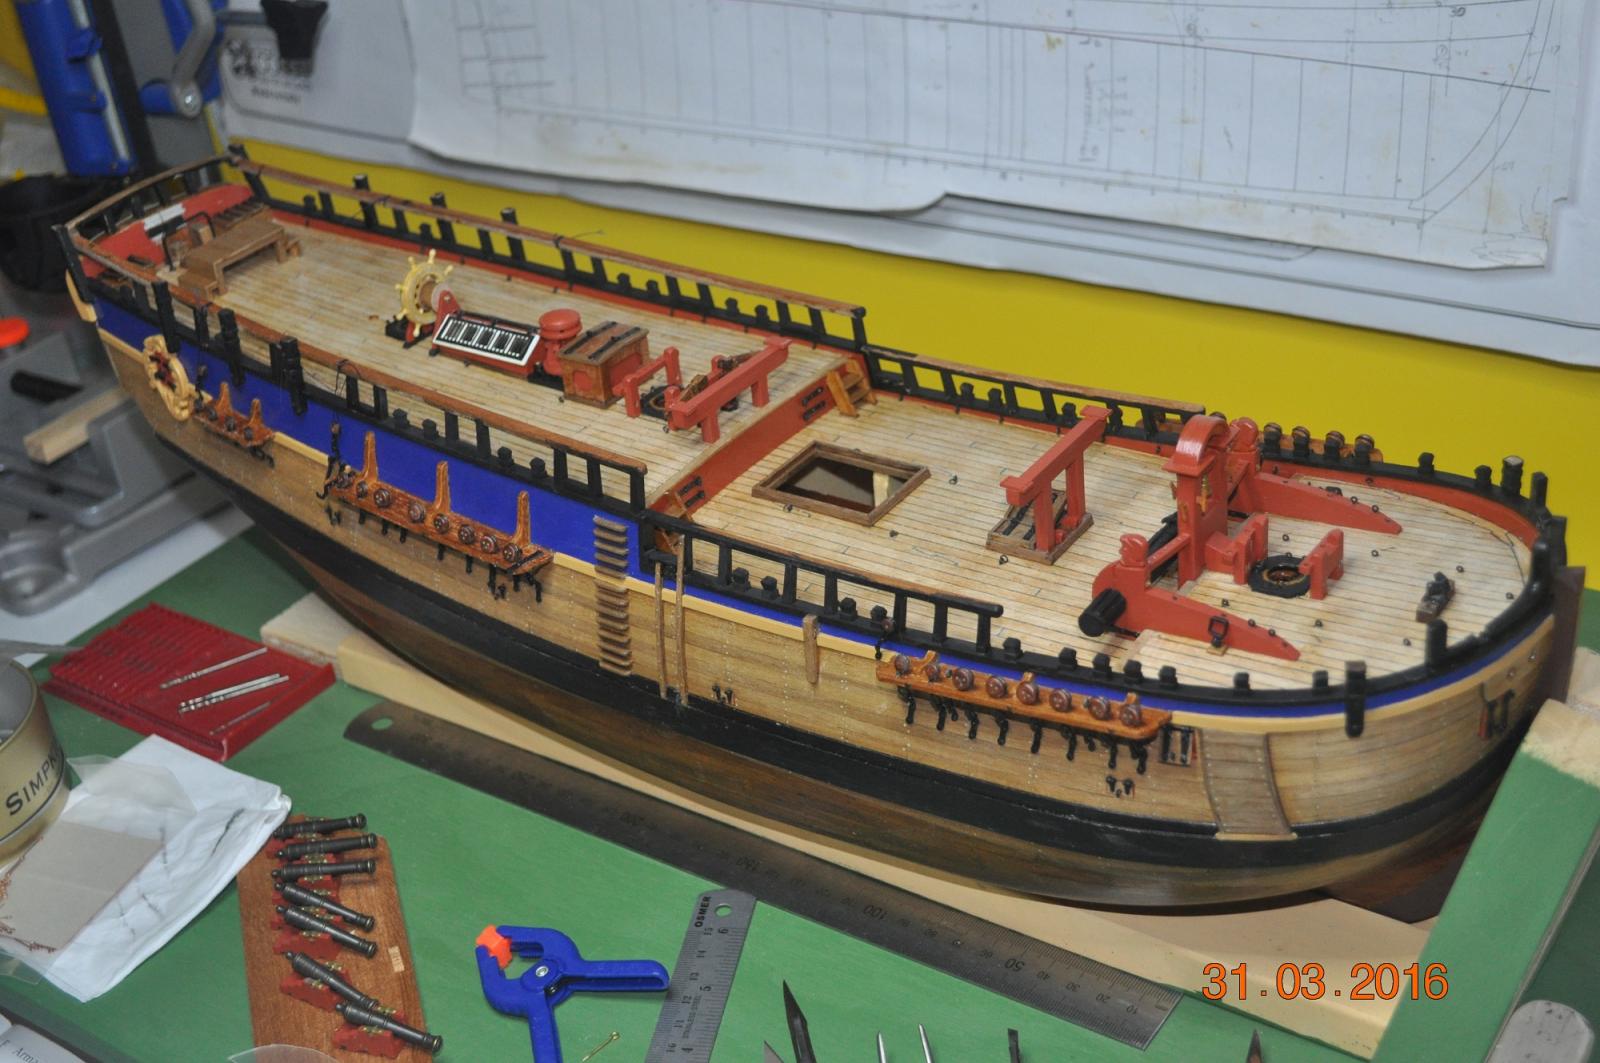
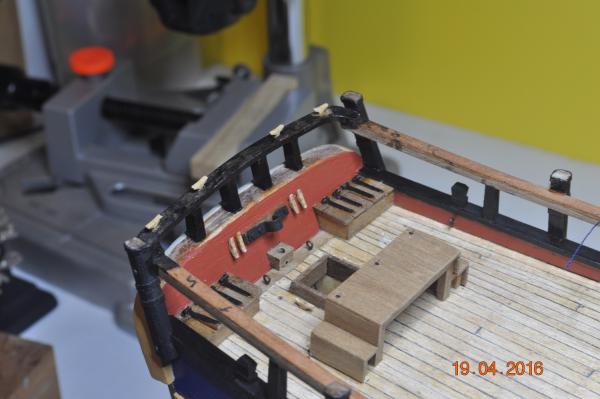
In the shipyard. Being 01 April, I'd just like to say thanks to all you chaps who look in on how my HMB Endeavour is progressing in the Shipyard. I also enjoy seeing what all you chaps are doing on your own Models. General Pic. (a have quiet a lot of other fixtures that are not in place, I am holding back for the rigging to make sure I don't have something in the road) Having a break from working directly on the hull -> moving to the 6 cannons. I used the kit supplied carriages some time ago, mounted the cannons while the planking glue was drying. Seems such a long time ago. I am sure they are not exactly correct, but I do try to use what I paid for from the kit, if it is similar. See if I can knock them into shape, add the fittings, blocks & ropes. Dave R