Supplies of the Ship Modeler's Handbook are running out. Get your copy NOW before they are gone! Click on photo to order.
×


DaveRow
-
Posts
686 -
Joined
-
Last visited
Content Type
Profiles
Forums
Gallery
Events
Everything posted by DaveRow
-
 Dash, Never a dull moment in the shipyard, designing, building, deciding(maybe not), alterations, maybe no alterations, changing ones mind when something comes along. ! What we do for glory ! The black, you know where, looks a lot better. Dave R
 -
Looking really good their Steve. Just where I wish to get my build too one day soon. Dave R
-
Thanks to all you guys(gals ?) who follow my posts. Your likes and usual positive comments provide the inspiration, and the effort I put into the shipyard construction worthwhile. I am now moving into the 3 year of this project. My shipyard workers have not had to strike once due to my excellent working conditions and pay(not that they(me) have a choice hee ! hee !). I sometimes get asked by those who visit the shipyard(at home) "how much longer will it take to finish". ? ? I ask myself the same ? Not 10 years... Dave R
-
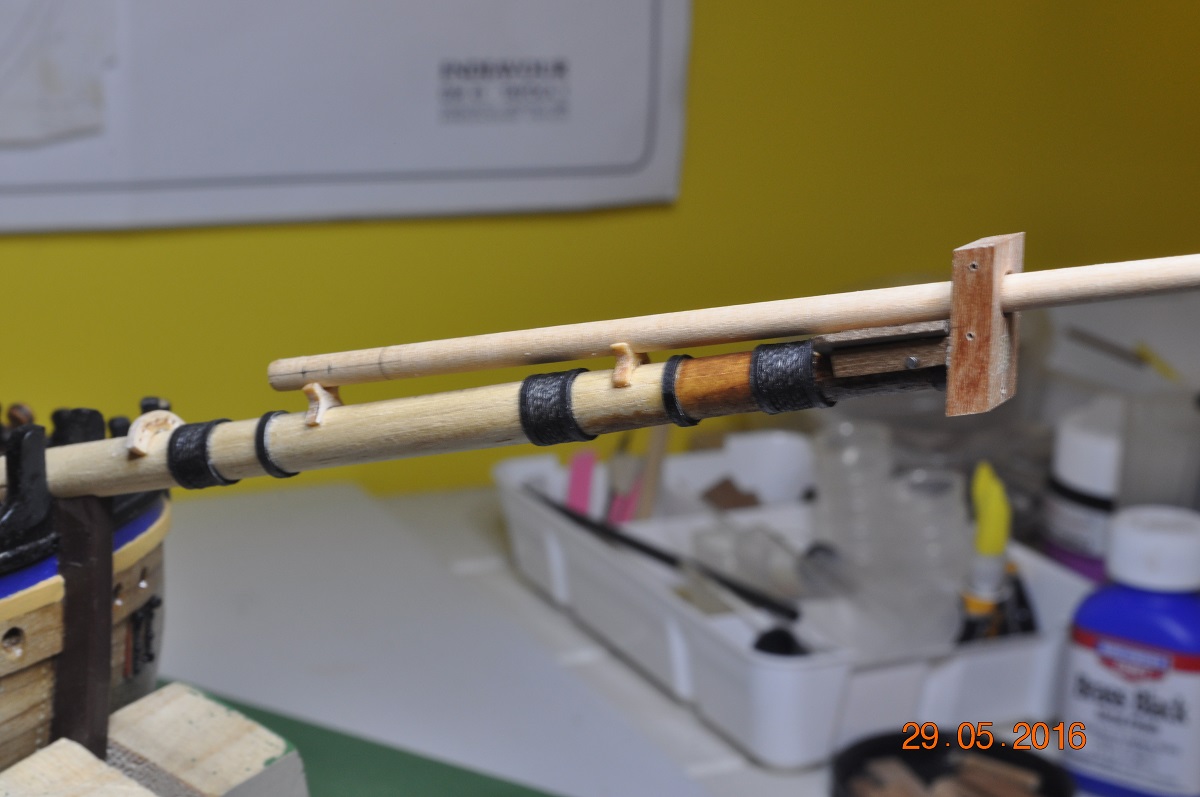
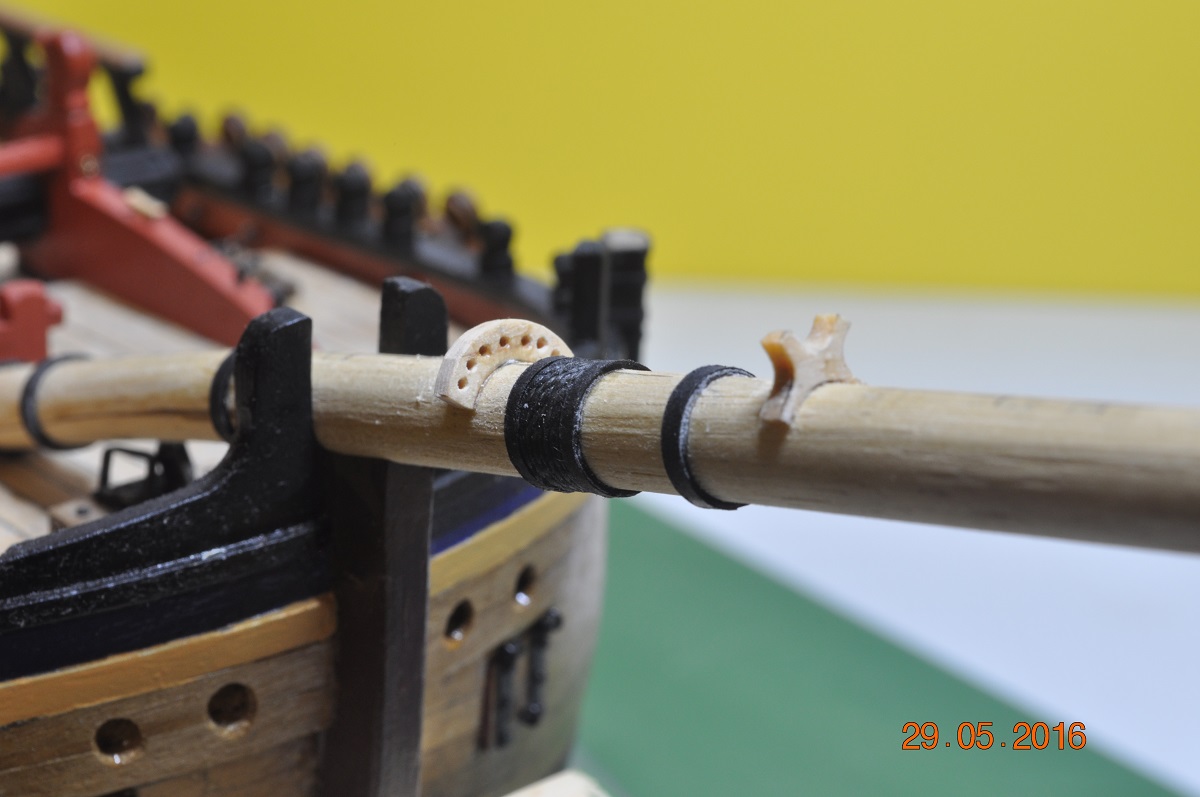
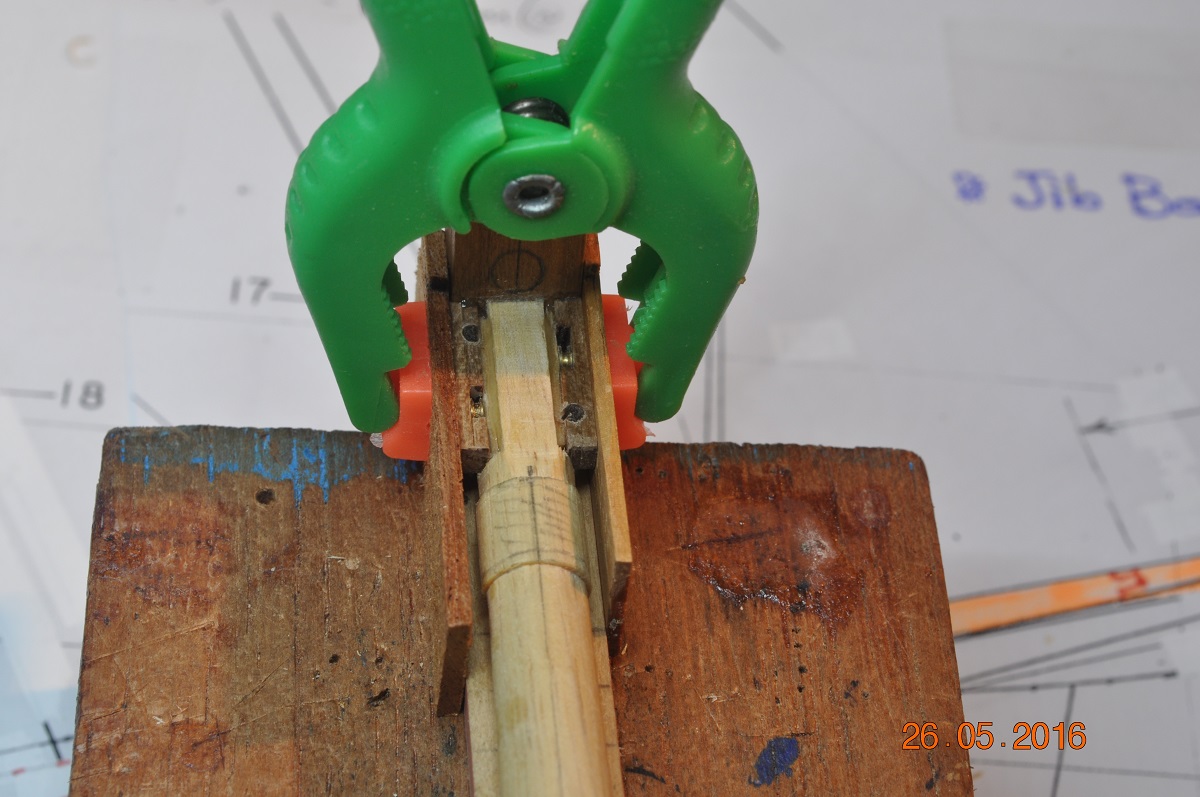
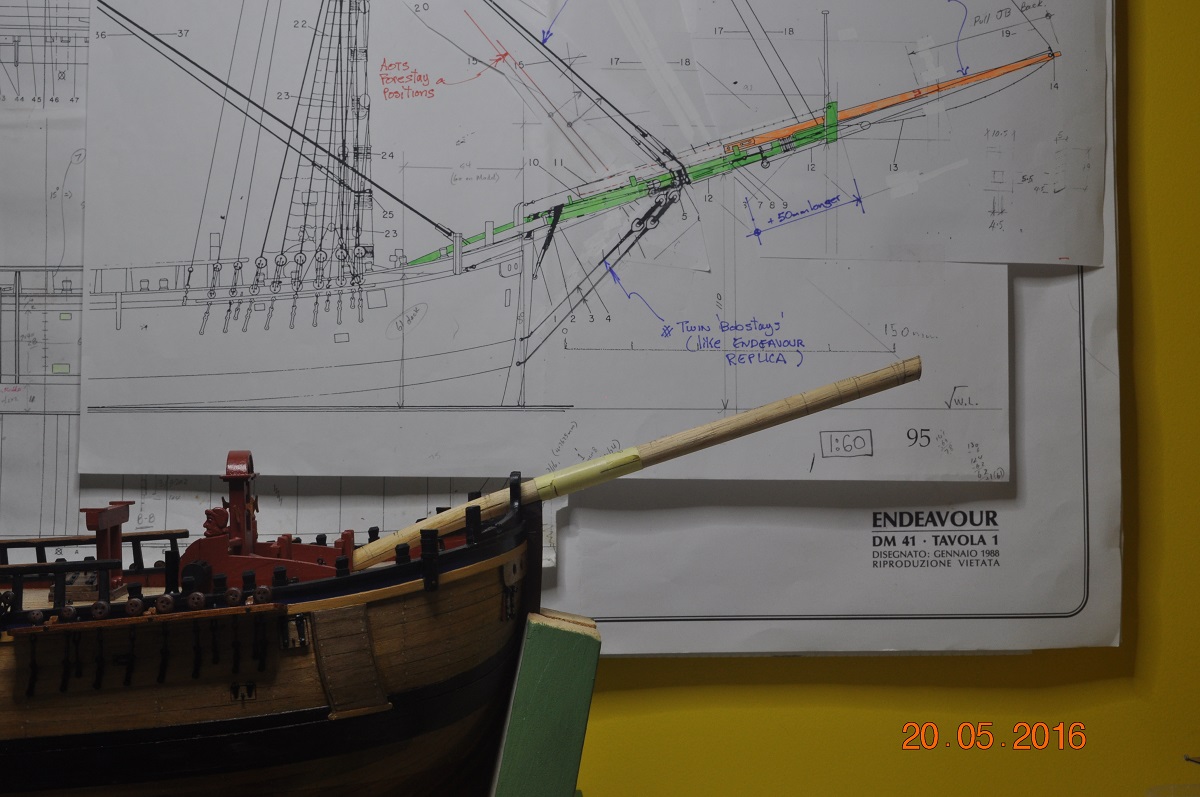
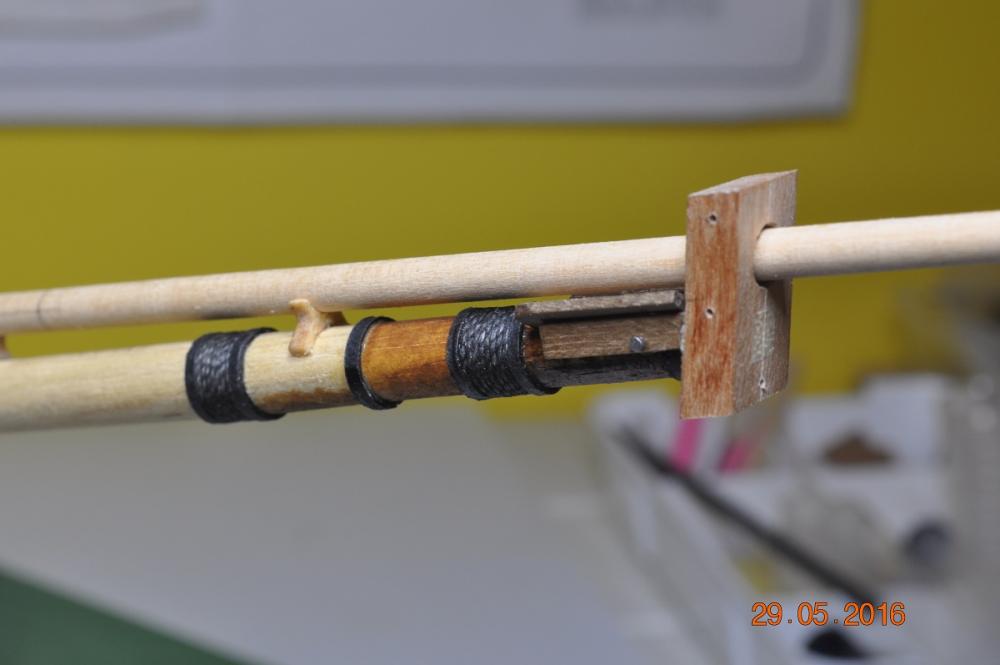
Back in the Shipyard - Bowsprit. Managed to get some more work out of the yard. Setting up the Jib Boom on the cradles, yes I have an extra one for the longer bowsprit. Fore one for normal outboard sailing, lashed down. The rear one for when retracted. Woolding and Hoops(from double wound black cardboard, can you tell ?) I have added additional woolding as has the AMM Endeavour Replica. Rear Fairlead Saddle and rear Jib-boom saddle(for when it is retracted all the way back), woolding and more iron hoops. Took the gamble and directly applied some Oak Stain on the cap end of the Bowsprit. Both yards I will stain oak. Their is a mass of eyes, blocks and lines around the Bowsprit( and Bow. Doing my best to identify all the eye bolts and drill holes for them now, than later on when 'B' fitted. Dave R


-
Dash, You made a good choice with a Caldercraft Kit. The Corel Kit I bought(novice choice) had no badges, figures, carvings. Wood is good, about all that was good actually. Dave R
-
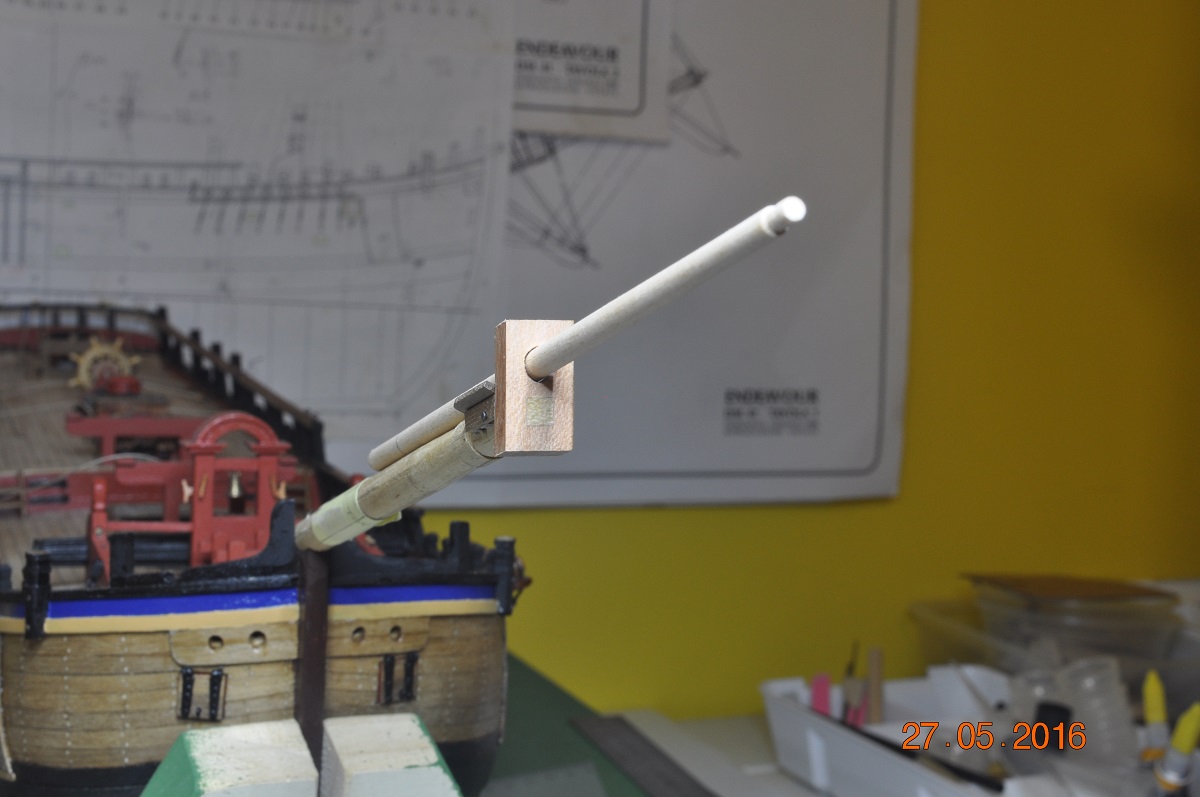
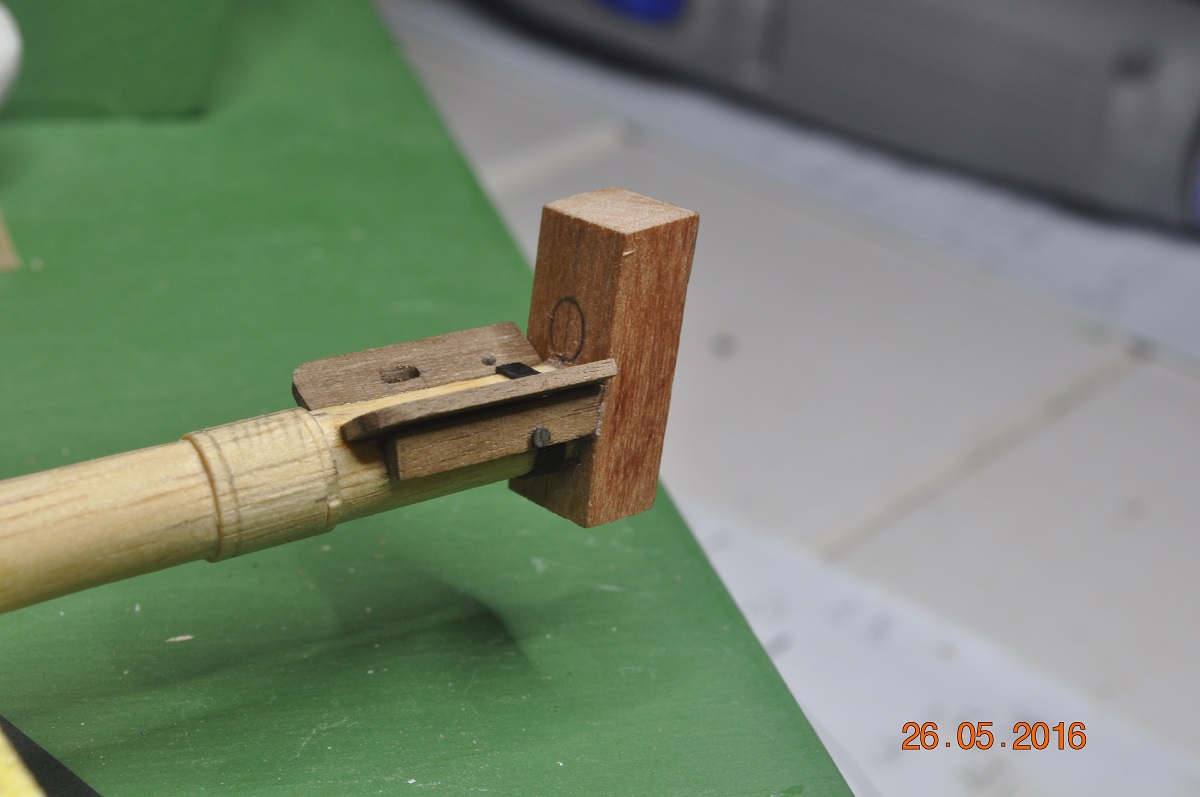
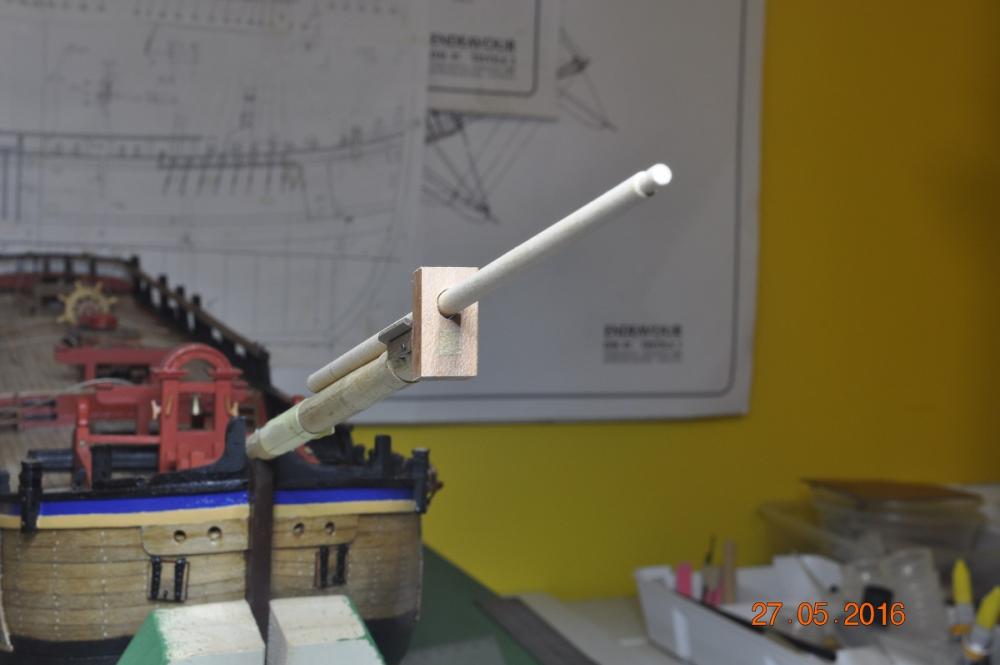
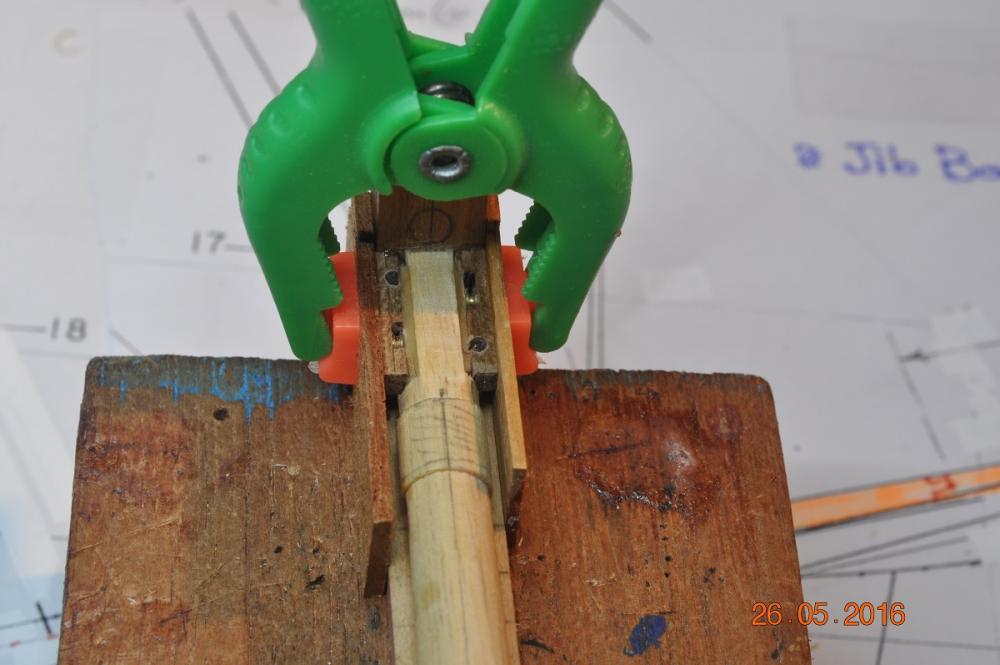
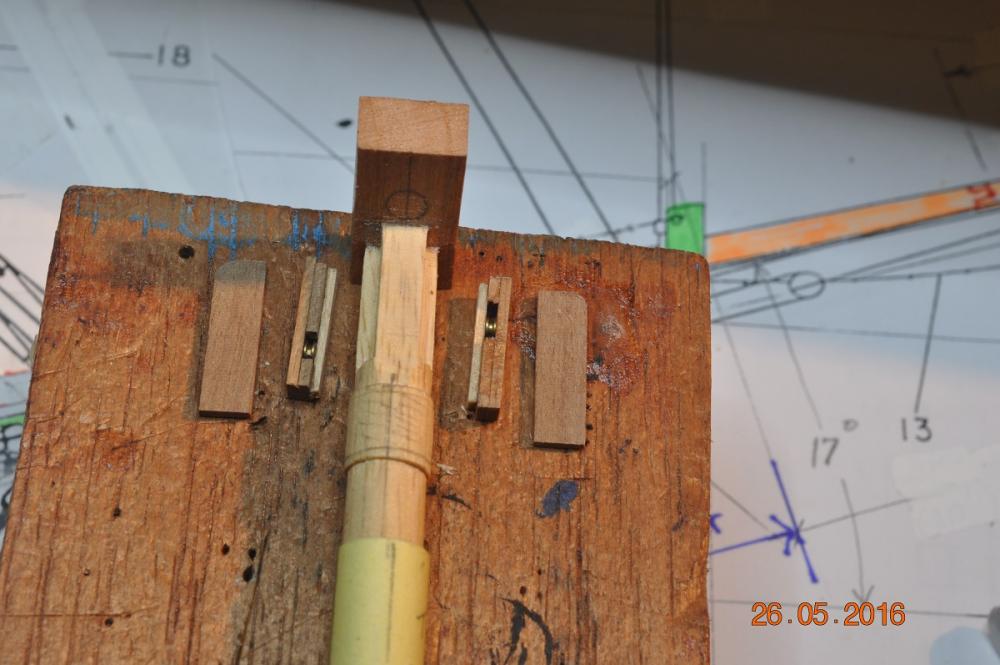
Hello Pat, I mark the hole outline I need either side, score the hole(square 4mm x 4mm this one was) with scalpel to get a neat edge. I use the surgical scalpel to first do a neat square cut down about the edges, excavate a mm or bit more deeper, take care not to go past the edges. Then use a small round engraving bit(on me Dremel) to excavate through from either side, not all the way to the sides though. Then back to the scalpel, square the sides up through to other side. Work from both ends of the hole, make the hole really neat and accurate. It took me a few goes early on to get this down pat. The pin end(to go in). I first make the pin end(square) oversize and whittle it down bit by bit so it fits neat. Test fit heaps of times. The trick is to shape the end that fits the far side first(the end you see, test fit it), then do not take any more off the end. Takes a while, but neat fit, >> if all goes well. Shaved the Cap this morning on the bench sander a bit thinner. Cap came up a treat. Better than I expected. I just used my new Lathe for first time to turn up the Jib Boom. Excited.... Dave R
-
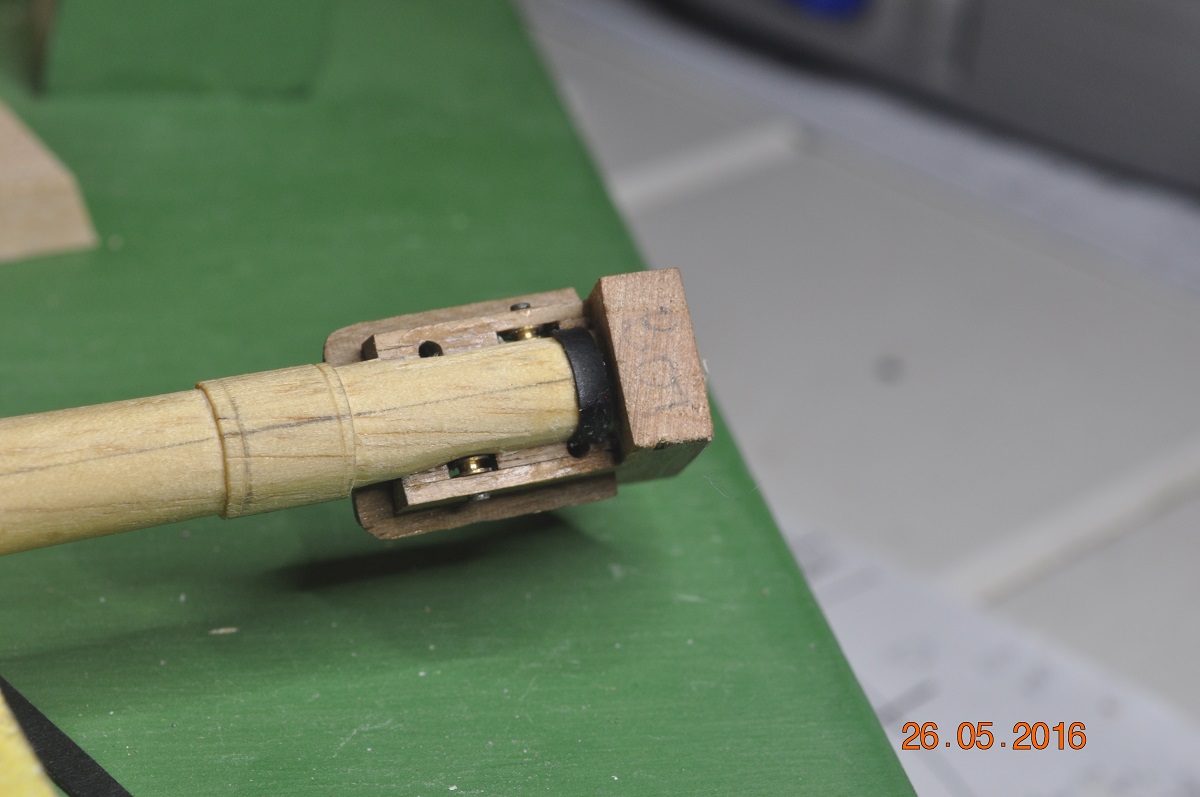
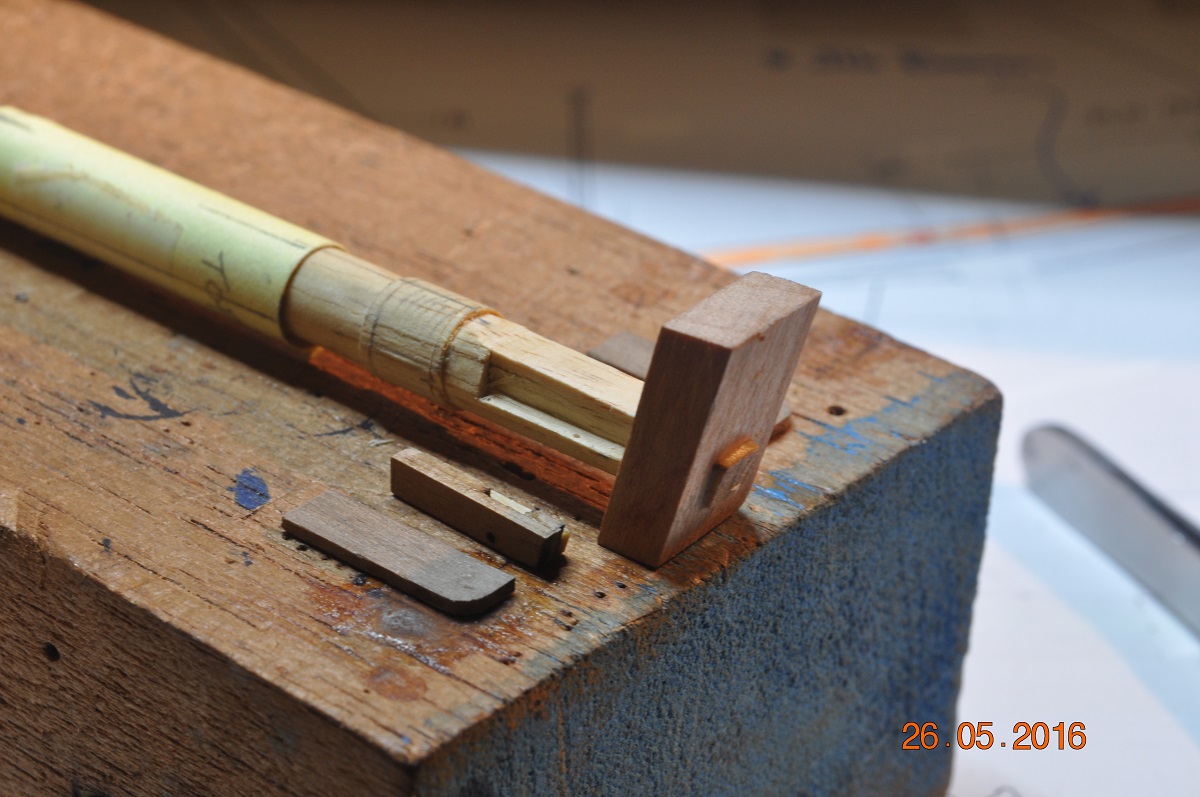
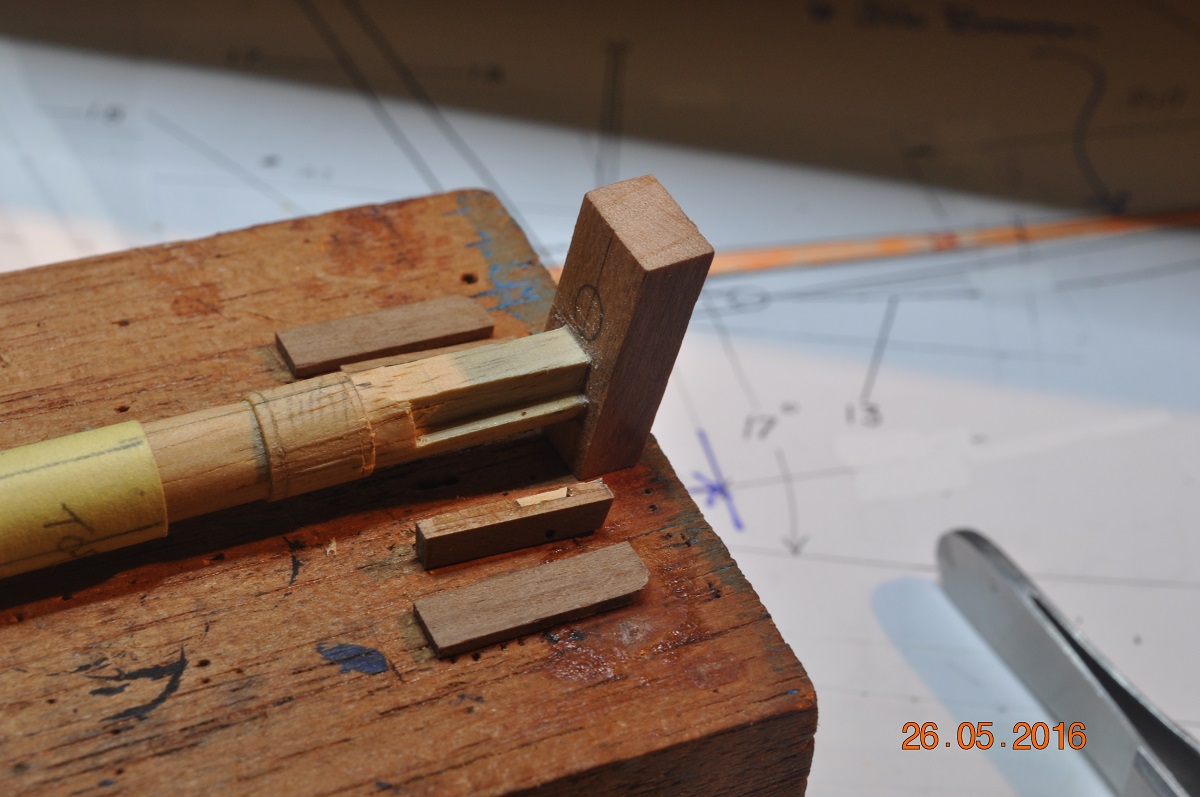
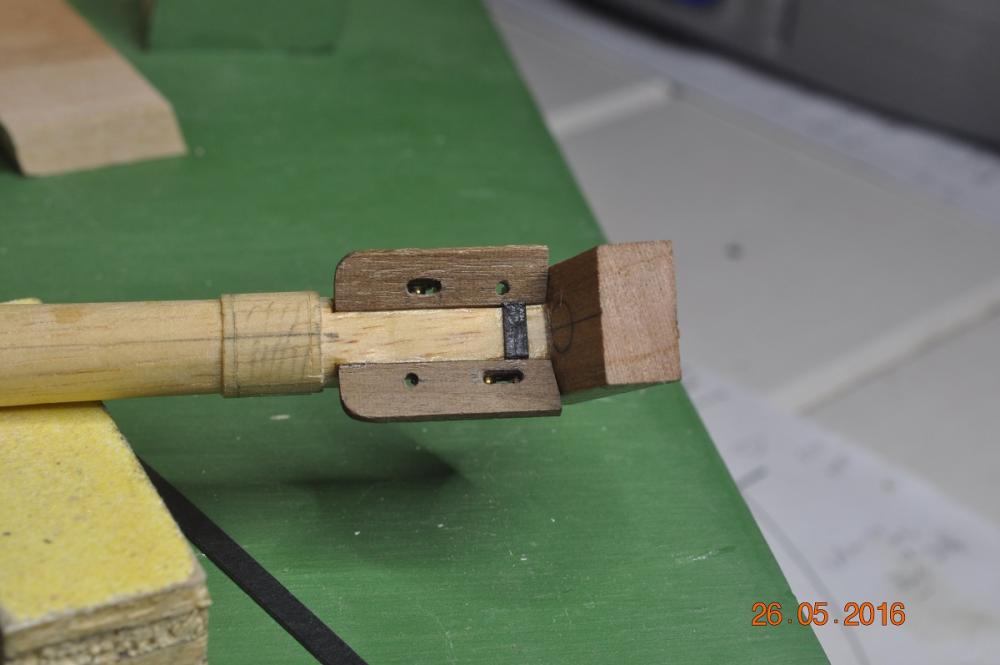
Back in the Shipyard, As I had mentioned in my post #396, have started on the Bowsprit. I made the side Bee Blocks with a sheave(for topmast stay) in each side and the 2 x Bees(top cover plates). The Cap has been fitted(bit thick and needs thinning down). Rebates on either side for the Bee Block to slot into. Bee Blocks in place, the 2 holes for emergency stays drilled, waiting for glue to dry. The right Bee Block top tapered for the Bee(angled) Bees glued in place. Under the head, holes and sheaves. Tried my best to line the parts up symmetrical. Lots more to do. Dave R


-
Hof, Hope the deck is behaving itself if you are attacking it. I cannot see the extent of the thinned areas to offer helpful advice to remedy. Dave R
-
Hi Chris, I guess the side planks may of been too short, somewhere along the build ? Hard one to fix now. I had cut 2 planks just a wee bit short and was fairly easy to extend. Hopefully the "lady" carving I do will cover this over. My kit didn't even come with the main metal piece over the windows, nor lady or leaf pieces. (Crappy Corel Kit) So will attempt to carve them all. I bought some pear wood ex. USA to do this. Couldn't find a AUS source. Dave R
-
Robin and Jud, I do not really know what color the glass was on the 1770's Endeavour for sure. Can either point to a definitive source. ? I did a bit of looking about to when navigational lighting on ships came into effect. Establishment of British legislationIn 1840 appeared the first rules on lights and traffic at sea. The 19th century also saw the first regulations on navigation at sea. Around 1840, with the earliest steamships, a number of nations became concerned about what steps could be taken to avoid collisions and shipwrecks. At the time, each of them acted separately. No ships carried navigation lights, except warships travelling in squadron by night. Whenever two vessels approached each other, it was customary to show one's presence by hoisting a flag or lighting a flare. British ships applied the signalling rules proposed by W.D, Evans, regarded as the father of present-day regulations. Source: http://www.imo.org/en/KnowledgeCentre/ReferencesAndArchives/HistoryofSafetyatSea/Documents/P.%20Boisson%20History%20of%20safet%20at%20sea%20extract.htm#_Toc516043734 Red usually means danger, if I was riding up to red light at night at sea, I'd be watching out close to see what it was or keep clear. Dave R
-
Dash, I have much the same, although after reading Shardlow report, Steel's Rigging, AOTS, Parkin, other MSW build logs, the Replica build, I came up with below. Will review after I get the main hull done(before the mast/rigging stage) Dave R
-
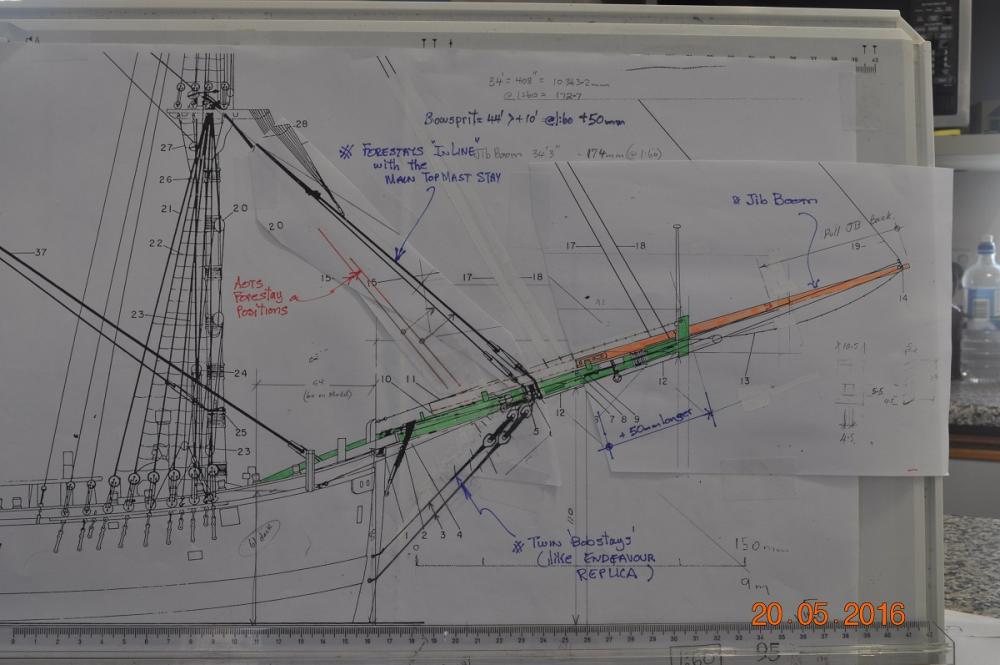
Shipyard Design Time. If you have a look at my Build Log Post # 286, you will see the case for a 10' longer Bowsprit for the Endeavour. I won't go into all the details, though it dealt a report Mr Ross Shardlow(artist) prepared some time ago(1994) relating to the Replica of the Endeavour. It put a forward “a case for a Taller Mizen Mast” and also a case for “a Longer Bowsprit”. It as all covered back in this Build Log #286. I believe Mr Shardlow was correct, the evidence indicates the Endeavour had an ~ 44' Bowsprit, during Cook's first Journey of discovery of Australia. Well me and the team have been working on how this can be implemented. The plan below shows the outcome(what we will aim for) - somewhat away from the AOTS in a couple of ways. 2 x Bob-stays will run up to the 2 Forestay psoitions(like on the Replica @ AMM). Why have a backup Forestay and not a Bobstay ? The 2 x Fore-stays are further forward, anchored to the Bowsprit, so that they are in line with the "Main Topmast Stay"(so the longitudinal forces are in line, no vertical force to the Fore Mast if not in line) Will be working out how the Jib Boom can be run back and housed in a conventional manner ~ 13 feet and miss Fore Stays(rigging). This apparently was done in bad weather so the Jib Boom was not snapped off - as it hangs out a long way. Other aspects remain similar, cleats, blocks etc. Lets get started. PS. In sailing terms, moving the fore sails out/away from under the blanket of the Fore-Mast sails makes sense. Feel free to add your thoughts. Dave R

-
Dashi, You mentioned "Next is to briefly soak and shape each channel to match the curve of the sheer strake and then decide whether to butt them on the sheer strake of check them into it?" I made a set of wider channels with new chain plate positions as well. I also built a a rebate into the sheer stake to let the channels in, much stronger than butting. Since you have already "thinned" them down, you may not want to reduce further as the stays may not be far enough out from the side to miss the top rail. Decisions ? Coming together well in your shipyard. Dave R
-
Hi Mike, Let know when you run out of desk space for your build. I extended my space 3 times now, so much bits and bobs gathered for the build. And that is not counting the shed machinery. Dave R
-
Hi Bryan, Just found your log on the Victory Bow section. What a fabulous effort you have put in. How you got all the decks fitted out ? magical. Dave R
- 77 replies
-
- 3
-

-
- cross-section
- hms victory
- (and 2 more)
-
Hi Mr Dash, Deck fit-out coming along very well indeed. Particularly like your hatch covers. Dave R
-
Great effort Ron, Some really great details and overall looks like she would sail on water. Have a deserved break, then into another ?? Dave R
-
Welcome aboard the Endeavour Shipbuilder's Club Mike. My best advice, that I received at the start of my build, was to see what others have done. Search the "Build Logs for SHIP MODEL KITS" for HMB Endeavour, and go through other logs. You'll pick up a lot of info, tips and instructions and "how too's". Don't hesitate to contact us. Will always try to help out. Dave R
-
Stern window detail looks good Chris. Are you planning shutters over them ? Dave R
-
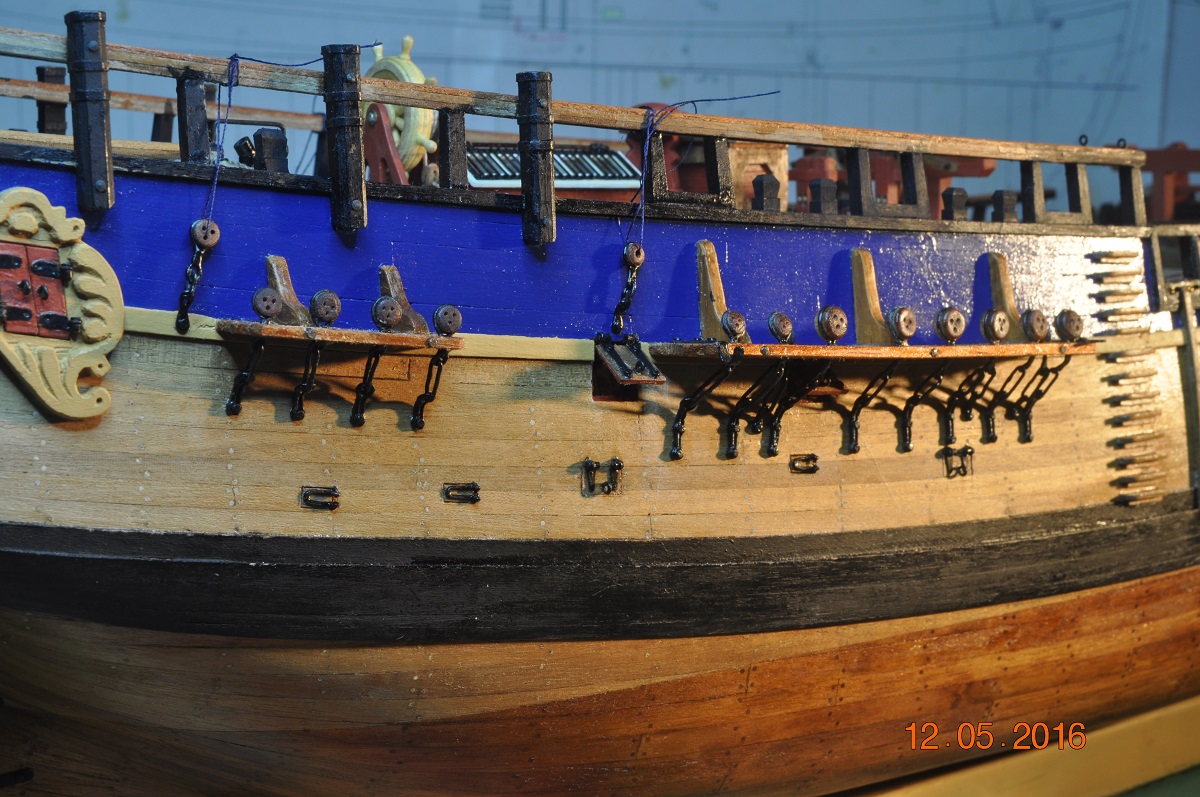
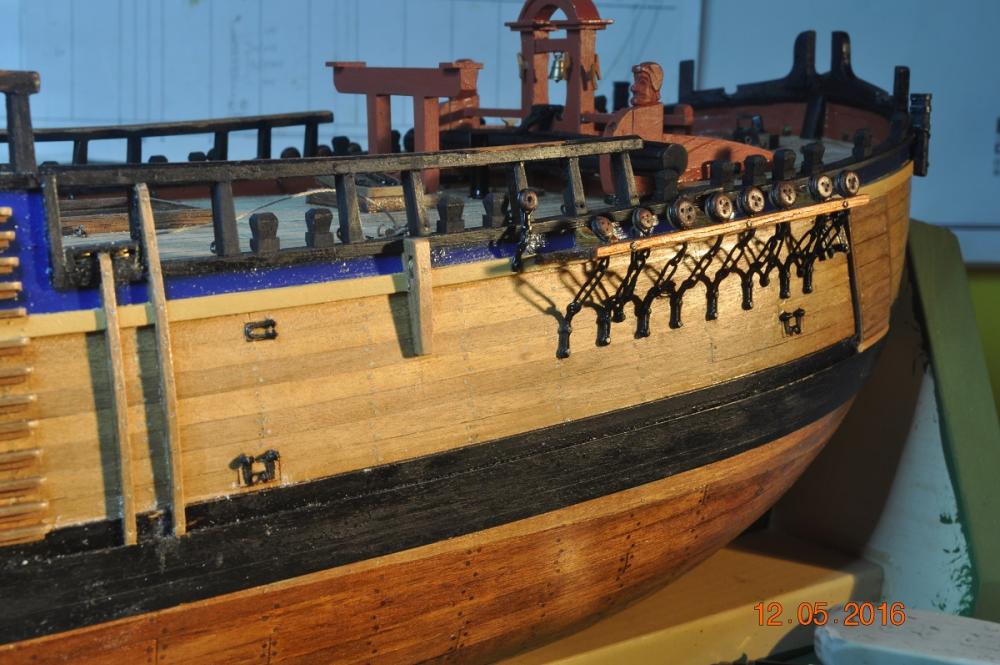
Quick Shipyard Update. Added the 5 smaller Airing Ports to both Port and Starboard sides of the hull. Fiddly little items("U" shape ones), been dreading making them and I was right(so fiddly). Starboard Side: Dave R

-
Looking fantastic their Ron. Will seem all worth it soon, when the final touches are added. Dave R
-
Someone has crafty hands. Excellent workmanship. Dave R
-
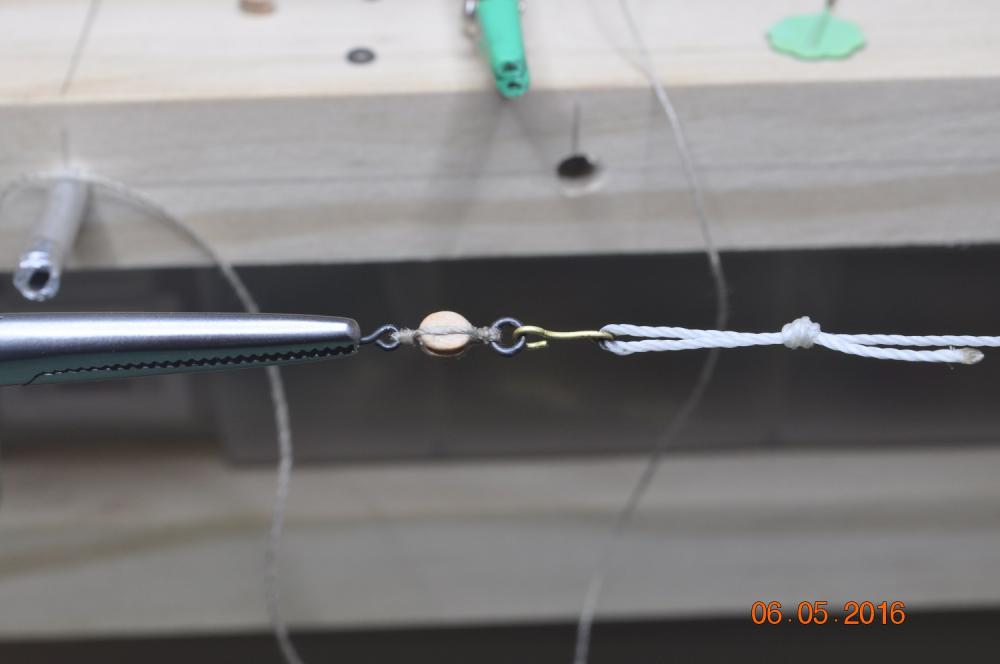
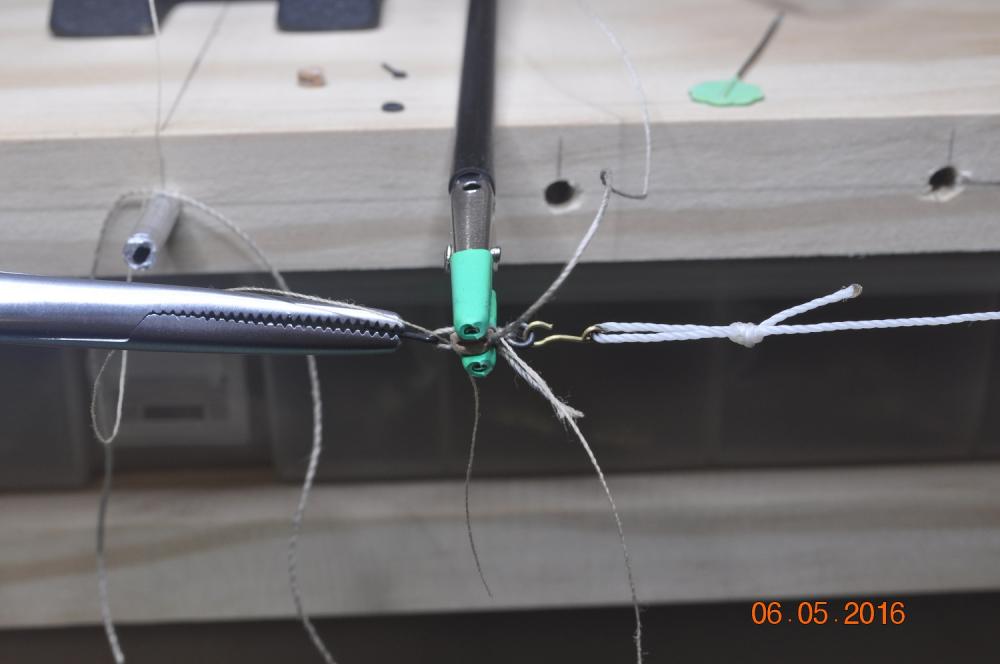
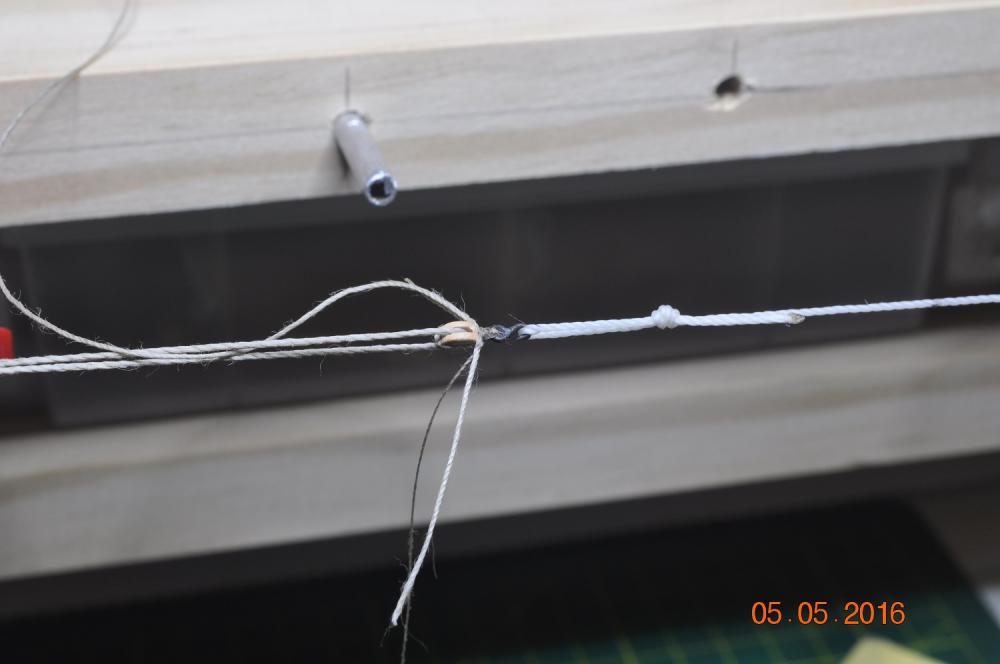
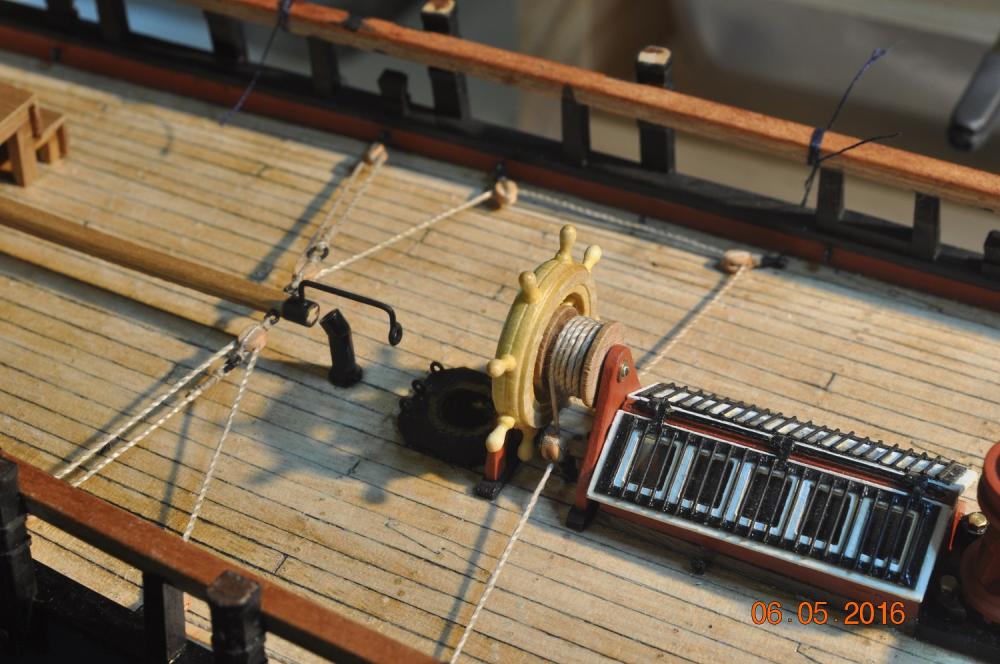
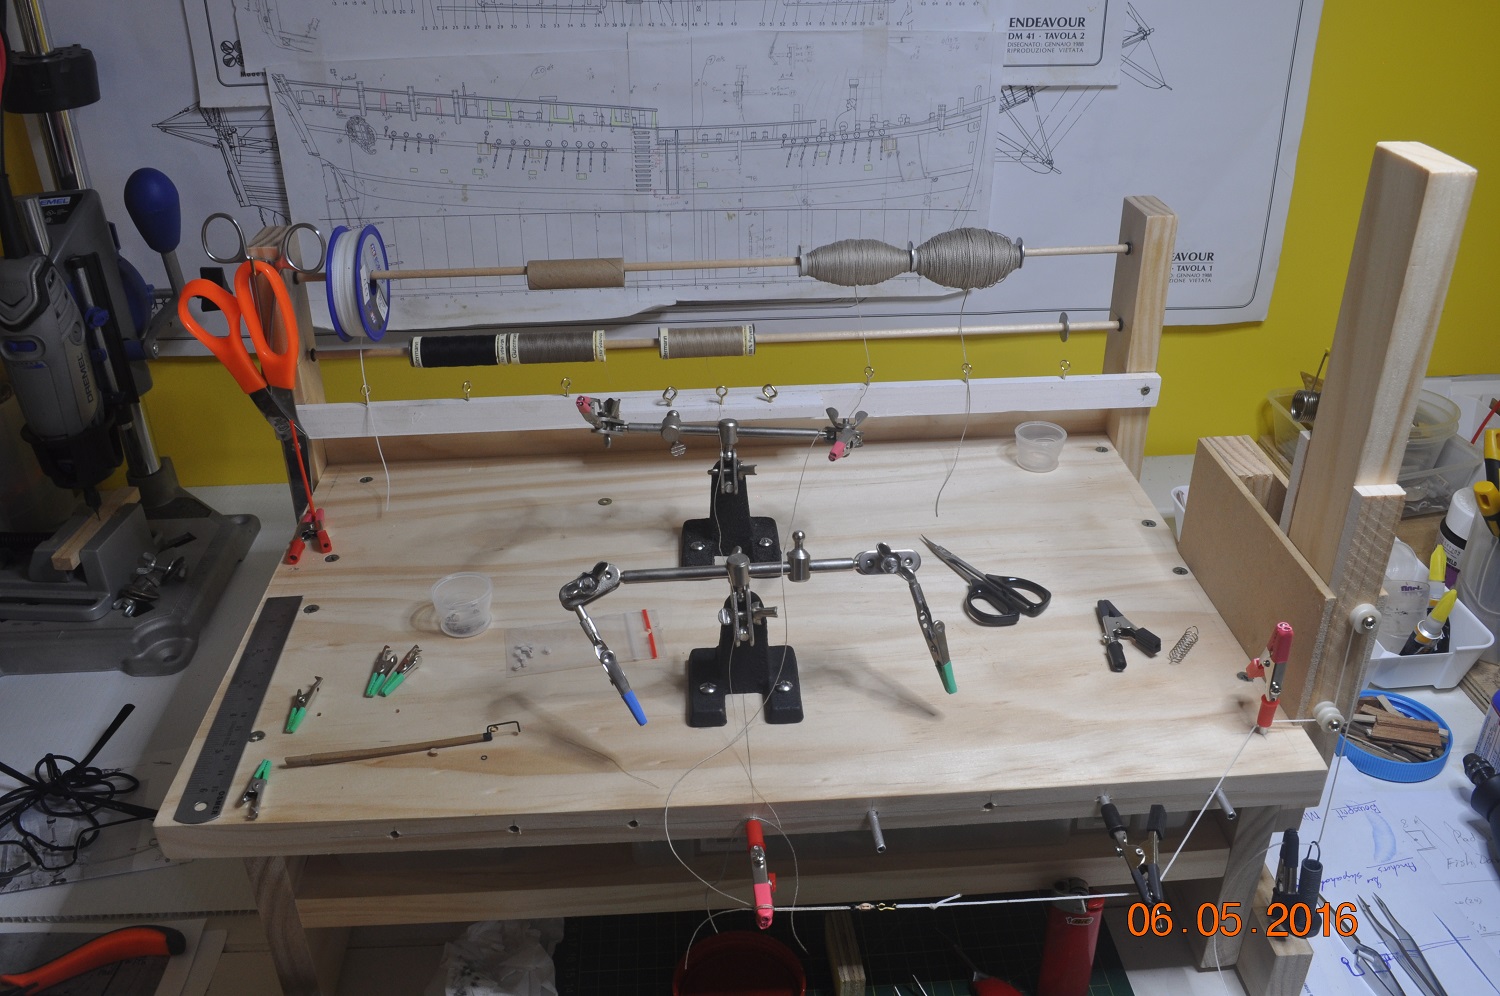
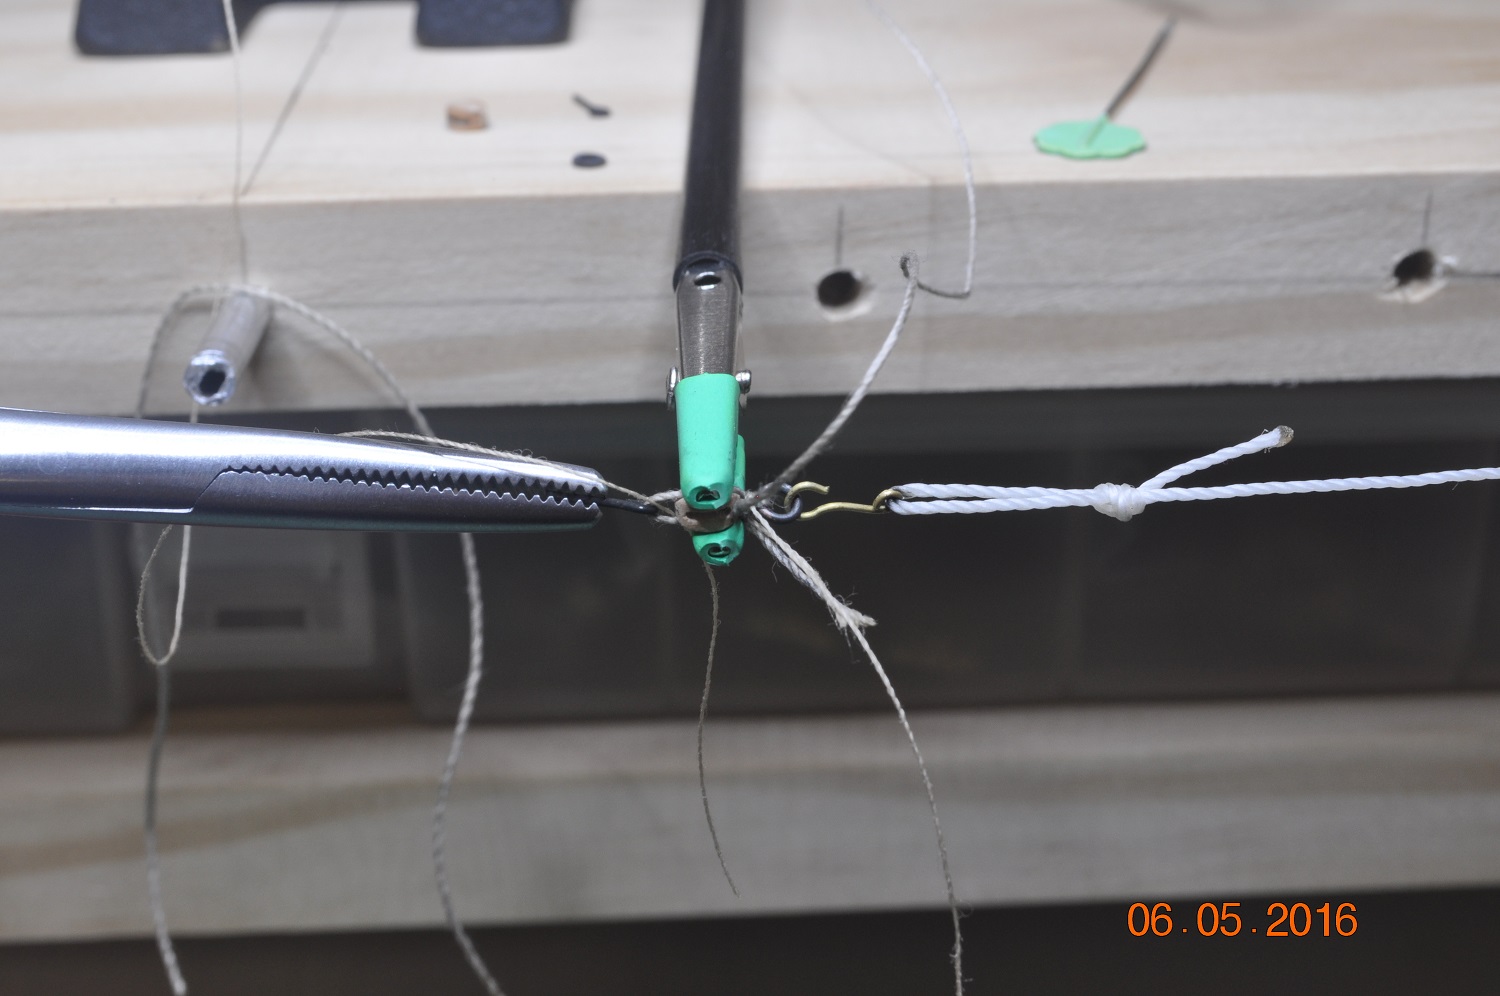
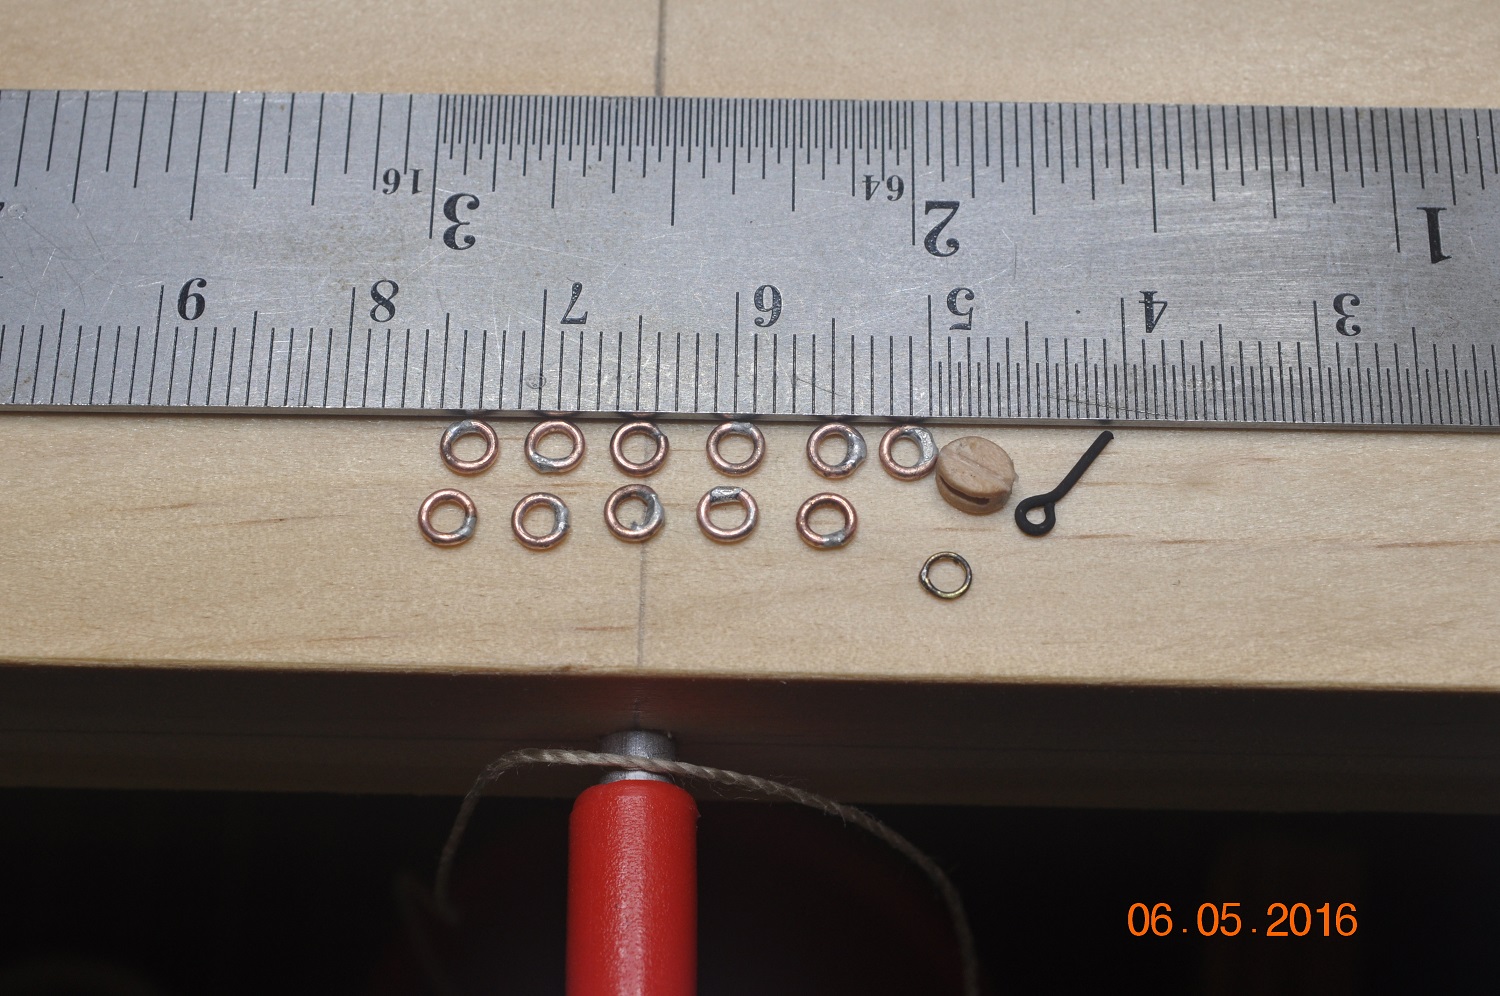
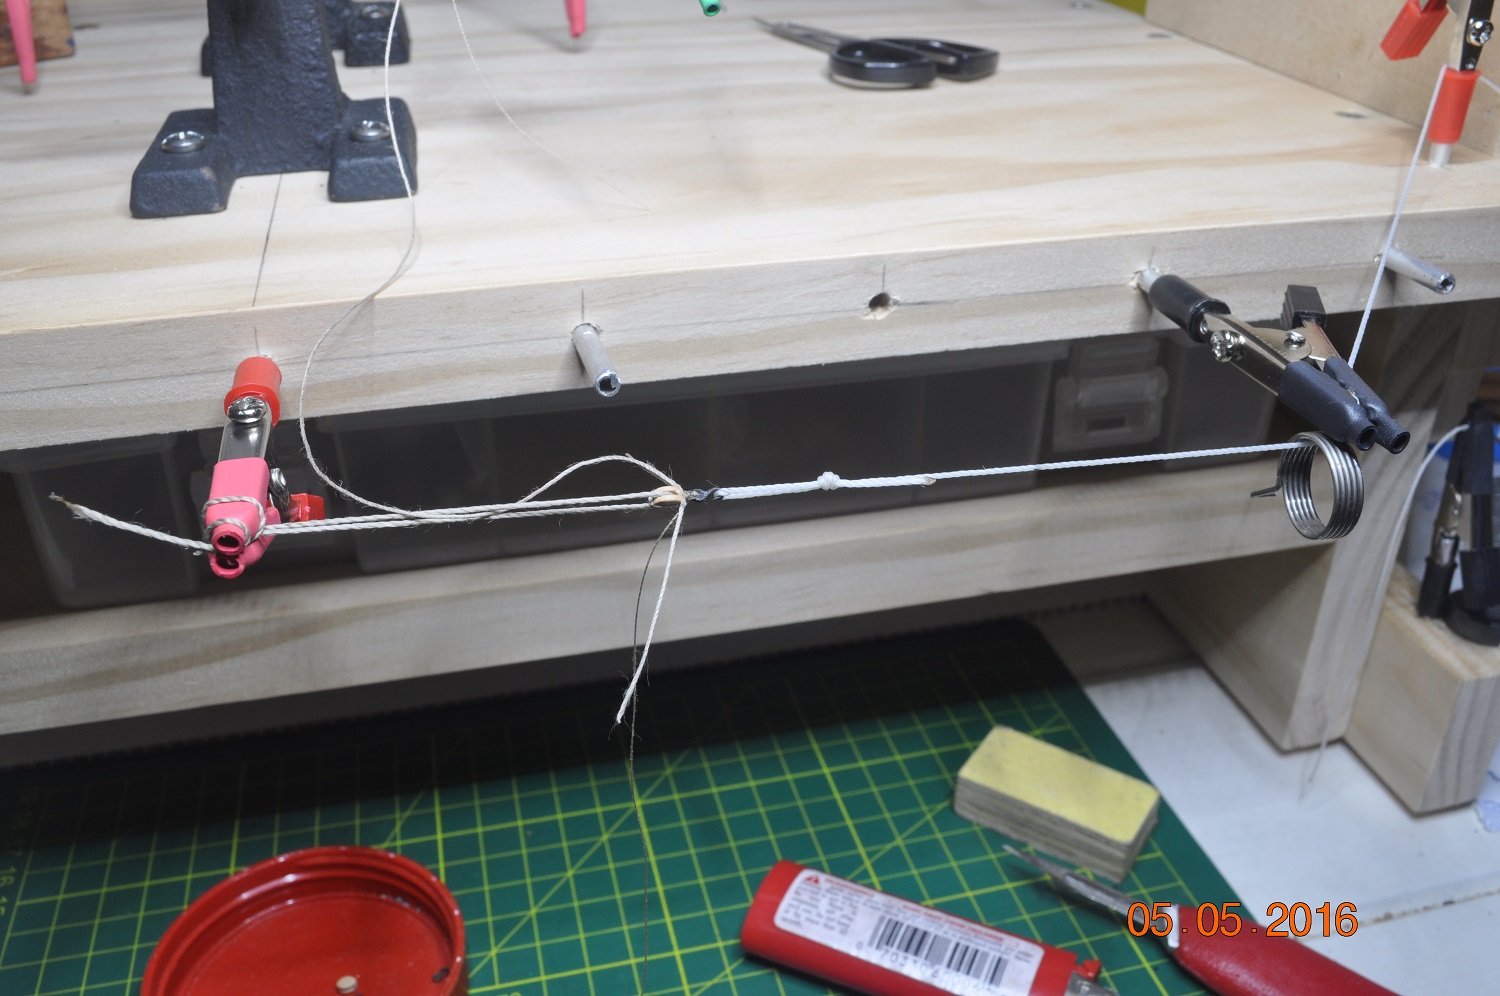
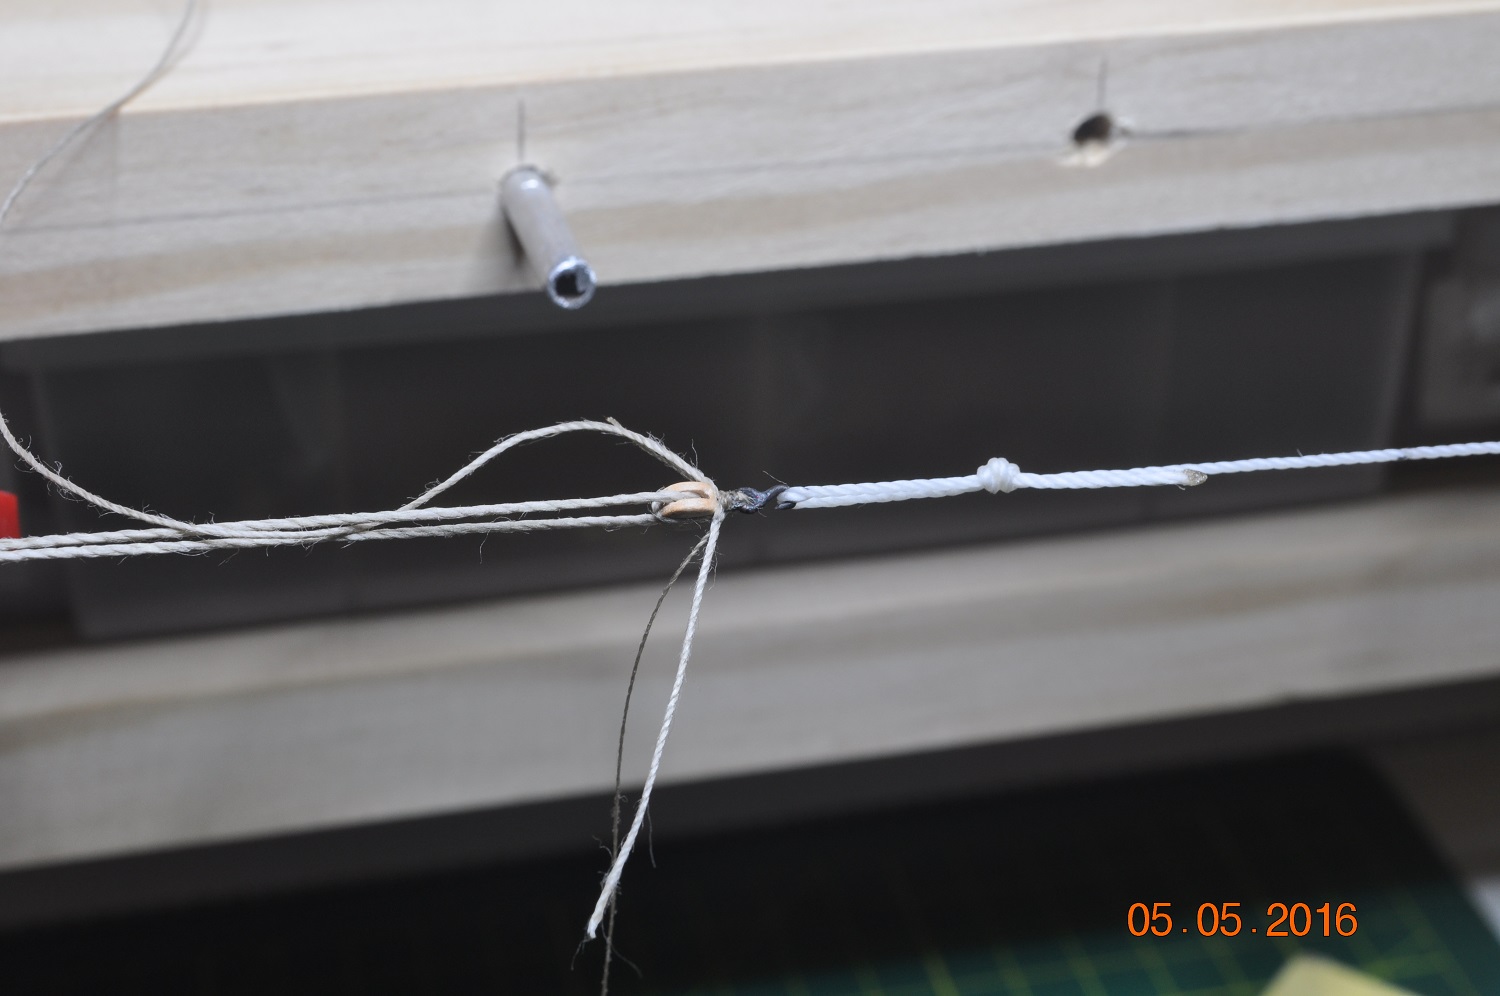
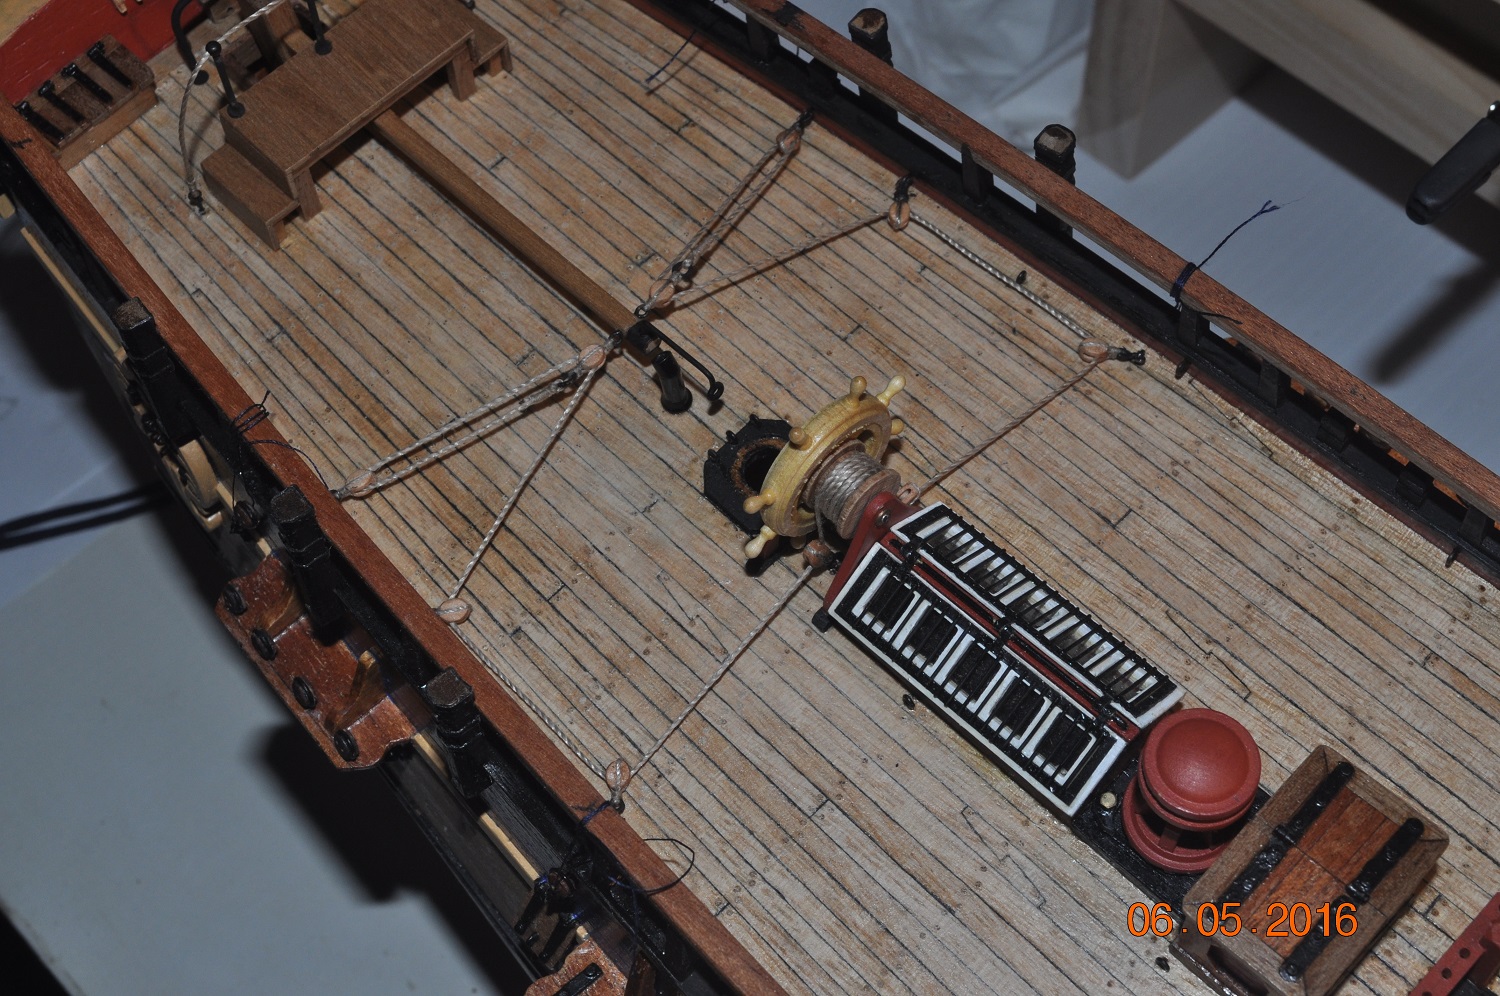
Back in the Shipyard. I started assembling the Rudder tackle, just by fingers, and the first 3 pulleys took me hours to complete. So I decided to construct a Rigging Station. I must thank Pat(Banyan) for showing us all his station in his log, as it has provided me with inspiration and ideas for my own. It enabled me to quickly assemble my blocks for the rudder steering tackle. I was planning on using some small rings I had purchased, but when I tried to weld them closed, too thin and not a good result(only managed 1 good one out of 4 so gave up). So I made my own out of copper wire(I will use the best circular ones, a couple not the best) The completed assembly of the rudder steering tackle on my Endeavour. I have gone away somewhat from the AOTS, in so far I have attached the tackle back from the raised tiller. I believe the steering tackle is best behind the chimney stack to ensure it does not fowl such. The raised arm on the end of the tiller,(as indicated on the drafts) existed, however was probably their for the crew to manually assist the rudder(to push or pull as it is at a height to do so) movement. I also added extra purchase on the rear line. This would, IMHO "ease" the load on the steering wheel, via the pulley purchase. Dave R