


DaveRow
-
Posts
661 -
Joined
-
Last visited
Content Type
Profiles
Forums
Gallery
Events
Posts posted by DaveRow
-
-
Welcome ca.shipwright to the Endeavour builder's club.
You will find many logs of the Endeavour on this site.
I am well into the HMB Endeavour Corel Kit 1:60 - well the hull at least.
My log is in this forum, have a look if you like, I have posted a lot of pictures and steps, as have others.
I was not too impressed with the instructions or the metal parts in the Corel Kit. Basically tossed them and using Karl Marquardt's "Anatomy Of The Ship " and crafting the wooden parts from scratch.
Happy to chat how your build goes along the way.
Dave R
-
Hi Greg,
I lost track of the hours on the ports. And still to make 10 of the smaller vertical hinges for the last lot, well I need to get my head in the right spot to do them.
The mid sized ones should open. However since I didn't/haven't "pinned" the flaps to the timber, the glue joint comes apart if too much pressure applied. So they look like they open, they should, but I won't try them.
Hi Jason,
I had a couple of earlier problems with the Walnut splitting, esp. the tight bends.
Lots of wetting and steaming was done.
Just used what was supplied in the Kit.
Dave R
-
Bit more work at the Shipyard.
Chess Trees added.
I could not source a 3.0mm dia. 1mm thick sheave, so filed down a 4mm dia. to suit.
The first picture I previously posted showing the laminated CT.
Other 2 Port & Starboard on the hull.
Dave R

- Captain Slog, GuntherMT, Philthy and 1 other
-
 4
4
-
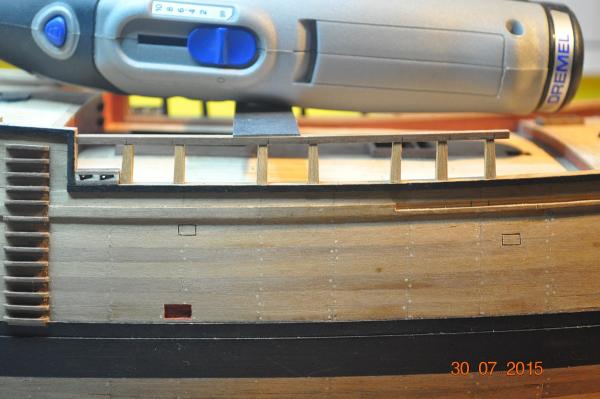
Back on deck SMs.
One left hand coming along slowly after the cut(Carpal T). Just takes time to heal, otherwise raring to go.
Had to do something though:
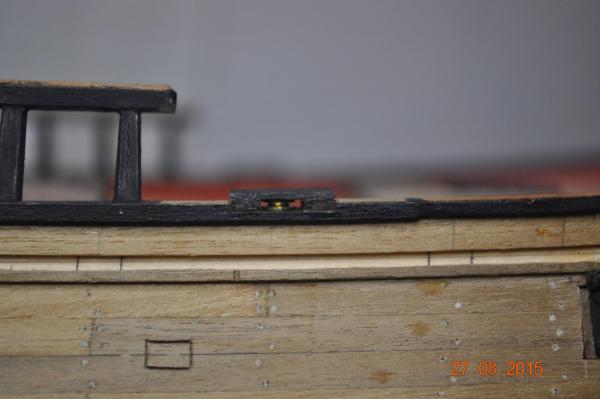
Installed the Airing Ports I had made some time ago.
Very fiddly work being so small.
Dave R


- Mike Dowling, Cabbie, kiwiron and 5 others
-
8
-
HOF,
The decking has come up a treat. Nice looking treenail system.
Dave R
-
HOF,
What no treenails(pegs) over the deck.?
The build is looking good mate.
Dave R
-
PaulV,
Went fully under.
Split next week.
Hope I am not out of action for too long.
Dave R
-
Thanks for looking in on the build log from my shipyard guys.
Your likes and comments encourage me.
Not much going on this weekend, I have a volunteer job at a canteen I a run for a Rugby carnival.
Then Wednesday have a Carpal Tunnel Op on the left hand. That may slow me up a bit for work on the Endeavour for a while as well.
Plenty of time to plan work ahead though.
Dave R
-
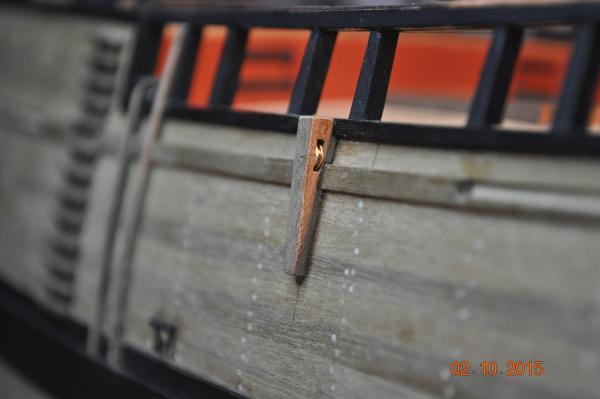
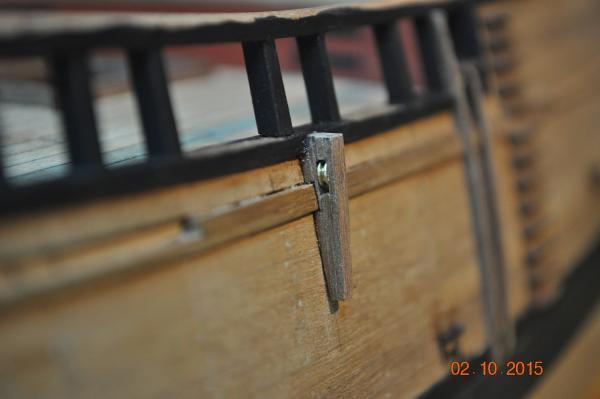
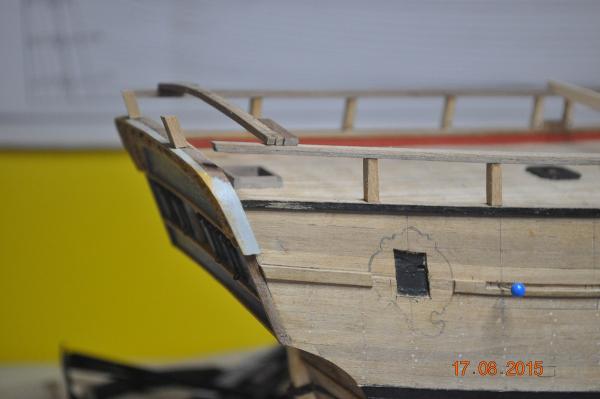
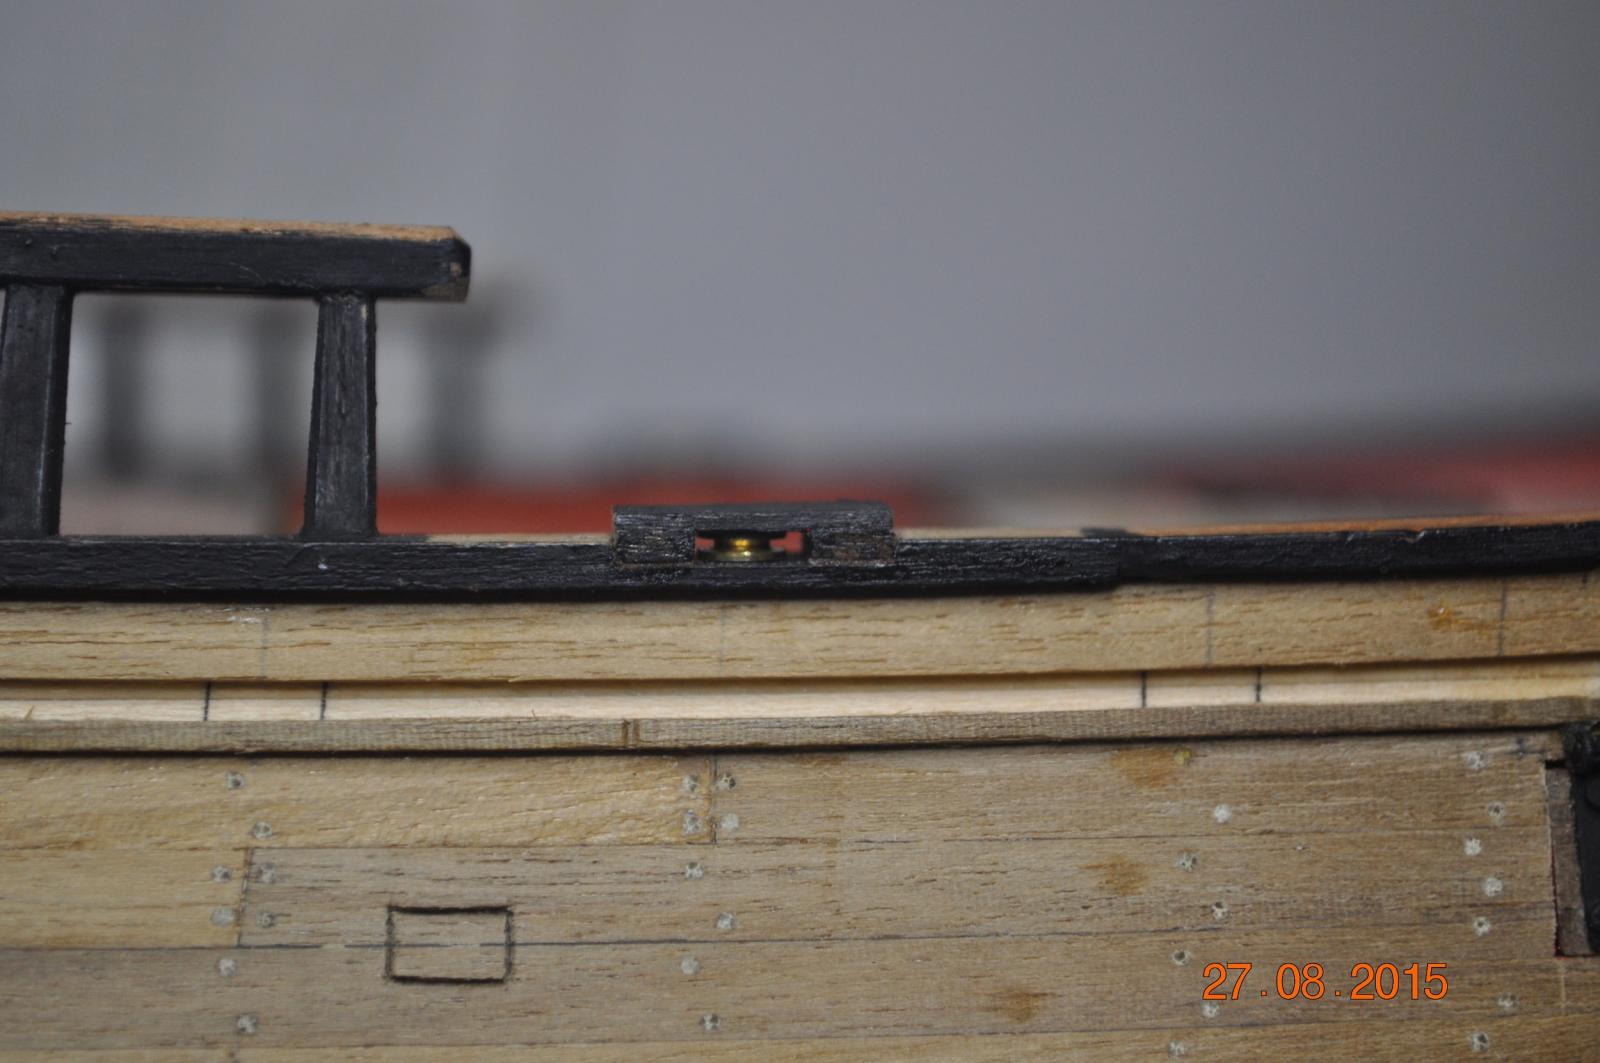
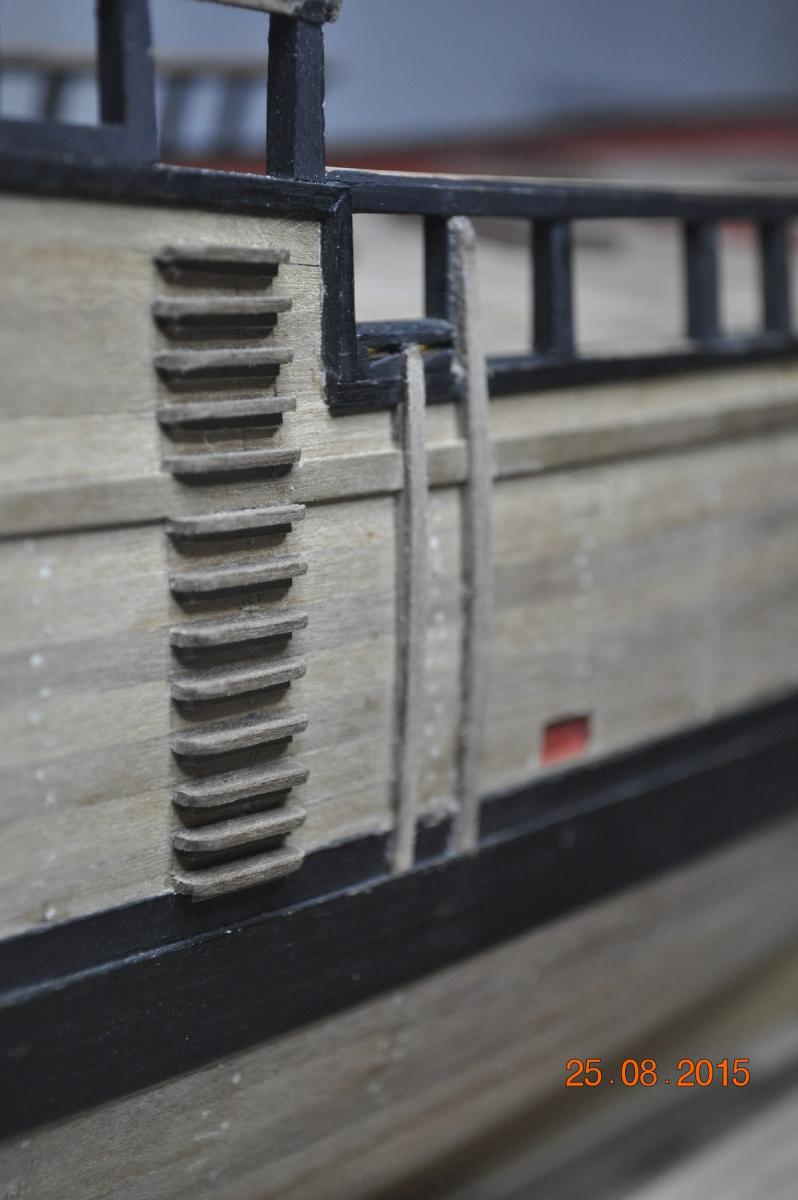
Tack Fairleads completed.
This is the Starboard one, recessed into the gunwale.
I've laminated some timber strips for the Timberheads.
Generally they look to be 3mm x 4mm in section, all on the gunwale in the AOTS.
However I noticed on the Replica in Sydney, some are on the inside of the aft gunwales(4 per side it looks like).
Dave R
-
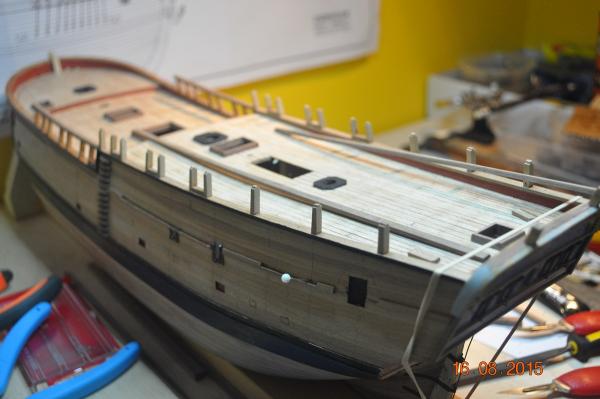
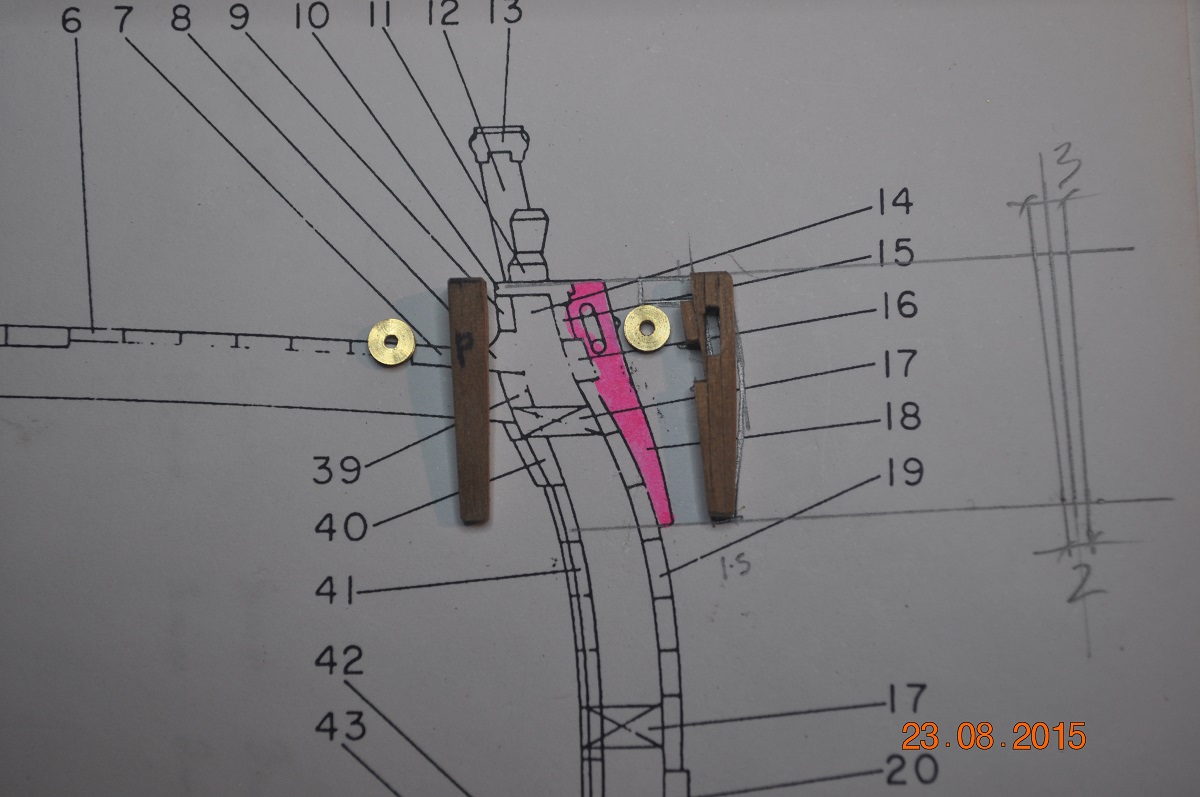
Shipyard Update,
The build has been constructing the Chess-trees.
Each is a lamination of 3 x 1mm layers to make the 1mm slot for a sheeve. Plus a small piece on the back to fit between the gunwale and sheer strake. I want to use a 3mm dia sheeve that 1mm thick, haven't got one yet !. Searching.
The other action in the yard is adding the skids to either side of the hull. I first glued a 1mm deep layer onto the hull, which serves as a base for a further 1mm skid. Pictures below.
Working on the Tack Fairleads next.
Dave R


- maggsl_01, Beef Wellington, BANYAN and 3 others
-
6
-
HOF,
Have fun constructing the Endeavour.
Have a look at the logs of the Endeavours on this site, quiet a few different ways to do the bow.
I planked both layers from bow to stern. Takes a while but I enjoyed it.
Let me know if you would like some info on planking and picture of the Endeavour replica bow planking. This info is available on the net, I just collected it over time. PM me.
Dave R
-
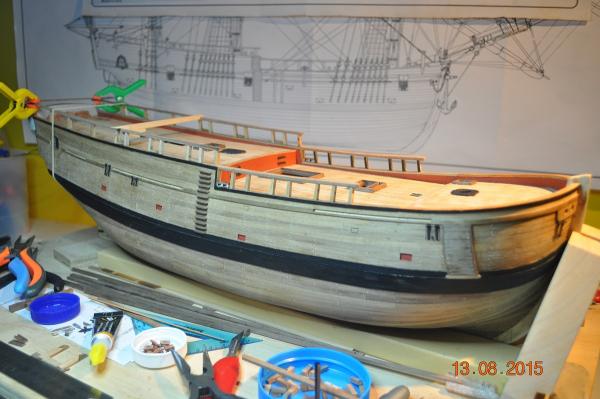
Thanks for looking in at the progress guys.
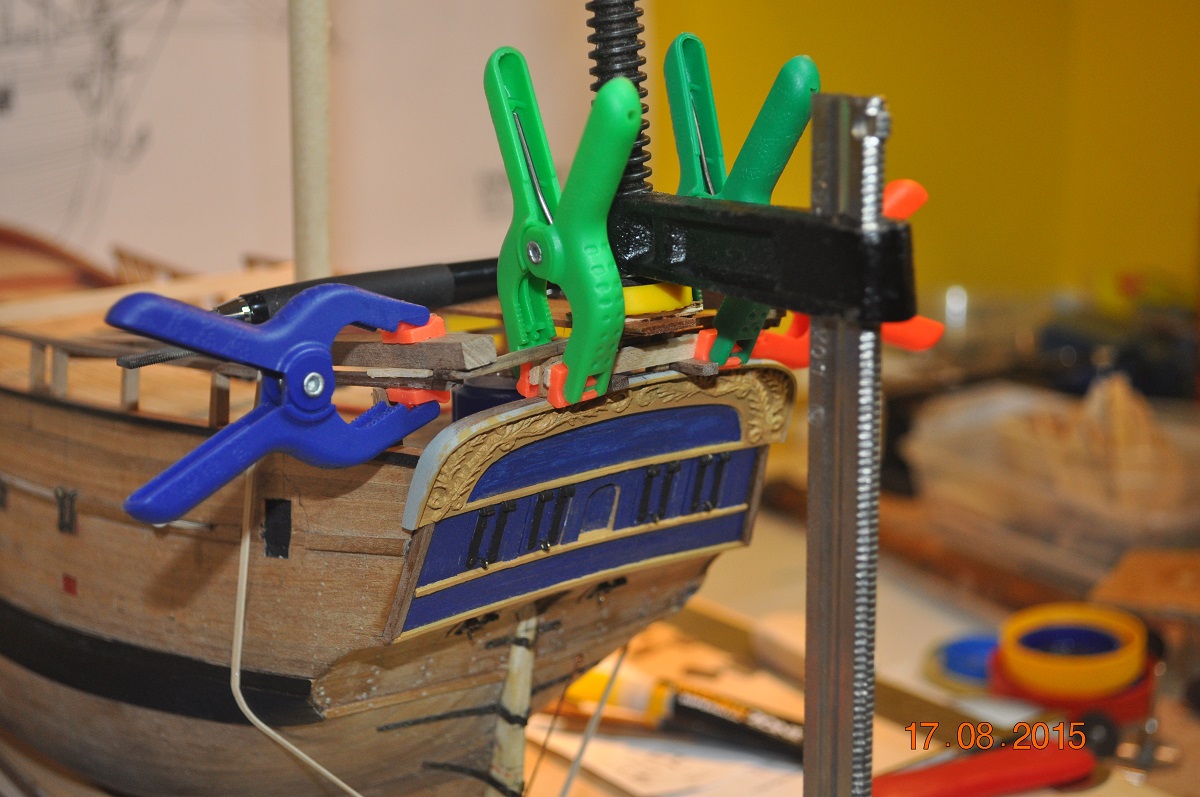
The stern Roughtree is now on, another step forward.
Below is a picture of the clamping on the stern rail whilst the glue dries, does your clamping look like this at times?
The rounded ends of the rail sit inside the swivel Gun Stock(one of the pics below shows how this will look)
Each of the long side rails have another 1mm to add on top of the rail. I left that off thinking it would be easier to bend the 2mm rail to follow the gunwale(that worked fine). The 1mm will butt up to the curved end of the stern rail, so it won't be a 2mm step only 1mm. That should look fine.
Added a bit of black to the stanchions - looking better.
One should contemplate doing the deck fit-out before doing too much more to the hull, working over the rails.
Dave R


-
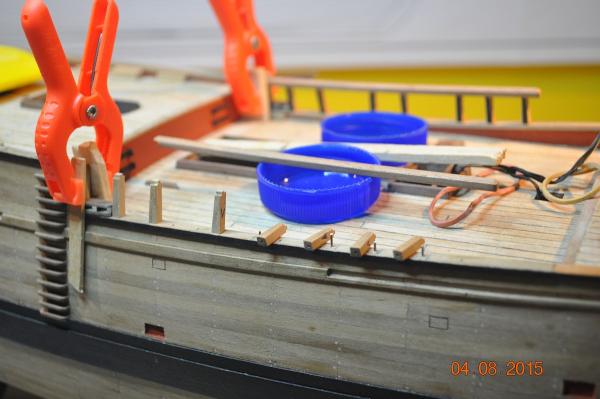
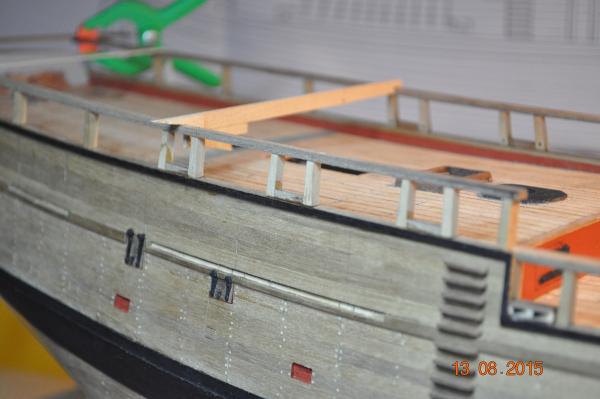
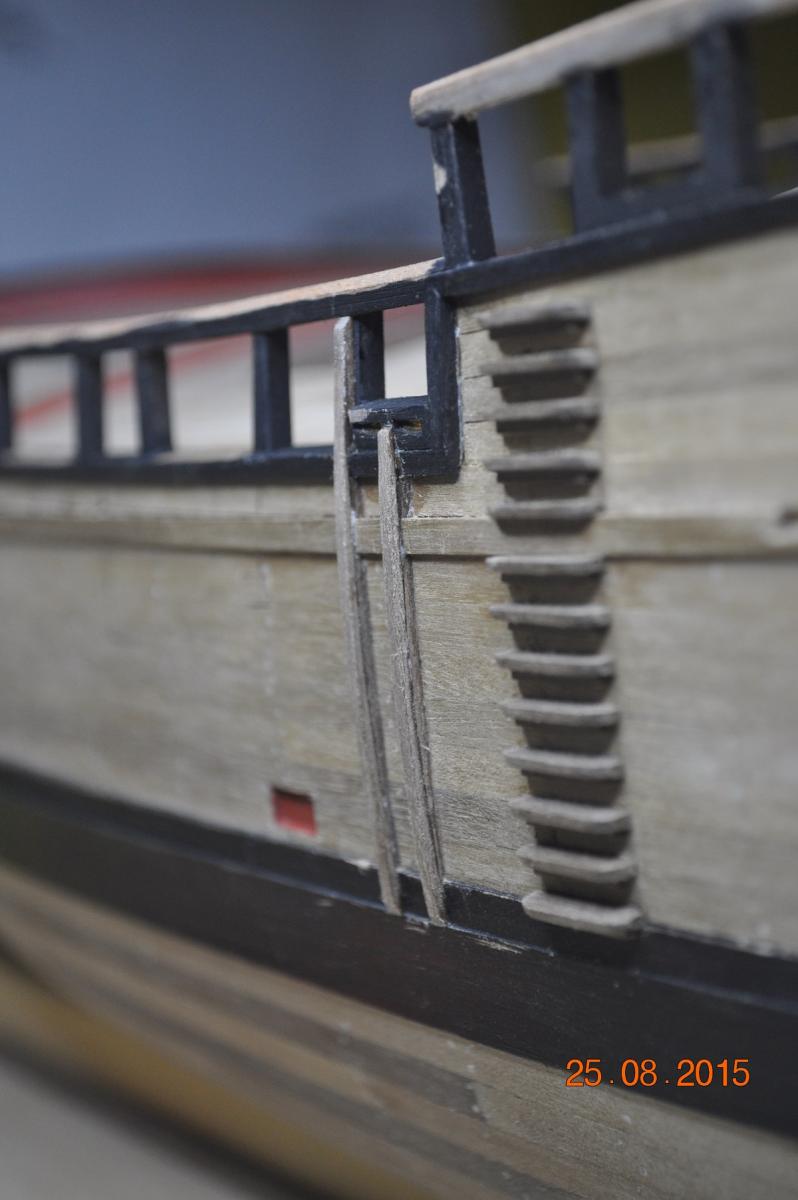
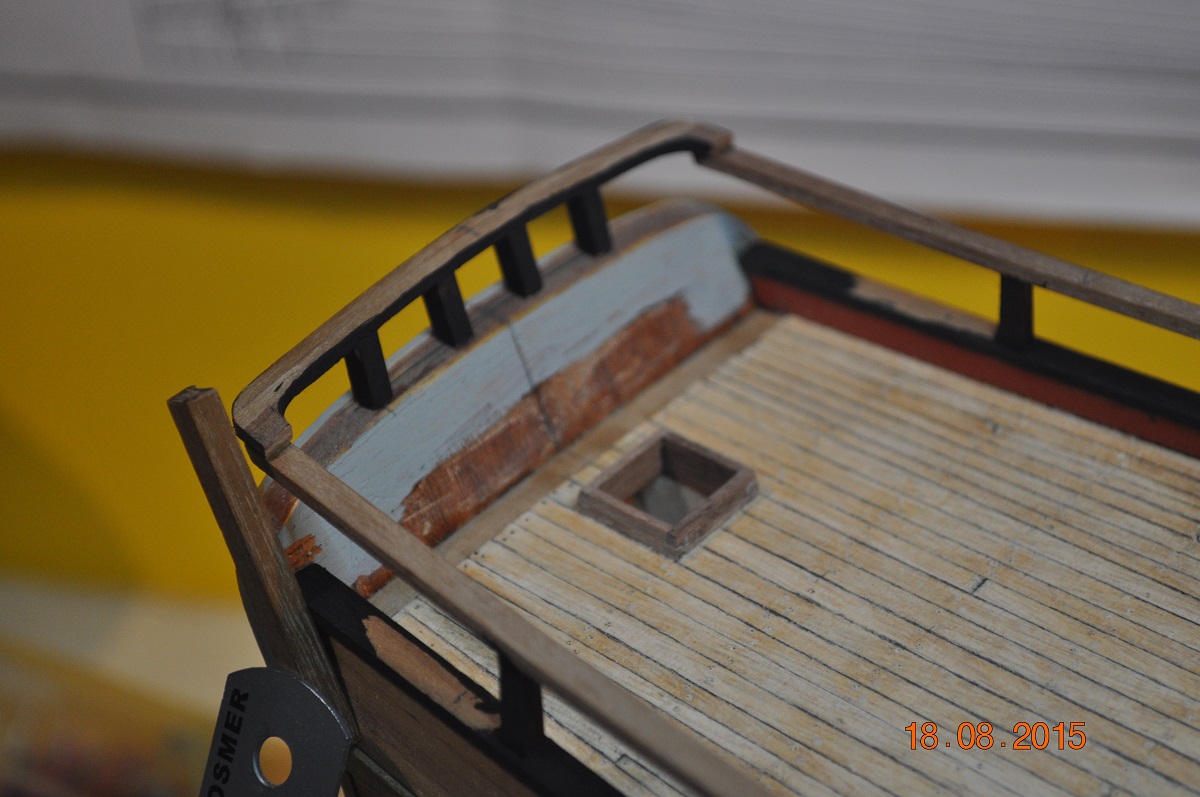
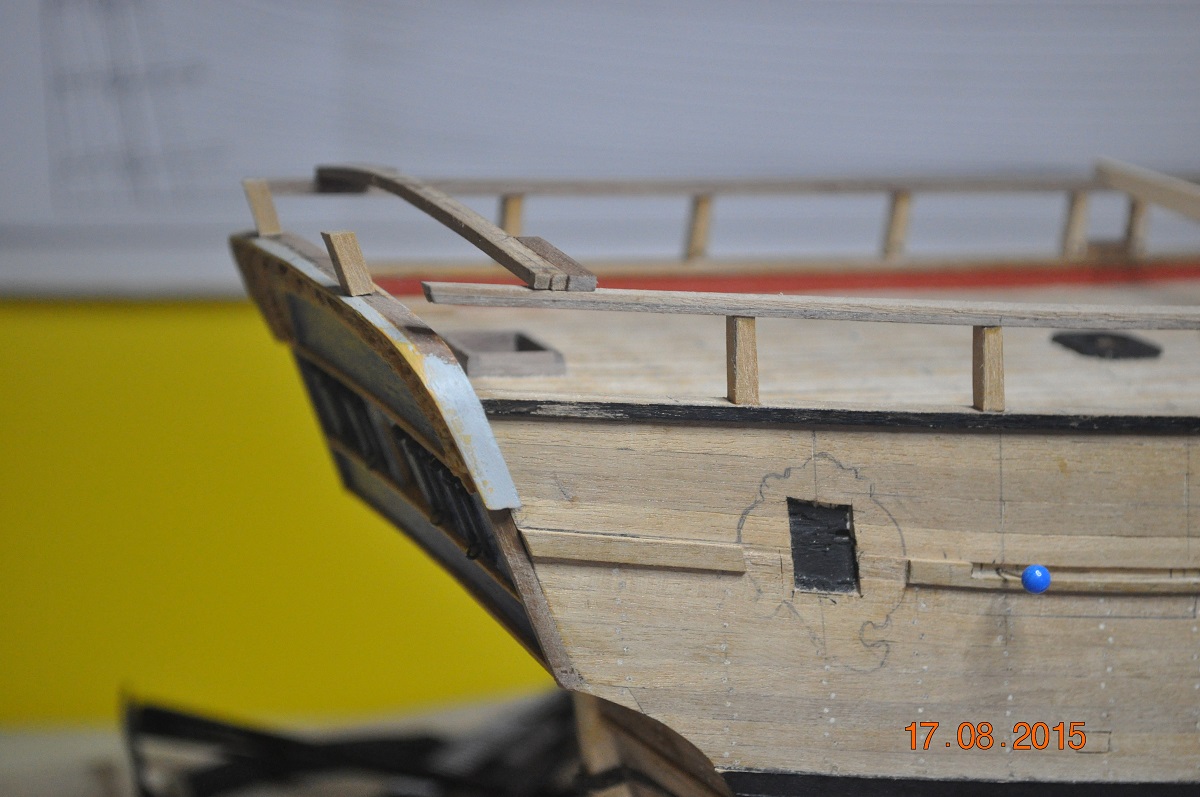
Roughtree Update shipmates.
I snapped a shot of the rear deck stanchions just before I glued the top Roughtree rail on. All the tops notched to provide a firm fit into the rail. Very pleased with this method.
Have moved onto the stern rail now.
I finally glued my stern window piece onto the boat. I made this piece months ago and although some more details to go on, need it firmly in place to fit the stern Roughtree on.
Am preparing the rail, taking into account the curvatures(horiz & vert.) and the joints either side. Nice challenge. I am planning to fix the rail over/onto the side rails like the replica, bit of a tight curve at the ends.
As they say, that's the plan.
Dave R
- GuntherMT, Beef Wellington, UdoK and 1 other
-
4
-
Hi Jason,
I made all the pieces from stock strips supplied in the Kit.
Mostly from 3mm x 3mm and 4mm x 1mm.
From a previous post, the Roughtree rails are rebated to take the stanchions.
Dave R
-
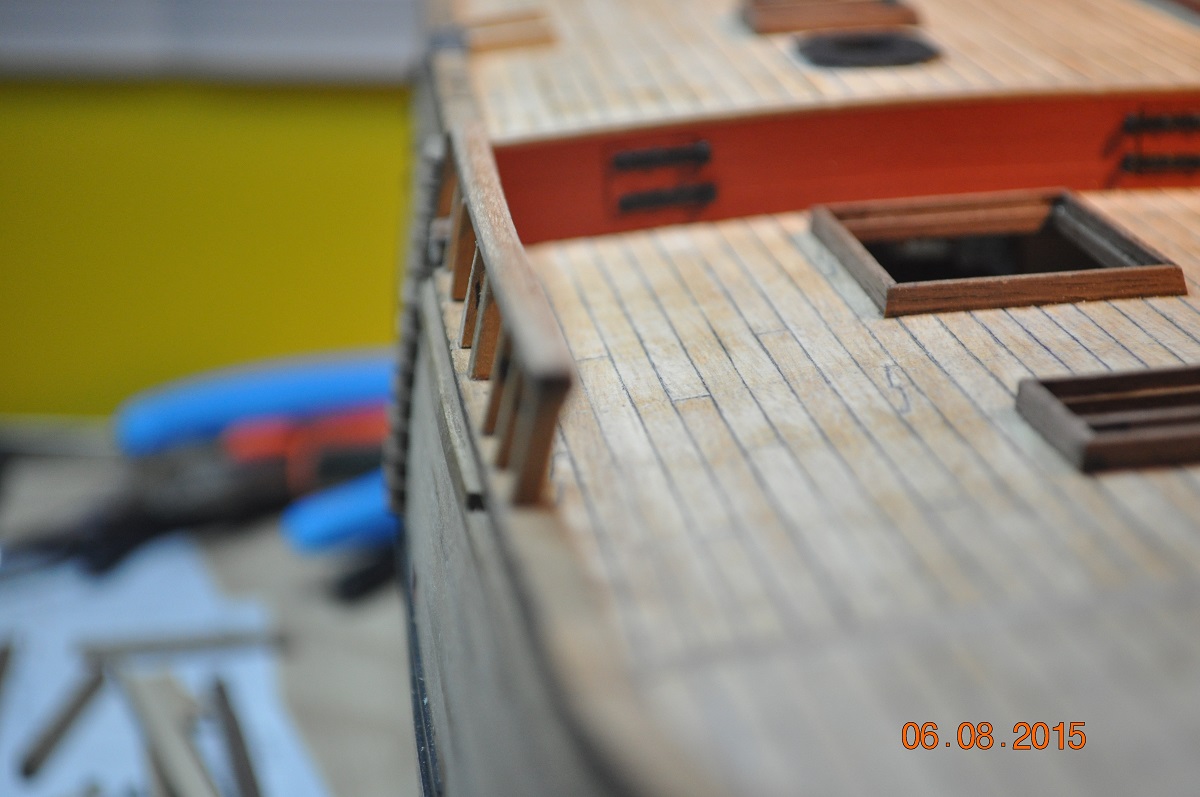
Hello Shipmates,
Seems a while that my shipyard has posted an update. Been busy making the stanchions and Roughtree rails.
Each stanchion bottom double bevelled, length tapered, top double notched.
A few pictures of where we are at for now.
Each stanchion is pinned to the gunwale, the top notched to slip into the rebated Roughtree rail. A lot of work but assembling and aligning worked out very well.
I have the stern Rougtree rail gluing at the moment(pic), she is double curved to sweep over the Taffarel and join either side Roughtree rail. Probably join as the replica is.
The rails have been a welcome distraction from the airing ports.
Dave R


- Captain Slog, Bobstrake, UdoK and 4 others
-
7
-
Hi Mike,
Looking ship shape.
Neat job I must say.

Hope mine comes out as good.?
Dave R
-
Love the shot of your build and the similar of the Endeavour.
Great work.
Dave R
-
Hi Greg,
I have that photo. One of the many you sent link for me to download - remember.
I went with the thicker 3mm deep(180mm) for the mid roughtree rail.
Bevelled the top like in AOTS so it did not look so chunky.
When you say the stern roughtree 120mm, you refer to the roughtree rail over the stern ?
Pic below.
Glue is drying on the mid rails, will post Pic when it is set hard.
Dave R

-
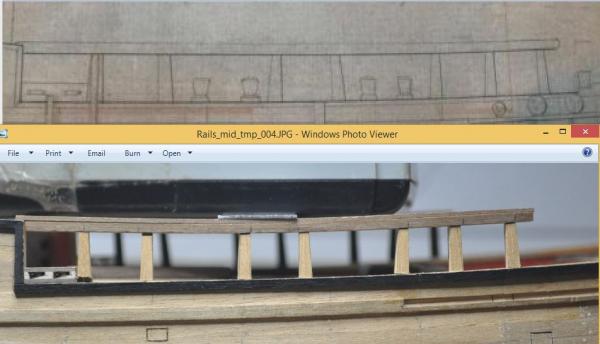
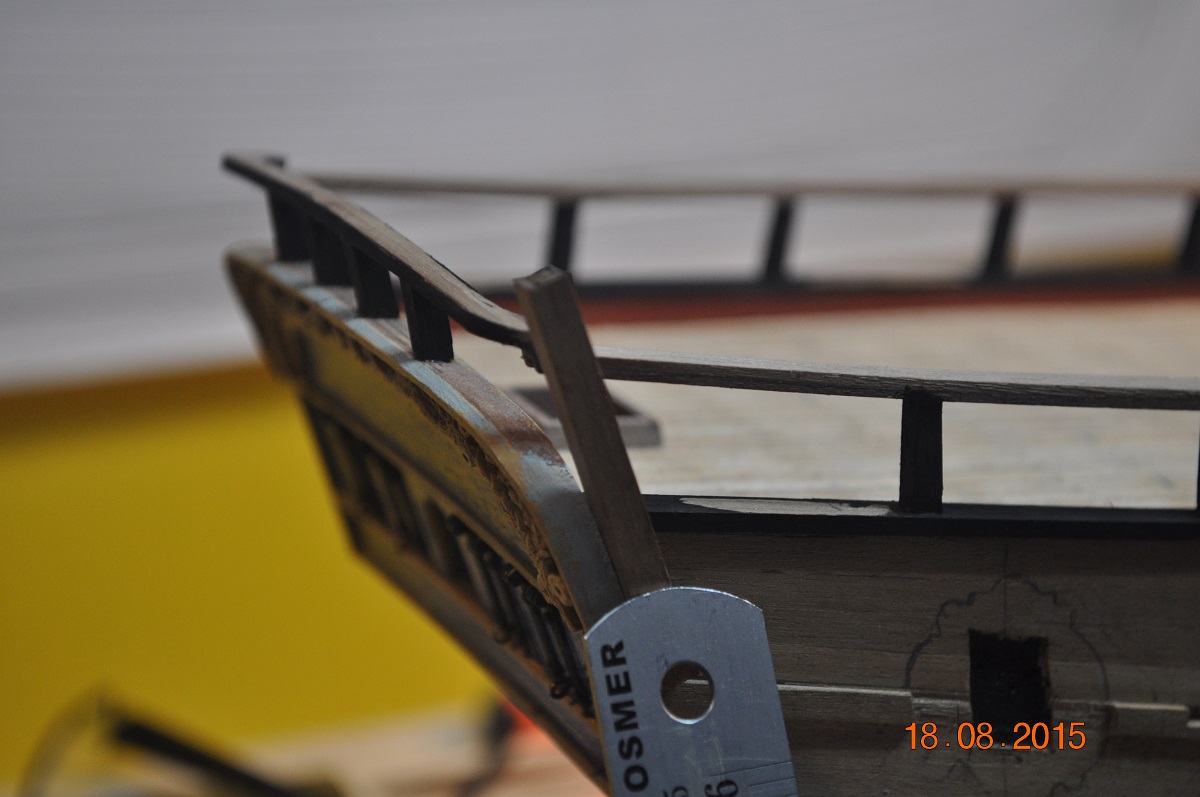
Hi Paul/Steve/Pat,
I agree the roughtree rail should rest over the quarter rail. I want it too. However the aspect between the stanchions threw me, it didn't look right, I wasn't happy - help!.
But having a closer look at the draft you posted Steve, gave me a thought.
The draft roughtree rail looks quiet thick. Thicker than the gunwale.
I have my gunwales 2mm(at 1:60 = 120mm) and the roughtree rail at 2mm thick, so if the rail was to go to say 3mm(180mm) maybe it would work out a bit better. So temp. I added 1mm onto it and compared to the draft - Pic below.
Bit of fiddling and I reckon I can live with this solution.
Great you guys throwing the 10 cents in. Has helped me come up with a solution.
Dave R
-
Thanks for looking in and your kind comments on the hinge posts Greg/s, Rohan and Steve.
My fingers were too big, going the way of jigs and using tweezers helping a lot.
Dave R
-
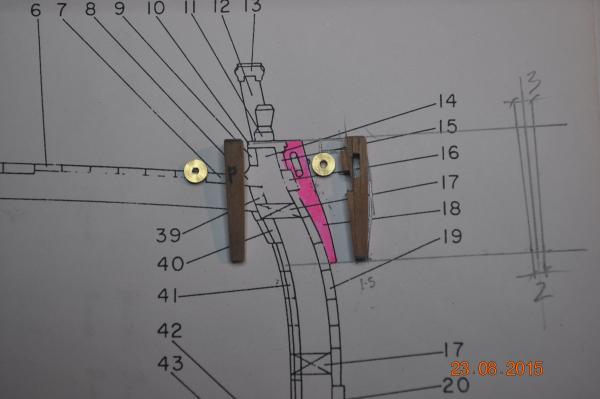
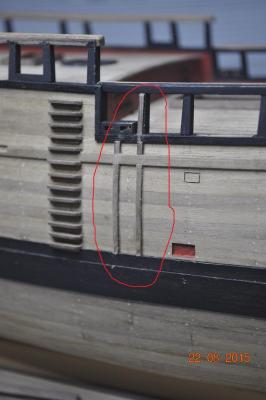
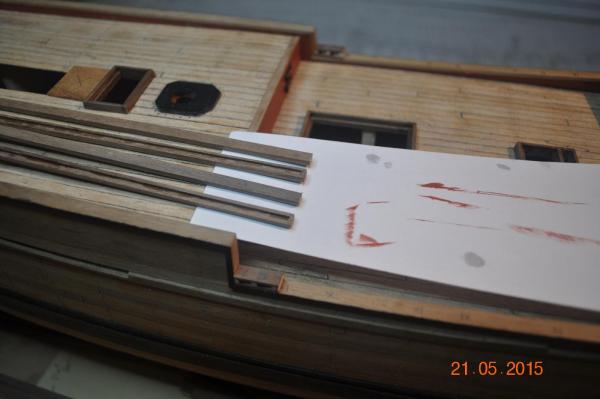
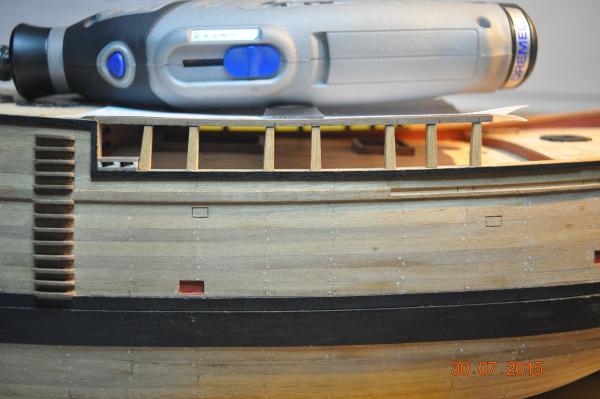
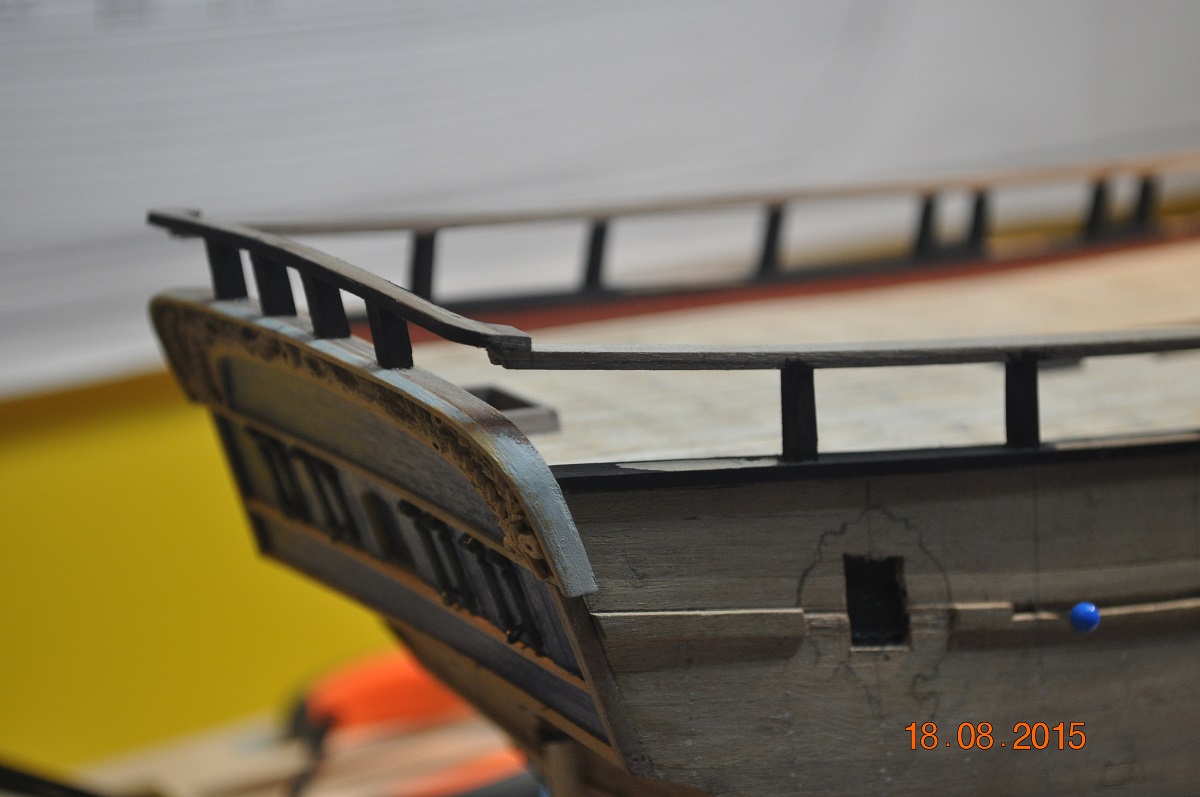
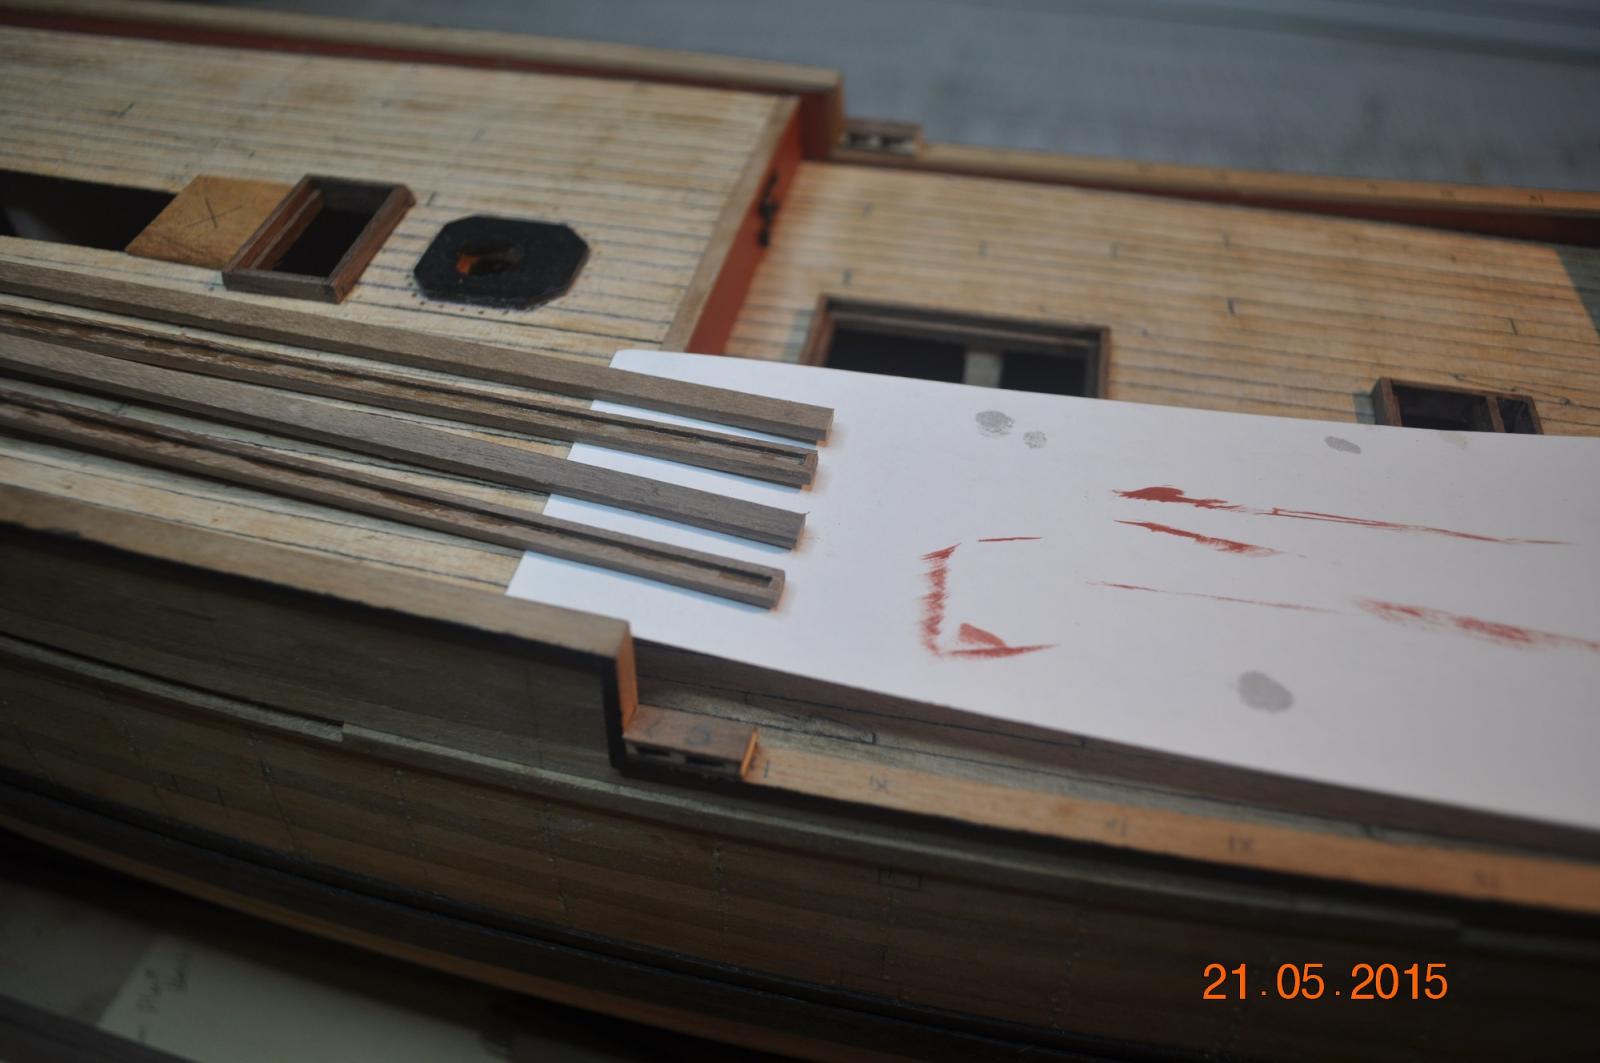
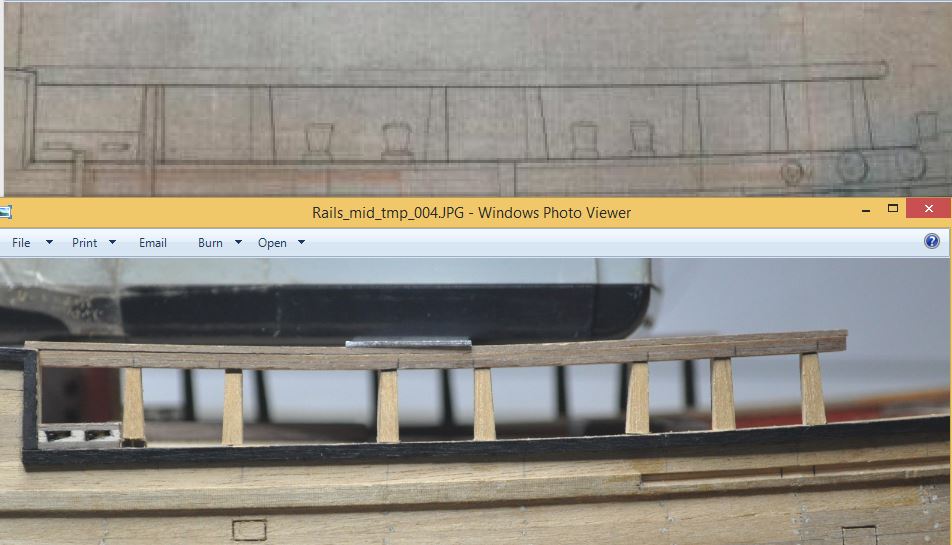
Problem Huston,
I hope I have done the right thing.

I started having a look at the Roughtree rails while the glue was drying on the mid Airing port hinges.
The Waist(front) Roughtree Rail(WRR); I laid out the rail with a stanchion height so the rail rested over the Quarterdeck Gunwale like in the AOTS and as many of the NRG MSW Endeavour builds. That makes sense to me. See Pic 01 below. However it did not look right as the rail looked too high, and where the cannons poke through the stanchions, had a high aspect whereas the AOTS has a wide aspect(wider than the height), and the rail is lower(in height).
Why ? Well I kept the gunwales very low to the deck, at the change in height between the Quarterdeck and Mid decks. Too late the change now.
So I lowered the waste roughtree rail 3mm.
 See other Pic 03 below.
Not happy that the rail does not lock over the rear gunwale.

There is a an Endeavour Model in the Torpedo Bay Navy Museum, Auckland, NZ that has the WRR butted to the vertical gunwale section. Maybe had the same problem. ?
I don't know if I have done the right thing now ? or what else is possible to do.
Gentlemen reading this post, ANY ADVICE - IDEAS ! Don't be shy.
Dave R
-
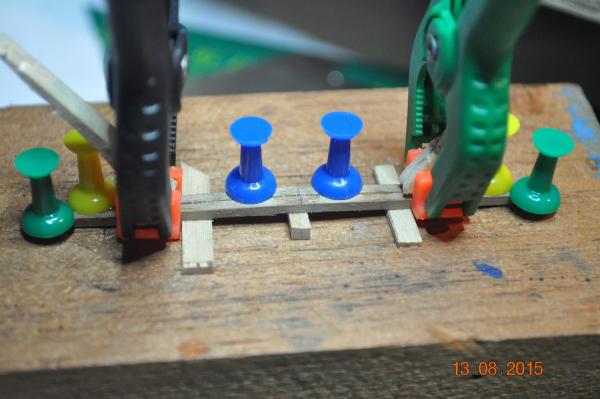
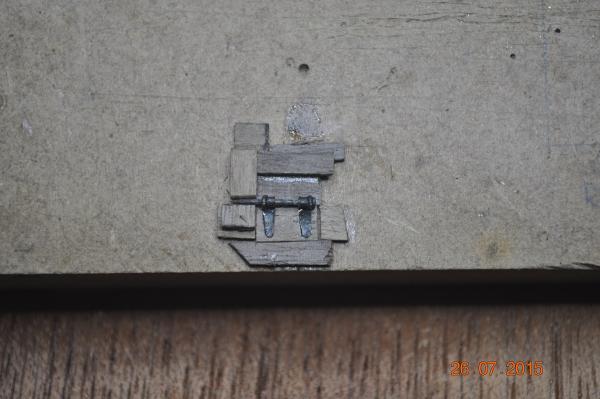
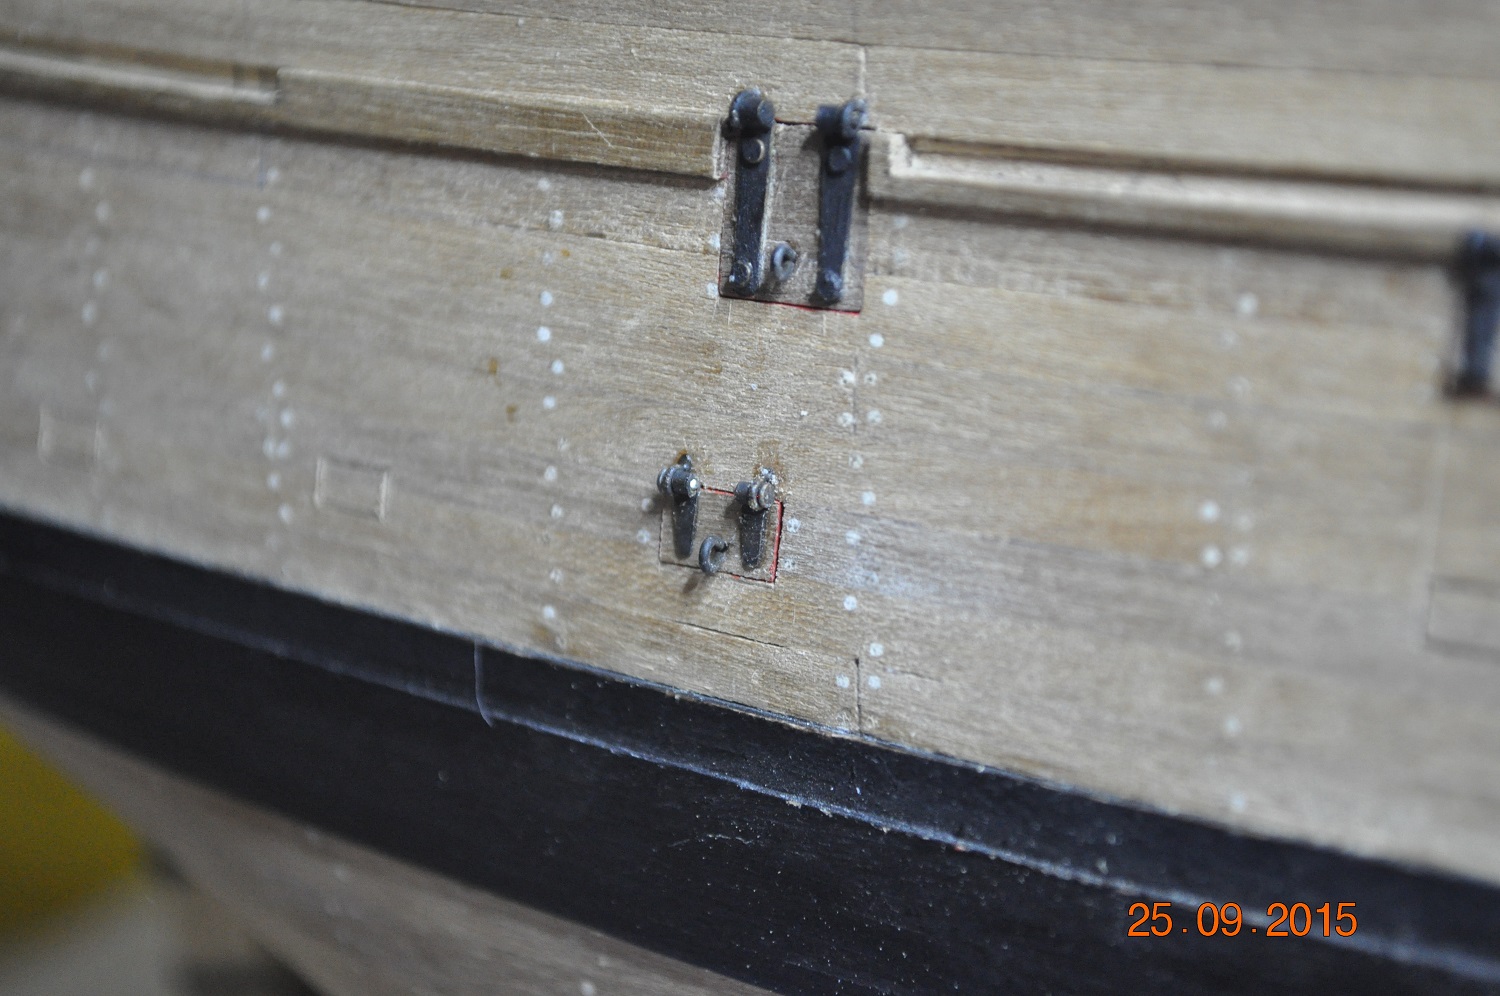
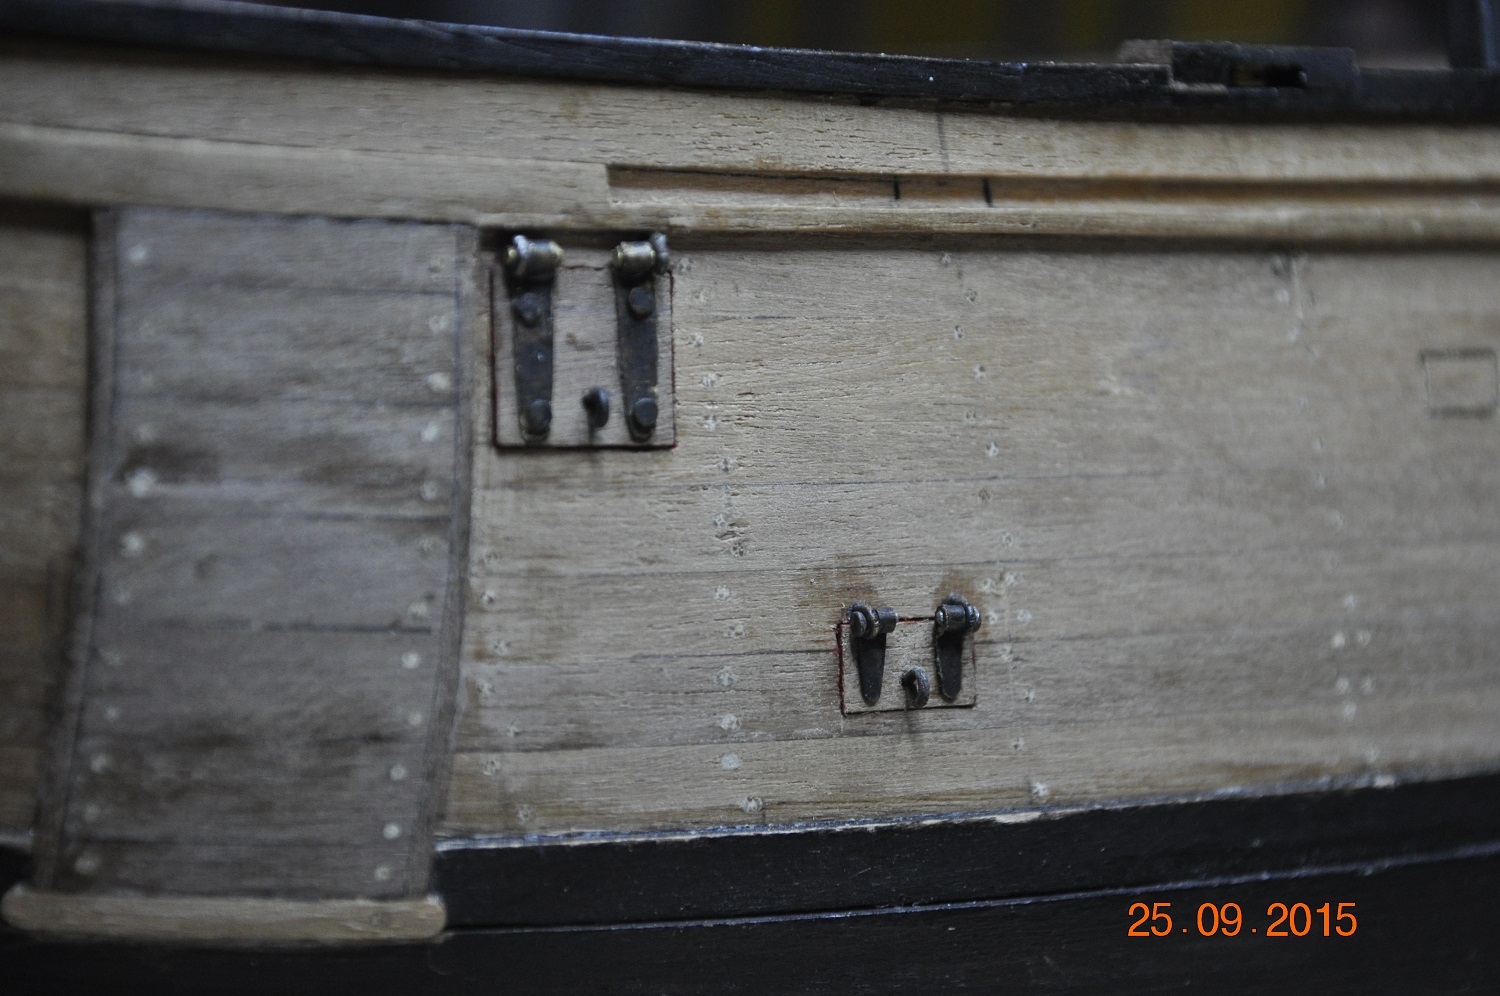
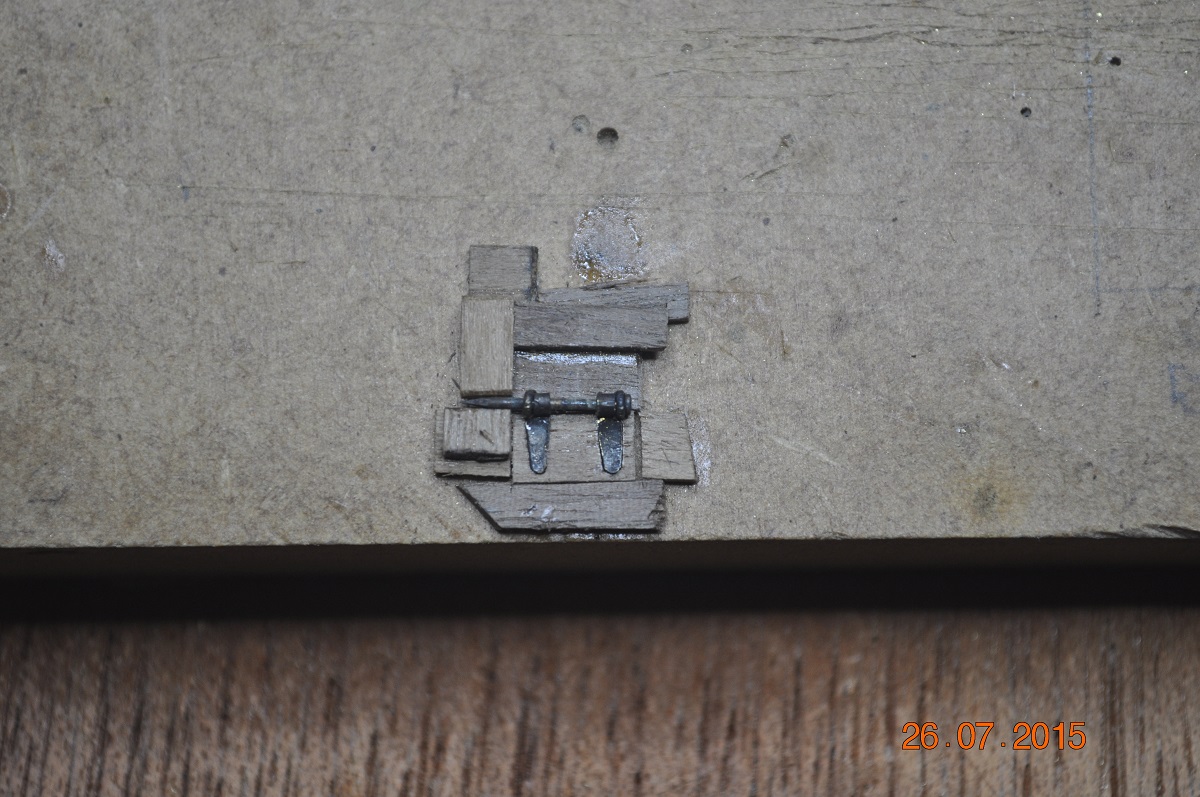
Airing Port Jig.
Bit crude, however does the intended job.
I use the crappy looking hinge glued onto a scrap piece of planking, with 2 holes drilled in the brass hinge. These are same as for the previous post alignment jig holes for the 2 x eye bolt pins.
Pic: Port Jig1
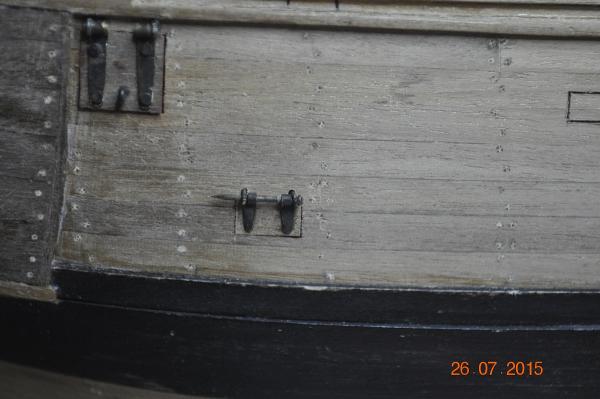
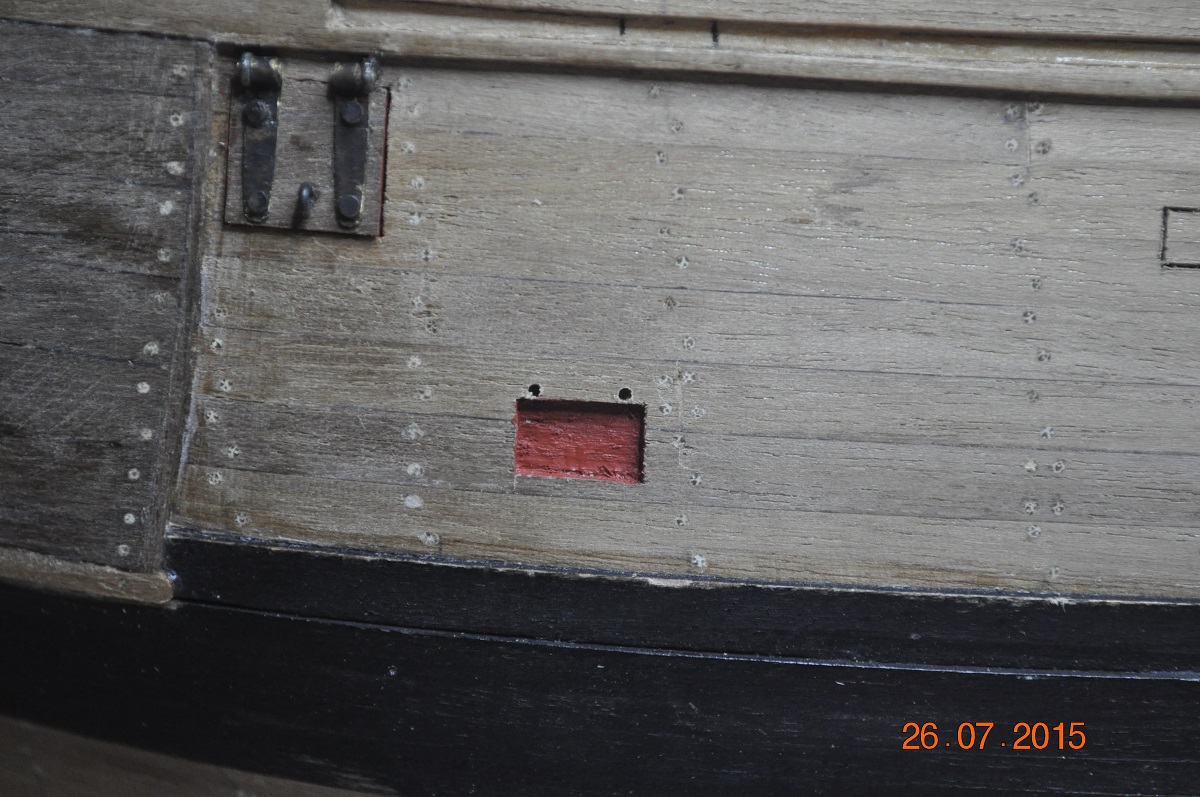
The jig is positioned into a airing port on the hull, and the 2 holes drilled through the brass holes.
Pic: Port P1
Holes drilled above the hull hole
Pic: Port P1 Port01
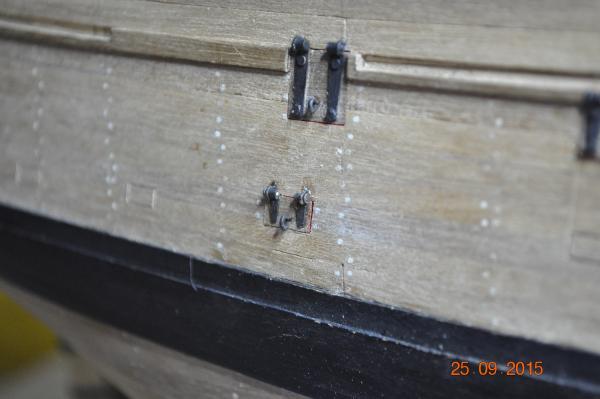
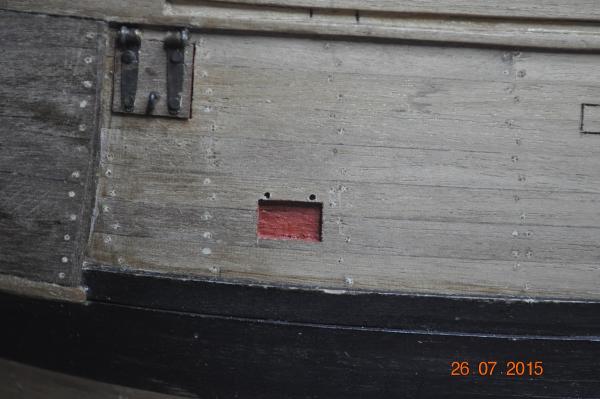
A part completed Airing Port fitted to the hull(with tmp pin).
Some more work on the pivot pins to go.
All this takes time, esp. making the sets of hinges, eye bolts, jigs etc.
And I still have the lower Airing ports to go.
Dave R

- Beef Wellington, maggsl_01, rowand and 3 others
-
6
-
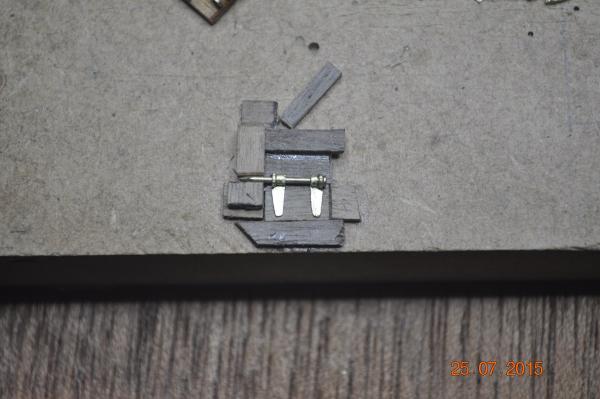
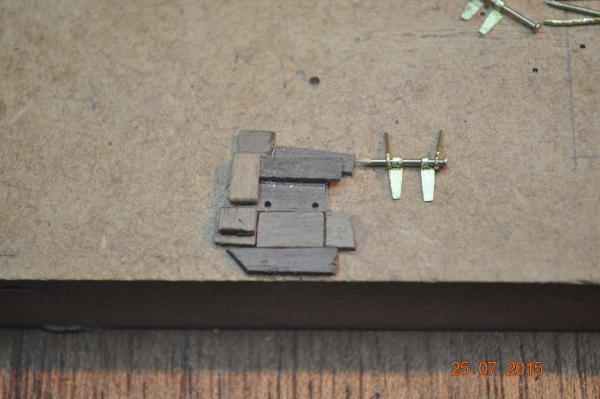
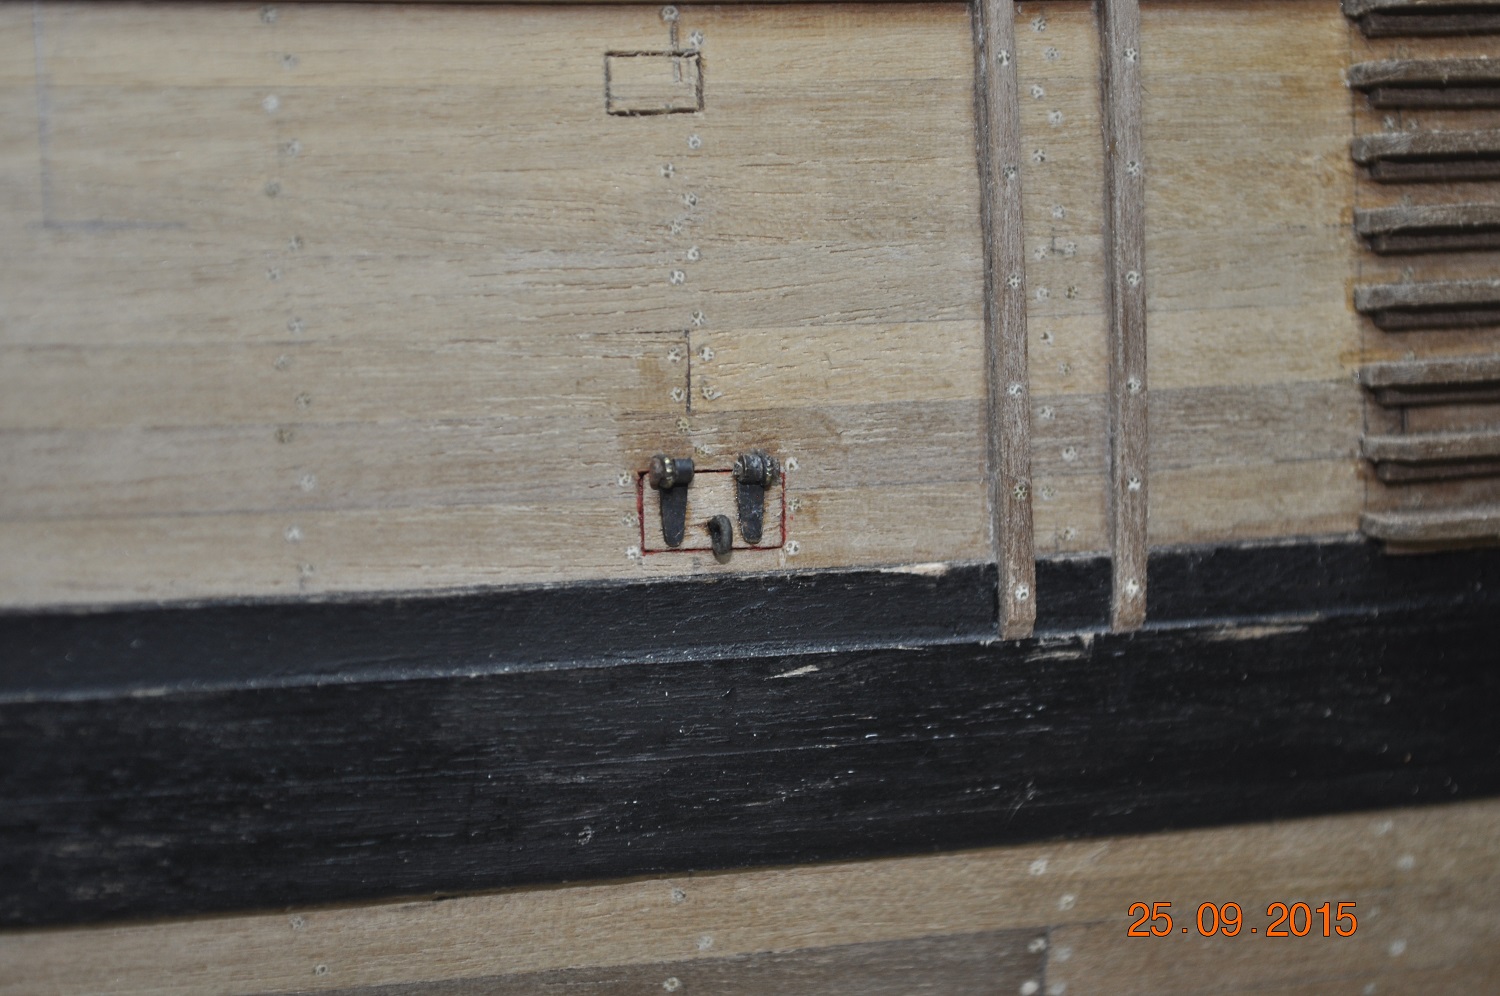
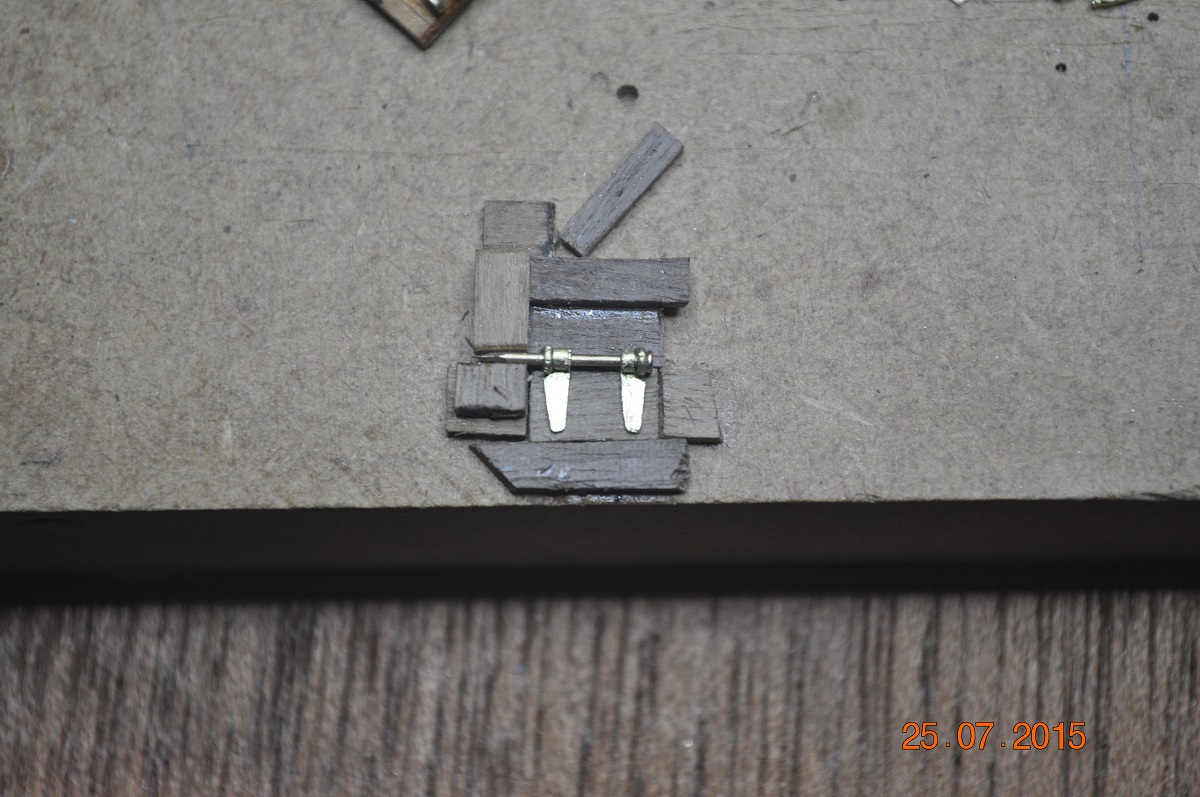
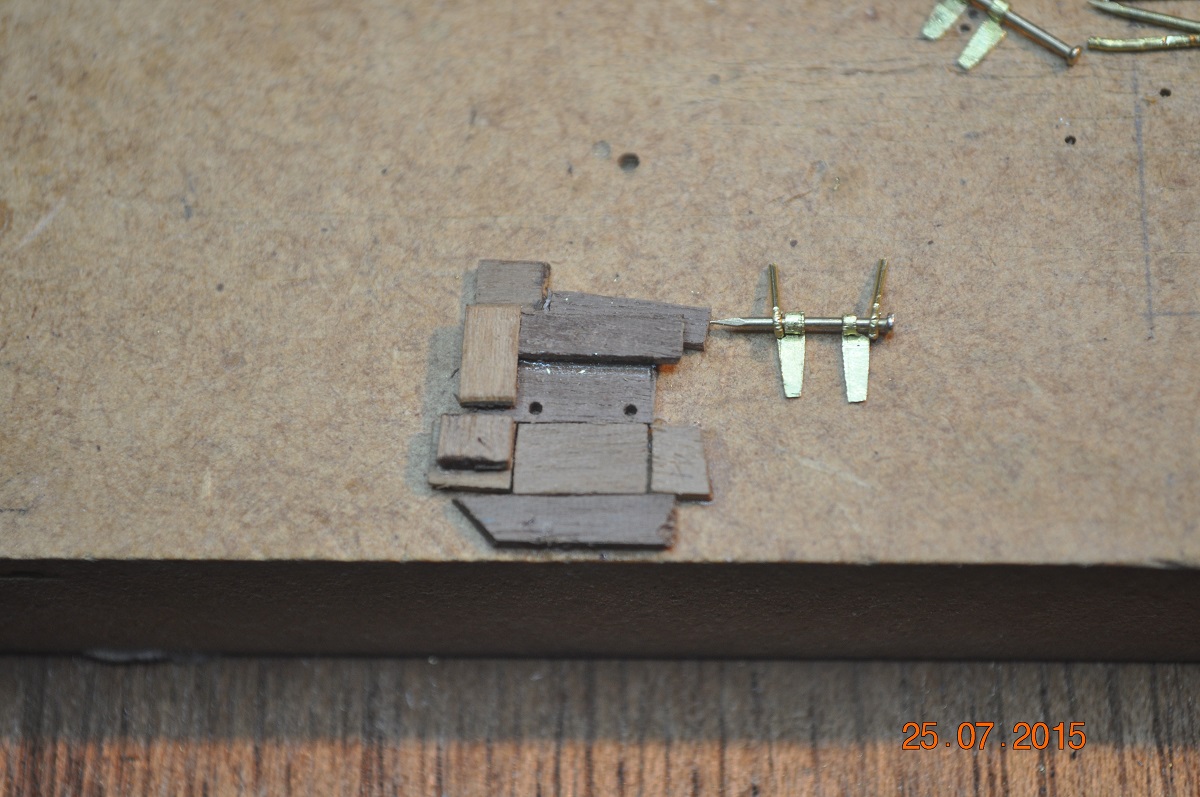
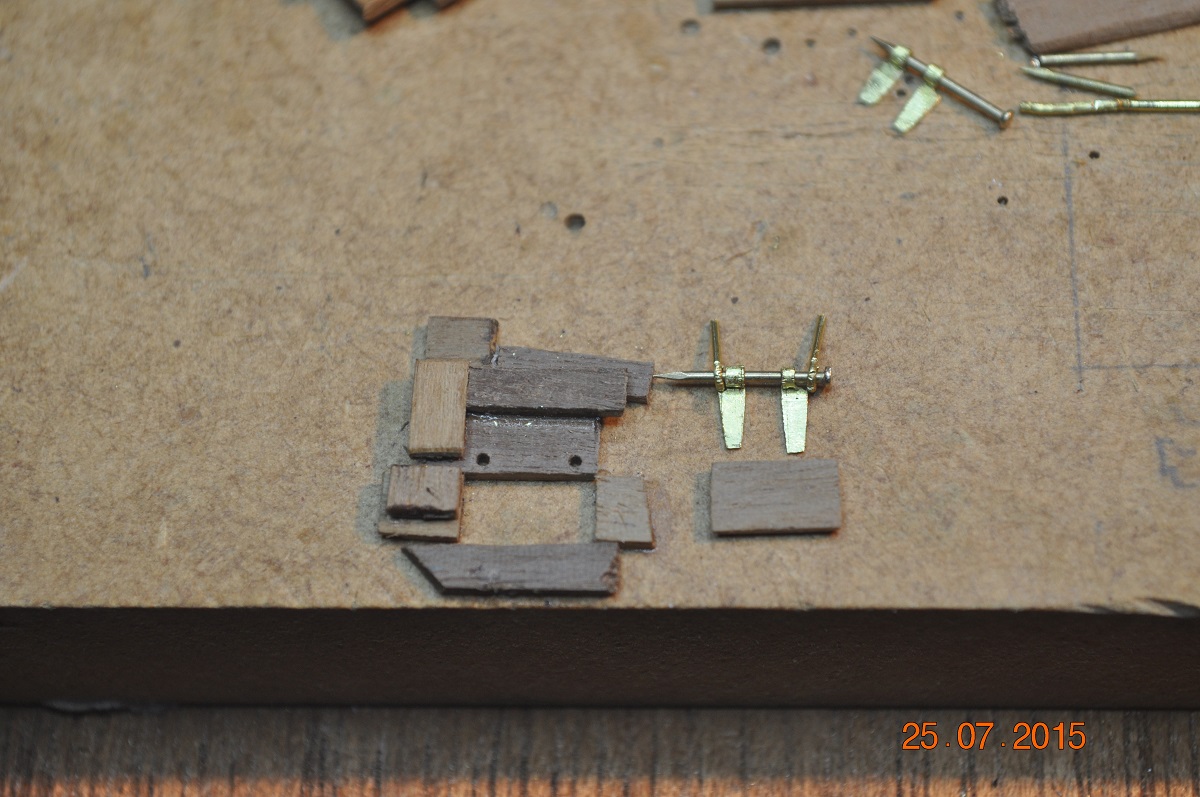
Airing Ports - update
The shipyard got smart on this one. Well hope so.
We made a jig to mount the small port timber, the 2 hinges, eye bolt and temp pinion(nail).
The series of picture hopefully indicate the alignment of the hinges whilst they glue onto the timber port.
I also have a hole drilling jig that I will use to position the eye bolt holes into the hull.
Next Post.
Dave R

- Captain Slog and UdoK
-
2
-


HMB Endeavour by DaveRow - FINISHED - Corel - Scale 1:60 - First Build Kit
in - Kit build logs for subjects built from 1751 - 1800
Posted · Edited by DaveRow
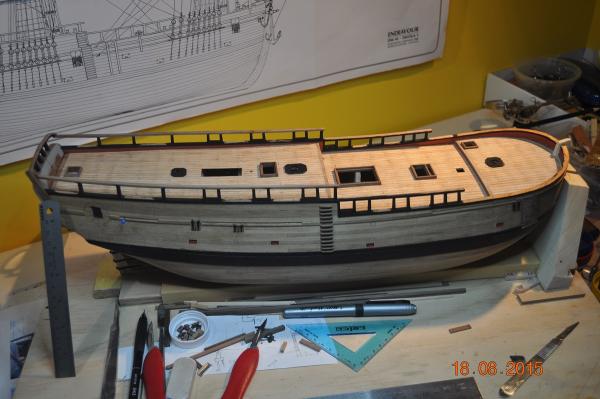
Hi All,
I made the trip to Sydney early this week to see the Endeavour at the Maritime Museum at Darling harbour.
I had planned/booked to join the Endeavour as crew for the 10 day Sydney to Brisbane Voyage, but the trip was cancelled.
So having the flight booked. I flew down and spent quiet some time on board, taking pictures, talking to the volunteers and generally getting the feel of the boat.
It was a weird feeling, as after building the model to date, I felt at ease on board, that I was kind of home. Weird eh!
Had a great visit.
Dave R