HOLIDAY DONATION DRIVE - SUPPORT MSW - DO YOUR PART TO KEEP THIS GREAT FORUM GOING! (Only 20 donations so far - C'mon guys!)
×


DaveRow
-
Posts
691 -
Joined
-
Last visited
Content Type
Profiles
Forums
Gallery
Events
Everything posted by DaveRow
-

HMB Endeavour by mikec - Eaglemoss
DaveRow replied to mikec's topic in - Kit build logs for subjects built from 1751 - 1800
Love it Mike. Looks really good. Dave R -
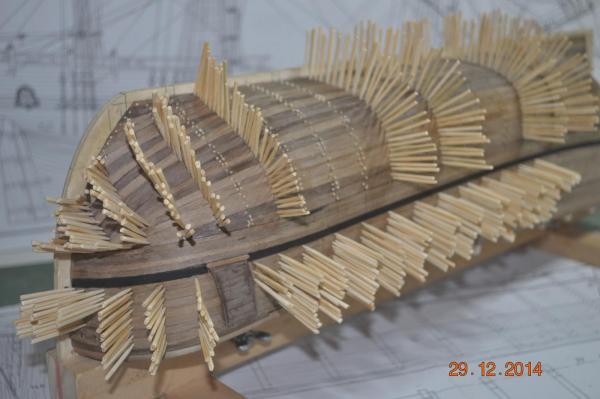
Hi Greg, Treenails - I had a look at my photo logs. I did a test run on the lower hull - just 20 odd plugs to trial the process - that was mid Nov14, and was fine. So got into it and all done by the end of Dec. My aim was get them done before 2015. I remember doing hundreds at a time, very laborious, but just kept saying, think of the end result. 1.5 months(many days) for the hull. Then the deck in early April - seemed a dream compared to the hull. Pic of the hull - memories.... Dave R
-
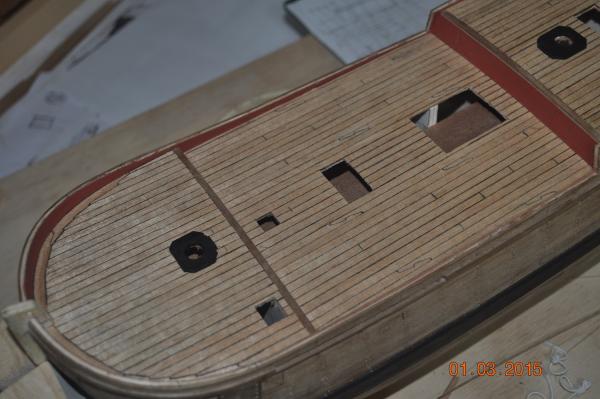
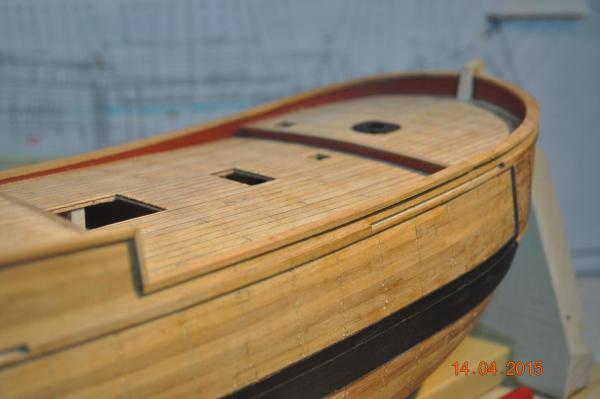
Hi Greg, Progress !! slow but steady. There are approx. 3,000 treenails(toothpicks) in the hull and that was only below the channel line(above I plan to paint the colour blue, no nails) Another 900 plus on the decking boards. The 0.4mm drill bit got a good work out. I am glad it is over, took days of drilling, gluing and trimming. Dave R
-
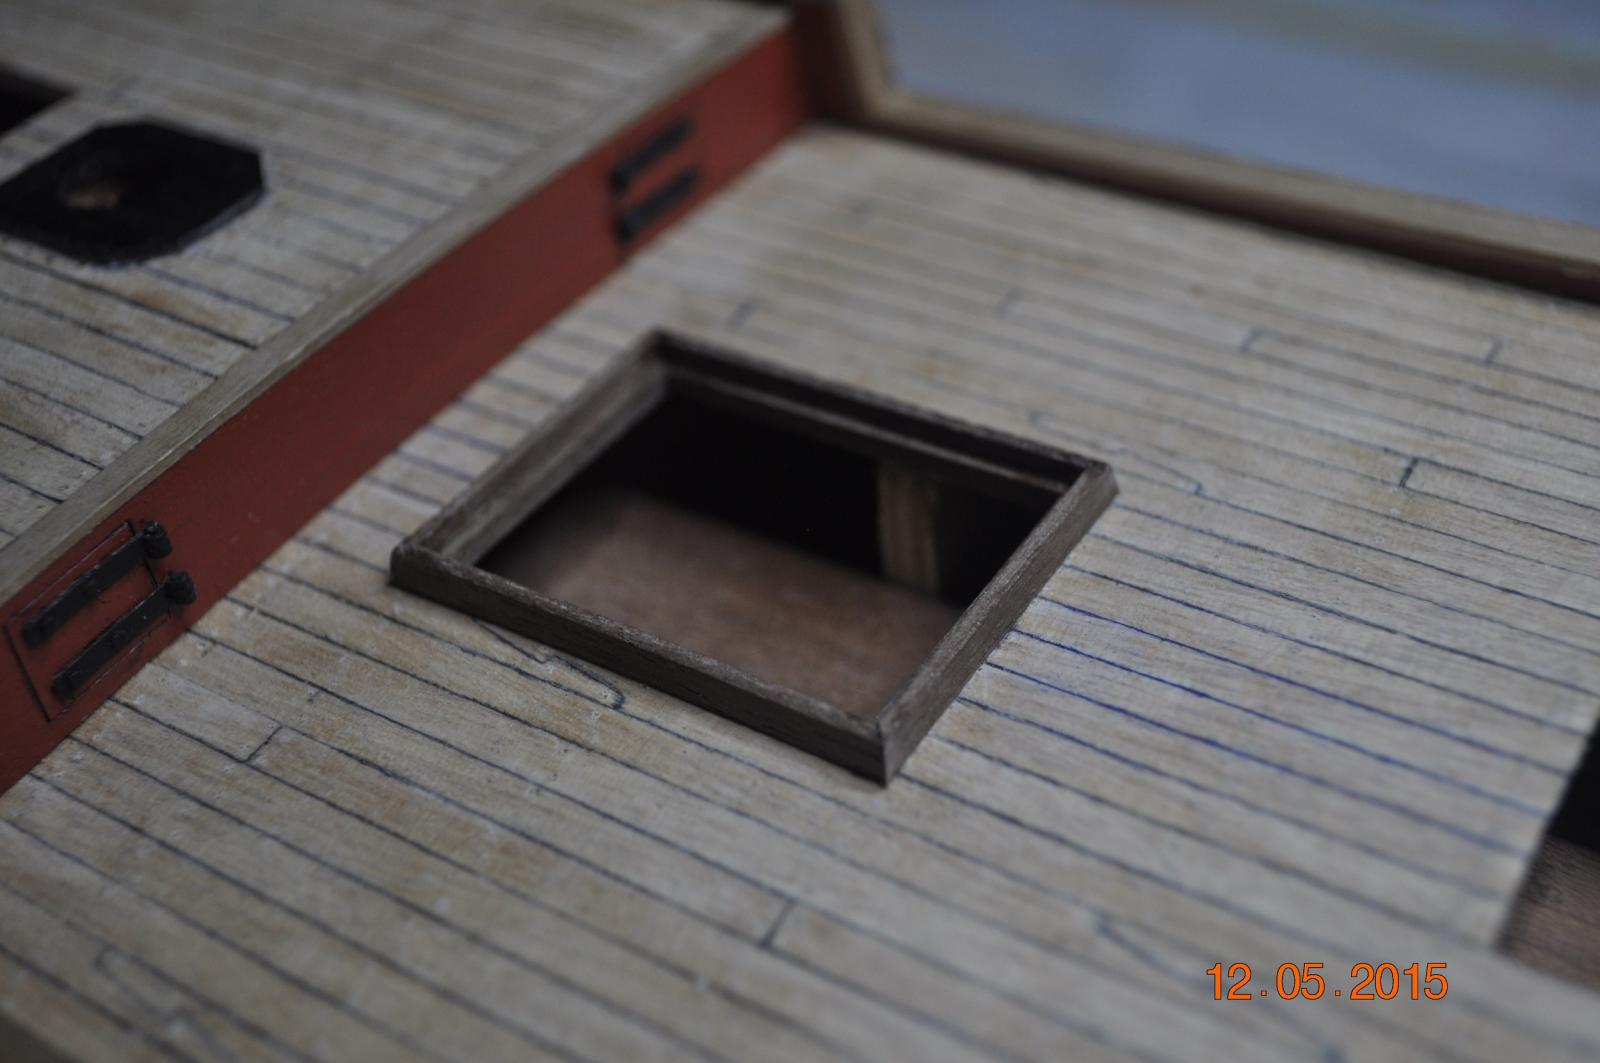
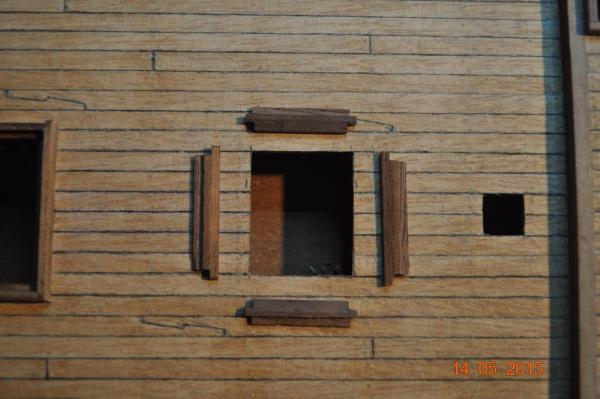
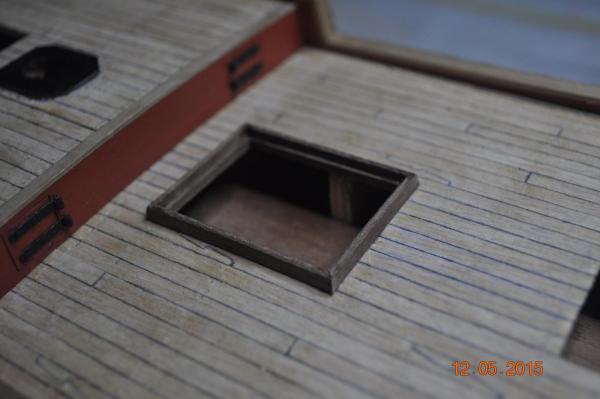
Stern Loading Port Hatches done. When I set them in place, I then realised the hinge point is on the top edge of the hatch, not offset on the planking. Therefore the hatch has a tight radius to close. I'll be making the side hatches with offset pivot point. Dave R

-
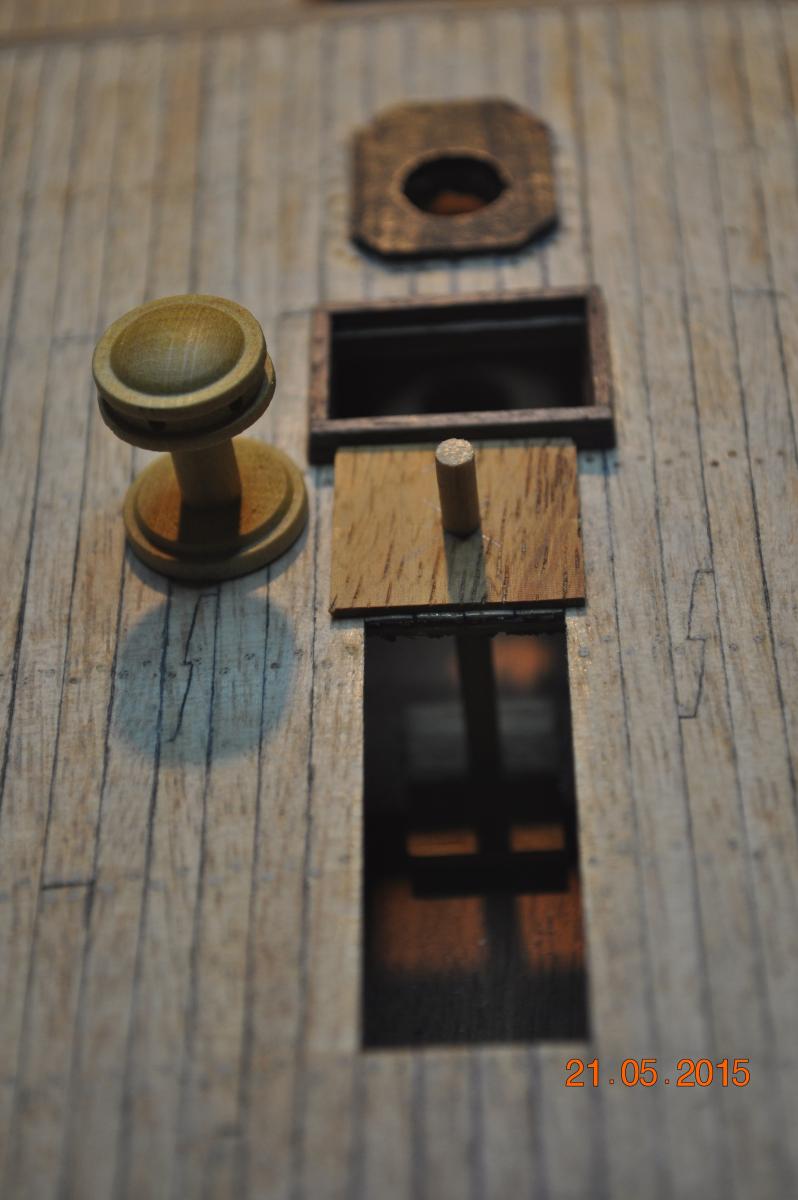
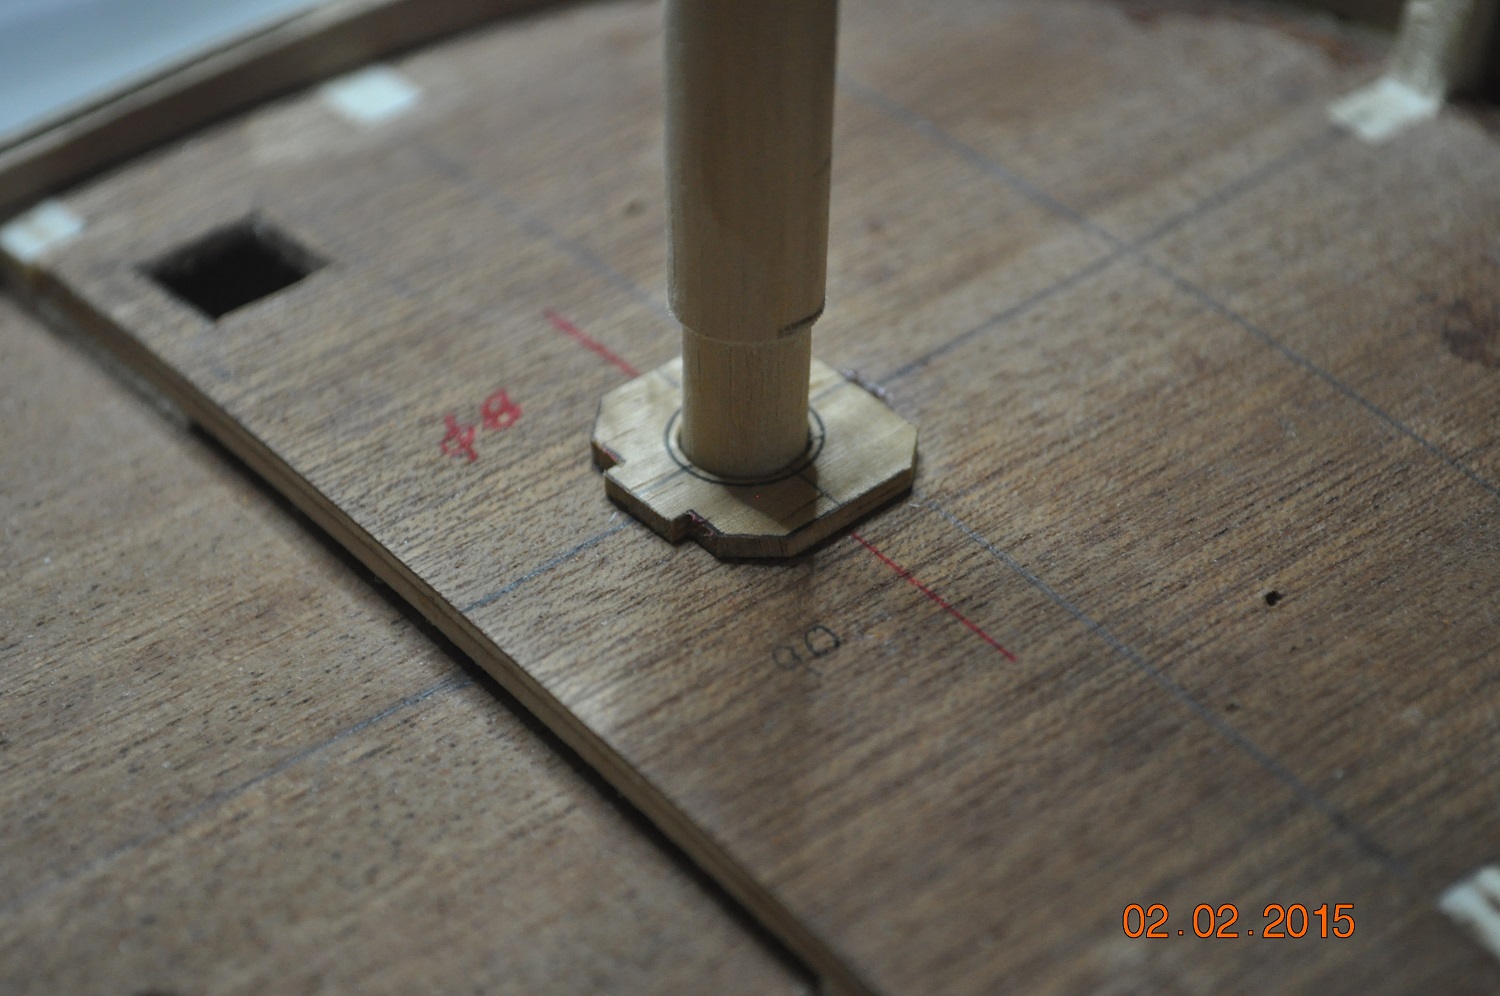
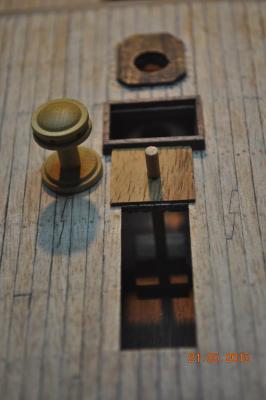
The Capstan. I thought it would be nice that the Capstan would rotate. I have fitted a length of dowel through a deck base plate, down into a lower plate below. I have drilled a hole in the bottom of the capstan to glue over the dowel. Aren't pictures great. Just realised, trim a wee bit of the left side of the deck plate, so it is even about the centreline. Dave R.
-
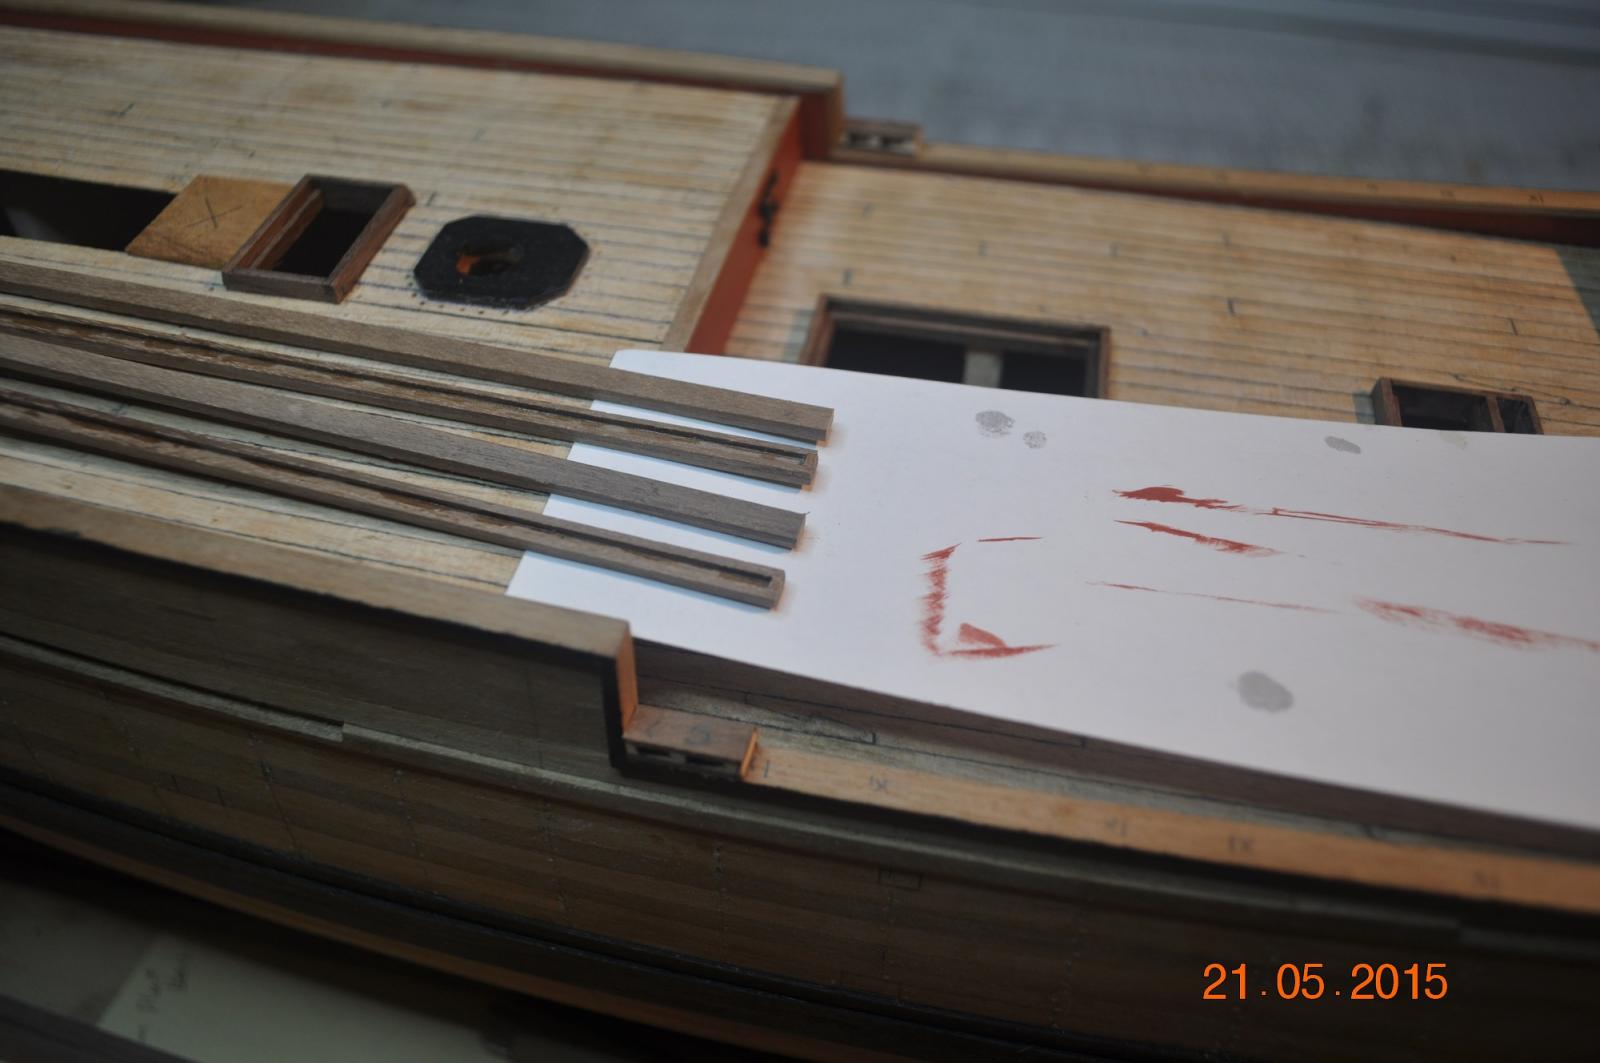
Made the roughtree rails from 4mm x 1mm and 2 pcs of 1mm x 1mm, glued to edges to create a rebate for the top of the posts to lock into. Bit early as I don't plan to fit them for a while, but got them out of the way ready though. Dave R
-
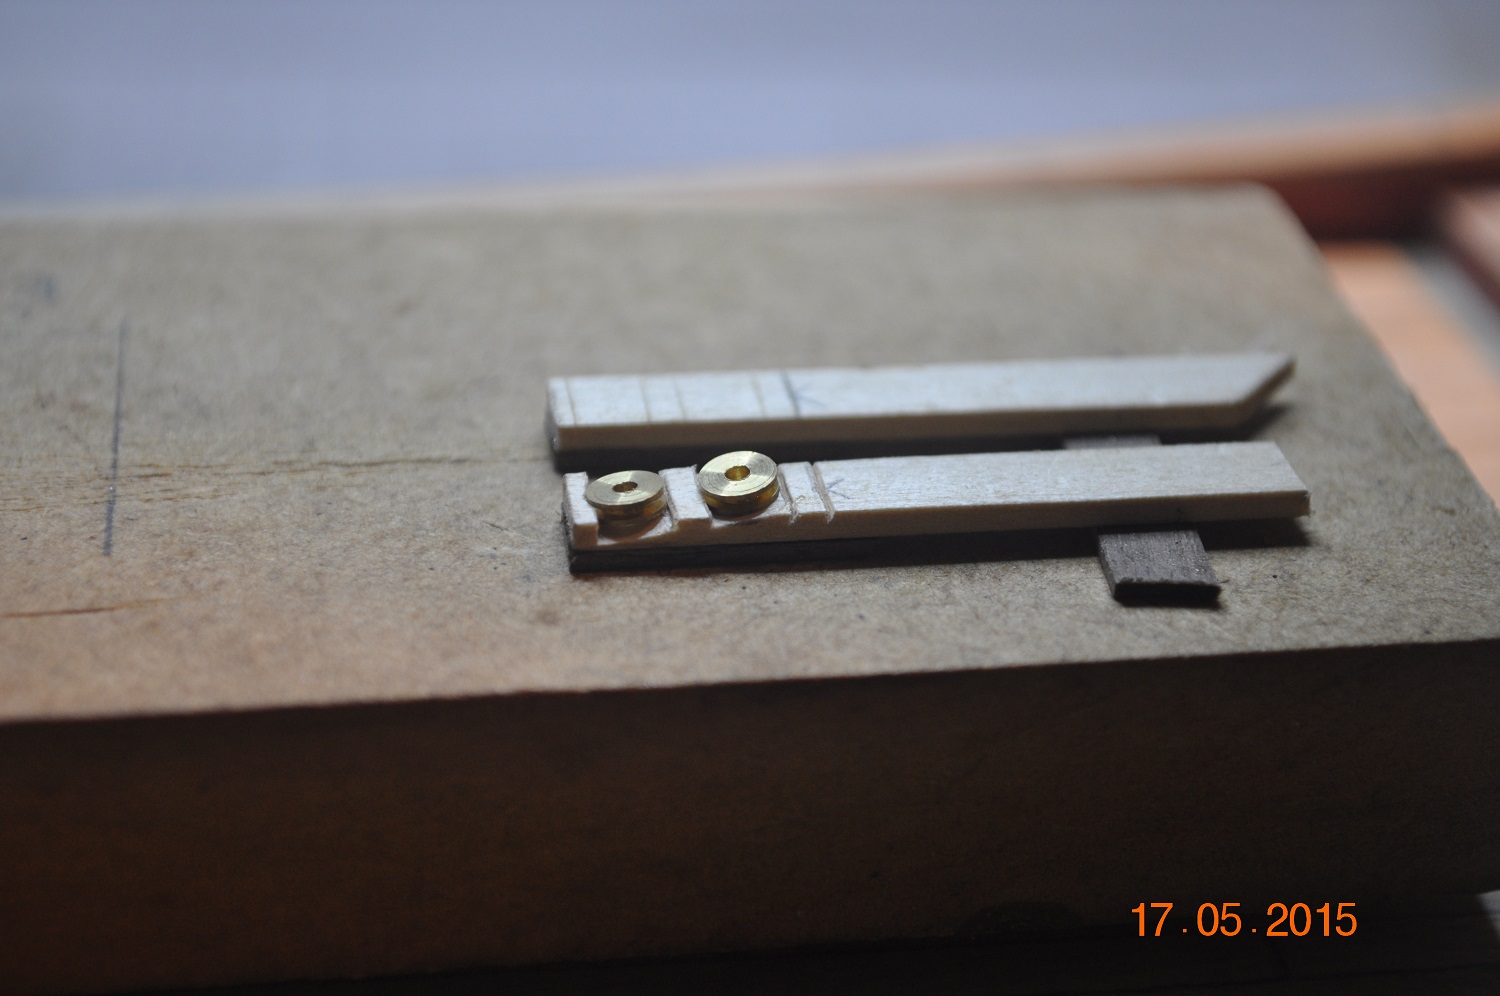
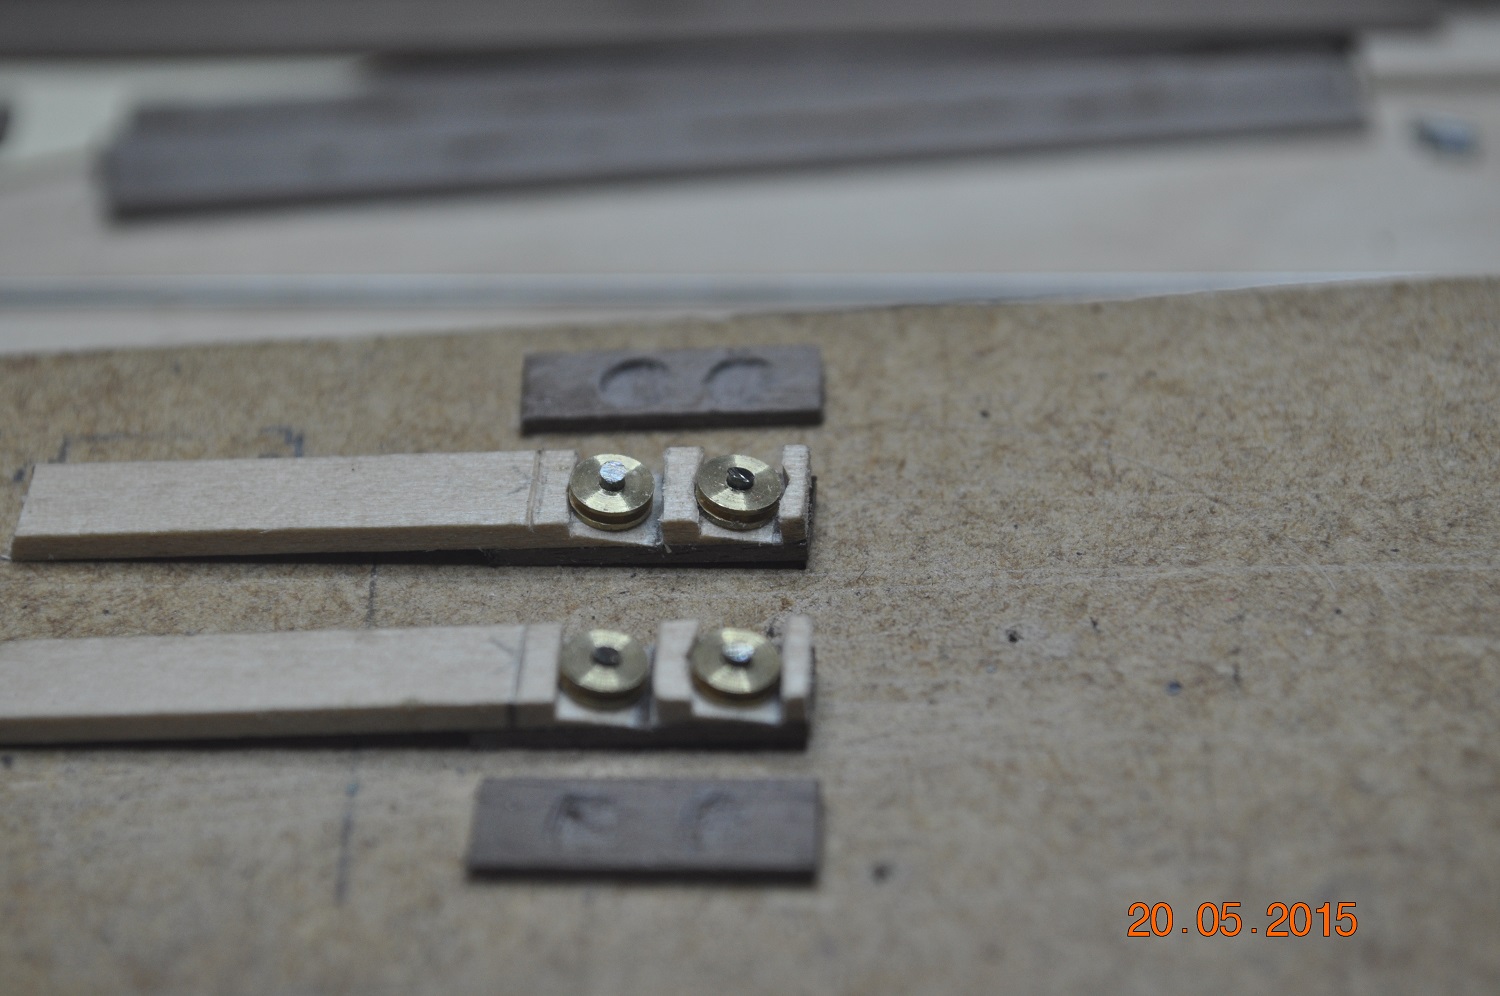
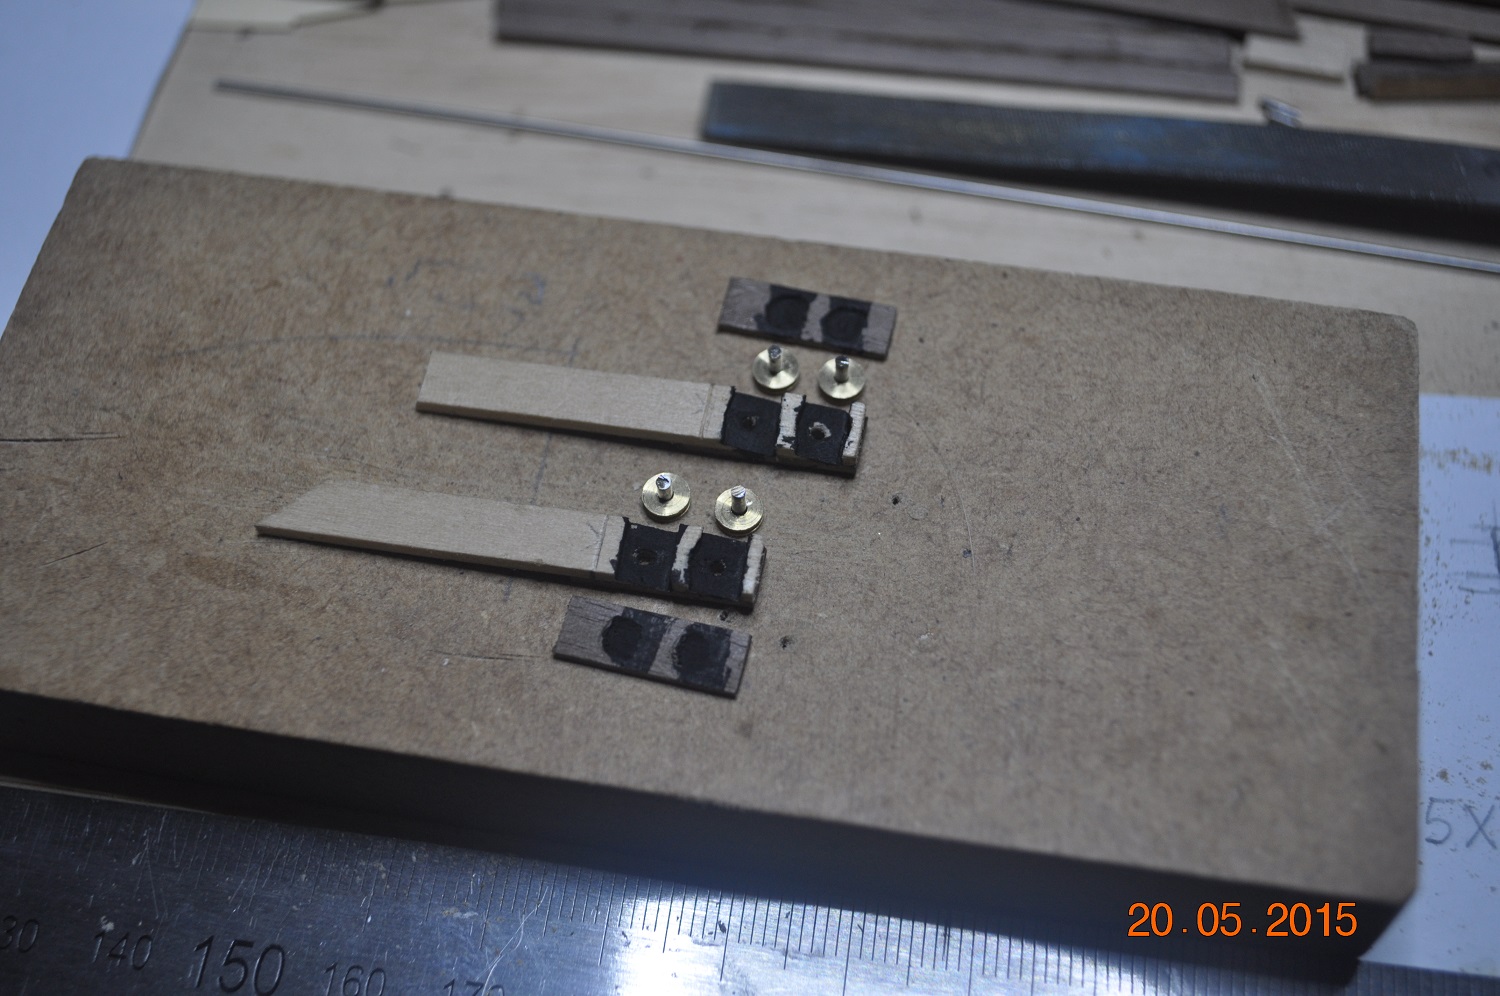
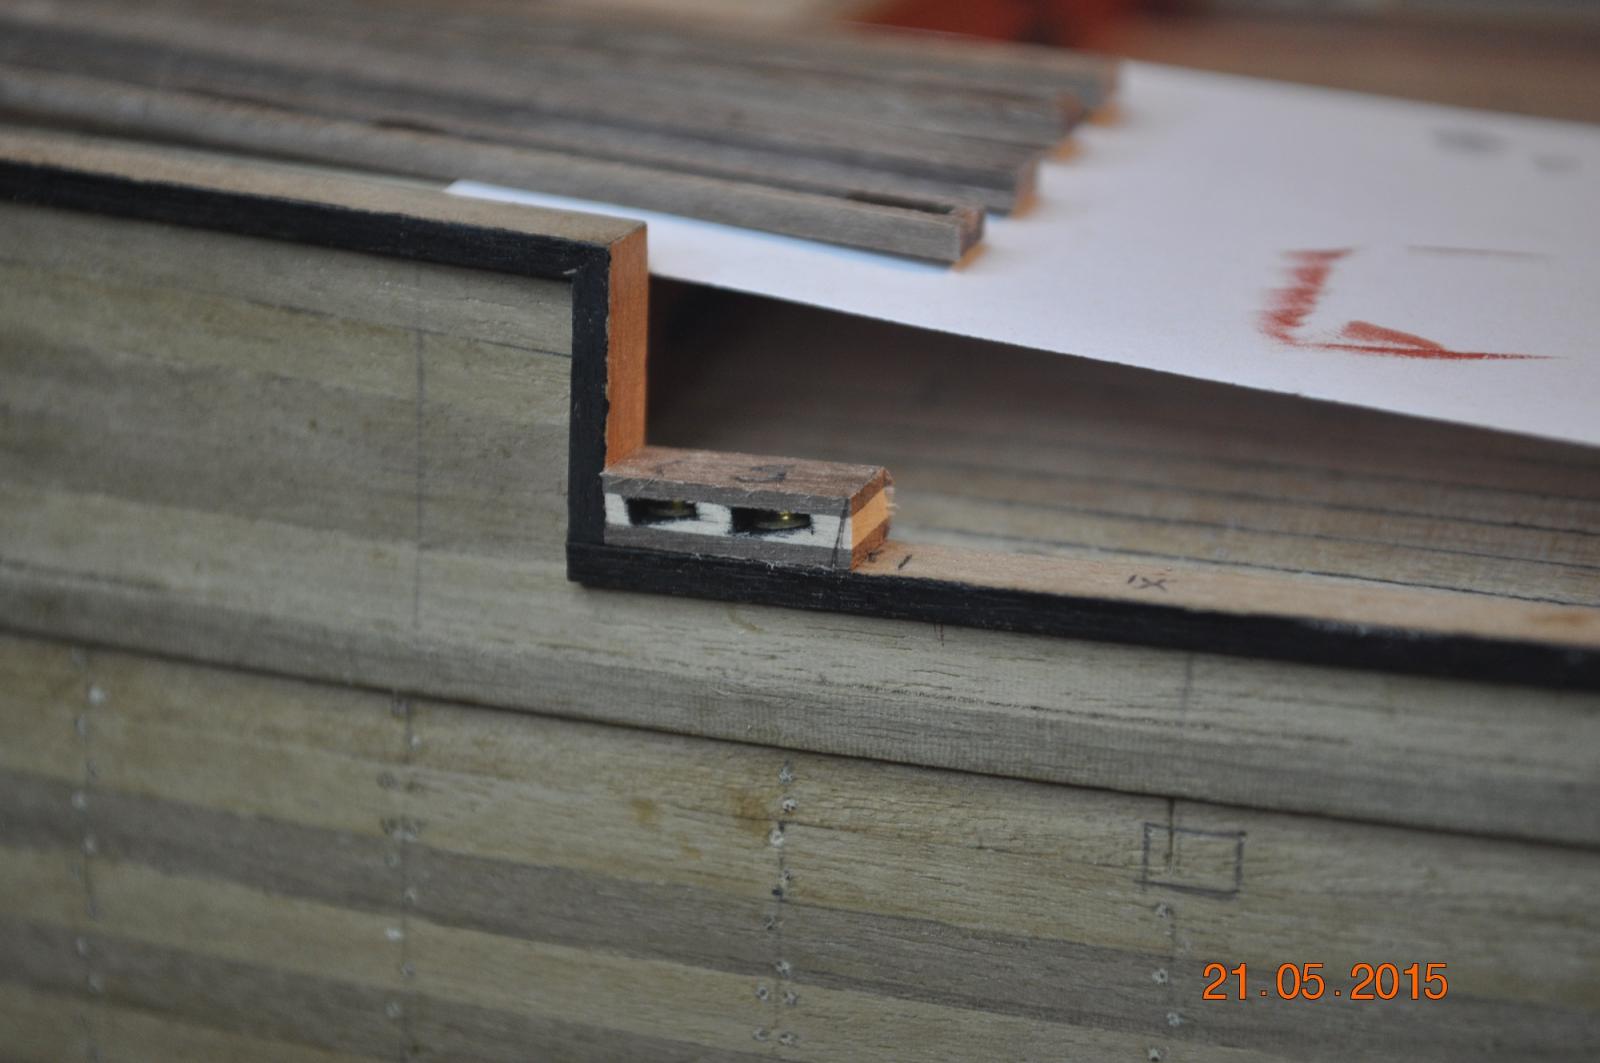
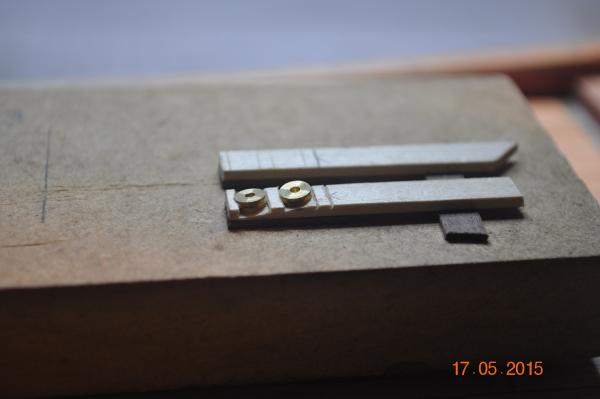
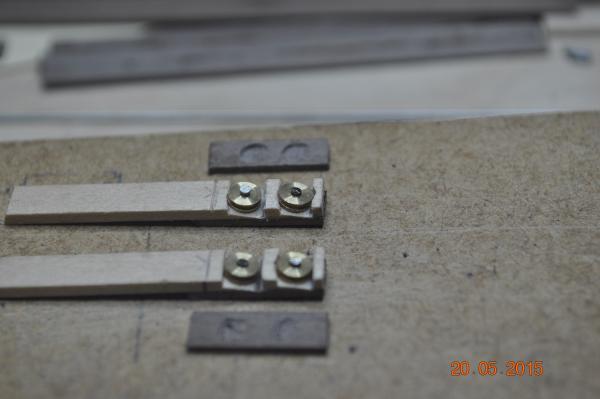
Tinkering in the Shipyard. Made the mid Sheets Fairleads - 2 off. Last Pic ready to fit to the roughtree post. Dave R


-
Hi Max, Steady as she goes. Your Shipyard is making good progress, looking pretty dam good. Planking the bluff bow and the tight turns on the stern were a bit of test on my Endeavour. You'll be up to where I am in no time. Dave R
-
Some pictures of progress on the deck hatch edging. Fore hatch: 4 edges pic. & picture of packing to hold trims in place whilst glue dries Scuttle Companion Amazing how the close up pictures show up little errors in the timberwork. I've yet to decide if hoods are going on the Fore and Companion hatches? I made both the same size so I can move a hood or grate between them. Dave R

-
Steve, Thanks for the smaller hinges info and picture. Now that's something I can do, and looks fairly easy - I hope. Let you know how it goes. Cheers Dave R
-
Hi Jason, It is a bugger(lot of work) getting the joints at 45 degrees. And you're right, no doubt the shipwrights did not do 45's. I'll have a go to overlap dovetail's for others. Cheers Dave R
-
First time rigging - being organized
DaveRow replied to RichardG's topic in Masting, rigging and sails
Hi All, I am currently building(my first) HMB Endeavour - a Corel Kit(instructions which are how can I say nicely, very basic lacking how to do things). But that is the fun part, learning how to make the parts. I threw all the supplied metal fittings out and scratch building from wood almost everything(not hinges). I am only up to hull/deck fit-out, however whilst waiting for the glue to dry on the hull planking, I started to ponder on how many blocks, single, double types, & rope sizes types I would need to rig the thing. 100 hundred 300 hundred, how many more ?(since found out over 700 on the replica) So Richard, I can se where you are coming from, a daunting task. What I came up with, is a spreadsheet based on David Steels "The Elements and Practice of Rigging and Seamanship" 1794. That is all I could find at the time as a source of rope and block sizes. The kit did not supply this information. A number of spreadsheet extracts are enclosed. What it ended up as is a massive workbook of calculations - only part completed. Apart from entering all the block types, sizes, rope circum. and lengths(all in Imperial), it converts the imperial to metric from the scale of the ship(you enter the scale of you model) It calculates most of the main block types/numbers off, rope diameters/length(m/rolls) nearest size to order etc. I've only entered the Bowsprit and Fore Mast figures from Steel's, and works out nicely to scale/size. It is work in progress, but it gave me the number of blocks and ropes for ordering. It does not provide the order in which to rig the lines on a boat. One log I read says to start from the inside and works outwards, so one is not working "into" what has been done. Anyhow, I believe it was a step in the right direction, although somewhat some time before I get to the rigging. Cheers Dave R Endeavour Rigging v1_Sample1.pdf Endeavour Rigging v1_Sample2.pdf Endeavour Rigging v1_Sample3.pdf Endeavour Rigging v1_Sample4.pdf -
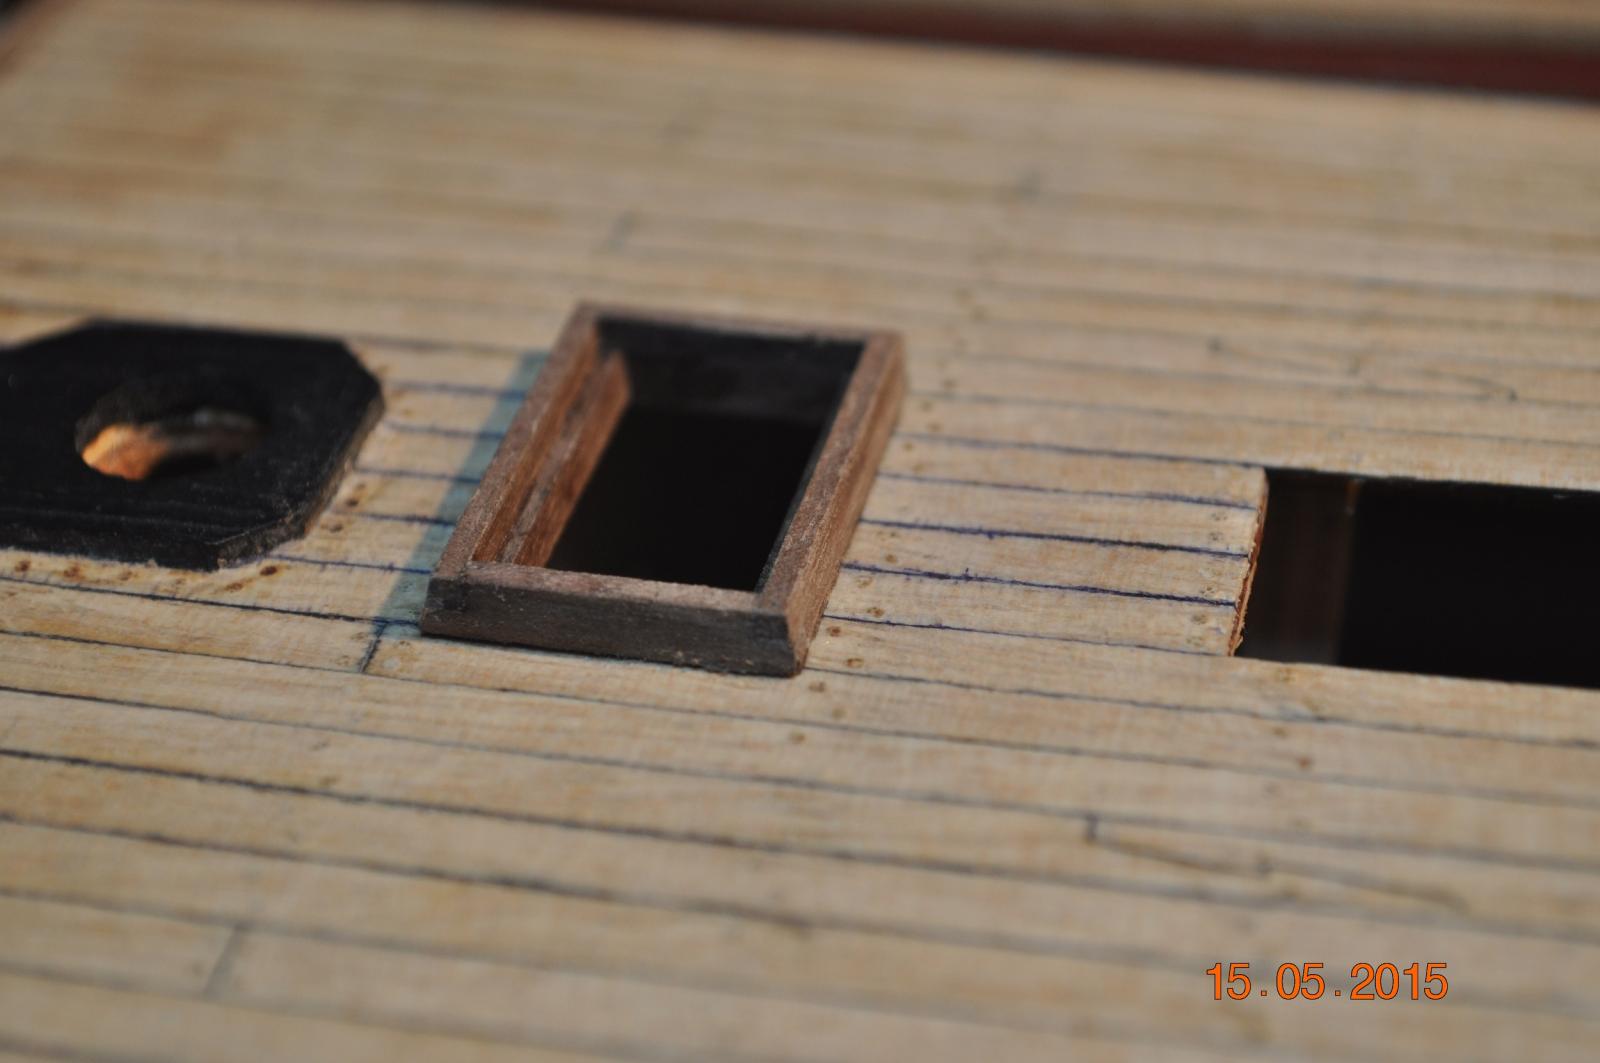
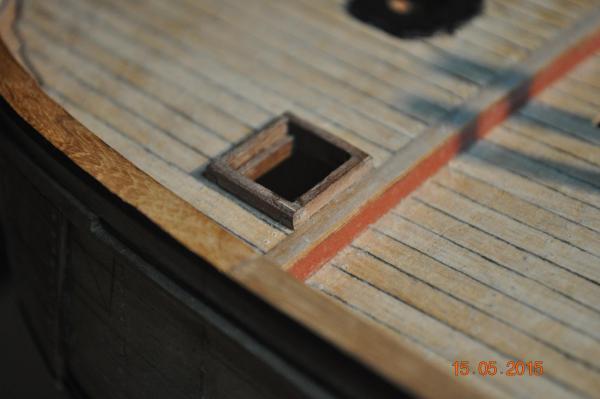
Main Hatchway edge frame done. Moved onto deck hatches whilst waiting for Looping Pliers to arrive to work on hinges for the smaller hull hatches. Dave R
-
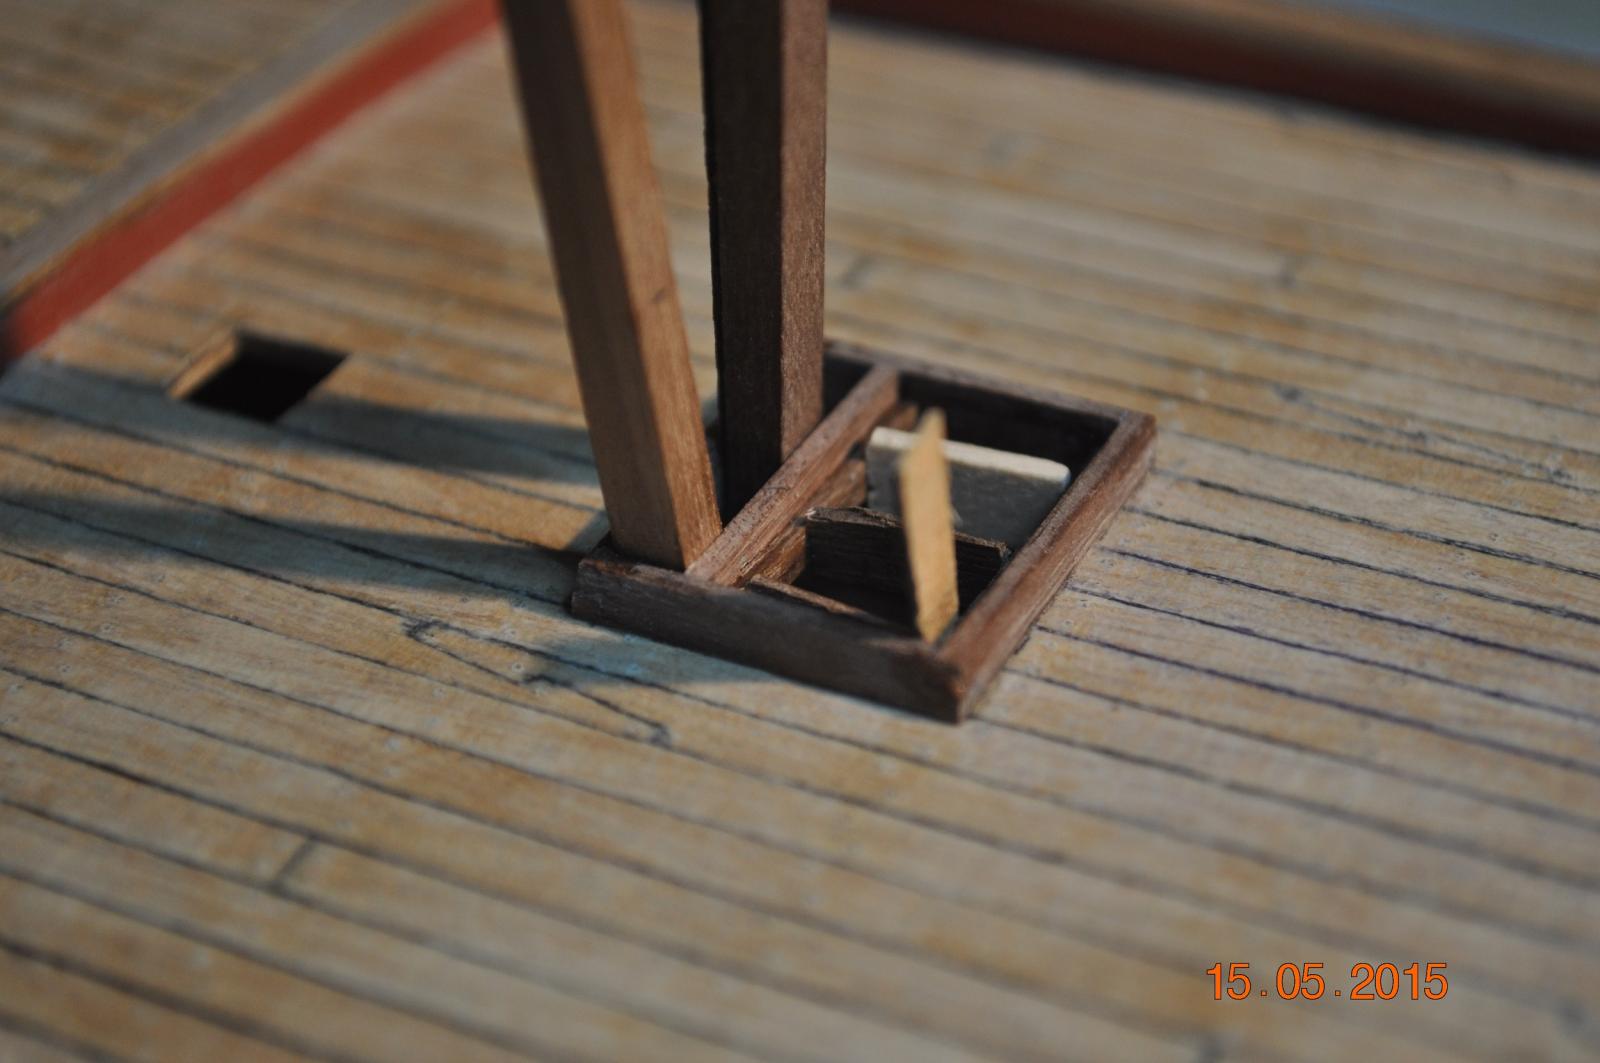
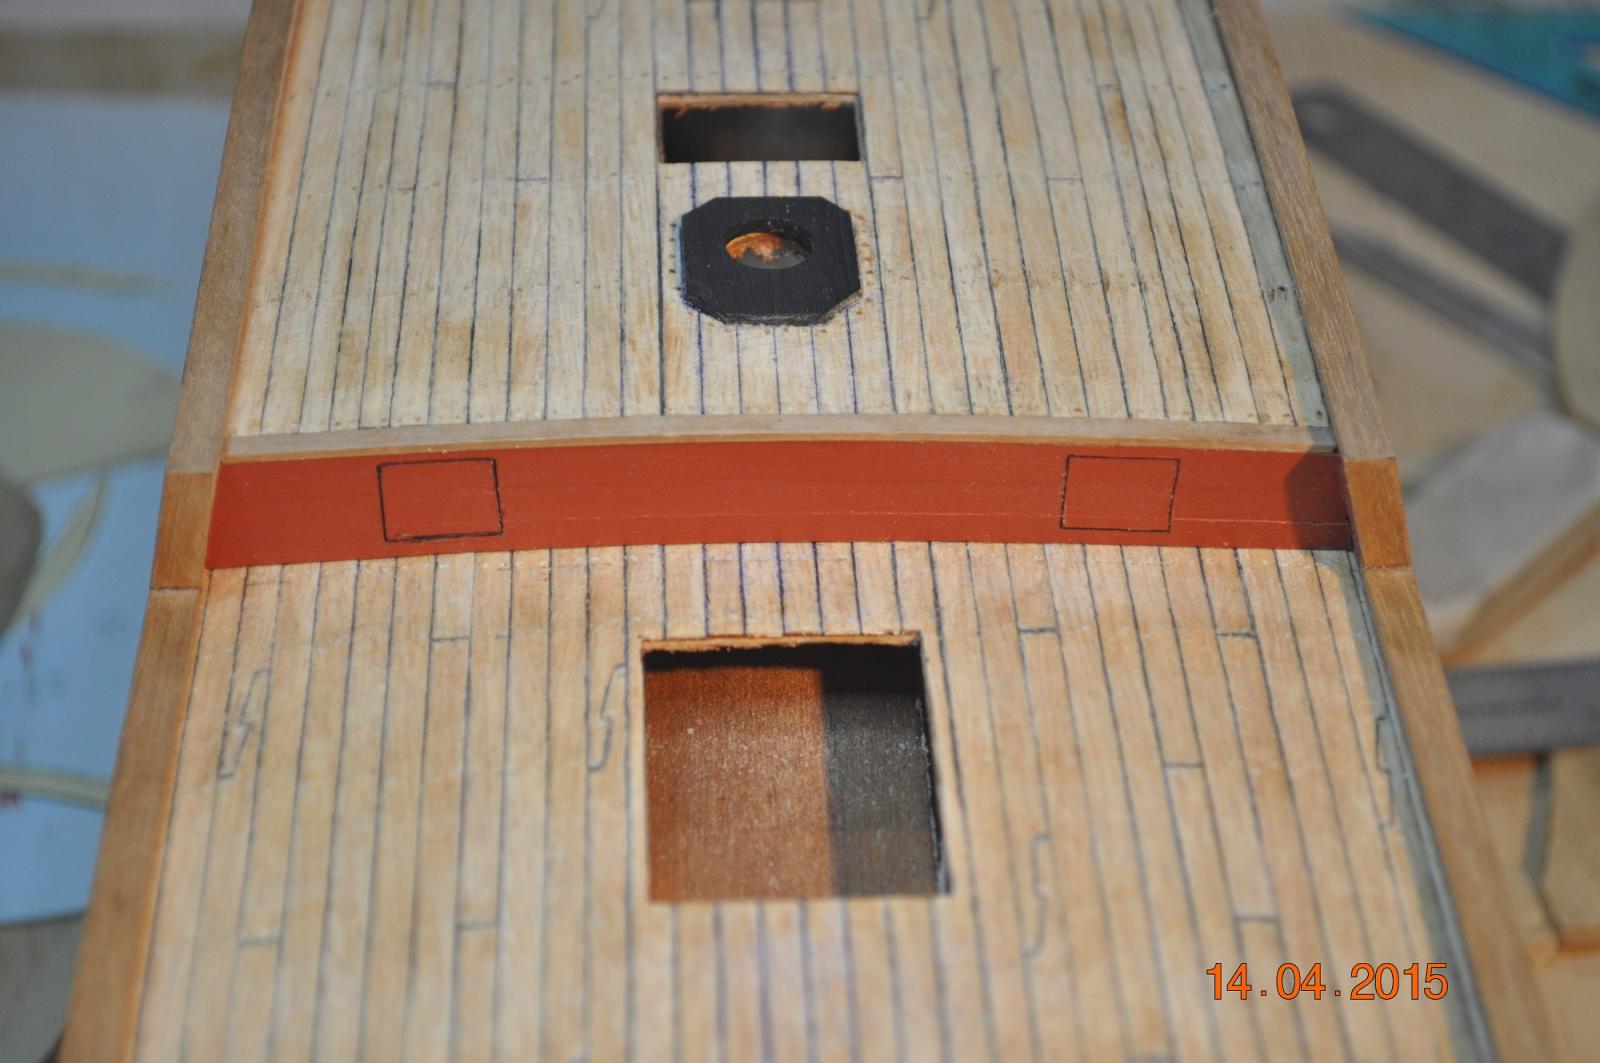
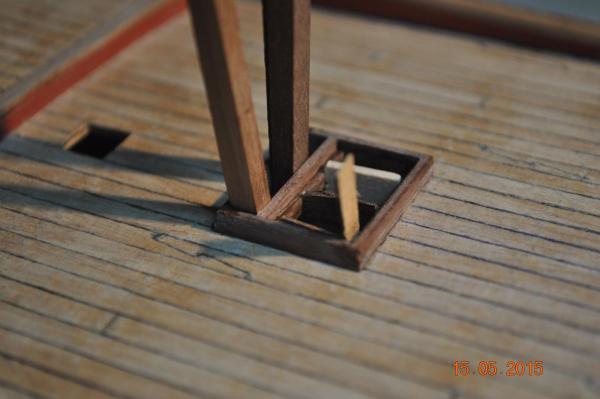
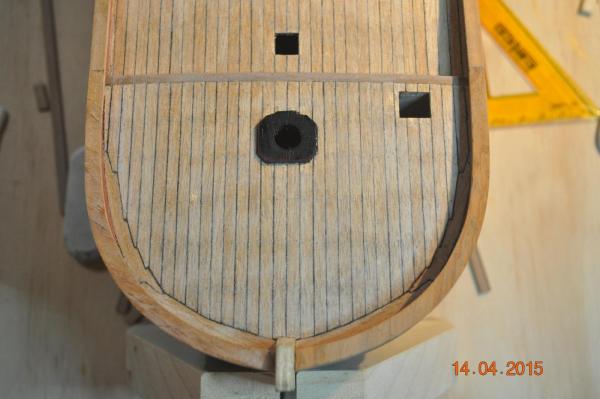
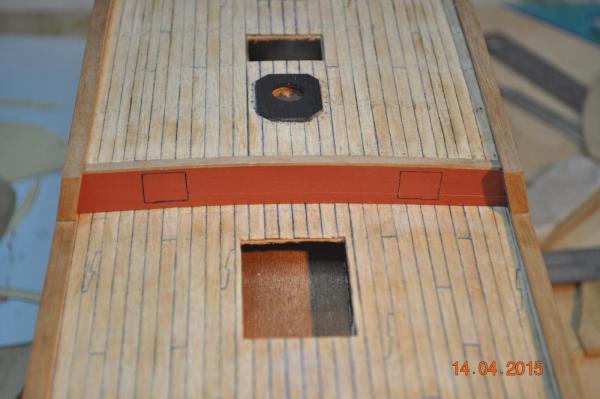
Hi Snoepert, Man your flying along with the build. I'm 12months into my Endeavour, but just getting to fit-out the hull and deck. The enclosed Pic. shows how I finished off where the masts go through the deck. I believe it is called a Partner, which I shaped to fit surrounding features. The ships would of had something like this to strengthen the deck about the hole. Dave R

-
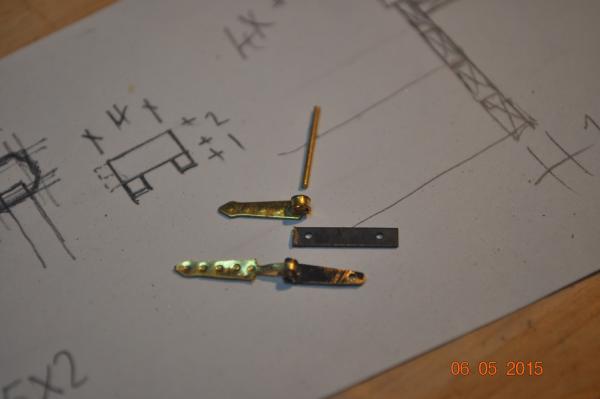
Greg, Storm was kind to where I live in Shorncliffe(Northern), no problems at home an family all good. Plenty of rain and flooding in places I have never seen so bad in 50 years living in my area. The hinges: 2.5mm width(across the pivot point) x 8.5mm long The leg 8.5mm long and trying to get a thin as possible. These ones approx. 2mm wide. I cut the left end to leave a tag that I glue into a hole. Very fiddly, hope the enclo. picture shows how I rebate the hatch for the leg. Dave R
-
New Forestay looks really nice now Steve. Dave R
-
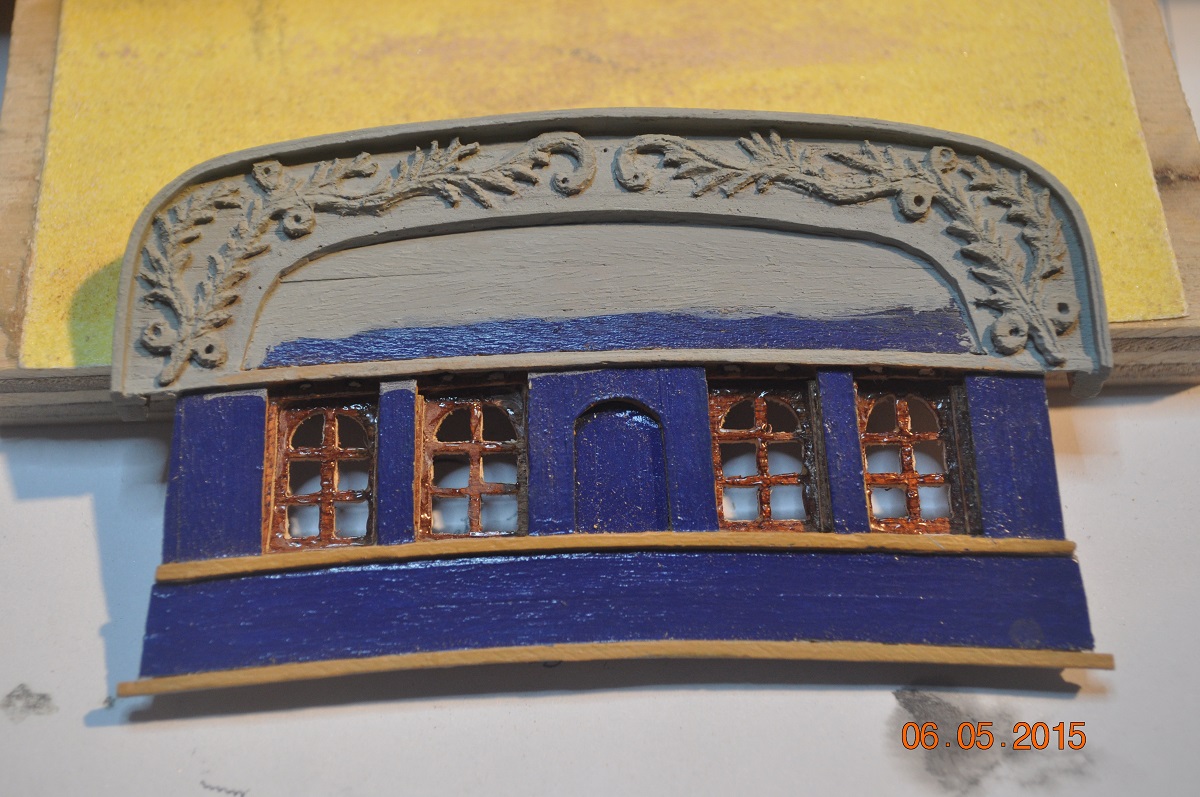
In the Shipyard. First Picture: I am using other parts offcuts to make small hinges, fiddly little things, but after some straightening and blackening, come up fine. This is 1 of 4 for the stern hatches. Second Picture: The Stern, progress on the Taffarel leaf. Best I can it for now, undercoated. Close up the imperfections show, however after some fine sanding and painting hope it come up a bit better. At a distance looks not too shabby. Have been procrastinating on this detail for weeks, so now done. I am however pleased how the top over hang come out. Formed by laminating 2 x 0.5mm deck planks to form the overhang. Have decided to get into the hull hatches, get hatch & hinges made and out of the way. Fiddly but in the right mind to do it - that helps. Dave R

-
Thanks Pat. Slow going on the fiddly bits. Dave R
-
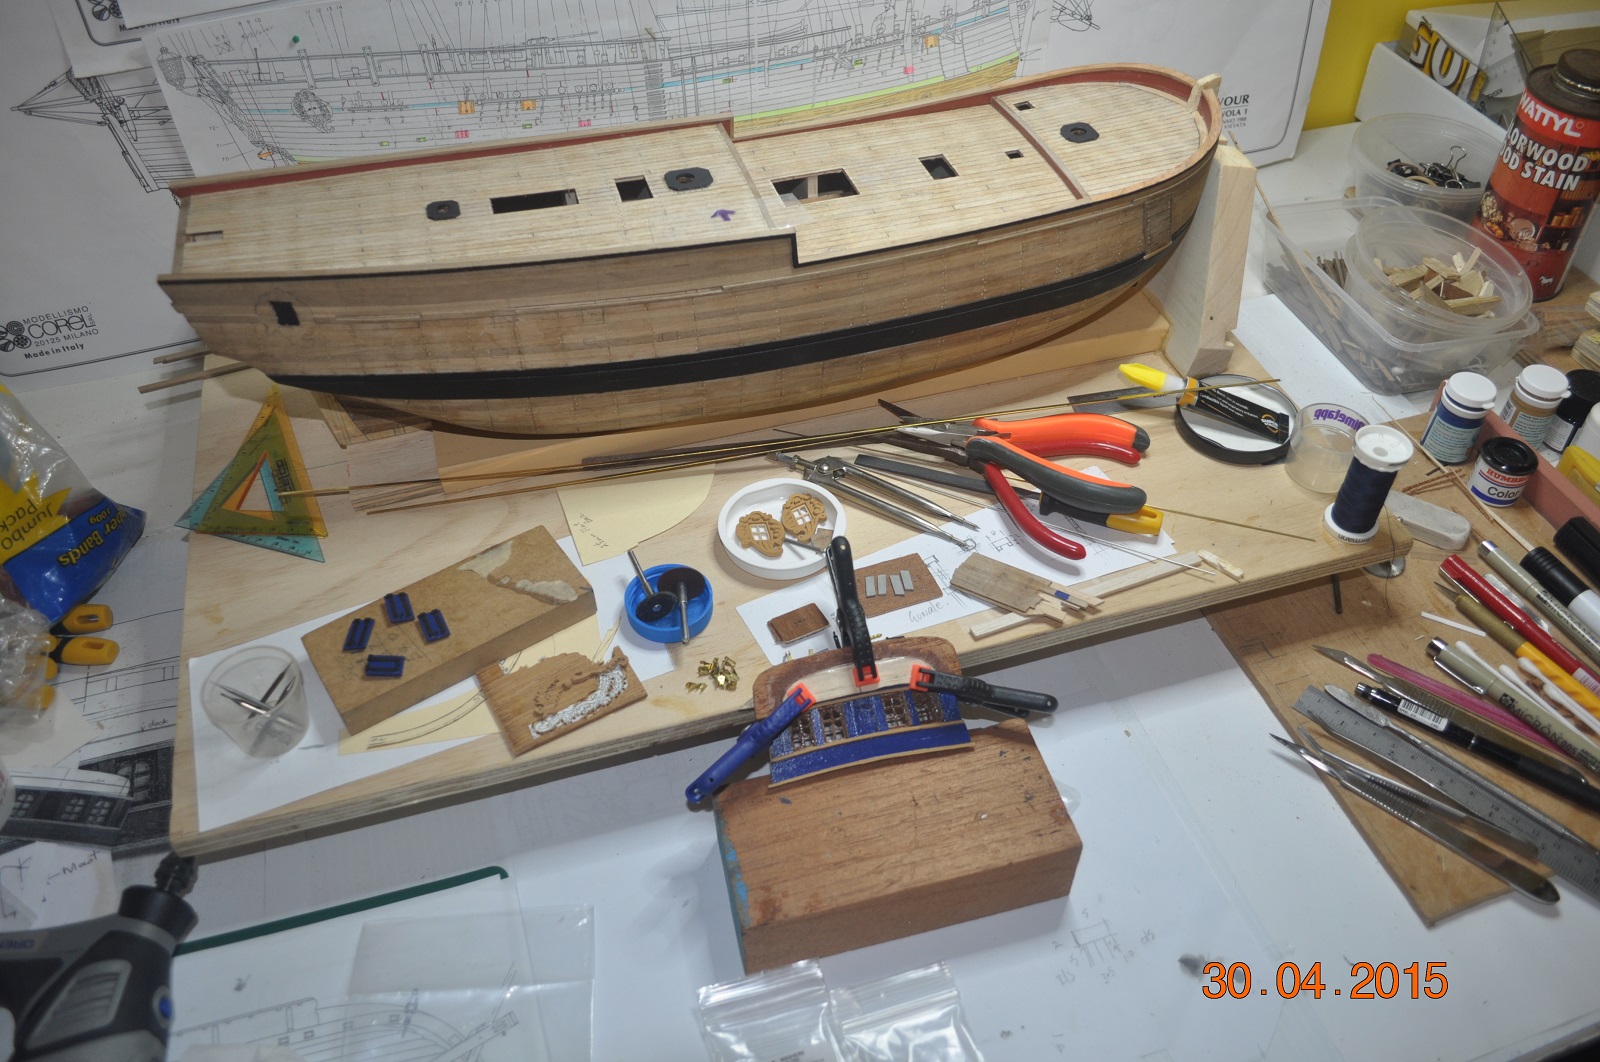
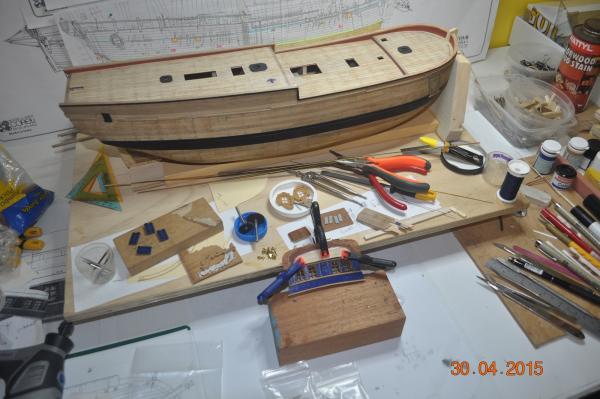
The picture below is my work bench - ala The Shipyard. Gets pretty hectic when I am working on a few different areas at once. Dave R
-
Sorry Steve, I missed the scale of your build which is indicated at the bottom of your posts. You're on top of it. Dave R
-
Nice repairs in the shipyard Pat. I've got some of Cucks hooks as well. Now ? need to test them before I use them. Thanks for posting the repairs, we all learn from others. Thanks Dave R
- 517 replies
-
- 1
-

-
- Endeavour
- Artesania Latina
- (and 1 more)
-
Hi Steve, I agree the forestay looks too big. I've done a bit of work converting the ropes and blocks on the masts from "The Elements and Practice of Rigging and Seamanship 1794 by David steel. It is from a ship 400 to 450 tons(closest tons I could source). Actually it was a lot of data entry and calculations in MS Excel. For Scale 1:60 The Fore Mast: Forestay 4 strands 11" dia with 14" heart conversion 1.5mm dia with 6mm heart Preventor 4 strands 7" with 11" heart conversion 0.9mm dia with 5mm heart With what sizes are available from suppliers, go with what we can source. Otherwise will be making our own - not me though. Cheers Dave R
-
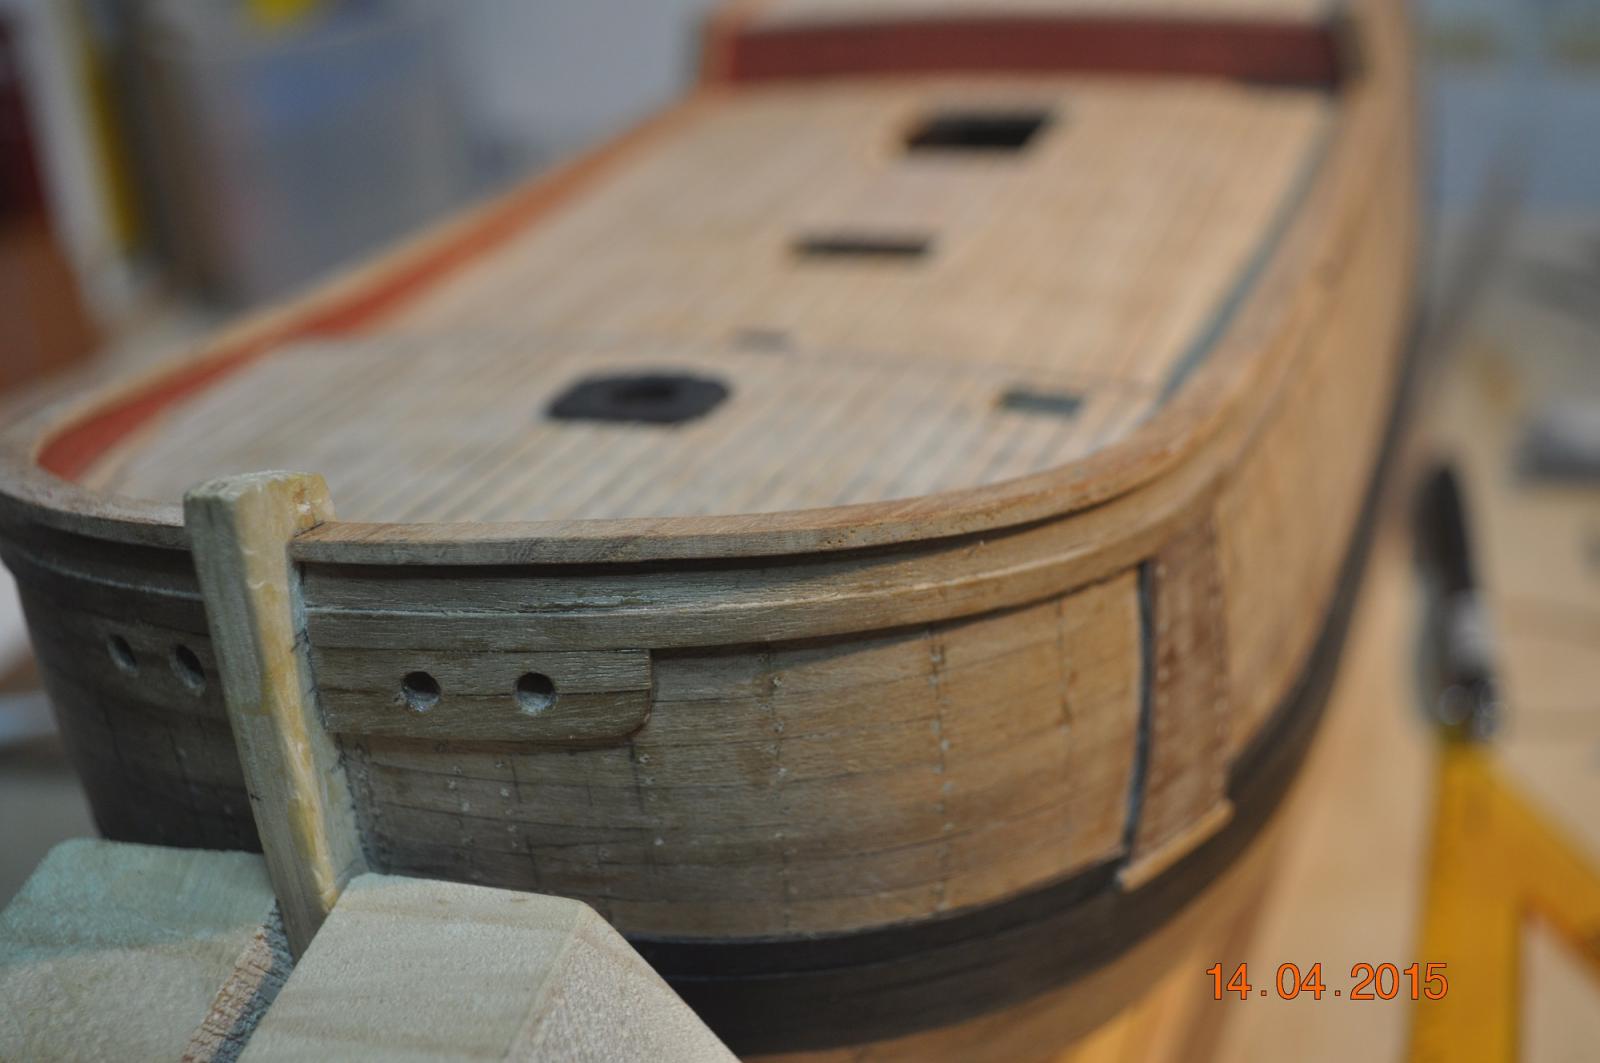
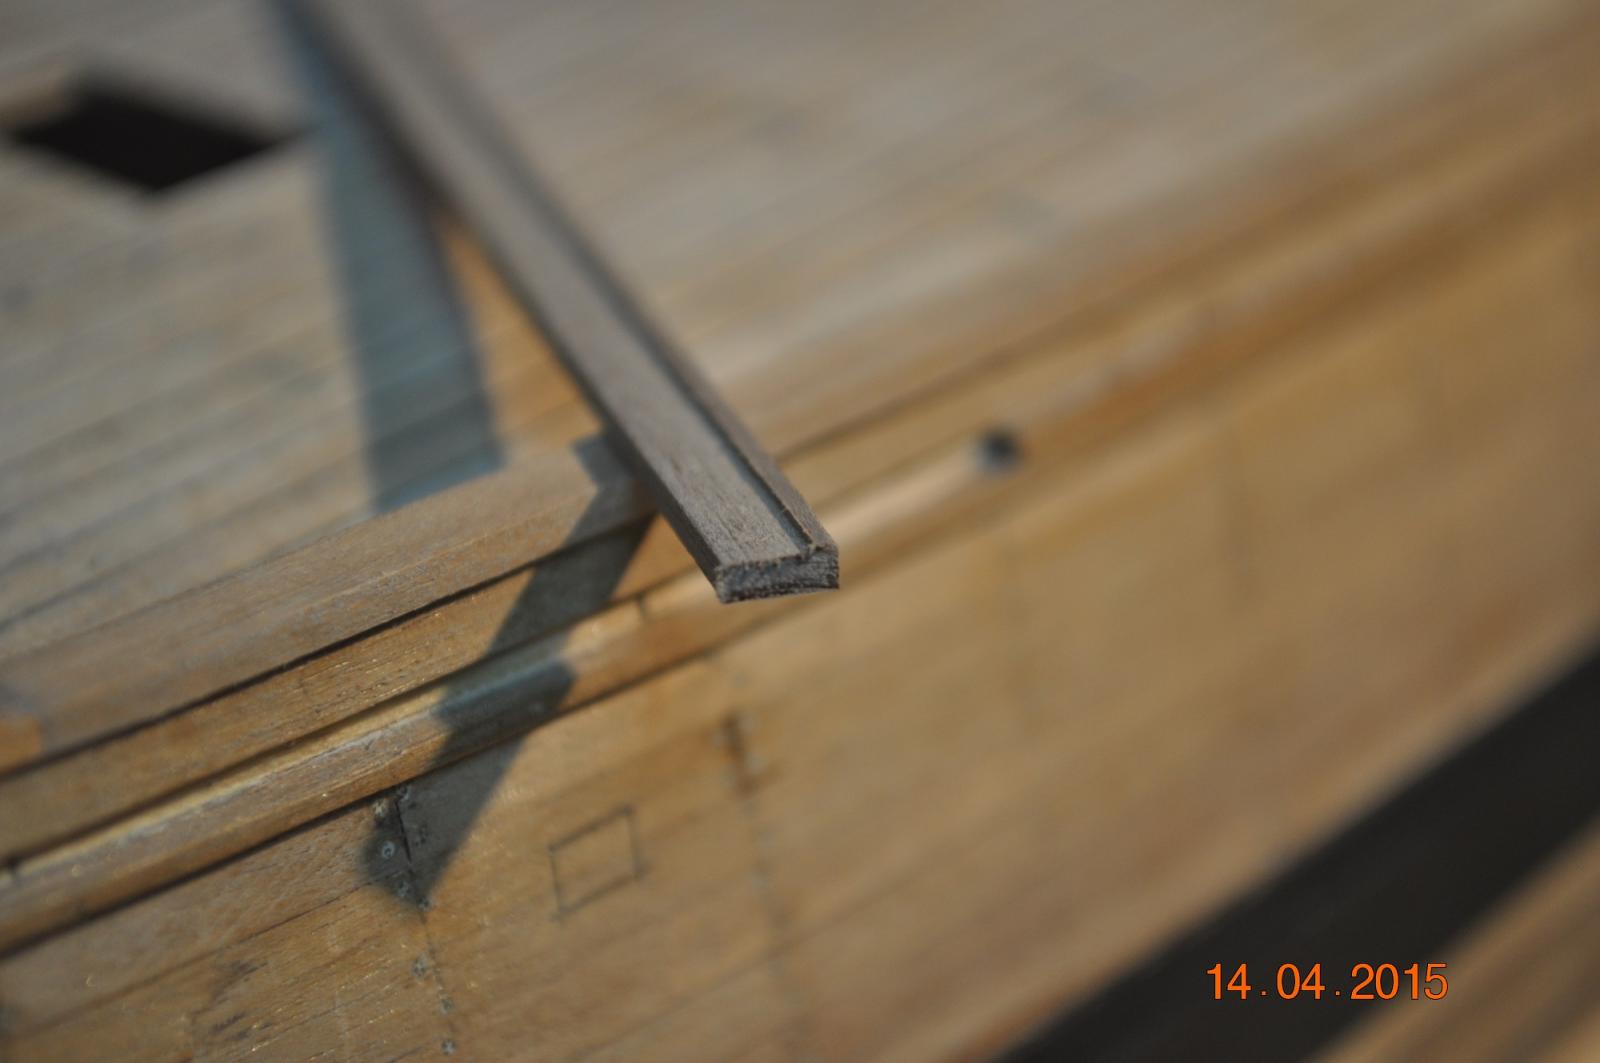
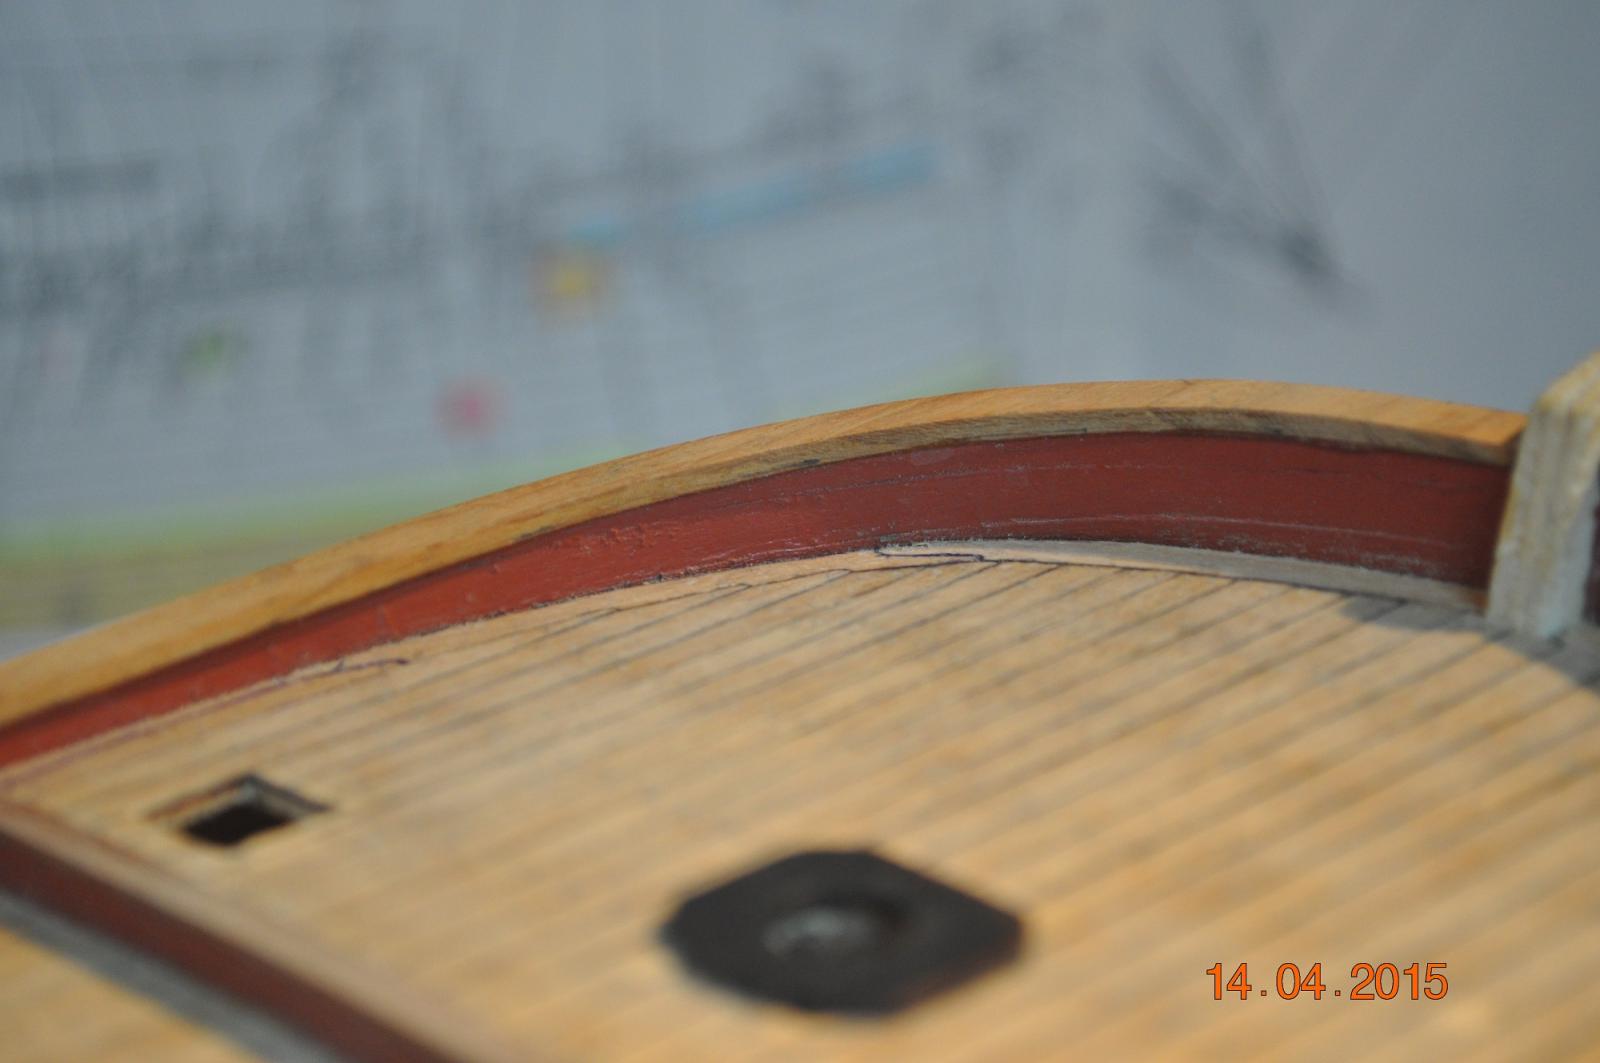
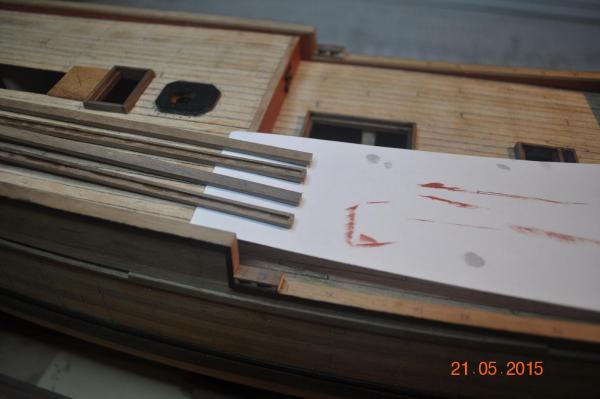
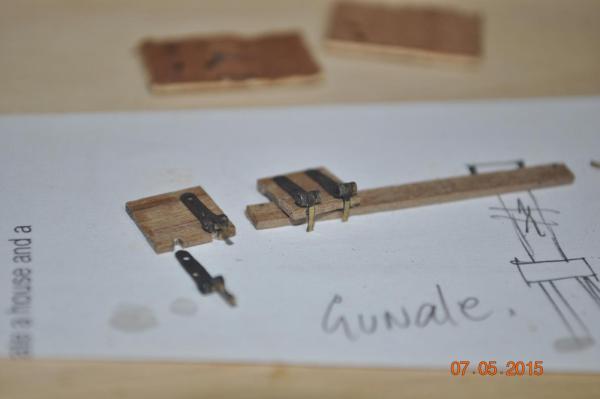
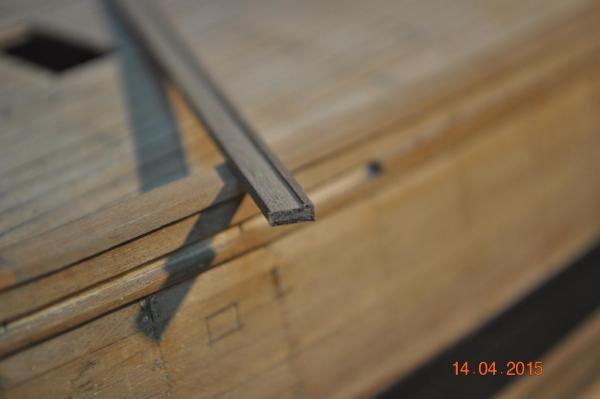
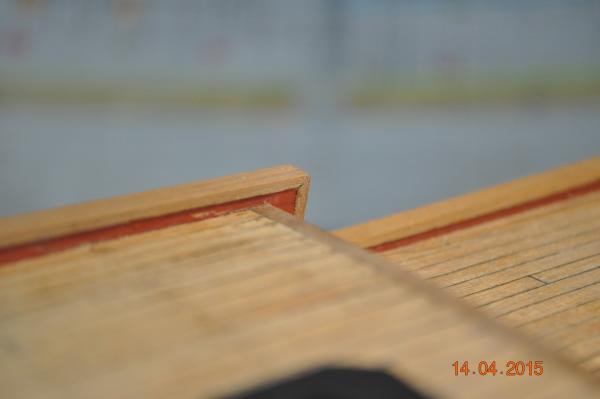
Gunwales. I made two(2) types of gunwales. # 1 for the straight runs(from 5x2), rebated underneath to provide a consistent corner edge against the hull. The 2mm edge to outside. Short bit in 1 of the pictures below. # 2 for the bow, cut by template from the exposed bow, out of a block of hardwood. Shaped by using a linisher/disk bench sanding machine. Took some time but worth it, didn't have to bend 5x2 stock. Forgot to take pictures of the process - bugga. #2 joined to #1 at line of fore and mid deck jump up points. All eventually painted black. Dave R


-
Thanks for your kind words Rowan, Greg and Ron. Slow going, but making progress. Dave R