Piet
-
Posts
3,568 -
Joined
-
Last visited
Content Type
Profiles
Forums
Gallery
Events
Everything posted by Piet
-
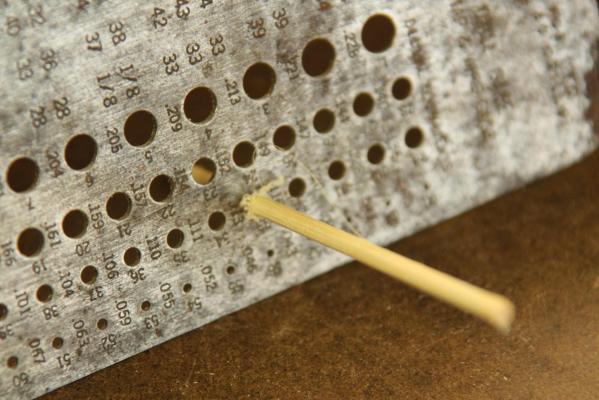
 This morning I ventured into the shipyard (garage) and tackled the net cutters on the trim vanes. I also cemented the paper covering on the vanes. I used "Liquitex" glazing medium for the glue and semi finish. This stuff is used by artists when painting pictures with acrylic paint. I don't use the stuff for my paintings, I like the good old oil paints or watercolors. Although acrylic paints have their place in the art world. In any case, when fully set I can lightly sand it to smooth out the brush marks and dull it some. In this case it really doesn't matter because the boat will be painted anyway in the colors when placed into service by the K M (Koninklijke Marine, Royal Navy) in 1939. The one vane actuator on the port side needs a "repair," the hinge pin hole is a tad too large. I need to plug the hole and re-drill it. No biggie. I'm glad it works and looking okay So, now the boat has some teeth As you can see I used brass shim to make the teeth. It's made in two parts, one strip with the width of the vane and curved to match. The teeth part is also made from the same shim stock with a "foot" bend at 90 degrees and the teeth cut into the other part. It was then soldered to the base strip and final fit to the leading edge of the vane. The teeth assy was glued to the vane with CA glue. Cheers,
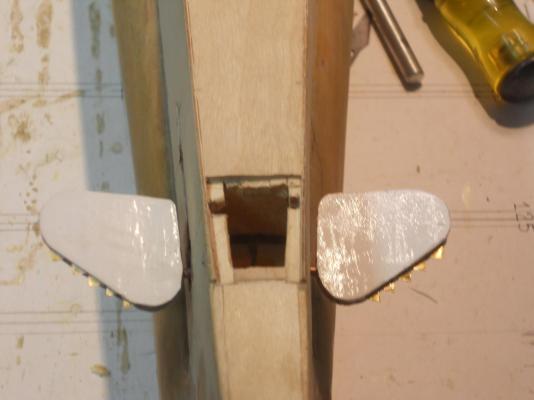
-
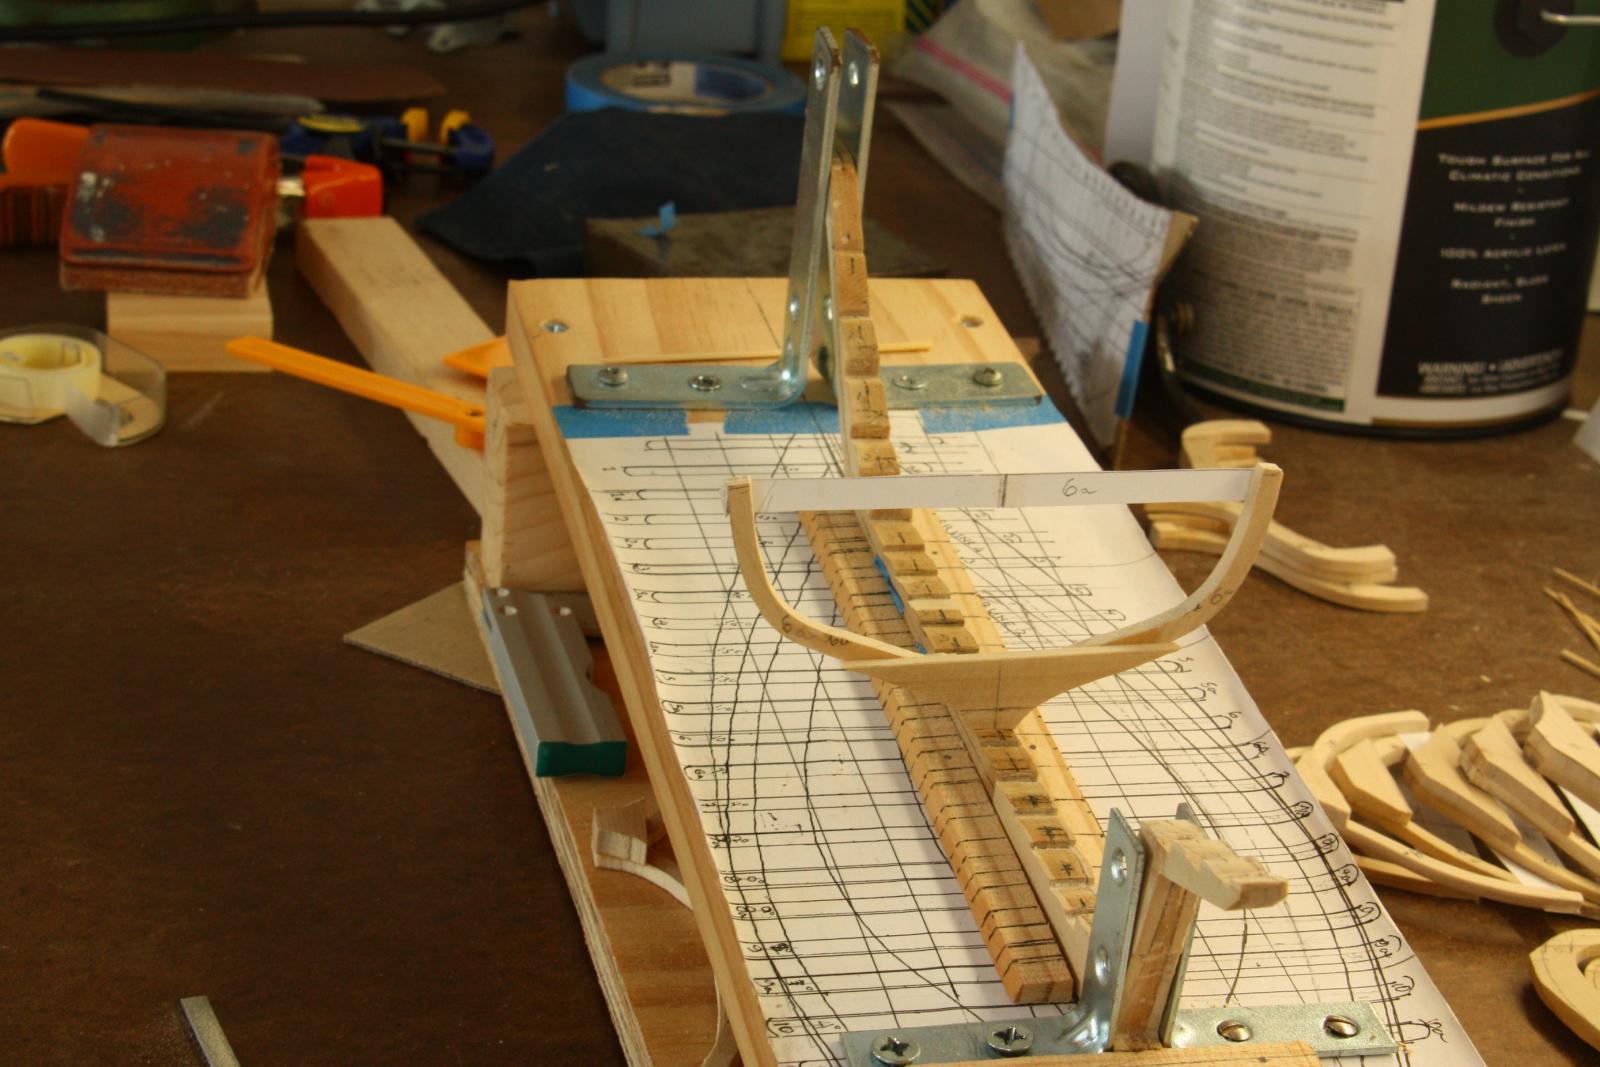
Having been absent from the shipyard today due to more domestic chores I'll post a few pics of a few frames taped to the keel. As mentioned before I taped a strip of paper to the tops of the frames with a pencil line at the center. This helped me in ensuring that all frames would be centered on the keel. I also added a cross plate to the bottom of the frame. This had two functions, one is to reinforce the frame and secondly, it was to serve as the support for the cabin deck. I used a protractor set at 7 degrees to place the frame at true vertical to the waterline. Then a small square at the frame location on the drawing to see that they match. I used a string from the center line of the bow to the center of the stern lining up the centerlines on the paper strip as well as centering the frames to the keel. After all the frames were checked and double checked I glued the frames to the keel. I had no means to clamp the frames to the keel as the glue was curing so I used tape to hold them in place. After the glue had cured for half a day and checking again for correct positioning I drilled holes diagonally through the bottom of the frames into the keel so they could be pinned. All frames are a little higher then the deck sheer but each is marked on the outside for the deck sheer. I have not taken any photos of this process and will also not show any more pics of mounting all the frames. When you have seen one you have seen all. This shows frame 6a temporarily taped to the keel to check against the lines in the drawing. That orange thingy behind the build dock is the cheapy plastic protractor of sorts I used for true vertical. Here you can see the clear plastic tape I used to hold the frame in place while I could do the checking. You can also see the splices. Cheers


-
Hey Anthony, thanks for the link, I'll go and brows a little. Kinda late in the game for this model though but who knows - - - I'm crazy enough to build another one in a larger scale. I have that drawing of the sail plan and used to rig my model, worked like a charm. Yeah, these Friendship sloops are lovely and in my next life I'll have a real one to sail, together with my dear wife Mark, thanks for defending my excuse My mom didn't raise a dummy Actually, because the poplar I used was not very kind to me, it didn't cooperate well at some of the critical cuts at the rabbet line. This way I had more control over it. If I'm ever nuts enough to build another one then I'll use a better and harder wood, for sure. Cheers,
-
First of all, thank all y'uns for the likes ! Thank you John, yes, she is coming along okay but slow. With the admiral gone for two weeks the domestic chores bite into building time. Adriaan, so good to hear that you coming along re your physical problem and I'm happy to oblige in keeping you sane I have been upgraded to 6 months checks inside the bladder instead of the three. Sure glad about that, it's a pain in the ahum, well you know - - - uh, I call it Sir Peter Cheers,
-
Well hello Adriaan, how's thing going with you? Still locked out of the shipyard? Thanks for dropping in and your kind comment. Yes, she's slowly taking shape. It would have been easier if I had done this before the deck framing went up, this was a challenge alright. But it is working and that's main thing. Hope to see you back soon at your model and in the meantime take care. Cheers,
-
Thank you fellows for your kind comments. All the frames were done in the same method and came out quite nice. I cheated though by making them first larger then needed and then cutting them to within a couple mm to the lines of each frame drawing. I wanted some extra wood for the final shaping. It gave me extra work with the fairing but I wanted to be on the safe side. Cheers,
-
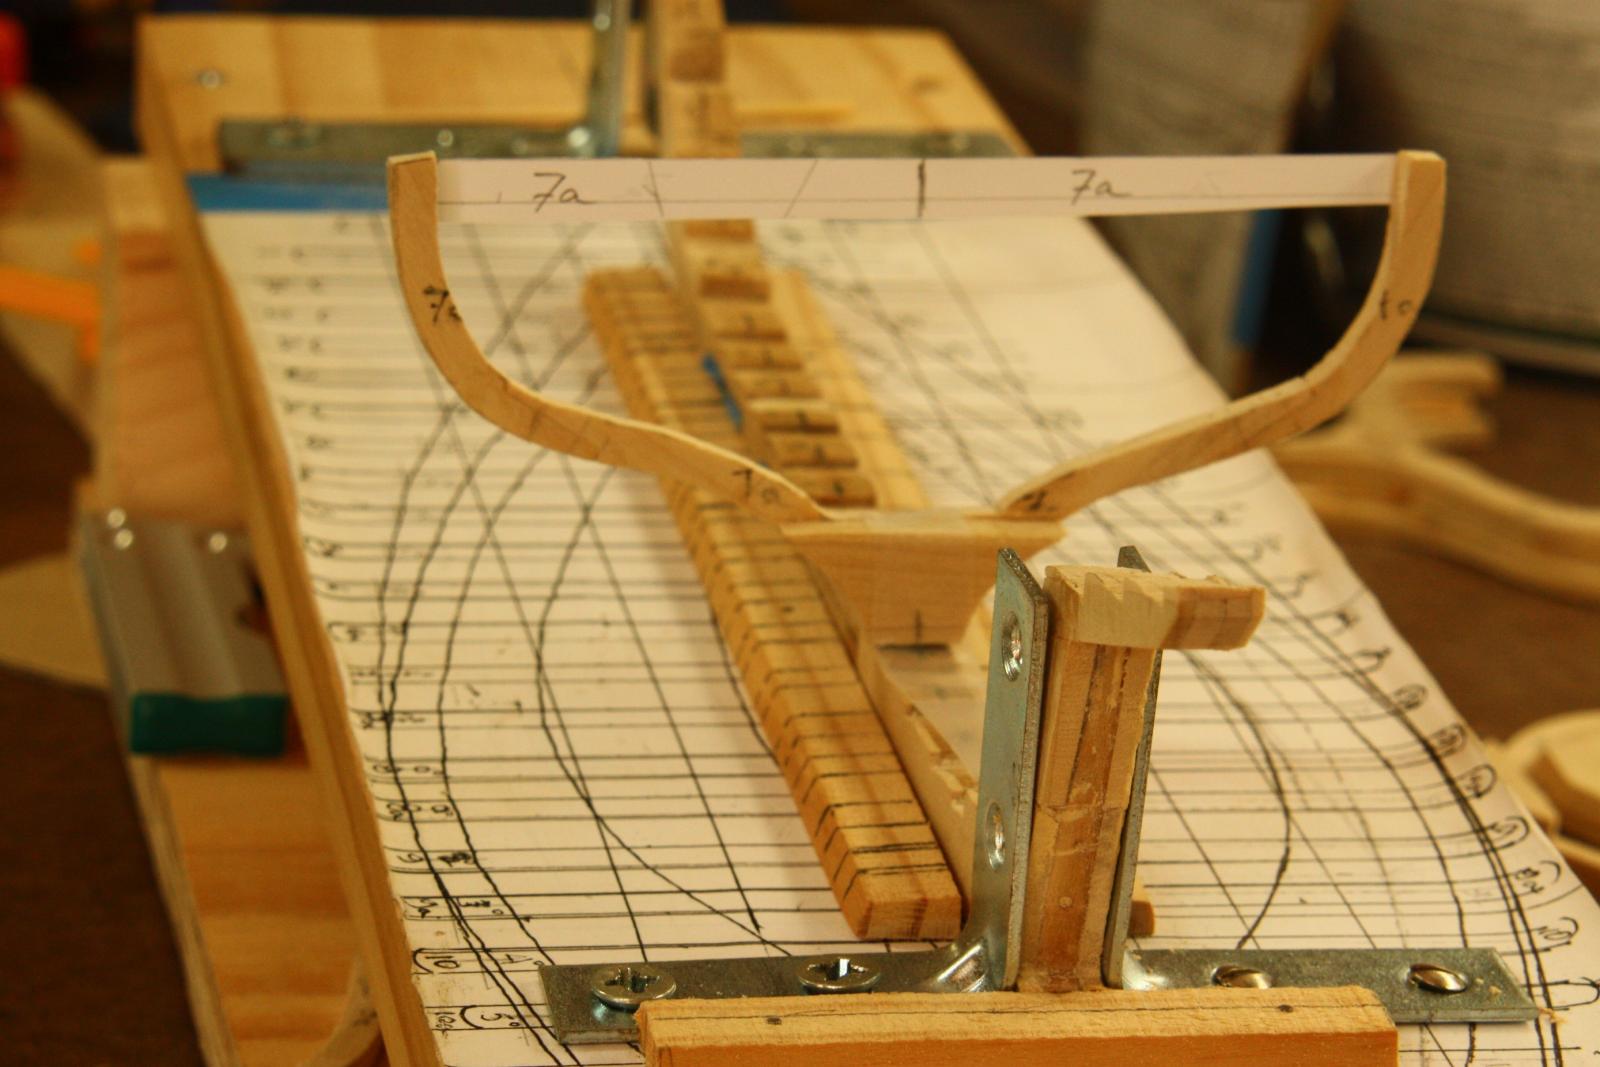
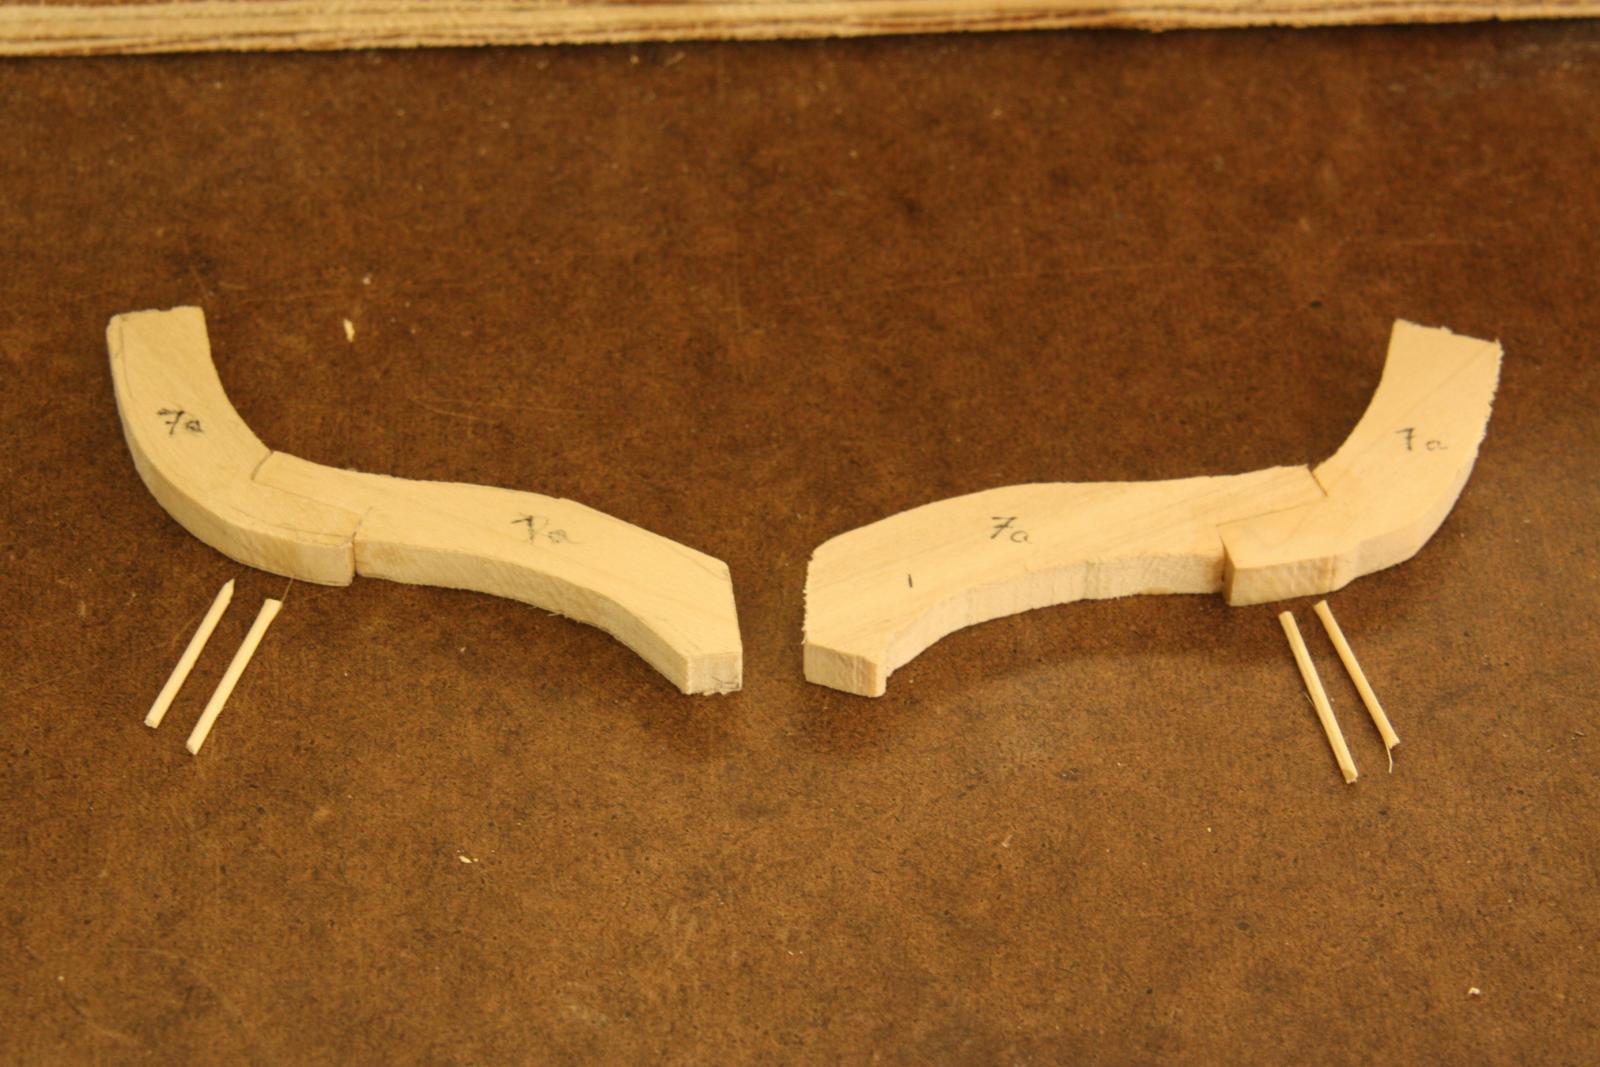
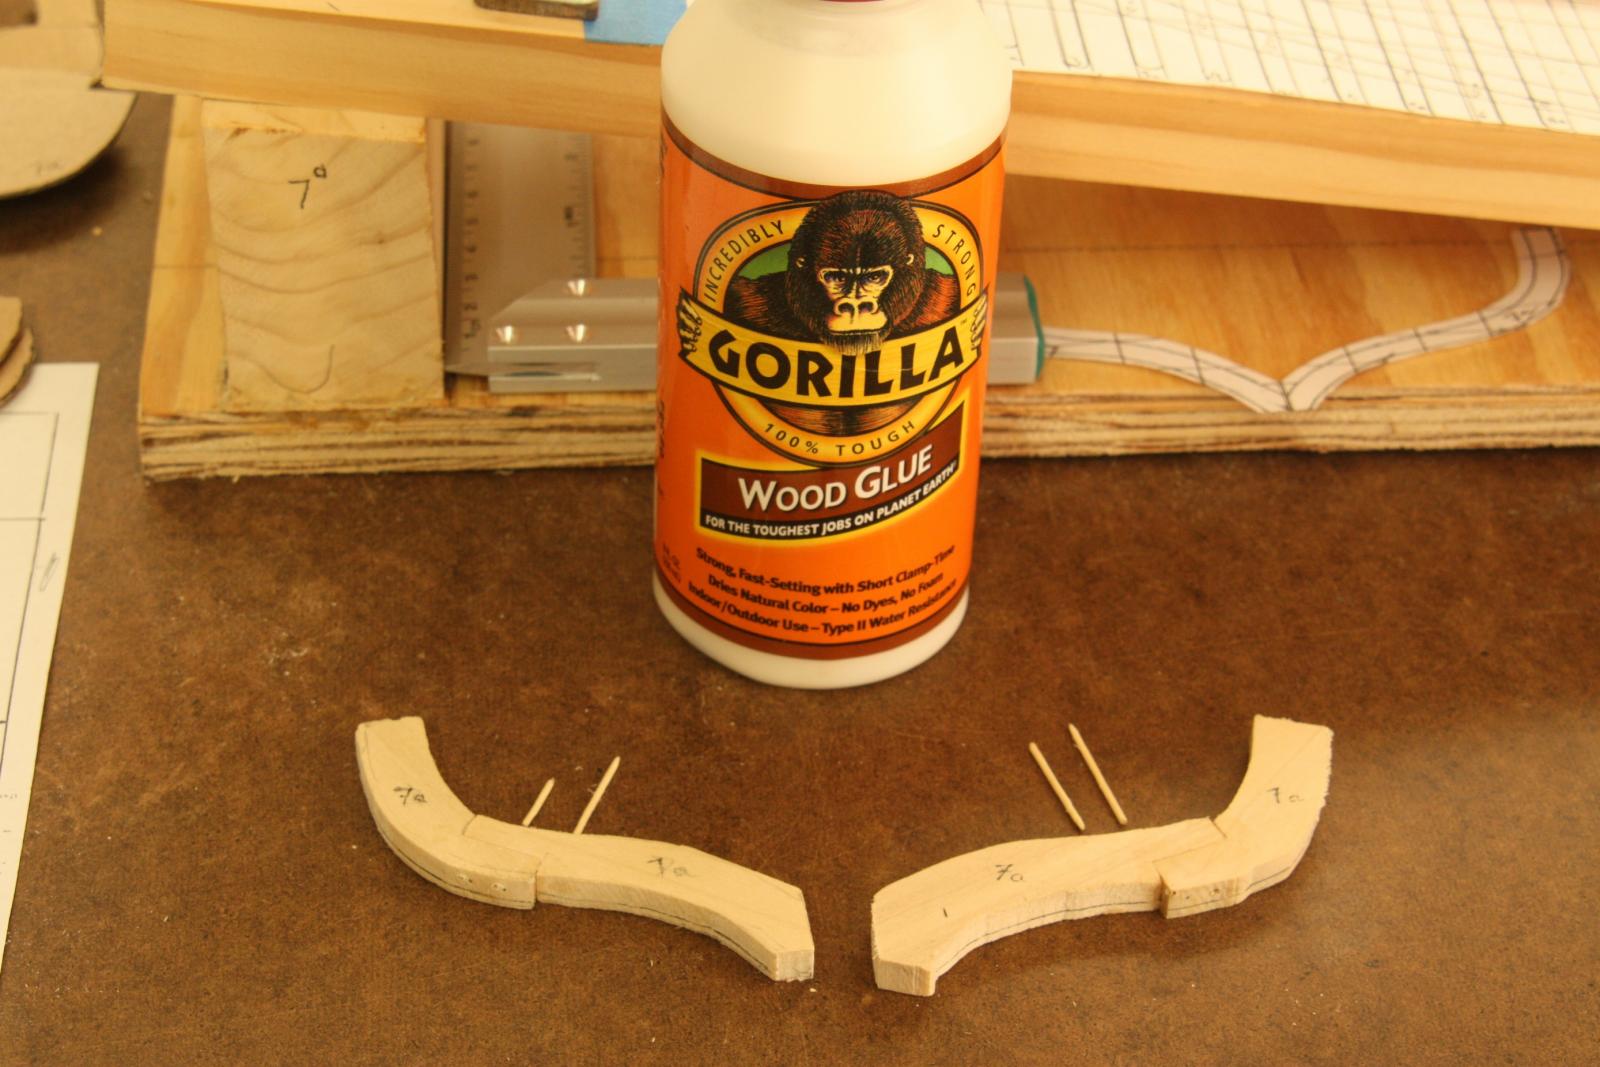
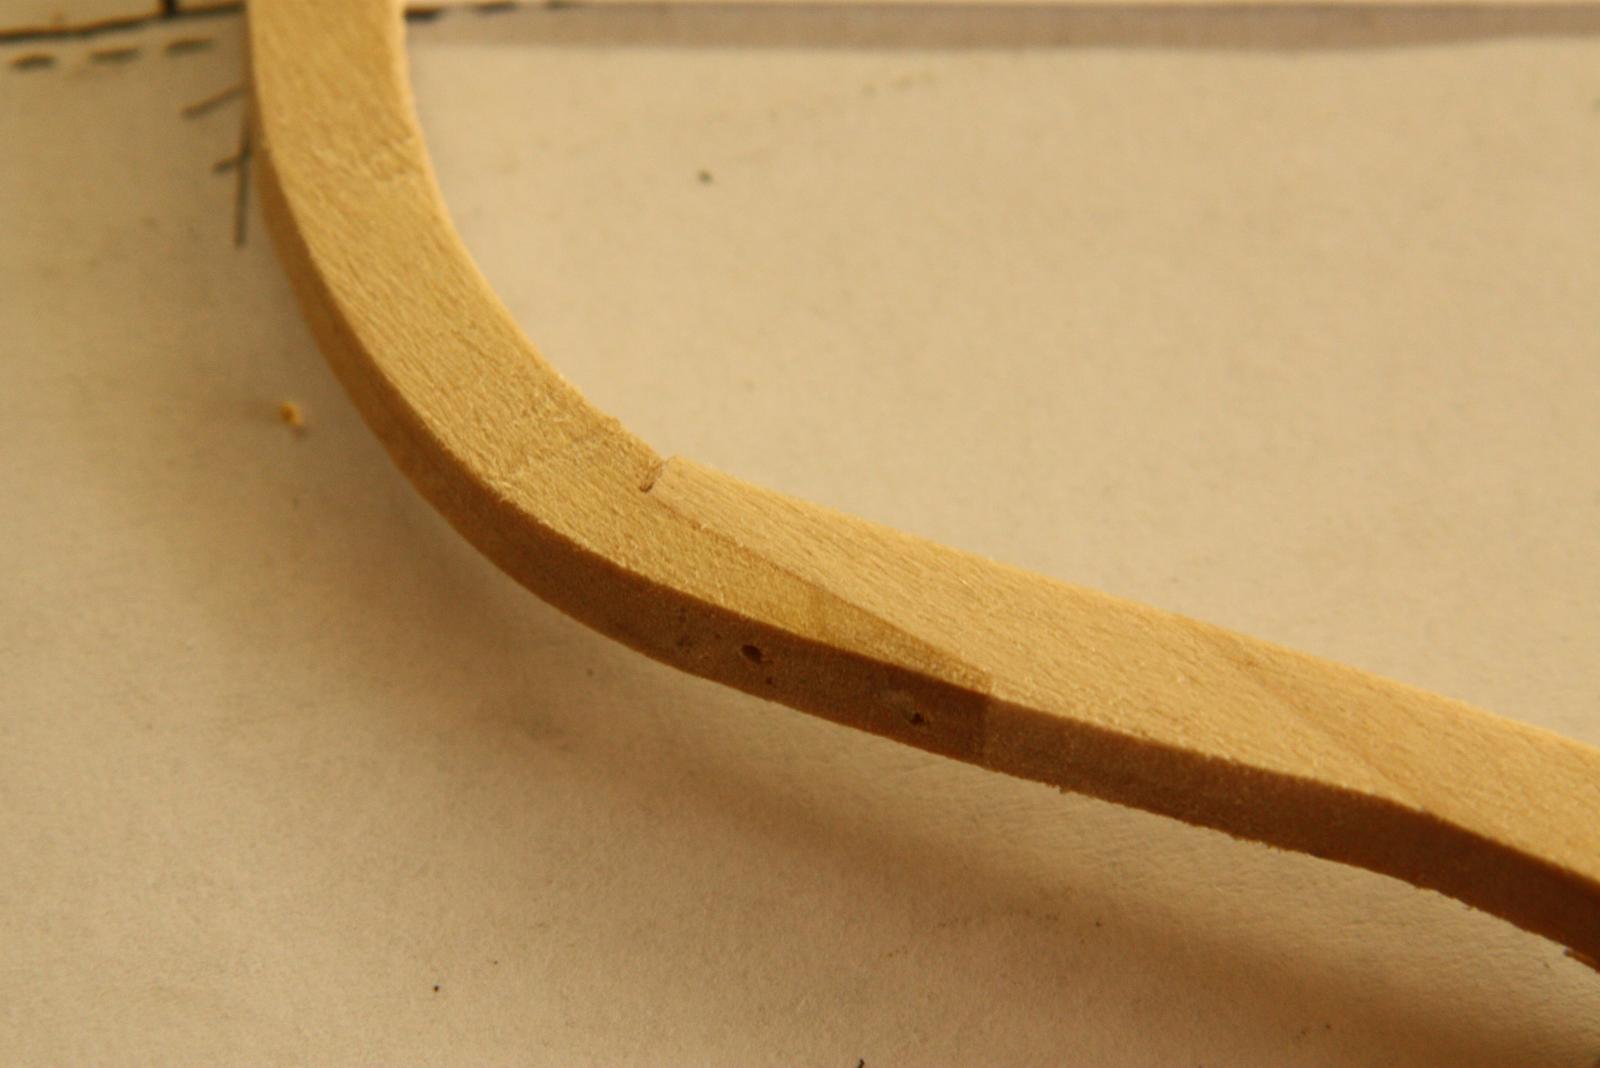
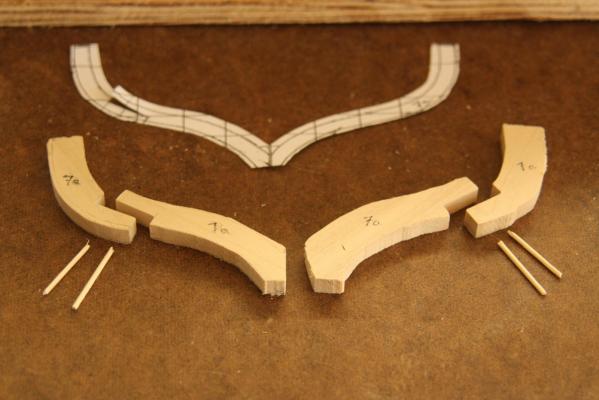
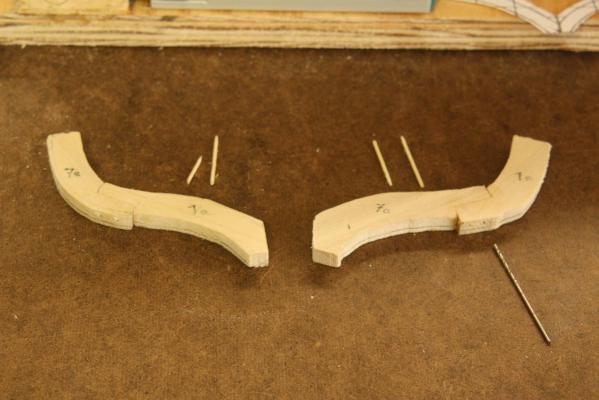
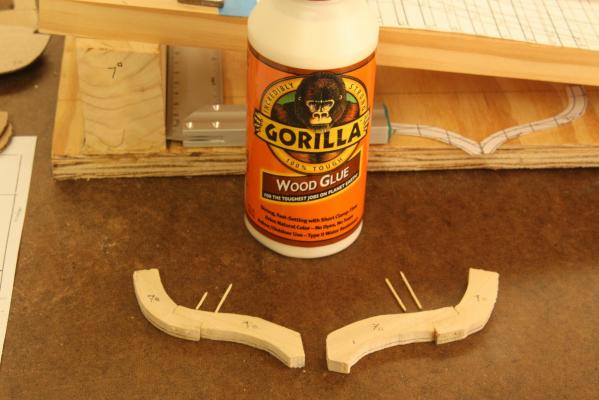
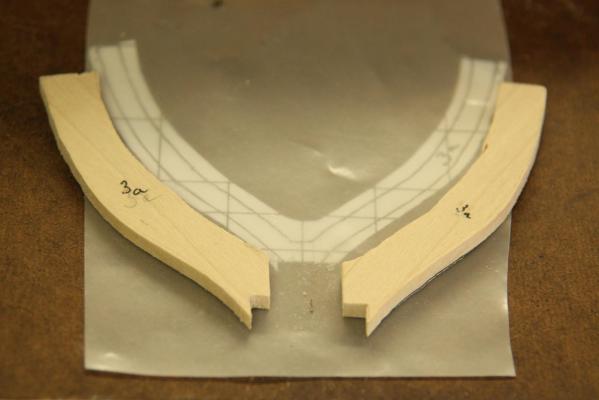
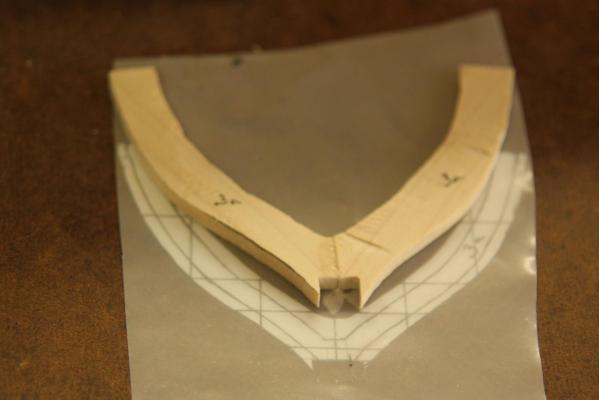
Following up on the previous frame build-up post, I like to show how I made the larger, curved frames. I decided to continue with making the frames in two halves but splice each half at the bilge curve. I also reinforced the center glue and pin joint with a block or some plywood as later posts will show.Here is a demonstration of frame 7a. The rest of the frames follow the same procedure. I again started out with more width and thickness then needed to be dressed to size after all the splices and center joints are completed. Then I paste the paper frame drawing on to the wood to sand then down to size. As shown I used Gorilla glue throughout this build, which worked fine for me. All the parts needed to assemble the frame. First both splices are in clamps being glued. The holes for the bamboo pins are next to be bored. The pins are now ready to be glued. Both spliced halves are now ready to be joined, they are also pinned. This is the completed frame all dressed up nice. The splice is clearly visible. Cheers,


-
Hi Bob, Maple is probably most economical in the better woods. It van be used for most everything and really not that expensive to make it prohibitive. Try Jeff ate Hobby Mill, he's a real prince to work with and has plenty of advice. Yes, It's nice if everything works but making pulley blocks even in 1:25 gets tedious to say the least. My VOC ship is at 1:80 scale and the small single sheaf pulley blocks are just 1 mm and I need hundreds of them. I'll have to settle with 2 mm. Fortunately I have very slim fingers and after my cataract operation my eye sight is back to 20 - 20. Oh well, we'll struggle along with the scale chosen, no space to display the model. Cheers,
-
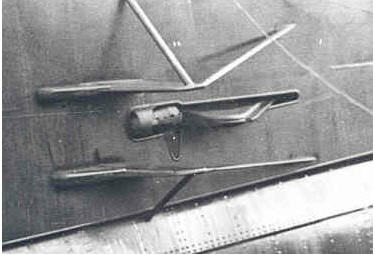
First of all, thanks fellows for your likes, appreciate it. With the admiral temporarily in another harbor, the daughter's place near Pittsburgh, PA , there are a few domestic chores I need to do now. I had some time this p.m. to go to the shipyard (garage) and do some more work on the trim vanes. I completed the moving mechanism and temporarily installed them for workability and fit. Nothing was cemented yet but they seem to work as advertised ! My biggest concern is the main swivel pin. I cannot CA glue them before putting the main swivel piece on them, they have to be installed together, it's a space problem. Sooooo,what to do and not glue the swivel to the hull frame. A head scratcher for sure. I'll have to sleep on it and hopefully Mrs Sandman will give me a dream with a solution. Ooooh wait, I have some plastic sheet that any glue wont stick to, I'll slip a strip of that stuff under the swivel piece, worth a shot. Well, I really can't install the vanes yet, they need to be covered first with paper to simulate steel and then the net / cable cutter on the leading edge. Hmmm, another interesting project and will make it out of some brass sheet stock. It looks like that before I can even permanently install them with the protective triangular thingies on the sides ( ) I must first cement the fake steel plating to the bow end of the boat to at least behind the trim vanes. Okay, here are a few pics of the last two day's work. These are all the parts to install the trim vanes except for the main swivel pin. The copper tube in the lower vane is actually just shoved onto a 1.5 mm brass pin that I CA'd into the vane. That copper tube will be CA's into the main swivel allowing the vane to rotate. The top vane assy shows it as extended and the lower one as retracted. Here I have temporarily installed both trim vanes. I had to cut slots in the upper "longerons" to gain access for a drill. Unfortunately the drill bit was just a little short so I completed the hole depth by clamping the drill bit in a small vice-grip plier and by rotating this I got a good 7 to 8 mm hole for the pin. Even though this pic is a little out of focus but the aim was to show the main swivel and the swivel pin. This shows the trim vanes extended. I am aware that the main swivel on the port side needs to be sanded down some to bring the vane closer to the hull. Actually, there are several things that still need attention. This is the starboard vane retracted. The port vane is also retracted but can't be see, you'll have to take my word for it. Yeah, there is some damage to the side plates. That's due to having to cut a slot into the deck support frame located behind the pencil line. However, it'll be covered with the paper fake steel plates. At least it begins to kinda look like the actual photo. Cheers

-
Hi Terry, thanks for following this build I did a year or so ago. If I ever would build another model of the friendship sloop it'll be double the size then this one, like 1:12. Even at 1:25 things got pretty small to make with a tendency to get out of scale. I wanted to make everything work and it did but - - - Even with my slender fingers I had to spend a lot of time and patience to make the detail parts I incorporated in the build. I'll also use better wood! Cheers,
-
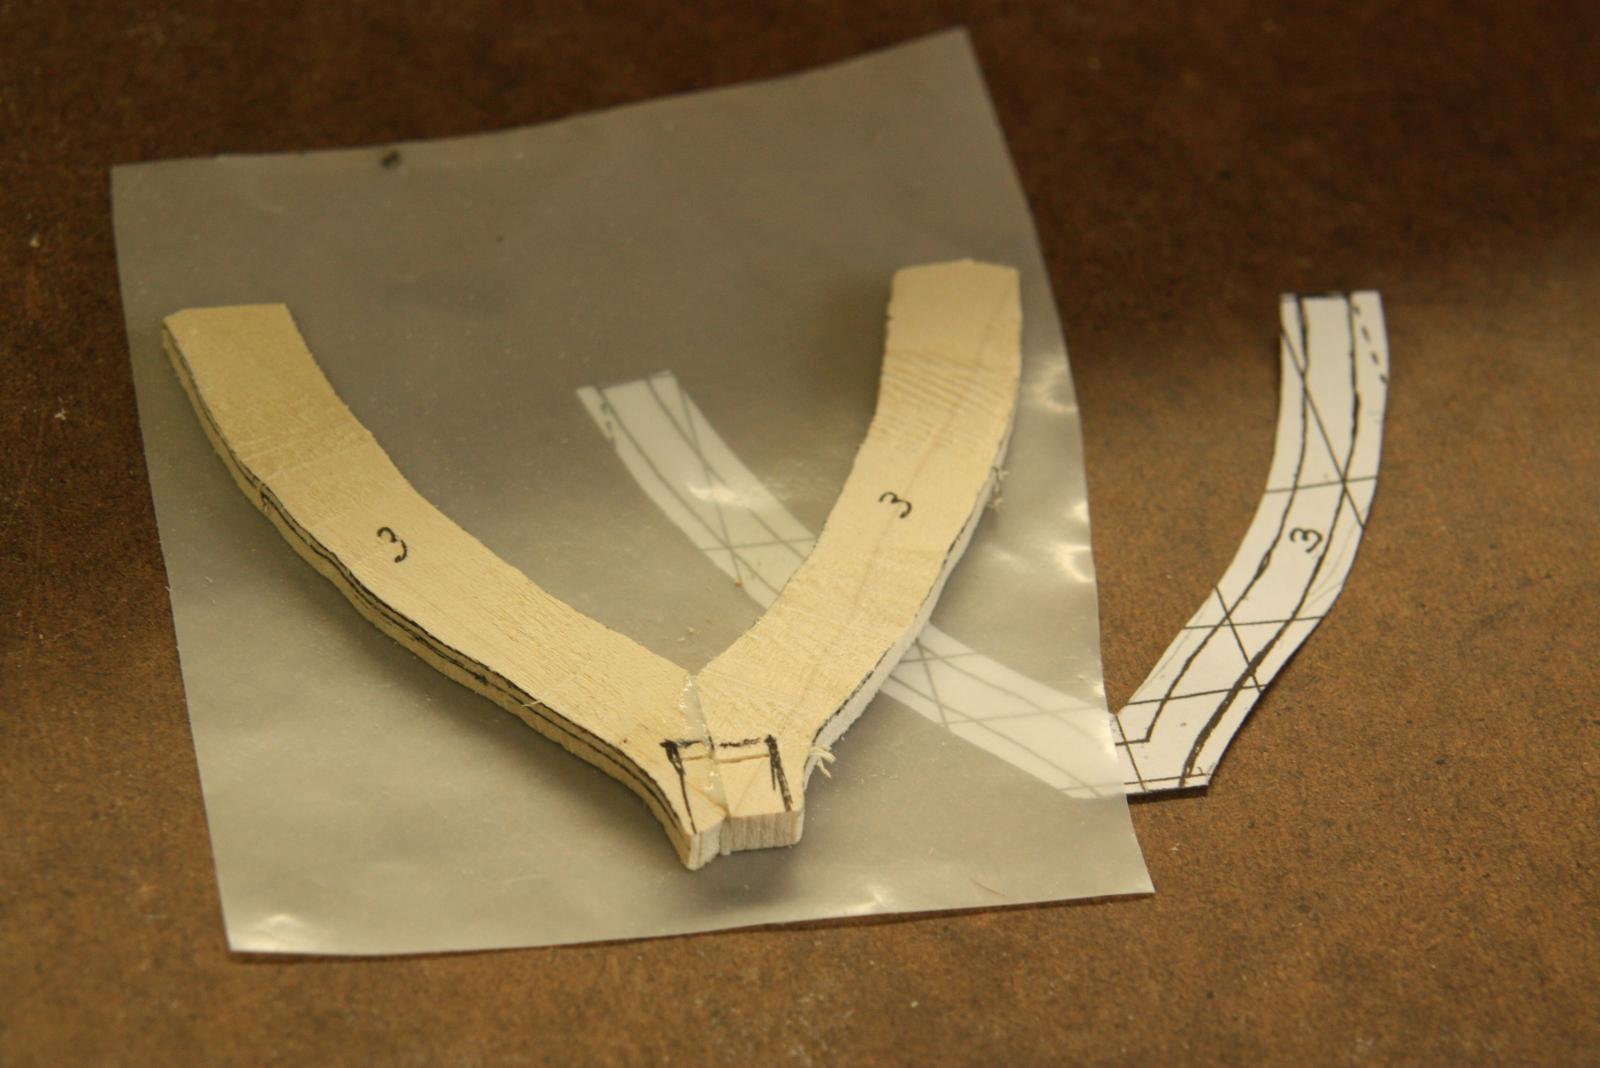
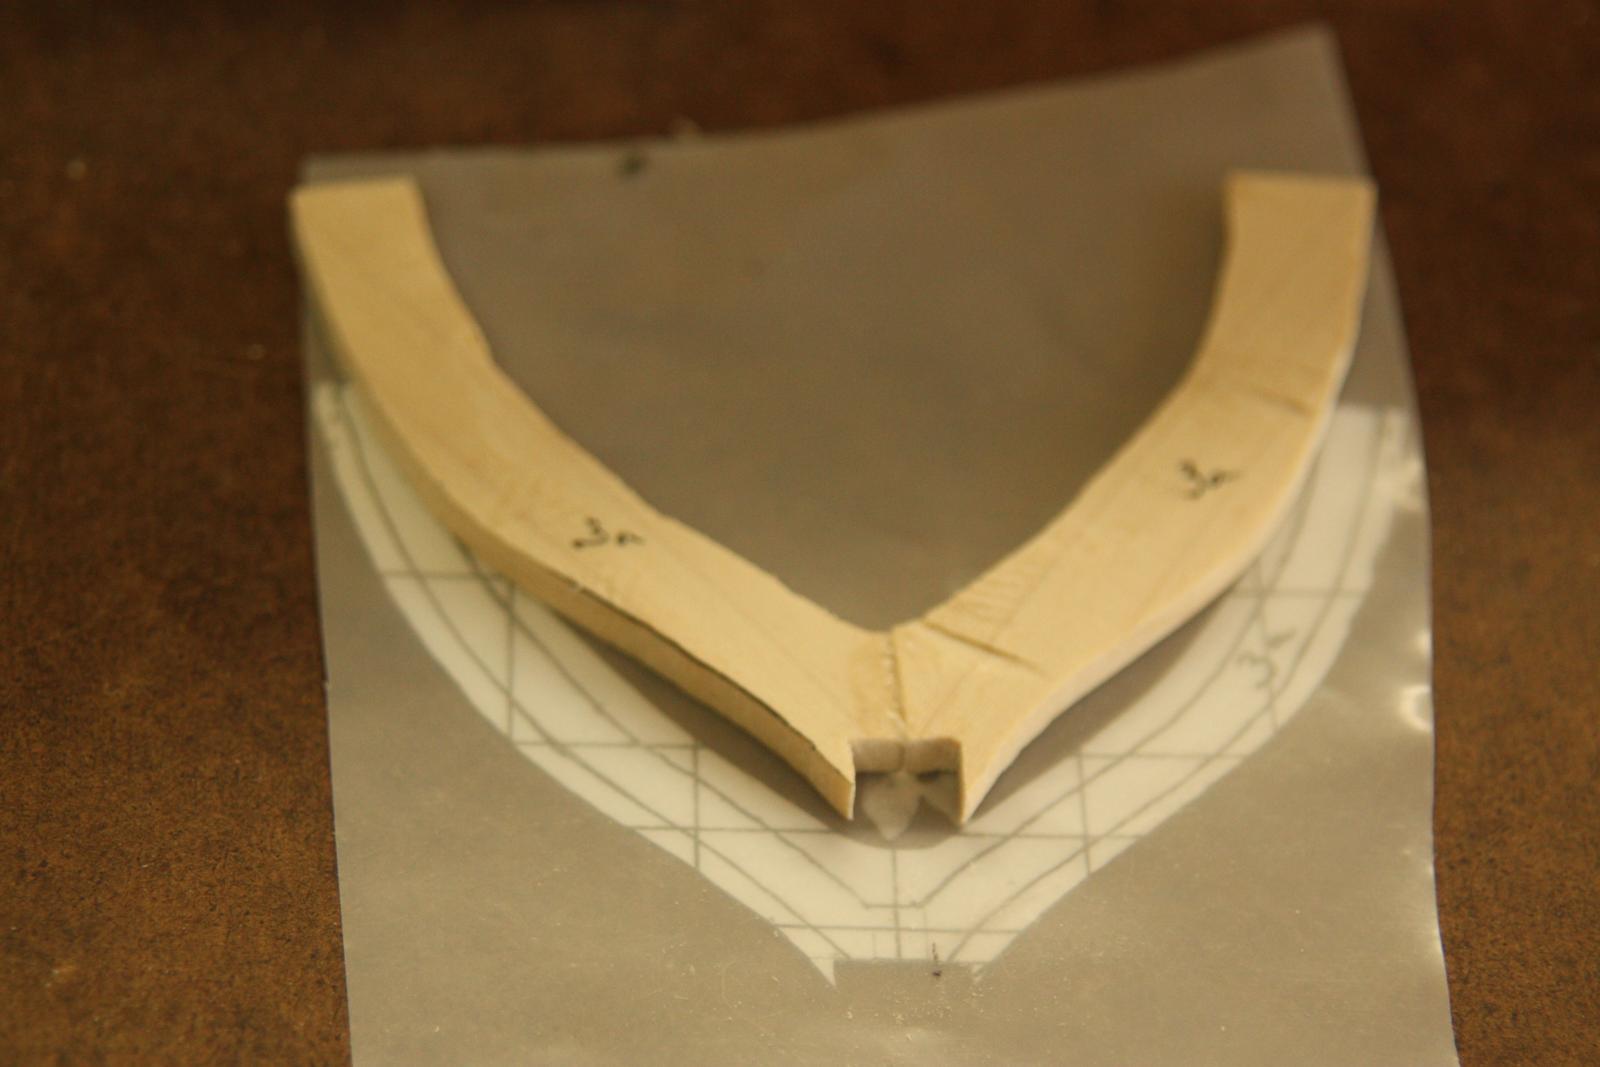
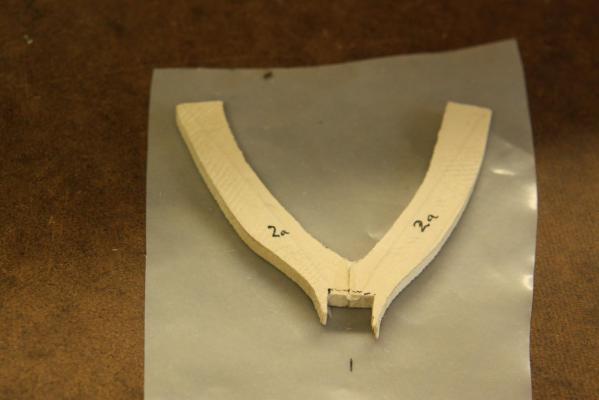
With the inherent weakness of poplar with regards to the grain I now tried to make the front frames in two halves, glued and pinned at the bottom. So, I cut each half rather generously to be trimmed after they are put together. Where the frames became wider I made the frames in two or even three parts, much like having floor timbers and futtocks. After they were assembled and sanded to the desired width I tack glued a copy of the frame drawing on it, allowing enough for fairing later, both on the inside and outside. I marked the frames with the estimated fairing lines. This method worked okay for me. Another issue I had with poplar is that it has a tendency to warp easily, which became a source of aggravation but learned to un-warp it before it was too late. This shows frame 2a glued and pinned at the bottom. You can clearly see that the grain runs nicely through the center of the frame halves. All frames are still in need of sanding them to desired thickness as well as further shaping to hull form. Frame 3 has been glued and pinned at the bottom. Yes, it looks rough but as mentioned above this is just the beginning stage. I used my number drill index for shaving the bamboo pins. I forgot what drill number hole the final diameter was. The pic shows it in the number 33 hole. Frame 3a is ready to be glued and pinned. I used a piece of plastic material on top of the frame drawing to locate the frame halves. The pin holes were drilled after the glue had set for at least 12 hours. I learned to drill the pin holes at least one number drill size larger otherwise the pins would not get all the way through and lock themselves up tight. There was no budging them and the only way was to re-dril the holes a little larger. It was a learning cure alright. Frame 3a glued together and ready for the pins. Cheers,

-
Ahoi, Cap'n Bob, great question. It would either be Swiss pear, cherry or boxwood. At the time it was a matter of economics, even is today. The Friendship sloop was going to be a practice project for my actual build of the VOC ship but with my nature of wanting to do things right I ran into some aggravating issues with poplar. In retrospect I should have bought the cherry and start over again but I stubbornly continued to work with it. Several of the issues are buried under the planking and interior finishing. Now you can see why I would like to rebuild the sloop but in a larger scale. The end result was satisfactory to me though, not perfect, but nice enough. I think that poplar or bass wood works okay for a first planking but not for the final planking or frames. I used cherry for the VOC ship planking, which I did as a single planking job. Worked just great. The deck planking is maple, worked fine as well. This was recommended by Hobby Mill to fit my budget. Cheers,
-
Hi Mark, well, here I go thinking again - - - Actually, right after I mentioned it I started to "engineer" a way to do just that. I have to model the guns anyway and mount them so it's just one more step to fold them and push 'm down. My biggest problem is some good photos or drawings of the guns. Hmmm, I have the make and then there is google - - - Today was spend doing grocery shopping and prepping a few dishes for the admiral when she comes back home again. She drove up to Pittsburgh, PA to assist our daughter with the move of the grandson to college (900 miles in 13 hours, in one day). Wow, how time flies. I have seen the little bugger being born and now he's off to college. So, I'll have to spend some time cooking, mostly Indonesian and Indian stuff. She loves my cooking, mainly because she doesn't have to No, really, she likes Far Eastern food but not too spicy. Cheers,
-
Next episode are making and placing the frames. I have not bothered making photos of each individual frame being made. I cutout the paper form and tack glued them to the wood, keeping the grain in mind. Then I rough cut each one slightly larger then the fairing line. Only when all the frames were cut and temporarily fastened to the keel did I begin to check for fairness. I have also not made any pics of this process but I remember making a batten at the gunnel location. I glued strips of paper across the top of each frame with a centerline marked on it so that each frame would be located at the center line of the hull using a sting from bow to stern and with 90 degree angles and protractors on the sides of each frame. As mentioned before, most frames are made up of two pieces, spiced, glued and pinned to keep the wood grain in line of the frame. Each frame was reinforced crosswise at the keel, then glued and pinned to the keel. The pins were installed diagonally to aid strength. The cross pieces was an afterthought because poplar wood is not very strong at each grain line and splits easily. All would be hidden by the cabin deck and interior furnishings. I won't bore you with a bunch of photos of the placing individual frames till all are made, permanently secured to the keel and faired. Below are just a few of the first frames. Cheers,


-
Hey John, my, you are quick ! Yes, for sure but it's these little things that take so much time. Oh well, at least it keeps me out of the bar not that I frequent such facilities. Wait till I get to the con - - - they had two retractable A A guns! Should I - - - hmmmm. Cheers,
-
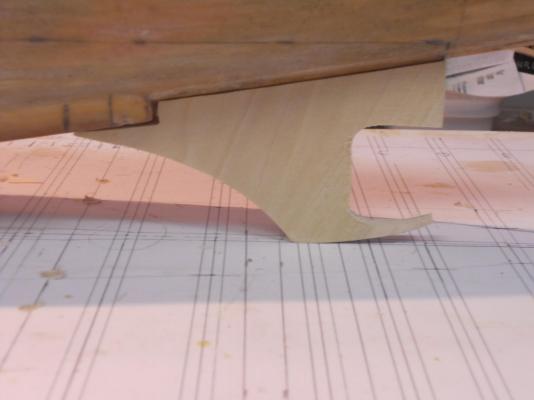
Thanks John, yes, and challenging . But in the end I hope it's all worth it. After some yard work this morning I ventured back in the dockyard (garage) after lunch and modeled the vanes some and also carved some more wood away in the deck frames. Lo and behold, the vanes now overlap each other in the center Everything is still rough and in need of some more shaping and trimming but I'm quite happy with the result. The pic below shows the vanes just loosely stuck in and not in their actual location. I'm now also working on the retract and "swivel mechanism." Last week, while waiting for my bandsaw drive belt I cut out the rudder hinge frame and keel extension on my Proxxon scroll saw. This too is still in the rough stage and needs shaping yet. Below are the pics showing it temporarily stuck under the aft hull. Well, at least there is some progress towards the positive side, building up instead of tearing down Trim vanes temporarily stuck in before extra rework on the deck bulkheads and vanes . Trim vanes temporarily stuck in after rework to the deck bulkheads and tapering the vanes towards the trailing edge. They can now go all the way in but this photo shows them close to where they belong. Yeah, they can still go a little further according to the photo. the rough cut rudder hinge frame / keel frame loosely stuck under the hull. There will be a cable / net cutter at the leading edge. This is a forward looking shot of the rudder hinge / keel frame. It still needs some modeling work and metal work before I can fasten it to the hull. Cheers,

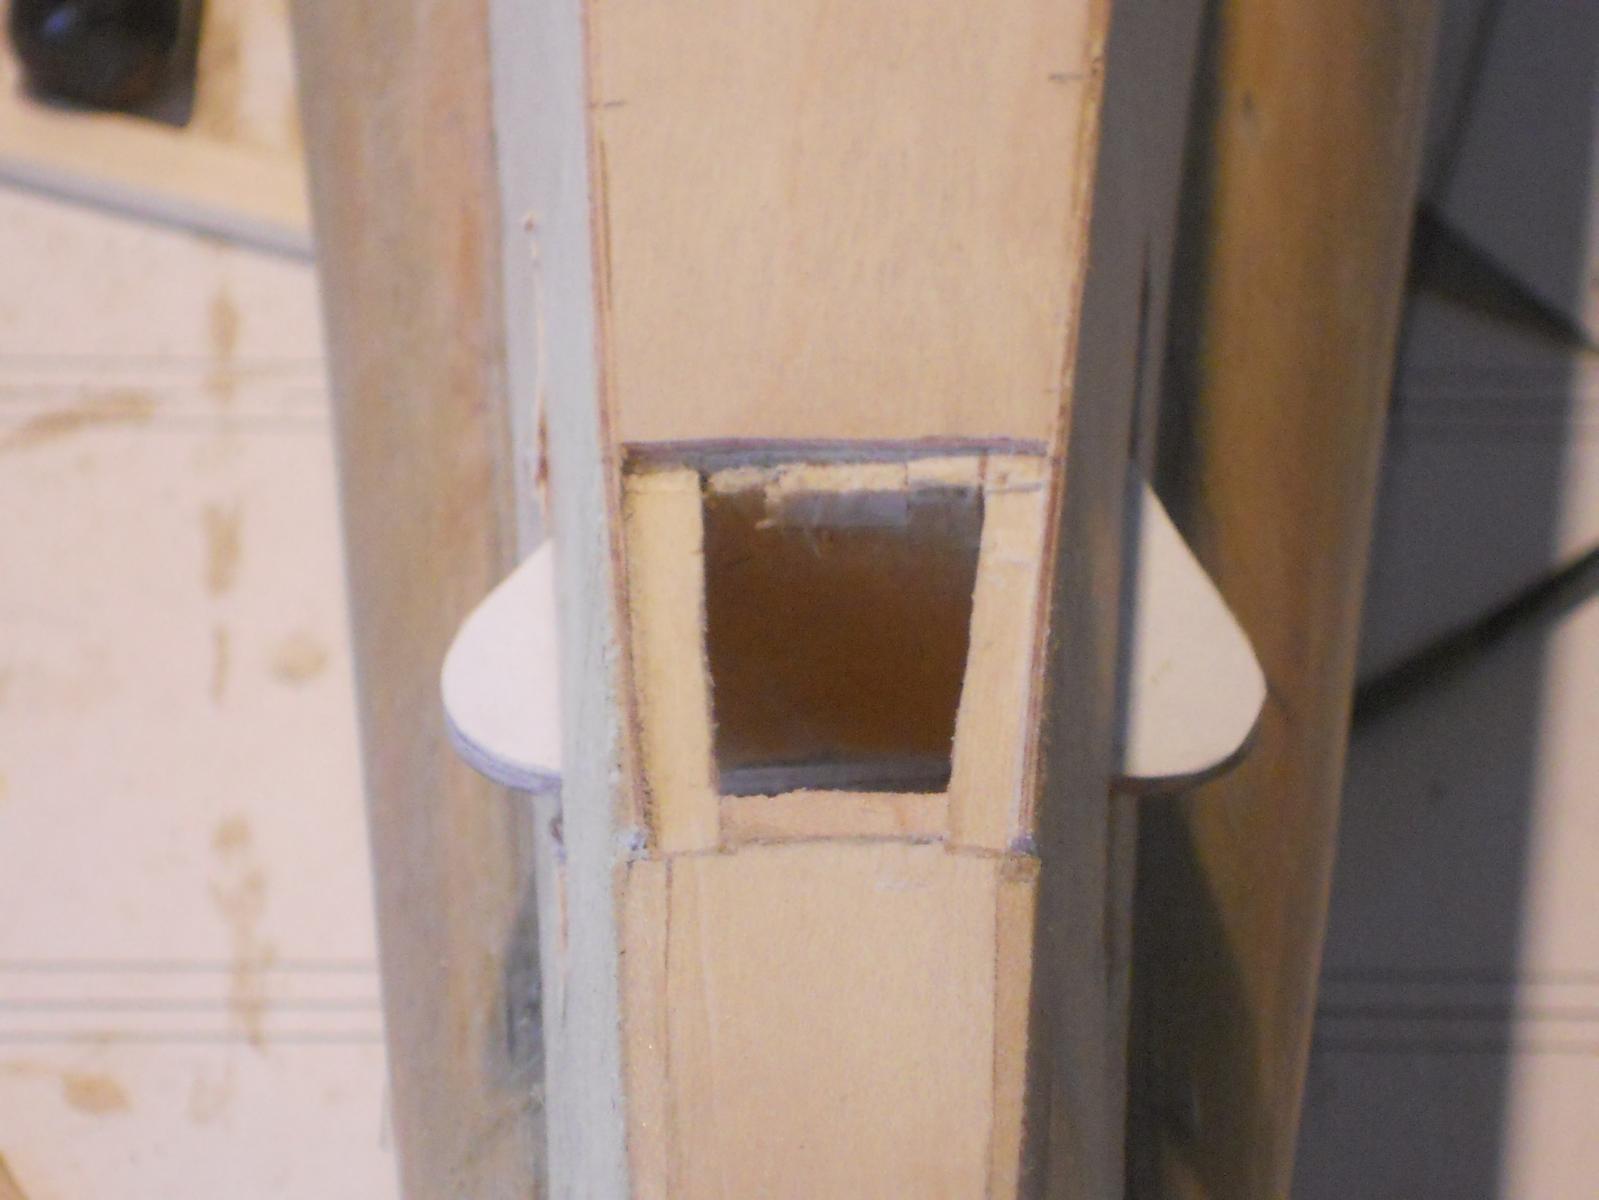
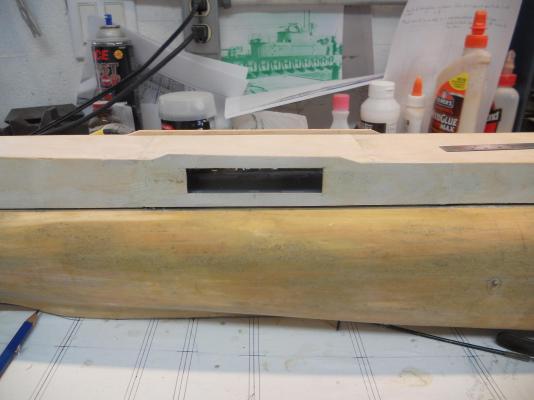
-
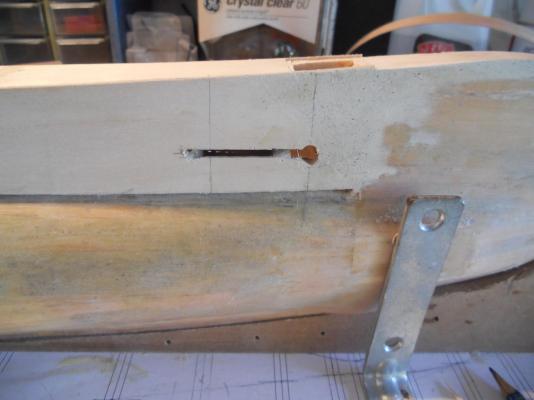
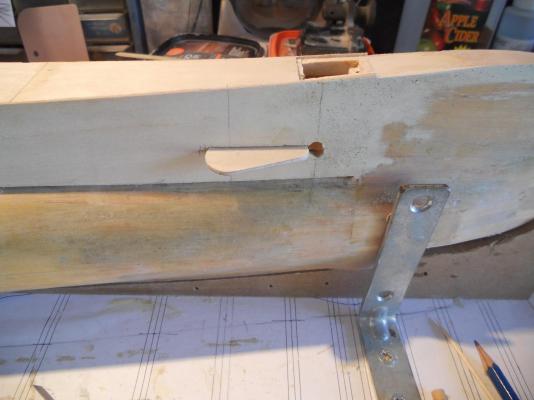
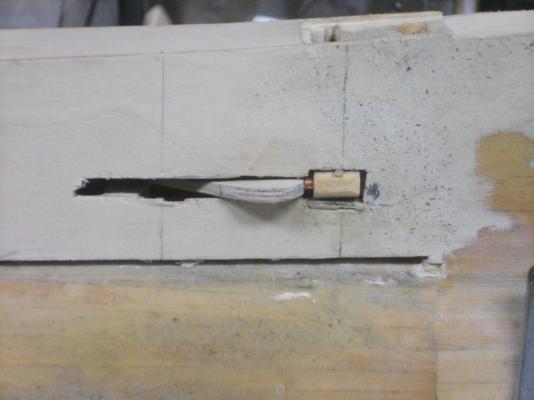
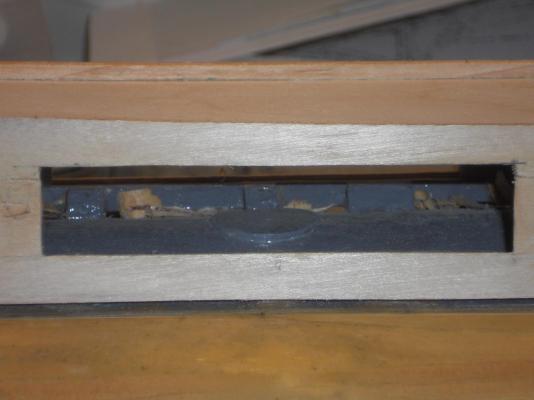
Hello all y'all, Yesterday I took the bull by the horns and removed 2 mm from the top edge of the deck torpedo door opening, starting on the port side. I also had to shave 1 mm from the underside of the deck beams. It is now also the size it should have been and checked it against the model drawings of the O 21, the boat build right after the O 19. This should also answer the question Borus had. I need to figure out how to make a "doorstop" at the top of the door. I had to remove material from the top frames and lost whatever i had that acted as a stop. But never fear, I'll figure out a way to do that. I also completed both trim vanes and found out that they would not go inside the space provided as shown on the original photographs. I now need to very carefully carve some wood away in the deck frame bulkhead. The vane will also be tapered a little towards the trailing edge, which will help a lot. Oh boy, what a tangled web we weave deck torpedo opening at 14 mm high. The bottom edge is .5 mm below the launcher turntable, just right. This is a close-up of the opening and you can see the launcher turntable Both trim vanes temporarily installed. More work needed to make them look like the photos. Cheers,

-
Hi Kevin, in actuality the trim planes did fit nicely inside the deck structure and above the pressure hull. Only a small portion remained outside. See pic below. Some time ago Gino den Ridder send me a whole bunch of photos and there are few that show them retracted. Now that I have made both vanes and inserted them they would not go in as far as the pic show. They but against each other in the center so I figured that they must overlap each other by rotating each one slightly in the opposite direction. I am carefully carving some space inside the deck area for that purpose. Gino send me another pic yesterday, which is much clearer then the one I had before. He also send me a pic of a drawing he is working on that shows the vanes retracted. Sometimes it helps when one has an engineering mind That drawing is a redraw of the deck layout with some added details because the original from the navy archive is not very clear. Cheers,

-
Hey Mark, thanks for the kudos! Actually my birth name given by my father is Pertus Wilhelmus and Petrus is the Latin version of the Greek Petros, which is after the apostle Peter. Petros means - - - rock, go figure I have been accused by an elder in our Church as being true to my name and namesake, the apostle Peter which was not meant as a compliment but I liked it and told him so, there - - - We remained good friends anyhow. Wilhelmus? I'm glad you asked. It's the Latin version for William and means "the trustworthy one." Yeah, my father's family was Catholic and liked Latin names for their kids. I like Piet though, nice and short. Cheers,
-
Thanks Mark and Anthony for your likes! Anthony, It's really not difficult to have several irons in the fire. I admit though that I'm slacking off with my picture painting and drawing I have about five started but it seems that my models, specially the O 19, takes preference. I get up at seven in the morning at at eight I'm rearing to go, stop for a break with coffee, then lunch and at it again till seven in the pm. The admiral cooks dinner most of the time so I can get stuff done. I do all the house maintenance and yard work, including my koi pond. I am most fortunate being able to do all the things I do. My admiral helps though with keeping "order in my life" Old? Yeah, I understand that some people are not as spry as others. Most folks guess me at 60 or 65 years old, which I take as a compliment, being 79 and some. Other then a few physical setbacks I feel just great and keep on moving like the proverbial pink wabbit. And then to think that I actually stared death in the face several times, some violent and some being felled by deadly diseases as POW with the Japs. Anthony when you wake up and see green grass it's a good day, then set one foot in front of the other and keep moving. keep the body and mind active my friend. The Friendship Sloop is a reposting from MSW 1 so all I need to do is write the stories behind the pictures and yes, that also takes time and I hope that some folks may be enticed enough to try their hand at scratch building Y'all have a great weekend and Cheers
-
Thank you fellows for your encouraging comments ! Of course I'm having a ball here in my hot garage aka dockyard This particular mod is double difficult because of the very limited space I have inside the deck structure. There is a question I have about how much of the vanes are actually retracted into the deck structure. The photos I have show a portion still sticking out the sides and that corroborates with the vanes I have made. I have send this question and a few others to my friend and mentor Gino den Ridder. In the meantime I did some quick math about the deck torpedo launcher, prepping for the build. For 21 inch torpedoes I figured the ID to be 10.29 mm which should give me an OD of about 12 mm, maybe less. I'm going to make them from card stock, which should only add 1 mm. Good so far. Then I measured the door openings and low and behold they are 12 mm. Hmmmm, a little too tight because there are is a turn pad underneath the launcher and hinges for the closing doors on the tubes. Well, it looks like I have to make the door opening at least 2 mm higher. That means I have to shave 2 mm off the underside the deck beams and make new doors. Are we having fun yet? Of course I could just fake it and make the tubes a little smaller, right? No one would know the difference - - - - - oooh, auch, auch, what was that? Ah, I know, a few slaps on the back of my head. That's what my father used to do when he wanted my attention or when I goofed up. Okay, okay, I'll make the area under the deck a little larger pappa to accommodate the launcher at it's scale size Never a dull moment. Not thinking ahead At least my bandsaw is back on line and have made some pieces for the rudder frame / keel. sorry, no pic - - - forgot - - - didn't think about it Cheers,
-
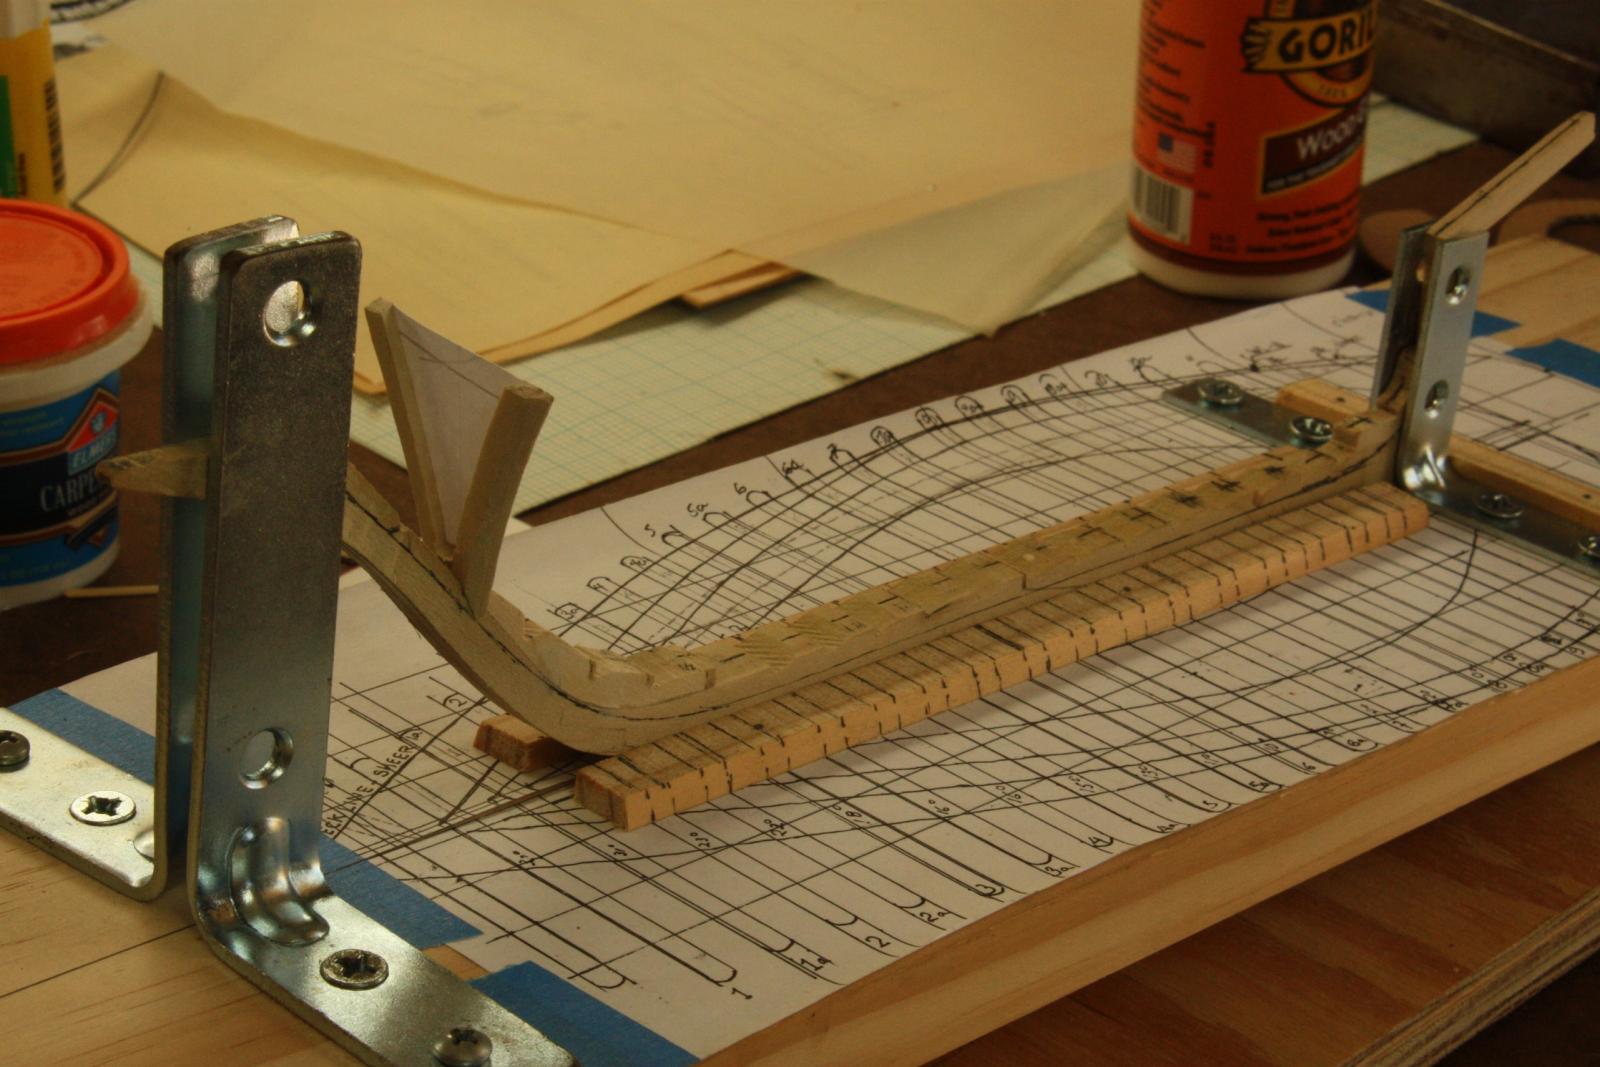
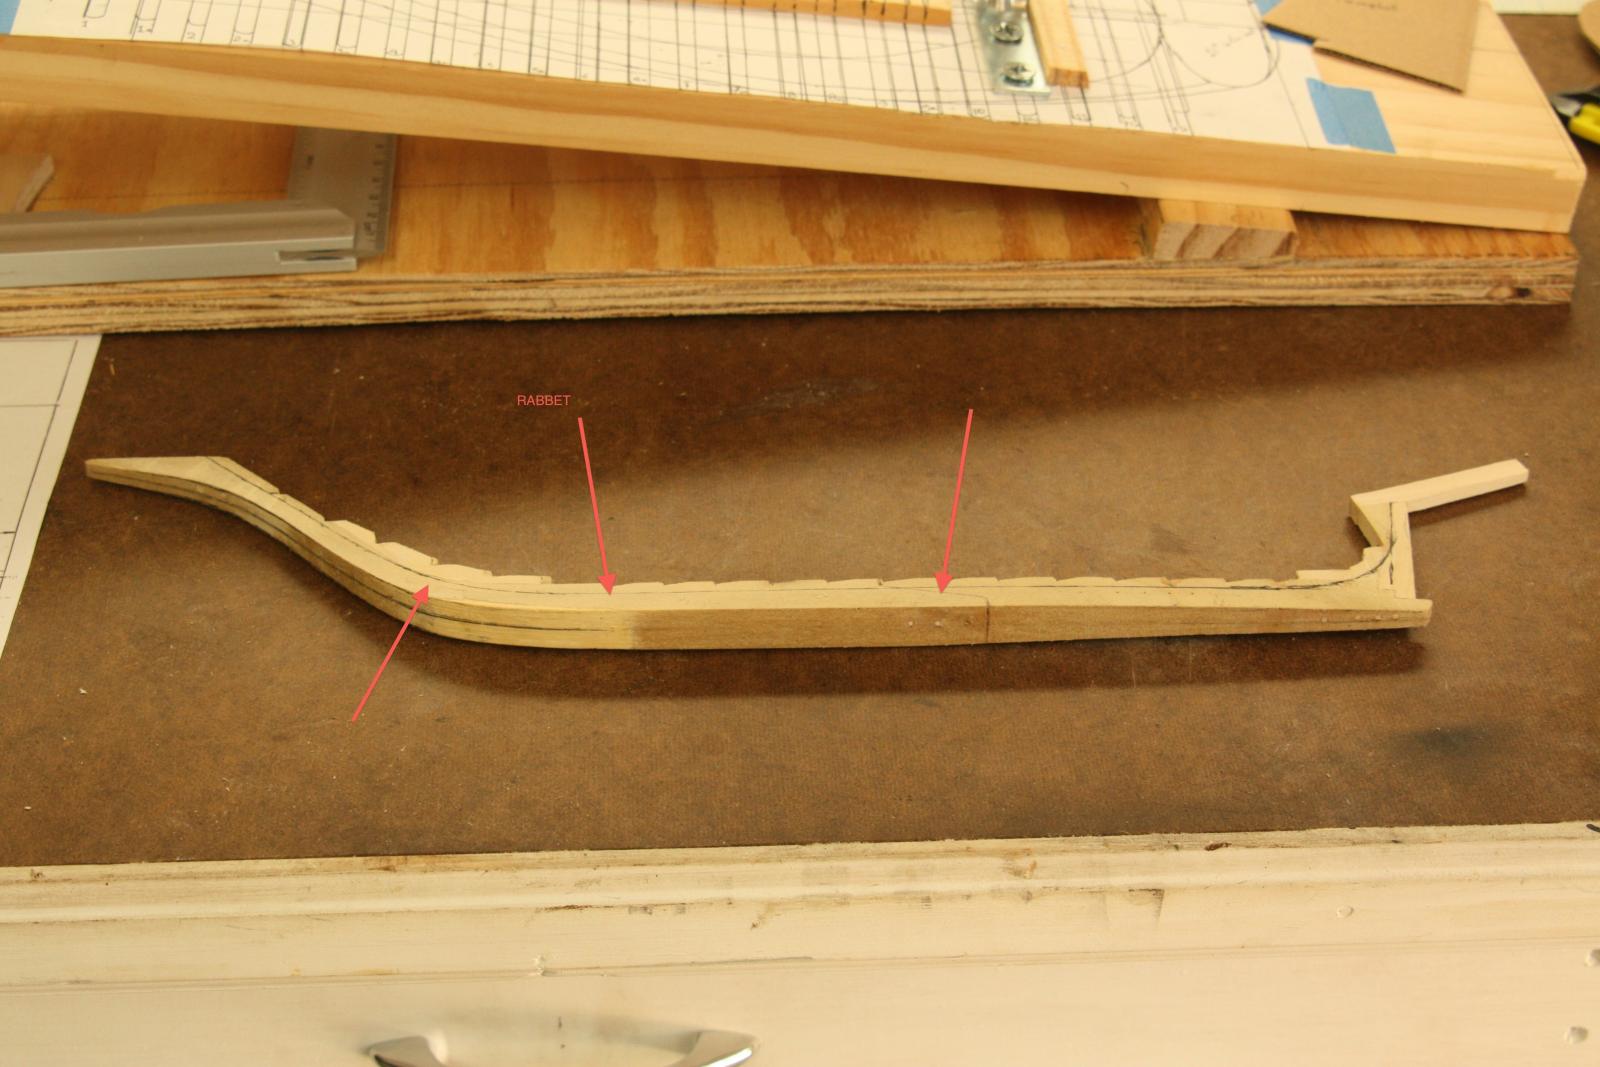
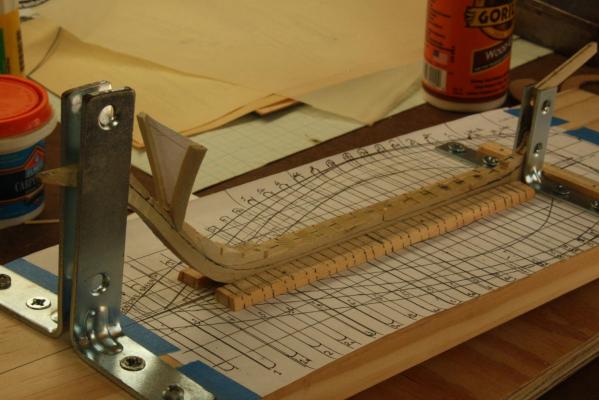
You guys are awesome, great stuff. Well, now that we have all the frames on paper they can now be tacked to the 1/4 inch poplar boards. However, as mentioned before, I had to keep the run of the grain in mind so that the grain would favor the long part of the frame. But before I can cut the frames I had to make the keel. I made the keel in three pieces with hooked scarf joints and pinned with two or three bamboo pins. At this point I don't remember exactly if there were two or three pins, but that doesn't matter right now. The point is that I pinned all glue joints, including the frames. All three pieces are made into 1/2 inch wide by gluing up two 1/4 inch pieces. These too were pinned together. I also marked and cut the rabbet. This may not be clearly visible in the photo and I didn't make a close up at the time. I then cut flat spots into the keel, where the frames are going to be, parallel to the waterline. I figured this to be the safest method for the model to ensure a nice and flat surface without having to cut the frames to a fit the sloping keel. I will also pin each frame to the keel when ready to be permanently glued on. I actually spend a lot of time in this process. Okay, the pictures can fill in on the story. The keel has been made. The left and right red arrows show where the splices are. They came out quite well, the one at the bow end can hardly be seen. The dark line is the rabbet. I also tapered the keel width wise going forward and to the rear. This is also quite visible on this photo. Here is the keel set in the dock fixture. The two keel splices are also visible. We are now ready to start cutting the frames but we'll reserve that for the next episode. Cheers

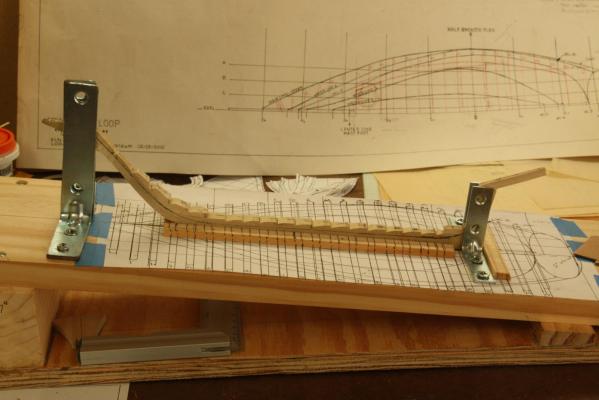
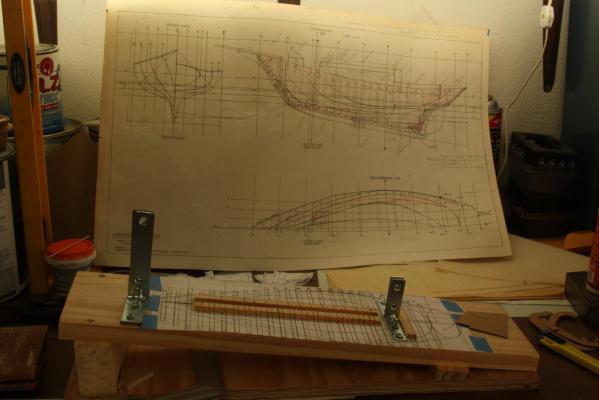
-
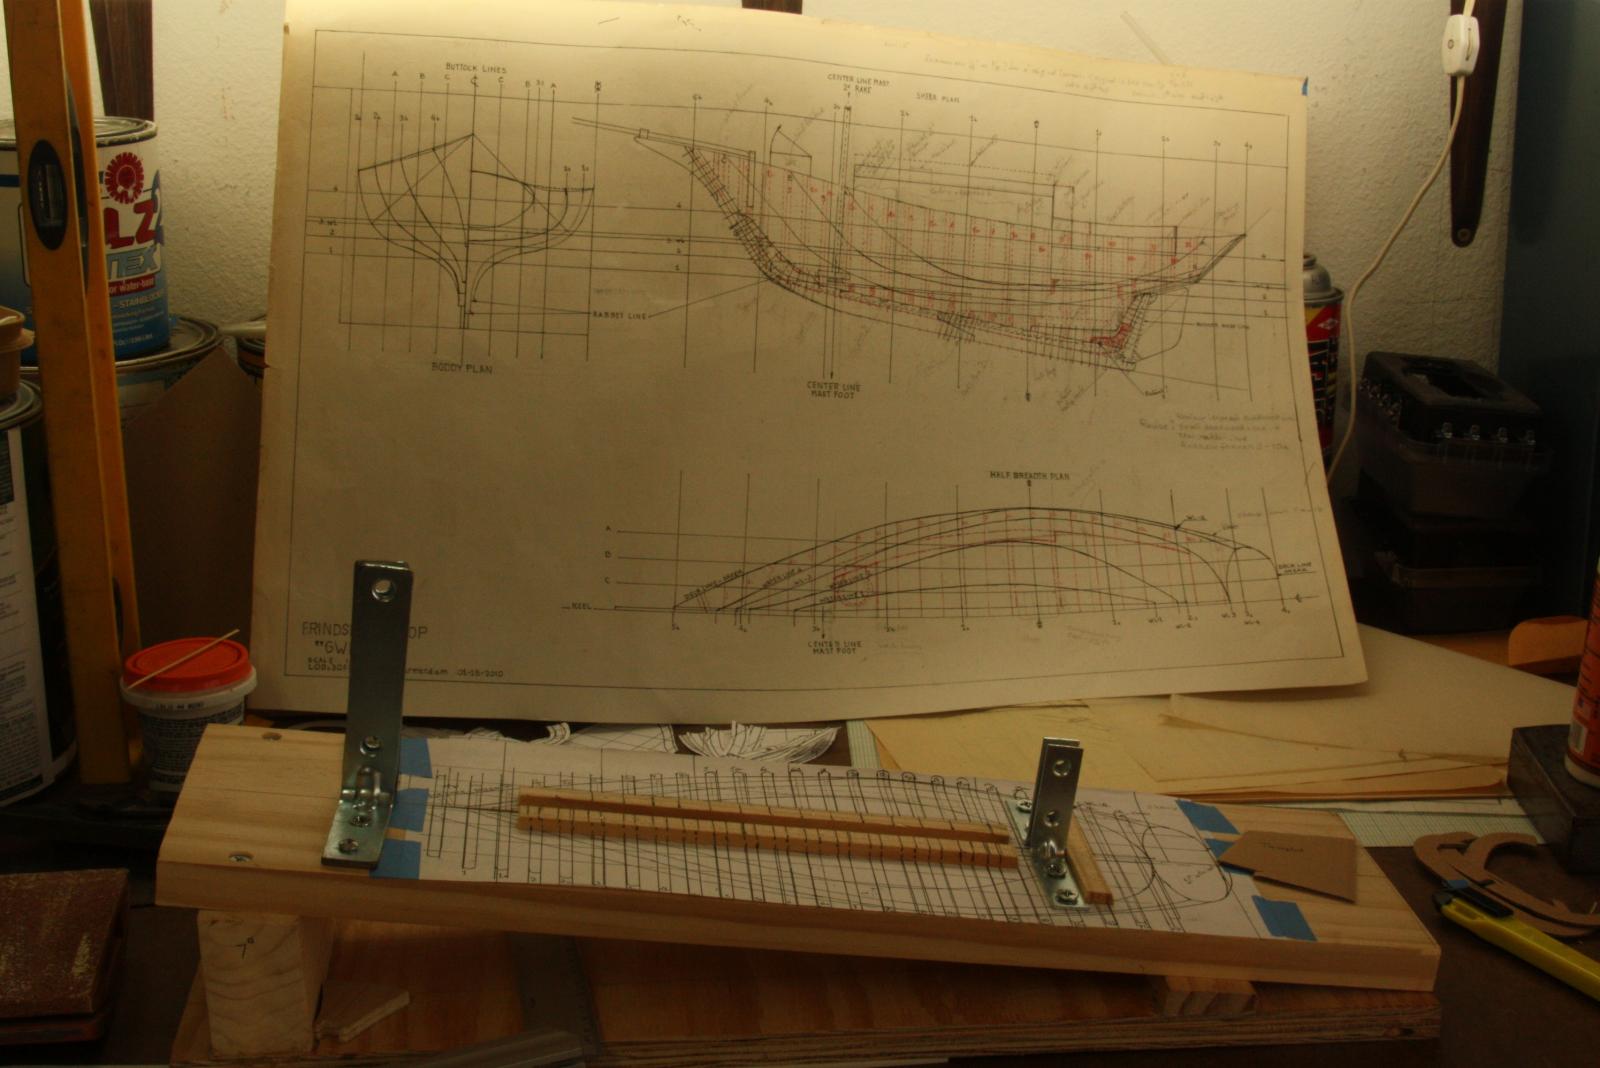
For today's episode I'll show the layout of one set of frames and the build dock. As the lines drawing shows there are no specific lines for each frame. I had to plot each one individually using the sheer and half-breadth plans and hoping that the final shape of the hull would be as I wanted it. The cardboard mockup seemed to indicate it would but the final test would still be in wood. As it turned out there were a few frames that did not quite work out but I found the source to be - - - me It was inaccurate lofting on my part but easily corrected. But I'm jumping the gun and looking way ahead in the build. As I mentioned in my intro, I'll sow and tell all the details in the build. Here are the two pics for this episode: I don't remember why I didn't number each frame successively from 1 to 24 instead of 1, 1a; 2, 2a; etc. Another thing I want to mention is that the kind if wood I used, poplar, was too soft and split easily. I added a red arrow to indicate where my biggest problem was, these nice sharp edges where the frame straddles the keel, broke away too easily, no matter how careful I was in cutting and positioning the grain. Again, if I would build another FS I'll be using a better wood. I had to make most frames in two parts because of that problem, which increased the build time but it was a fun project though Unfortunately I did not make a copy of all the frames I lofted and only one photo of half of them. This is my build dock. It follows the usual method with a copy of the half breadth plan cemented to the dock. Fortunately by home made work bench is level both ways so I can use it for checking the alignment of the frames, etc. The dock plank is set at 7 degrees and iI used a protractor to set the frames at 90 degrees to the waterline. I don't have a picture to show, sorry, but all of us should know how that's done I placed a cross piece on the dock at the stern post position to ensure that the boat would always get back in the right position when removed. The angle irons are set to a perfect 90 degrees to the waterline or vertical and holds the keel nice and snug. This is all rather eliminatory but perhaps helpful for someone brave enough to tackle a scratch build Cheers,

-
@ Anthony: That's a cute little sailer! If I would build it (in my next life I would extend the cabin aft a little and make the cockpit smaller. Too cramped for a weekender. It looks like good for a day sailer though. @ Harvey: Thanks for the extra info on the Friendship sloop, not many people know about this magnificent boat. I opted for the clipper bow, real sexy looking I guess it all depends on who's mast formula one uses, LOD + 20% or LOD + draft, it comes out about the same. One might say that my model is a custom designed boat just for my wife and I But with a 5 ft headroom in the cabin it would serve many others quite well, I guess. BTW, pop corn and good Belgian beer are on the house! Everyone is welcome! Cheers,
-
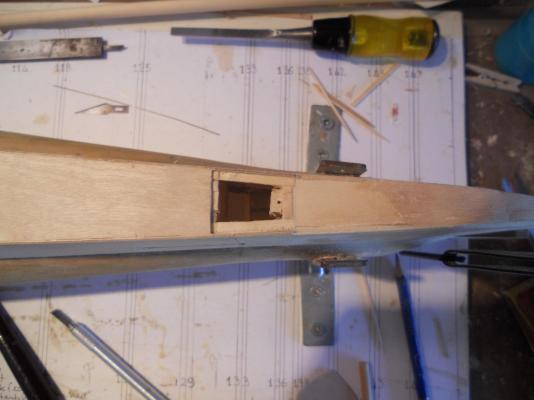
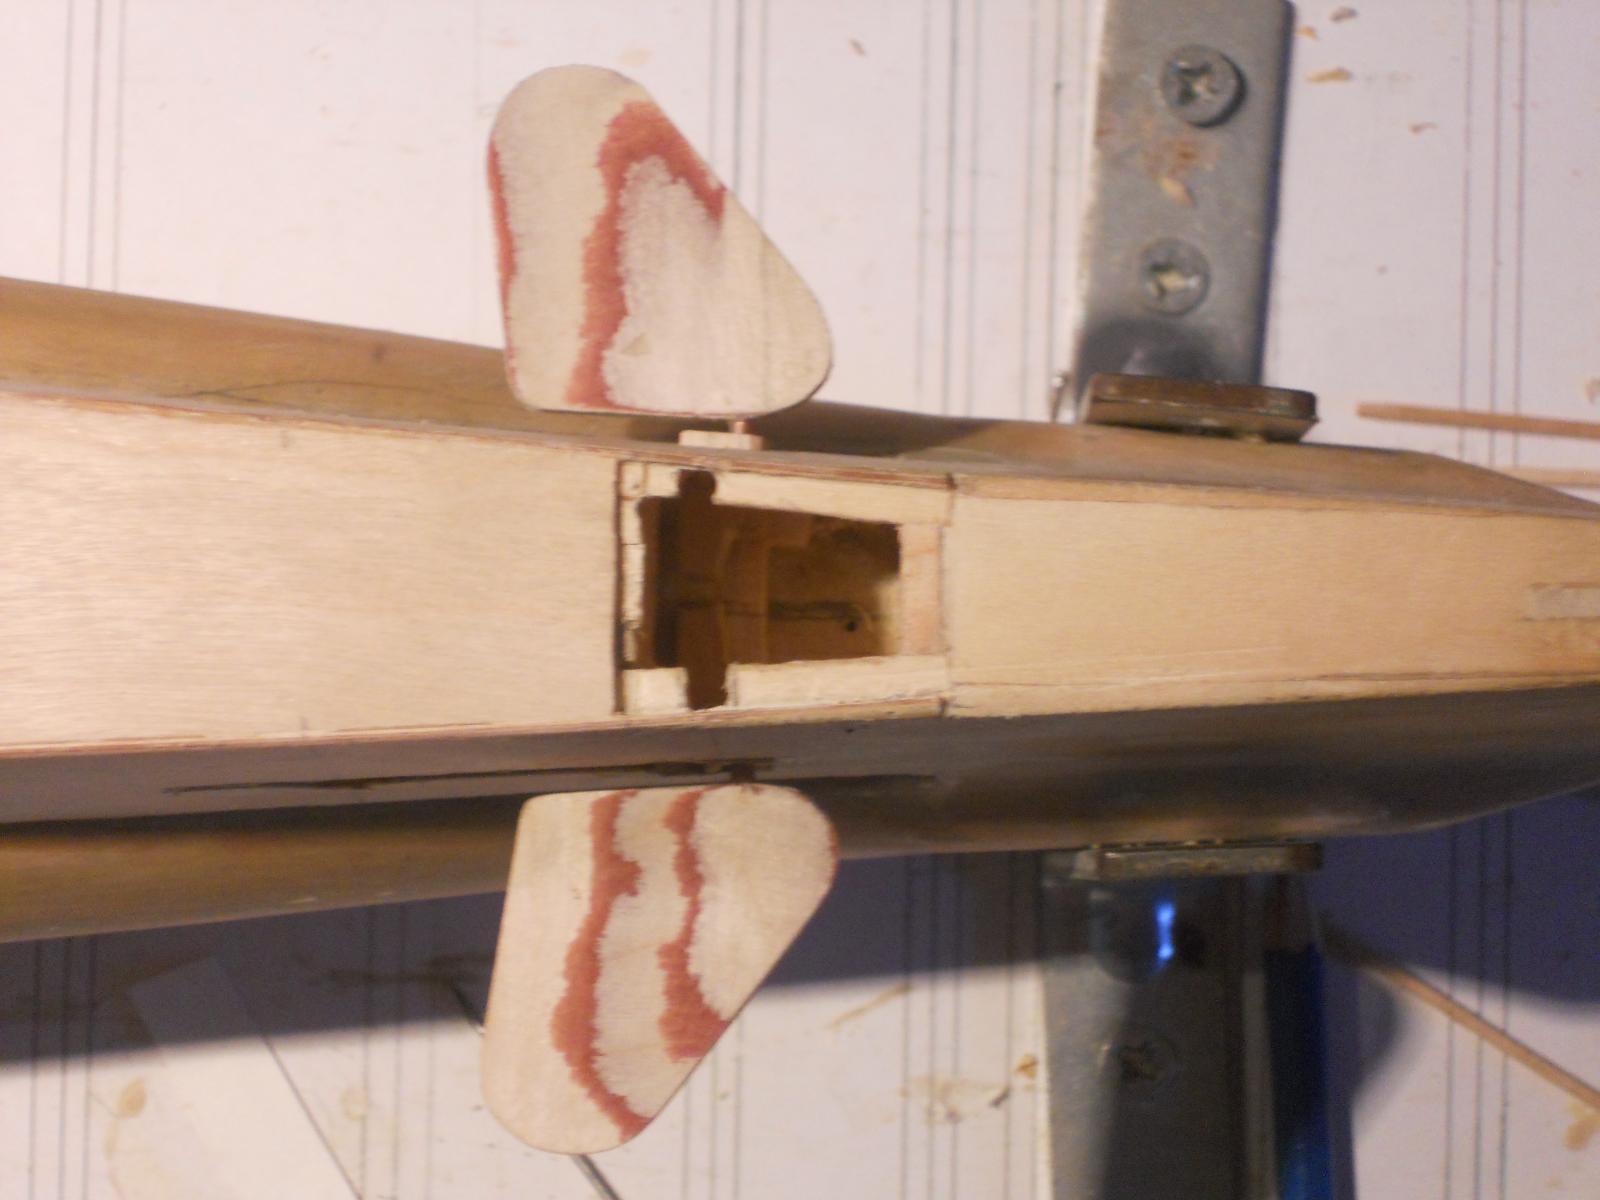
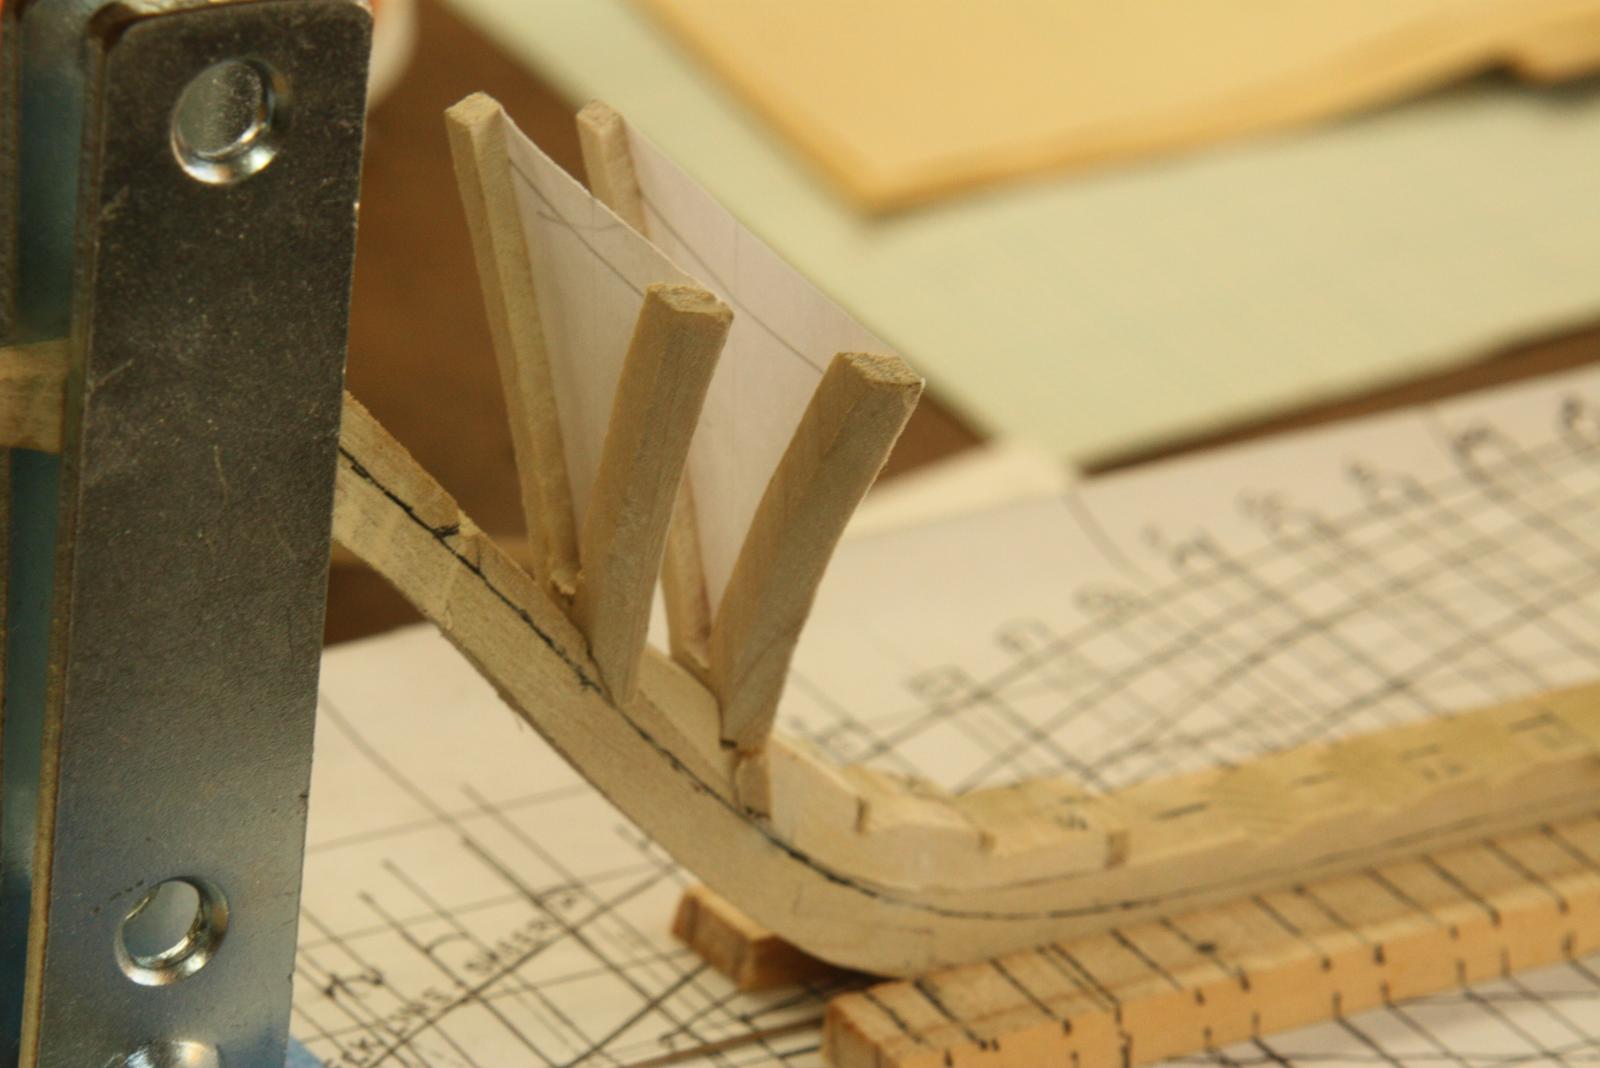
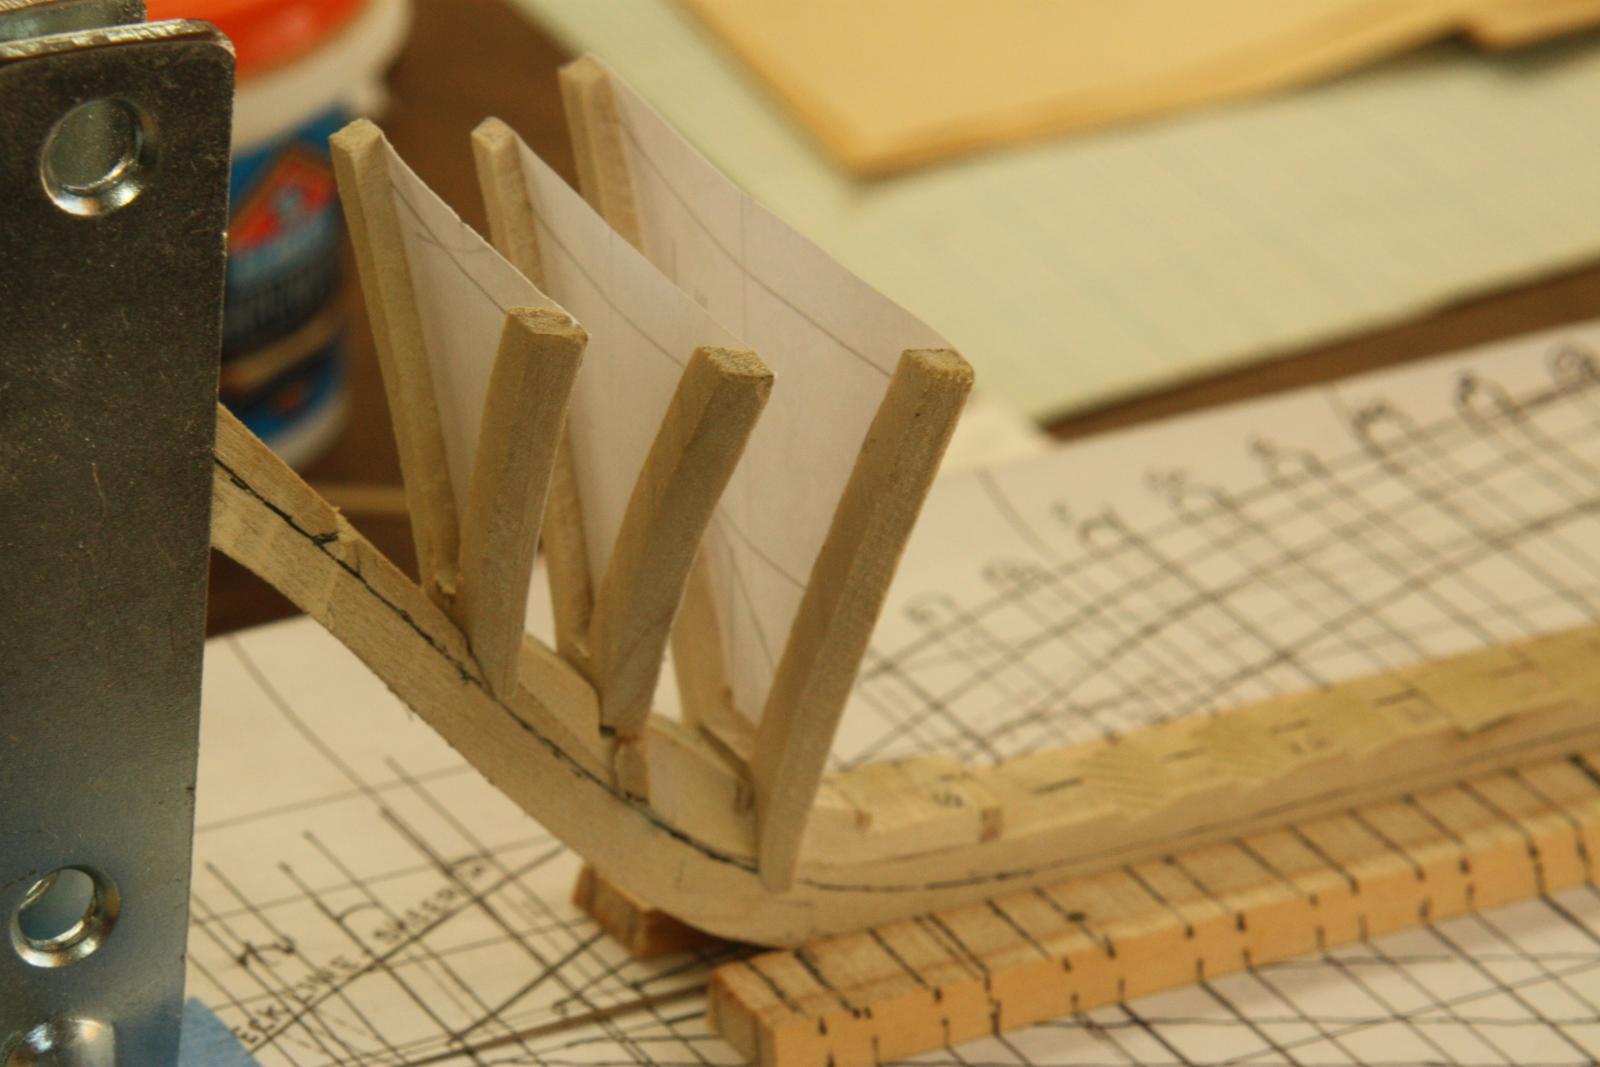
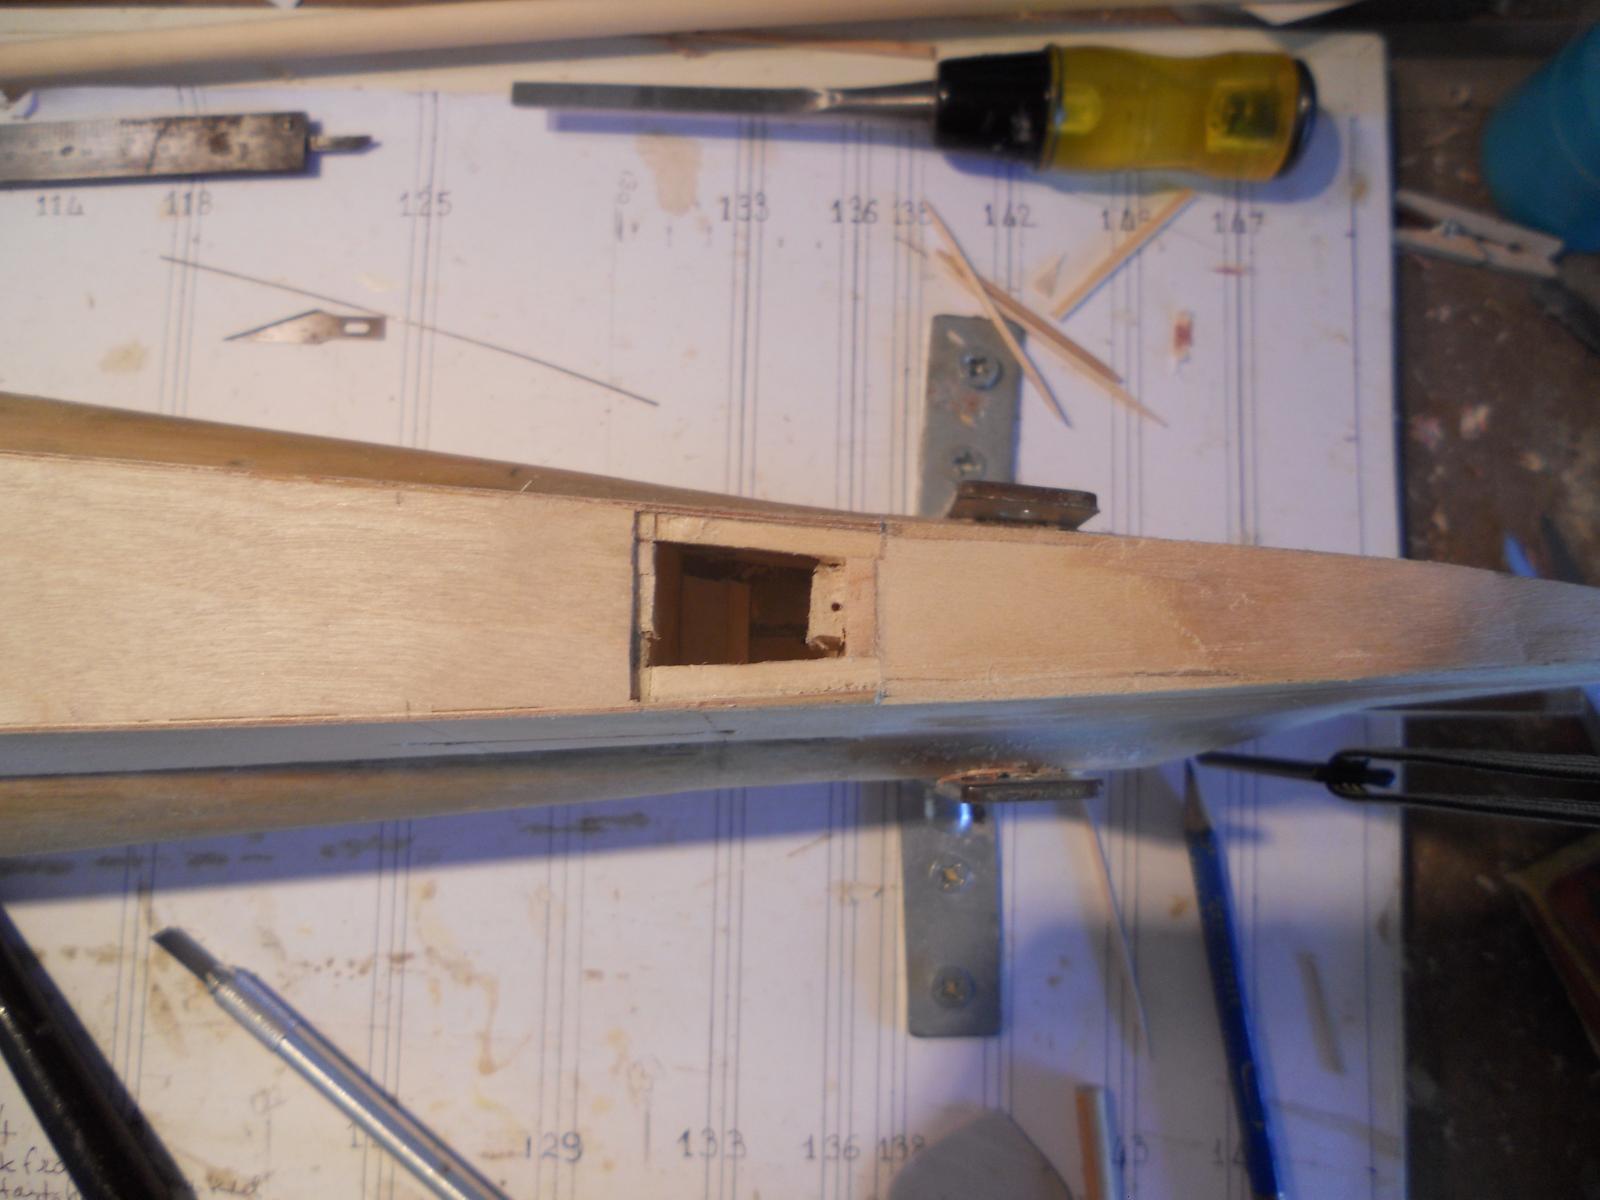
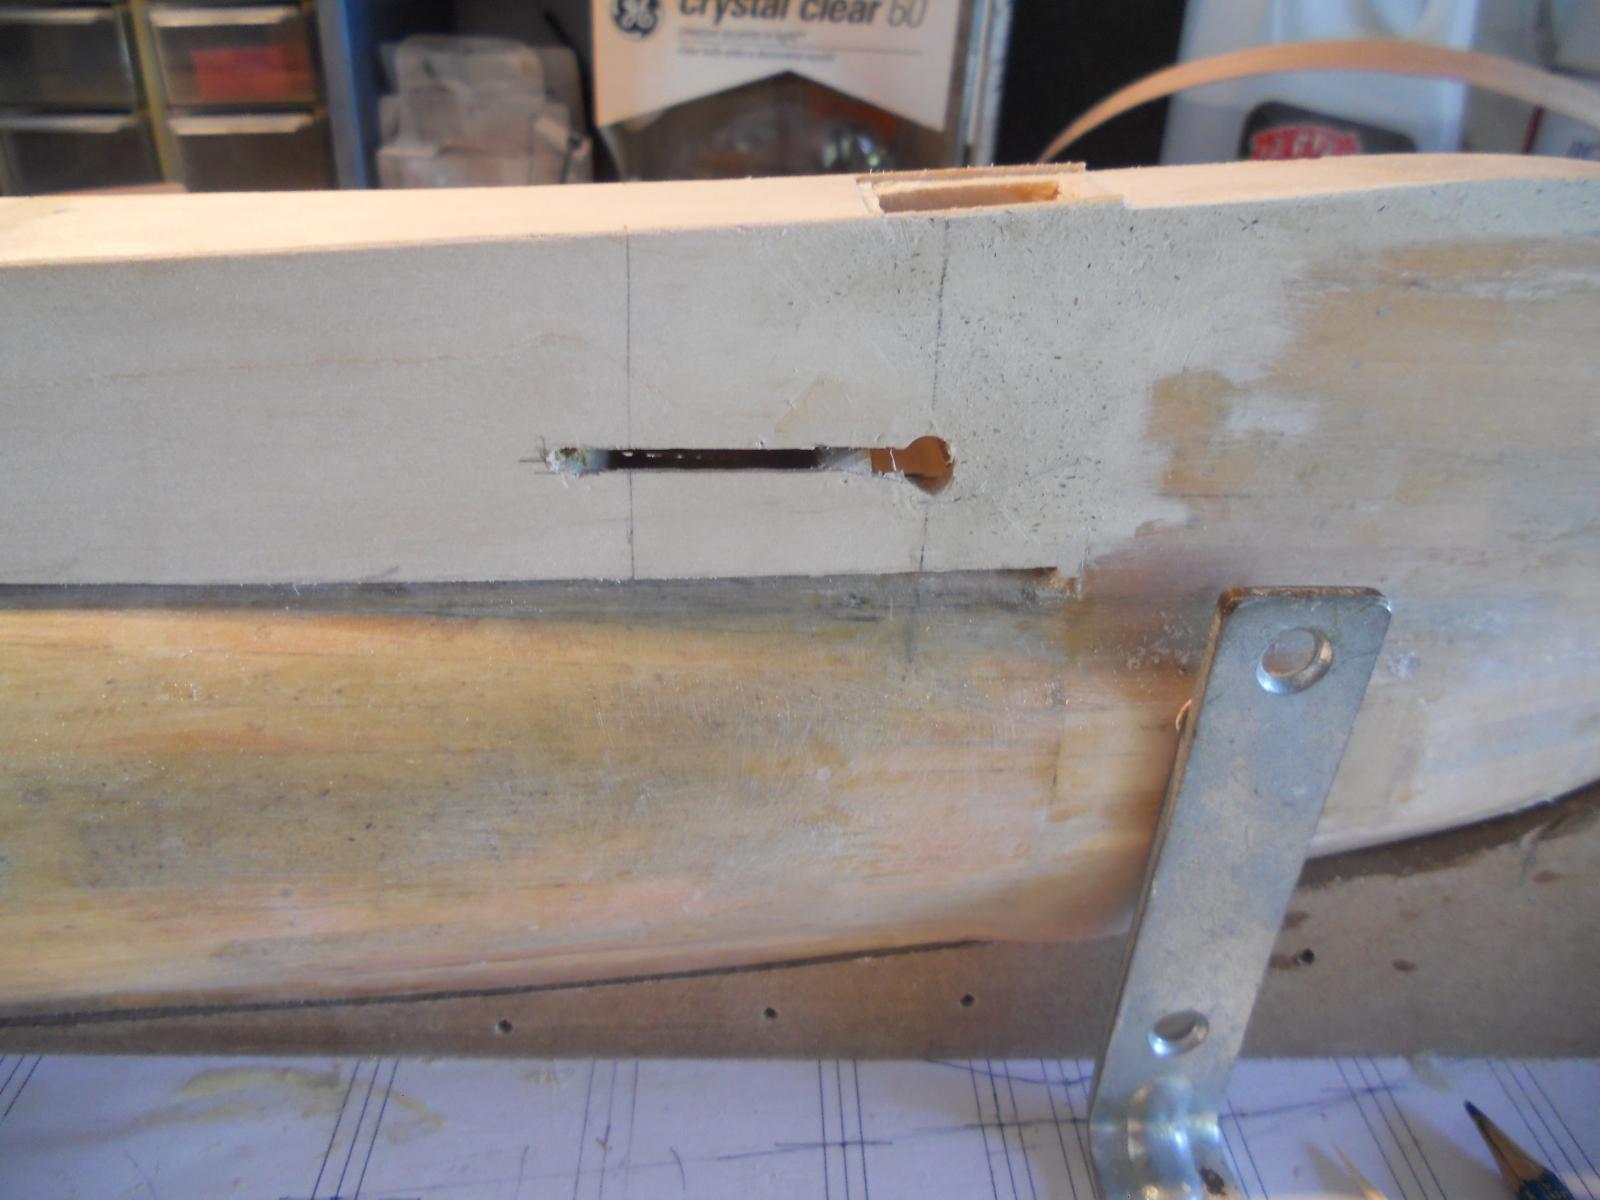
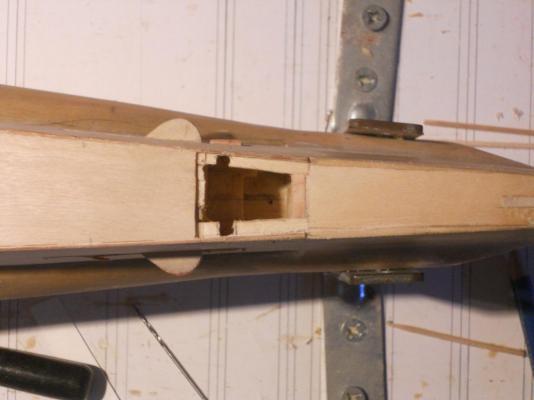
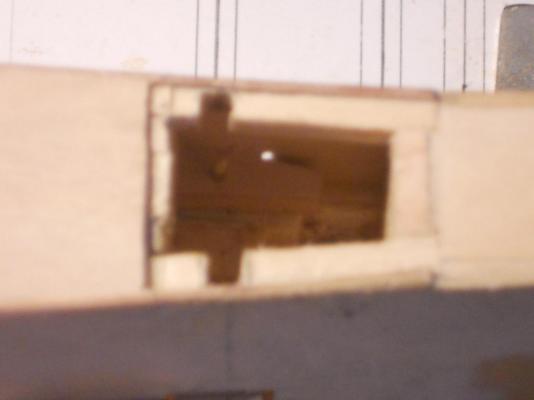
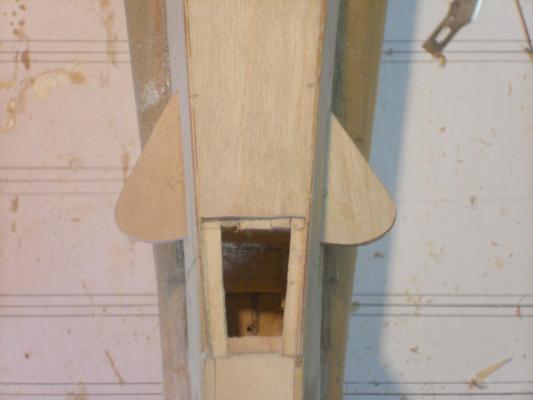
Well, I have changed my mind again I decided to make the trim vanes at the bow kinda workable, i.e. retractable and movable. Originally I was just going to pin them to the side to a dummy shaft ( that's why there is a large hole in the side) but thought it would look better with a semi workable unit. Kinda late in the process because I have to cut into two deck frames and add some wood for the actuators to pivot on. I hope I can manage cutting the slots in the two deck frames without doing any damage to the side plates and make it work. I need to stop thinking too much, all it does is gets me into trouble Here are a few pics of what I'm doing. My idea should work in theory so keep our fingers crossed. Looking down into the small area where the pivots for the trim vanes will be located. I had to remove a portion of the bow deck but that's not a problem. Starboard side view of the slot and pivot shaft opening. I'm engineering this on the fly so it still looks a little rough. I have finished one of the vanes but may have to add another mm piece to it so I can contour the vanes and add the net/cable cutter to the leading edge. Don't forget that everything will be covered with paper as the fake steel plates and then paint. Cheers,