Louie da fly
-
Posts
7,990 -
Joined
-
Last visited
Content Type
Profiles
Forums
Gallery
Events
Everything posted by Louie da fly
-
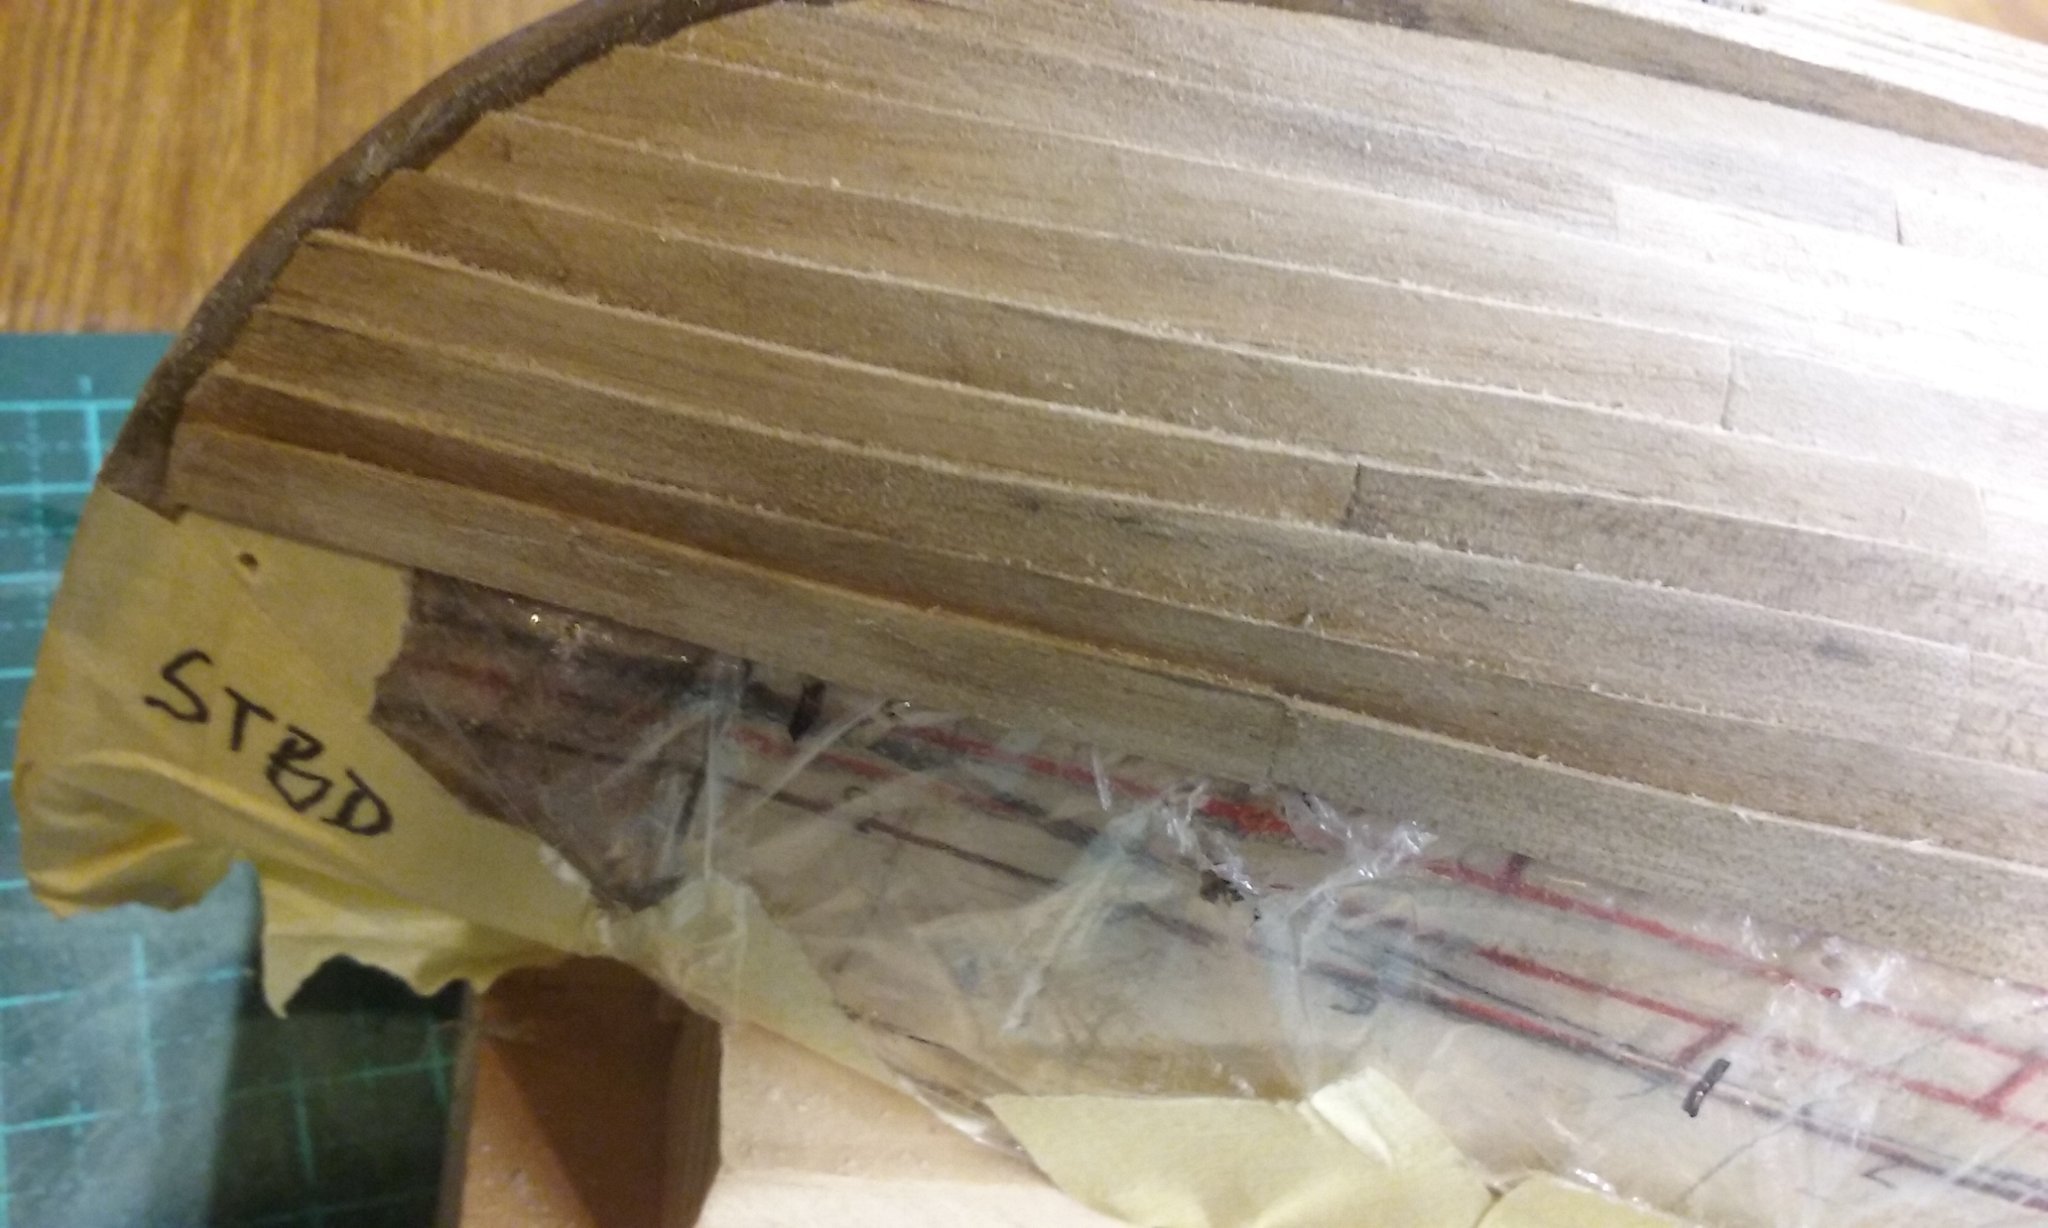
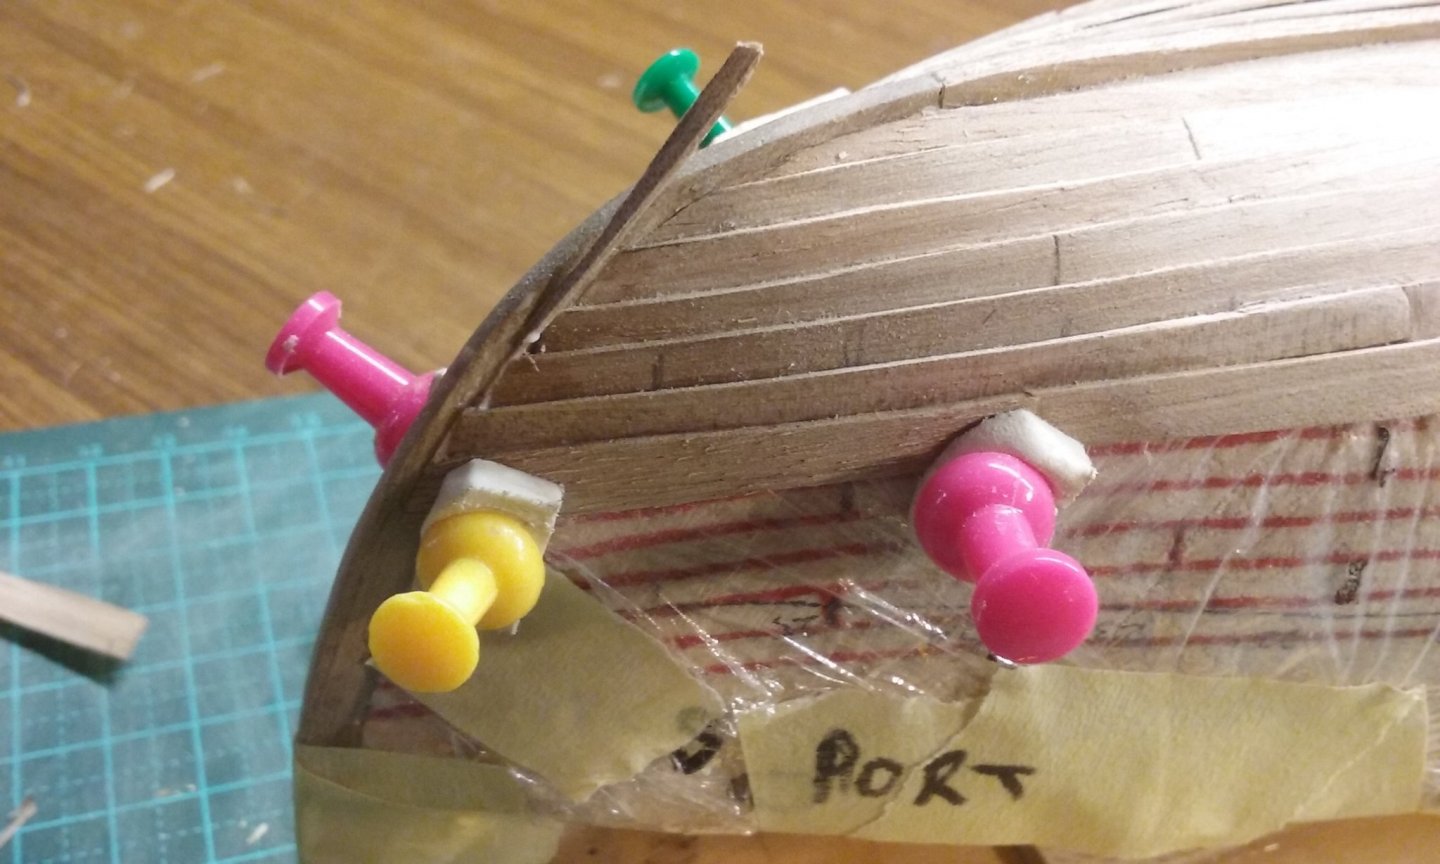
 I don't think I'll be putting "nail dots" in - I doubt that they would be visible at this scale. I think a lot of people add these kinds of details unnecessarily, often far too big. On the other hand, the nails are a different colour from the wood, as in this pic, and so might be visible after all. I'll have to think about it a bit. Steven
-
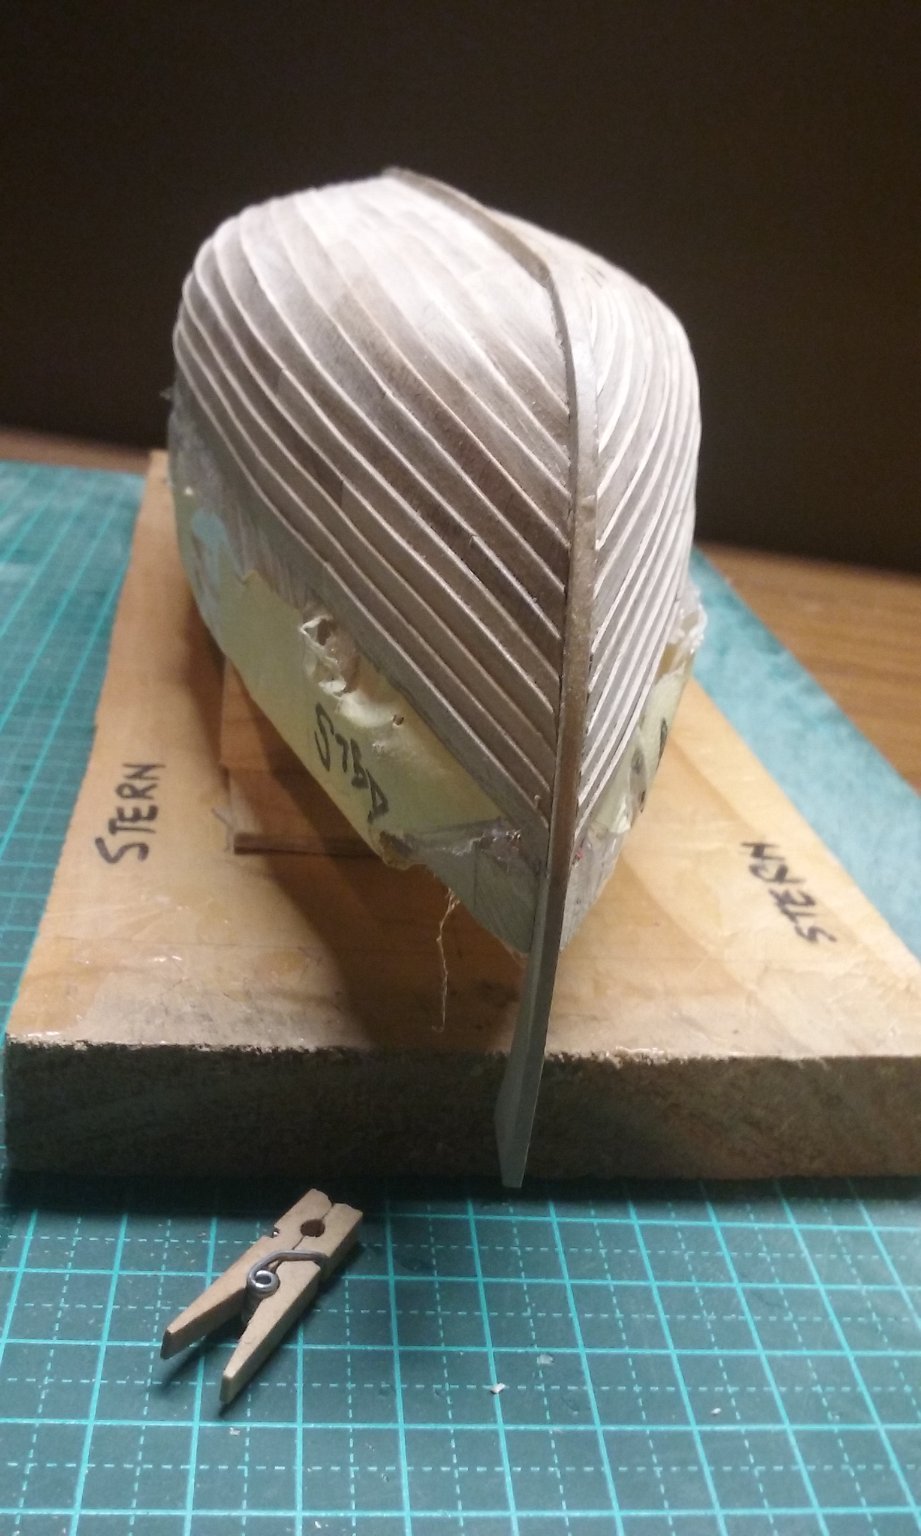
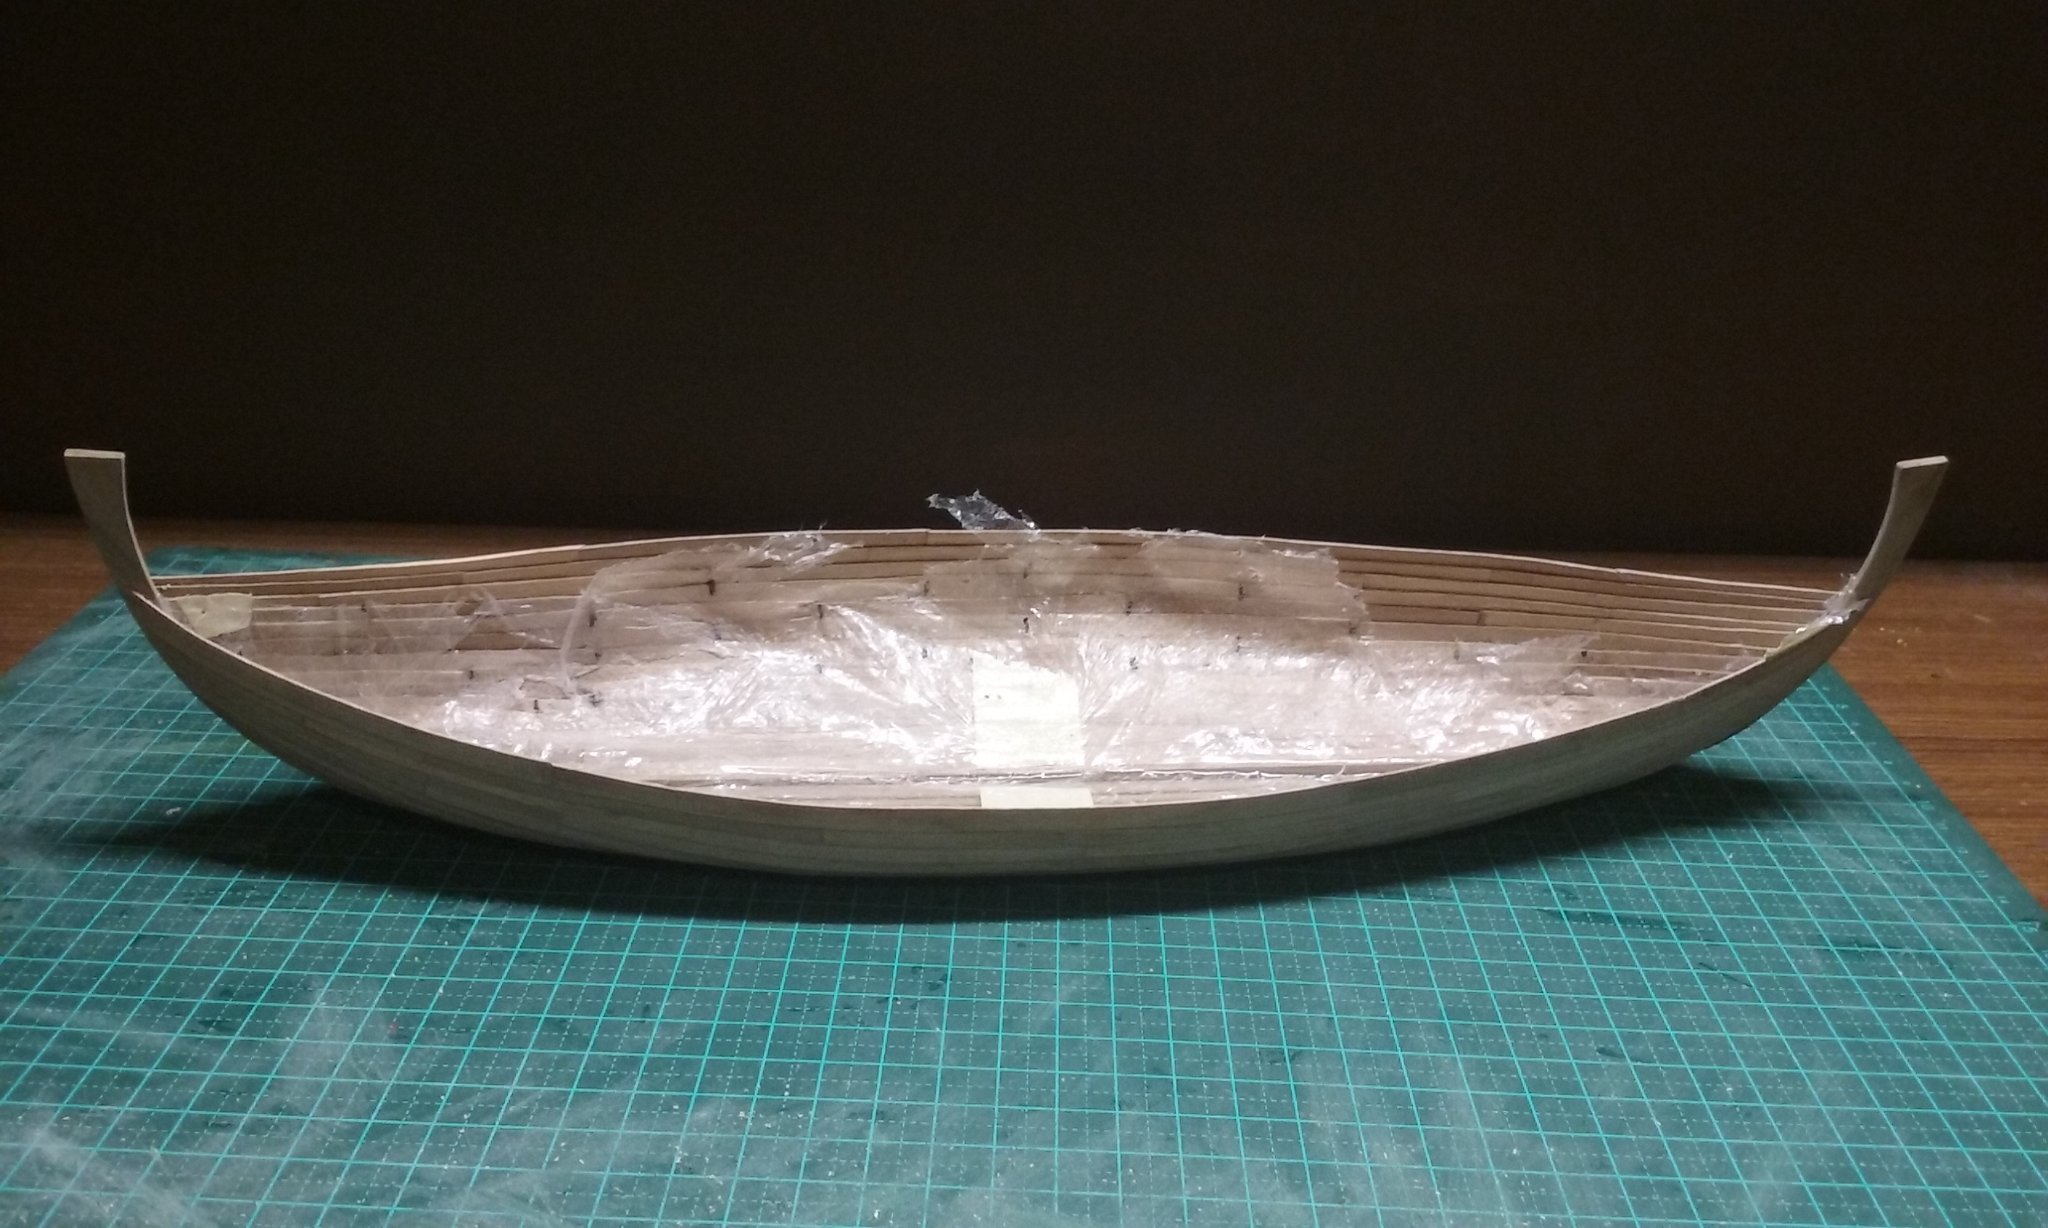
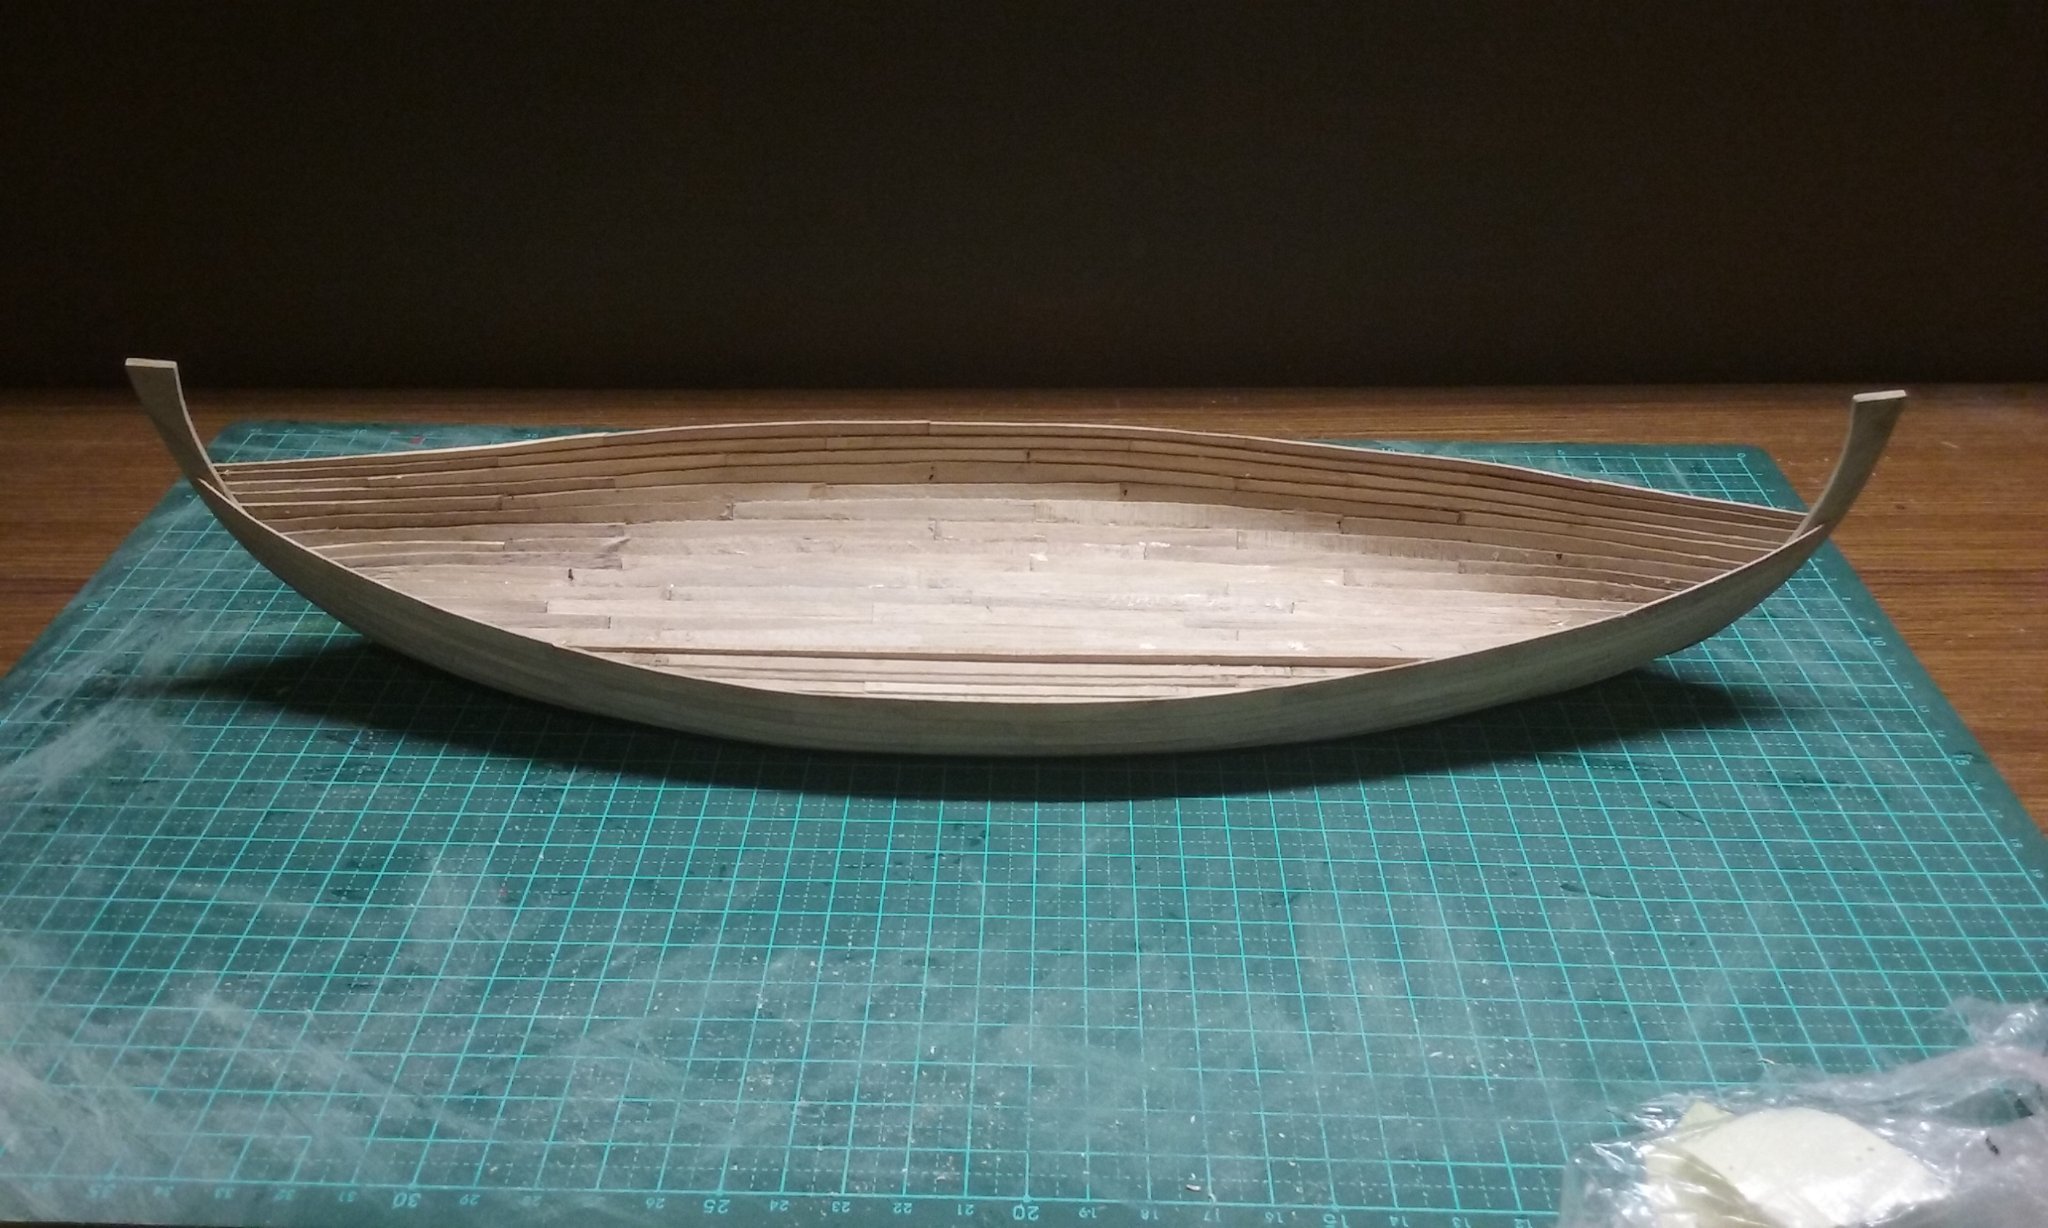
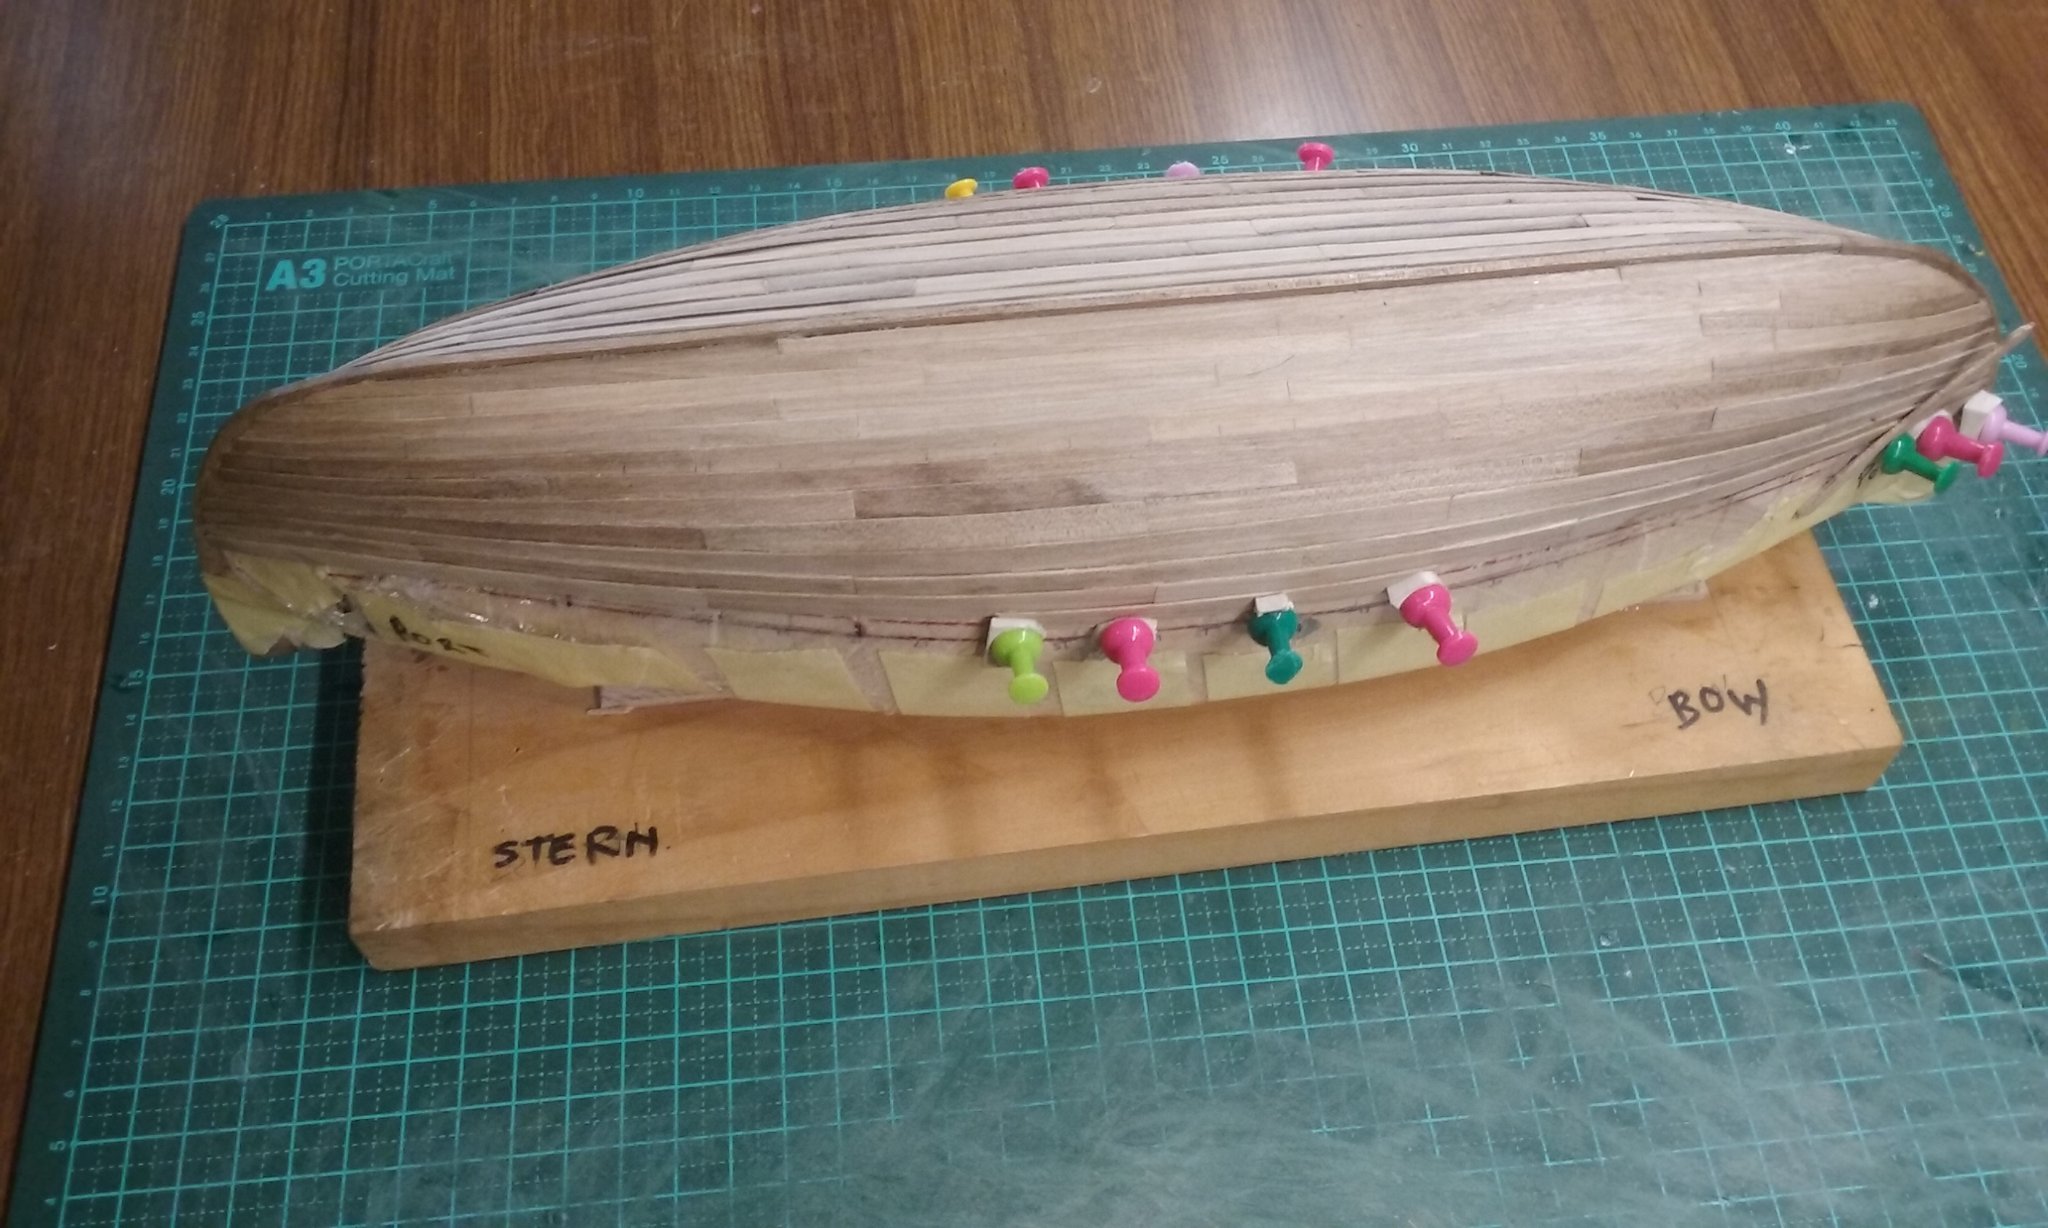
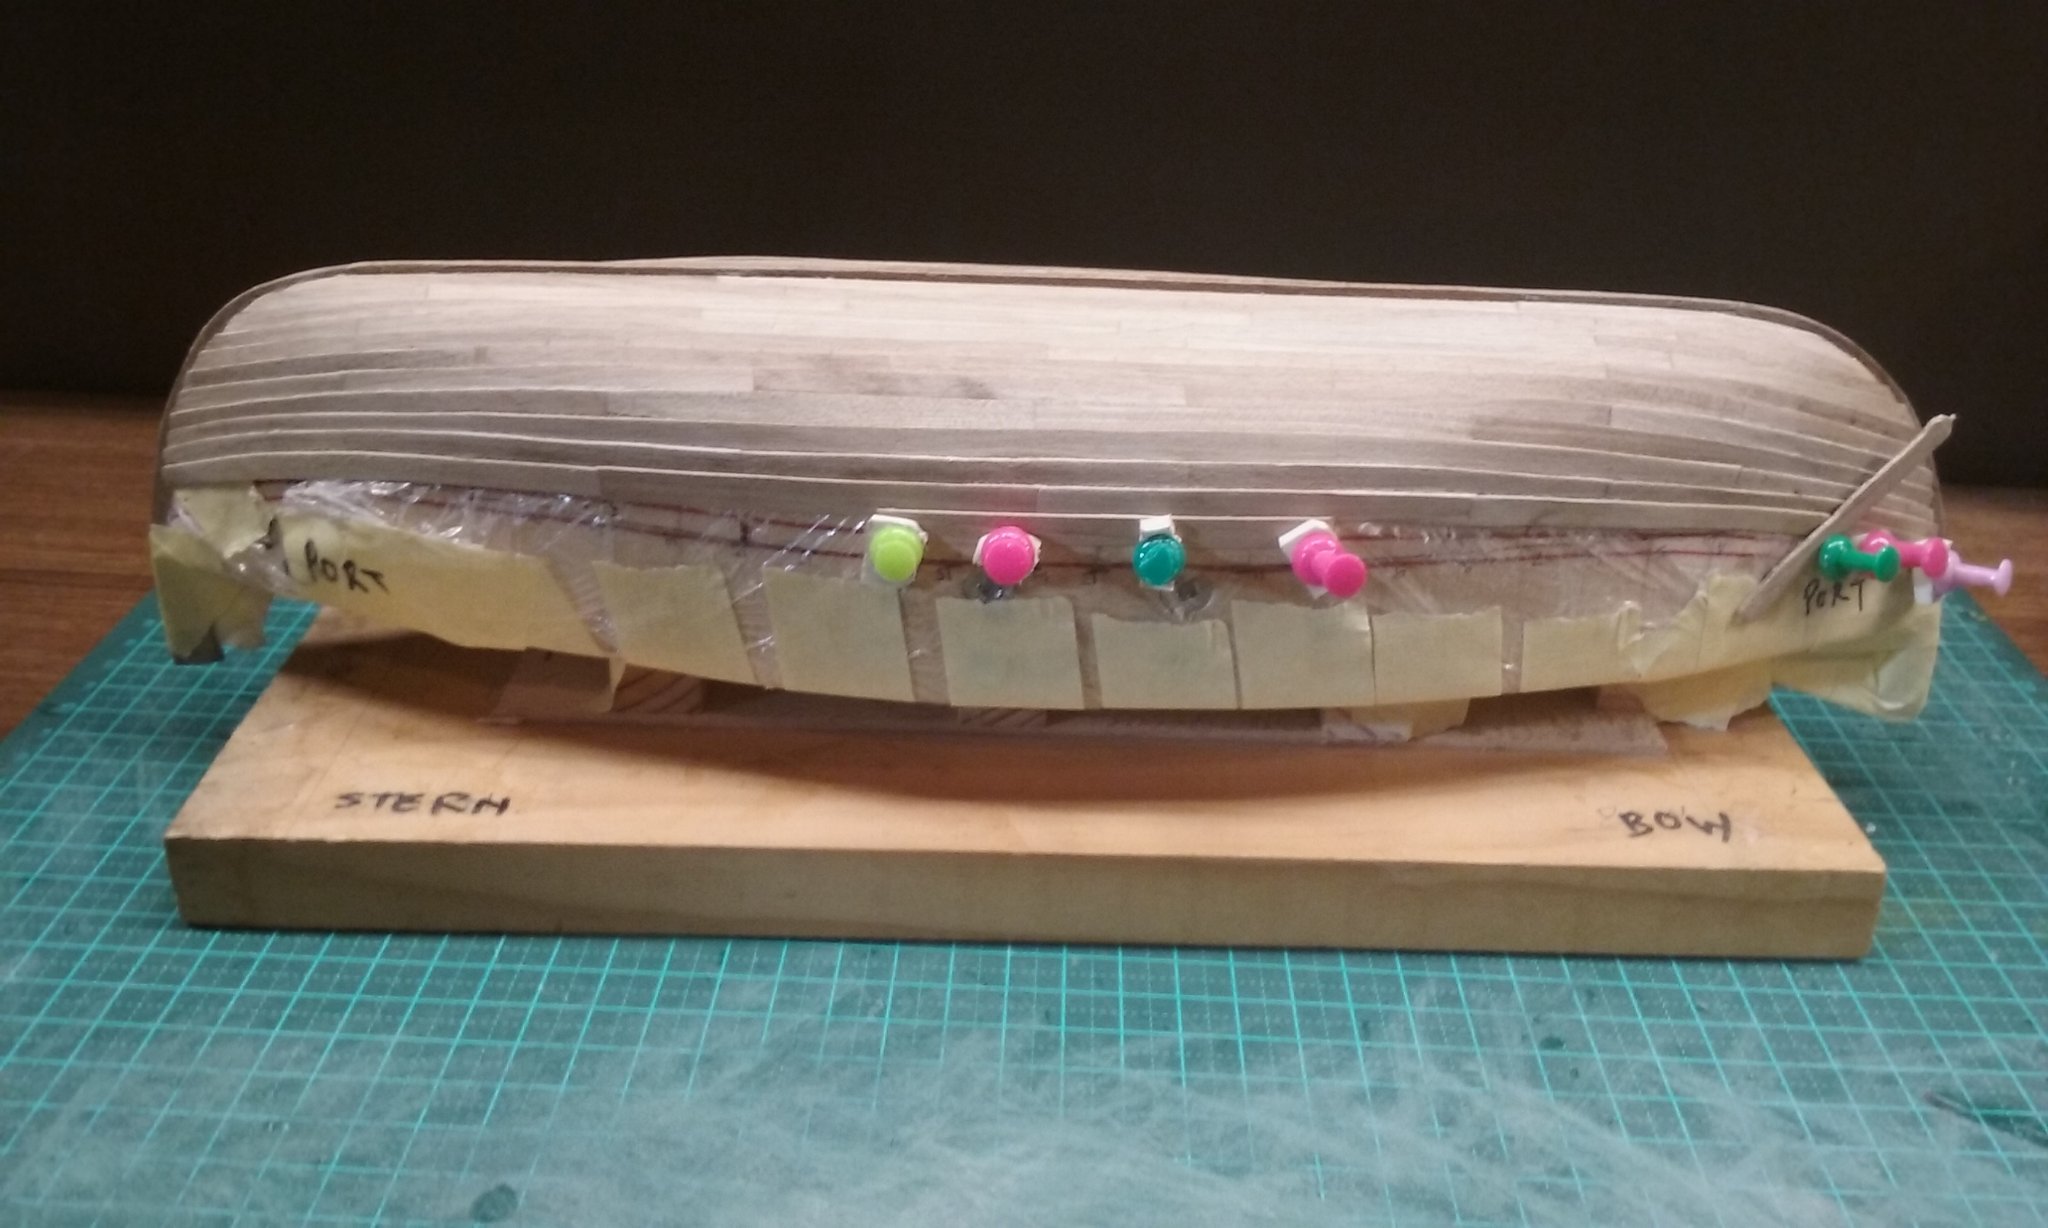
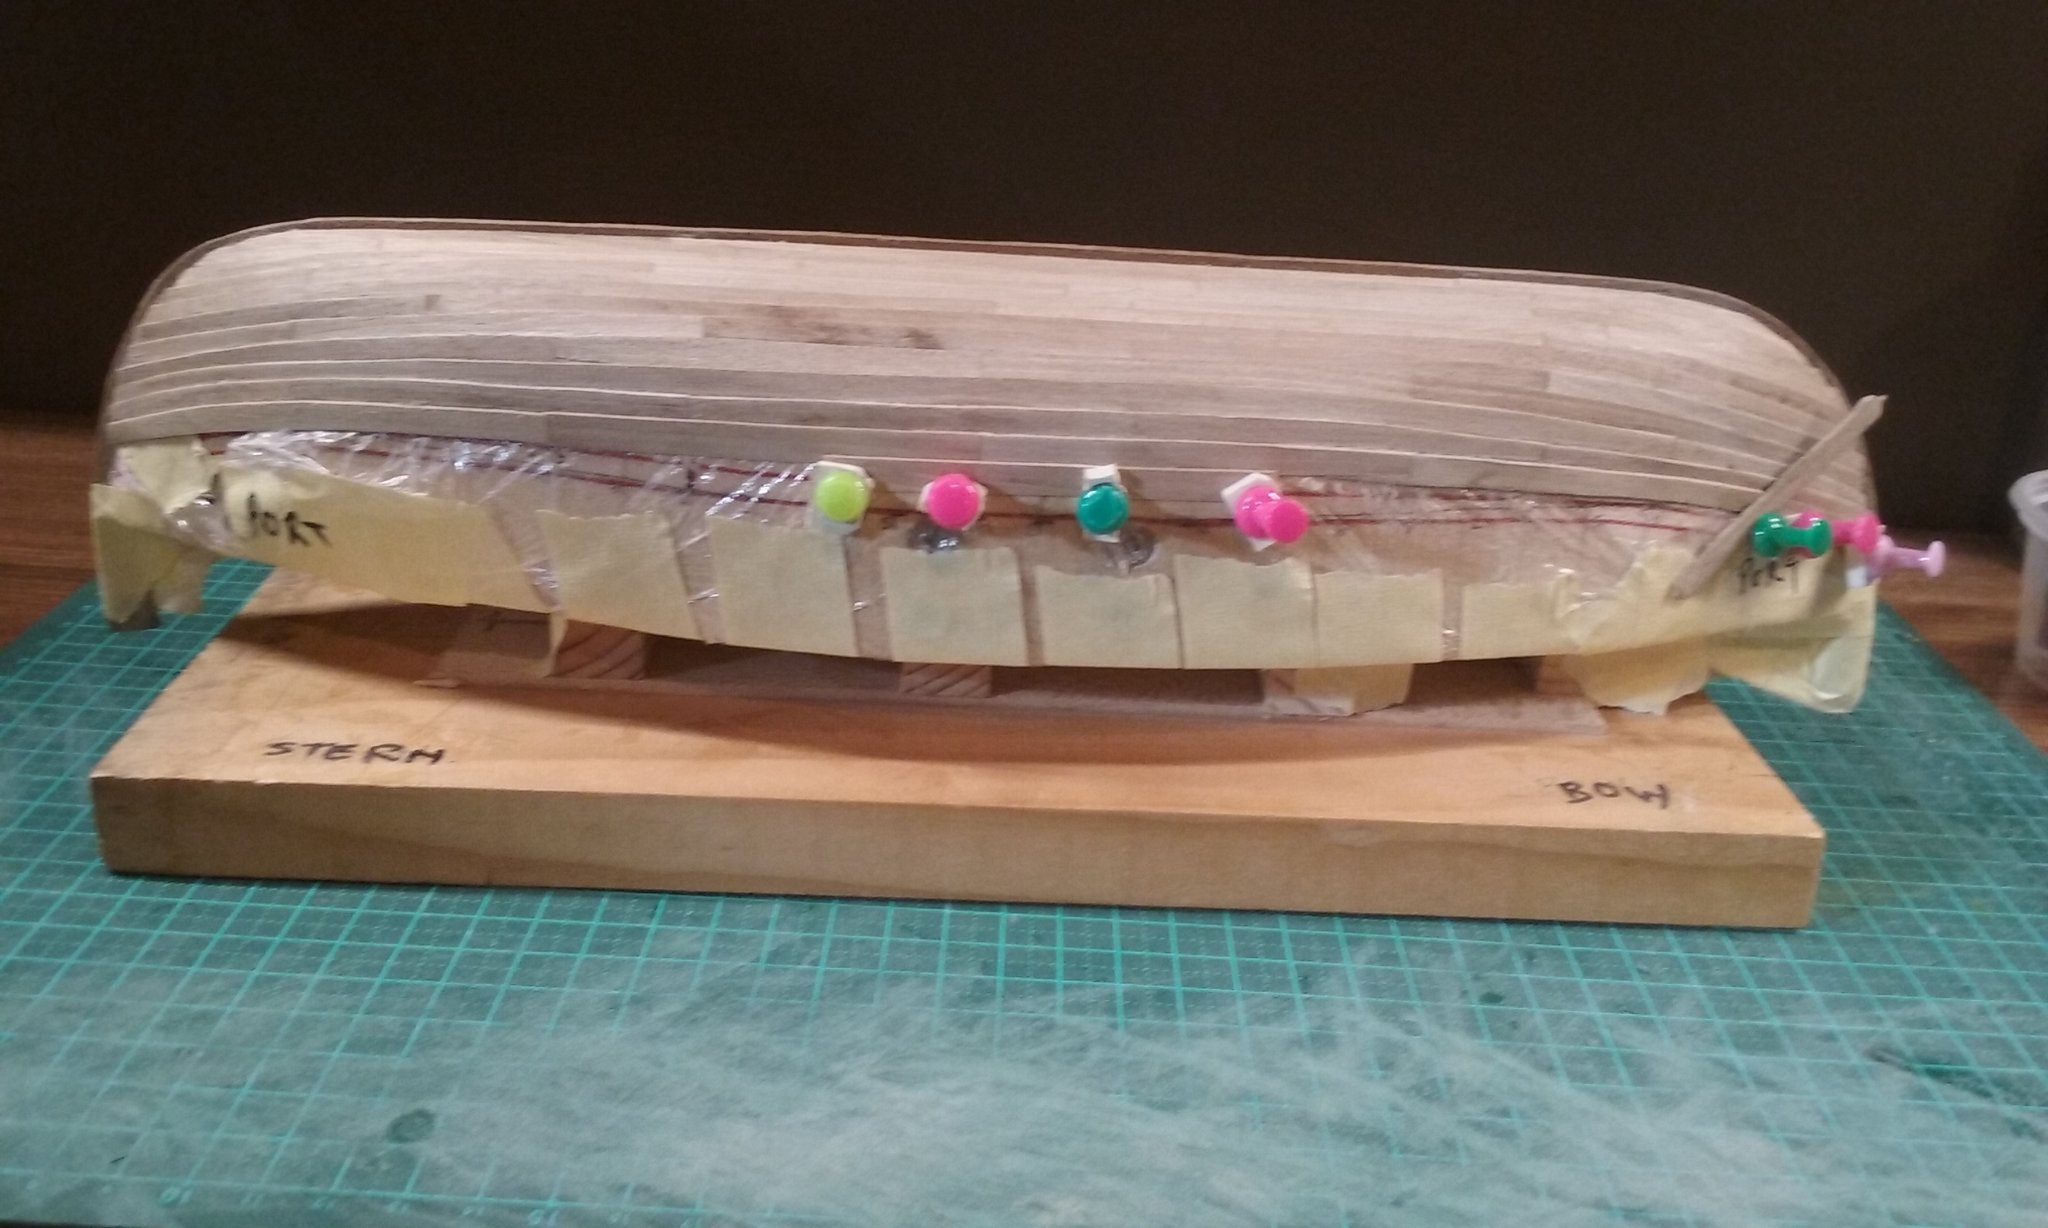
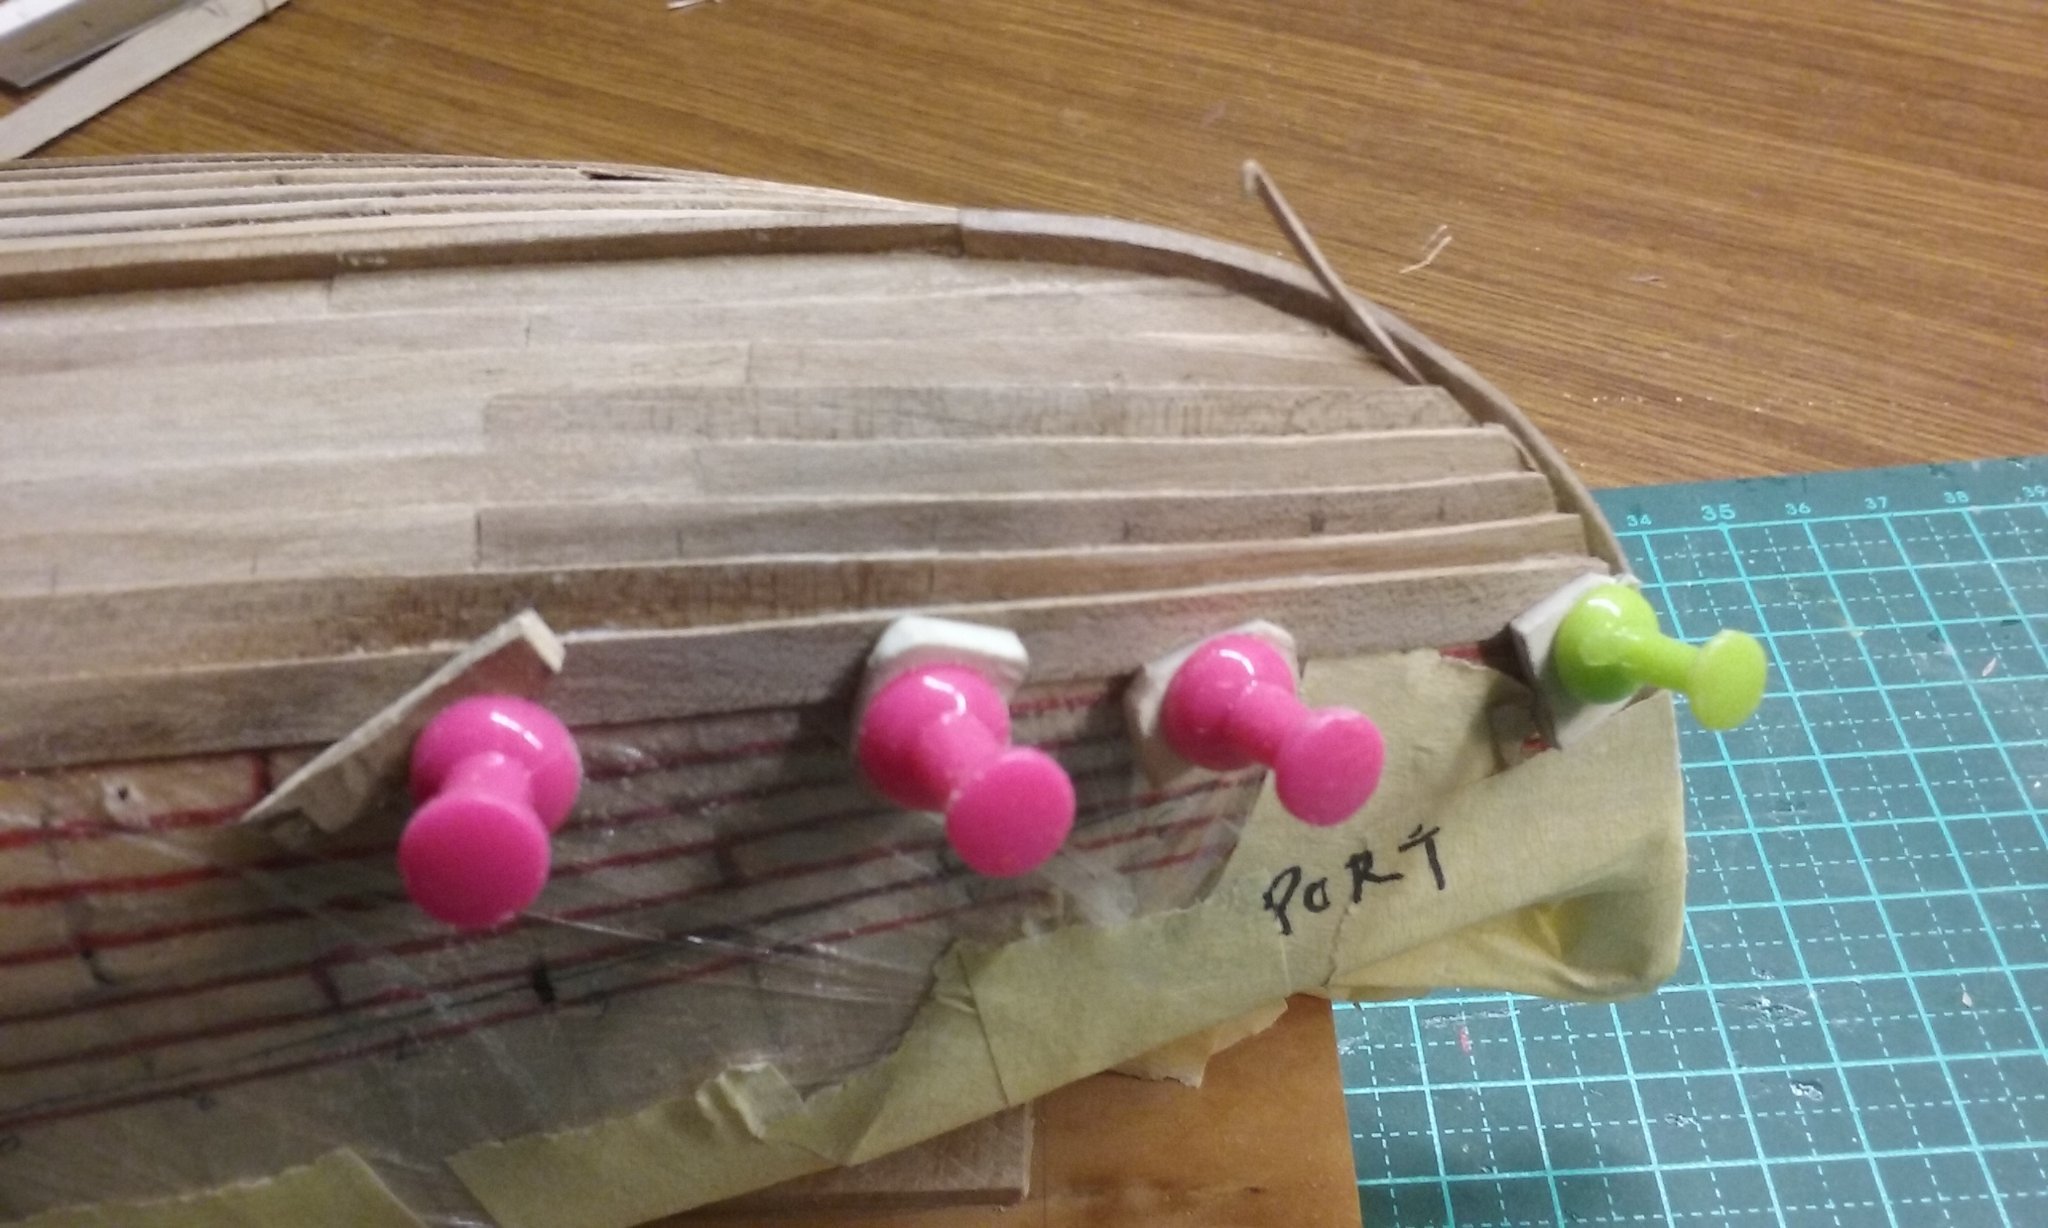
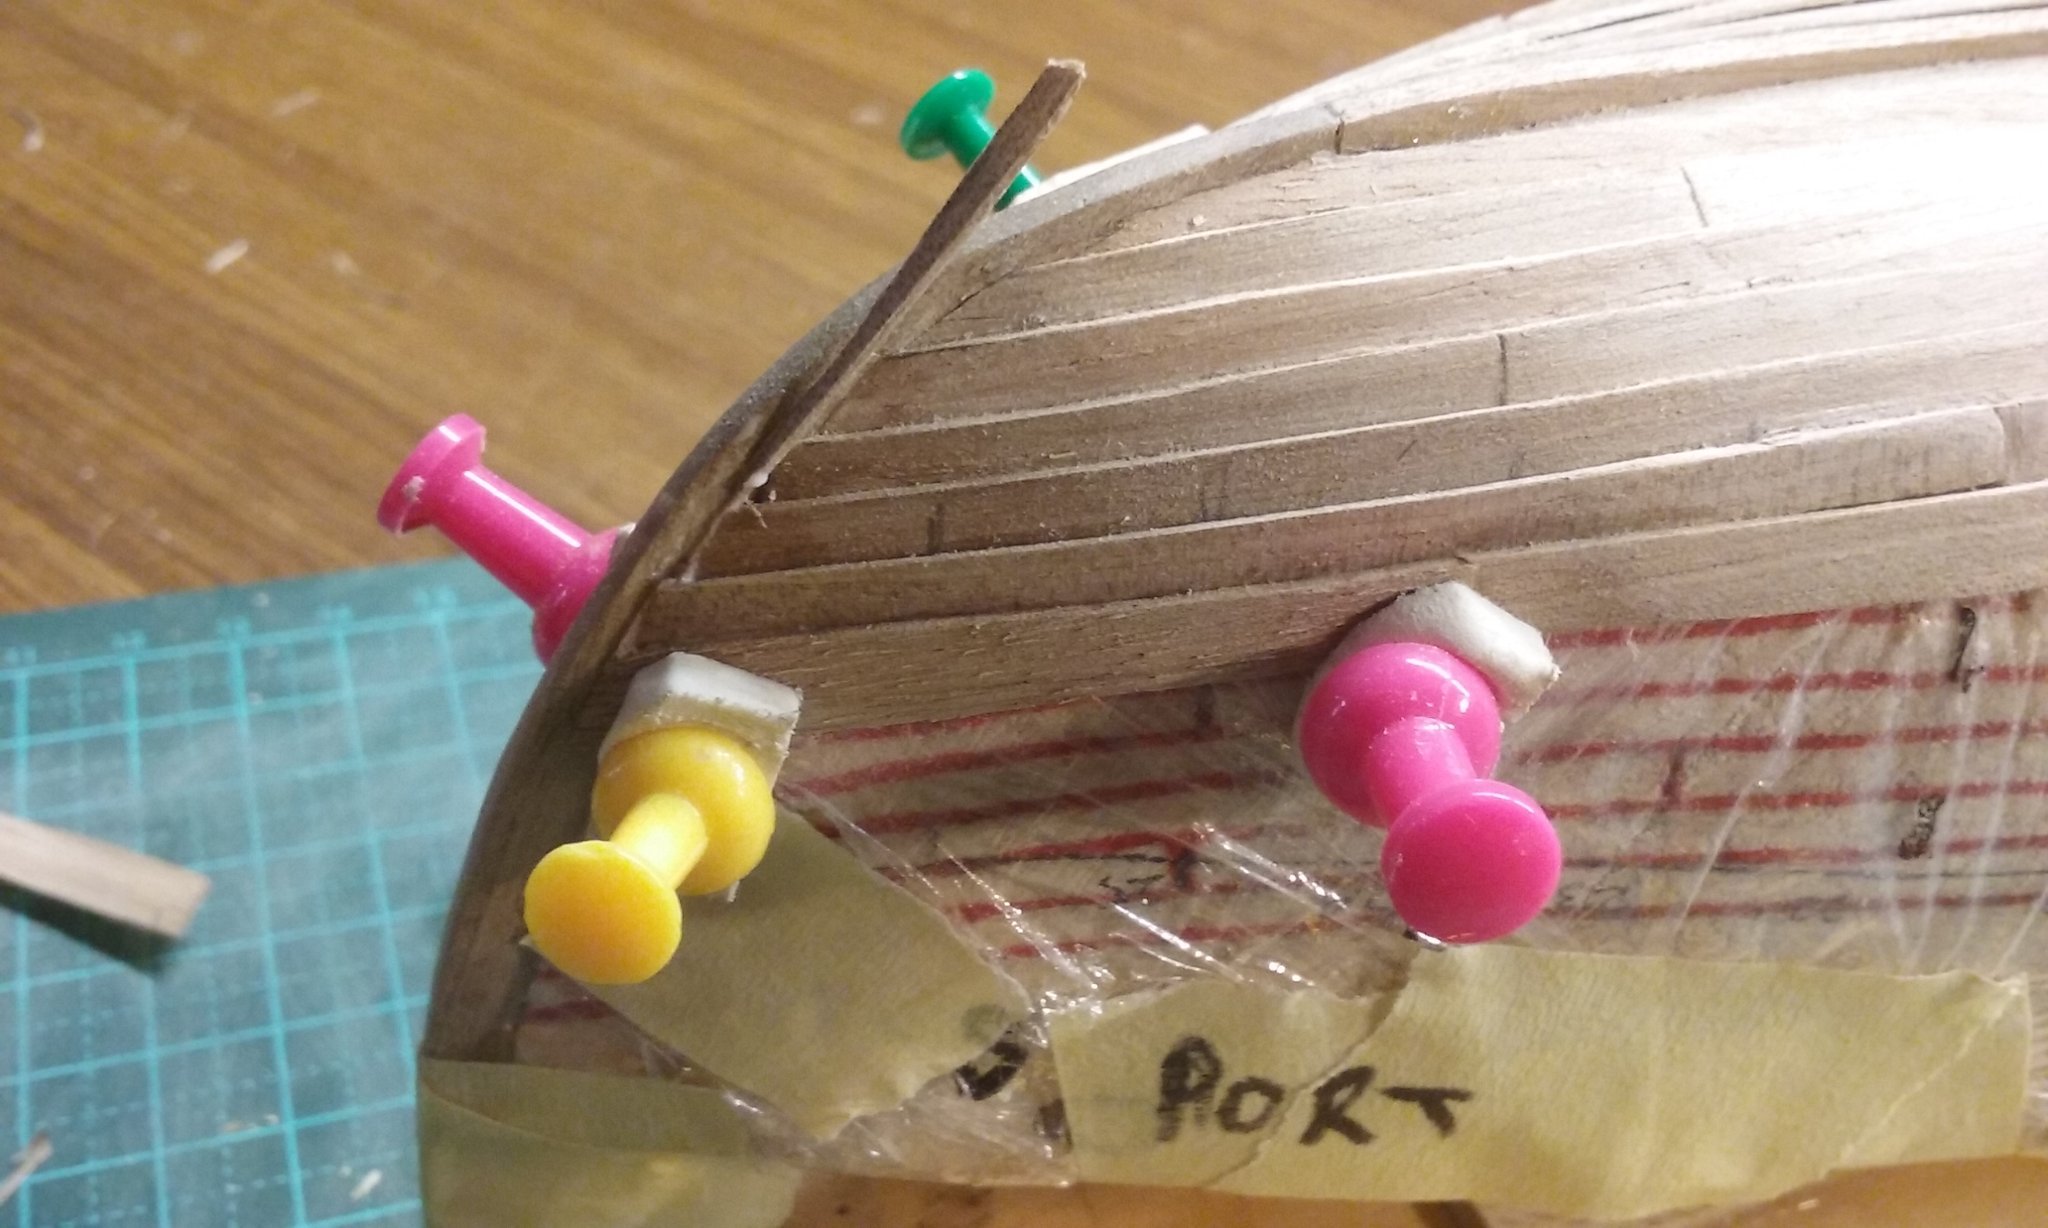
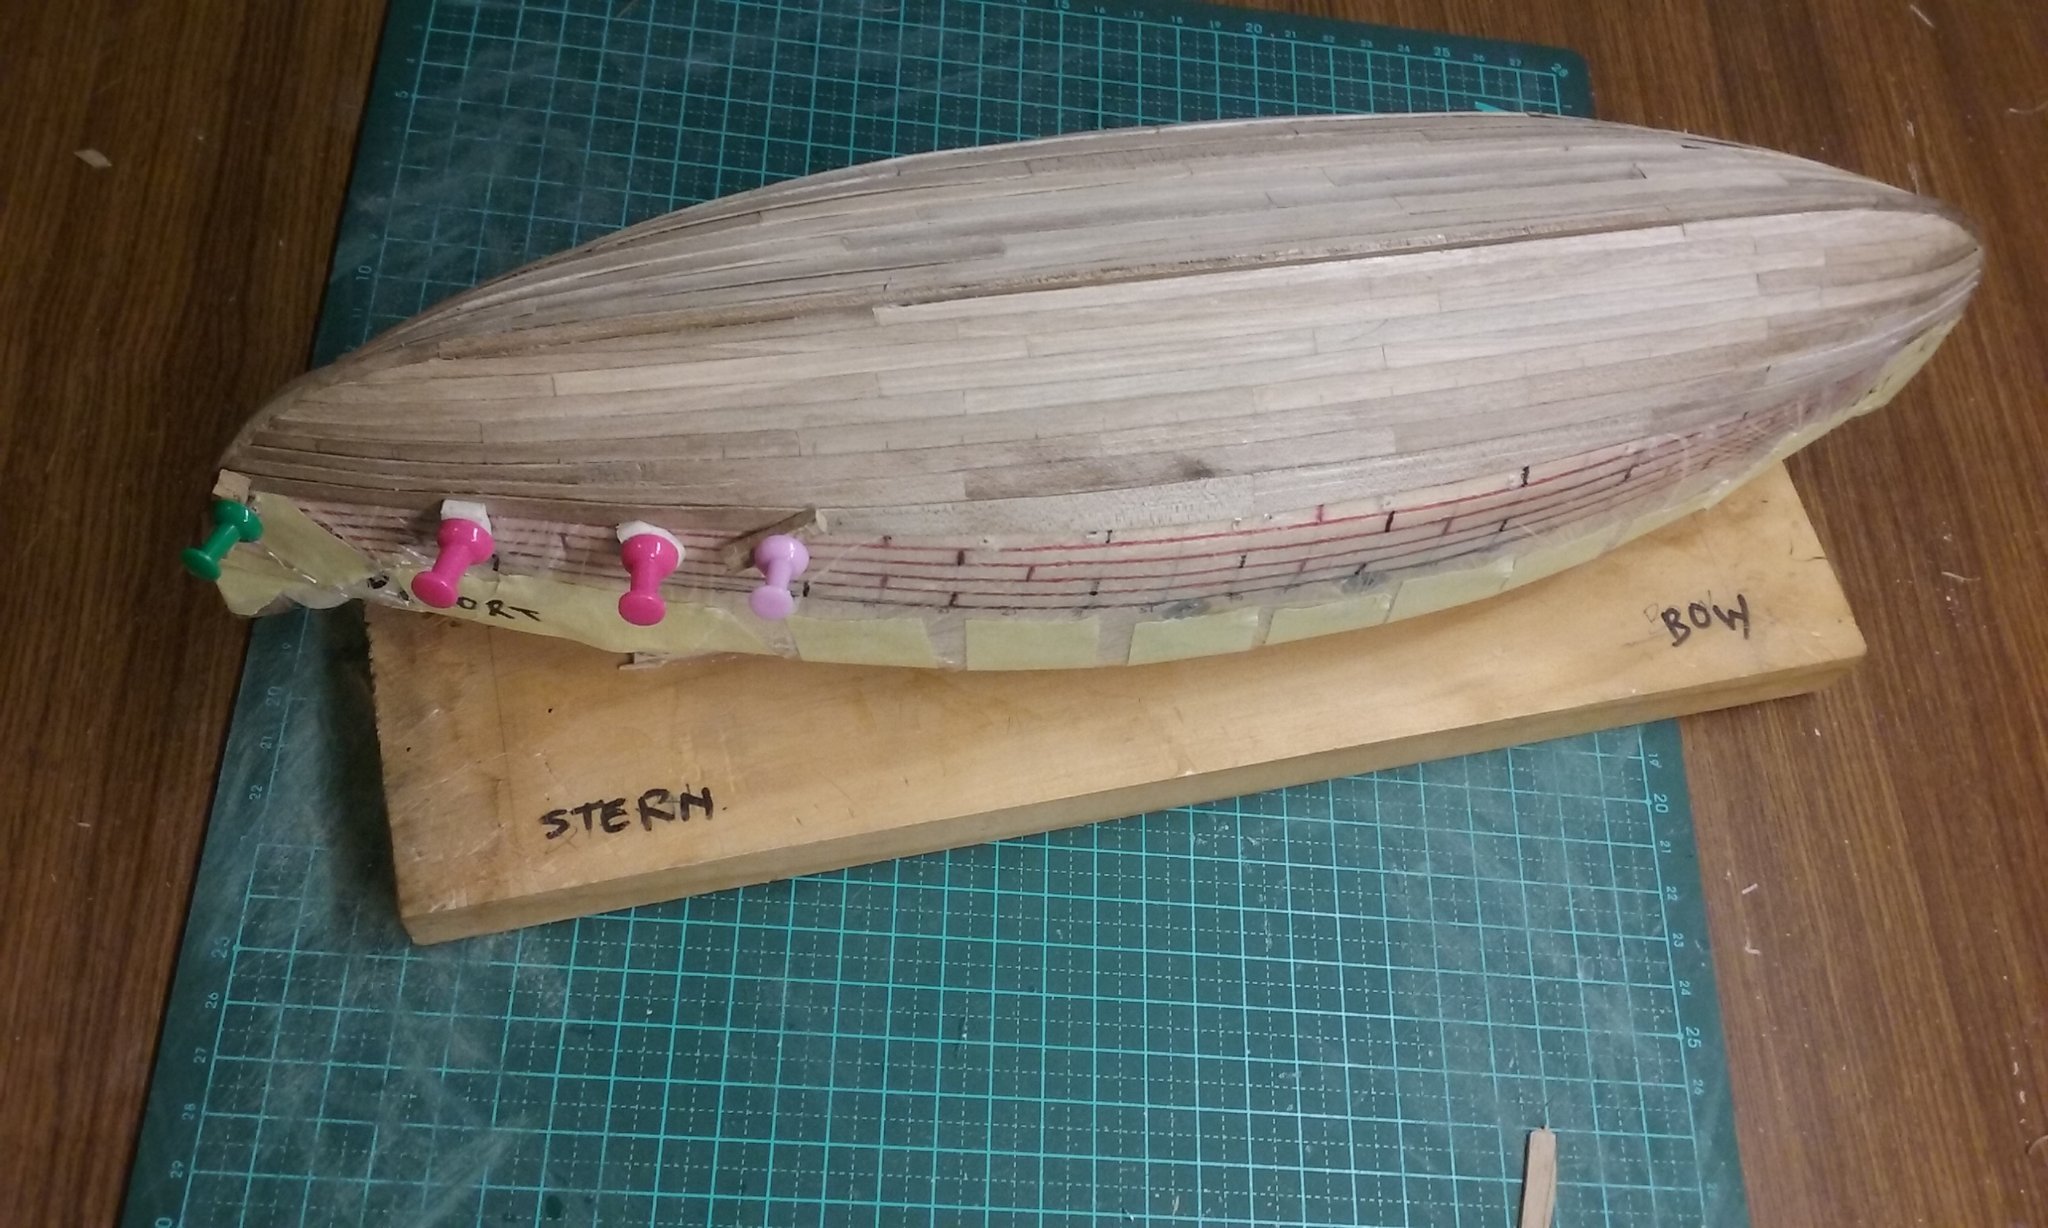
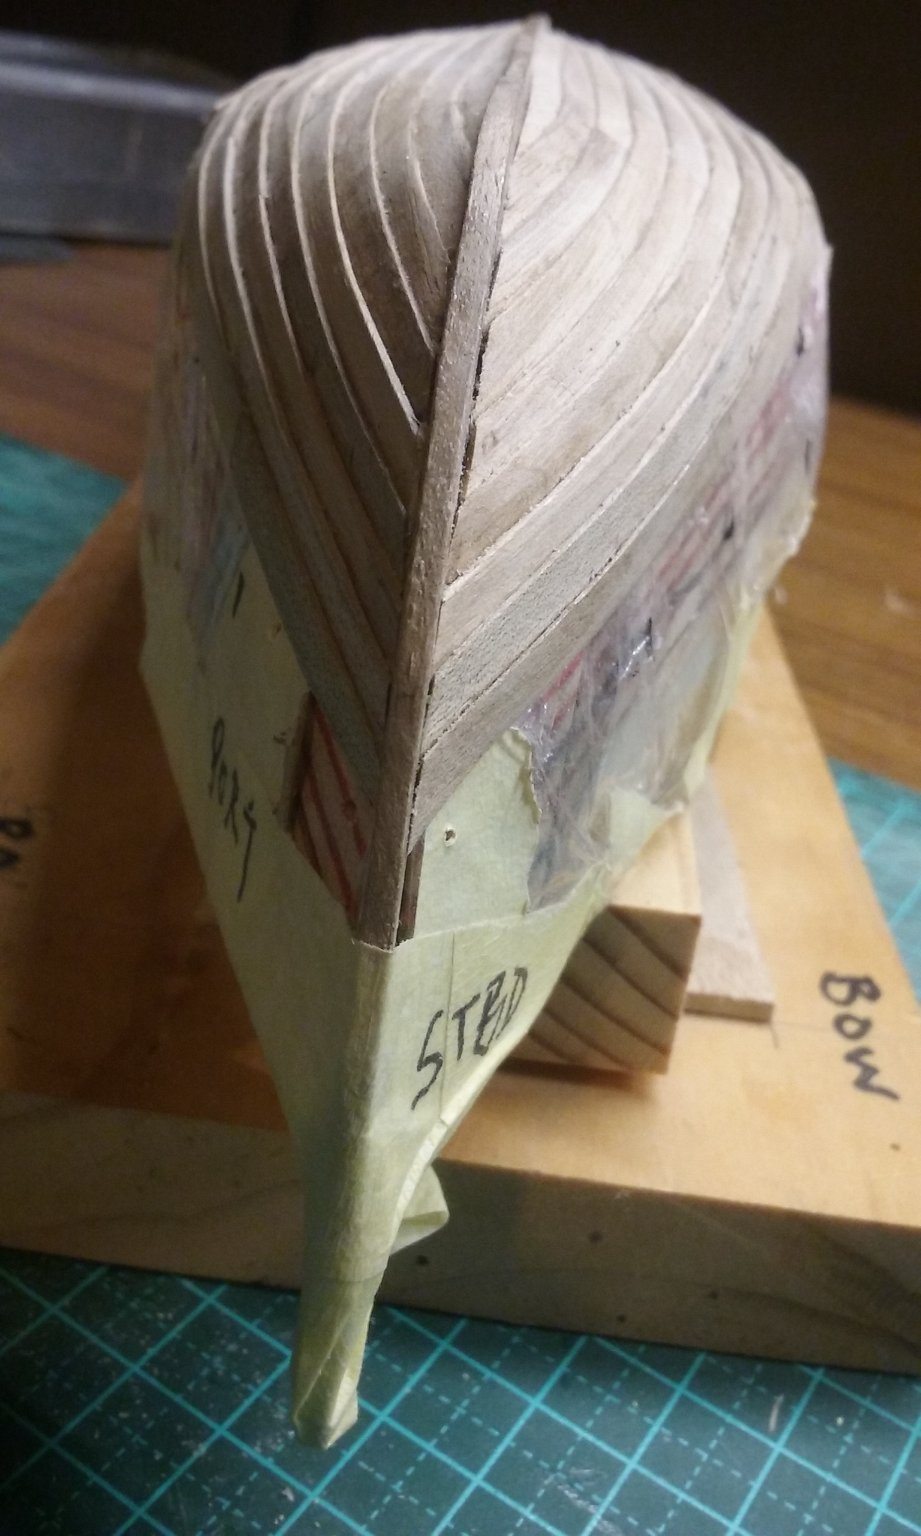
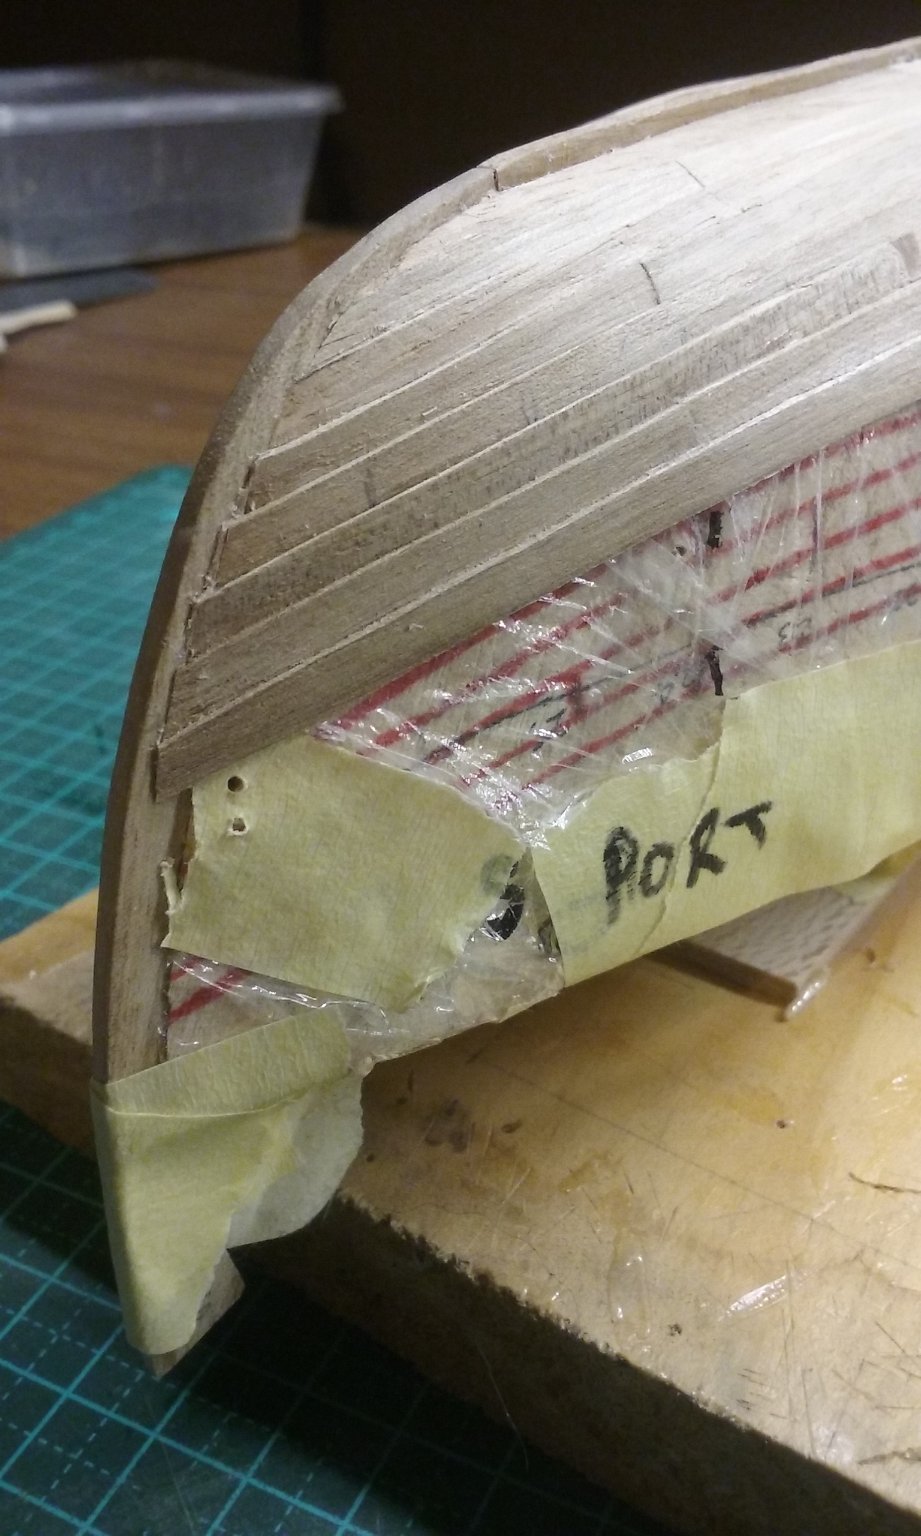
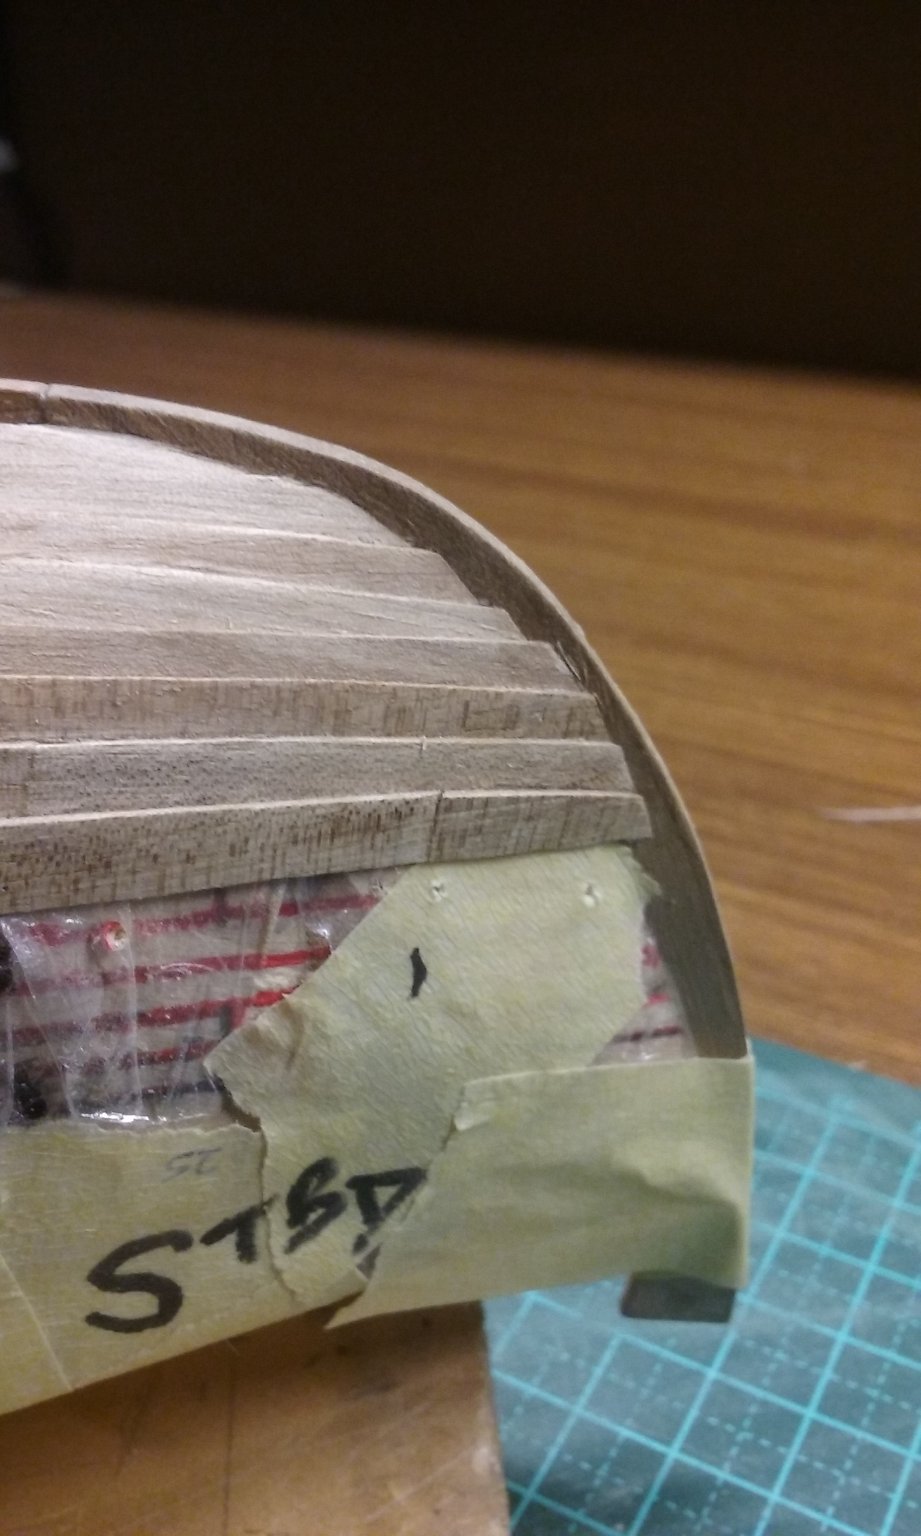
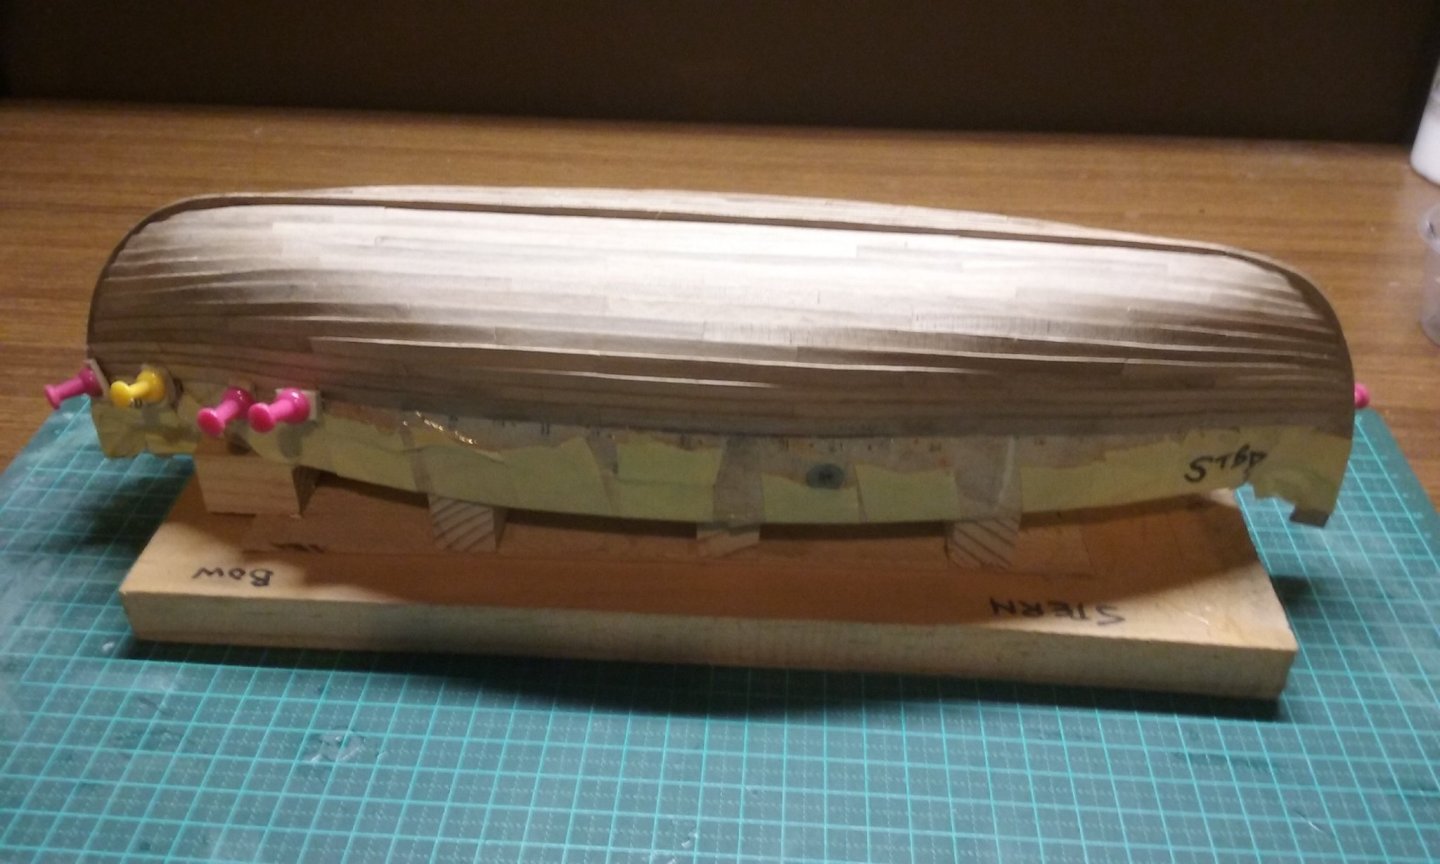
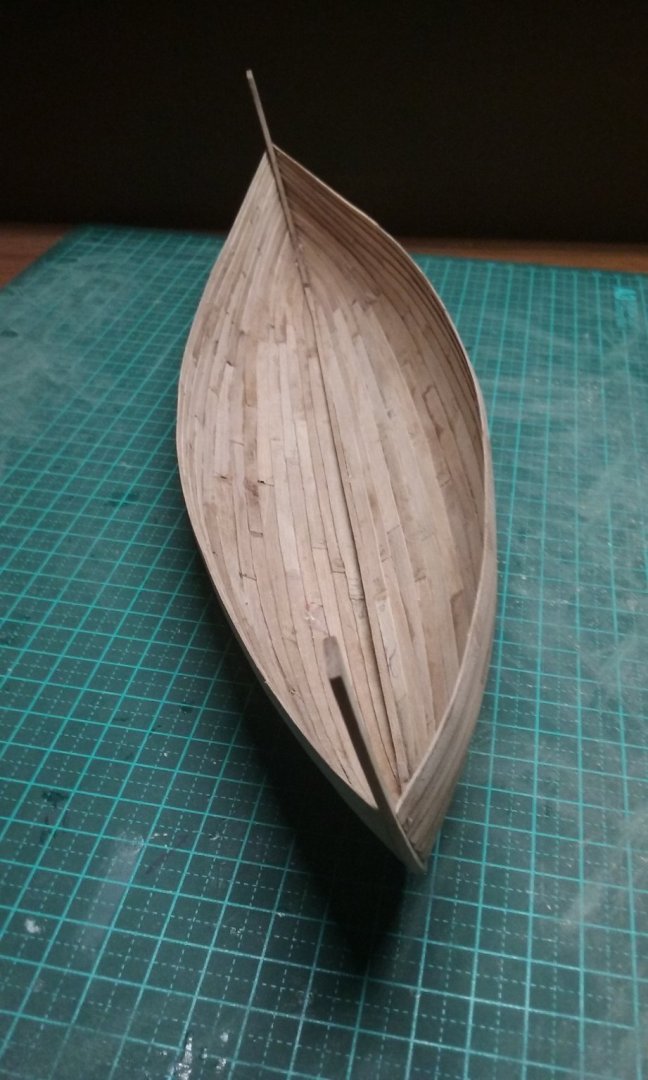
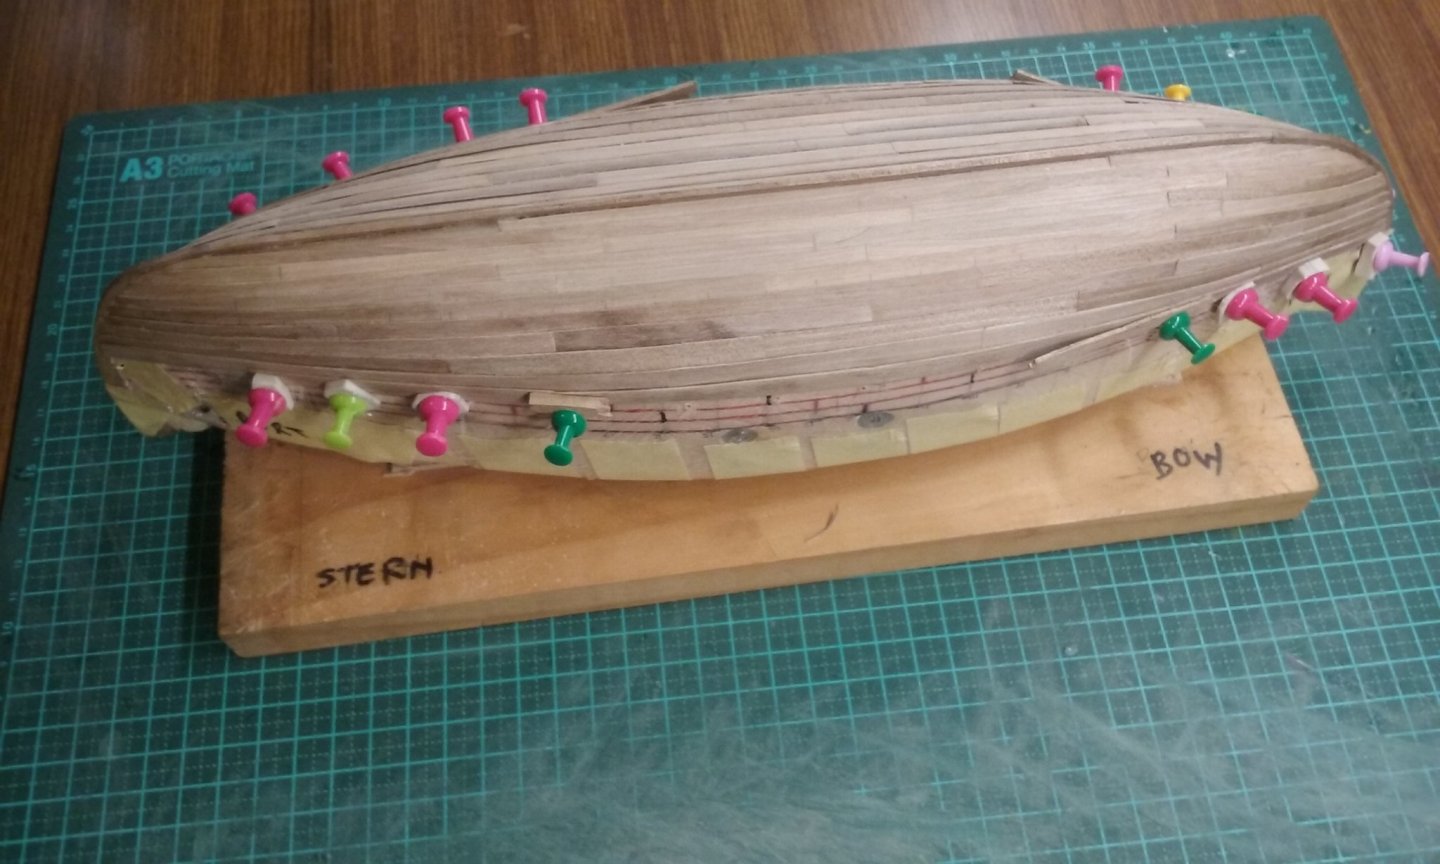
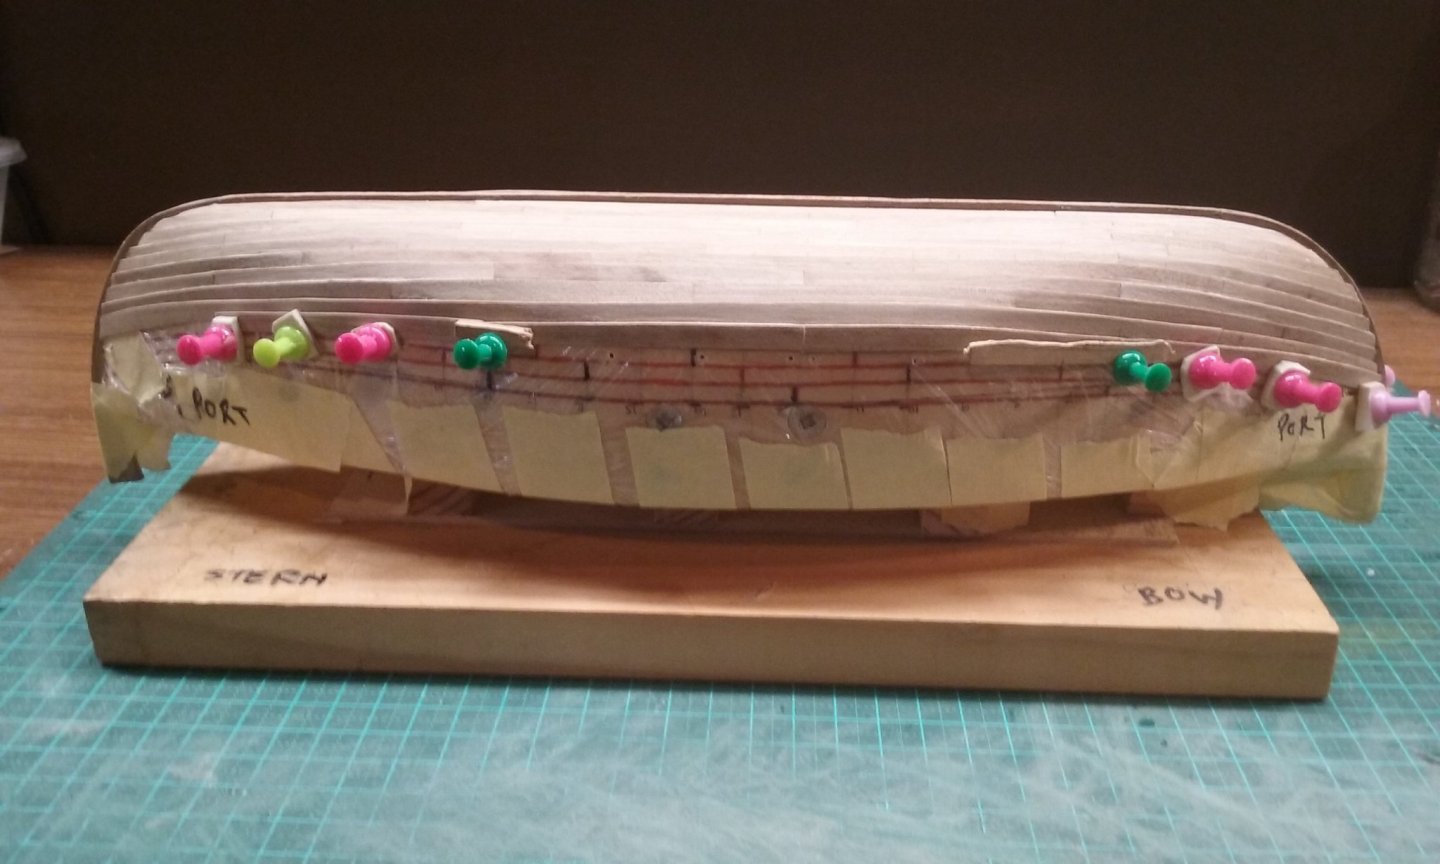
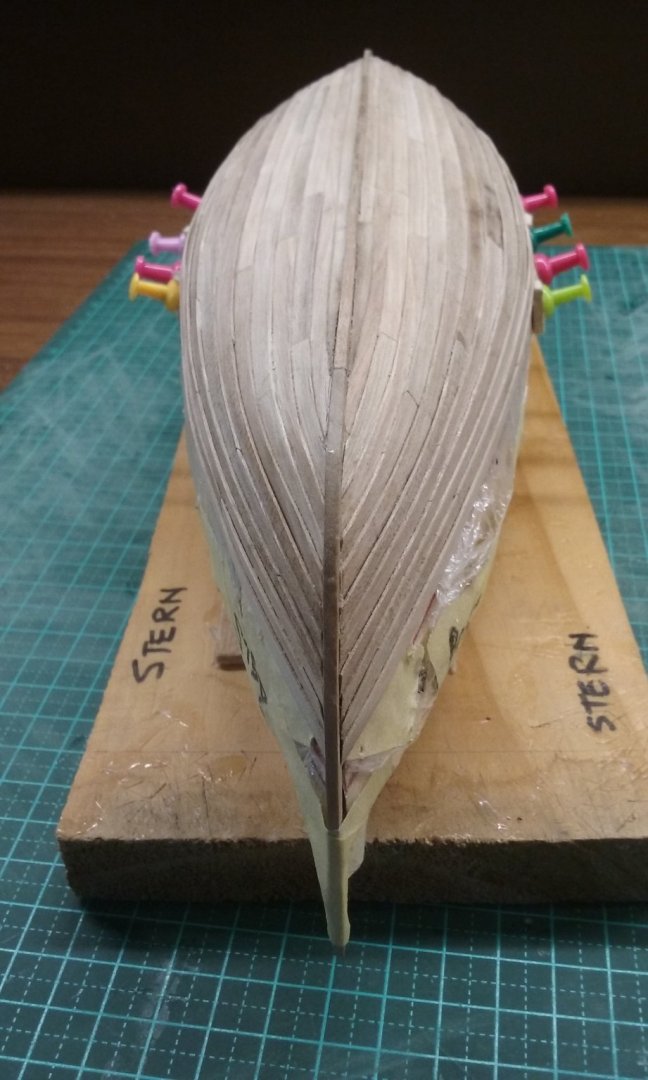
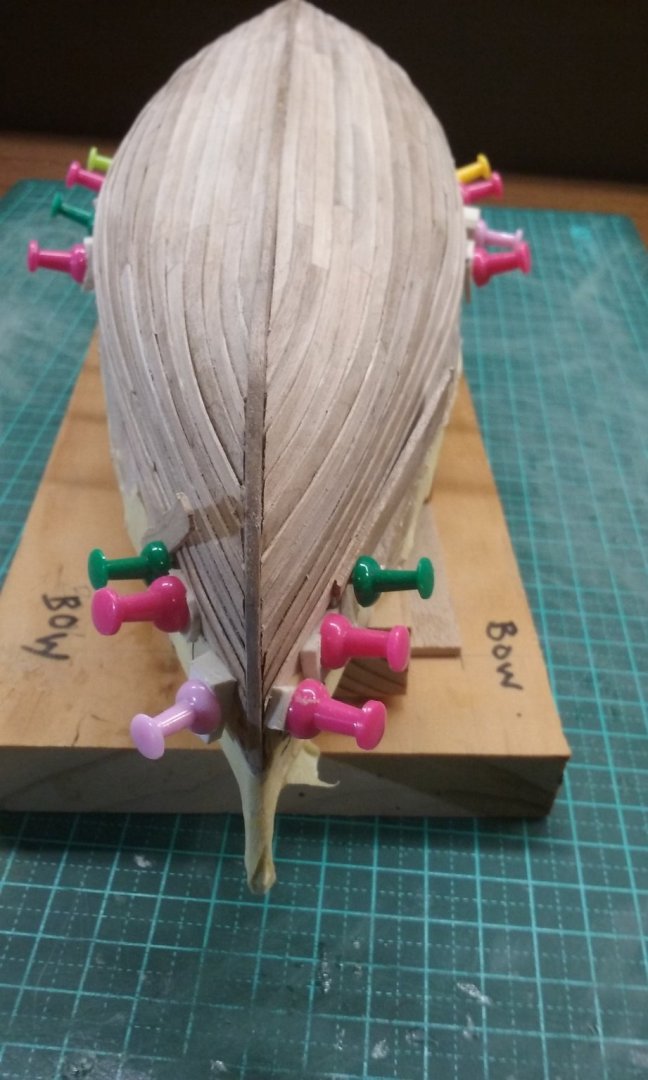
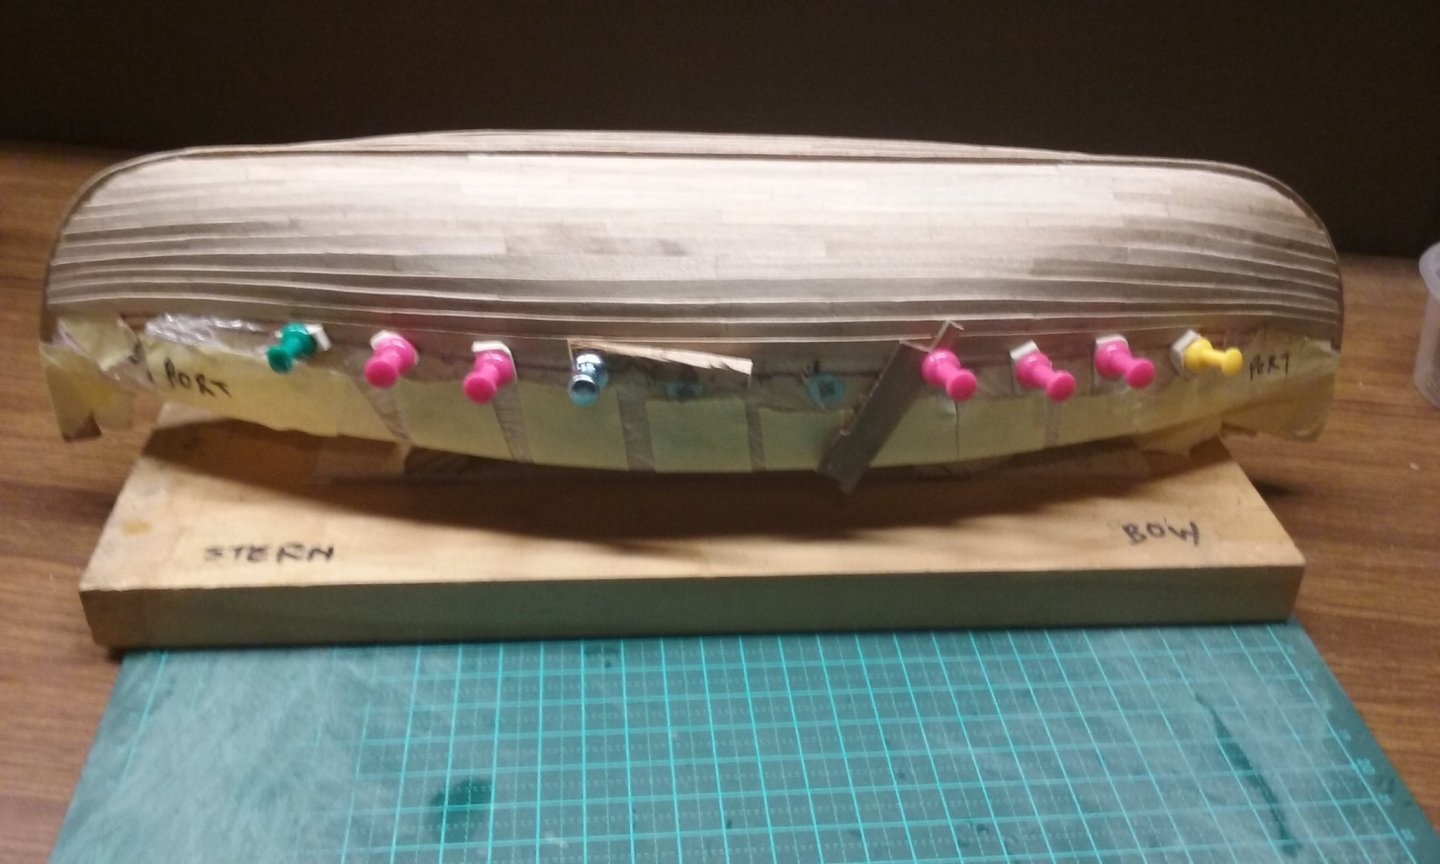
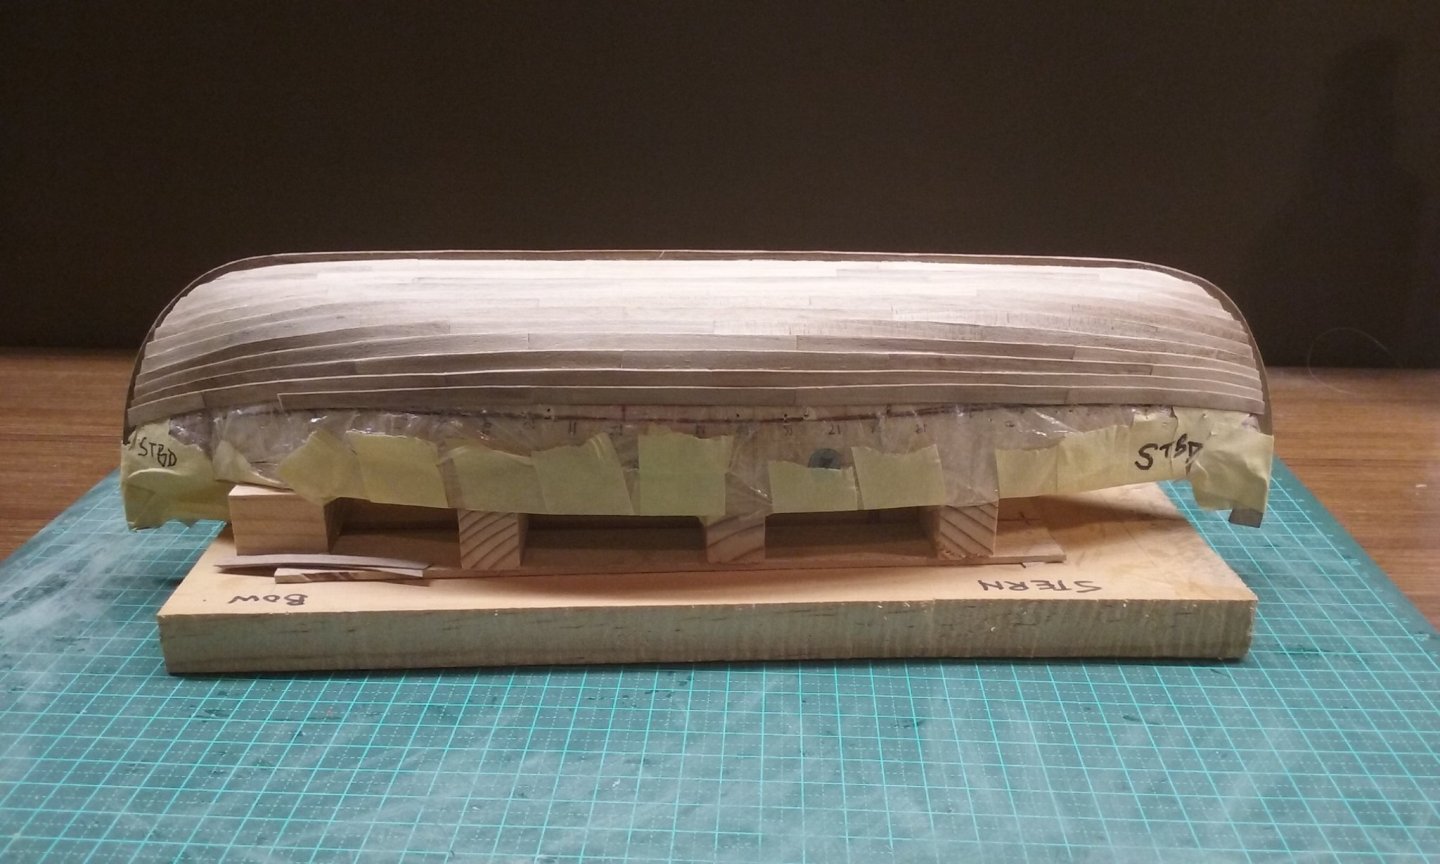
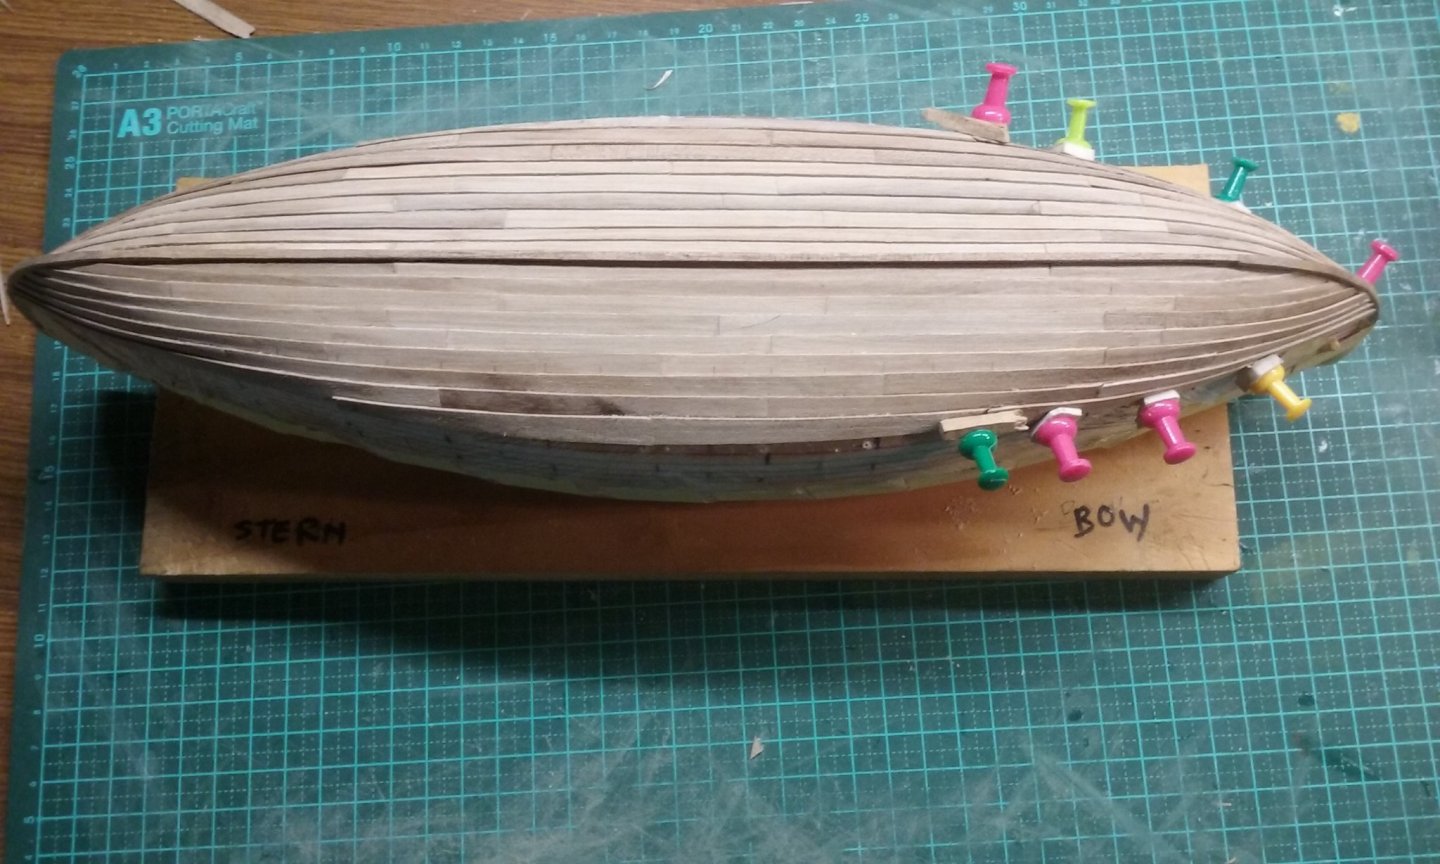
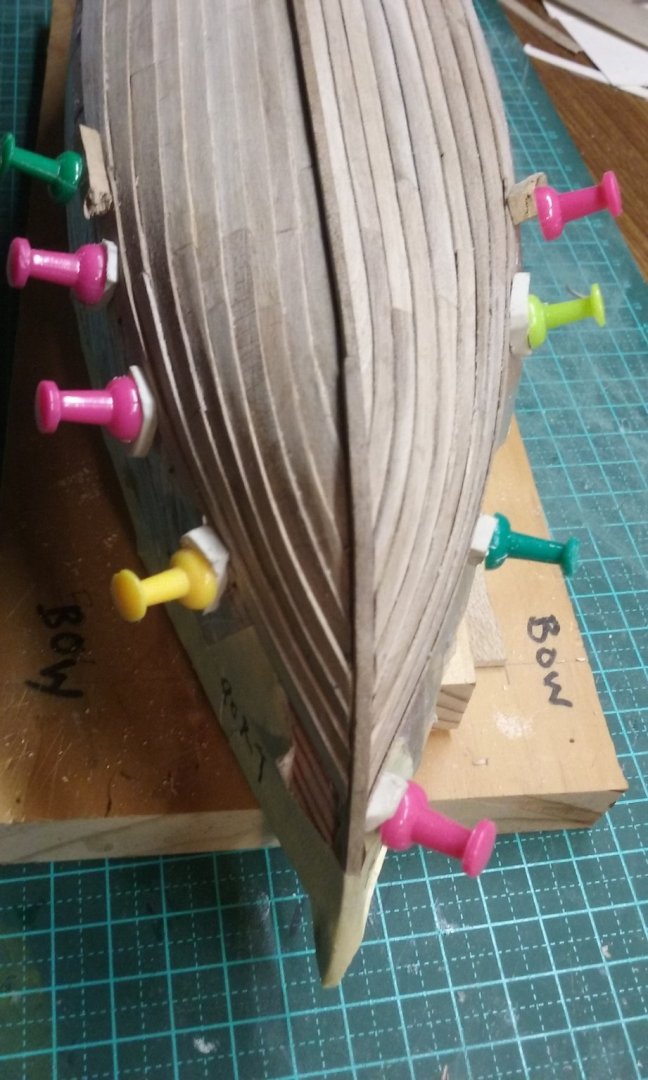
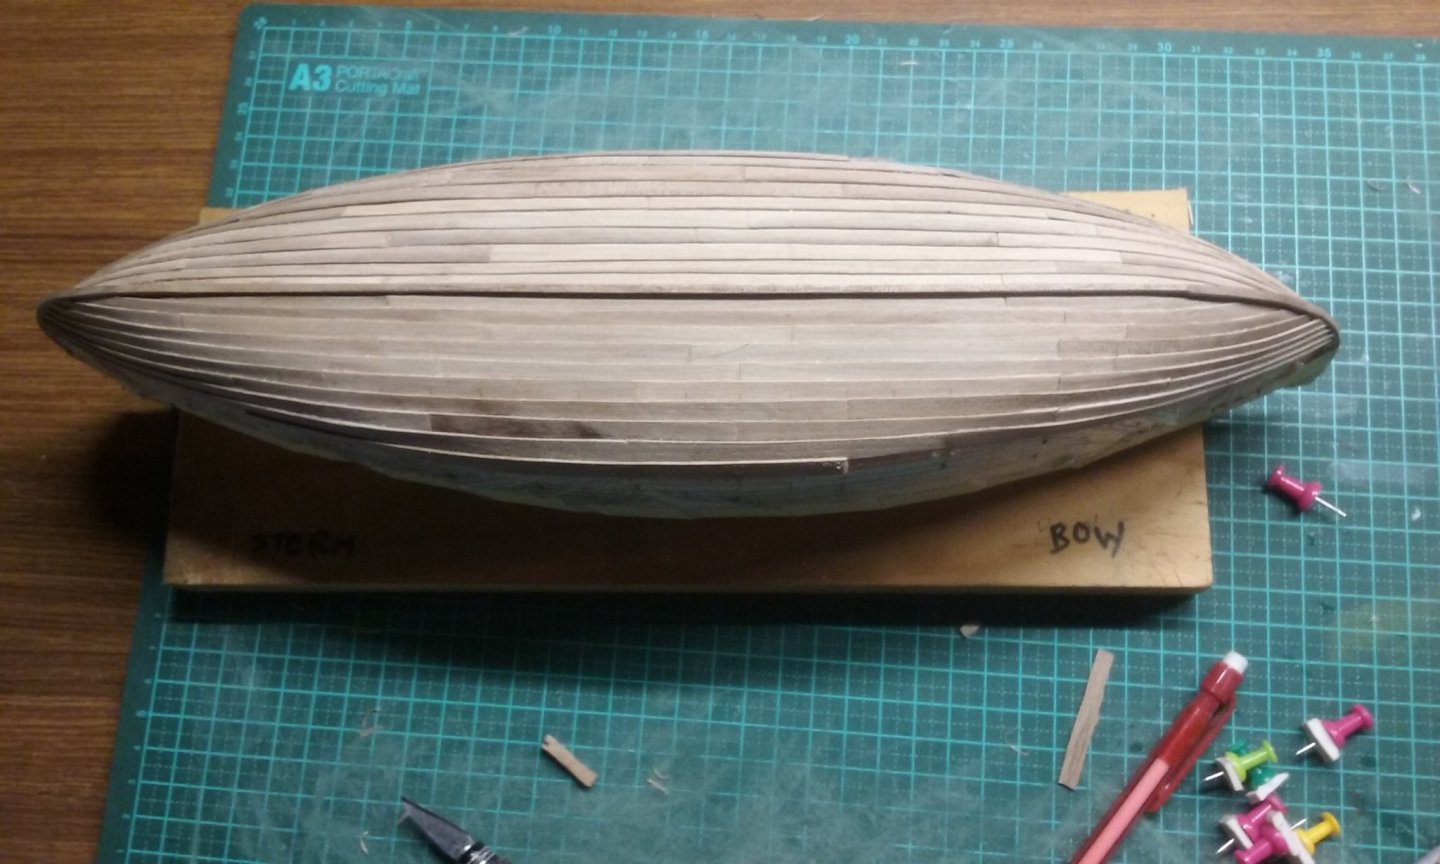
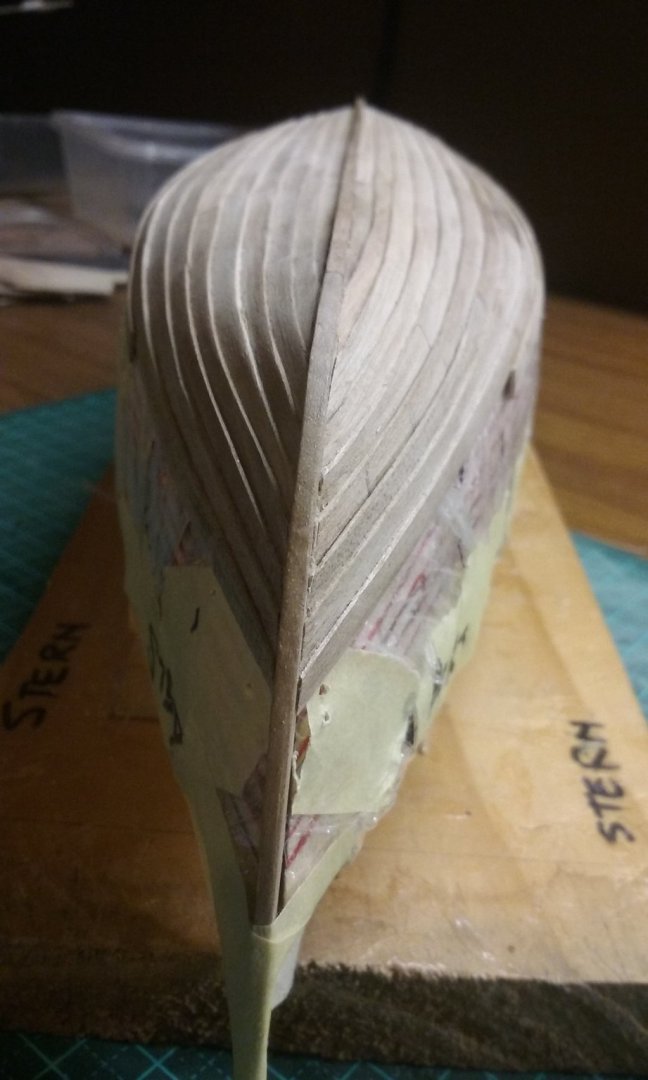
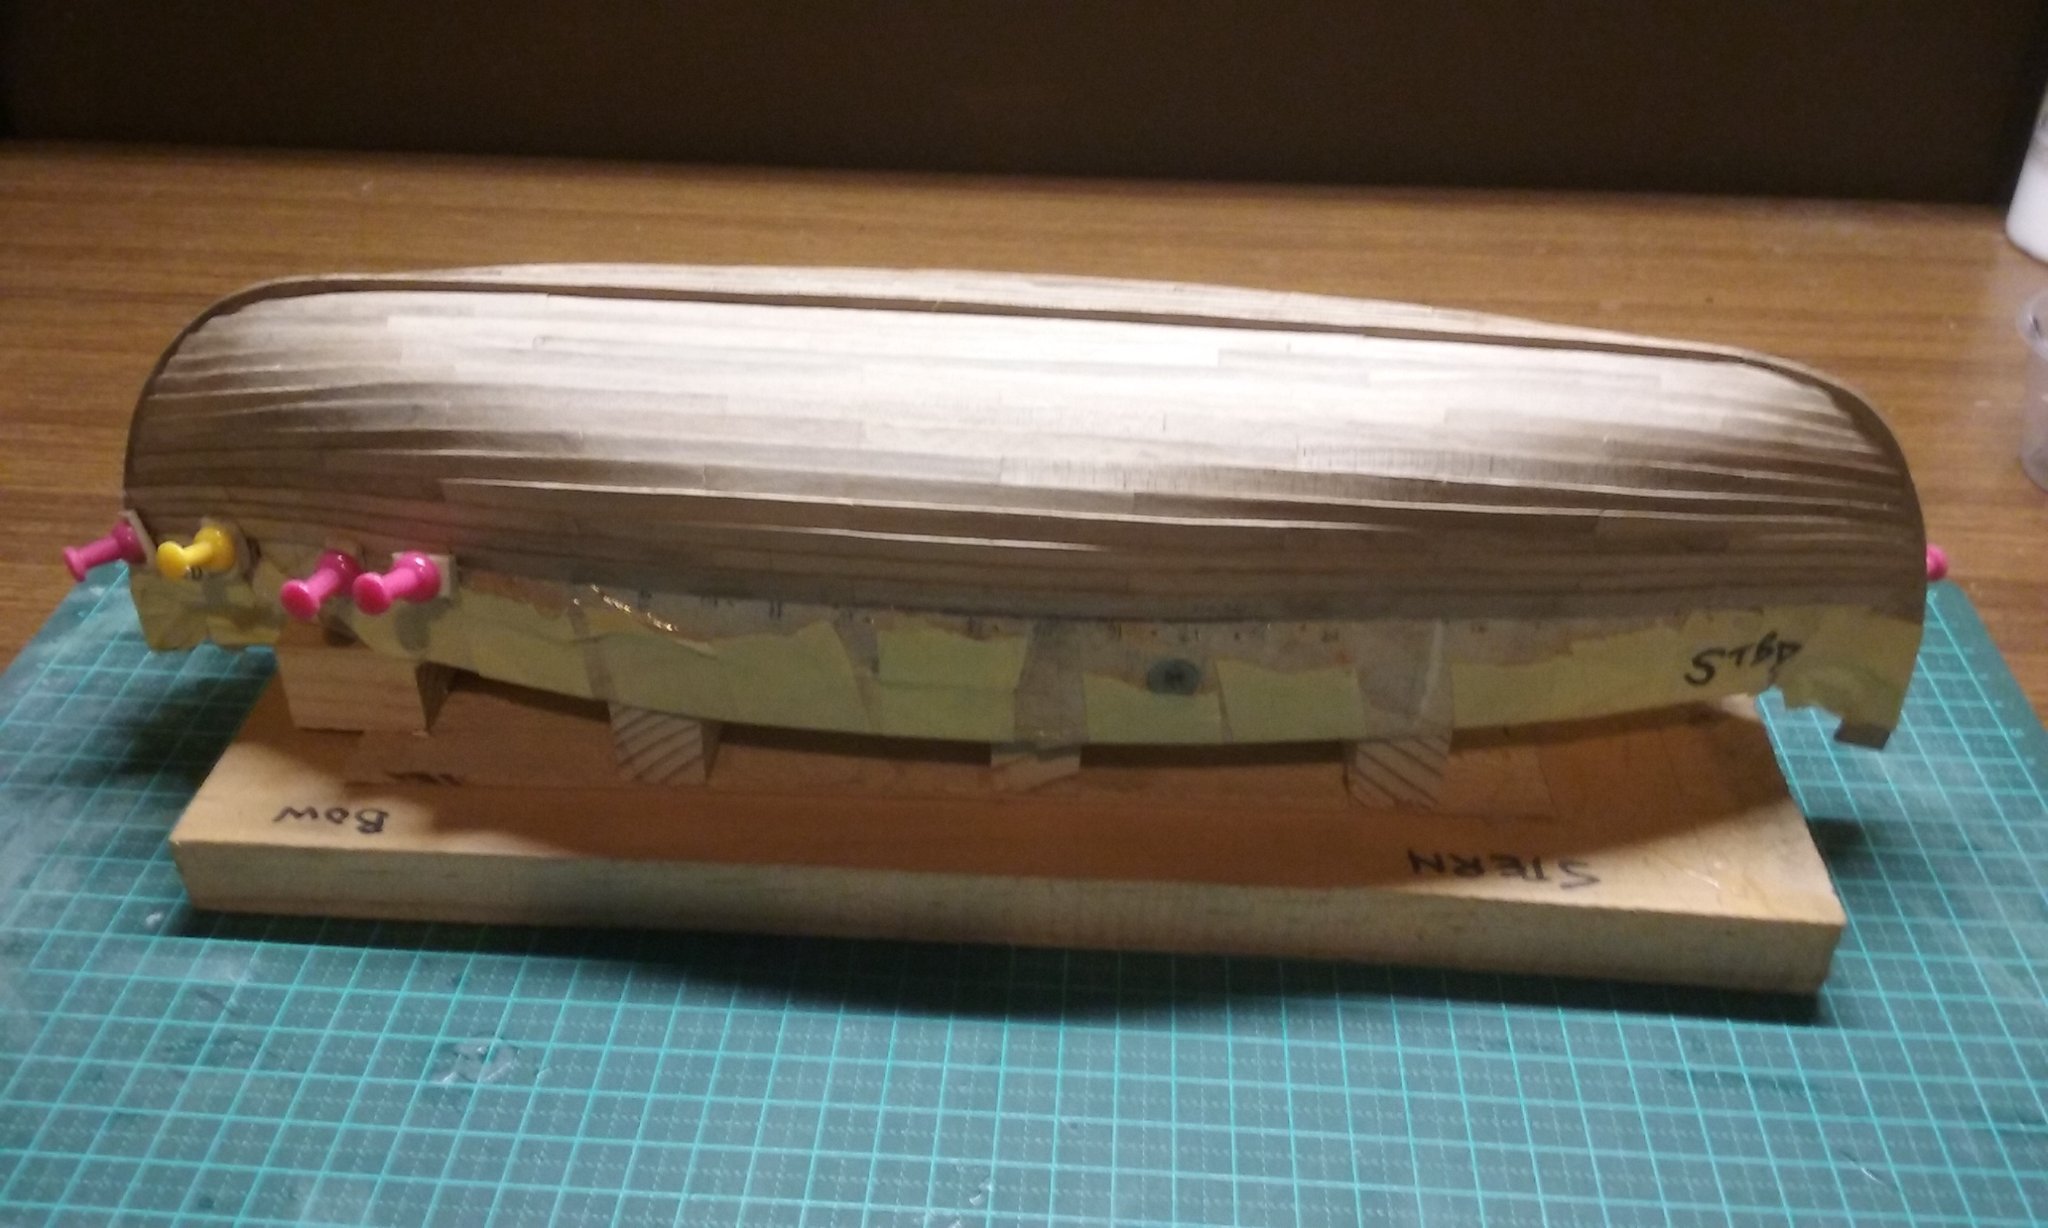
A-A-A-A-N-D . . . PLANKING IS COMPLETE! Last steps . . . All planks in place - pushpins removed. And it came off the plug without damage! There was an initial problem - the clingwrap had got torn in a few places during the planking procedure, and a couple of planks had stuck lightly to the plug. I had to ease a blade between the planking and the plug to free them up. Fortunately it was only the very last layers of planking, so I could free them up. A bit of careful jiggling back and forth, and VOILA! (I tore the clingwrap to get the ship free - this is the bit left behind between the planking and the plug). And here she is free and clear. Rather a pretty shape, I think . Now, there's a possibility that the hull might squeeze inward without frames, so the next job is the cut the plug into crosswise slices - one for each frame - and then make frames based on those shapes. All good . Steven
.thumb.jpg.383fa1e281b41e19e4aee55862f349b9.jpg)


- 327 replies
-
- 21
-

-

-
Hi and welcome to MSW! If you haven't made any wooden ships before, I'd suggest you look at this thread, which should help you choose a suitable model to work on. Once you're ready to begin, make sure you start a build log - instructions are here: https://modelshipworld.com/topic/24705-before-you-post-your-build-log-please-read-this-starting-and-naming-your-build-log/ It's a great way to get help and advice, and getting your questions answered. And we get to see your progress. The people here are very supportive and helpful. Don't get too intimidated by the quality of some of the models on MSW - some of the people here have been doing this stuff for decades, but there are also plenty of people on their first model. And don't get too worried about making mistakes (you will make them - we all do - it's part of the learning process). Good to have you aboard! Steven
-
Hmm - there's a difference between a plural and a collective noun. The plural of nef should, I suppose, be nefs (using the French system of making plurals out of singular words). This of course doesn't take into account the fact that nef really isn't a specific term for this kind of ship - there wasn't one. In fact, I thought I'd made it up, in default of any correct name existing for them, then found others on the Internet had beaten me to it. But a collective noun for them - like a Pride of lions or a murder of crows, or a parliament of fowls, or a mob of kangaroos (yes, really - that's the name for a group of roos!), a sanctimony of bishops, a flourish of strumpets, or a flange of baboons, a smugness of young IT professionals - hmmm, perhaps a jabberwock of nefs? Oh, no, that would be for hulcs, wouldn't it? Maybe a bandersnatch of nefs? Steven
-
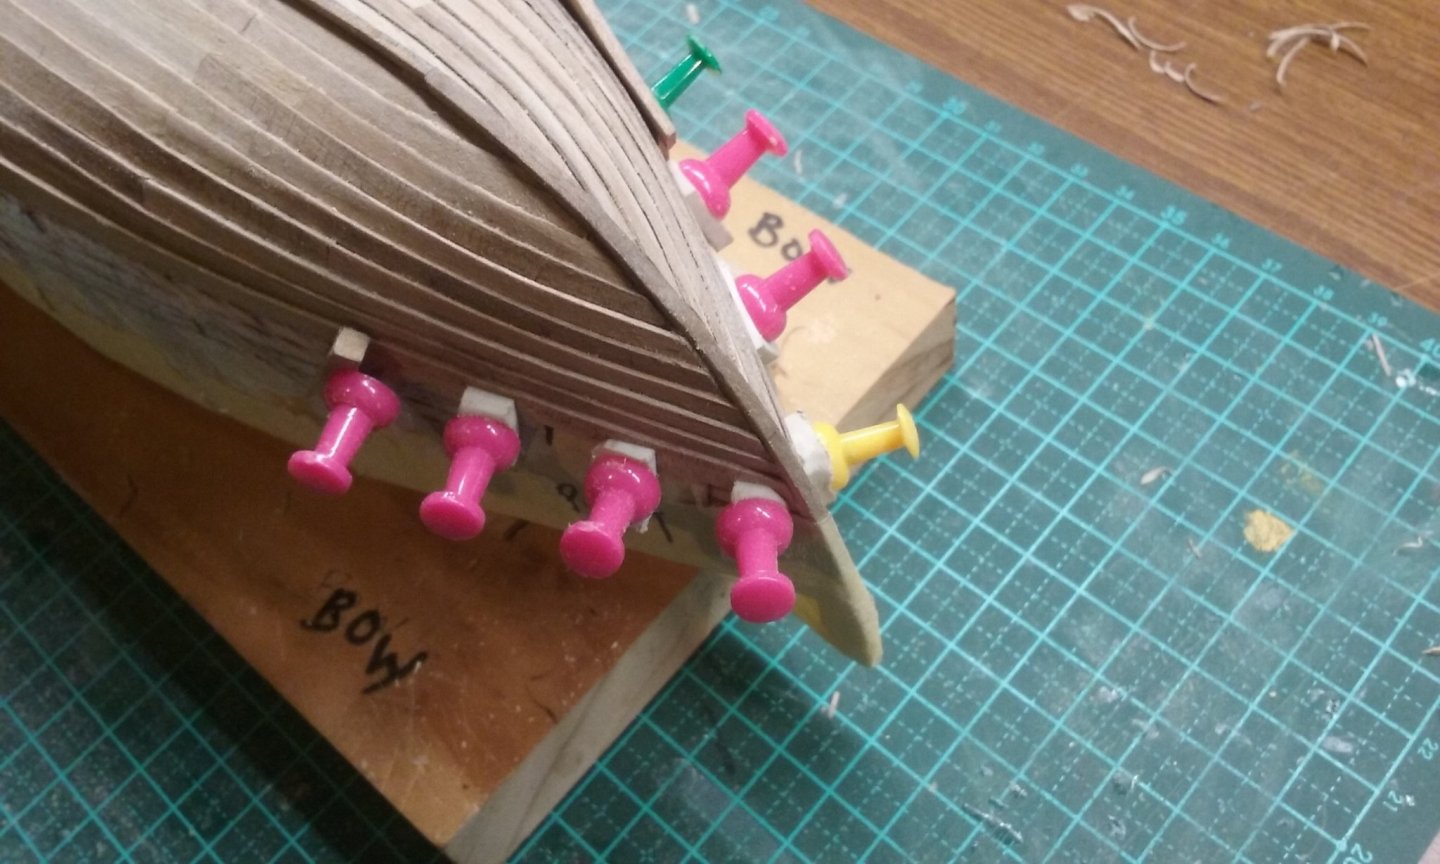
Current progress on the planking: I was just about to finish the second-last strake, when - AGHAST! I've been using a 1mm drill to make the holes for the push pins (after nasty painful experiences pushing them in when I was making the dromon), and I just broke my last drill bit. We're currently in lockdown, so I have to wait till I can get new ones click-and-collect from Bunnings . . . Interesting - I'm not exactly following the lines I drew on the plug for the planks - I think the planks are trying to tell me something - that my own lines weren't right. Certainly the planking looks better than what I'd drawn. So, pretty happy with it all. Steven


-
Those sails look very good, Patrick. And yes, "hem" is the correct term in English. Steven
- 756 replies
-
- 3
-
-
-
- galleon
- golden hind
- (and 2 more)
-
From the wreck of the Gribshunden, Denmark 1495. A "griffin-hound" swallowing a screaming man. "Dragon head" figureheads were a common feature on large ships of this time. http://moocs.southampton.ac.uk/shipwrecks/2016/02/09/the-loss-of-the-gribshunden-1495-and-preliminary-archaeological-investigations/ Steven
-
Perhaps they are theoretical reconstructions. The only contemporary images of nefs I'm aware of are on city seals, plus three manuscript illustrations. Which is the problem faced by those of us who are interested in ships of this period. These images are about all we've got, as we lack any archaeological information on ships of this type. Steven
-
Ancient galley rams discovered - photos
Louie da fly replied to Louie da fly's topic in Nautical/Naval History
I'm sure I've read somewhere that the "ram" on renaissance galleys (which by this time was right up at upper deck level) was used as a boarding bridge. Steven -
No worries, Roger. Taken in the spirit it was offered, and your interest is appreciated. Steven
-
All the best with it, Mark. She's a beautiful vessel. Steven
-
I'm wondering if it wouldn't be best for you to sand all the planks down at the bow cheeks to make a single smooth surface. Otherwise I can't see how that decal is going to stick. Whether you should also varnish it, I really don't know. Steven
- 62 replies
-
- 2
-
-
-
- amati
- greek bireme
- (and 1 more)
-
So long as it's stable, you should be fine. I've seen the results of ship models tipping over. Not to be thought of. Steven
-
Nice work, Dick. Beautifully detailed as usual. Steven
- 186 replies
-
- 1
-
-
- keelless
- reverse clinker
- (and 4 more)
-
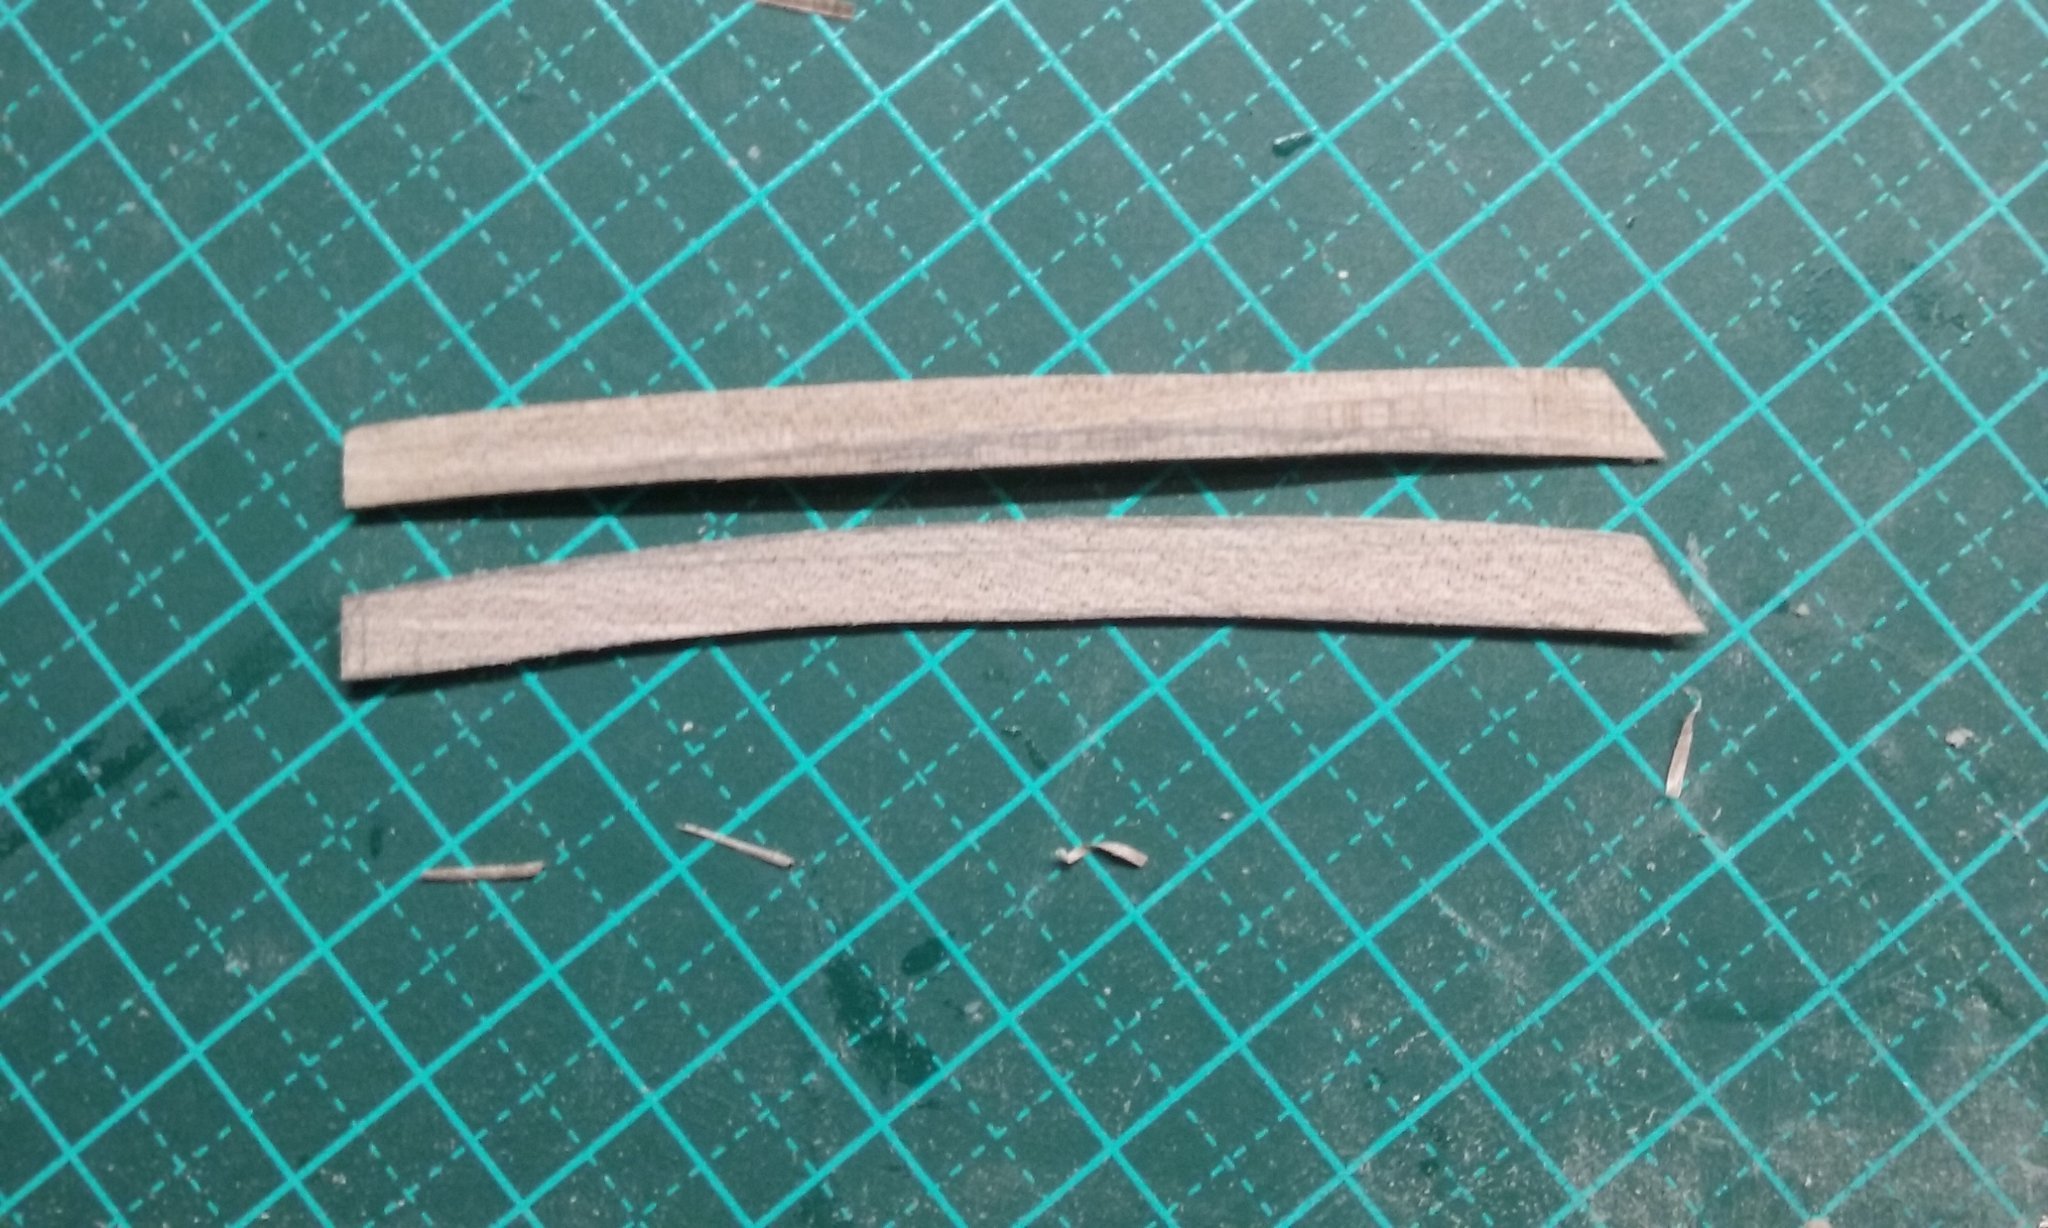
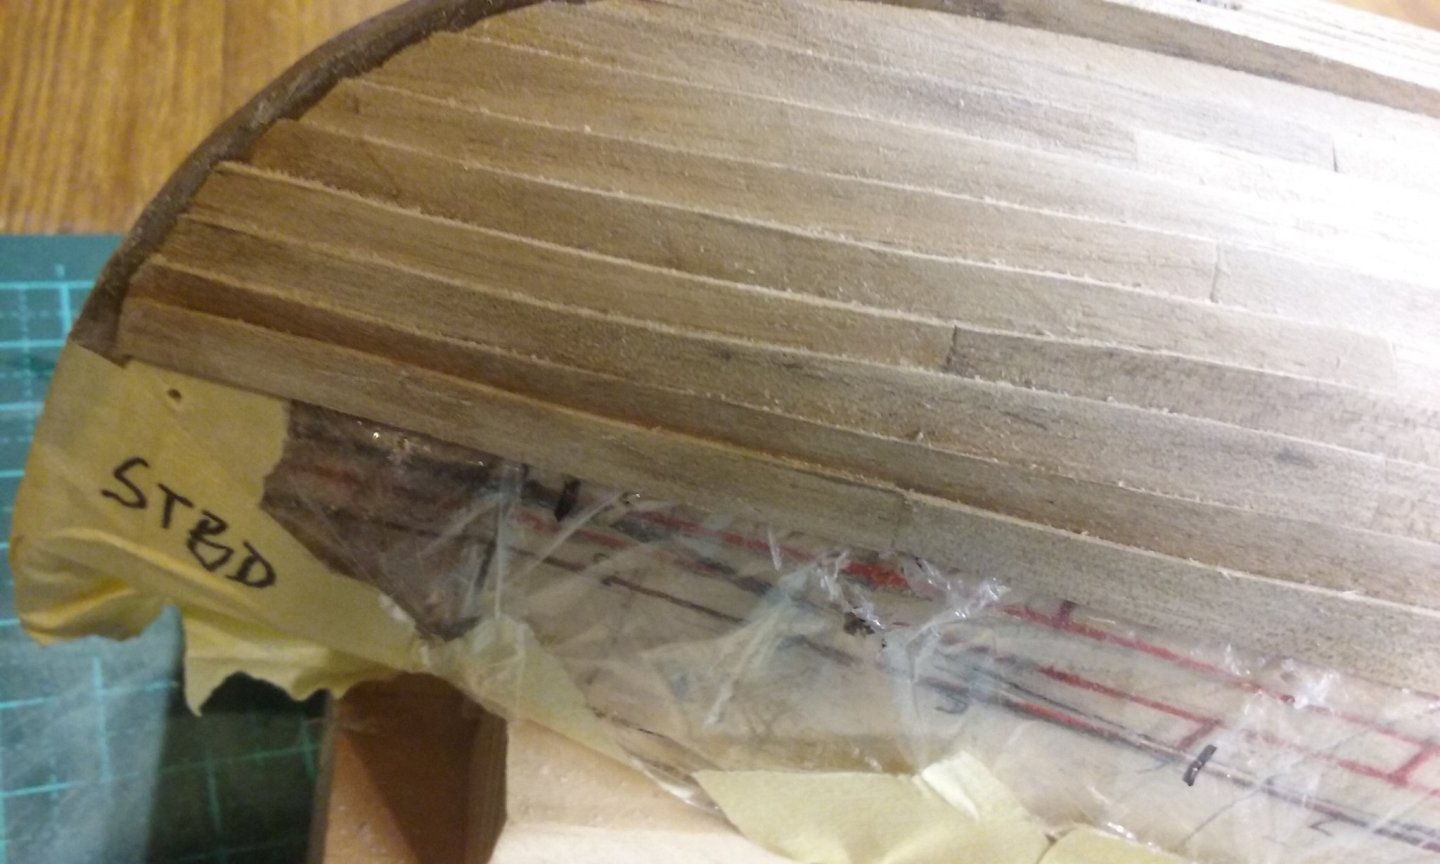
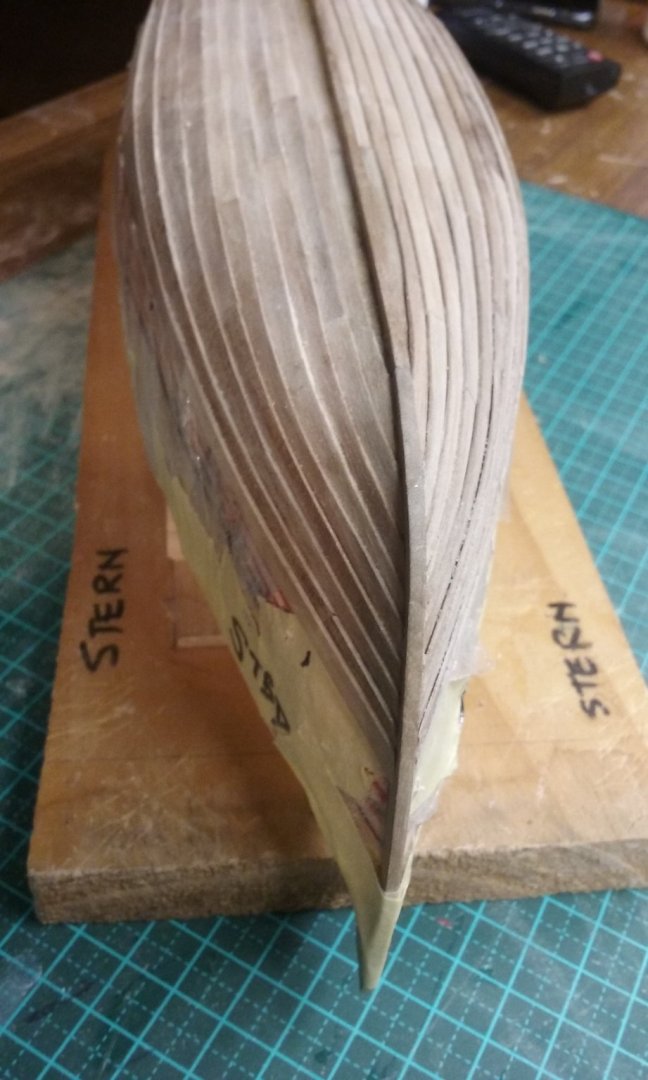
Just checked the taper in the strakes. The visible part (i.e. not taking the overlap into account) goes from 5 millimetres amidships to 3 mm at the ends. So a taper of 2mm in 5 - not all that shabby after all. Steven
-
Thanks people for the likes. Roger, I know about these carved stem and sternposts. Not a problem, but I decided to do it a different way, as nefs are later and further south than Viking ships (there's one on a seal from as far south as Spain!) and could well have followed a different tradition of construction. Chuck, the planks do taper but perhaps not as much as they should, and the taper is not terribly obvious in the photos. Steven
-
Well, I can't speak for anybody else, but the base on my own galley (dromon) is wide enough so it doesn't tip over sideways but narrow enough for the oars to stick out either side. I think it looks better that way. Note that the base is made of a piece of marble, so it's VERY heavy, to keep it stable. Steven
-
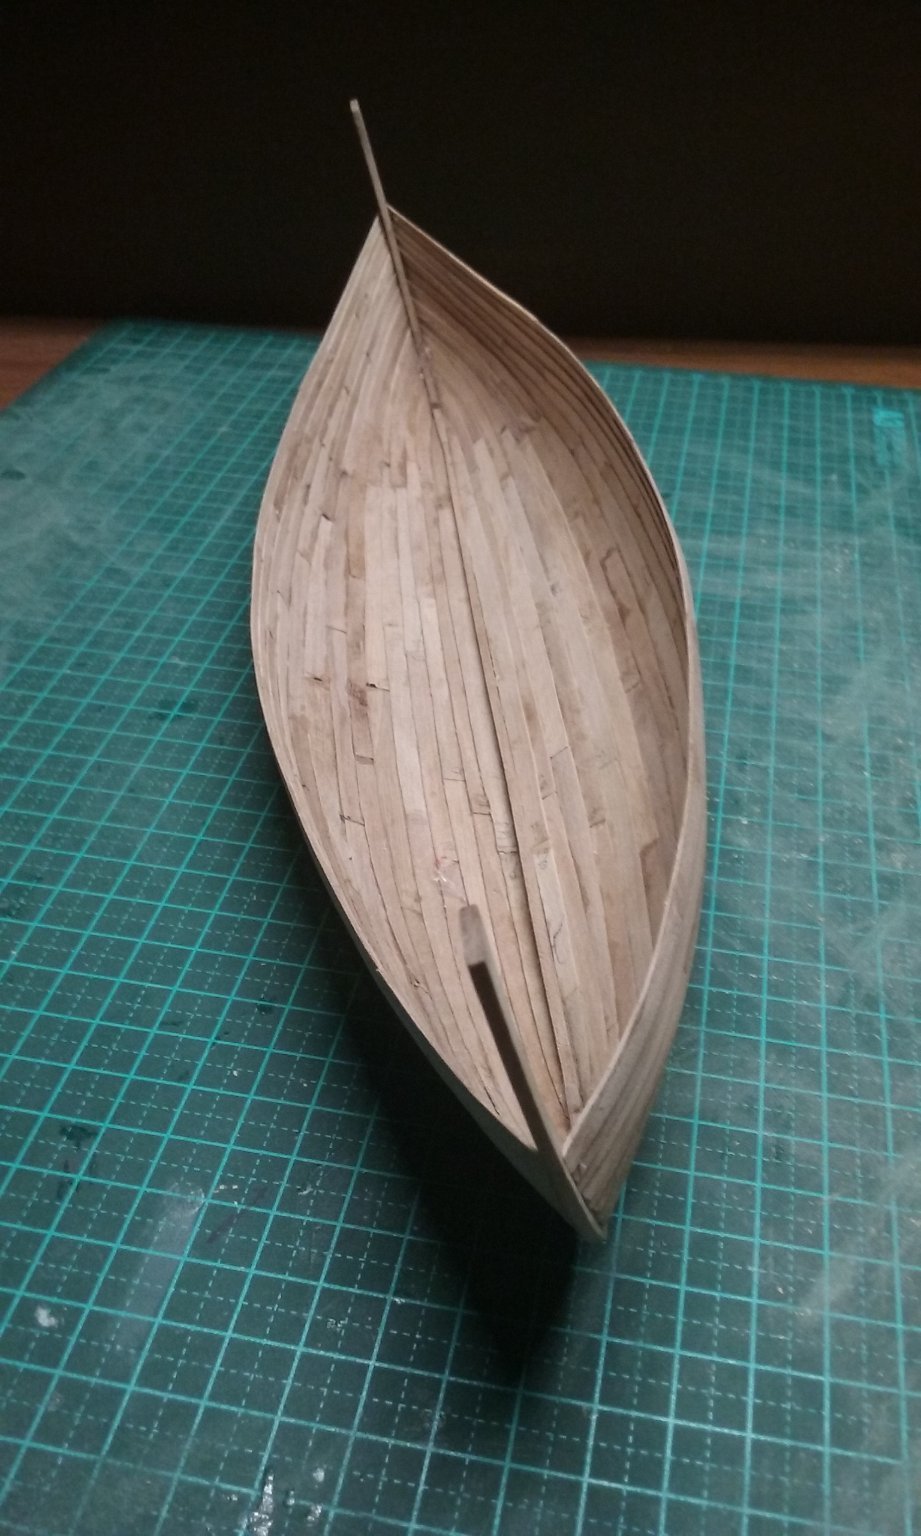
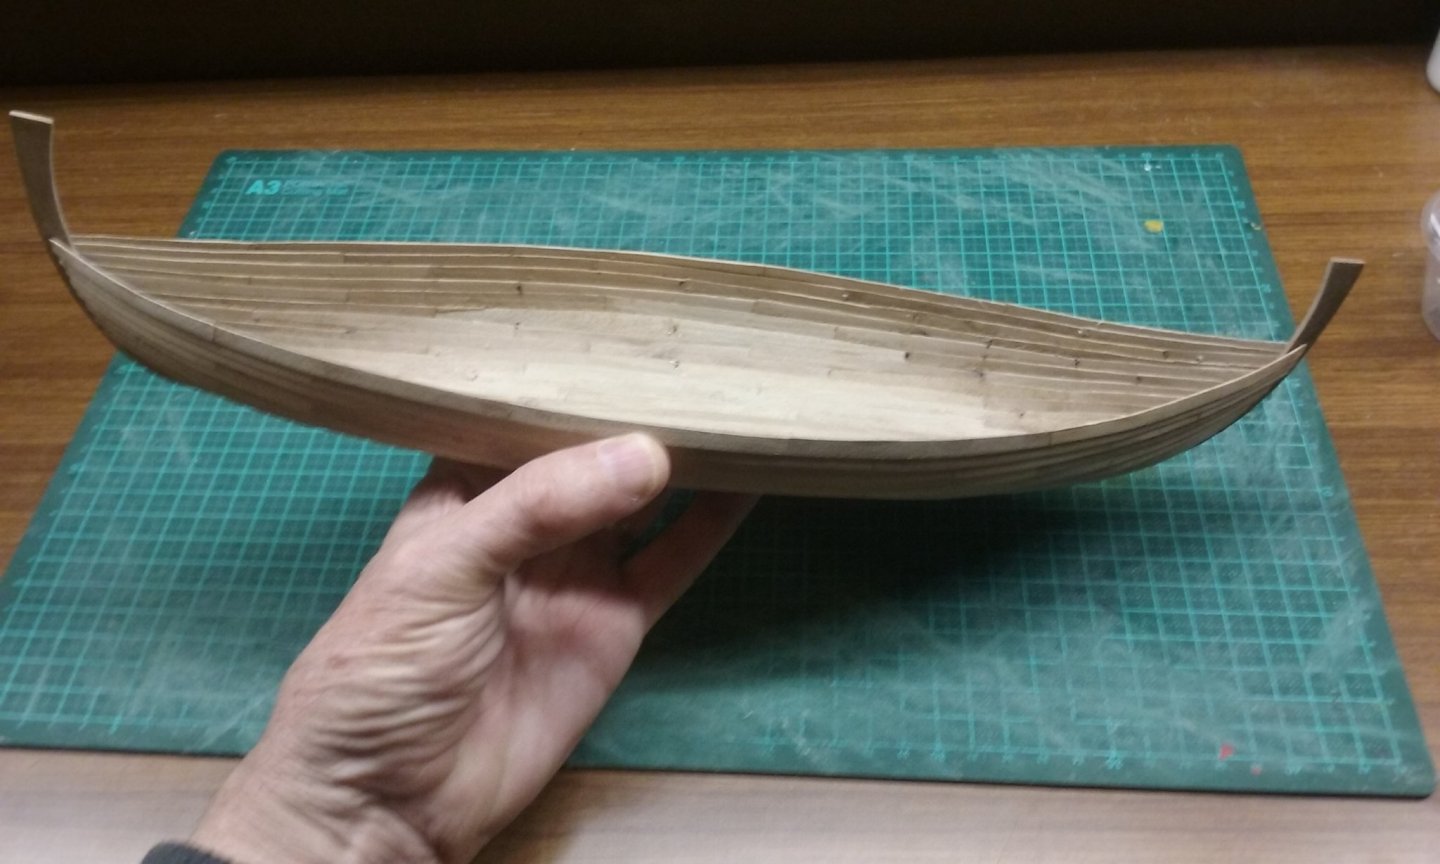
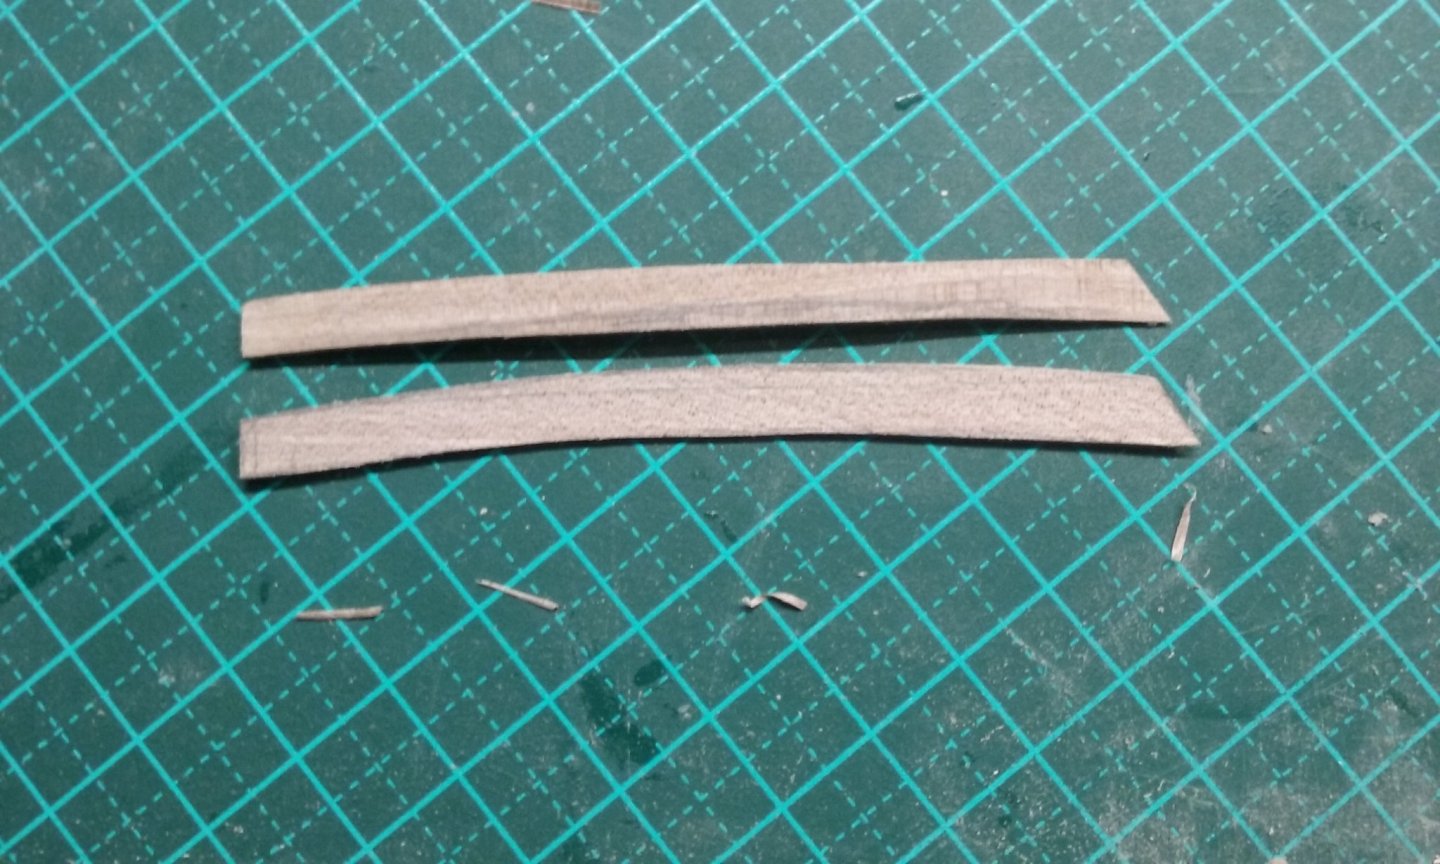
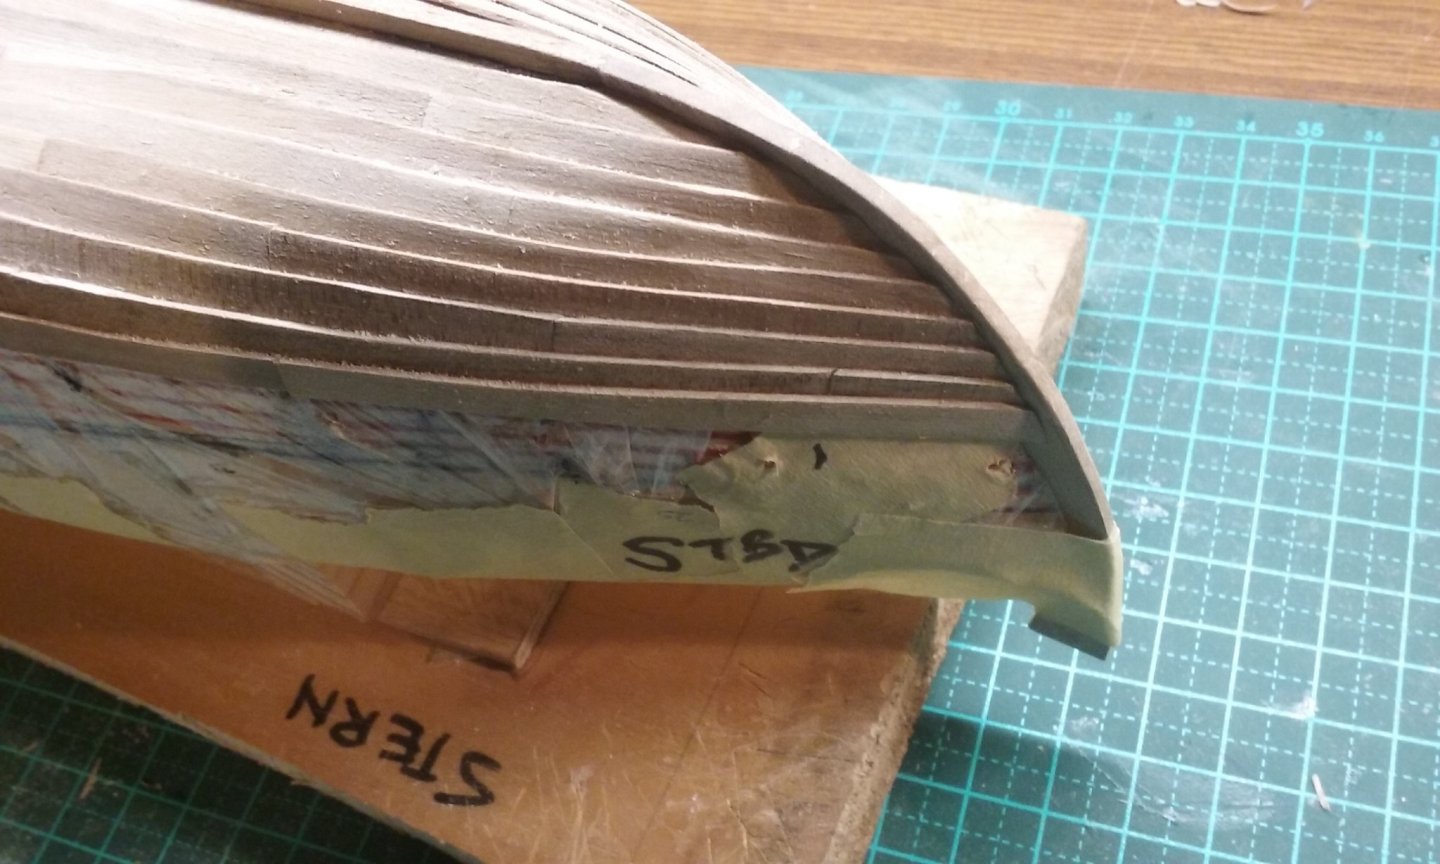
Thanks everybody for the likes and i particular thanks Woodrat, Druxey and Bolin for the info on bow/sternpost planking. Well, I've reached something of a milestone - I seem to recall Druxey saying the hardest bit of planking is getting to the turn of the bilge. Which I have now done! I've found that I'm doing an average of one pair of strakes every two days. Here's a pair of end planks. I've been joining the planks in a strake with scarphs in the thickness of the plank. There's a lot of trial and error involved and quite a bit of adjustment needed to get the planks to fit properly and follow the line of the strake smoothly. Of course the upper side of the plank isn't as important as the upper, because it will be hidden by the next plank overlapping it. Sometimes it doesn't quite work at the ends and I have to put in slivers of wood to fill the gaps. And then trim them off smooth. So here's the sequence - progress photos as the planking gradually gets done. Some more gap filling needed here. I'll get onto it in due course. This end is rather better. I'm pretty happy with this. And the pattern of the planking is unexpectedly attractive. It's made me appreciate clinker construction a lot more. Steven


- 327 replies
-
- 15
-
-

-
Ancient galley rams discovered - photos
Louie da fly replied to Louie da fly's topic in Nautical/Naval History
I've also seen a suggestion that ancient galleys didn't ram other vessels side-on, but on an angle from the stern. This makes sense if the opposing galley was travelling at speed - less likelihood of the ram being torn off by the collision. Unfortunately I've lost the reference. [Edit] I read a book a while ago called (I think) The Crescent and the Cross - The Battle of Lepanto. It basically described the battle as one of a single round of gunfire, followed by soldiers boarding opposing galleys and wiping out the crews in hand-to-hand combat. The galleasses, being much slower (though much more heavily armed), only figured in the battle at the very beginning after which they were left behind by the ebb and flow of the fighting. And the battle had very little effect on the overall situation - the Ottoman fleet had been completely replaced within a year. It was more of a propaganda victory than a strategic one. [/Edit] Steven -
Ancient galley rams discovered - photos
Louie da fly replied to Louie da fly's topic in Nautical/Naval History
Yes, much heavier and more powerful vessel than a galley, which was built as lightly as possible because it was moved by muscle-power. Steven -
Ancient galley rams discovered - photos
Louie da fly replied to Louie da fly's topic in Nautical/Naval History
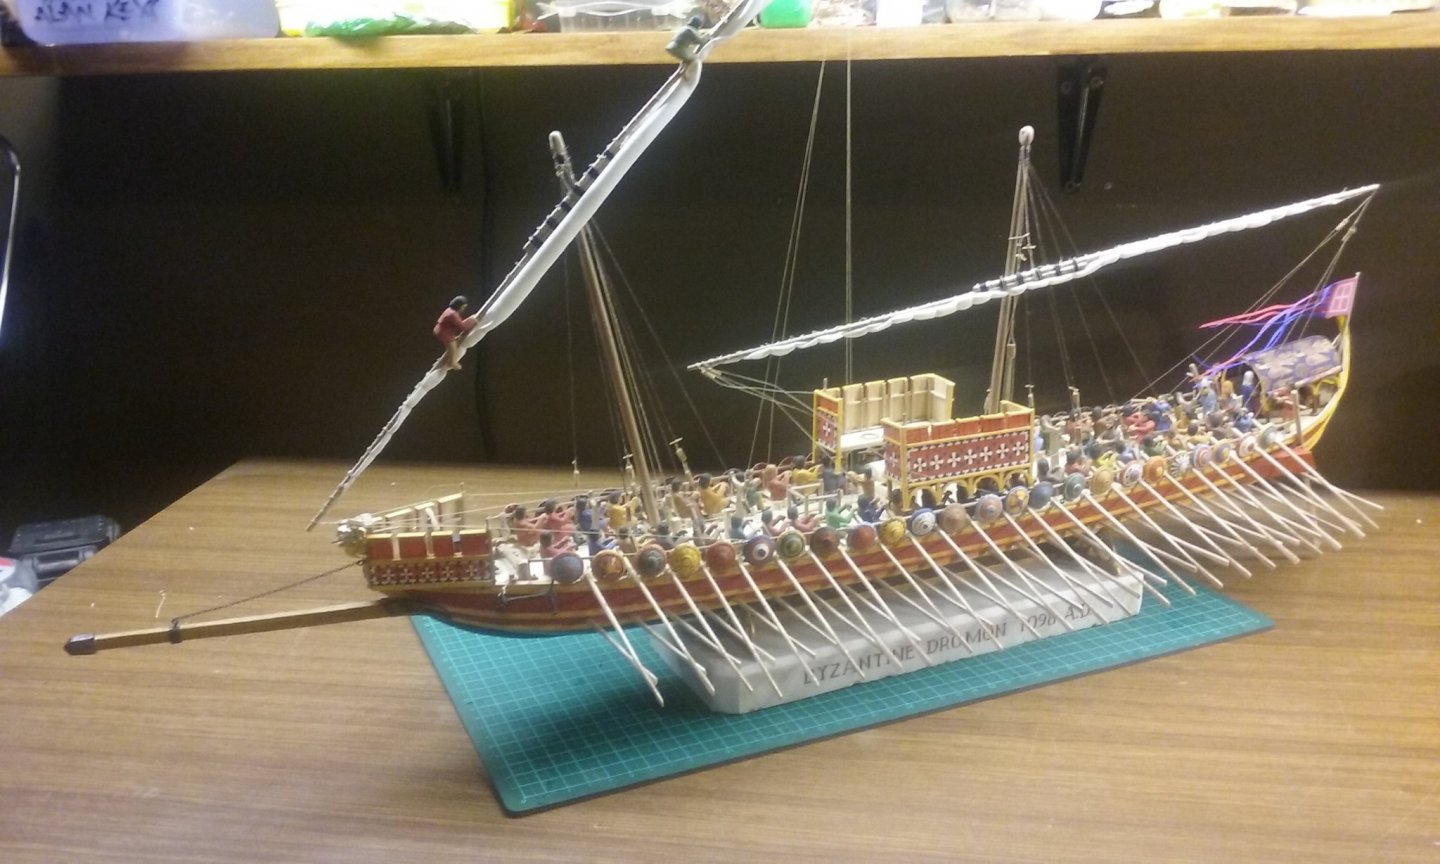
Well worth getting if you're into that kind of thing. Very well and comprehensively researched, and as far as I'm concerned though it was published back in 2006 is still the definitive work on the subject. The discoveries at Yenikapi in Istanbul have made some of it out of date, but it's still the best book out there on dromons. Steven -
Thanks, mate. Is that first picture you posted from the wreck of the Lomellina at Villefranche? Steven
.jpg.b741fb724cae9585c621101ea16f2531.jpg)