Louie da fly
-
Posts
7,990 -
Joined
-
Last visited
Content Type
Profiles
Forums
Gallery
Events
Everything posted by Louie da fly
-
Could I persuade you to start one now? Do you have progress photos? I, for one, would be interested in seeing them. Steven
-
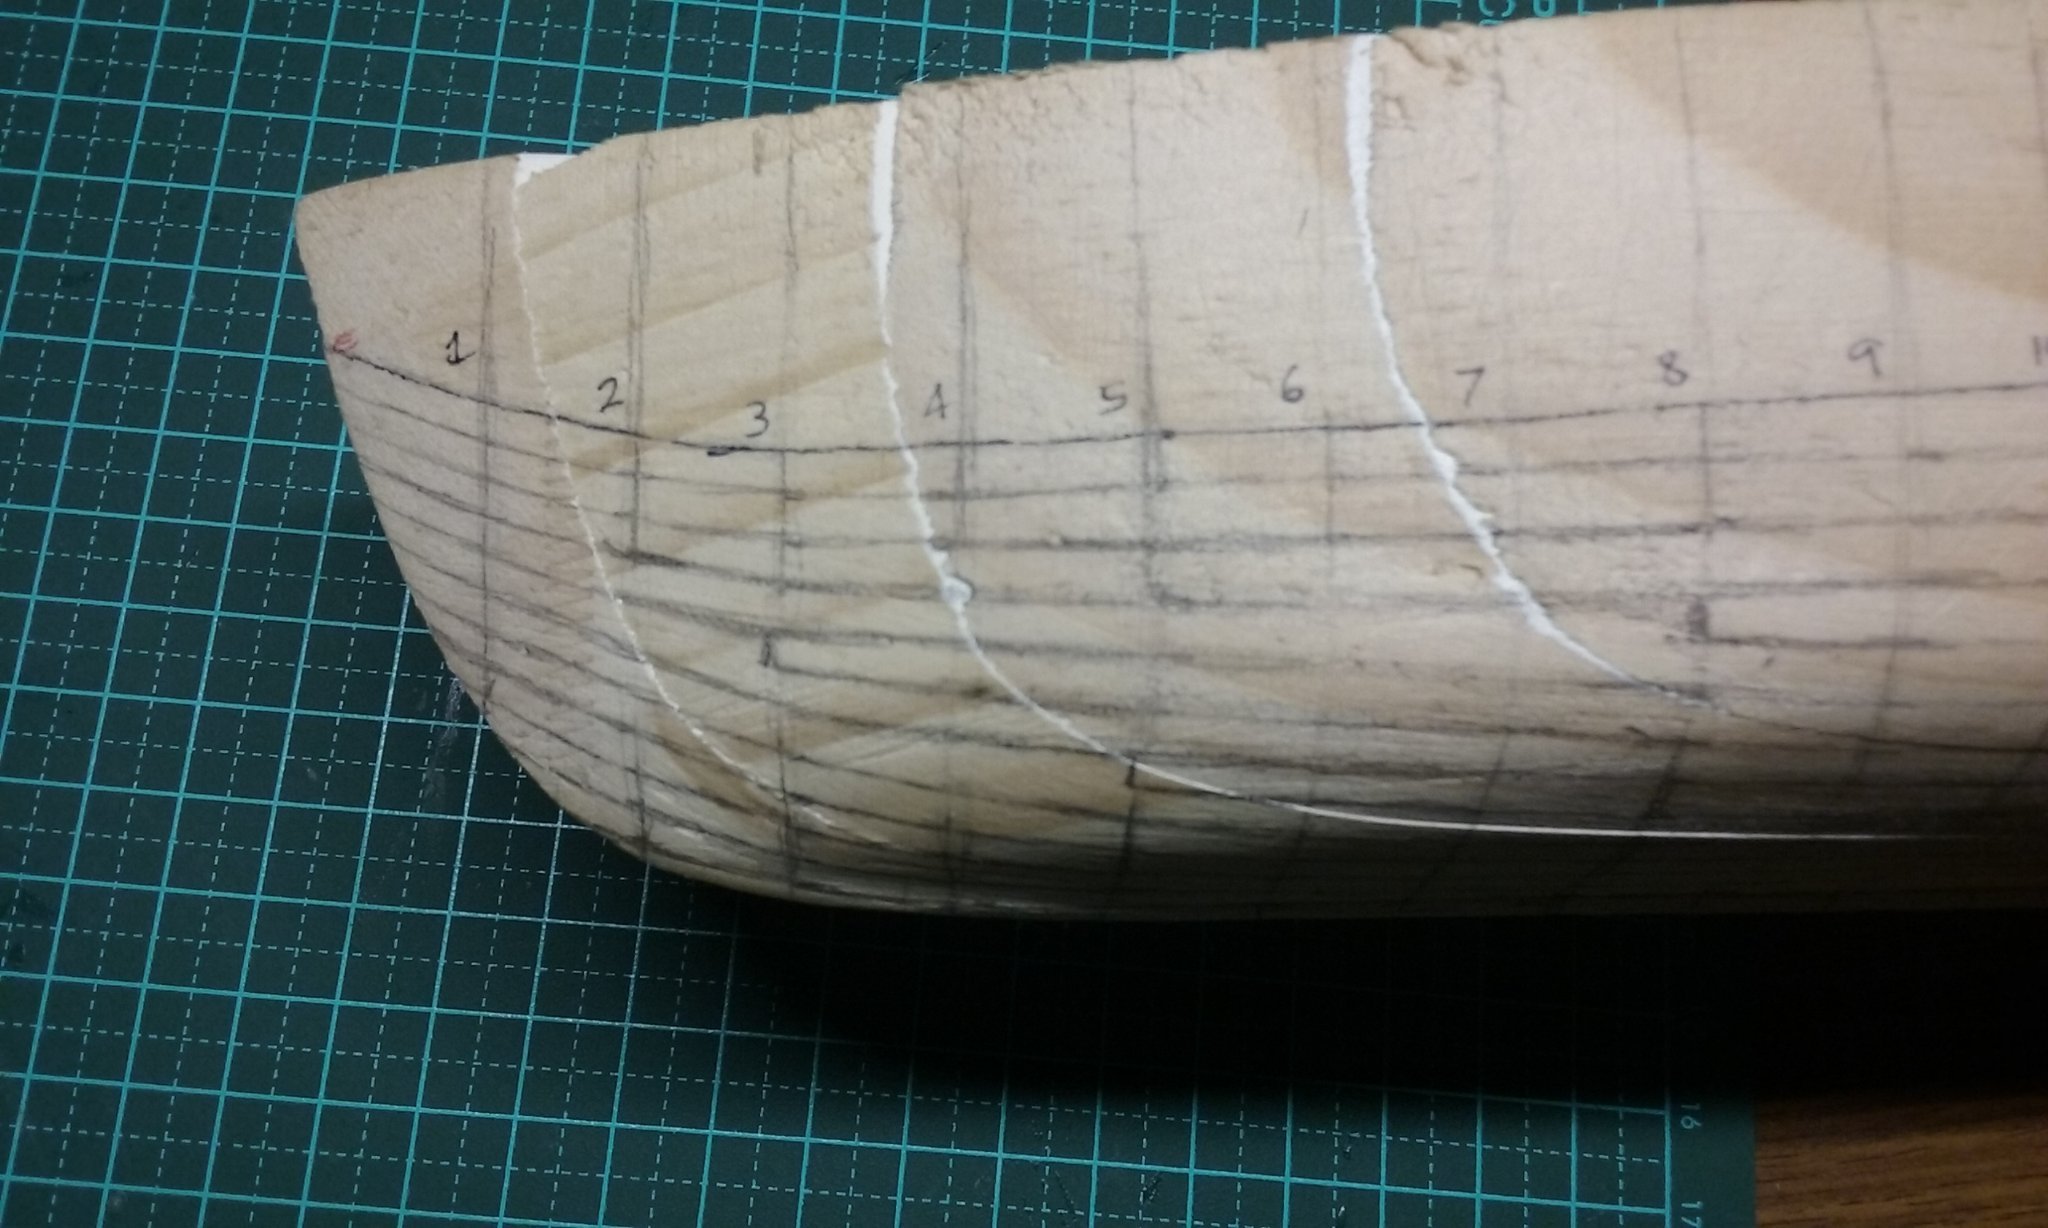
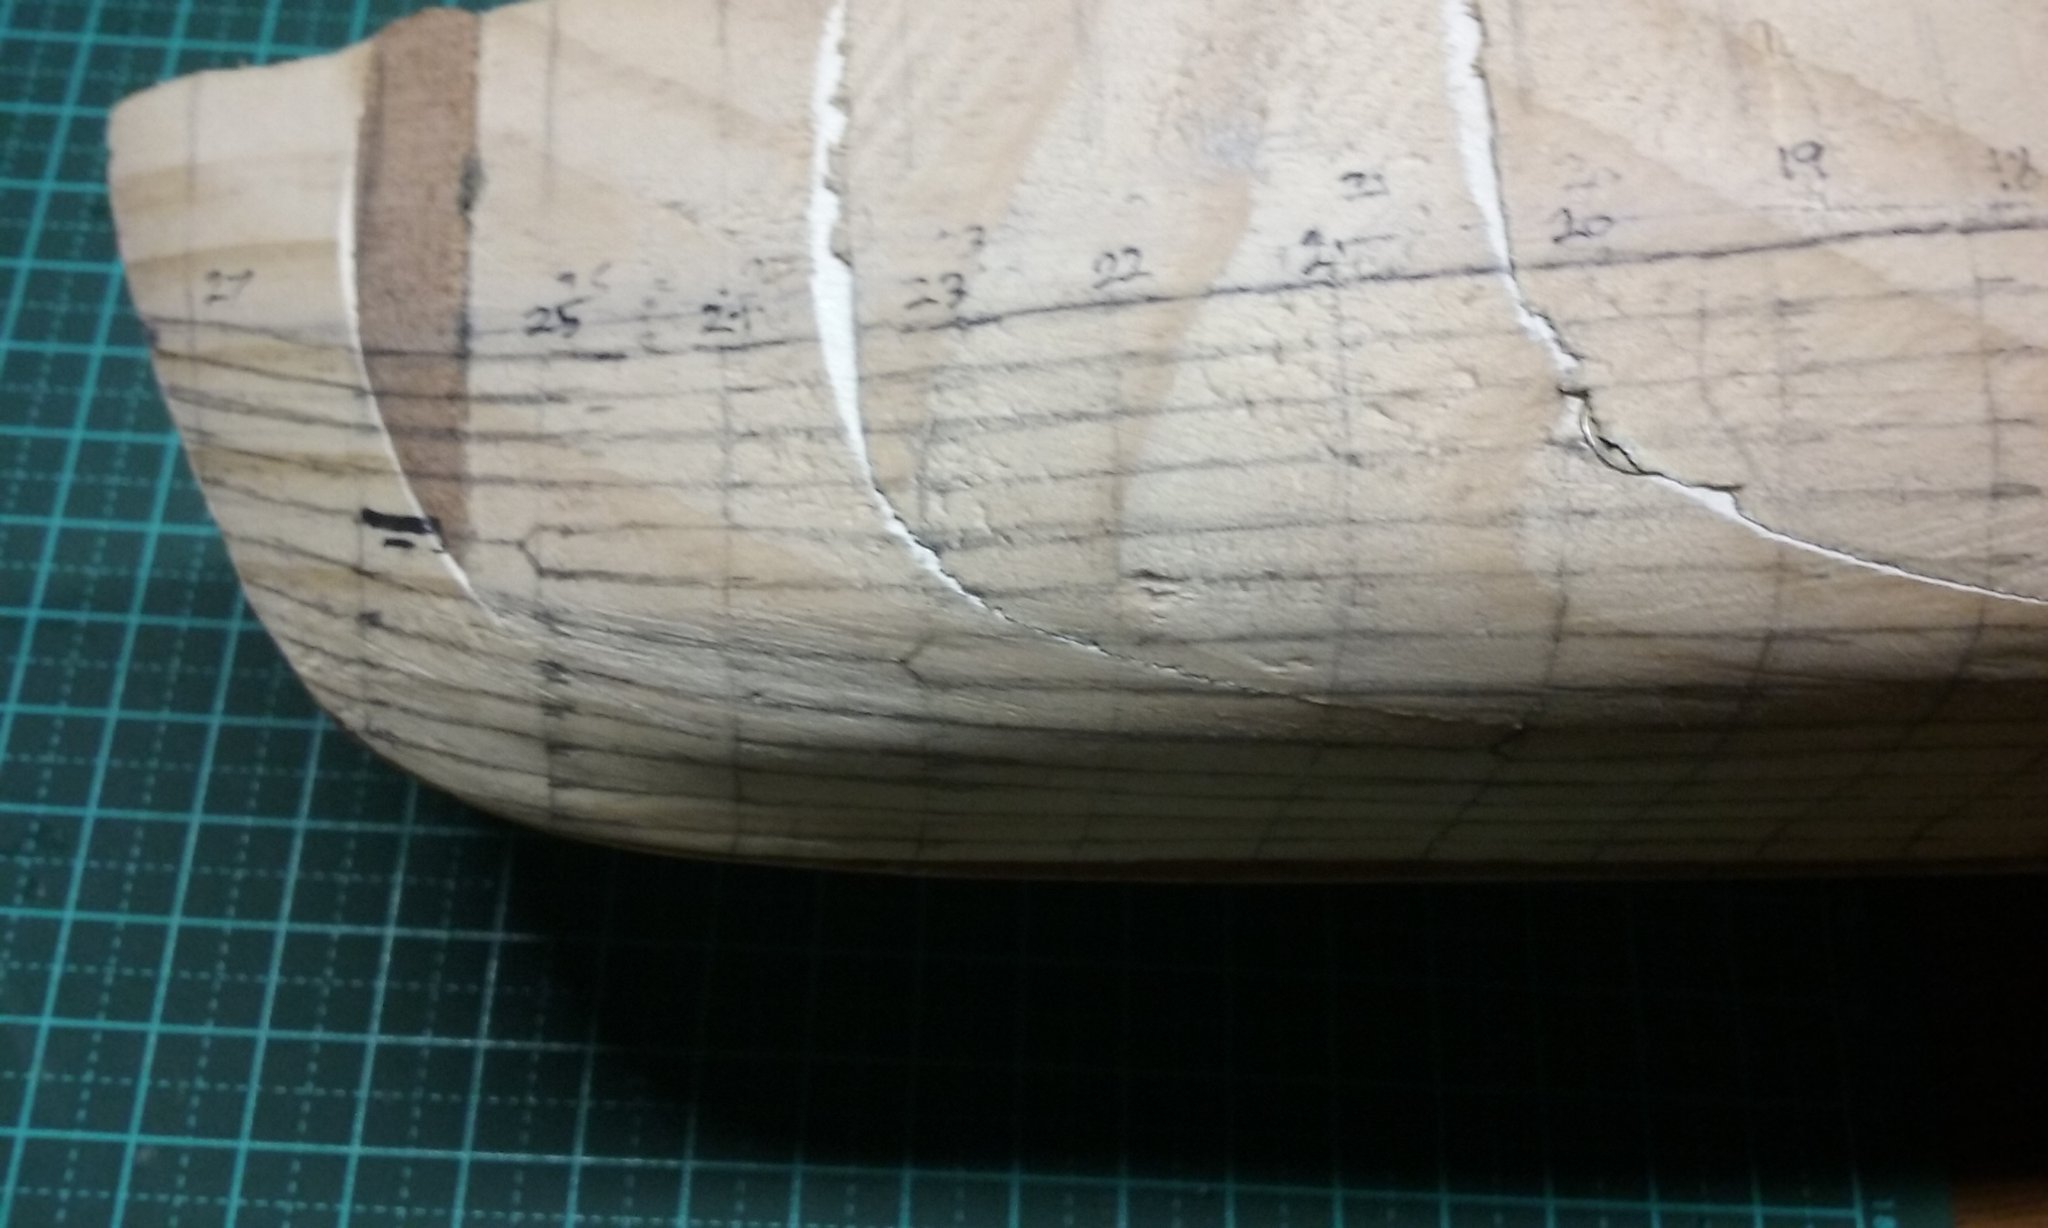
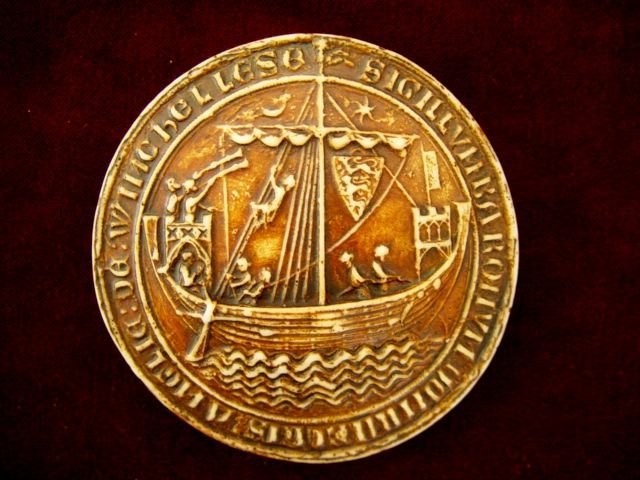
 Thanks for the likes and comments, people. I'm now in two minds about the drop planks. What I was working off was this drawing of a knarr - unfortunately, I didn't make a note at the time where I got it from and now I can't find the original again. But the Winchelsea seal does show considerably more sheer than this knarr (though of course it may be due to artistic license). Now I have to decide which way to go - if I increase the sheer it might mean that I have to make new stem and sternposts so they come up high enough above the top of the planking at the ends of the vessel. Time to do a bit of thinking . . . Steven
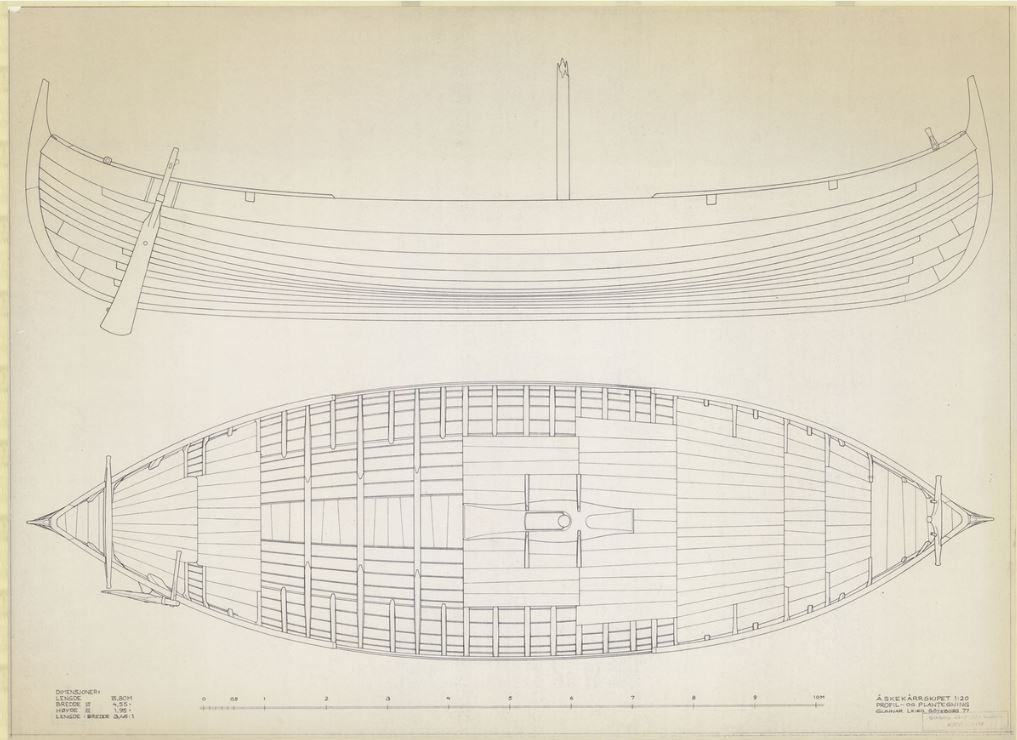
- 327 replies
-
- 10
-

-
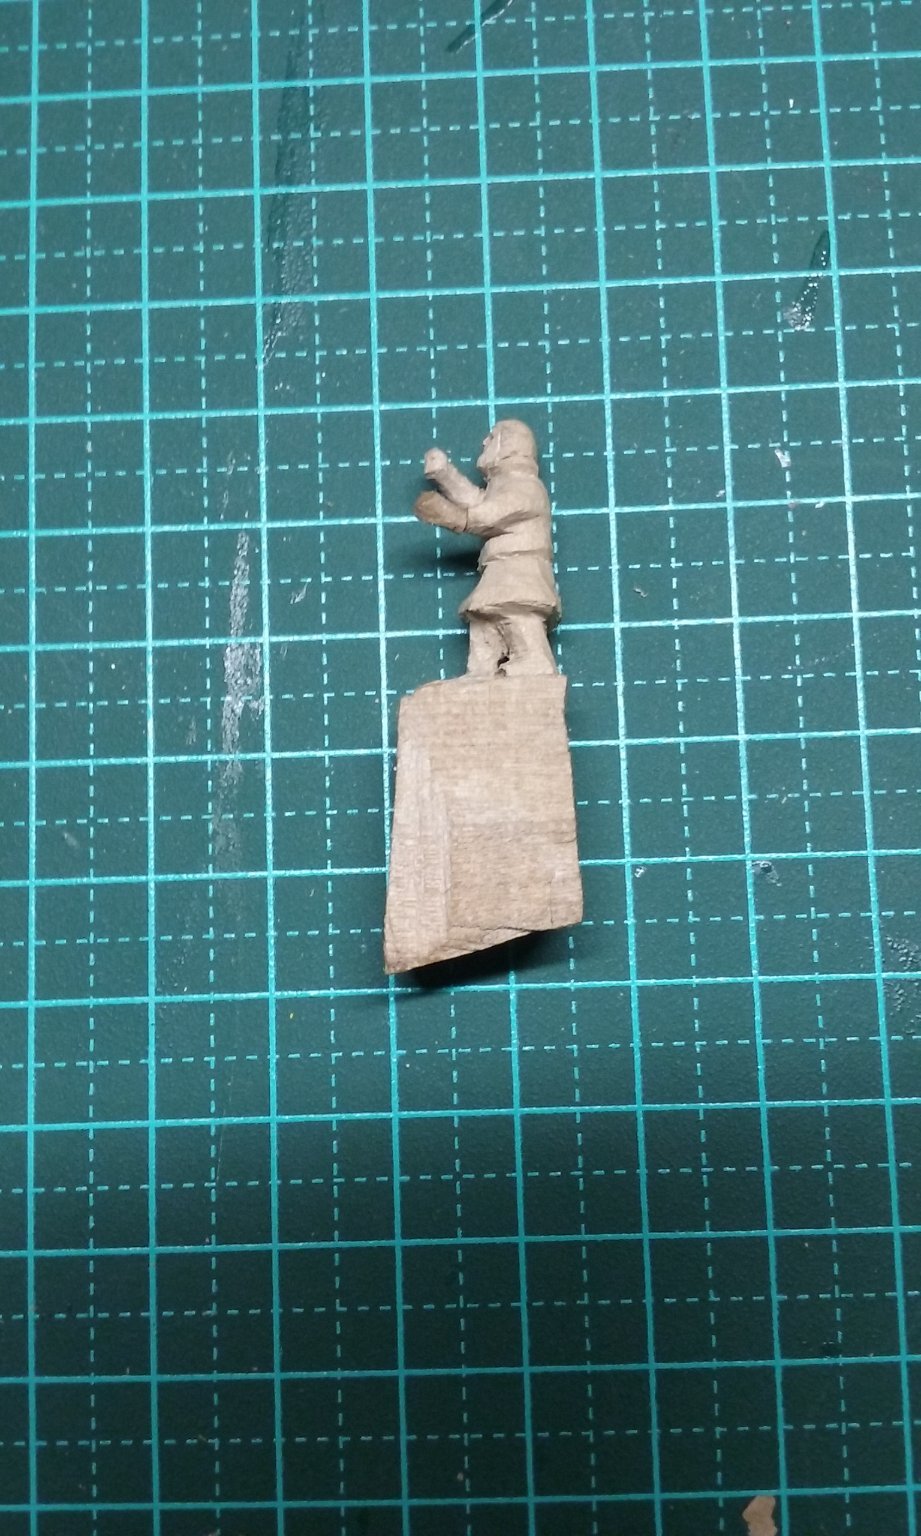
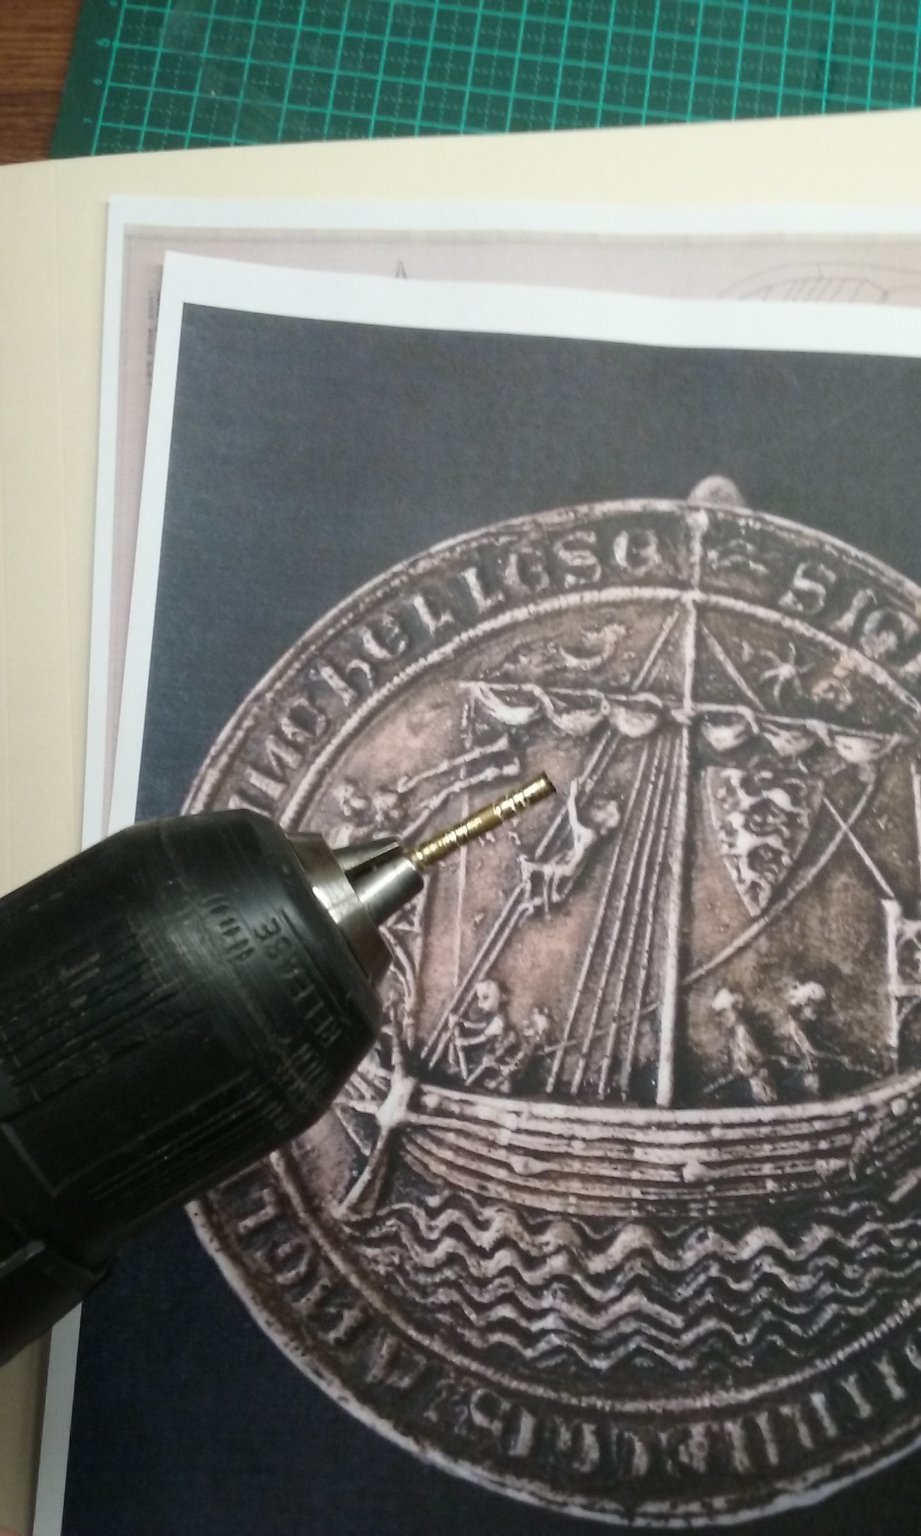
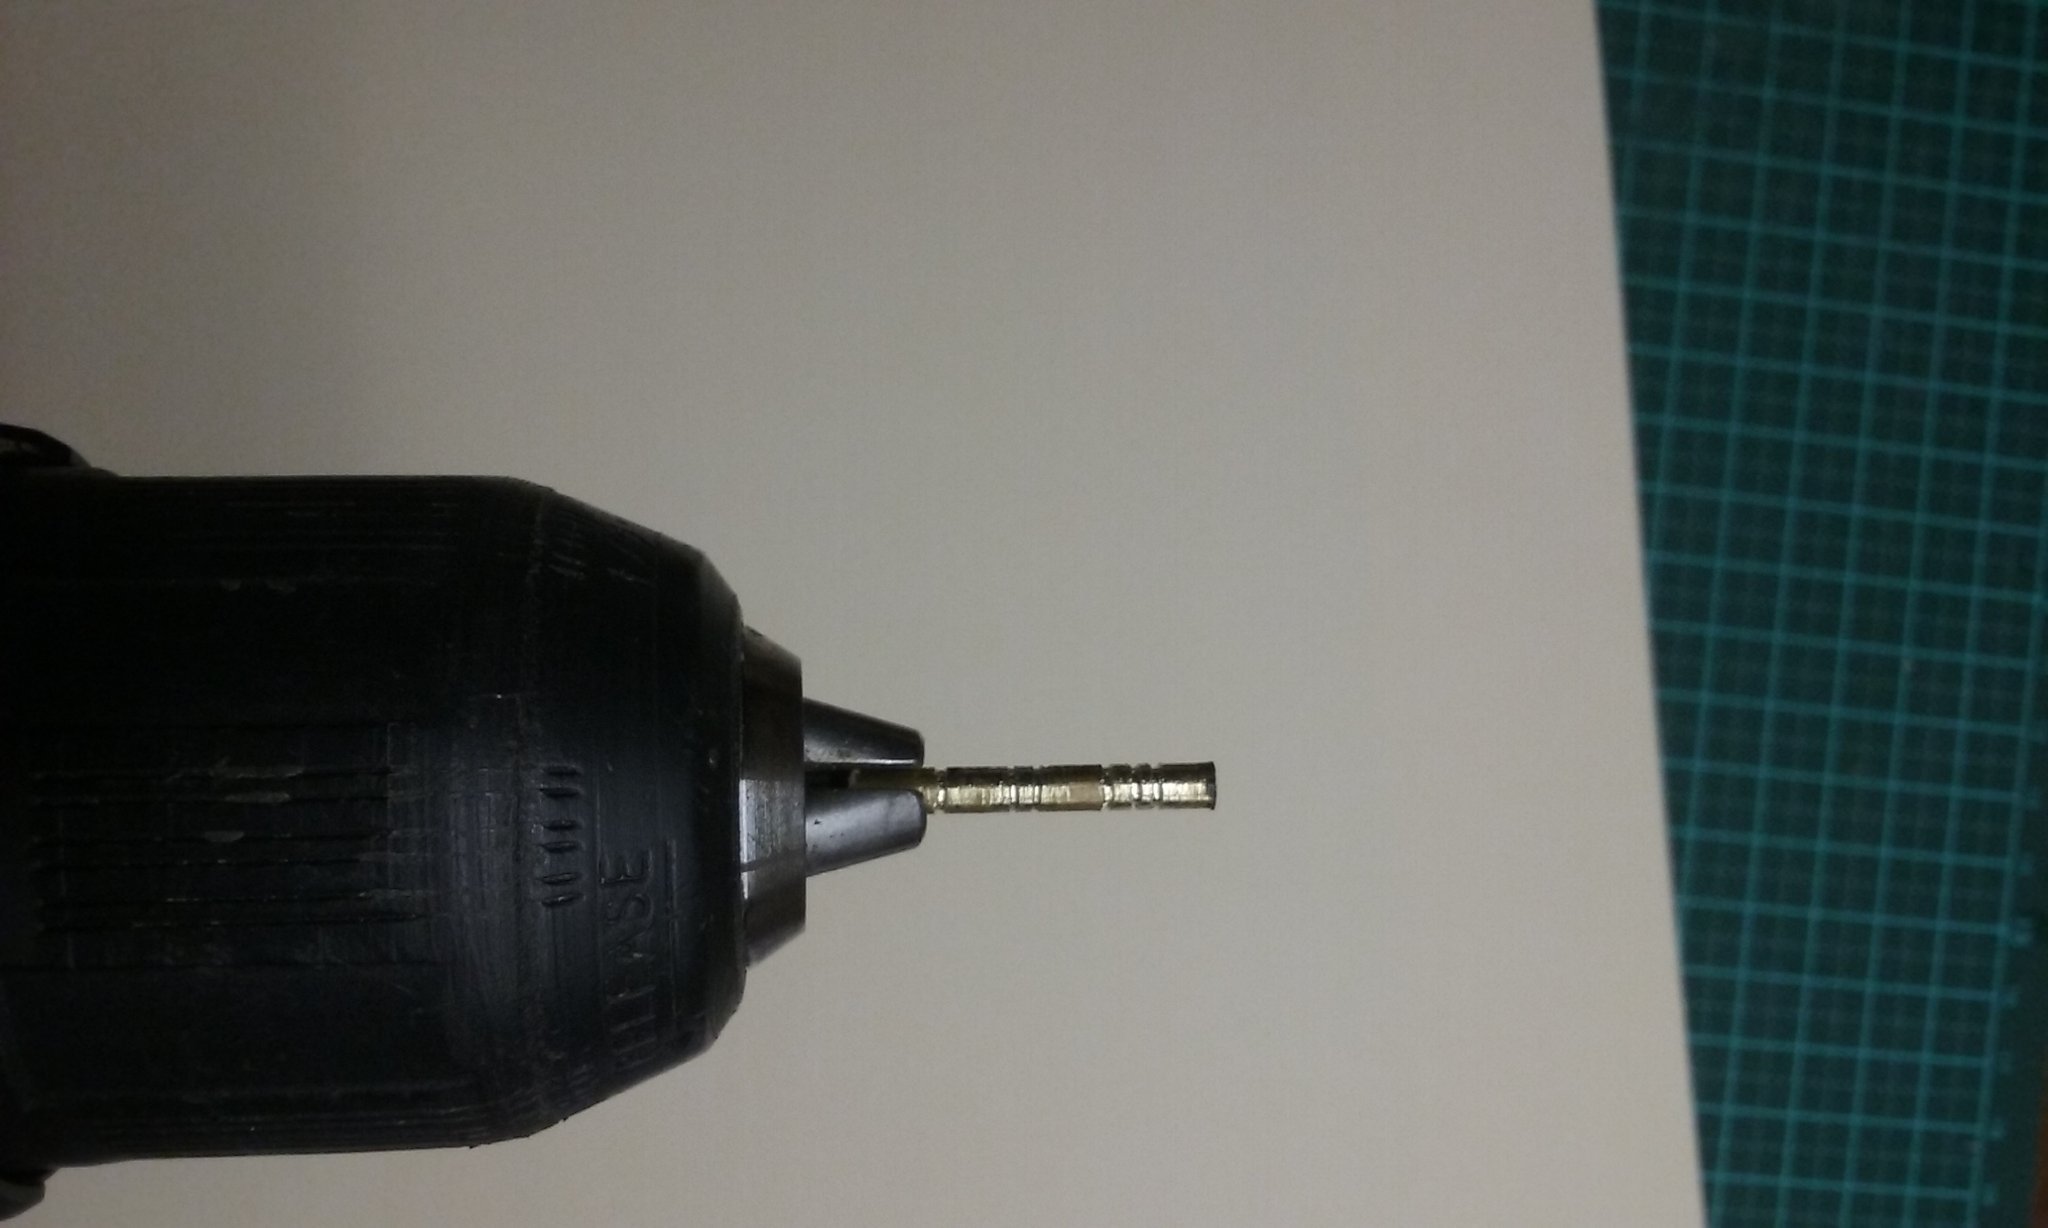
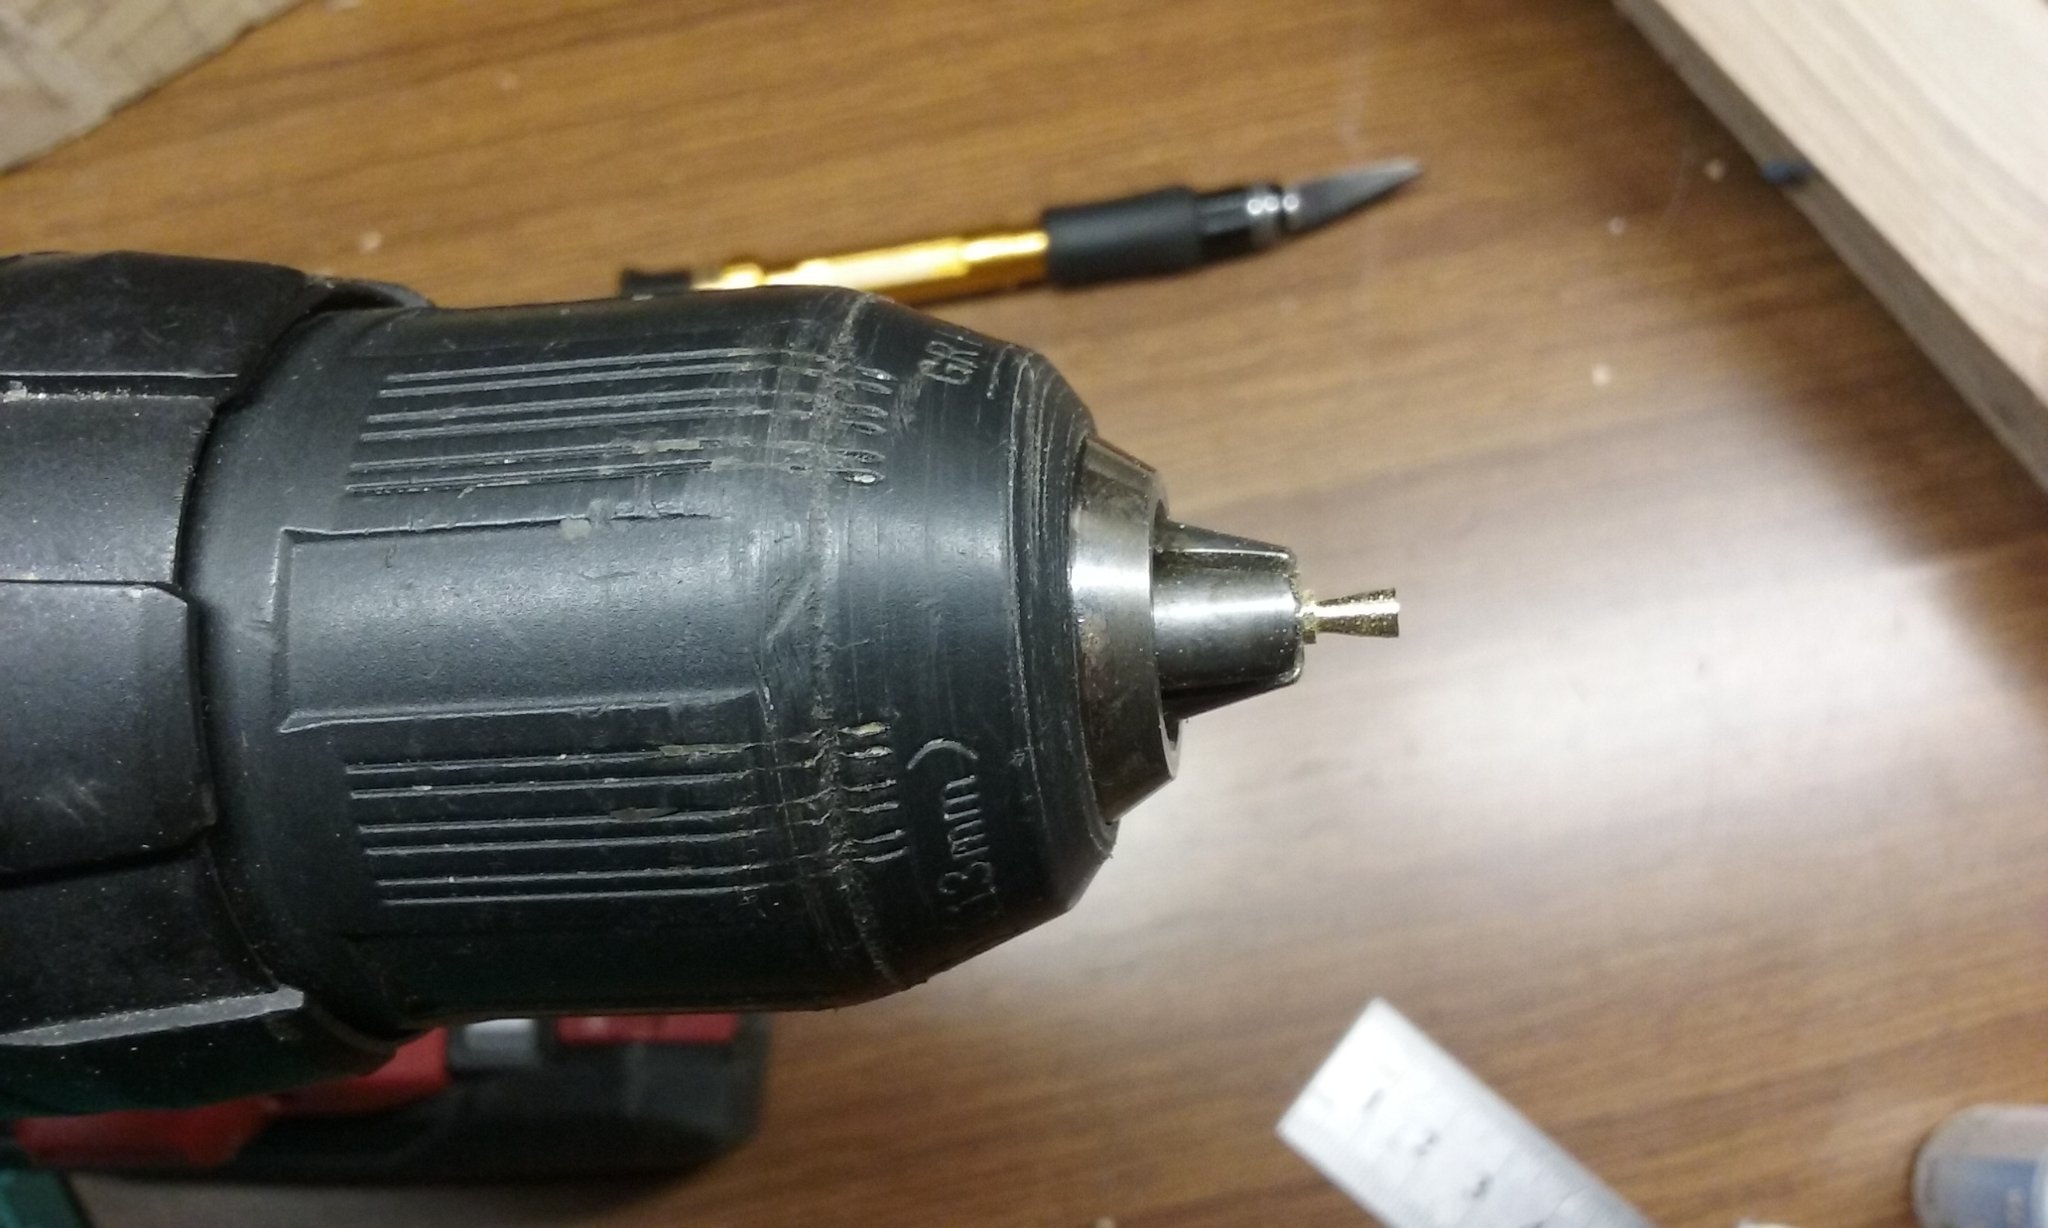
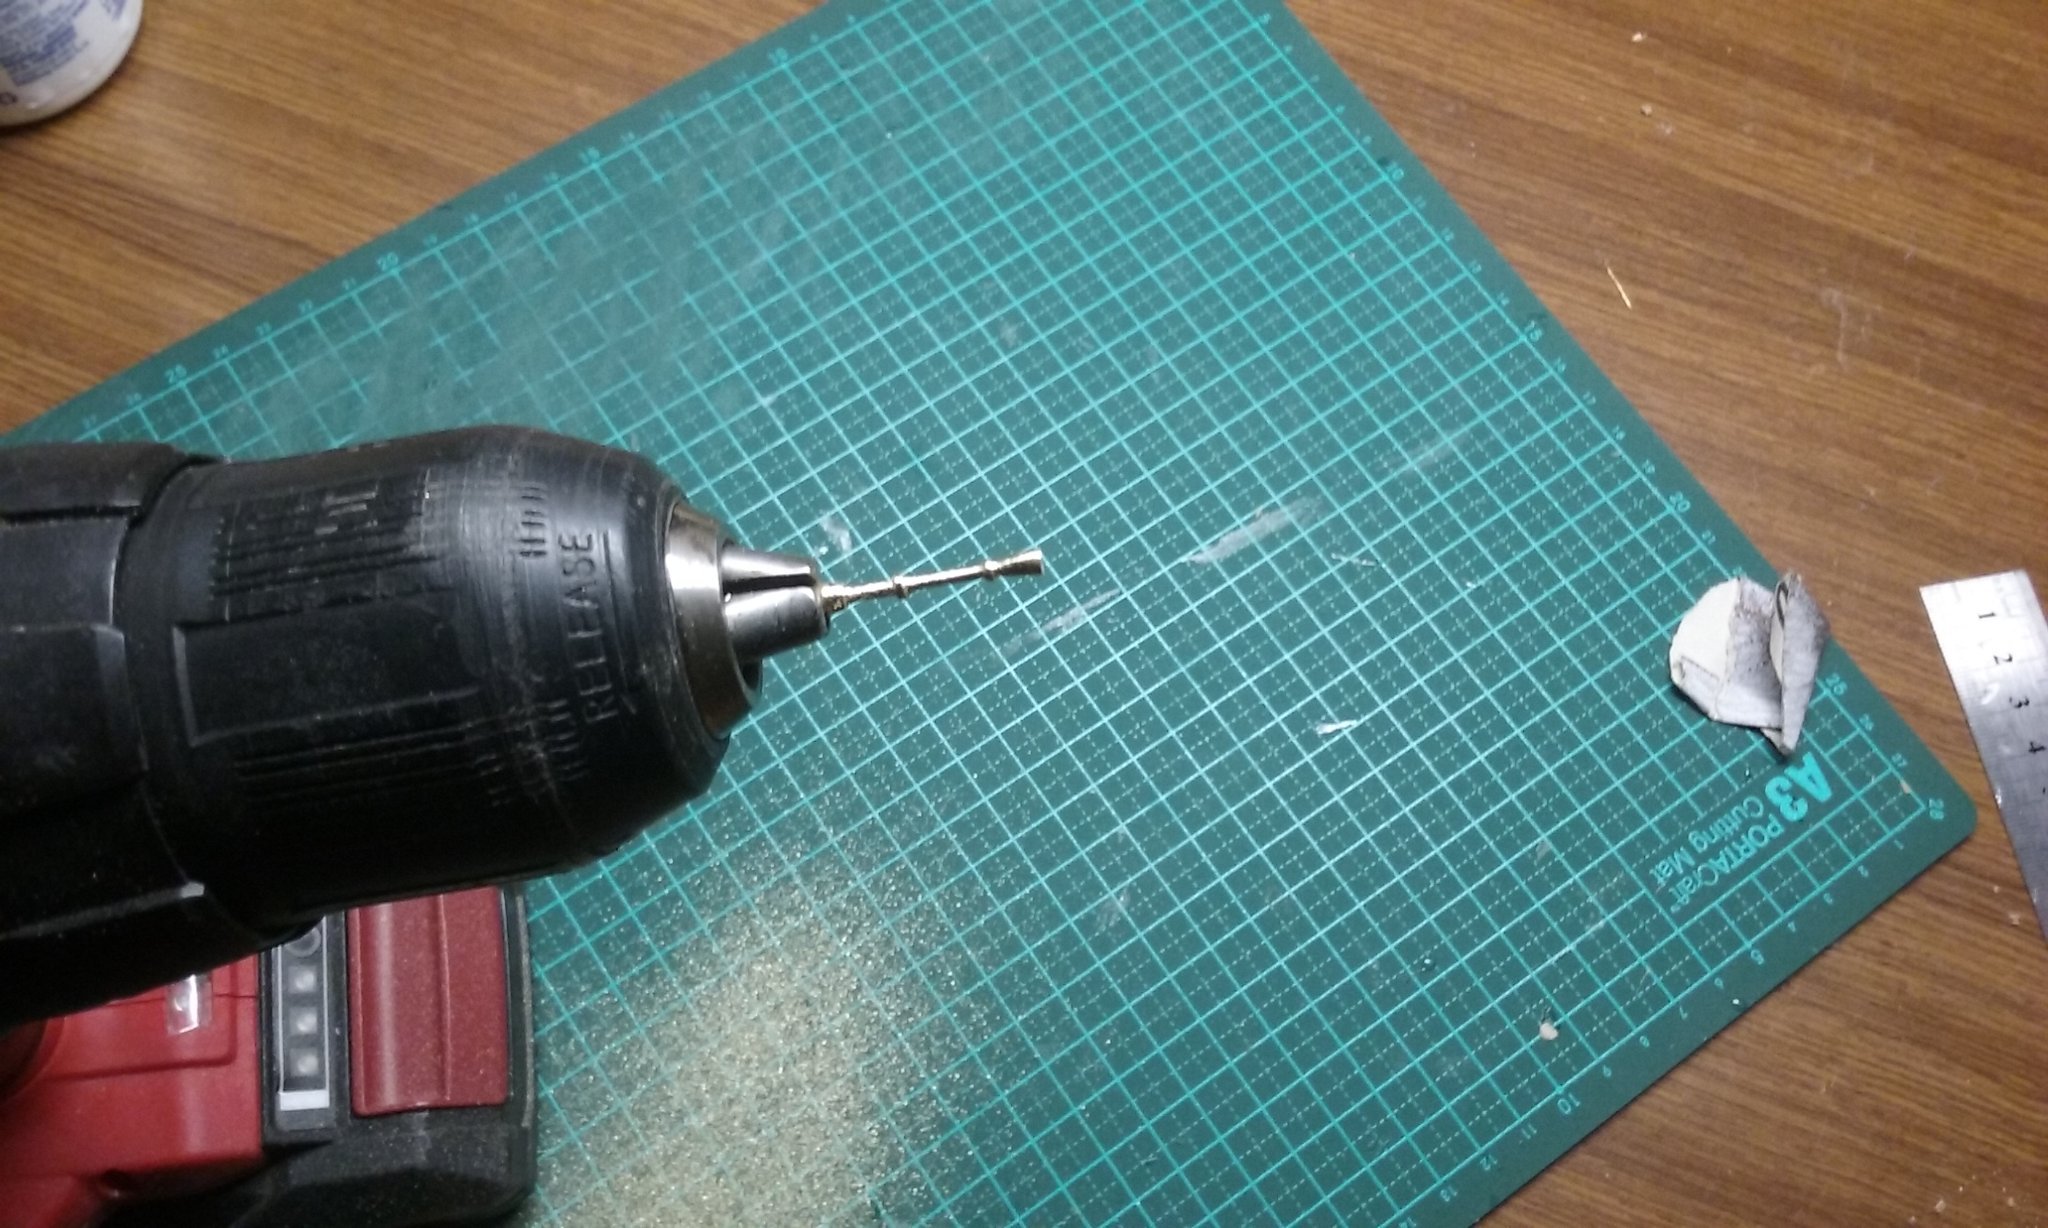
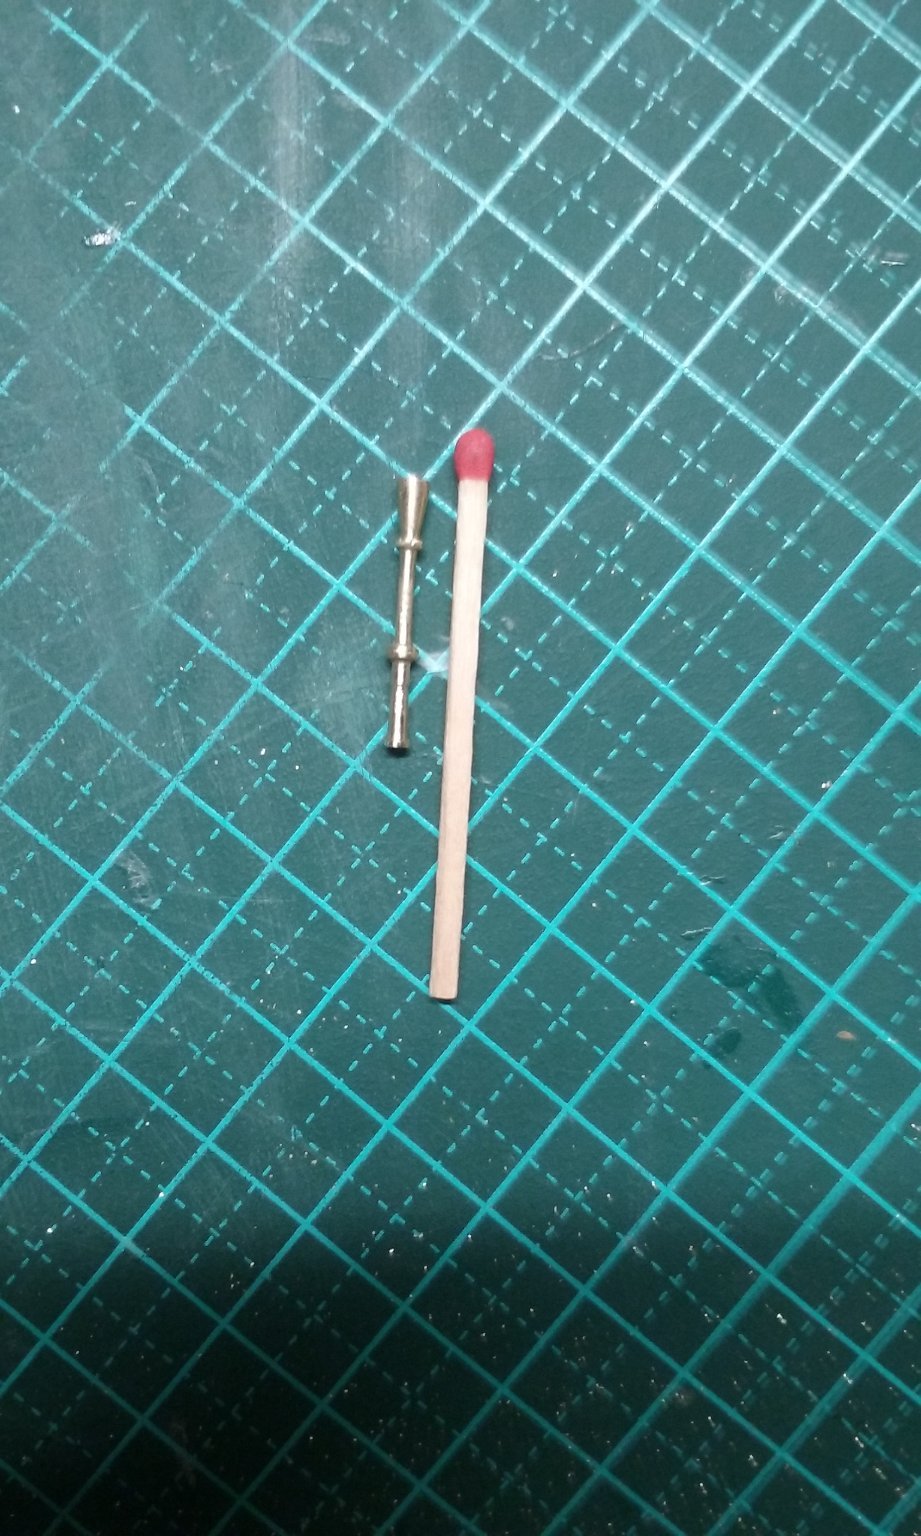
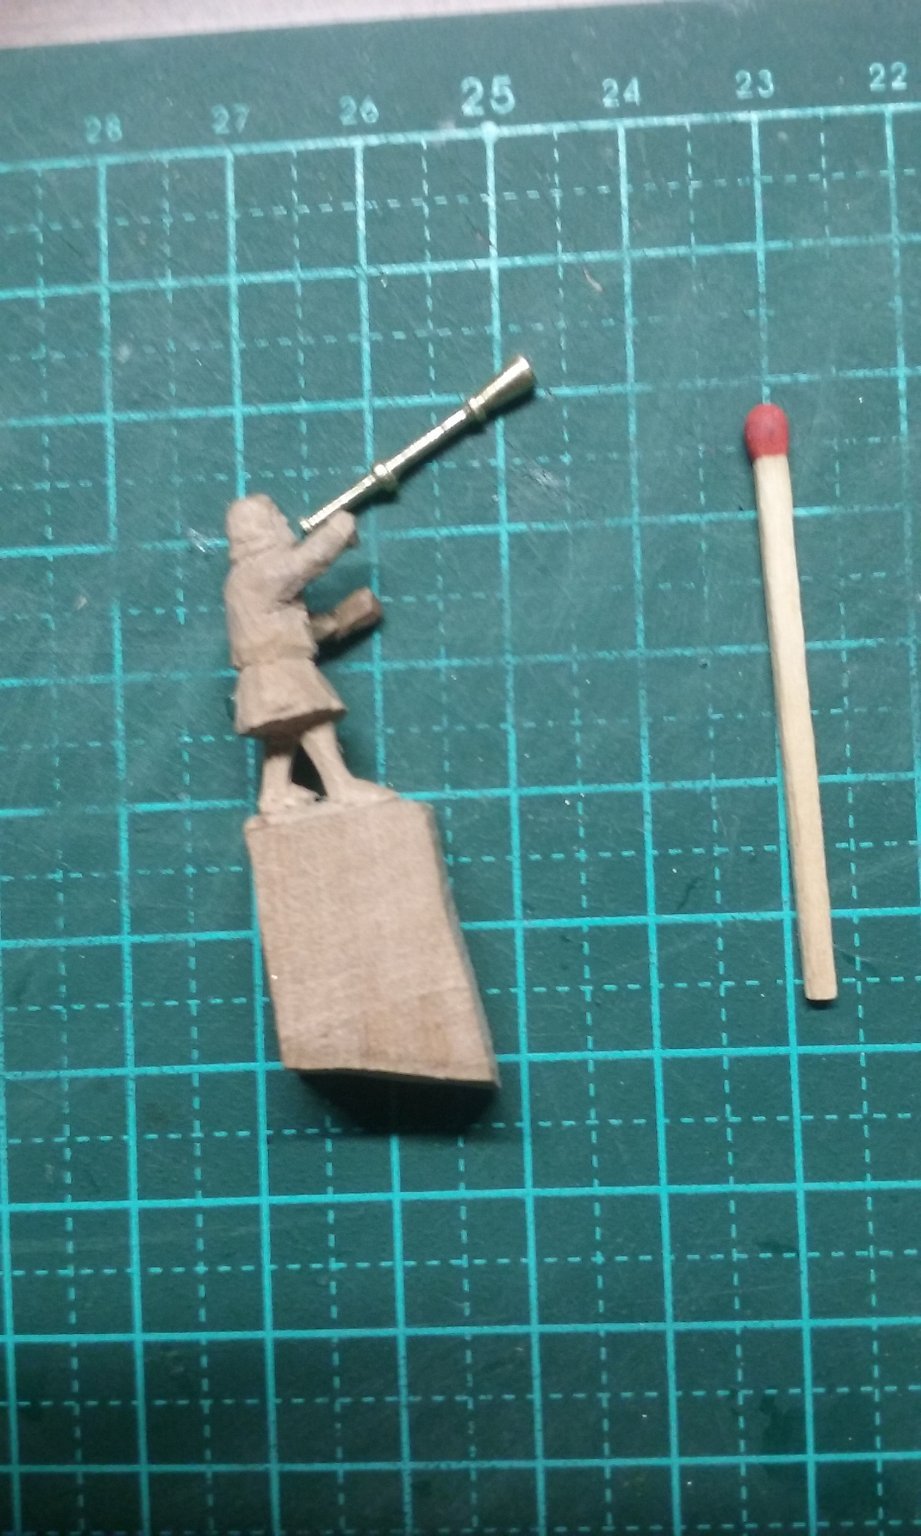
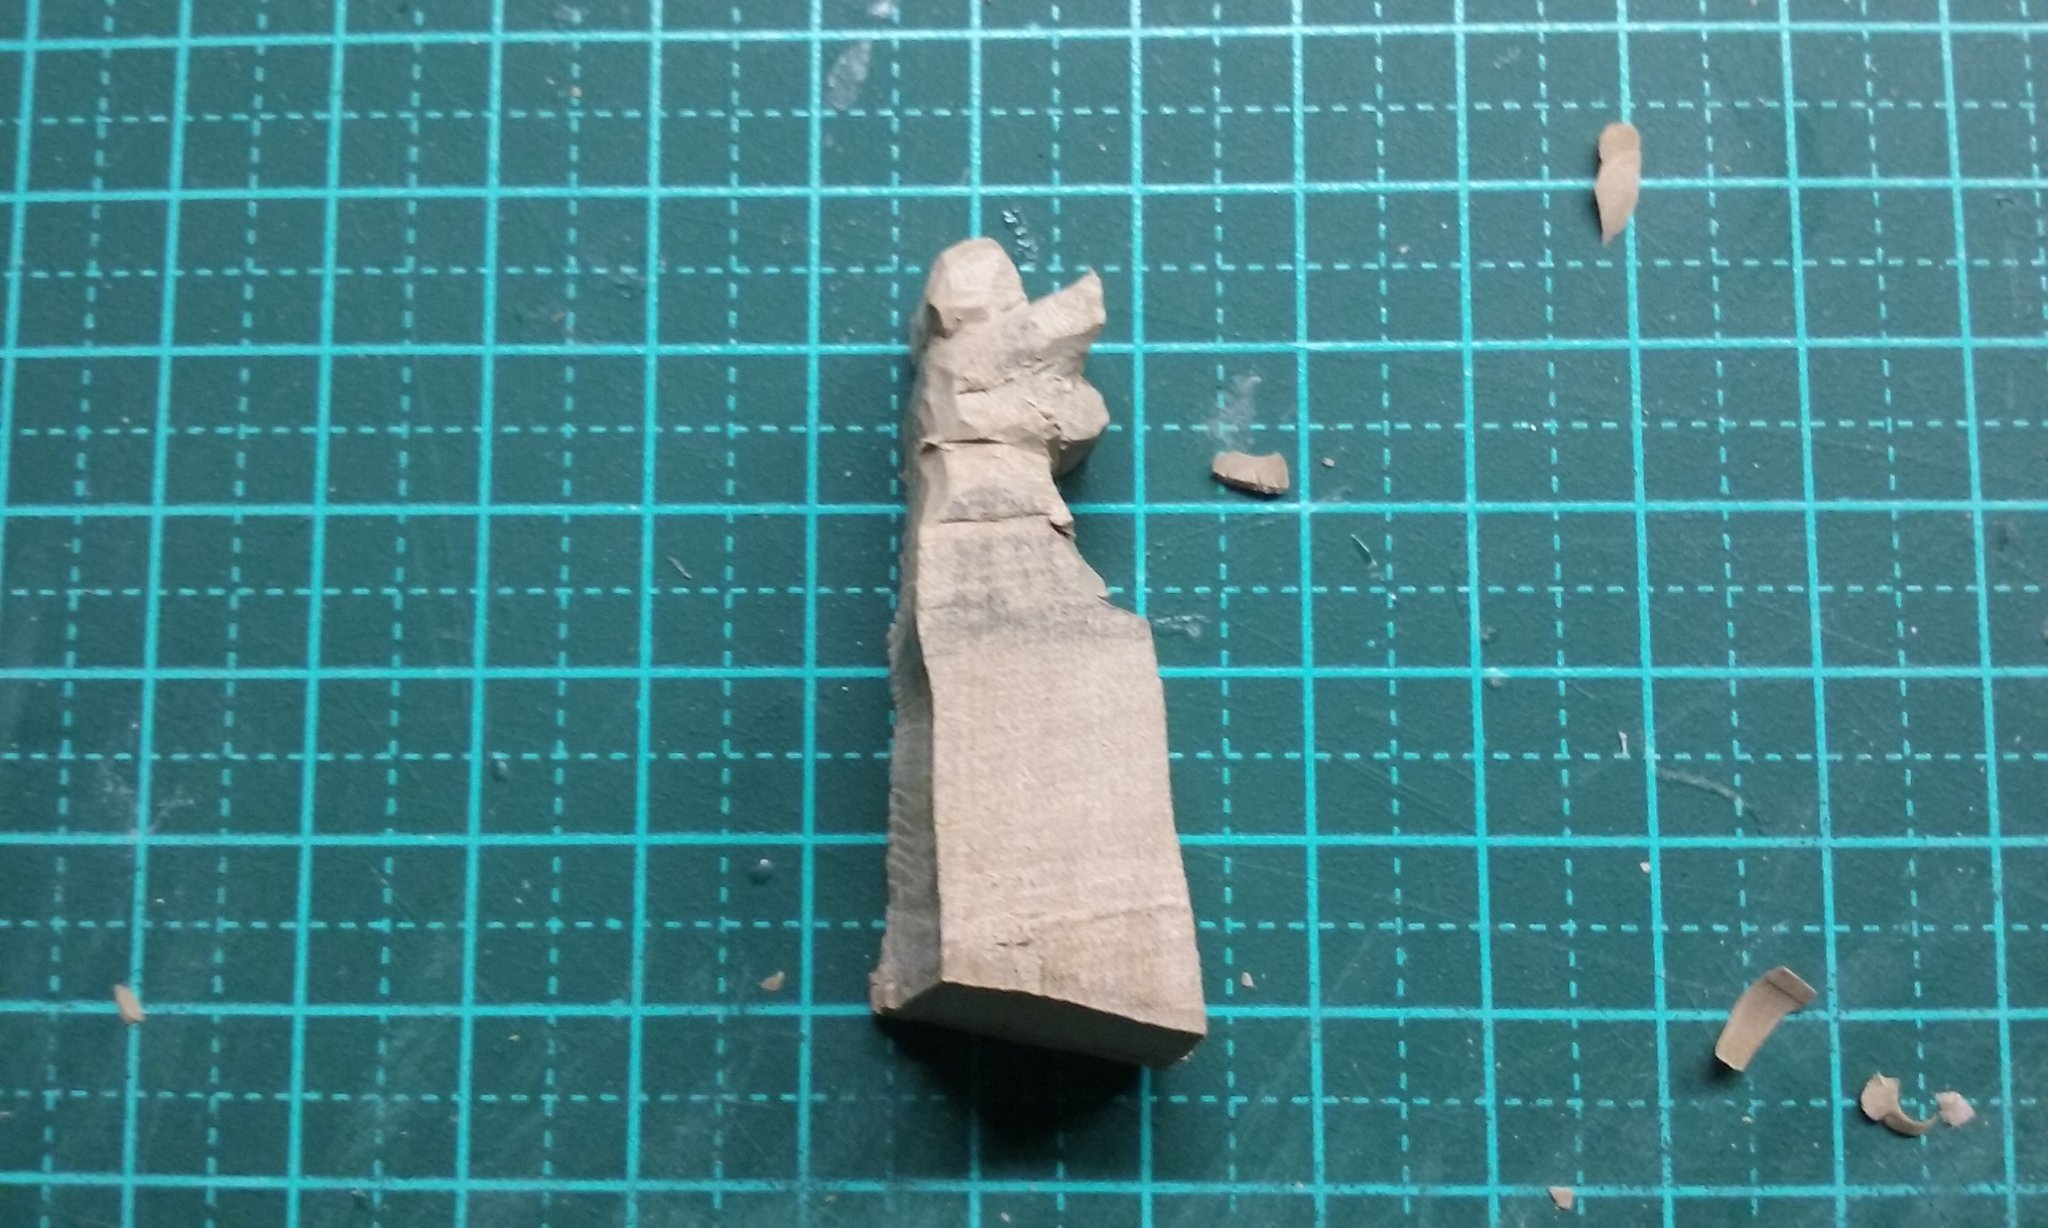
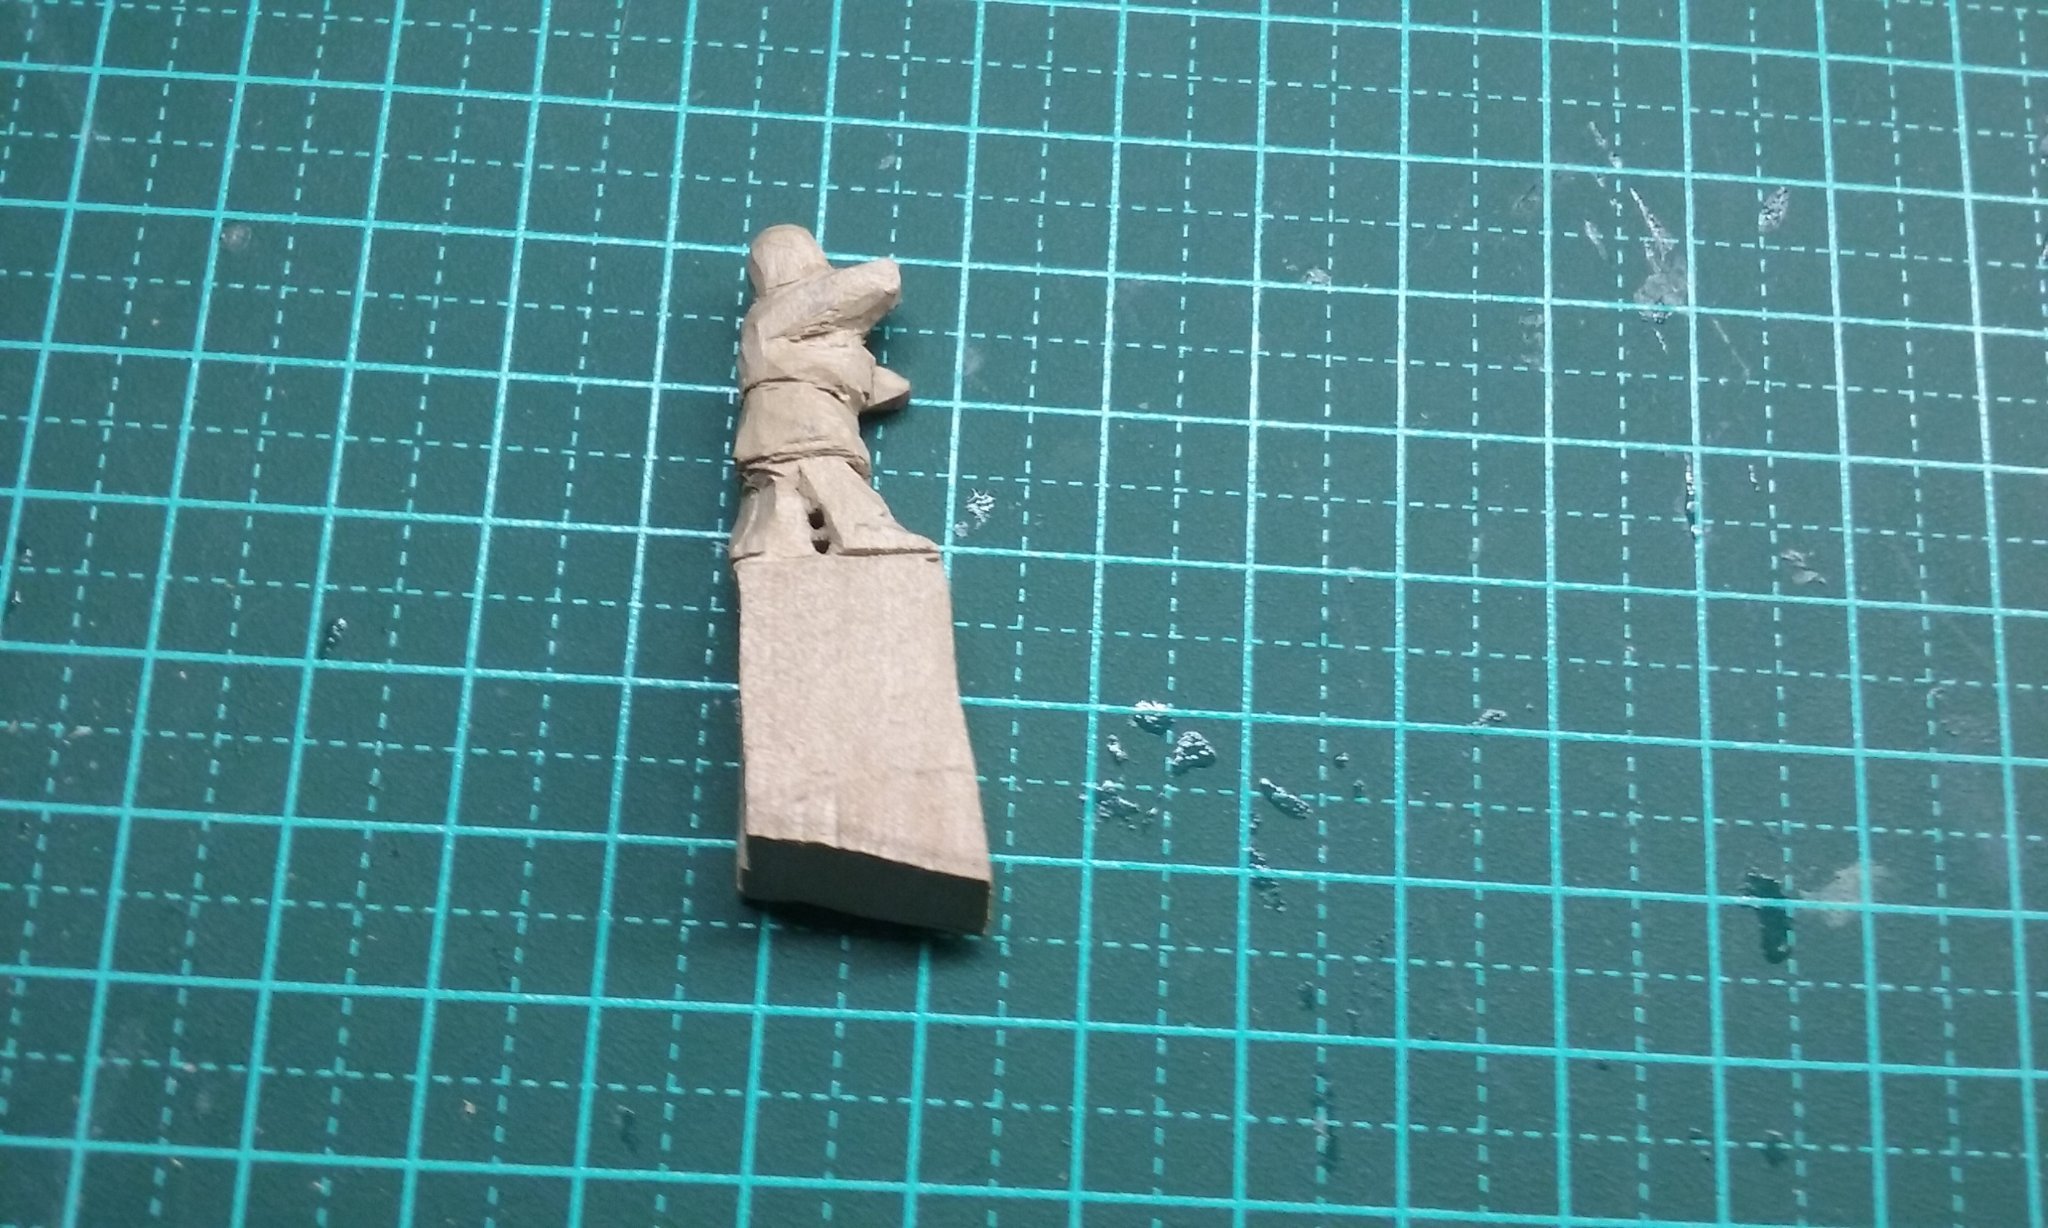
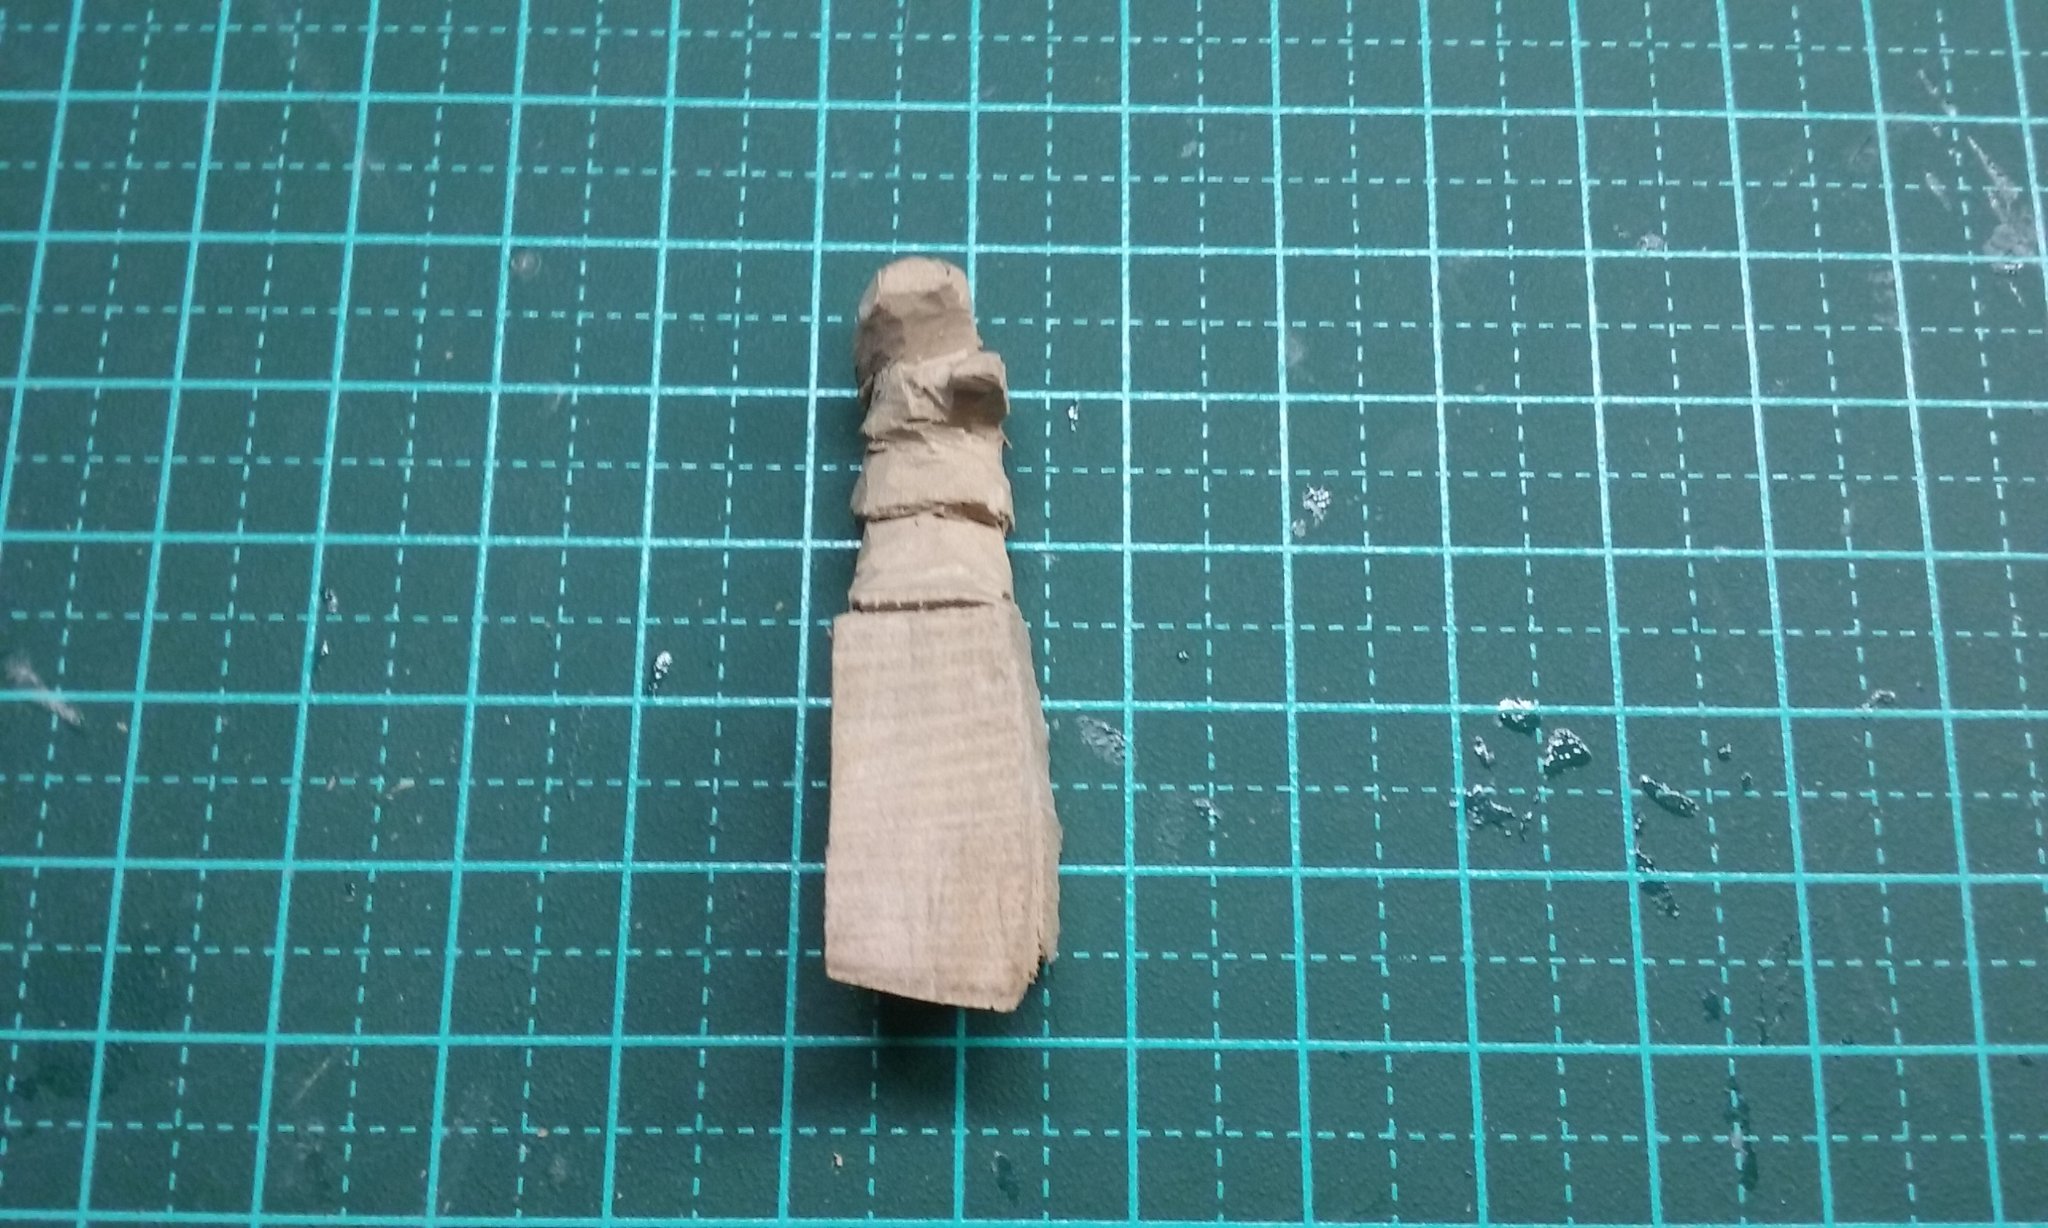
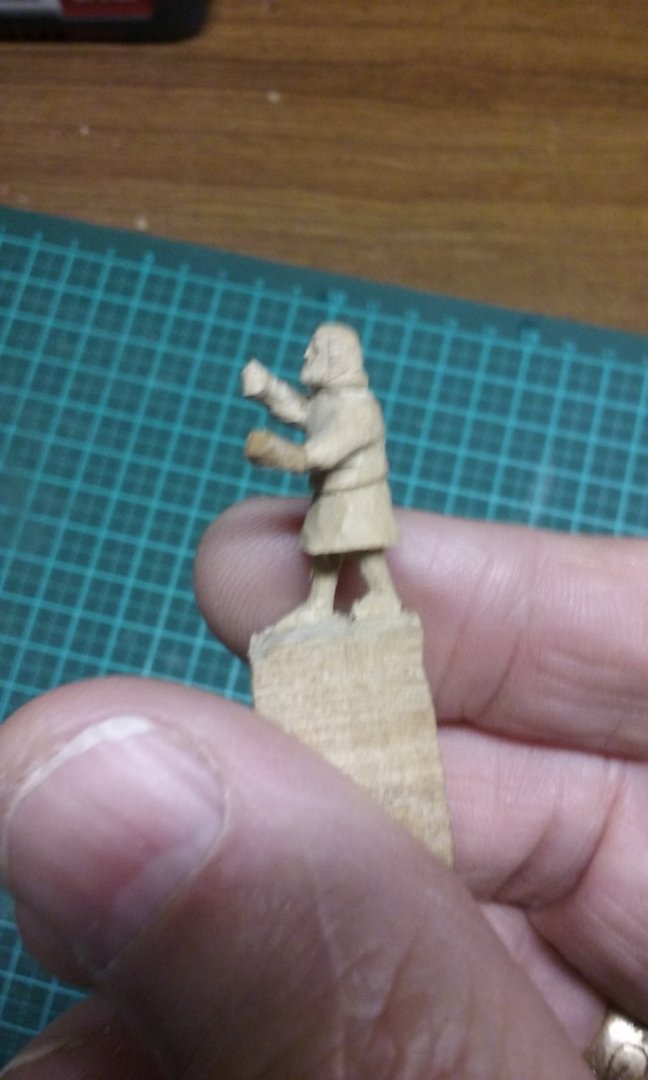
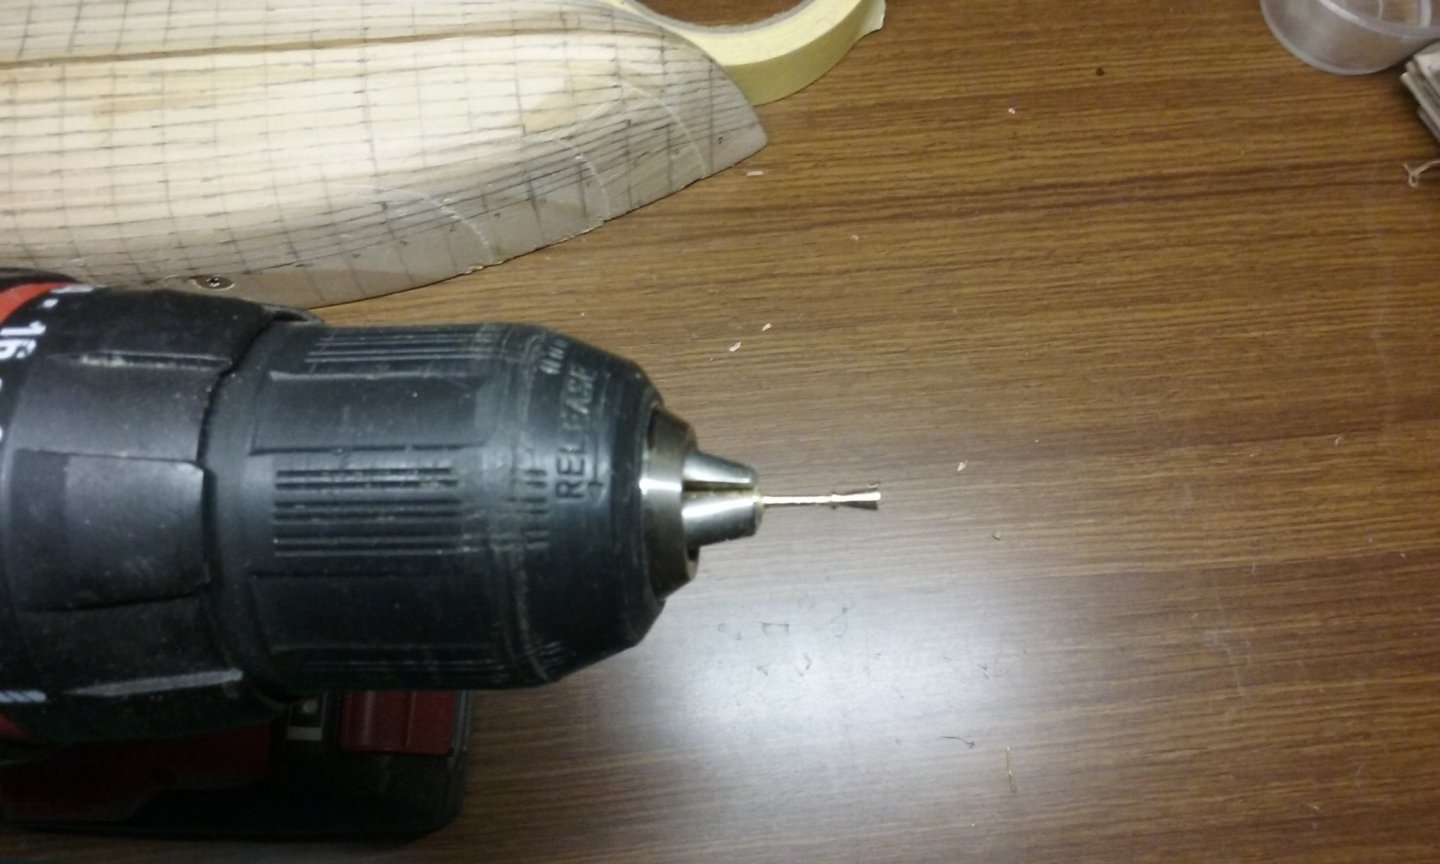
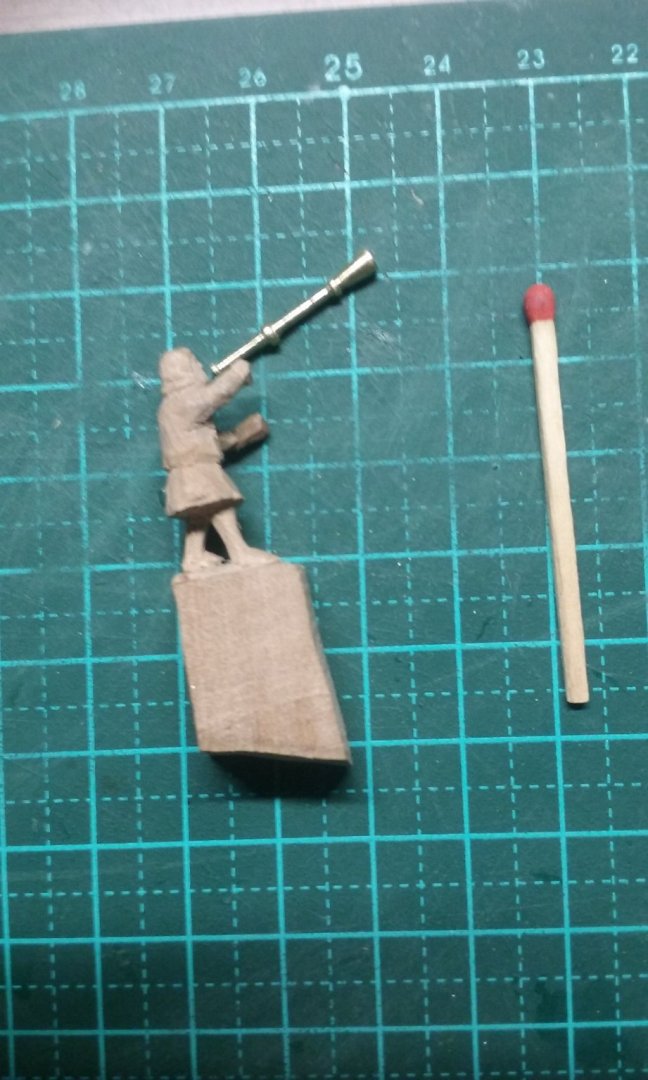
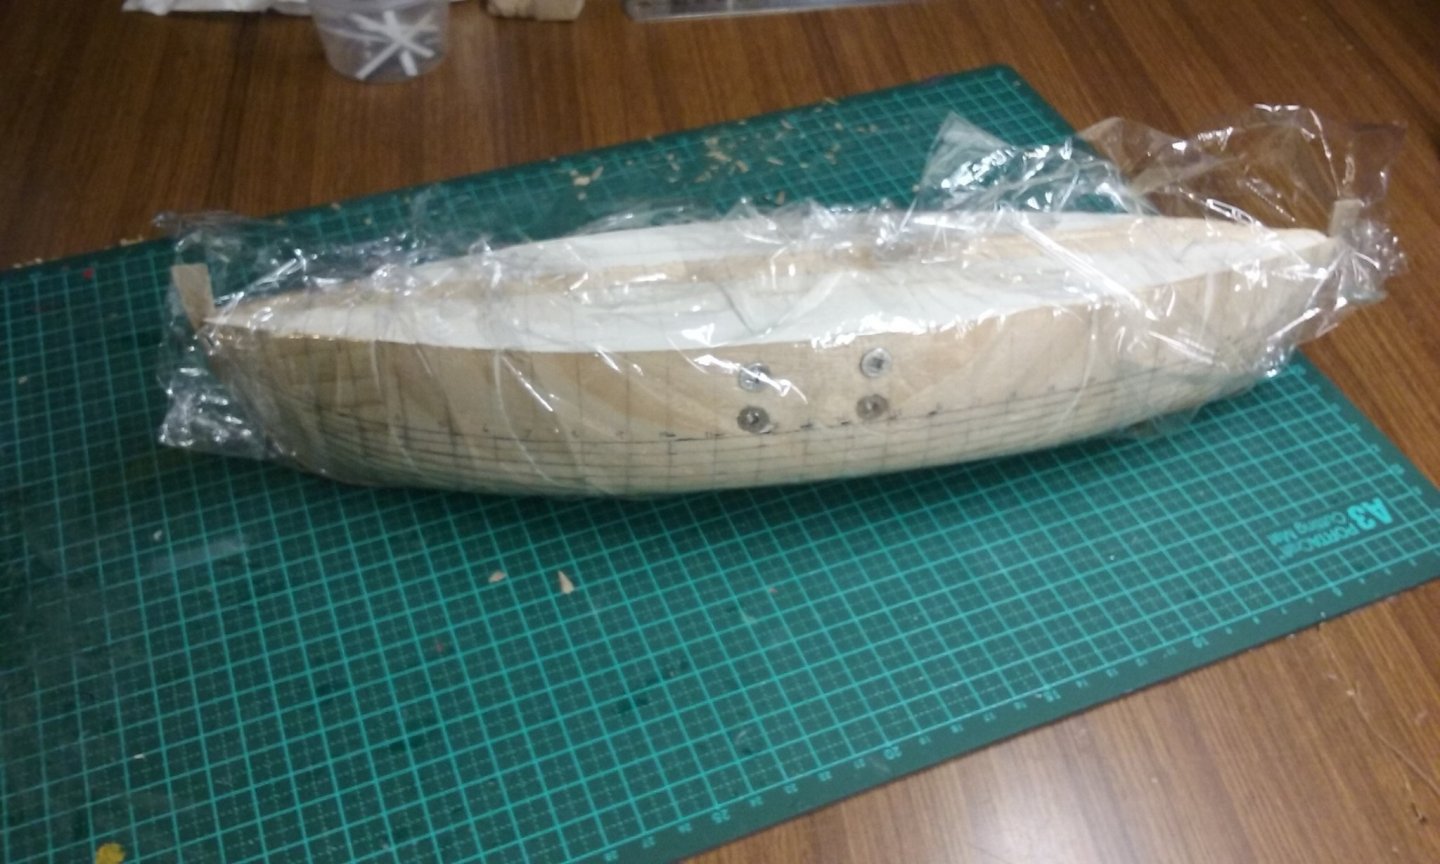
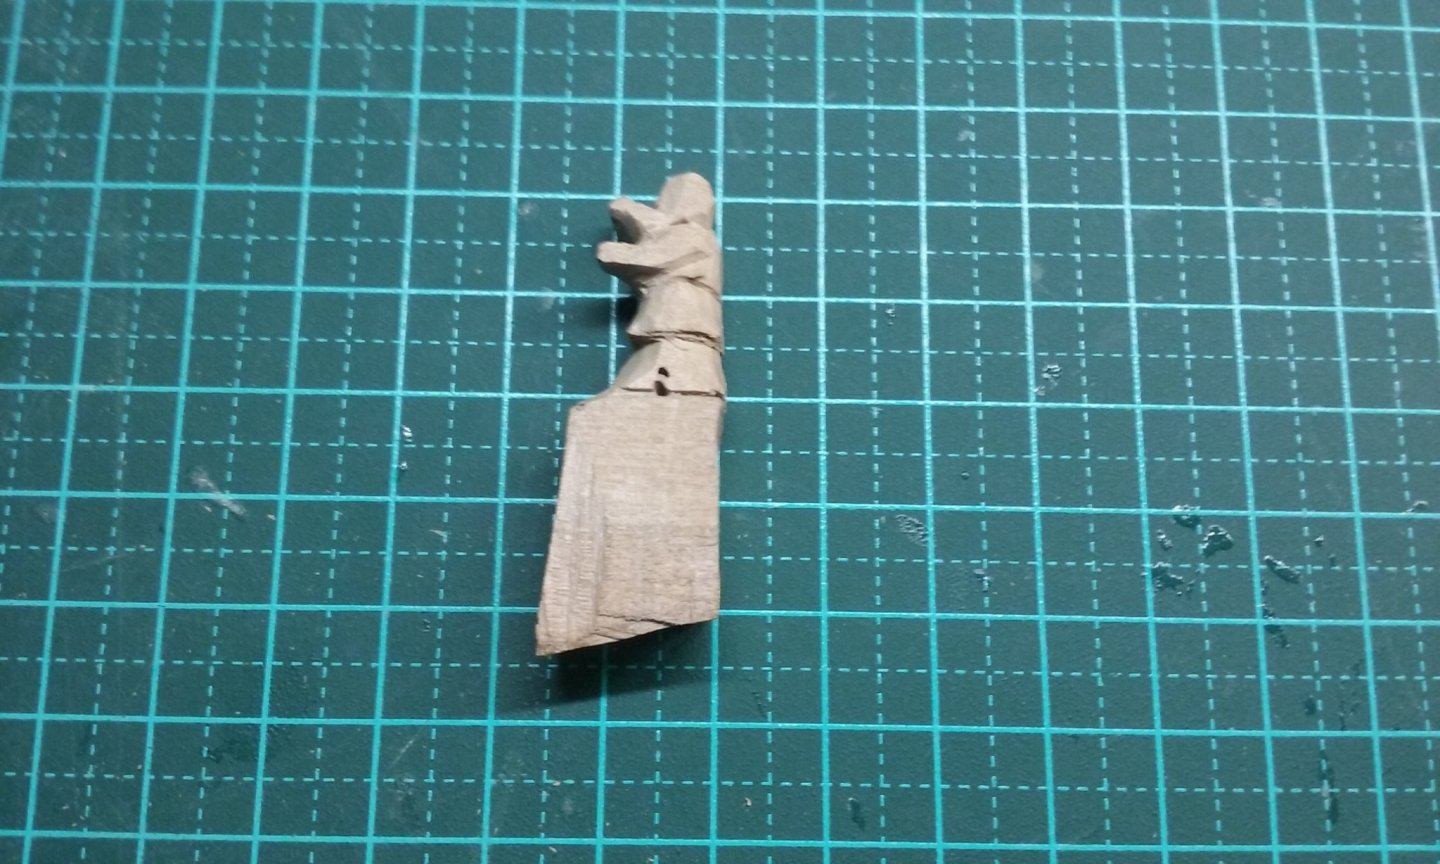
I discovered a small problem. Due to the shape of the hull, I've had to include stop planks, but I was "stopping" them as though they were carvel planks - with both the plank above and below the stopped plank taking its place. But that doesn't work with a clinker built vessel. The overlapping of the planks means that only the plank above the stopped plank overlaps. So instead of this: I had to change the overlap to this: Which means I had to take off the clingwrap and start again. The first buisine player is complete except for removing him from his bit of wood. And I experimented with the buisine. I first thought of making it out of wood, but wood painted to look like brass doesn't look like brass. So I decided to try making one out of brass. Found an old piece of brass welding rod and put it in my "poor man's lathe". And worked it up, bit by bit. To keep the thing from bending uncontrollably I kept my working surface close to the drill chuck, only letting it out bit by bit as I needed to. Pretty happy with the way it turned out. The only problem is that I seem to have made it too thick - more like a bazooka than a trumpet. And now it's been cut off I can't fix it. So I think I'll have another try and see if I can make a thinner one. I hope I can make it work this way - otherwise I'll have to go back to wood, which I'd rather not do, for the reason above. Steven


- 327 replies
-
- 10
-
-
Yes, it seems to work quite well. So full size yours would be somewhat smaller than mine, but well within the "permitted variation" for ships of that type. Mine's at a slightly smaller scale, but of a bigger ship - its dimensions are taken from Hedeby 3. Steven
-
Ships of the early 17th century: pictures
Louie da fly replied to Mark P's topic in Nautical/Naval History
Actually, doesn't he appear at the very end of the Lord of the Rings - when Frodo goes to the Grey Havens? Steven -
Mr Pleasant, do you have a build log? I looked and couldn't find it. Steven
-
David, the JoTika model (like most other commercial kits) has a forecastle that is probably incorrect, because of the lack of available archaeological evidence (so far they haven't found the forecastle), and based more upon galleons than carracks (which is what the Mary Rose was). At the stage you're at on the model, if you want to, you could think about doing the forecastle differently. But it's your model, your decision. Whatever you do, the important thing is to have fun with it. Steven
-
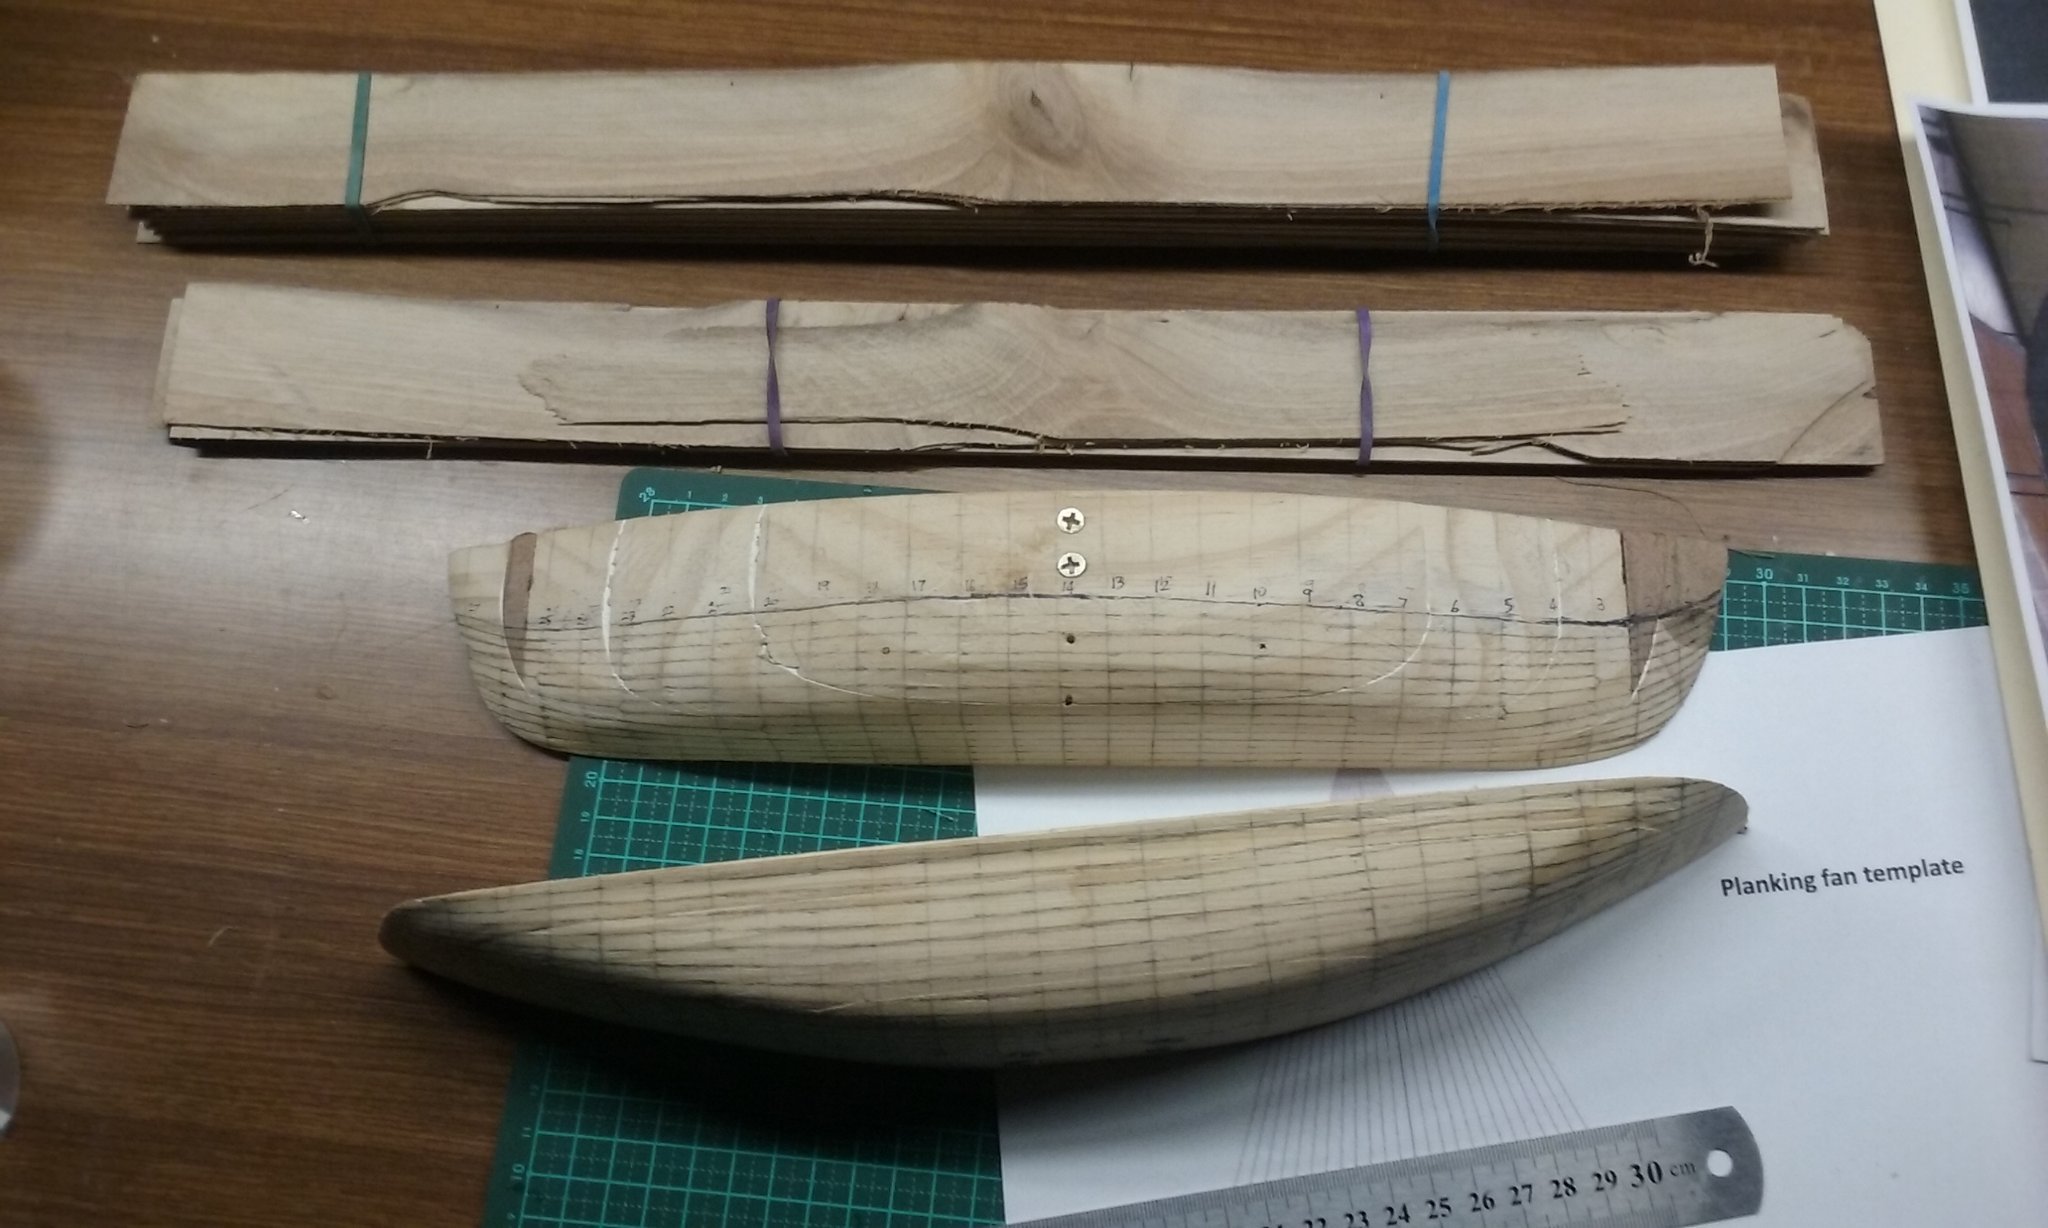
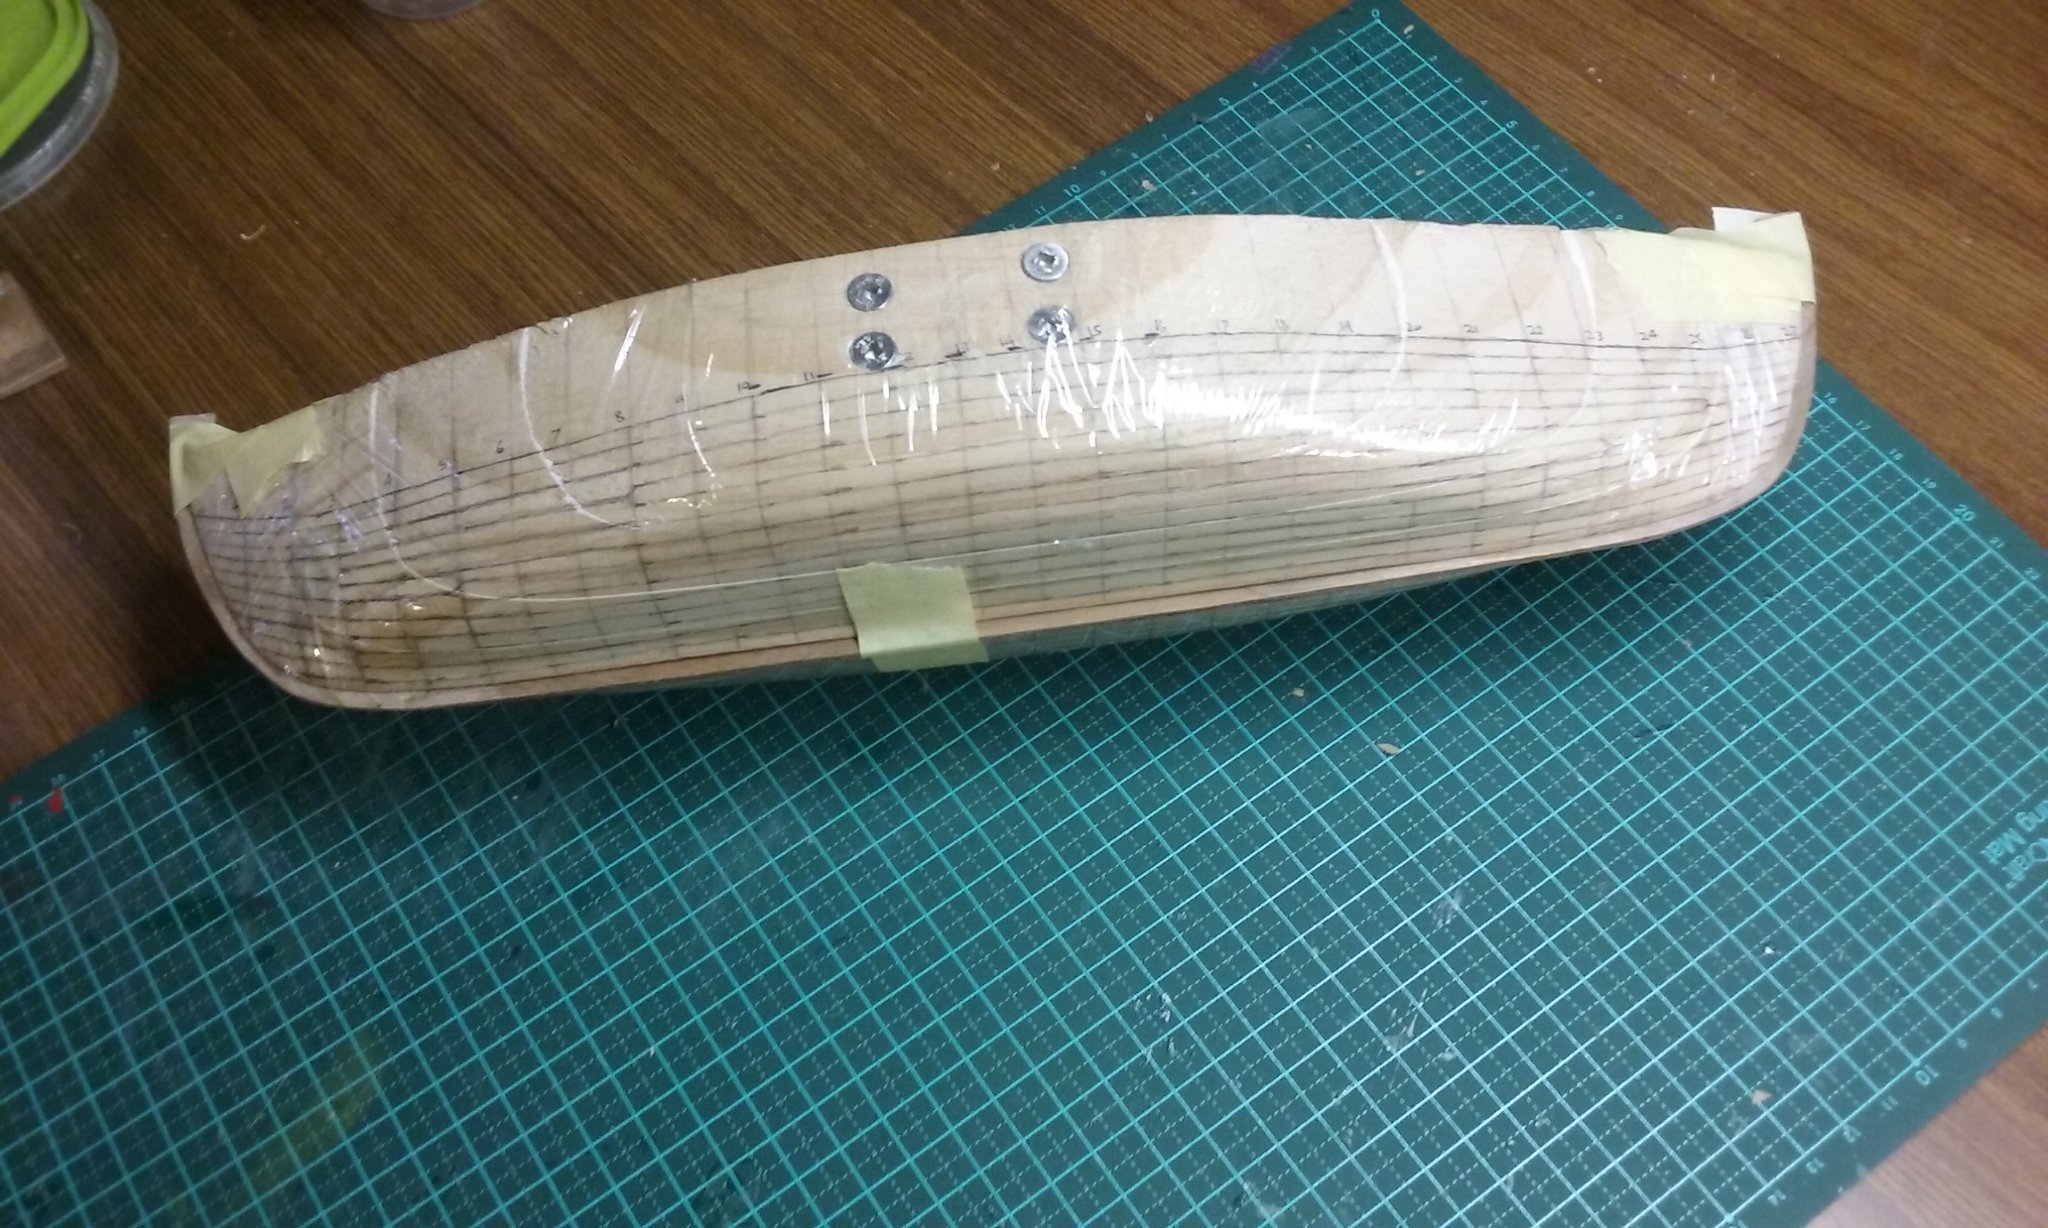
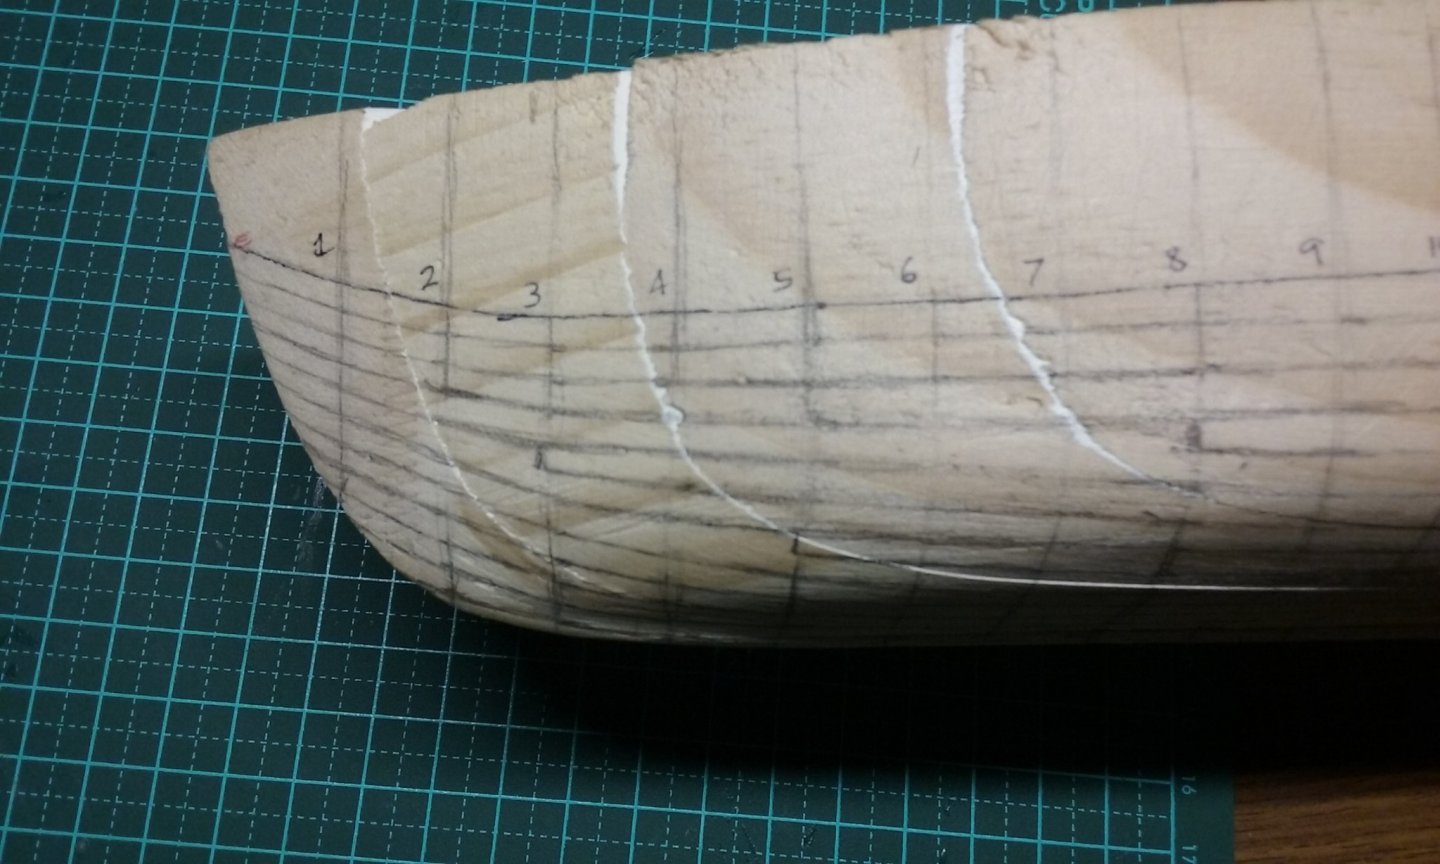
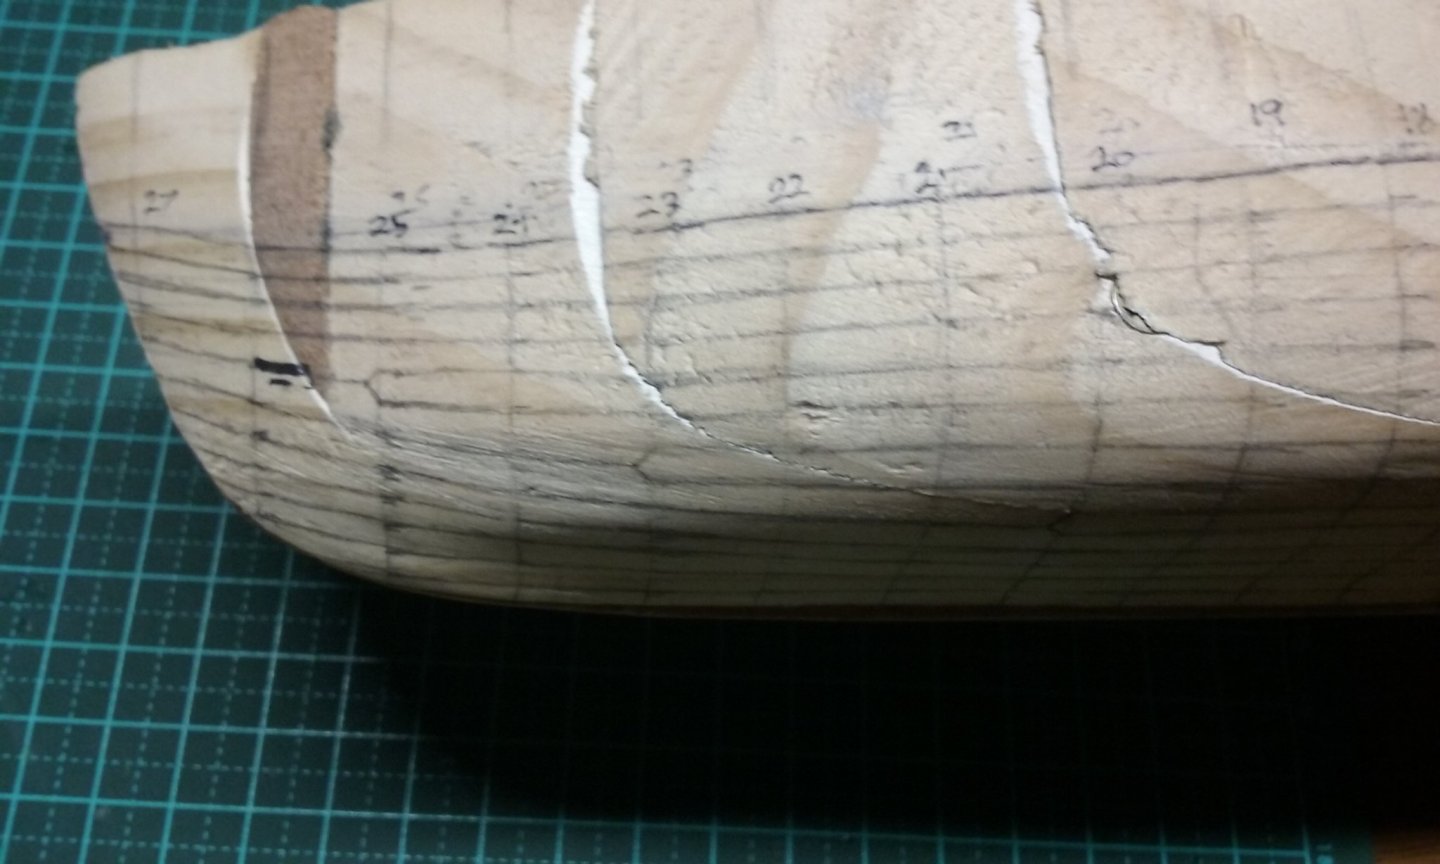
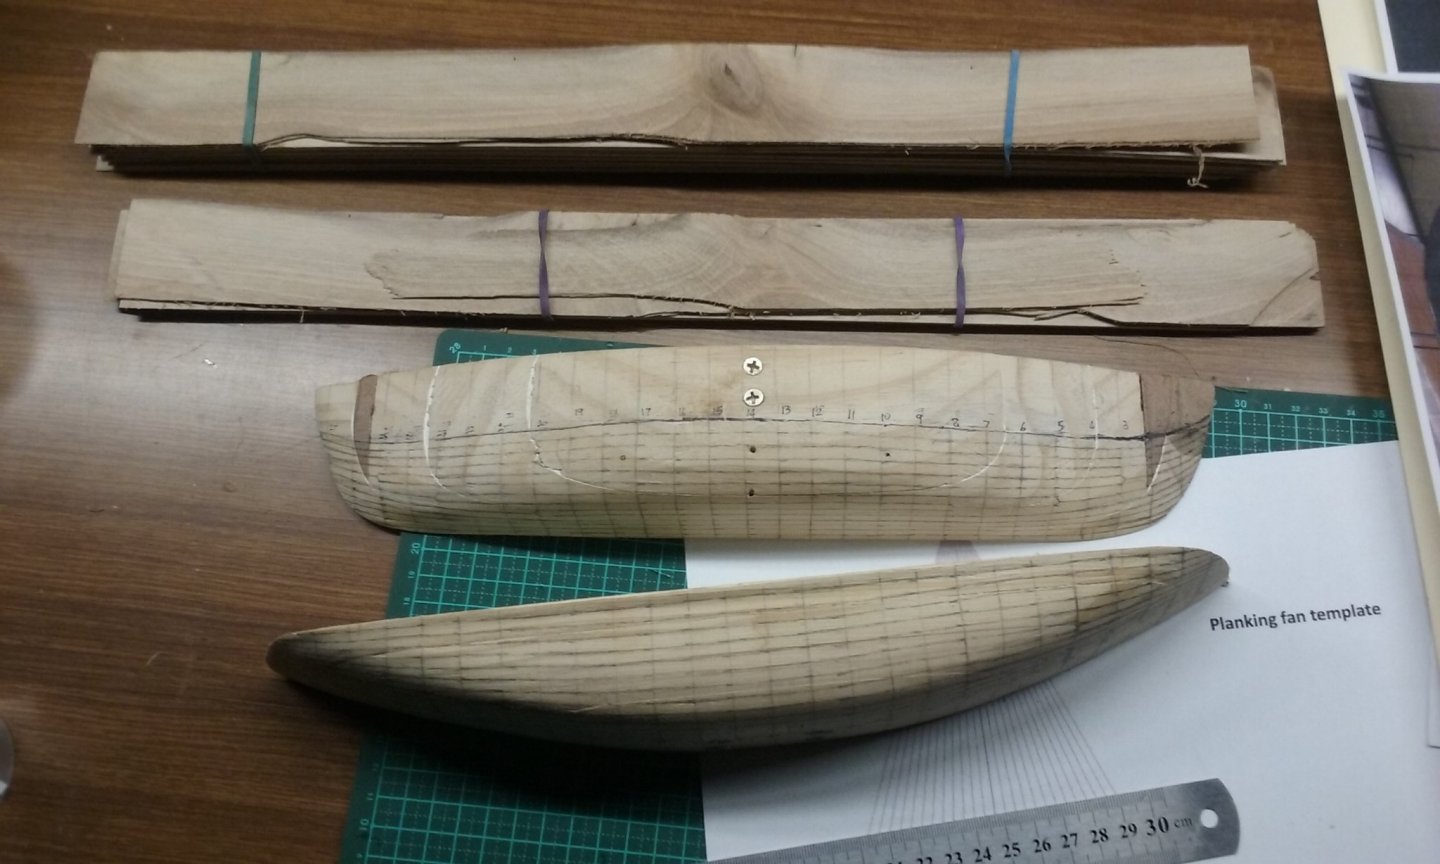
I've drawn the lines of the planks on the plug, basically using the technique outlined in the planking tutorials. And at the top you can see the wood I'm going to be using for the planking. Walnut from the dead tree of the guy next door, cut into sheets by the guy across the road. It's nice having good neighbours. And covered it in cling-wrap so the planks don't get glued to the plug. I used packing tape to hold the clingwrap close to the plug, and to keep the keel and stem and sternposts in place. And I've started carving the first trumpeter. Steven


- 327 replies
-
- 12
-
-
Ships of the early 17th century: pictures
Louie da fly replied to Mark P's topic in Nautical/Naval History
Look at the designs of Mathew Baker (1530-1630) (do a Google image search) for typical galleons of the late 16th-early 17th century. And of course, there's the Sovereign of the Seas, but that was far bigger than the usual run of the mill ships. You might also look at https://www.kentarchaeology.org.uk/sites/default/files/archcant/1990 107 Chatham Dockyard and a Little-Known Shipwright Matthew Baker (1530 - 1613) Blatcher.pdf If you don't want to restrict yourself to English ships, there's the Vasa (1629). I'm sure others will be able to make other suggestions. Steven -
Thanks everybody for the likes and comments. Patrick, that sounds interesting, but as you say, might not be suitable. I'm sure there's something available in Oz - in fact, almost certainly in Ballarat - that will do the job. Steven
- 740 replies
-
- 3
-
-
- Tudor
- restoration
- (and 4 more)
-
HMCSS Victoria 1855 by BANYAN - 1:72
Louie da fly replied to BANYAN's topic in - Build logs for subjects built 1851 - 1900
You might find a silver-grey, but perhaps wire rope was painted anyway - if not, you should probably choose a thread that looks like weathered wire. But I'm sure you've already thought of that. Steven- 1,013 replies
-
- 2
-
-
- gun dispatch vessel
- victoria
- (and 2 more)
-
Those are really nice drawings - very faithful to the originals and very believable as seagoing vessels. Steven
-
Yes, I think you're right. I did consider that myself, merging several nefs that incorporated my favourite features, then I decided it would be better to portray one specific nef rather than a "conglomerate". Steven
-
Thanks, Paul. I'll check out the wire situation first - It seems to me that those holes really can't get too much bigger without encroaching on the integrity of the deadeyes themselves. Glad you're having fun with the 3D thing in general and the culverin in particular. Is it that amazing one with the helical faces around the barrel? Any chance of some pictures? Steven
- 740 replies
-
- 3
-
-
- Tudor
- restoration
- (and 4 more)
-
I got this pic off Facebook. Unfortunately it didn't say where the flag is held. Aha! "It's kept in the national maritime museum in Greenwich - and it is 32 ft. x 47 ft. in size." Steven
-
- 5
-
-

-
- San Ildefonso
- Trafalgar
- (and 4 more)
-
Hmm - might be worth considering, Roger. Probably the stuff you get in electrical cord, that gets its flexibility by being made up of large numbers of very fine wires.
- 740 replies
-
- 3
-
-
- Tudor
- restoration
- (and 4 more)
-
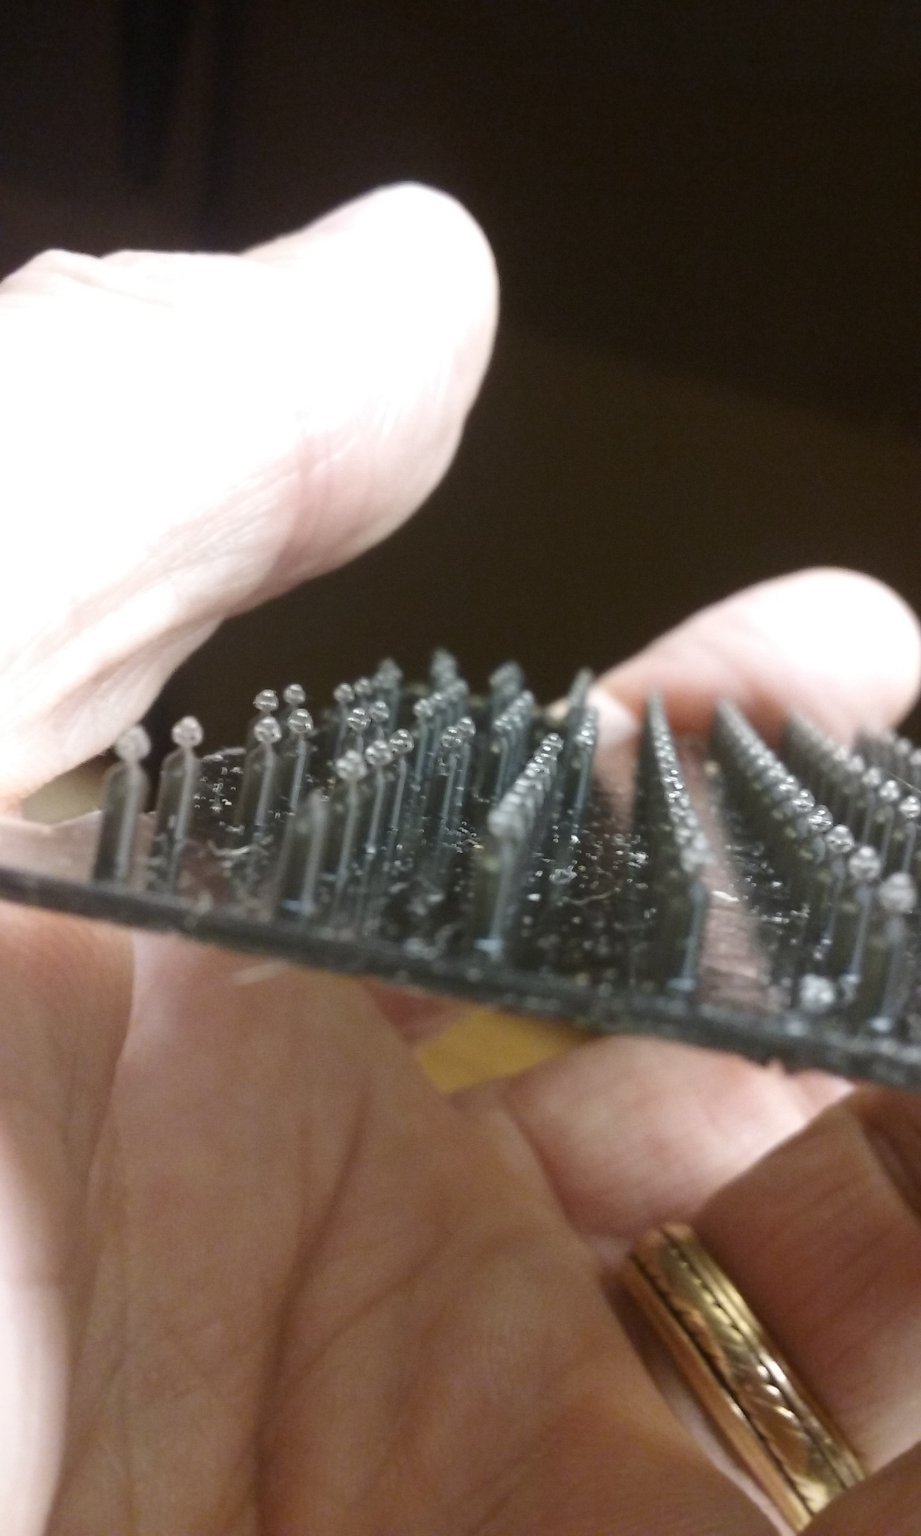
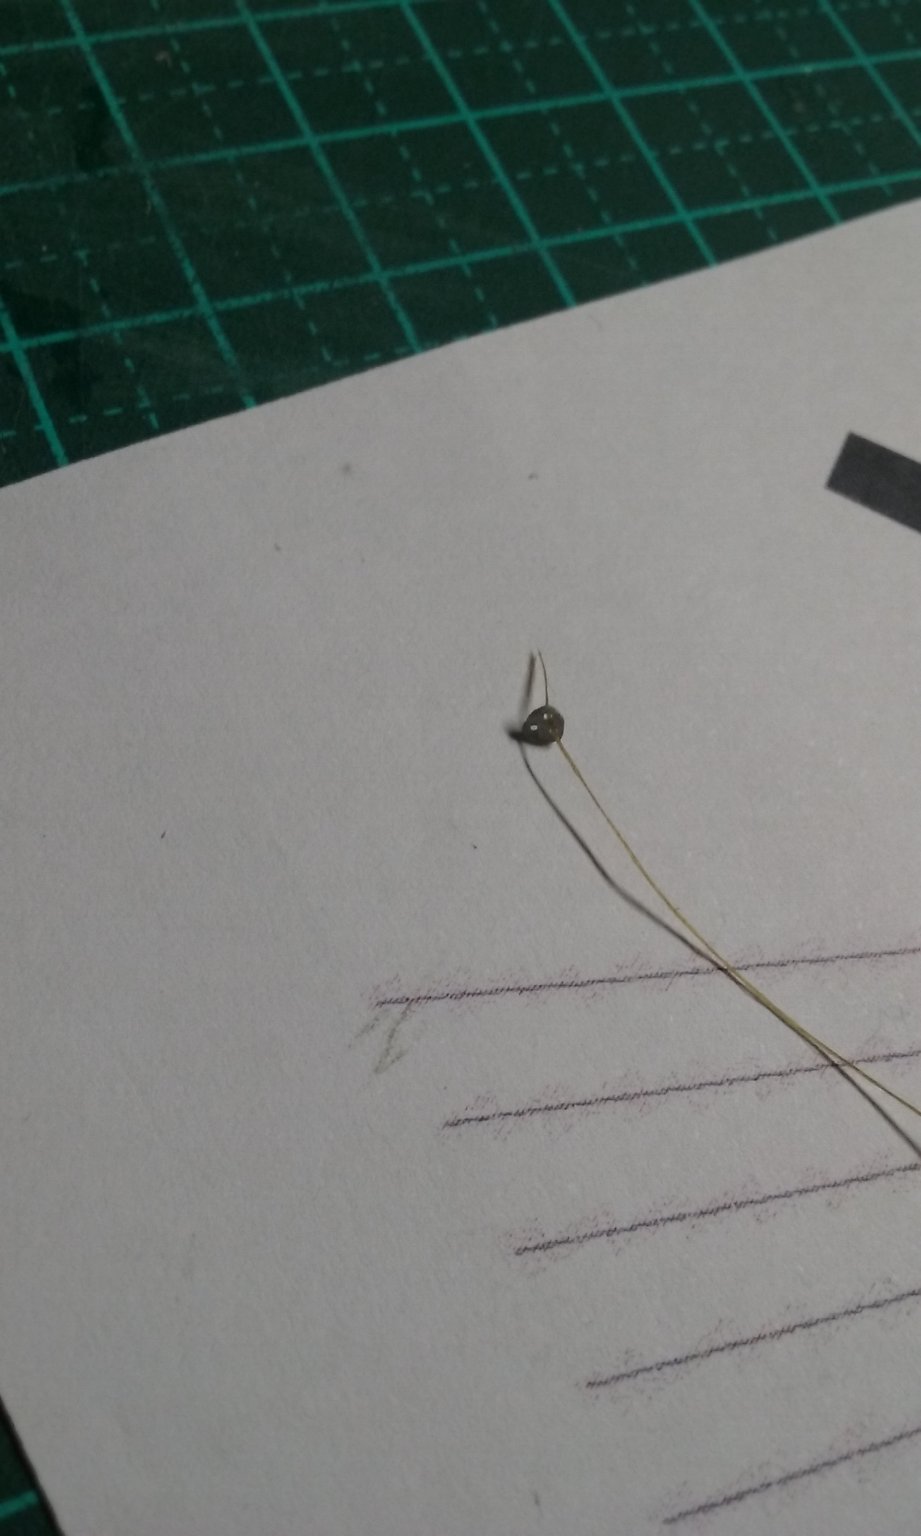
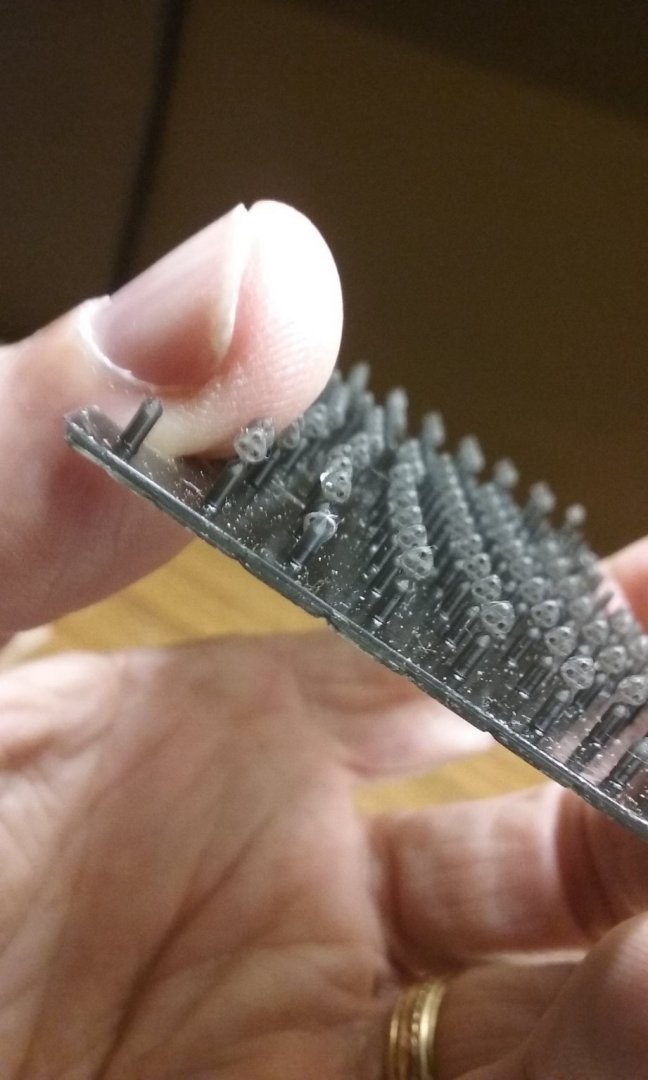
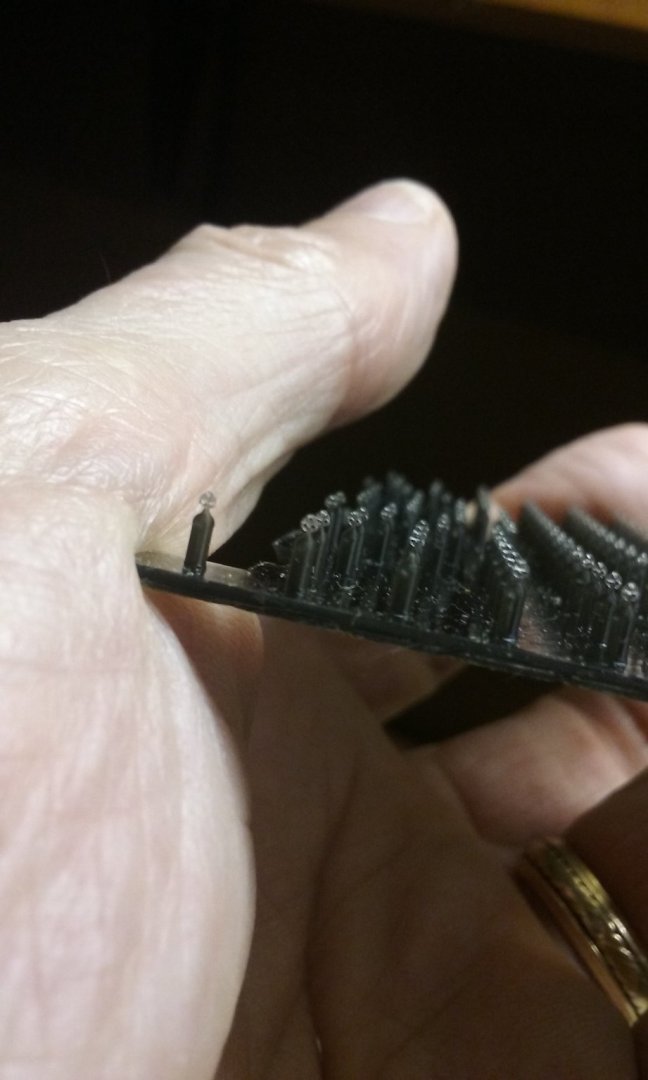
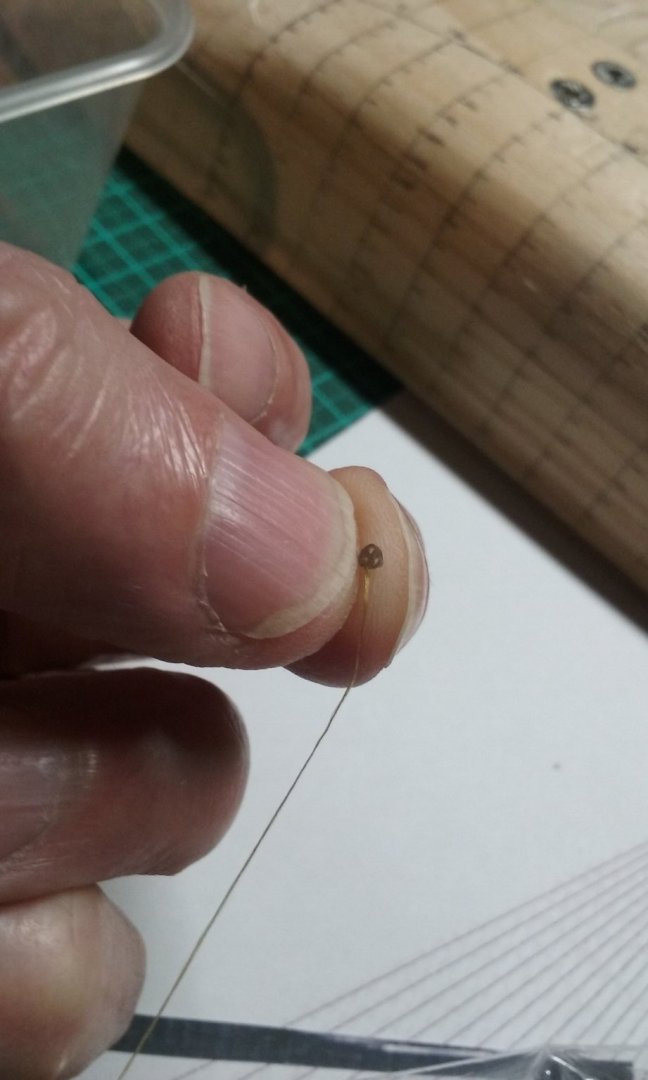
Got the finest available fly-tying thread from Rehfisch's huntin' & shootin' & fishin' shop in Ballarat. SO many ways of killing things up on the wall and in the shelves! And Lo! and Behold! The mass produced deadeyes printed by Paul (HenrytheStaffy) arrived in the mail! To say I'm gobsmacked is putting it mildly. Here are the two sizes he 3D printed and sent me - 2mm on each side (for the lower shrouds for the mizzen and bonaventure masts and the main fore topmasts) and (for heaven's sake!) 1mm on each side (for the upper mizzen and bonaventure shrouds and the main and fore topgallant shrouds). There's no way I could have made even one of the smaller ones by myself, let alone mass-produced them. And even the larger ones are a real trial for me and never completely successful. And here is the finest available fly-tying thread going though one of the holes of the larger sized deadeye ; Unfortunately for me, even that thread won't go through the holes in the smaller deadeyes - they're just SO tiny! Just a matter of modern technology outpacing the materials (and hand-eye co-ordination, for that matter) available. I'm afraid my expectations were a little unrealistic - not of the 3D printer, but of the rest of the resources available to me. I may not be able to get thread through the holes of these tiny deadeyes, but I think I'll be able to set them up in place and glue the thread in front of them so it looks like it's going through the holes. My heartfelt thanks to Paul. You're a legend, mate. You really produced the goods, and exceeded the capabilities of this mere ship-modelling guy. All I can say is WOW! Steven


- 740 replies
-
- 11
-
-
-
- Tudor
- restoration
- (and 4 more)
-
HMCSS Victoria 1855 by BANYAN - 1:72
Louie da fly replied to BANYAN's topic in - Build logs for subjects built 1851 - 1900
Nice work as usual, Pat. Very good result. I was surprised you used brass for the pigeonholes, but on reflection you can probably get more precision that way than with wood. Just out of interest, was there any mention of chain gammoning chafing the bowsprit? Steven- 1,013 replies
-
- 5
-
-
- gun dispatch vessel
- victoria
- (and 2 more)
-
Trireme Olympias - wonderful footage
Louie da fly replied to Louie da fly's topic in Nautical/Naval History
There's been a lot of study on this. Yes, it was hard to keep rowing strongly for any length of time, though an easier pace can be kept up for longer. The Olympias was a good source of practical information on these issues. Steven- 4 replies
-
- 2
-
-
- ancient Greece
- galley
- (and 3 more)
-
What a beautiful model! I came to this late - very glad to see it! You've done a wonderful job. Steven
-
Nice job, Bill. She looks good. Steven
-
Beautiful work, Lyle! I'm sure your Dad will love it. Steven
- 83 replies
-
- 1
-
-
- Sea of Galilee boat
- SE Miller
- (and 1 more)