
Supplies of the Ship Modeler's Handbook are running out. Get your copy NOW before they are gone! Click on photo to order.
×


Louie da fly
-
Posts
7,983 -
Joined
-
Last visited
Reputation Activity
-

 Louie da fly got a reaction from Matrim in Viking Longship by Binho - Dusek - Scale 1:72 - Model based on the 11th Century Skuldelev 2 wreck
Not to worry, Alberto. There are very few things that can't be mended with a bit of work, and even the best of us have sometimes forged ahead where angels fear to tread and had to go back and start again. Stick with it; you'll get there.
Regarding the bent keel, there are various posts on the forum on how to fix such things (though of course unfortunately I can't remember where I saw them). If worst comes to worst, it might be necessary to make a new one. Is the keel made of ply? If so, it's not an inherent twisted grain problem as I faced when I started my dromon.
If you used PVA (white) glue on the frames you can dissolve it by soaking in isopropyl alcohol (isopropanol). Both that and methylated spirits (ethanol with 5% methanol otherwise known as wood alcohol) are commonly called rubbing alcohol, but isopropanol is the only one that works on PVA, as I discovered to my cost.
One thing is that you've learned an important modeller's lesson. Don't glue unless you know you've got it right. You'll find a lot of modellers "dry fit" things together before they add glue. It can prevent a lot of heartache.
And don't give up because something occasionally goes wrong. With patience and perseverance you'll get there, even if you have to retrace your steps once in awhile. Speaking for myself, and I'm sure for everybody else on the forum, there's no build that ever goes perfectly. And as your level of skill improves and your own standards for your work raise, you'll find ever new and more interesting mistakes to make!
Having said all that, I'd like to add that you've chosen a beautiful ship to build. I'm sure it'll turn out to be something you'll be very happy to have done.
Steven
-
.thumb.jpeg.d239701c2f7247a100a3f432822c4eda.jpeg) Louie da fly got a reaction from rkwz in Golden Hind (ex-Pelican) by Baker - FINISHED - scale 1/45 - Galleon late 16th century
Louie da fly got a reaction from rkwz in Golden Hind (ex-Pelican) by Baker - FINISHED - scale 1/45 - Galleon late 16th century
That's a much more interesting name than the English one - just boring "mast cap". The Italians, on the other hand, call it a testa di moro - "Moor's head". But we make up for it with deadeyes - because they look a bit like a skull. The French call them caps de mouton - sheep's caps (unless it's an old name incorporating the Latin capitum - "head". Somehow sheep's head sounds more poetic.
-
.thumb.jpeg.fc5d633a7b34428fcf19419a73d56d55.jpeg) Louie da fly got a reaction from EricWilliamMarshall in 10th-11th century Byzantine dromon by Louie da fly - FINISHED - 1:50
Louie da fly got a reaction from EricWilliamMarshall in 10th-11th century Byzantine dromon by Louie da fly - FINISHED - 1:50
I've been looking at what happens to the free end of the ropes for the blocks etc I've been working on so far. Normally there'd be a coil to take up the surplus rope at the end. I've tried making a coil copying a technique used by others on MSW but it's pretty difficult if I'm making it out of the surplus rope at the free end. I think it's probably better to just make separate coils and attach them to make it look like they're part of the main rope.
Wrapping the free end around the end of a pen and gluing the coils together (later I had to remove the grey hair that had somehow got itself mixed up with the coil).
Then I added an extra bit of cord to simulate the bit that winds around the coil to keep it in shape. And a clothes-peg to hold it all together till the glue dried.
And the coil in place next to the oarsman in green. Note also the free end of the vang being held by the standing crewman. My understanding is that it would just lie there on the deck until the operation was over, then be coiled up properly.
And another bit of housework - the free ends of the robands and gaskets were sticking out at all angles - a combination of the springiness of the cotton thread and the presence of random dabs of the glue I used to hold them to the yard. They should be hanging down under gravity. So I've started glueing them in a "natural" position. The left-hand photo is "before", the right-hand isn't so much "after" as "during". The 5th and 7th ties from the end of the yard show the difference. A lot to do here - it'll take a while.
-
 Louie da fly reacted to Binho in 10th-11th century Byzantine dromon by Louie da fly - FINISHED - 1:50
Man, that looks absolutely beautiful! Good work!
-
Louie da fly got a reaction from EricWilliamMarshall in 10th-11th century Byzantine dromon by Louie da fly - FINISHED - 1:50
I've been having a few problems with the rigging - particularly with belaying points, but I'm making slow but steady progress. My original idea for the foretacks was to run each one to a turn around a "bollard" on the forecastle which acted as a fairlead, to a point aft of the mast so the yard could be pulled back behind the mast when tacking.
Only problem was - it wouldn't have worked (which I realised when I was in bed, where all one's best ideas arrive - usually at some ungodly hour of the morning). I had run the tack under the benches would have made it impossible to pull the yard back.
So I re-ran the tacks, still with a turn around the "bollard", but then outside the shrouds. (The clothes-peg is just holding the rope in place while the glue dries on the bollard.)
Fixed the "bitter end" around an upright of the pavesade aft of the mast, and tied off the free end to the pavesade rail nearby.
Then the vangs. One end of the port vang is fixed around an oarbench, the other to the rail of the pavesade. The starboard vang is still loose:
And both fore-vangs tied off:
Now for the after yard. I added the crewmen hauling up the yard:
Unfortunately the rope they're all holding just couldn't be a straight line due to the one of the guys standing on the hatch cover. In the real world they would have adjusted their grip to allow for that. Not so easy with carved figures . . . However, it's a small issue and I'm not going to bother about it. I know about it, and now you do as well - but I doubt anyone else will ever notice . . .
Here all the ropes for the yard are loose - bosun very unhappy.
So I put the fellow in yellow to work, holding the port tack so the yard doesn't swing around as it's raised. Sorry about the picture quality.
The other tack will be loose, as will the vangs, as the yard is in the process of being raised.
Now I'm trying to work out how to produce a natural catenary curve in the loose ropes. Cotton thread is "springy" and doesn't naturally fall into such a curve. I'm experimenting with wetting the thread and with soaking it with a weak solution of PVA (white) glue. But if anyone can make suggestions or has been in the same position I'd be grateful for advice.
-
 Louie da fly got a reaction from Boxbuilds in 10th-11th century Byzantine dromon by Louie da fly - FINISHED - 1:50
I've been looking at what happens to the free end of the ropes for the blocks etc I've been working on so far. Normally there'd be a coil to take up the surplus rope at the end. I've tried making a coil copying a technique used by others on MSW but it's pretty difficult if I'm making it out of the surplus rope at the free end. I think it's probably better to just make separate coils and attach them to make it look like they're part of the main rope.
Wrapping the free end around the end of a pen and gluing the coils together (later I had to remove the grey hair that had somehow got itself mixed up with the coil).
Then I added an extra bit of cord to simulate the bit that winds around the coil to keep it in shape. And a clothes-peg to hold it all together till the glue dried.
And the coil in place next to the oarsman in green. Note also the free end of the vang being held by the standing crewman. My understanding is that it would just lie there on the deck until the operation was over, then be coiled up properly.
And another bit of housework - the free ends of the robands and gaskets were sticking out at all angles - a combination of the springiness of the cotton thread and the presence of random dabs of the glue I used to hold them to the yard. They should be hanging down under gravity. So I've started glueing them in a "natural" position. The left-hand photo is "before", the right-hand isn't so much "after" as "during". The 5th and 7th ties from the end of the yard show the difference. A lot to do here - it'll take a while.
-
Louie da fly got a reaction from EricWilliamMarshall in 10th-11th century Byzantine dromon by Louie da fly - FINISHED - 1:50
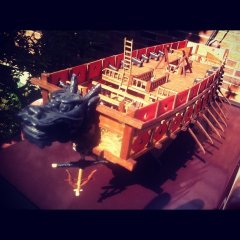
All the shields of the port side are in place. Check the sixteenth and seventeenth rowers, Boxbuilds!
And I've finally glued the xylokastra (wooden castles) into position.
-
Louie da fly reacted to Brinkman in A small cog c. 1410 by Brinkman - FINISHED - scale 1:20
The gangways lets the crew cross the hold without having to crawl over the cargo and a sturdy beam spans the hold to keep the hull from bulging out. Rosebolts keeps it in place.
The twin mast steps for the bipod mast are in place, and they act as steps to get up on the gangways.
The hold has a nailed down ceiling to keep the cargo out of the bilge, but the planks in the middle are loose for cleaning out dirt. The planks are roughly sawn with natural edges.
I've started with the mast and will have a boom for lifting cargo, here shown with the bowsprit in its place. Calculations in the thesis about the wreck calculates that the ship reaches it's cargo limit when filling up the hold with bricks, so I imagine the ship was made for smaller amounts of high density cargo rather than large amounts of light. And then a lifting boom would make sense and the bipod mast could be there as support.
Bulkheads are of course needed to keep the cargo in place and I did sides for the gangways for this purpose and a simple bulkhead aft of the hold. But it's hard to fit a bulkhead in front as the boom intervenes with anything higher than 40cm ( 1 1/3'). I must come up with a better solution here.
-
Louie da fly reacted to Lapinas in Santa Maria by Lapinas - FINISHED - Amati - 1:65 - First build
A little update this time. Did a second layer of black acrylic paint at the front of the ship. Then glued a 2 mm x 2 mm square plank around the ship perimeter. I am really satisfied about the 45 degree angle joint at the stern
Next update is going to be a bit delayed - need to experiment with varnishes and stains on wood scraps.
-
Louie da fly reacted to Binho in Viking Longship by Binho - Dusek - Scale 1:72 - Model based on the 11th Century Skuldelev 2 wreck
Thanks! It is a very elegant ship, I really like the proportions. I agree that the shields were probably for display only. When I was at the ship museum I was chatting with one of the people who sail the reconstructions. He said that on the Skuldelev 5 replica, the shields get in the way of rowing when they are mounted.
Here is a pic from the front, Cathead. The sides aren’t very vertical at all! Below is the reconstructed hull lines of the actual wreck for comparison.
My strakes are pretty messy too - but then again, they were fairly messy on the ships of this period. Skuldelev 3 was even asymmetrical, it had more strakes on one side than the other. Skuldelev 1 had a crooked keel from a repair job.
Since the Scandinavian ship builders weren’t building to plans, I feel there was some amount of freestyling going on during construction. While I think in this case the planking issues are a problem with the kit, I just tell myself it’s a more rustic, realistic look
-
Louie da fly reacted to Cathead in 10th-11th century Byzantine dromon by Louie da fly - FINISHED - 1:50
That's what I would have tried first. Another, possibly crazy idea, might be to make a pattern of the curve you want (like by bending a piece of wire in-place on the model) and then using that as a guide to shape a glue-soaked line that dries off the model and then is installed when stiff?
-
 Louie da fly got a reaction from Binho in Viking Longship by Binho - Dusek - Scale 1:72 - Model based on the 11th Century Skuldelev 2 wreck
That's looking very good, mate. Such a beautiful, elegant ship - I have no idea why anybody would want to do Gokstad after seeing this.
I don't think there's any real need for stanchions under the thwarts. They're sitting on a beam - that should be enough. The thwarts/benches on one of the Yenikapi galleys from Istanbul were slotted into the hull (the wreck contained a wale with slots in it approx 900mm apart just at the right height for the benches - and they found quite a few of them, as well. They were just planks).
Yes, but that may have been done as part of the burial, though the shield fittings were the genuine article - the bosses were good steel ones and there were holes around the rim which were probably where the thread/lacing was to hold the (probably leather) shield rim on. However, I have serious doubts about shields being on the sides of a ship except for display or battle (and possibly not for battle either - except as they rowed toward the enemy. Once contact was made I'd assume everybody would pick up his shield and fight with it in his hand).
-
 Louie da fly got a reaction from Keith Black in 10th-11th century Byzantine dromon by Louie da fly - FINISHED - 1:50
I've been having a few problems with the rigging - particularly with belaying points, but I'm making slow but steady progress. My original idea for the foretacks was to run each one to a turn around a "bollard" on the forecastle which acted as a fairlead, to a point aft of the mast so the yard could be pulled back behind the mast when tacking.
Only problem was - it wouldn't have worked (which I realised when I was in bed, where all one's best ideas arrive - usually at some ungodly hour of the morning). I had run the tack under the benches would have made it impossible to pull the yard back.
So I re-ran the tacks, still with a turn around the "bollard", but then outside the shrouds. (The clothes-peg is just holding the rope in place while the glue dries on the bollard.)
Fixed the "bitter end" around an upright of the pavesade aft of the mast, and tied off the free end to the pavesade rail nearby.
Then the vangs. One end of the port vang is fixed around an oarbench, the other to the rail of the pavesade. The starboard vang is still loose:
And both fore-vangs tied off:
Now for the after yard. I added the crewmen hauling up the yard:
Unfortunately the rope they're all holding just couldn't be a straight line due to the one of the guys standing on the hatch cover. In the real world they would have adjusted their grip to allow for that. Not so easy with carved figures . . . However, it's a small issue and I'm not going to bother about it. I know about it, and now you do as well - but I doubt anyone else will ever notice . . .
Here all the ropes for the yard are loose - bosun very unhappy.
So I put the fellow in yellow to work, holding the port tack so the yard doesn't swing around as it's raised. Sorry about the picture quality.
The other tack will be loose, as will the vangs, as the yard is in the process of being raised.
Now I'm trying to work out how to produce a natural catenary curve in the loose ropes. Cotton thread is "springy" and doesn't naturally fall into such a curve. I'm experimenting with wetting the thread and with soaking it with a weak solution of PVA (white) glue. But if anyone can make suggestions or has been in the same position I'd be grateful for advice.
-
 Louie da fly got a reaction from mtaylor in Problems with a medieval bipod mast
Yes, sheer legs.
But regarding the fixing of the yard - perhaps a vertical "topmast" above the bipod? Then the parrel could swivel without hindrance. Otherwise it might be possible to have some kind of adjustable truss which could be loosened every time you tacked - somewhat like this one marked trozza (used on a lateen sail), but allowing for the bipod? Might be completely impractical, but it's a thought.
The other thing would be to look at how the yard was held on Egyptian ships, if it's known. Unfortunately Sceatha's magnificent Byblos ship has the mast lowered and no yard fitted, or you might be able to get some ideas from his. However, on page 1 of his log there's a picture of a ship with the yard fitted, and it seems to be perched on the very top of the bipod, where the legs come together.
-
 Louie da fly got a reaction from ccoyle in 10th-11th century Byzantine dromon by Louie da fly - FINISHED - 1:50
I've been having a few problems with the rigging - particularly with belaying points, but I'm making slow but steady progress. My original idea for the foretacks was to run each one to a turn around a "bollard" on the forecastle which acted as a fairlead, to a point aft of the mast so the yard could be pulled back behind the mast when tacking.
Only problem was - it wouldn't have worked (which I realised when I was in bed, where all one's best ideas arrive - usually at some ungodly hour of the morning). I had run the tack under the benches would have made it impossible to pull the yard back.
So I re-ran the tacks, still with a turn around the "bollard", but then outside the shrouds. (The clothes-peg is just holding the rope in place while the glue dries on the bollard.)
Fixed the "bitter end" around an upright of the pavesade aft of the mast, and tied off the free end to the pavesade rail nearby.
Then the vangs. One end of the port vang is fixed around an oarbench, the other to the rail of the pavesade. The starboard vang is still loose:
And both fore-vangs tied off:
Now for the after yard. I added the crewmen hauling up the yard:
Unfortunately the rope they're all holding just couldn't be a straight line due to the one of the guys standing on the hatch cover. In the real world they would have adjusted their grip to allow for that. Not so easy with carved figures . . . However, it's a small issue and I'm not going to bother about it. I know about it, and now you do as well - but I doubt anyone else will ever notice . . .
Here all the ropes for the yard are loose - bosun very unhappy.
So I put the fellow in yellow to work, holding the port tack so the yard doesn't swing around as it's raised. Sorry about the picture quality.
The other tack will be loose, as will the vangs, as the yard is in the process of being raised.
Now I'm trying to work out how to produce a natural catenary curve in the loose ropes. Cotton thread is "springy" and doesn't naturally fall into such a curve. I'm experimenting with wetting the thread and with soaking it with a weak solution of PVA (white) glue. But if anyone can make suggestions or has been in the same position I'd be grateful for advice.
-
Louie da fly got a reaction from Keith Black in 10th-11th century Byzantine dromon by Louie da fly - FINISHED - 1:50
All the shields of the port side are in place. Check the sixteenth and seventeenth rowers, Boxbuilds!
And I've finally glued the xylokastra (wooden castles) into position.
-
 Louie da fly got a reaction from flying_dutchman2 in 10th-11th century Byzantine dromon by Louie da fly - FINISHED - 1:50
Well as I mentioned before, I've re-jigged the blocks at the bottom of the shrouds. Naturally enough, since I was shortening the block assembly, the shrouds needed to be longer so I had to replace them. I was lucky enough that one shroud in each set could be re-used, and that I seemed to have enough dyed cord to make the rest. Until the last moment, when I discovered I was one shroud short!
The existing shrouds are darkened to look like tarred cordage. I dyed another lot of cord, having to re-insert it into the dye bath three times to get the colour to match . Of course as soon as I'd finished, I discovered I actually had just enough of the old cord to do all the shrouds after all. Ah, well, at least I've got some nice dark cord that I can use for other things. Here is the ship with shrouds undone and incidentally the yards lowered to allow new shrouds to be installed. The bosun is going to be in big trouble from the captain for that horrible raffle on deck.
Here is the new, shorter, block arrangement. (Sorry about the vagueness of the photos - I don't know what went wrong the day I took them). I'd originally put cleats inside the hull walls to belay the downhauls - I'd used modern cleats because none have been found in archaeology but I really wasn't happy with them. Then when it came to it I found it was much easier and probably more sensible to belay them to the oarbenches. At least as strongly fixed as a cleat and much more convenient to use. You'll note small clothes-pegs hanging from the sides of the ship - they're holding the downhauls in tension while the glue dries. After that I removed the pegs and tied off the downhauls. That raffle of unsecured ropes is getting gradually less. The bosun will be happy.
After I'd replaced the shrouds my lovely (and observant) wife, all unsuspecting, pointed out that the after yard was hoisted inside the shrouds (instead of outside where it should have been). Oops. So I had to loosen off the tacks which I'd temporarily tied up, undo the toggle that held the yard to the halyard, and take the halyard off and re-set it outside the shrouds. I'm very glad she noticed it. It would have been murder to fix it later in the build.
And here is the after yard in its correct place - you can see the toggle which joins the halyard to the yard itself, as well as the trozza (truss) that holds the yard to the mast.
The guy lying on the deck isn't dead. He's "in storage" - when the four guys are put in place hauling up the yard he'll be holding the tack to keep the yard under control.
To provide belaying points for the ropes of the after lateen sail (tacks and vangs) I need to install the xylokastra (wooden castles). But first I have to add the shields to the pavesade - the castles would make it impossible to reach in and tie off the ropes holding the shields on.
In an earlier post I showed the ochanos (straps) at the back of the shield. To hold each shield in place I tied a piece of cotton sewing thread (to resemble rope, same as I've been using for the rigging) through the ochanos and around the railing and each upright of the pavesade, then added a dab of glue to make it permanent. That holds it fairly securely, though I may also glue the bottoms of the shields in place to stop them from flapping around.
Here are the shields about half-way installed on the starboard side:
And here's the starboard side complete.
It's nice after having painted all these shields some months ago and having had them in storage all this time, to finally be able to put them in place. I'm pretty happy with the way they look. Certainly makes the ship look more colourful.
-
 Louie da fly got a reaction from rybakov in 10th-11th century Byzantine dromon by Louie da fly - FINISHED - 1:50
I've been having a few problems with the rigging - particularly with belaying points, but I'm making slow but steady progress. My original idea for the foretacks was to run each one to a turn around a "bollard" on the forecastle which acted as a fairlead, to a point aft of the mast so the yard could be pulled back behind the mast when tacking.
Only problem was - it wouldn't have worked (which I realised when I was in bed, where all one's best ideas arrive - usually at some ungodly hour of the morning). I had run the tack under the benches would have made it impossible to pull the yard back.
So I re-ran the tacks, still with a turn around the "bollard", but then outside the shrouds. (The clothes-peg is just holding the rope in place while the glue dries on the bollard.)
Fixed the "bitter end" around an upright of the pavesade aft of the mast, and tied off the free end to the pavesade rail nearby.
Then the vangs. One end of the port vang is fixed around an oarbench, the other to the rail of the pavesade. The starboard vang is still loose:
And both fore-vangs tied off:
Now for the after yard. I added the crewmen hauling up the yard:
Unfortunately the rope they're all holding just couldn't be a straight line due to the one of the guys standing on the hatch cover. In the real world they would have adjusted their grip to allow for that. Not so easy with carved figures . . . However, it's a small issue and I'm not going to bother about it. I know about it, and now you do as well - but I doubt anyone else will ever notice . . .
Here all the ropes for the yard are loose - bosun very unhappy.
So I put the fellow in yellow to work, holding the port tack so the yard doesn't swing around as it's raised. Sorry about the picture quality.
The other tack will be loose, as will the vangs, as the yard is in the process of being raised.
Now I'm trying to work out how to produce a natural catenary curve in the loose ropes. Cotton thread is "springy" and doesn't naturally fall into such a curve. I'm experimenting with wetting the thread and with soaking it with a weak solution of PVA (white) glue. But if anyone can make suggestions or has been in the same position I'd be grateful for advice.
-
 Louie da fly got a reaction from Cathead in Viking Longship by Binho - Dusek - Scale 1:72 - Model based on the 11th Century Skuldelev 2 wreck
That's looking very good, mate. Such a beautiful, elegant ship - I have no idea why anybody would want to do Gokstad after seeing this.
I don't think there's any real need for stanchions under the thwarts. They're sitting on a beam - that should be enough. The thwarts/benches on one of the Yenikapi galleys from Istanbul were slotted into the hull (the wreck contained a wale with slots in it approx 900mm apart just at the right height for the benches - and they found quite a few of them, as well. They were just planks).
Yes, but that may have been done as part of the burial, though the shield fittings were the genuine article - the bosses were good steel ones and there were holes around the rim which were probably where the thread/lacing was to hold the (probably leather) shield rim on. However, I have serious doubts about shields being on the sides of a ship except for display or battle (and possibly not for battle either - except as they rowed toward the enemy. Once contact was made I'd assume everybody would pick up his shield and fight with it in his hand).
-
 Louie da fly got a reaction from EJ_L in 10th-11th century Byzantine dromon by Louie da fly - FINISHED - 1:50
I've been having a few problems with the rigging - particularly with belaying points, but I'm making slow but steady progress. My original idea for the foretacks was to run each one to a turn around a "bollard" on the forecastle which acted as a fairlead, to a point aft of the mast so the yard could be pulled back behind the mast when tacking.
Only problem was - it wouldn't have worked (which I realised when I was in bed, where all one's best ideas arrive - usually at some ungodly hour of the morning). I had run the tack under the benches would have made it impossible to pull the yard back.
So I re-ran the tacks, still with a turn around the "bollard", but then outside the shrouds. (The clothes-peg is just holding the rope in place while the glue dries on the bollard.)
Fixed the "bitter end" around an upright of the pavesade aft of the mast, and tied off the free end to the pavesade rail nearby.
Then the vangs. One end of the port vang is fixed around an oarbench, the other to the rail of the pavesade. The starboard vang is still loose:
And both fore-vangs tied off:
Now for the after yard. I added the crewmen hauling up the yard:
Unfortunately the rope they're all holding just couldn't be a straight line due to the one of the guys standing on the hatch cover. In the real world they would have adjusted their grip to allow for that. Not so easy with carved figures . . . However, it's a small issue and I'm not going to bother about it. I know about it, and now you do as well - but I doubt anyone else will ever notice . . .
Here all the ropes for the yard are loose - bosun very unhappy.
So I put the fellow in yellow to work, holding the port tack so the yard doesn't swing around as it's raised. Sorry about the picture quality.
The other tack will be loose, as will the vangs, as the yard is in the process of being raised.
Now I'm trying to work out how to produce a natural catenary curve in the loose ropes. Cotton thread is "springy" and doesn't naturally fall into such a curve. I'm experimenting with wetting the thread and with soaking it with a weak solution of PVA (white) glue. But if anyone can make suggestions or has been in the same position I'd be grateful for advice.
-
 Louie da fly got a reaction from Tony Hunt in 10th-11th century Byzantine dromon by Louie da fly - FINISHED - 1:50
I've been having a few problems with the rigging - particularly with belaying points, but I'm making slow but steady progress. My original idea for the foretacks was to run each one to a turn around a "bollard" on the forecastle which acted as a fairlead, to a point aft of the mast so the yard could be pulled back behind the mast when tacking.
Only problem was - it wouldn't have worked (which I realised when I was in bed, where all one's best ideas arrive - usually at some ungodly hour of the morning). I had run the tack under the benches would have made it impossible to pull the yard back.
So I re-ran the tacks, still with a turn around the "bollard", but then outside the shrouds. (The clothes-peg is just holding the rope in place while the glue dries on the bollard.)
Fixed the "bitter end" around an upright of the pavesade aft of the mast, and tied off the free end to the pavesade rail nearby.
Then the vangs. One end of the port vang is fixed around an oarbench, the other to the rail of the pavesade. The starboard vang is still loose:
And both fore-vangs tied off:
Now for the after yard. I added the crewmen hauling up the yard:
Unfortunately the rope they're all holding just couldn't be a straight line due to the one of the guys standing on the hatch cover. In the real world they would have adjusted their grip to allow for that. Not so easy with carved figures . . . However, it's a small issue and I'm not going to bother about it. I know about it, and now you do as well - but I doubt anyone else will ever notice . . .
Here all the ropes for the yard are loose - bosun very unhappy.
So I put the fellow in yellow to work, holding the port tack so the yard doesn't swing around as it's raised. Sorry about the picture quality.
The other tack will be loose, as will the vangs, as the yard is in the process of being raised.
Now I'm trying to work out how to produce a natural catenary curve in the loose ropes. Cotton thread is "springy" and doesn't naturally fall into such a curve. I'm experimenting with wetting the thread and with soaking it with a weak solution of PVA (white) glue. But if anyone can make suggestions or has been in the same position I'd be grateful for advice.
-
 Louie da fly got a reaction from Gbmodeler in 10th-11th century Byzantine dromon by Louie da fly - FINISHED - 1:50
I've been having a few problems with the rigging - particularly with belaying points, but I'm making slow but steady progress. My original idea for the foretacks was to run each one to a turn around a "bollard" on the forecastle which acted as a fairlead, to a point aft of the mast so the yard could be pulled back behind the mast when tacking.
Only problem was - it wouldn't have worked (which I realised when I was in bed, where all one's best ideas arrive - usually at some ungodly hour of the morning). I had run the tack under the benches would have made it impossible to pull the yard back.
So I re-ran the tacks, still with a turn around the "bollard", but then outside the shrouds. (The clothes-peg is just holding the rope in place while the glue dries on the bollard.)
Fixed the "bitter end" around an upright of the pavesade aft of the mast, and tied off the free end to the pavesade rail nearby.
Then the vangs. One end of the port vang is fixed around an oarbench, the other to the rail of the pavesade. The starboard vang is still loose:
And both fore-vangs tied off:
Now for the after yard. I added the crewmen hauling up the yard:
Unfortunately the rope they're all holding just couldn't be a straight line due to the one of the guys standing on the hatch cover. In the real world they would have adjusted their grip to allow for that. Not so easy with carved figures . . . However, it's a small issue and I'm not going to bother about it. I know about it, and now you do as well - but I doubt anyone else will ever notice . . .
Here all the ropes for the yard are loose - bosun very unhappy.
So I put the fellow in yellow to work, holding the port tack so the yard doesn't swing around as it's raised. Sorry about the picture quality.
The other tack will be loose, as will the vangs, as the yard is in the process of being raised.
Now I'm trying to work out how to produce a natural catenary curve in the loose ropes. Cotton thread is "springy" and doesn't naturally fall into such a curve. I'm experimenting with wetting the thread and with soaking it with a weak solution of PVA (white) glue. But if anyone can make suggestions or has been in the same position I'd be grateful for advice.
-
Louie da fly reacted to MESSIS in 10th-11th century Byzantine dromon by Louie da fly - FINISHED - 1:50
It looks awsome and fantastc! Its superb.Greatly done Steven! Congrats.
Christos
-
Louie da fly reacted to Jean-Pierre in Coca by Clark Griswold - Amati - 1:60 - first wooden ship model
I do love the ship you are building here. I personally built decades ago this very ship from a plastic kit by Imai (an easy build by the way). A question: did you make some inquiries about the original model? I f you want some information or pictures of it I will glad publish them here. By the way, I went to Rotterdam a month ago and made some picture of the "original", of which I enclose a pic.
This model is in my opinion one if not the most important historic ship model, as with the exception of a few Egyptian antiquities, it is is the oldest REAL scale model, and the only 15th century period model. It has always been THE source of inspiration for the best Santa Maria models, among others. It is to be noted that many authors suspect that the model's proportions are not correct (too short in length) and it seemed to have at the origin have been fitted with 3 masts, then the foremast was removed, and finally it was left with just one mast.
I wish you a lot of fun with this build.
JP
-
Louie da fly got a reaction from Clark Griswold in Coca by Clark Griswold - Amati - 1:60 - first wooden ship model
Making slow but steady progress. Seems to be going well so far, and you're overcoming obstacles as you come to them.
What kind of glue are you using?
