
HOLIDAY DONATION DRIVE - SUPPORT MSW - DO YOUR PART TO KEEP THIS GREAT FORUM GOING! (Only 20 donations so far - C'mon guys!)
×

kees de mol
-
Posts
796 -
Joined
-
Last visited
Content Type
Profiles
Forums
Gallery
Events
Everything posted by kees de mol
-
 Its all build by hemselve. He has a drawing of a beamtrawler in a book and the rest is done with pictures. The hull is carved out a piece of hardwood. I like his ships very mutch because the remind me from when I was a boy watching my father building a modelship. When I grew up he helped me to build models myself. Thank you for your kind reply. Yes it is strange but. But I am very happy with this page and the Englisg language gives us the possibility to communicate no matter where we are from. Leuk dat je me volgt op dit forum
- 434 replies
-
- 5
-

-
- pelikaan
- beamtrawler
- (and 2 more)
-
Thank you all for the repleys, the views and all the likes. I still find it amazing that my little modelship travels the entire world with on click of the mouse. Today two parts I finished. At first the block which is used to haul in the sumwing. Sumwing is the wing on which the net is attached. It flies over the bottom. In this block there is a big pully which I made on the lathe because it is very vissible. And I made the pulswinch. The ship works with pulsfishery (most Dutch beamtrawlers do). It means that the nets fly over the bottom and instead of chains (that goes trough the bottom) there are electrodes whitch give short electric pulses. The fish are disturbed and 'jumps' into the nets. The electrical current comes from a cables whitch is reeled in on the pulsewinch (2 on each ship) And a little off topic but I think it is appropriate. This ship is made/finished by my father last week. It is in scale 1/100 and 43 cm long. The ship is the 'old' KW88 Pelikaan. I made a few trips on the trawler when I was a boy. My father has always been an example to me when it comes to shipbuilding so I am happy he has build this ship.
.thumb.jpg.bea1ab39de90fd0edccce1ea8d15984b.jpg)
.thumb.jpg.83cc787d20b7699071e96b09ee14ee41.jpg)
.thumb.jpg.13557bc1a1cdba1d587277f9aff81842.jpg)
.thumb.jpg.fe48e144d29b48b0a55af2eb4df30310.jpg)
.thumb.jpg.012bc32b91d728a626d4d93085791279.jpg)
- 434 replies
-
- 17
-
-
- pelikaan
- beamtrawler
- (and 2 more)
-
ancre La Salamandre by tadheus - 1:24
kees de mol replied to tadheus's topic in - Build logs for subjects built 1751 - 1800
Continuation.... I really like that word. Thank you for the updates -
Maybe a little. But as you can see in my buildinglog I've been building in sections. At this moment the most sections are ready and now I have to assemble them to create a full ship. Then painting with the airbrush which I am really looking forward to. Kind regards, Kees
- 434 replies
-
- 4
-
-
- pelikaan
- beamtrawler
- (and 2 more)
-
Ahh tank you for the right name Nils. Sometime I have to guese the names. It feels like production when I am building these things but I didnt want to buy them from billing boats or an other brand. I think (hope) these blocks will look more realistic when the model is finished I am very happy to learn from other people because all the thinks I build I can do only because of other helpfull and gifted people. I am also happy to contribute to this forum so others may learn something from me. Please enjoy my build wich comes slowly to an end and hold on for the next build.... (rumour says it has sails on it... and wood! )
- 434 replies
-
- 5
-
-
- pelikaan
- beamtrawler
- (and 2 more)
-
Thank you Mark, Marcus and Omega and all the others for hiiting the like-button. I made some blocks again, 12 this time. They are blocks with 3 rollers. Here a few pictures of how I worked.
- 434 replies
-
- 11
-
-
- pelikaan
- beamtrawler
- (and 2 more)
-
Hello Mark I uploaded them again. Are they okay now? They look okay to me. regards, Kees
- 434 replies
-
- 3
-
-
- pelikaan
- beamtrawler
- (and 2 more)
-
Hello, This week I went to a modelshow with a good friend of mine and before we went to Germany we had some coffee in his house. He told me he had a present for me and came up with this beautifull model kit from Model Shipways. It is a motortrawler from Hull (GB) and the kit is released in 1954. All the parts are there. A hand made wooden hull, some other wooden parts, a full set of drawings and a box of white metal fittings in their original paper bags. I am very happy with it and I hope to build it in the future. But that will take some time tough. Kind regards, Kees
-
Hello foks I started to make some rigging for the model because there are a lot of blocks on this ship. The first ones to build are the jumperblocks. These are used to lift parts of the nets. Their shapes makes it possible to lift the nets, chains shackles, hooks and other stuff without damage. A very bad picture of the originals The housings cut out of thin brass sheet. And then the rolls. I made these on my small lathe. First I formed a toolbit/chisel and then I made the form Yes! Finely there are some video images from the cave Offcourse people: Do Not Try This At Home! And the results It is now one year ago that I recieved the drawings for this model and soon after that I started building. It all takes some more time than I planned but the results are more important to me. No building activity tommorrow because I hope to visit the Intermodellbau in Dortmund. It will cost me money though.... So please dont tell the missus
- 434 replies
-
- 13
-
-
- pelikaan
- beamtrawler
- (and 2 more)
-
Thank you. Happily I managed to make a full set for my friend because I had made some castings before and and the last castings were very small and went okay. The last 60ml I used for the exhaustpipe and I think it became a little to hot. Thank you. I build everything in smaller steps and I do a lot of thinking before I start to build. If you see the whole mast it is very complex but I look at it like it is a combination of 5 or 6 parts in one. But I make mistakes to and not everything goes as I wanted. I think every shipbuilder will know how it is. 3 steps forward, 2 steps back
- 434 replies
-
- 6
-
-
- pelikaan
- beamtrawler
- (and 2 more)
-
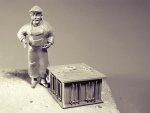
Thank you all for your enthousiasm I worked on the masts and they are finished now. I have build the reinforcemwent at the front of the masts. And a picture of the whole package with al the resingcasts and polyesterlaminated parts. With this package I hope to make someone happy, a man who was very helpfull to me in the past. Something funny. I used the last drops of pu resin that was left. But after casting this is what happened.
.thumb.jpg.a97d759c32d2ef658312c6a3c6770834.jpg)
.thumb.jpg.df178af8eb54ff00ded5a3fd78fa3439.jpg)
.thumb.jpg.7e1d890094aa9cae3edfcf09bdda8d40.jpg)
.thumb.jpg.6c2b21b942941f427afc4799edbb4ad4.jpg)
- 434 replies
-
- 10
-
-
- pelikaan
- beamtrawler
- (and 2 more)
-
Thank you. some of the wires are vissible because I couldn't place them in the tubes. I think it won't be noticable when the masts are painted. I learn a lot of these models and the most important thing I have learned is that I never build 3 models again in my life. In fact I've canceled two requests for models because next year I will only build for my self
- 434 replies
-
- 4
-
-
- pelikaan
- beamtrawler
- (and 2 more)
-
Some progress just because I am proud of it. I made the trawl-beams and glued them to the mast. The most work is in installing the ridiculously small led's On every mast are just 5 led's but it was a total nightmare to place them and their wiring. But it works I hope to make a small vid for you later.
.thumb.jpg.00a8bab77223419a2f509c052d65913a.jpg)
.thumb.jpg.b663c573afbe576f5fbad78de5f5dbc8.jpg)
.thumb.jpg.13c909f9cb7a24e1e8577e29b112b0b1.jpg)
.thumb.jpg.f424f9bce56c8e4961a3f86ac6d56094.jpg)
.thumb.jpg.28420afc301a6b38e82331fb19152bf0.jpg)
.thumb.jpg.3ae553f8d8351fc1b88cc7bdbc3dd1bb.jpg)
.thumb.jpg.3b614f06e806ca8ef53295d055cbab55.jpg)
- 434 replies
-
- 15
-
-
- pelikaan
- beamtrawler
- (and 2 more)
-
I did some work on the frontmast. The railings are done and the topmast with the furuno radars. Some wiring prepared for the steamlights later.
.thumb.jpg.ccf15ca576f0b12539155d0ca24f20ba.jpg)
.thumb.jpg.474063b6a6784d9b738785451a26ea88.jpg)
.thumb.jpg.6d18617a49e61d07c87d8380069e44df.jpg)
.thumb.jpg.18d2bf717830ee46d23dea5fe7ddf0aa.jpg)
.thumb.jpg.6a1ce37644edec6b3edcd53c4205252f.jpg)
.thumb.jpg.e25b0d2c0935a33a3ecb79916fe51d39.jpg)
.thumb.jpg.f4c6ecf7e753f78f4fcdcd9e71c99758.jpg)
.thumb.jpg.4702cc6ddbac11d2007f4b893812e8ee.jpg)
.thumb.jpg.bc8675c7c9875b762c9cd8b99d031bbf.jpg)
.thumb.jpg.b12b7a310ce2806d3d5adac1ff9a37ca.jpg)
.thumb.jpg.cf5228f8af2ac65b1c17b82d57ed4488.jpg)
.thumb.jpg.ad01e1f536c3c7512e6669b8c4a80722.jpg)
.thumb.jpg.cb2d4052a52b35622a86e2c6673ecf75.jpg)
.thumb.jpg.58d7de3b52dd9d98934526d5990c4699.jpg)
.thumb.jpg.378c7807d1a170ea181dac83d3c7de79.jpg)
.thumb.jpg.33f173f1433aa2455abce9b729cc4d1a.jpg)
.thumb.jpg.73a049f4ebd54e25e5e28493c0091410.jpg)
- 434 replies
-
- 13
-
-
- pelikaan
- beamtrawler
- (and 2 more)
-
I try to solder as fast as possible and I use solderingflux. To solder fast I set the Iron on a high temp arround 400 C and it is a thin tip so I only heat a small part. The thicker vertical brass rods I glue to the paper so I only have to worry about the thinner horizontal rods.
- 434 replies
-
- 7
-
-
- pelikaan
- beamtrawler
- (and 2 more)
-
Thank You all for your response and hitting the Like-button Ik started building the mast of the ship (In Holland we call it the voor(front)portaal but I dont know how it's called in English). I had some very good drawings whitch were printed out (very kindly by the guy who gave me the drawings) in scale 1/75. At first sight I thought it wouldn't be a lot of work and my plan was to post the mast here totally finished but I found out it was loads of work so I make an update to show how far I am now. I started gluing some styreen together and soon ther was a nice mast born at the attick. The masts are not ready but I hope to show them finished in my new update. Kind regards en Hartelijke groeten uit Nederland, Kees
.thumb.jpg.a39ff9f7bdcf6bafe4faca974ead1bc4.jpg)
.thumb.jpg.6d1d3c72d21f3647c5719735c1f5c81f.jpg)
.thumb.jpg.f95a2fa73ea843e922dbff52df8fe9b0.jpg)
.thumb.jpg.411898eb002a853f982ded23afca41cb.jpg)
.thumb.jpg.0187ae0e044cbd80a7b91c1e3854da95.jpg)
.thumb.jpg.03cfe3c46e0b411bbb1ecf41c64e1d40.jpg)
.thumb.jpg.255feb9e9040271ffc735ddf50cbba30.jpg)
.thumb.jpg.fcb93158f7401b7b9c6e233990810bd4.jpg)
.thumb.jpg.ccaa326c70eb35d39e37fc0894e9a0a5.jpg)
- 434 replies
-
- 19
-
-
- pelikaan
- beamtrawler
- (and 2 more)
-
Hello everybody. Thank you for the reply's and for hitting the like-button! I finished the keels and the bowthrusters. These thruster makes it possible to manoeuvre without using the rudder and without making forward motion. The props will be added later when the hulls are painted. Kind regards, Kees
.thumb.jpg.2dc54e60660770ffd7c6802e79340bbe.jpg)
.thumb.jpg.4a75ffcd0448c3bc75574134f33cc782.jpg)
.thumb.jpg.b68ac116800514e71cbefc5bb592b1b4.jpg)
.thumb.jpg.7395a0508a796819a2b05d31baa8882b.jpg)
- 434 replies
-
- 15
-
-
- pelikaan
- beamtrawler
- (and 2 more)
-
Very Hi-tech this build. I like it.
.jpg.2eaa9d640bf0be8613af82bd8f8f8a9c.jpg)
.jpg.62fe3e46d11ca63b2025426276c31c2e.jpg)
.jpg.74125b5841cde275cc88687394943671.jpg)
.jpg.70e9dbc68304f8a890a87cf37d8ee10c.jpg)
.jpg.8ca30eb90f2aa431e5a338162cb109f1.jpg)
.jpg.68f139a91472f6b50d45423300c6b2ae.jpg)
.jpg.e3ec5c620d9545f58a9992d3bb543a8f.jpg)
.jpg.3a99ee76c45f1a04c180d0728aa00497.jpg)
.jpg.2f9fe4322c0b37da718c504c355f1dc6.jpg)
.jpg.2d42251a31ac4745e1814b0b0e83a695.jpg)
.jpg.db459d96ab7f38317531a888f0dc5718.jpg)
.jpg.838eb00c1c1456add1425ec73aba6f26.jpg)
.jpg.6918f63d4cb29365c540e264e5e595c2.jpg)
.jpg.b91f0b55863028a180899f10731a7b7a.jpg)
.jpg.3d69bbfc9e5fd4e5e40a11312a87acd1.jpg)
.jpg.923857a30a49938f54ff34bf43b2a652.jpg)
.jpg.5c2f14d5e6c8c48cd52d884dea2ae332.jpg)
.JPG.baf0a7a942f1fe3e685999cad67737d8.JPG)
.jpg.3f50fbc9d590af7a87cdf65f5aaaa628.jpg)
.jpg.1de4bd399e429b3fe5e24cc18c10ad38.jpg)
.jpg.b6b9b88ce394cff2e71e8fd06ab03c9b.jpg)
.jpg.e1f8748e2d397fafd284d21a3f0cb7bd.jpg)
.jpg.e9addb83b21910903cfa952b8cecb2fb.jpg)
.jpg.8107b0dfd249b50d60a78535bbaf459e.jpg)
.jpg.b957c33192fe94cb19a4a3c1050611b8.jpg)
.jpg.1ac527ebcb754a28461b23b0202b3dee.jpg)
.jpg.831bb5d8a1765e6f8ce5793fc1f71436.jpg)
.jpg.d4bc0401d33a3ec1b2ba003d98343504.jpg)
.jpg.daf65f7b822c1cb3da14f5c9b841ceee.jpg)
.jpg.99a85f96aa7912c4803fb37042686e8c.jpg)
.jpg.43403f0a90a609e9aa861488b2aaa57b.jpg)
.jpg.fa3b8b7d0d7a9b0d2565b402c3e96114.jpg)
.jpg.c758e4f1f9057dc7d3ba99053eed8f8f.jpg)
.jpg.89872a3c41798b784dc753cce456ba2b.jpg)
.jpg.50a438e15a36ef235429469bbdaa79cf.jpg)
.jpg.7b1c1ba8d7d6199459de4f0e435cd524.jpg)
.jpg.afb5cb7ffafaa7e73d376fb65b6a1312.jpg)
.jpg.642488abd239ba405dcab5524415d48e.jpg)
.jpg.1d73a7ced230470101eca9ee979a764b.jpg)
.jpg.f3862519c8410d58fd64072bbeda1d4a.jpg)
.jpg.a067ed7c882b4e02856ad422ee55b99e.jpg)
.jpg.4e13bcef0a4bf9f92aad30a354659303.jpg)
.jpg.fa196cd0f555b61bc044f31ac51578be.jpg)
.jpg.0ccf77311b3512bb266c2ac98ec60708.jpg)
.jpg.66312198f50899a692bc08411d85ccc4.jpg)
.jpg.3069162f9dc67c2060ff64af4bbb186e.jpg)
.jpg.32fa31073e928f74094c930169620d68.jpg)
.jpg.aa5a3ff33cd134e17109d525e21c7a3c.jpg)
.jpg.dba963b76d5d7685d049df4b34a6cfac.jpg)
.jpg.f1482b6e91adffad0fe7ebaea0b88b7f.jpg)
.jpg.696bdfdb272521a9ab89e36e6889352d.jpg)
.jpg.efcedb123bac6f113b46185b99769a06.jpg)
.jpg.97bced2505d99fc1c1b90e448c8ed403.jpg)
.jpg.c37003e07e324a06d630892b0c75967c.jpg)
.jpg.f2067dcc01fab6a63b18566ed4cabf48.jpg)
.jpg.820305b6ec9ebc2d1374fbf9114965af.jpg)
.jpg.2629dc5e5406f8e8b8a42ef32c22b395.jpg)
.jpg.d93f08000ea9501229d437ae6d9d1ec9.jpg)
.jpg.714f40a281846095ae0b61832121195f.jpg)
.jpg.49ebef911d18aaf7f9f59061b6e827f8.jpg)
.jpg.1a49d9037ab9f5f70882b55c2657764a.jpg)
.jpg.22ba42c1524a563c2cab6de5b3f9cba9.jpg)
.jpg.61aecfd9fd2e1598990af5d31061d8e2.jpg)
.jpg.9b34d076fb9dfc85241863d07c7c598c.jpg)
.jpg.96227d3a83100a1ab380433532d2e84b.jpg)
.jpg.d111874d31771825e161fea896bb6193.jpg)
.jpg.5b0e9bf2181b01ee8ecd908882c88839.jpg)