hornet
-
Posts
690 -
Joined
-
Last visited
Content Type
Profiles
Forums
Gallery
Events
Everything posted by hornet
-

Straightening thin brass wire
hornet replied to vossy's topic in Metal Work, Soldering and Metal Fittings
Thin brass rod from 1mm and upward in diameter is available on EBay. I’ve found it to be useful for a variety of applications. Usually comes in a pack of 5 & lengths of 300mm -
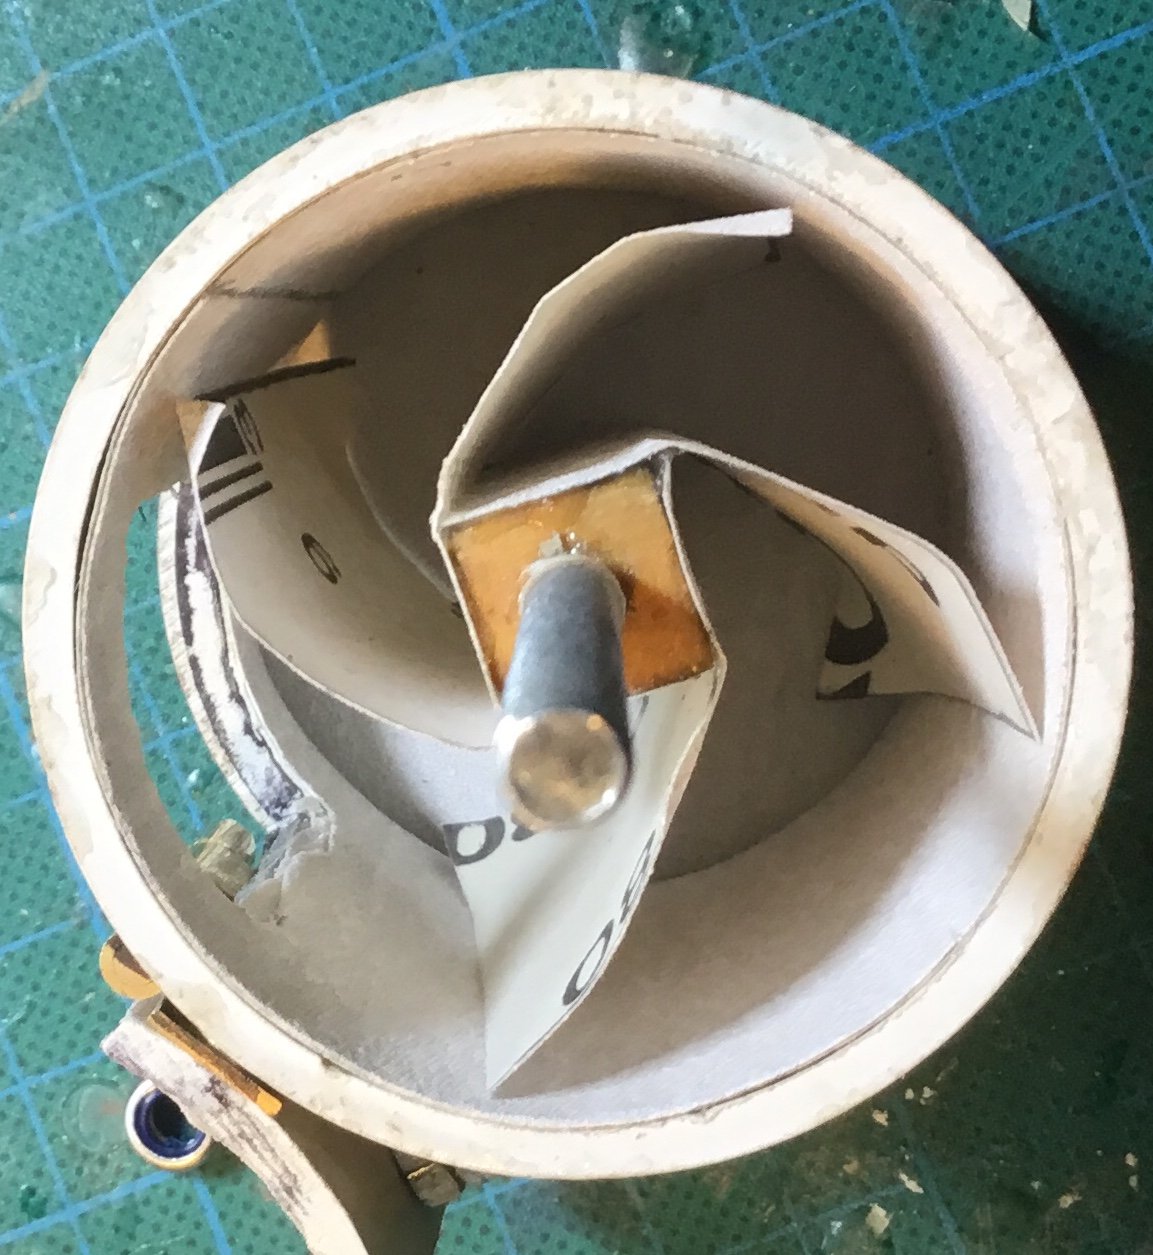
Building the PVC tumbler was a bit of work Y.T. but it was a fun project and gave me a sense of achievement (not dissimilar to building a model). I have to agree with Mark though, the inflexible blades on a food mixer may be a little harsh for the job. You might like to consider making a whole new sandpaper ‘impeller’ to replace the blades on the spline completely or cut the blades off the attachment and replace with something more flexible. Post your endeavours as I would be interested to see the results.
-
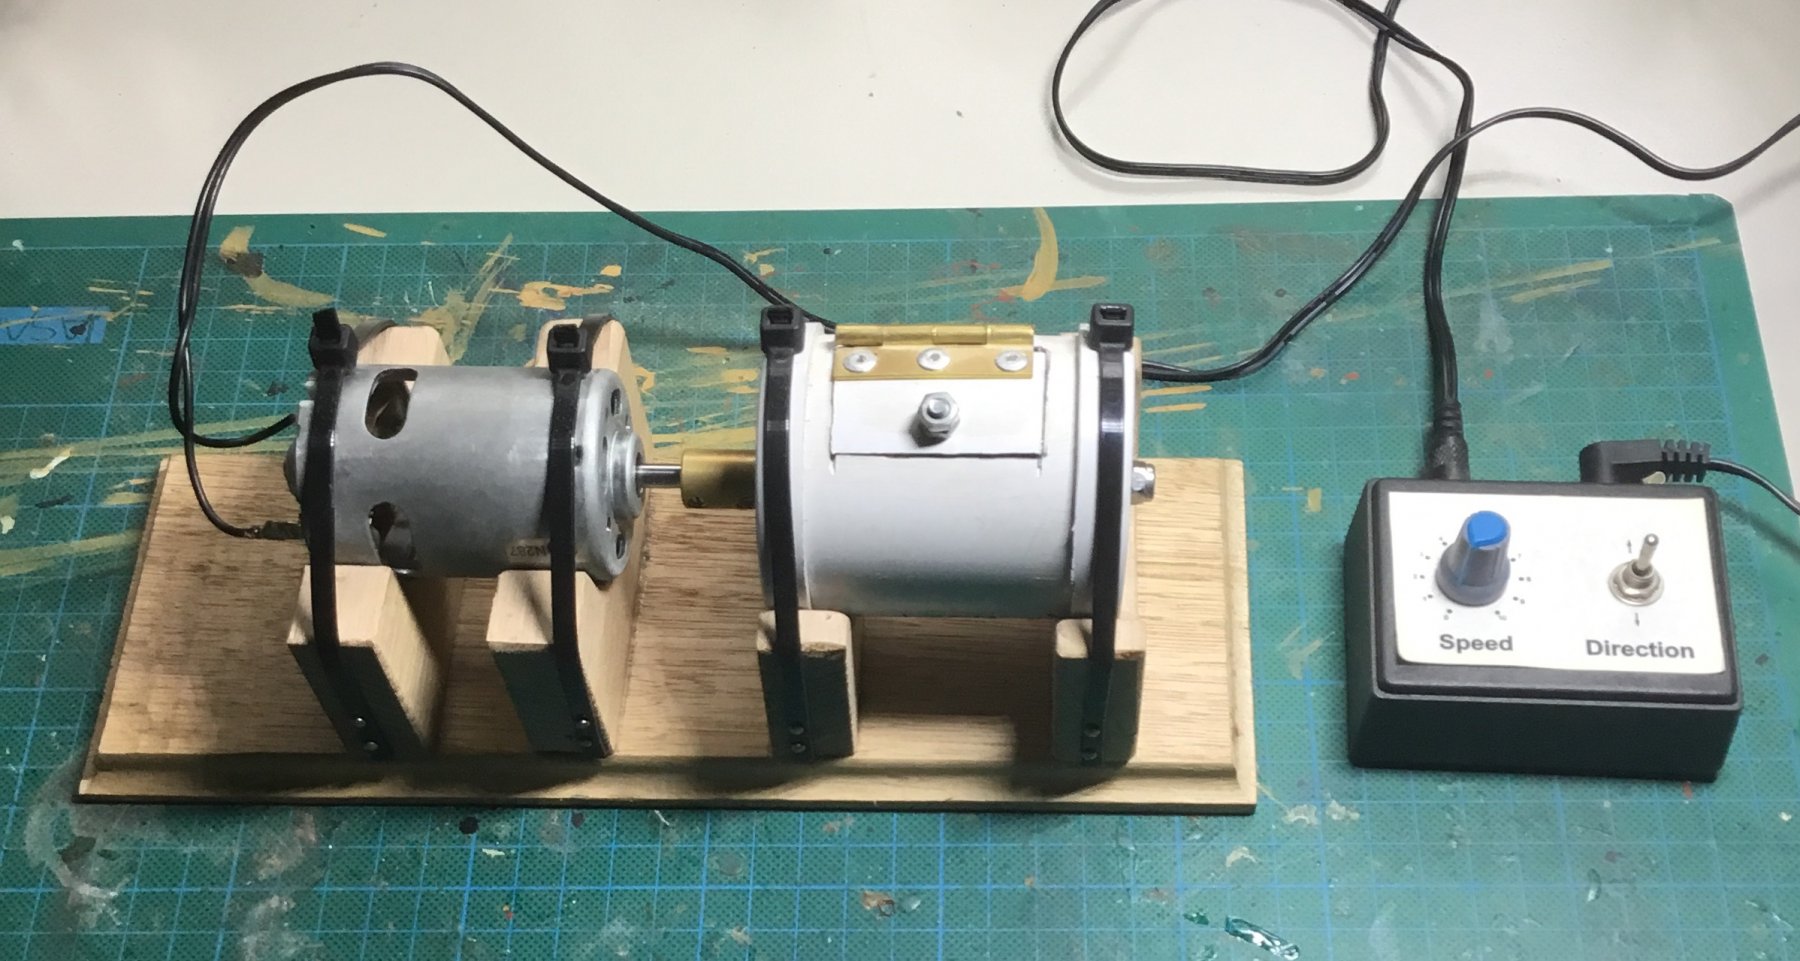
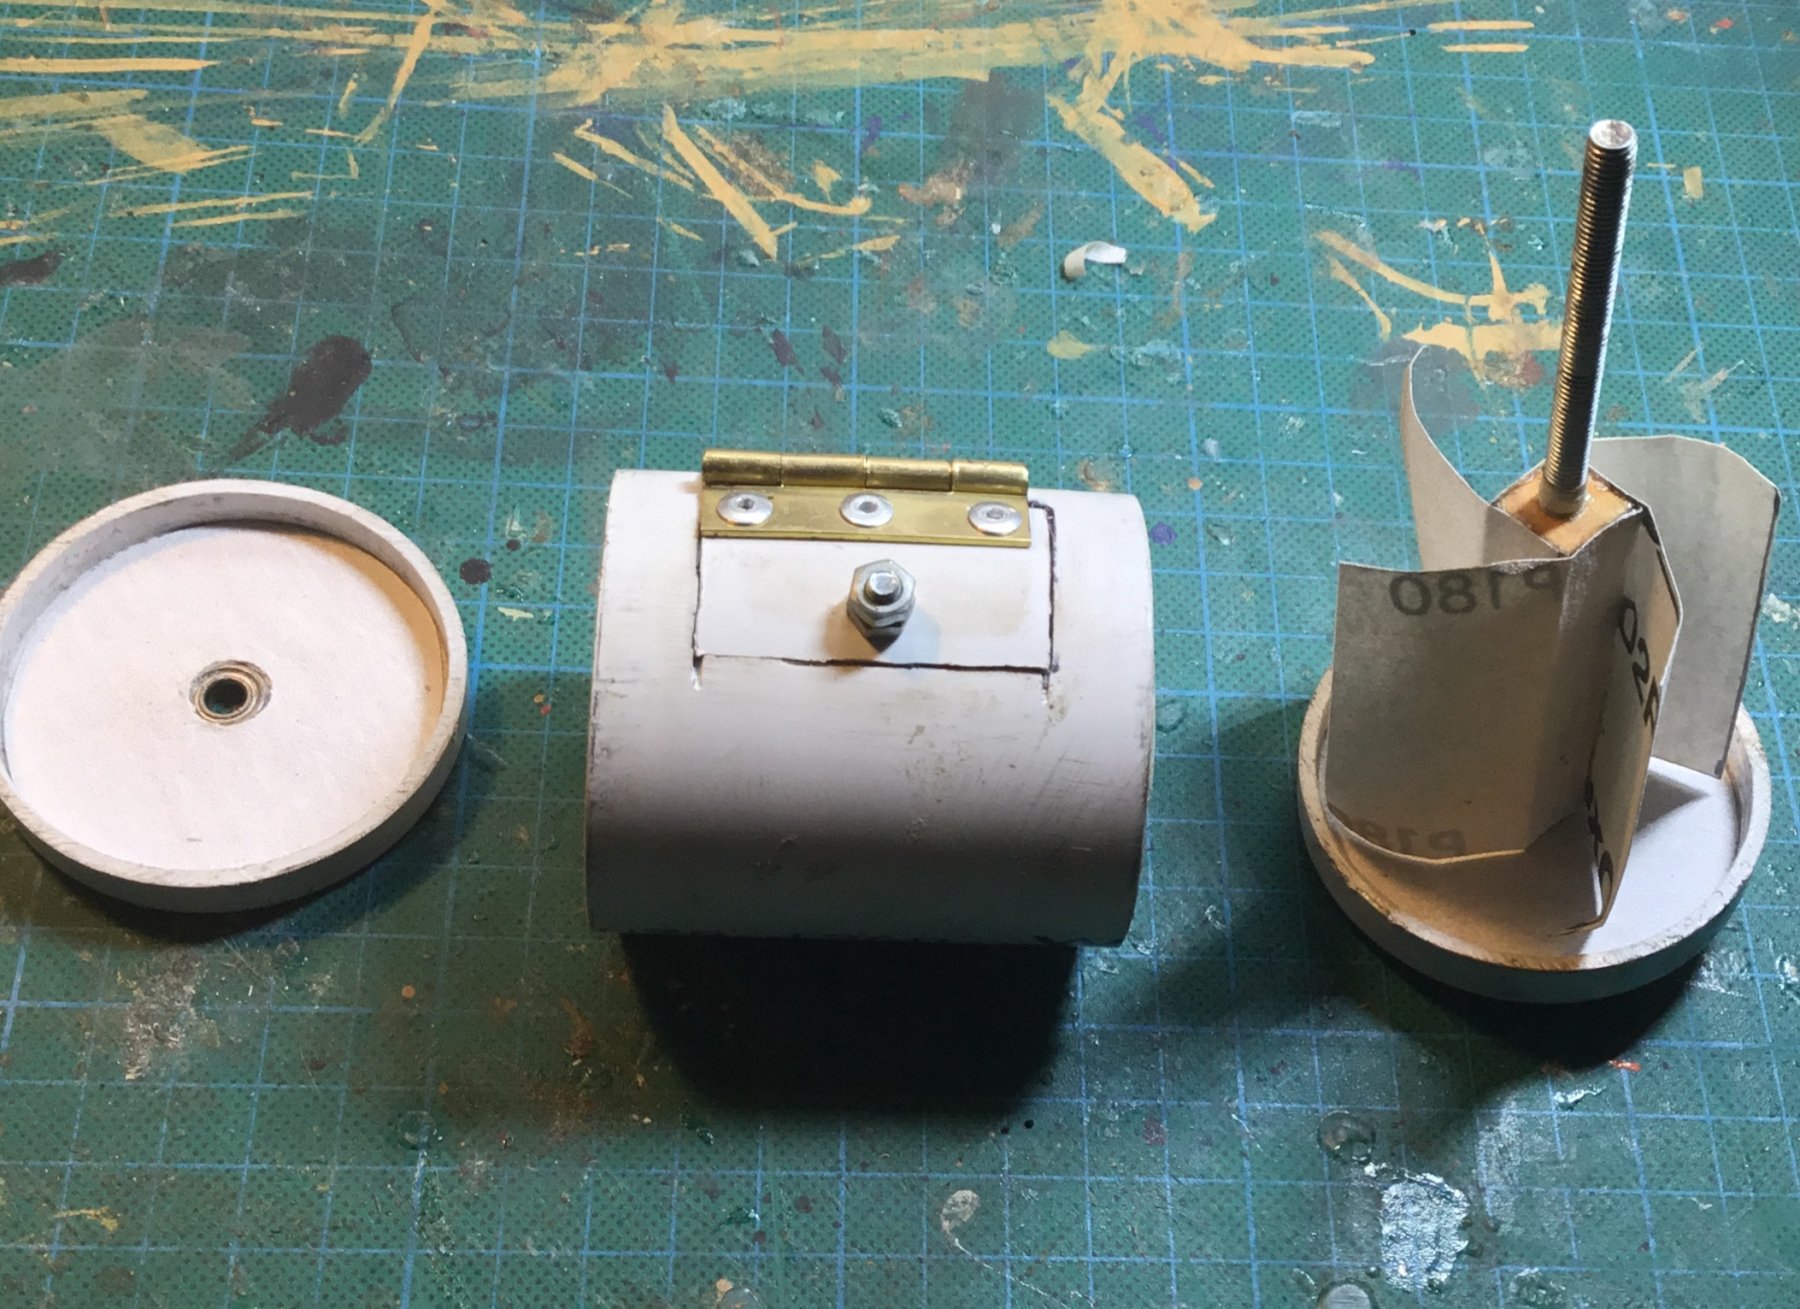
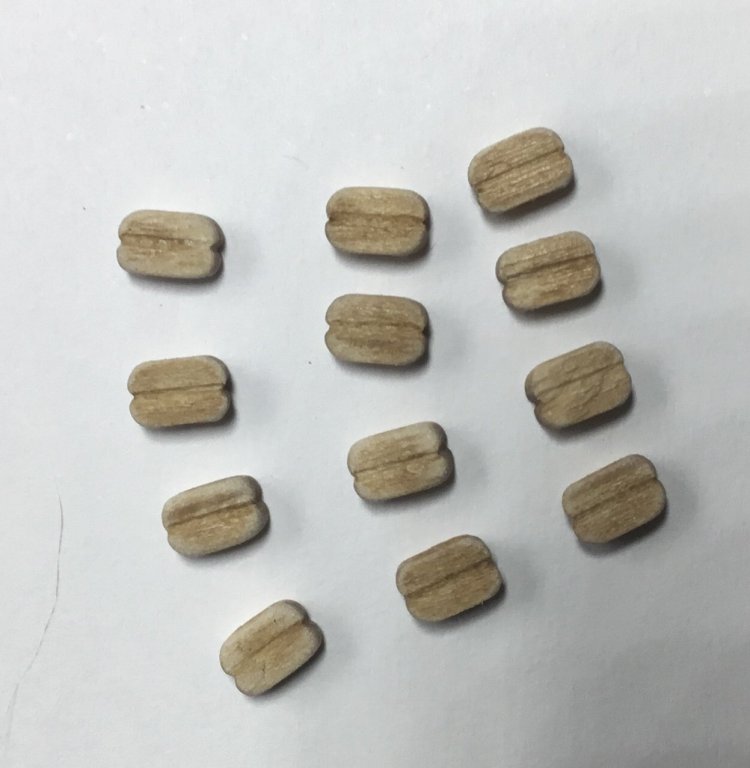
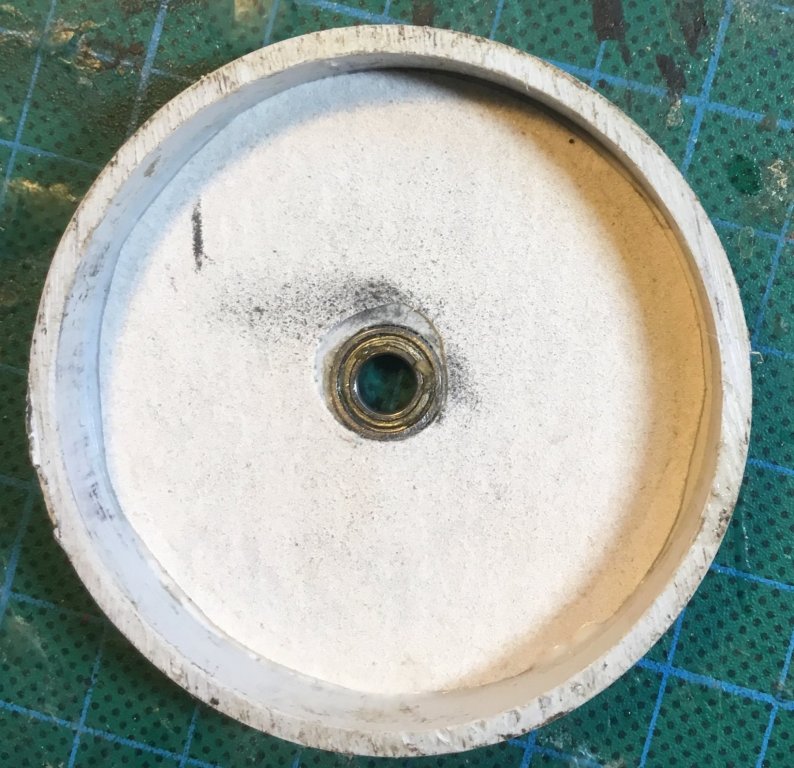
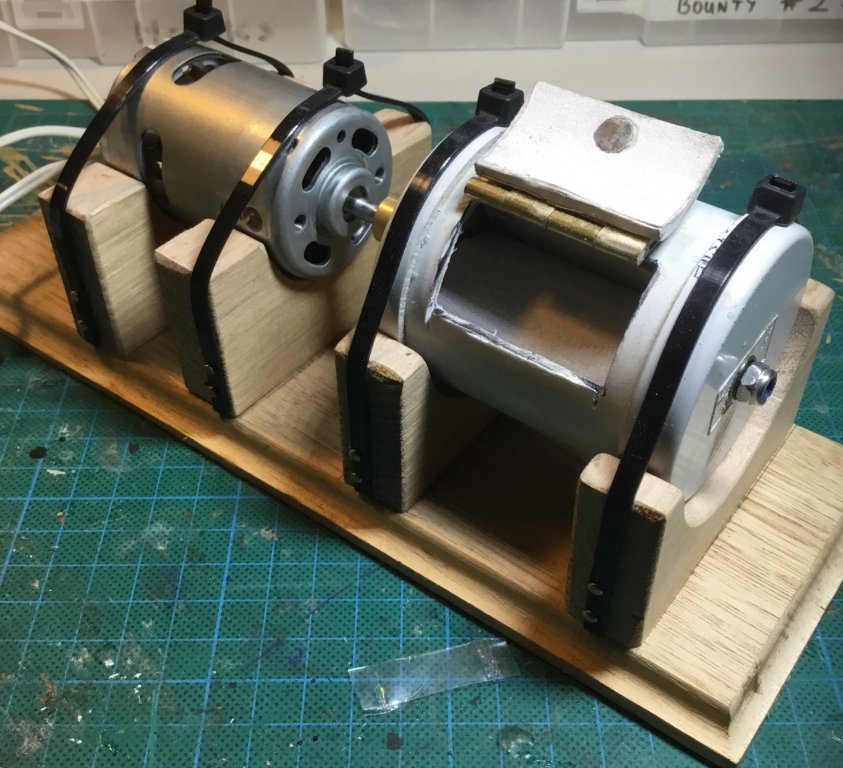
I use the variable speed control from my Domanoff serving machine ( which I also use on my home made rope making machine) I experimented with different grit sandpaper in the tumbler and ended up deciding on 180 grit. I tumble them for a couple of minutes but because I use the variable speed control the number of revolutions in the tumbler depends (obviously) on the motor speed - not too fast, not too slow. I check the blocks as I go. Another pic of tumbler and some tumbled blocks below.

-
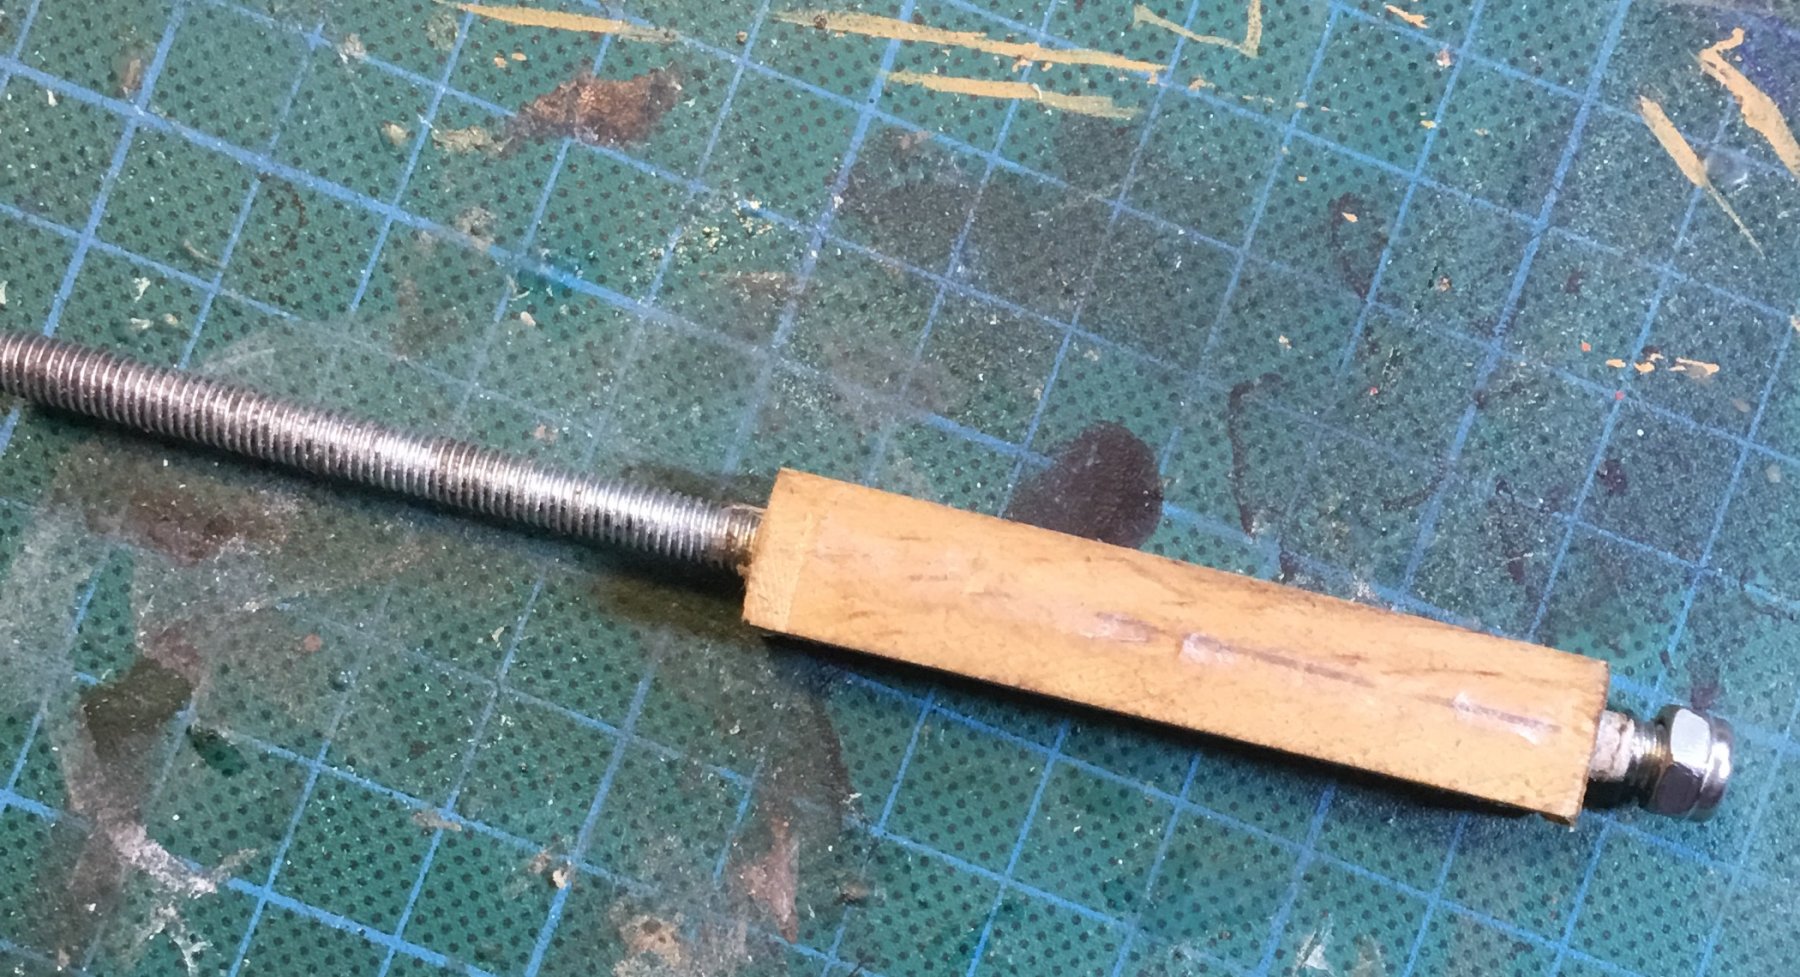
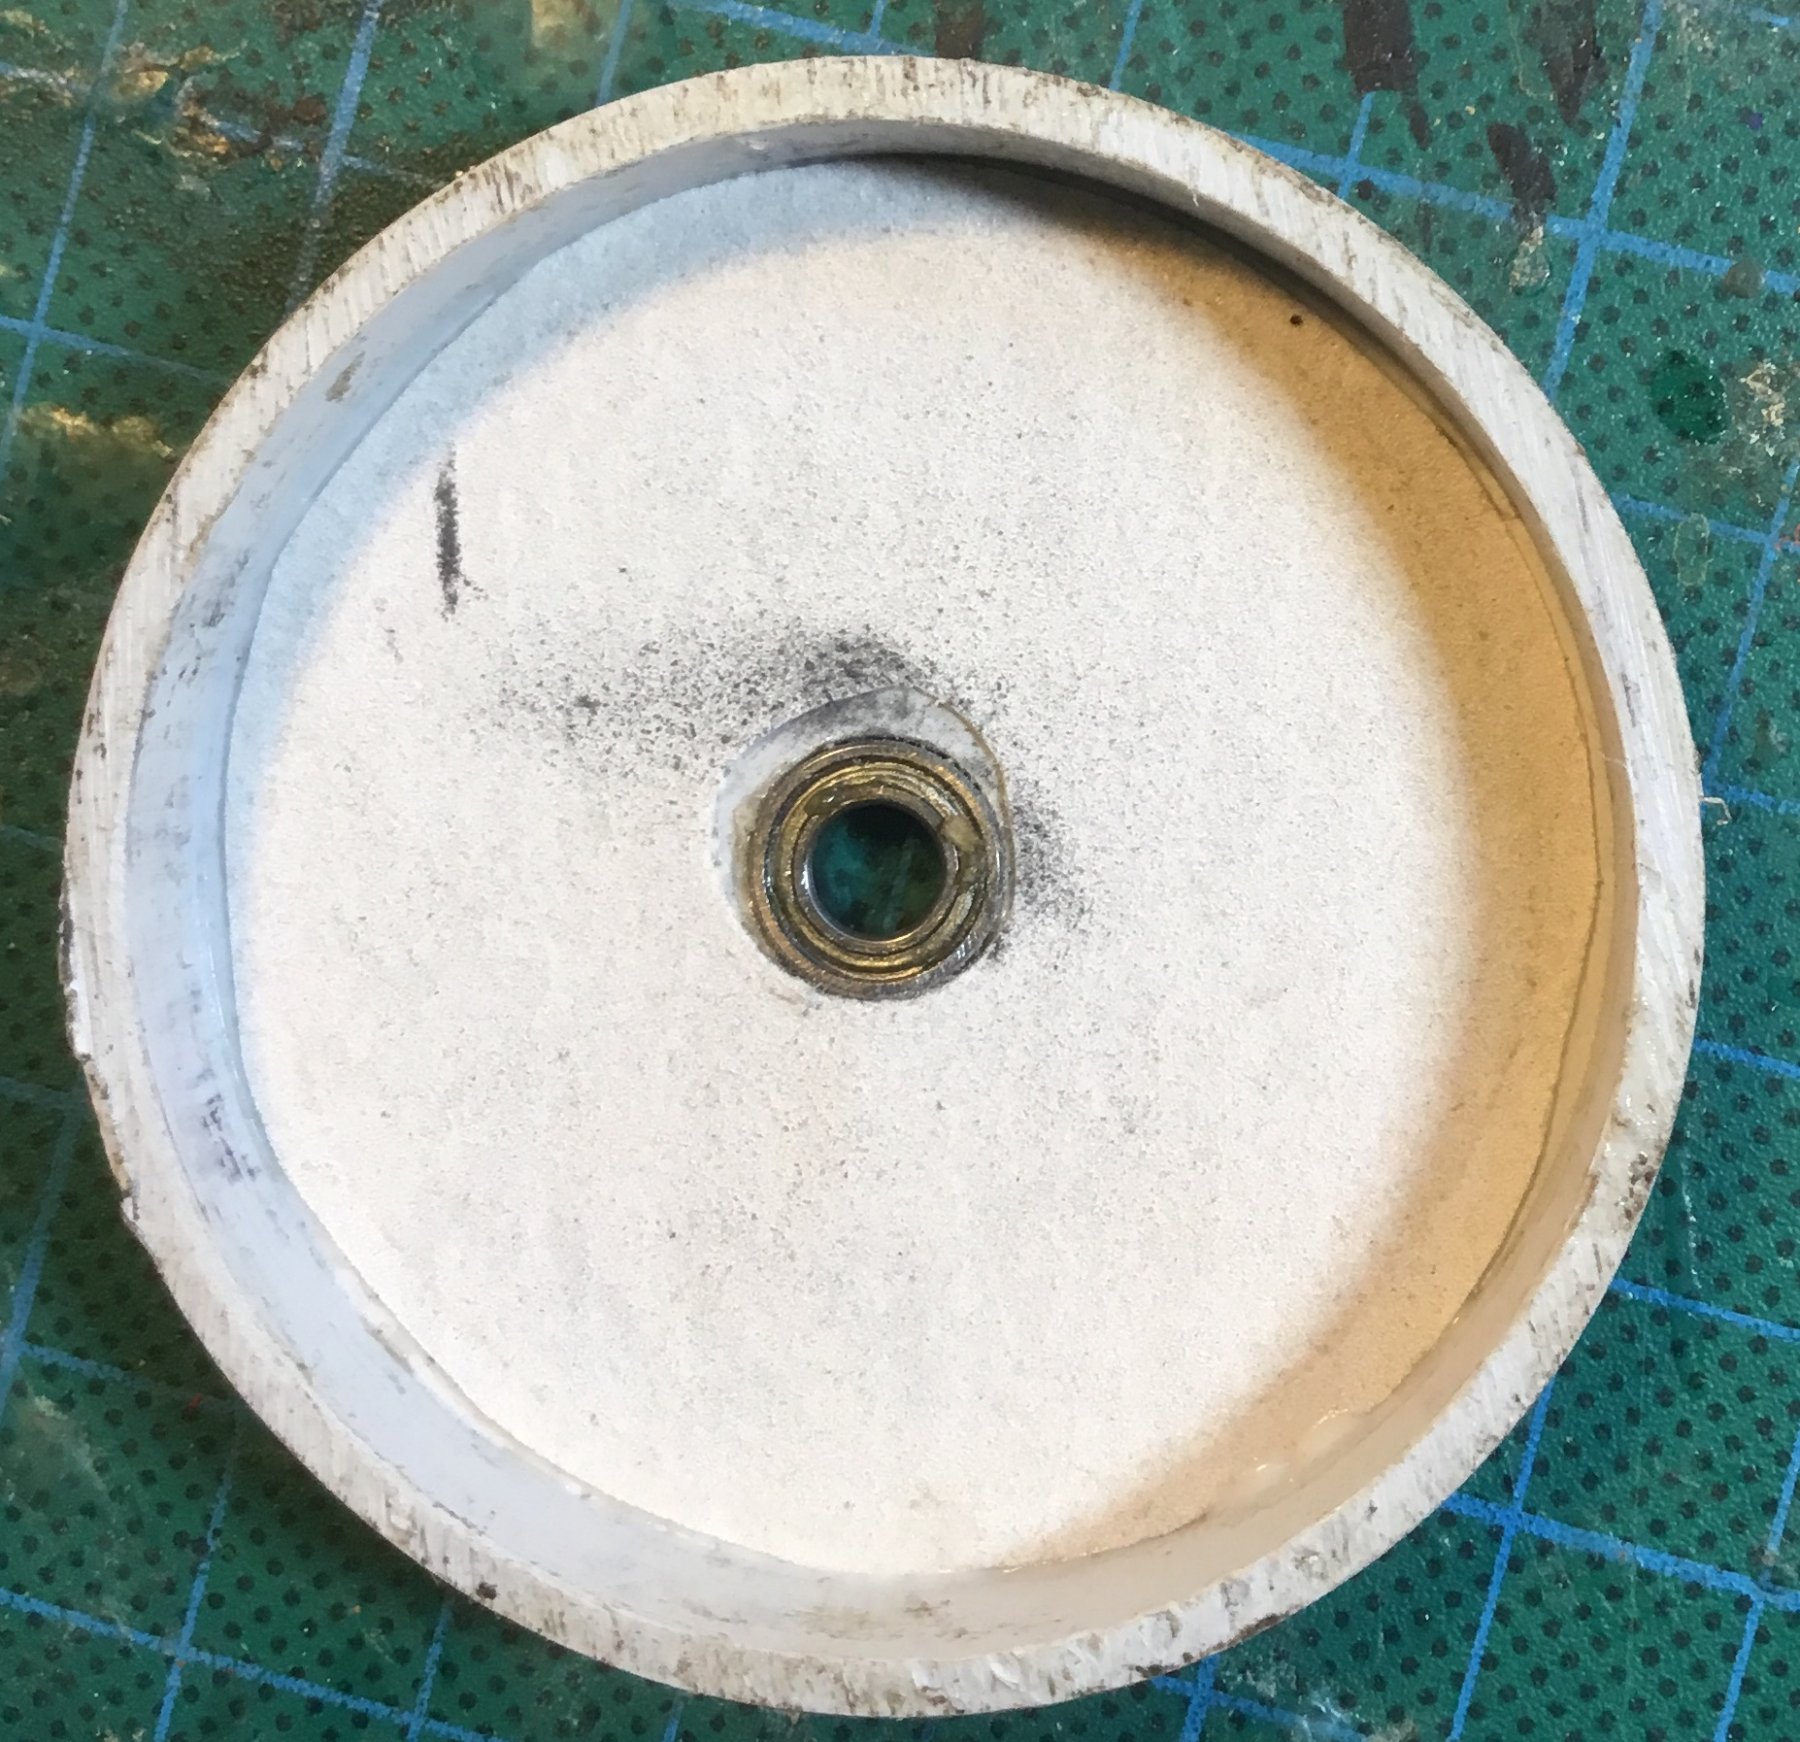
Just spent the day putting together a block tumbler using PVC pipe and end caps. Had to cut the end caps down a bit but it works well. The whole thing comes apart by taking one nylex nut from the end of the shaft. Bearings were obtained very cheaply on EBay. Added a small 12 volt motor and now I can tumble a handful of blocks very quickly. Cheers Steve.


- 10 replies
-
- 15
-

-
Newbie with a few tool questions....
hornet replied to CPDDET's topic in Modeling tools and Workshop Equipment
I’d probably add a keel clamp of some sort to your list. Check out the thread above for one that I made cheaply and have used on 10 builds. -
I have recessed a set of these into a piece of timber. Covers most sizes of dowel I use. Push dowel into recess, centre marked, job done. https://www.ebay.com.au/itm/8Pcs-Dowel-Drill-Centre-Points-Pin-Wood-6mm-8mm-10mm-12mm-Dowel-Tenon-Center-Set-/351989788914
-
Lots of great ideas here.
-
Hull filler.
hornet replied to bluenose2's topic in Building, Framing, Planking and plating a ships hull and deck
I have found that if you are careful about hull shaping as you apply the first layer of planking, packing out/ trimming planks as you go, there is very little need for filler of any sort. If you are concerned about small gaps you can make a wood dust & PVC paste to fill them. I you are concerned about planks drying out and cracks appearing you can use bandage gauze and PVC - a bit like fibreglassing on the inside of the hull. -
Anyone using electric plank bender?
hornet replied to MESSIS's topic in Modeling tools and Workshop Equipment
The beauty of the aeropiccola bender is the spring loaded roller attachment. It allows you much more control of the bend. I normally use mine while the handle is clamped in a vice. This allows me both hands to work the plank. You could do the same with this bender. -
Anyone using electric plank bender?
hornet replied to MESSIS's topic in Modeling tools and Workshop Equipment
These are the bees knee. Not sold any more. I have had one for over 30 years. If you can find one second hand, snap it up! -
For anyone who may be interested, this book is available on Apple iBooks (in Australia at least) for 99c (down from about $14) Written by Daniel Bryce.
-
Favorite Paint
hornet replied to Koa4225's topic in Painting, finishing and weathering products and techniques
Admiralty Paints for me. -
I hate making tree-nails
hornet replied to barkeater's topic in Building, Framing, Planking and plating a ships hull and deck
1 mm is easy with Byrnes draw plate but I have found that for a 1:64 scale model, 0.5 mm is more to scale. When drawing bamboo down to this size it I have found it does get tedious and fiddly. -
Been reading this series by J D Davies. Good yarn and very accurate with seafaring references and historical content. Available very cheaply on iBooks (in Australia at least) well worth a read.
-
- 3
-
-
1:64 Copper plating
hornet replied to Peter Y.'s topic in Building, Framing, Planking and plating a ships hull and deck
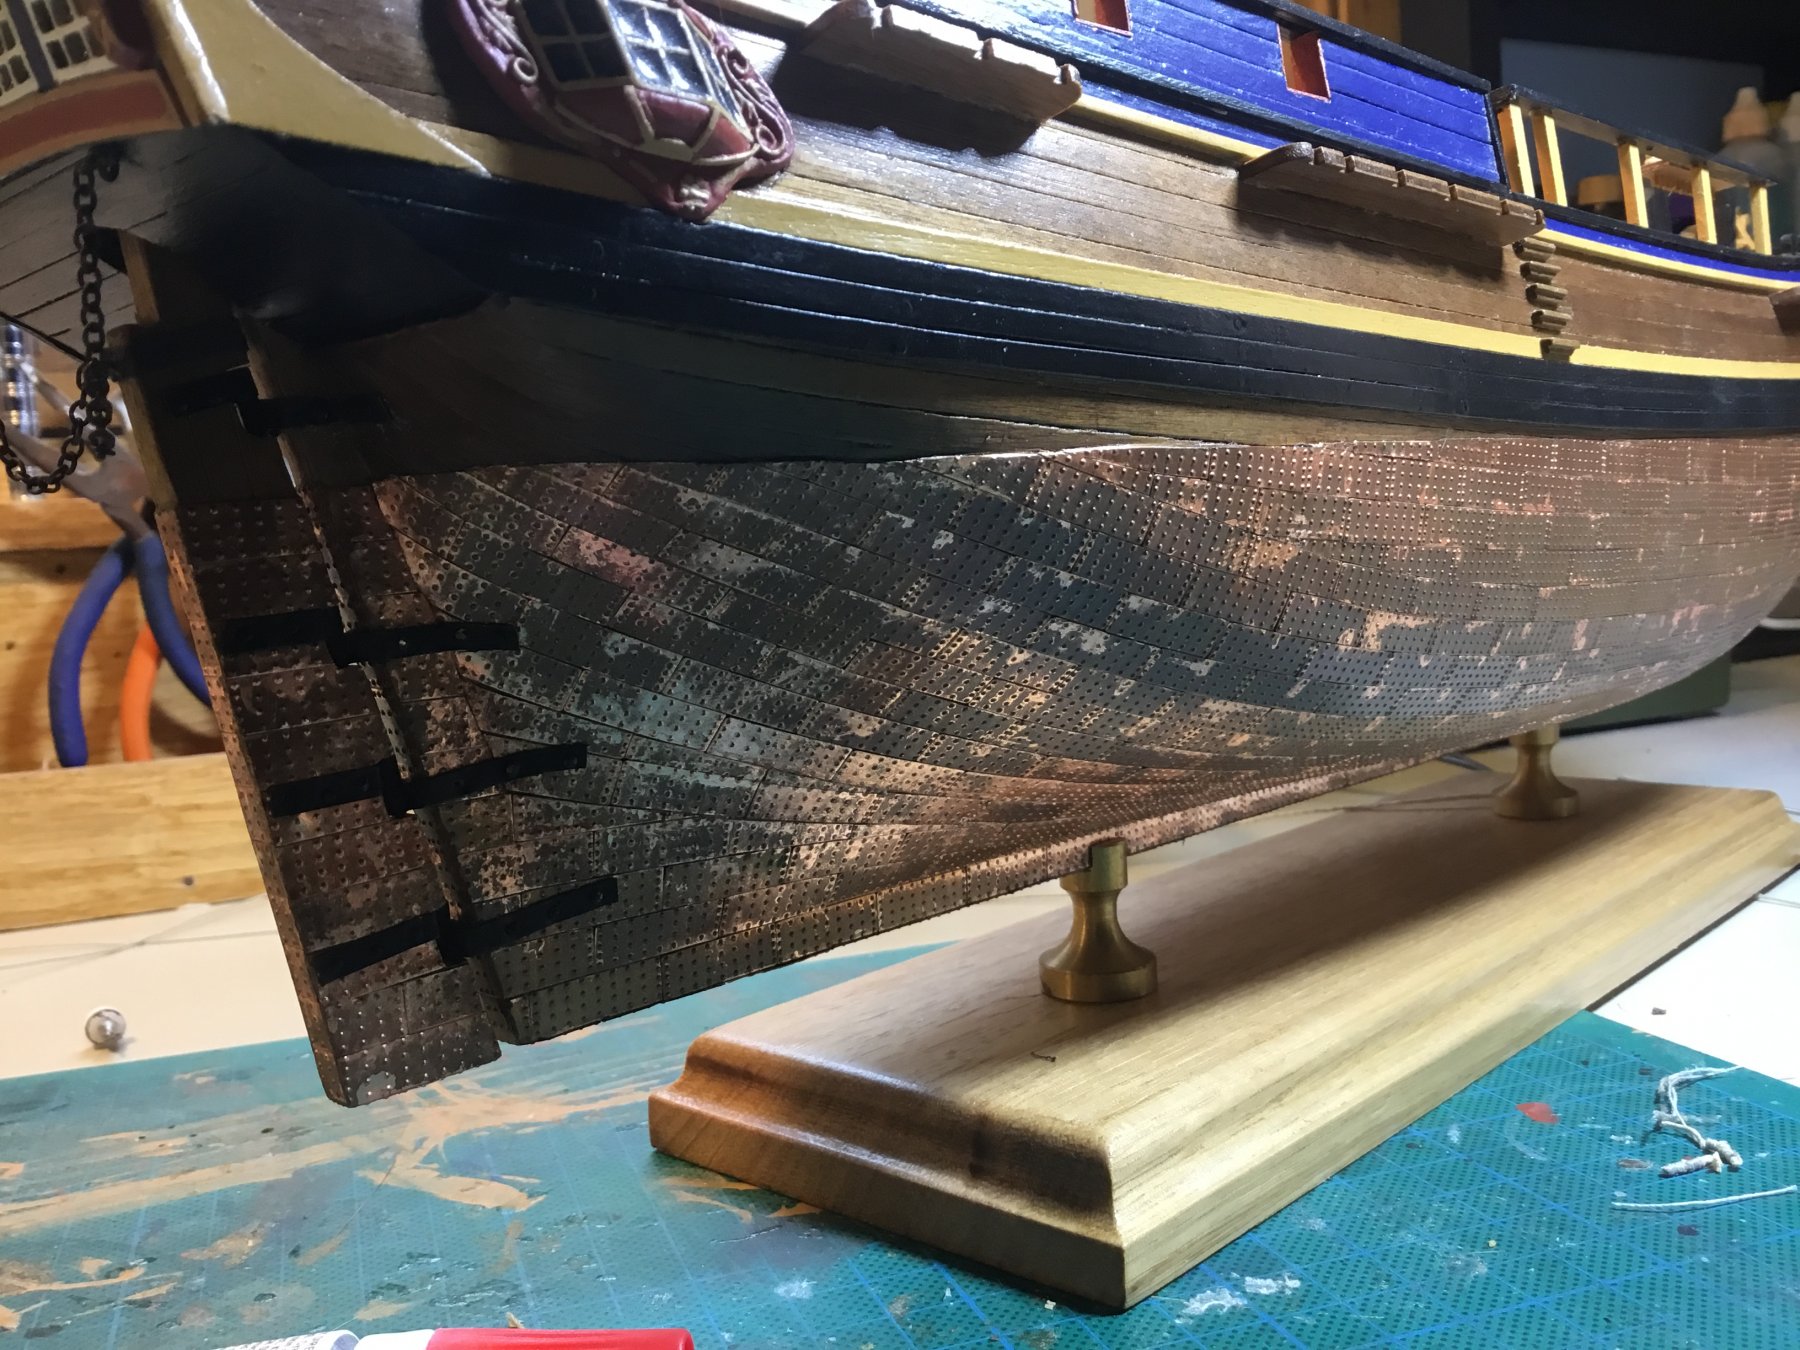
Whichever plates you choose, I probably wouldn’t overlap them. I think it would be very difficult to get a neat and tidy finish. I’ve done 3 models using your option 1 - I bulk ordered the plates from Cornwall Models and they were a bit too expensive to bin. While not completely satisfied with the size of the rivets/dimples on the plates, I was happy with the overall effect. If I was choosing again, I would probably go something with much smaller rivets but I still wouldn’t overlap. Below is my current build - HMAT Bounty with option 1 plates attached.
- 14 replies
-
- 4
-
-
- pickle
- caldercraft
- (and 1 more)
-
Google ‘squadron precision glue applicator’ It is specifically designed for applying CA glue. I use it when attaching copper plates. Works very well.
-
I also only use diluted wood glue on rigging. CA glue fumes are also very toxic. Cause flu like symptoms. I only use CA when fixing copper plates. I put puddle on the bottom of an upturned glass jar and use a glue applicator (like a metal hook that holds a drop of CA) purchased from a hobby shop. I only use CA while working outside on a verandah in the open air.
-
I have about 10 proxxon tools. The drill press is one of my favourites. Check their website if you want to see it in action. Excellent quality product.
-
Black wire for eye bolts/rings
hornet replied to Johnnyreg's topic in Metal Work, Soldering and Metal Fittings
2mm cannon balls can be obtained on eBay. Type in 2mm steel ball bearings. I was able to blacken mine but you could paint with dull (metal) black from Admiralty Paints. -
bending planks
hornet replied to bluenose2's topic in Building, Framing, Planking and plating a ships hull and deck
Ripping to 1mm and soaking, heating then bending should work. Maybe you could also score the rear of the planks at close intervals with a No 11 blade before attempting to bend. This has worked for me in the past. -
bending planks
hornet replied to bluenose2's topic in Building, Framing, Planking and plating a ships hull and deck
I have found mahogany to be very brittle at the best of times. I’m not sure that soaking it for an extended period will make much difference. I suggest you rip it down to 0.5 mm and use it as a veneer over limewood or something similar. -
Black wire for eye bolts/rings
hornet replied to Johnnyreg's topic in Metal Work, Soldering and Metal Fittings
I forgot to say, don’t leave items in the solution for too long, I have found that the blackening tends to come off if you do. I don’t know why. Rinse in fresh water and leave to dry on absorbent paper. Soak again if necessary. Some people dilute the solution and get good results, I usually use it undiluted. Experiment and see what works for you. I have collected the medicine cups that come with cough mixture and use them for this job, as well as to mix and dilute paint. Always use tweezers to pick up your copper/brass items so as not to get the oil from your fingers on them.This will affect the quality of the blackening. Cheers Steve -
Black wire for eye bolts/rings
hornet replied to Johnnyreg's topic in Metal Work, Soldering and Metal Fittings
John I’ve never found a situation where there was enough pressure on the ring to open it. So, for me, silver solder in this situation is unnecessary. -
Hi dgreen. If you haven’t read the tutorial from this forum on planking, I suggest you do.There are a few good ideas there. I use a ‘plank bender’ after soaking planks for 15 - 20 minutes in warm water. You can also use your hobby knife to cut slightly into the rear of the planks at close intervals (about 1mm apart) This makes bending without breaking easier and is not visible from the front. It is still best to soak the planks and use a plank bender as well. I pin the damp, planks to the frames and filler blocks until they dry (overnight) and they usually retain their bend. Never try to glue down damp planks as they tend to shrink when dried and gaps between planks result. Hope this helps Steve http://modelshipworldforum.com/resources/Framing_and_Planking/Plank_Bending.pdf
- 6 replies
-
- 1
-
-
- sark constructo
- on cutty
- (and 2 more)
-
Black wire for eye bolts/rings
hornet replied to Johnnyreg's topic in Metal Work, Soldering and Metal Fittings
Yes, blackening solution will work on silver solder. You may have to apply more than once to get s good coverage. Just wondering why you need to silver solder your eye lots though? Seems like a bit of overkill to me