hornet
-
Posts
680 -
Joined
-
Last visited
Content Type
Profiles
Forums
Gallery
Events
Everything posted by hornet
-
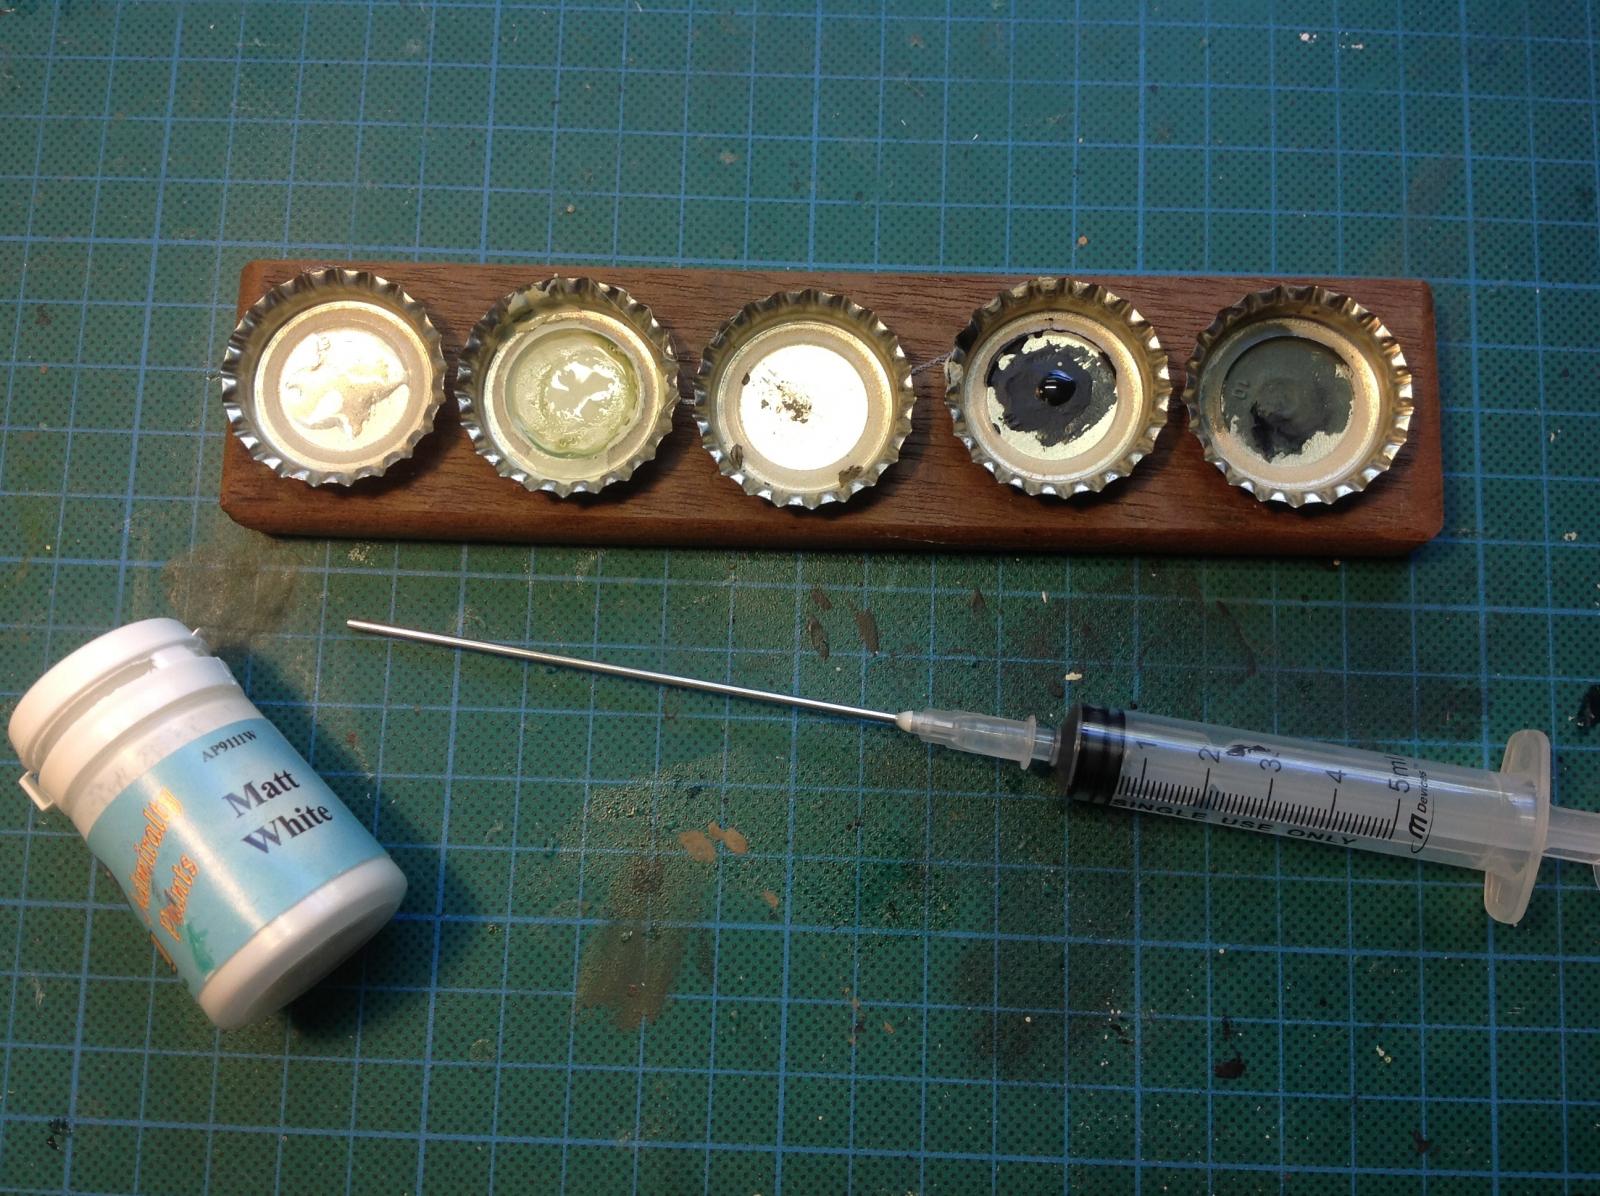
 When painting with a brush I used to work straight from the jar/bottle but I found this was often a little messy. Recently I purchased some dispensing needles and syringes very cheaply on eBay. These are great of removing paint from a bottle with the minimum amount of mess. They are also great for sucking out all unused paint from the bowl of my single action air brush. I also made up a simple paint palette using bottle tops glued to a piece of wood. I used some new bottle tops left over from by 'brewing' days but I am sure used ones would work just as well. The inside of the lids were lined with plastic so they were easy to clean (I only use acrylics) after use. Combined with the dispensing needles it means I can reduce mess and wastage when completing fiddly jobs with a brush. Cheers Steve
-
I get my Wattyl polyurethane at Home hardware. I think any brand of matt or satin would do the same job though. It's just that I have used Wattyl for years and change is bad
-
GLOSS varnish or polyurethane is generally not recommended for finishing your model - too 'shiny' and unrealistic. Many modellers use tung oil or something similar. I use MATT or SATIN polyurethane diluted 50:50 with low odour turps and applied with an airbrush. In Australia Wattyl make an Interior Estapol - which is what I use. If you don't have access to an airbrush you can use the spray can variety. Interestingly Australia's biggest hardware chain - Bunnings - does not carry Wattyl products any more. Other hardware outlets do though. Hope this helps. Steve
-
aluminum planking clamps
hornet replied to umeckt's topic in Building, Framing, Planking and plating a ships hull and deck
Or you could try making your own. I made these up out of plastic clothes pegs quite a while ago. http://modelshipworld.com/index.php/topic/3734-planking-screws-moved-by-moderator/?hl=%2Bplanking+%2Bscrews -
Why remove nails?
hornet replied to halfmoonheinz's topic in Building, Framing, Planking and plating a ships hull and deck
When fitting the first layer of planks, I do not nail them in place. I use planking screws. However, If you are going to nail your planks in place and not remove the nails when the glue is dry, it would make sanding the planks back to an even surface difficult. The main purpose of the first layer of planks on a double planked hull is to provide strength and the correct shape to a hull - through sanding and, if necessary, filling the surface with wood filler or a mix of PVA glue and wood dust. It also gives you practise at correctly shaping planks before fitting the second layer. -
Terry From memory, I too had to take quite a bit off bulkheads 9, 10 & 11. Frank has given you some very good advise about using a batten. From memory I had to add some `meat' to a couple of the other bulwarks using the method Frank describes - using 0.5 strips. Just make sure you get her smooth and level. It's better to get it right at this stage than having to overuse filler and sand the hell out of it later. I dug up a photo of my HMB Supply at this stage from my archives. Hope it helps. Steve
-
I have purchased both flax and linen thread quite cheaply from antique/ collectable shops. Apparently the spools they come on are collectable.
-
I would say that sanding back is your best option here. Just make sure that the Cargo hatches and hole for main mast line up with the keel. Looking at your second photo, this seems to be the case. If they are lined up, you probably only need to sand one side. If not, you will have to centre the main deck then sand both sides. BTW, when I built my Supply, I reduced the width of the main cargo hatch on this centre deck. If you look at the photograph of the model on the front of the kit box, you will notice how close this hatch comes to the rear of the guns. In my opinion it would have been too close for the crew to work them. I reduced its width by a deck plank on each side (about 1cm) Cheers Steve
-
Hi Terry Personally I find fairing in a challenging part of a build. Sometimes you need to take quite a bit of 'meat' off the edge of a bulkhead to get the lines right. It's hard to tell from just one photo / one angle, but it looks to me like the bottom of bulkhead 2 needs more fairing in so that the planks sit squarely on its edge as they come around onto the filler blocks. At the moment it looks to me as if the plank would only sit on the leading edge of this bulkhead. Have you bent up a plank yet to use as a guide to check if it sits snugly on this bulkhead? Cheers Steve
-
Caldercraft make a range. They are sold by Cornwall Models. (See link below) or you could scratch build one as I did on my HMB Supply. http://www.cornwallmodelboats.co.uk/acatalog/caldercraft-ships-boats.html
-
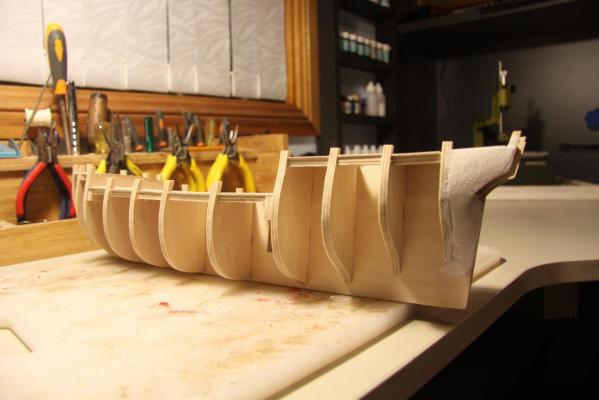
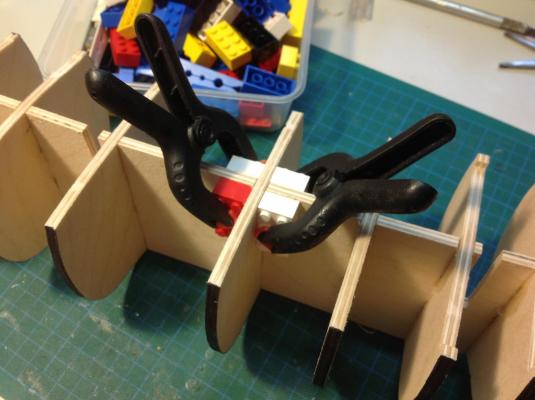
Hi Terry Another thing to check is whether or not the dowel for the two masts slides easily into the two slots provided for them in the keel. From memory one of them was a bit tight on my Supply. Easier to adjust this now than after planking and deck had been fitted. I did not cut a rabbet on my Supply. Nor did I fit the bow piece (part 23) before the first layer of planking. Caldercraft actually sent me the wrong board containing the bow piece and I ended up scratch building one I completed the first planking, then cut the planks level down the bow, THEN fitted my home made bow piece. The fit was very flush. I then fitted the second layer of planking. P.S when you go to square up your bulkheads, using clamps and Lego blocks works well. See pic below. I also colour the edge of the bulkheads black. This allows me to get a more even result when fairing them in. Bow of my Supply below:

-
Hi Terry I used balsa for bow and stern fillers on my 'Supply'. I gave the balsa a few coats of watered down PVA glue after shaping and fitting to try and give it a little more strength and stability. It worked OK. On past builds I always used pine blocks as fillers and I think I will go back to them on my current build. While the pine is a little tougher to shape, I think it provides a more solid base for the planking screws to screw into when holding planks in position while glue is drying. This is particularly the case when dealing with buff bow sections or some of the tight curves which occur at the stern. There is a great tutorial on shaping bow and stern fillers in the planking and framing link on the NRG site. If you haven't read it, I suggest you do. Steve
-
Terry I ended up making my own pintles & gudgeons (rudder hinges) for my HMB Supply. See link below. Good luck with your build http://modelshipworld.com/index.php/topic/4679-the-kit-bashers-guide-to-the-galaxy/page-5 Steve
-
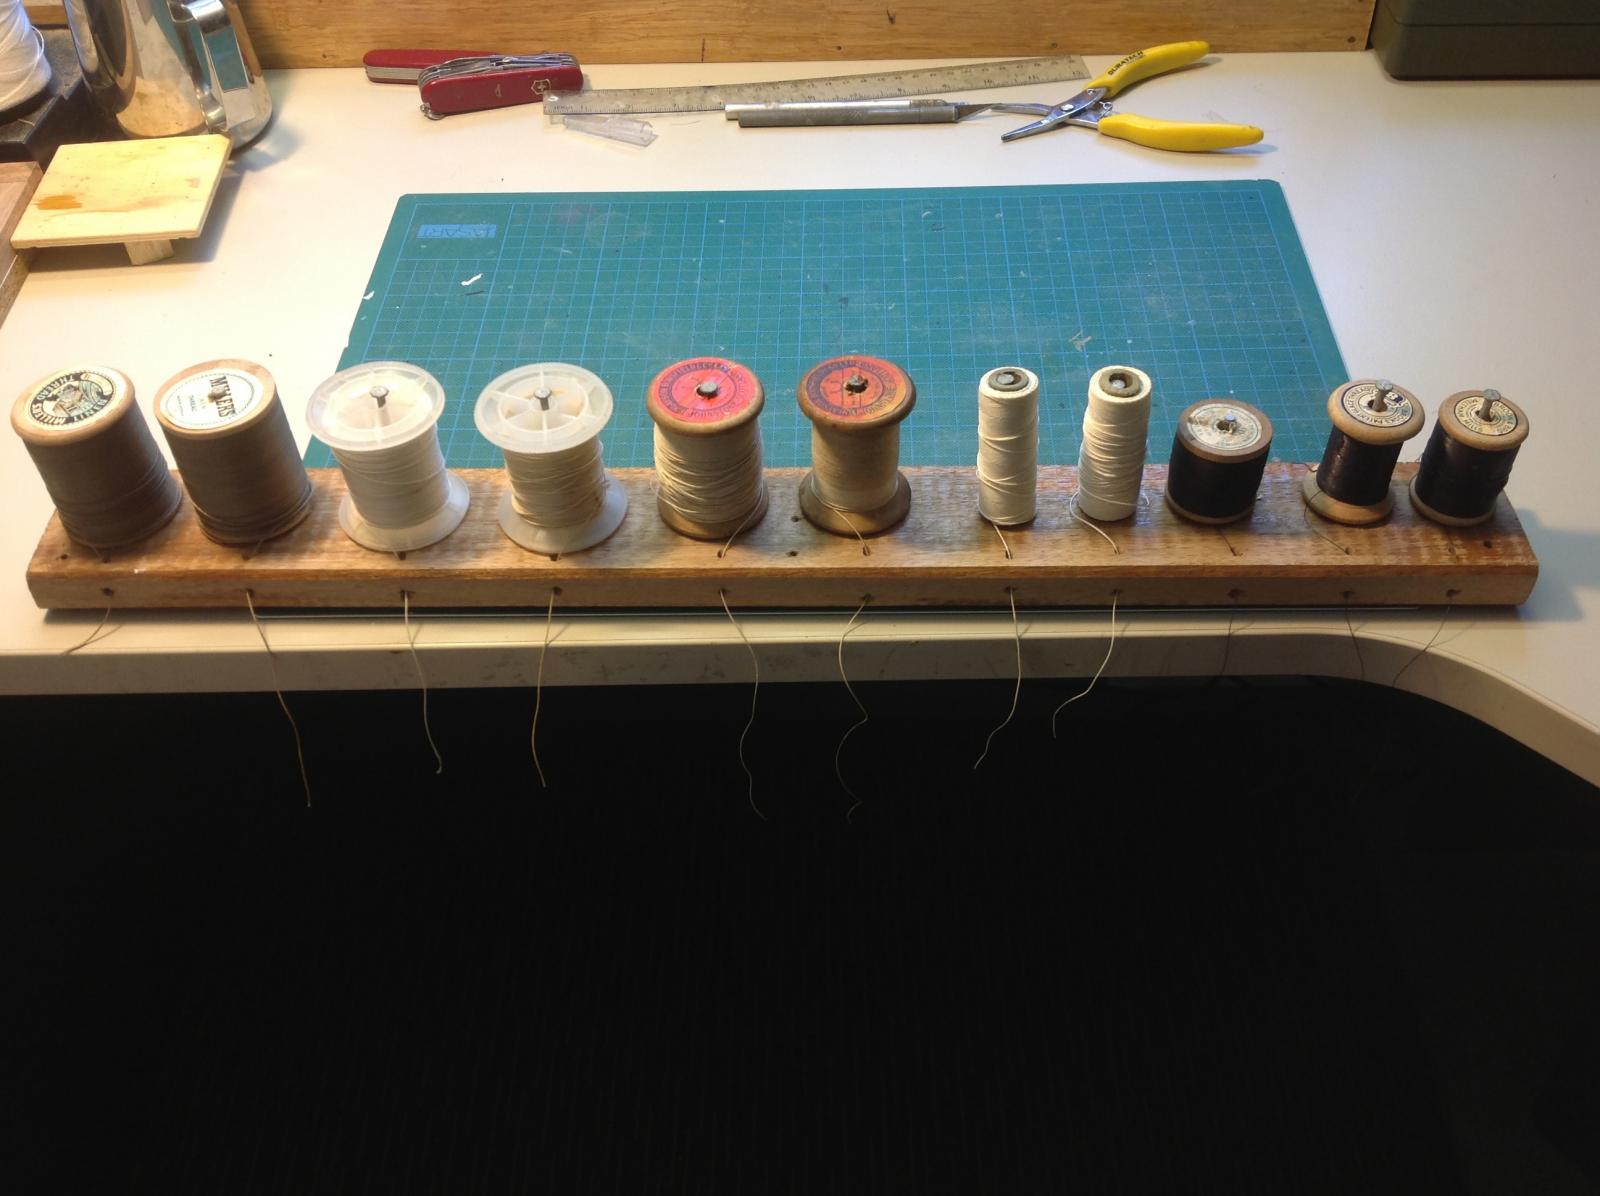
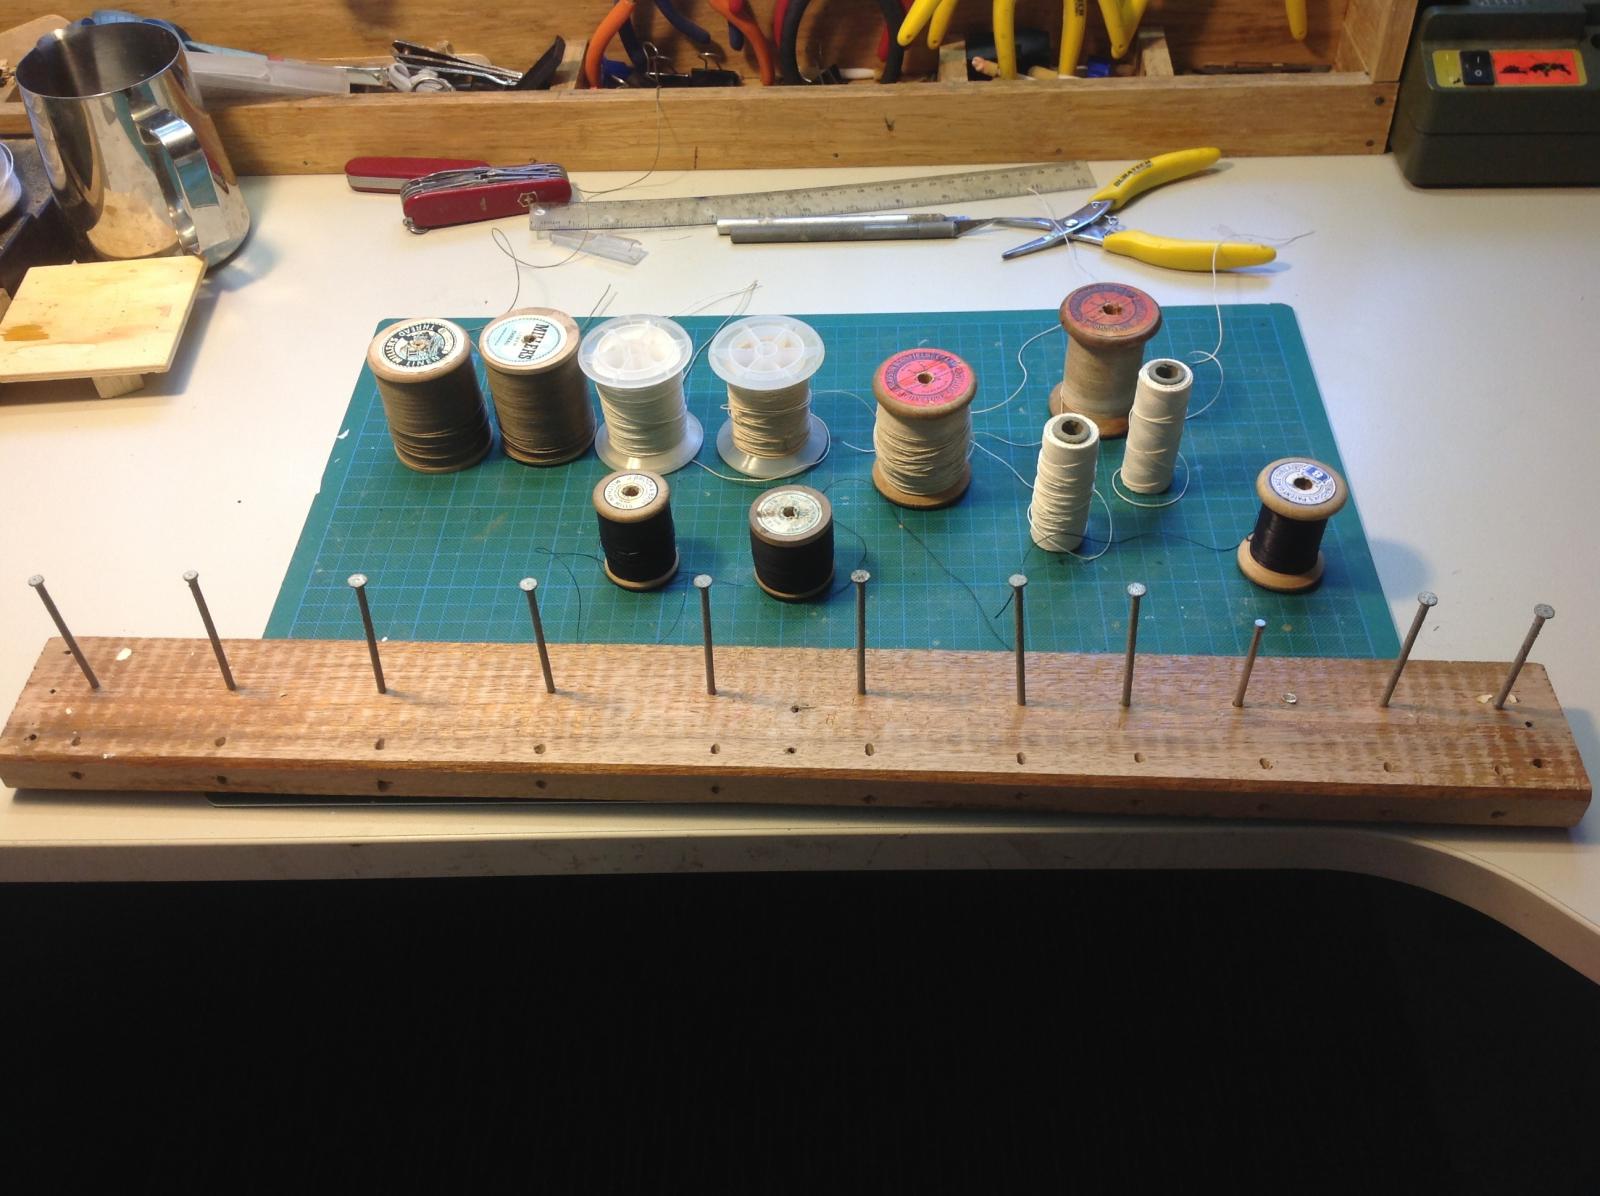
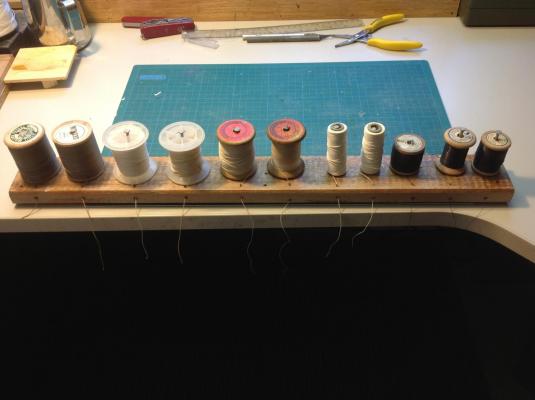
I used to store all my threads in an old fishing tackle box but got sick and tired of them getting jumbled and tangled so I thought of an alternative. I drilled holes ( at an angle) along the edge of some scrap timber. I lined some nails up with the holes and then placed my spools of thread on the nails and pulled the ends through the holes thus creating a dispenser of sorts. I have a few like this. I have collected quite a lot of 'antique' cotton and linen threads from antique and collectible shops. They are relatively cheap - apparently the spools are collectible - and, in my opinion, are often better quality than the modern stuff. Hope the idea helps someone who also suffers from tangled thread syndrome. Cheers Steve

- 2 replies
-
- 11
-

-
Hi Mark. When I first built my rope walker, I was hoping for it to be hand powered. However, if I wanted to make up a rope of a decent length it was far too slow to be practical. I now run mine with a variable speed battery operated drill. It is much easier. I've not seen the ME one but I would guess you may have the same problem with it as well. Steve
-
You can also make your own rope walk. I have done this using Lego, scrap timber, perspex and a few screws, nuts and bolts. It may not look as flash as commercially bought rope walks but it cost me very little and does the job. There are lots of ideas that you can copy ou YouTube.
-
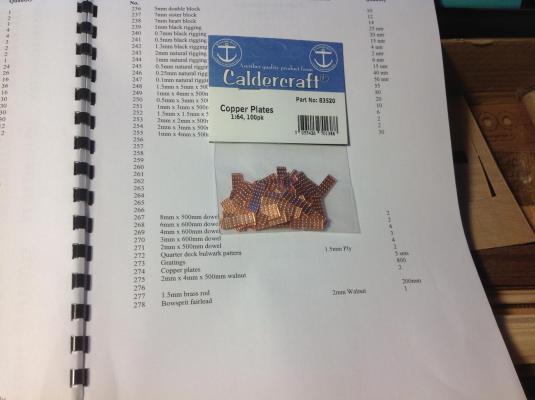
Just re-reading this thread and realised that the number and size of plates for the Amati 1:60 version could be similar to my current build the Caldercraft Bounty (1:64) Supplied with this kit are 800 plates which you can get from Cornwall model boats. I bought some from them a while back for my HMB Supply build. It was actually cheaper to get them from England than buy locally - although our $$$ has dropped in value somewhat since then They come in packs of 100
-
Made the leap, the Caldercraft HM Brig supply
hornet replied to Telp's topic in Wood ship model kits
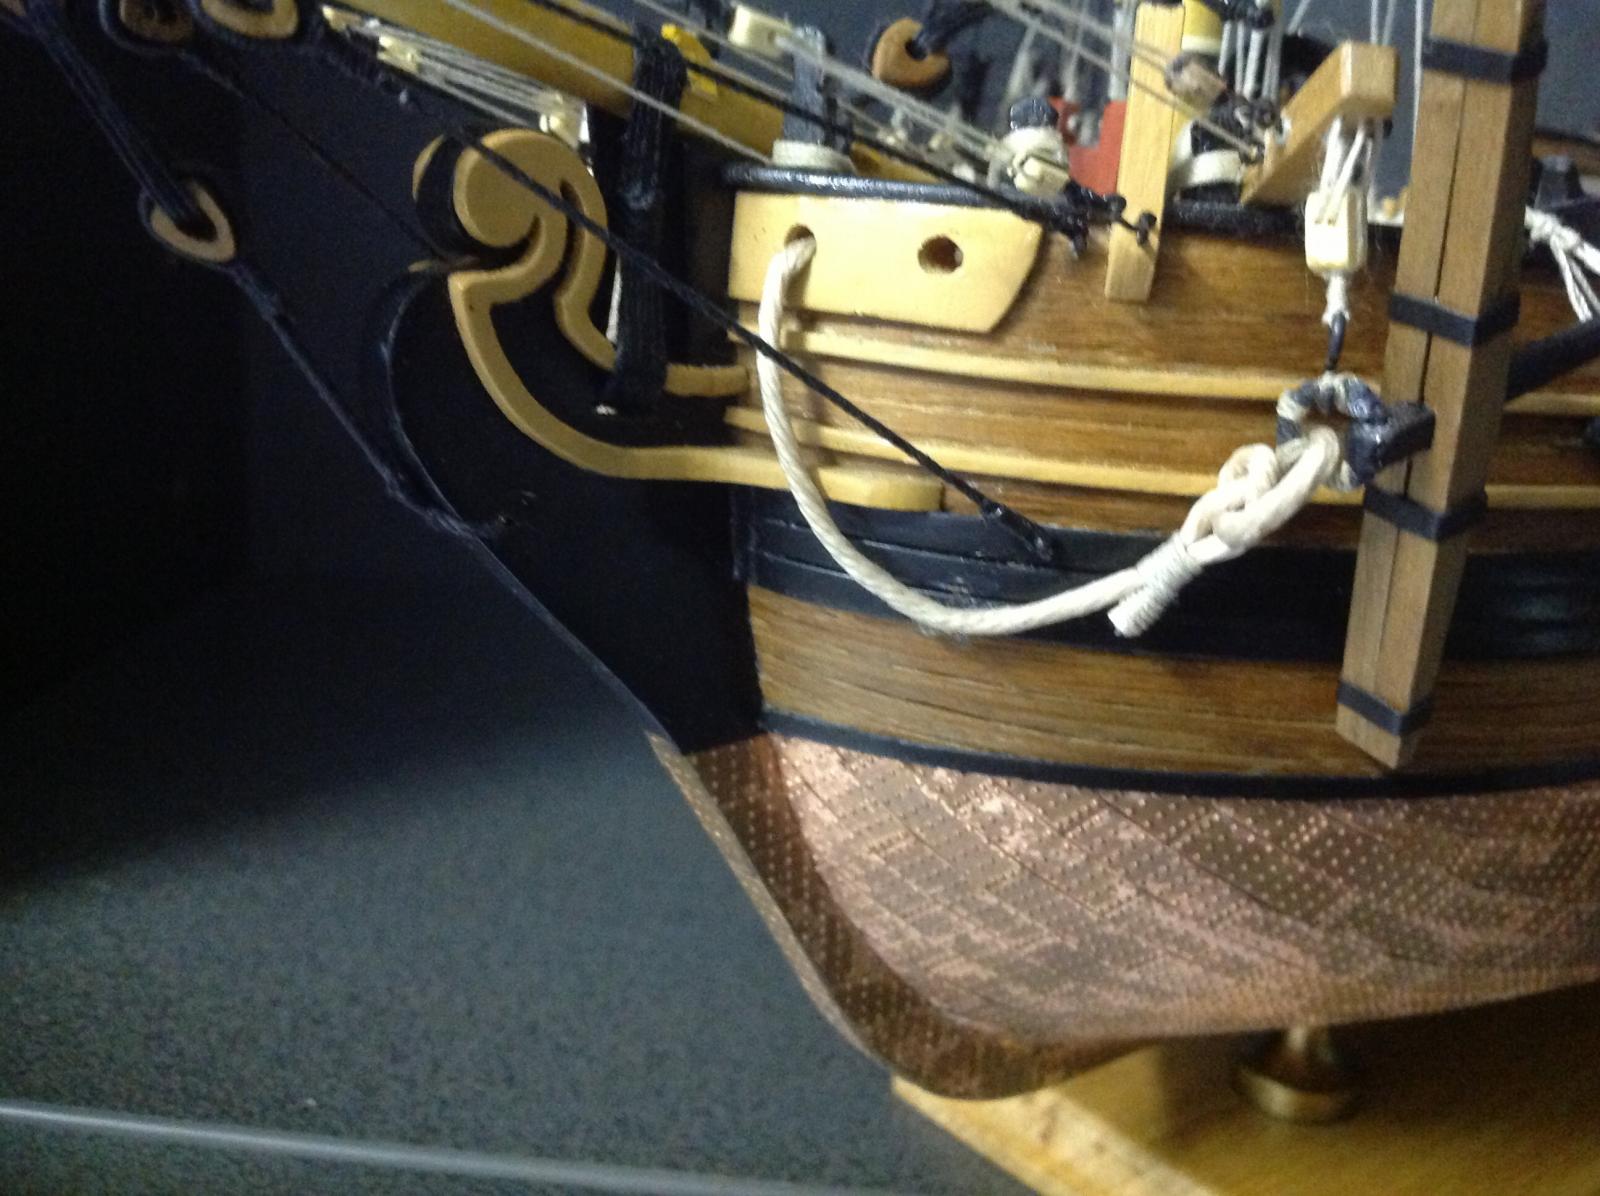
Hi Terry. Having completed this build myself, I can say that there is very little literature out there about her. I used the Sydney Powerhouse Museum model as well as some contemporary paintings (found on the net) as a guide. Also used Dan V's and Dfel's models ( in kit gallery). I found that the most useful resource was 'Rigging Period Ships' by Lennarth Petersson. It was most helpful as the rigging plan in the Caldercraft Supply seemed to be somewhat 'Dumbed Down' for beginners. Best of luck with her, I look forward to following your log. Steve -
Proxxon Scroll Saw Problems DSH 37090 UPDATED
hornet replied to bigcreekdad's topic in Modeling tools and Workshop Equipment
I have a number of Proxxon tools including a scroll saw. Haven' t had any issues yet. Proxxon tools come with a 2 year warranty. If it were me I would return it to the supplier rather than stuff around with it and perhaps void any warranty. -
Copper Plating help
hornet replied to Shazmira's topic in Building, Framing, Planking and plating a ships hull and deck
Hi Robbyn Check this one out. https://m.youtube.com/watch?v=9JWlSFzJ8uA Steve -
After watching that clip, I am glad I left my Victory unpainted
-
airbrush for wooden ship?
hornet replied to michael101's topic in Painting, finishing and weathering products and techniques
I agree with the above posts. I have a badger Model 200 single action brush. It is a little beauty. -
airbrush for wooden ship?
hornet replied to michael101's topic in Painting, finishing and weathering products and techniques
Michael, in addition to the advice given above I would suggest you go for a single action airbrush. I have both a single and double action brush and have been using both for a couple of years. The single action is usually cheaper to buy than the double action. It is easier to use and clean. It does a great job when painting small and large areas. I assume you will be using acrylic paints as they are much easier to clean up and dry a lot quicker. I use Admiralty paints exclusively. They give good coverage, are authentic colours and can be thinned with water for use in an airbrush. My recent build, HMB Supply (in my gallery) was almost completely painted using a single action airbrush and Admiralty Paints. Cheers Steve -
Proxxon TG125 Bench Disk Sander
hornet replied to pompey2's topic in Modeling tools and Workshop Equipment
Hi Nick. I have had one for about 18 months. It has done a lot of work in that time. I have found it to be robust, accurate and very quiet. Changing disc pads is easy and quick. You should be happy with your purchase if you decide to get one. Steve -
Long Term Paint Storage
hornet replied to mikiek's topic in Painting, finishing and weathering products and techniques
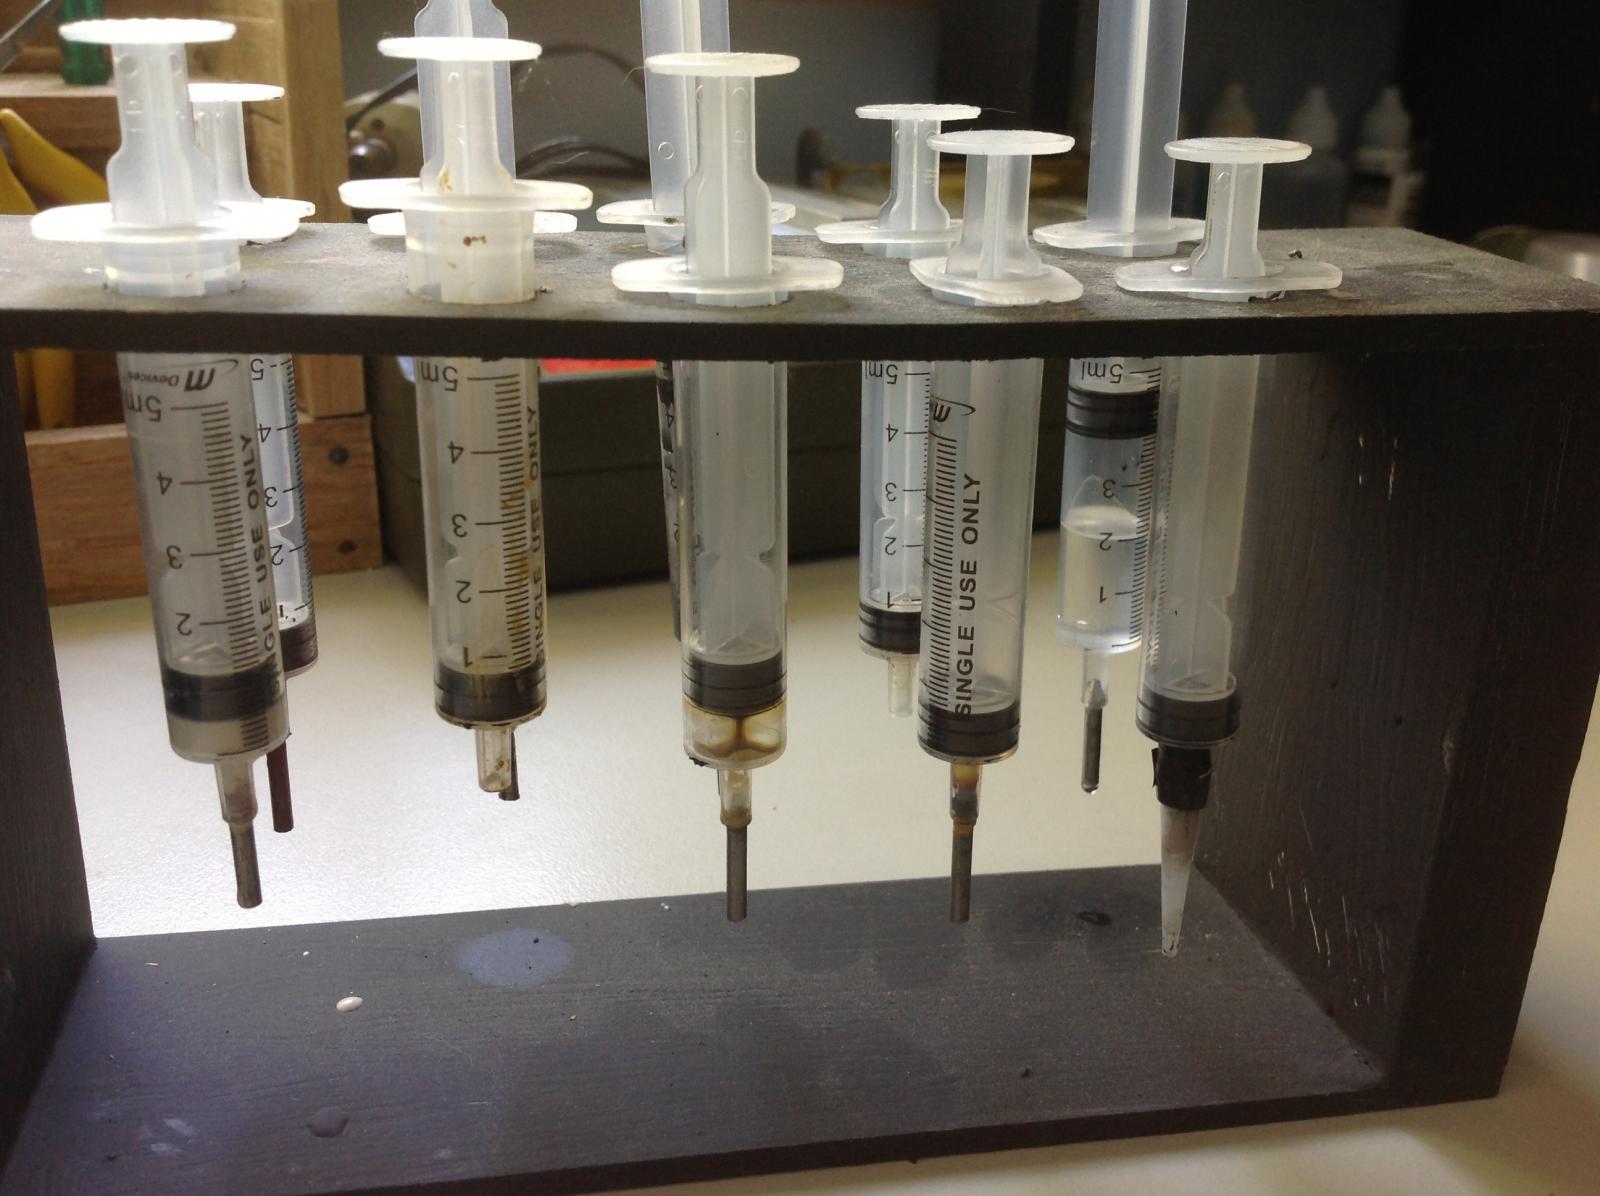
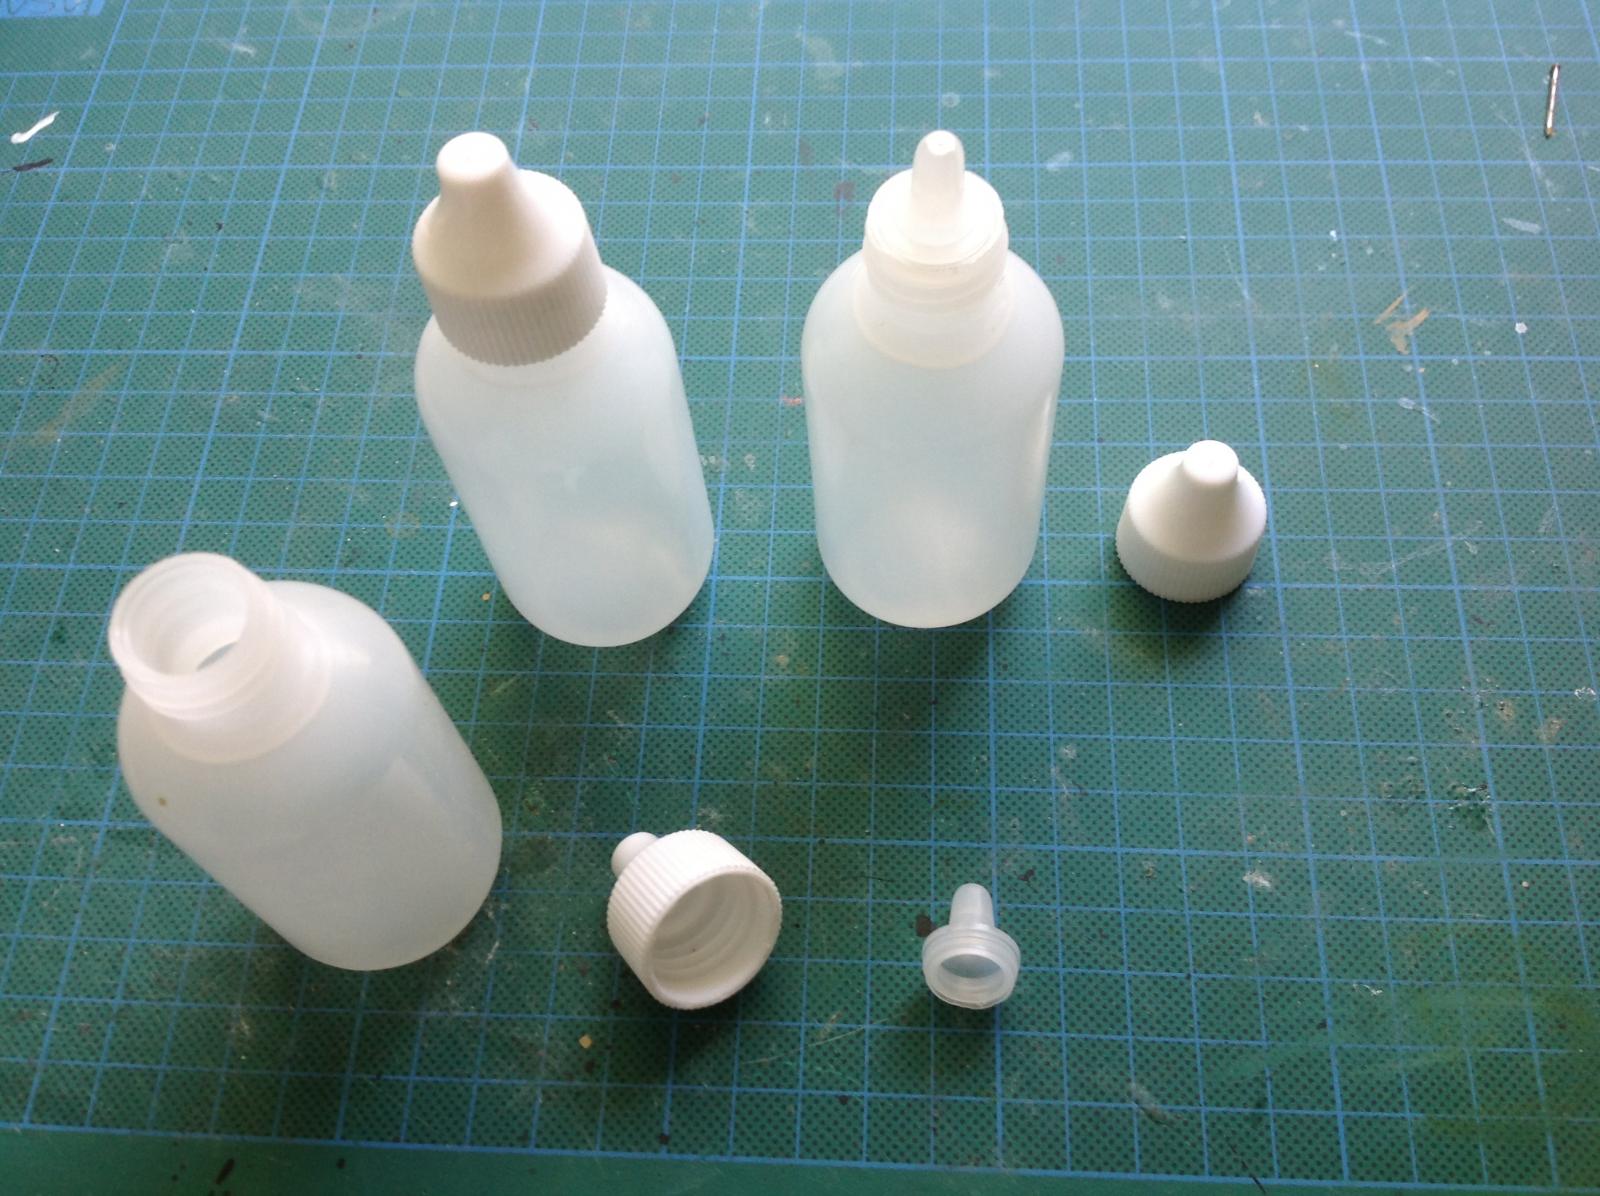
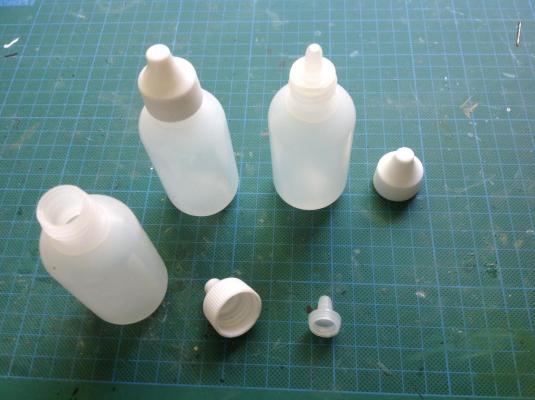
After mixing and using acrylic paint in my airbrush, I store the surplus in syringes which I seal with the end of a nail. I have stored paint this way for many months. Syringes are available cheaply on eBay and I have made stands to store them. Being transparent makes it easy to determine the colour of the paint and being stored in a syringe makes it very easy and economical to reuse the paint. In addition, also available on eBay, are plastic bottles designed for storing acrylic paint for use in an airbrush. These are also quite economical to buy. Search airbrush supplies on eBay if interested.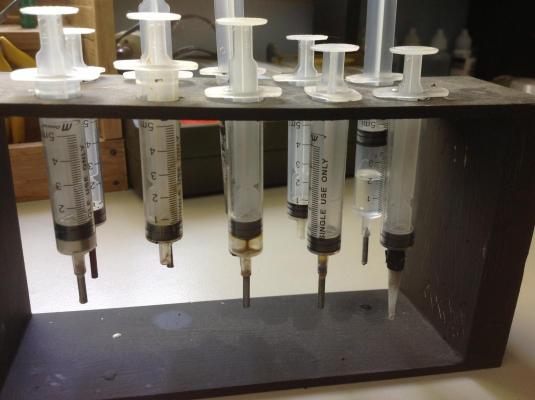
- 15 replies
-
- 11
-