HOLIDAY DONATION DRIVE - SUPPORT MSW - DO YOUR PART TO KEEP THIS GREAT FORUM GOING! (83 donations so far out of 49,000 members - C'mon guys!)
×


hornet
-
Posts
690 -
Joined
-
Last visited
Content Type
Profiles
Forums
Gallery
Events
Everything posted by hornet
-
 Because the decks are on three different levels, the thickness of the planks may not be an issue. However, because the hull planks are three times as thick as the deck planks you may find that things like scuppers and ports may not line up properly. In addition, if your decking timber is different from the timber used on the hull - for example hull planking - basswood and decking timber - Ash, then using two different timbers on your deck will give an inconsistent finish. You may also find that your deck planking s a different width to your hull planking. I think your best bet is remove the planking and redo it with the supplied deck planking. In the overall scheme of things it s not a big job to remove and replace with the correct timber.
 -
I suggest you slip a No 18 X acto chisel blade under them and remove them carefully. Resand and replank with the correct decking planks.
-
I have built he Corel version. I would not recommend it as the instructions are woeful. I am currently building the Caldercraft Supply and have the Caldercraft Bounty and Endeavour on the shelf Both instructions and fittings are very good - although I have done a lot of scratch work on the Supply. Timber used for the second layer of planking is of inconsistent quality but there is plenty of it. On the basis of my experience with these kits, if I were to build another Victory, I would seriously consider the Caldercraft version.
-
Double planking technique
hornet replied to Roubaix's topic in Building, Framing, Planking and plating a ships hull and deck
Hi Shaun. A while ago I posted a method of making planking screws using clothes pegs. They worked well for me. Check out the link to the thread if you are interested. http://modelshipworld.com/index.php/topic/3734-planking-screws-moved-by-moderator/ -
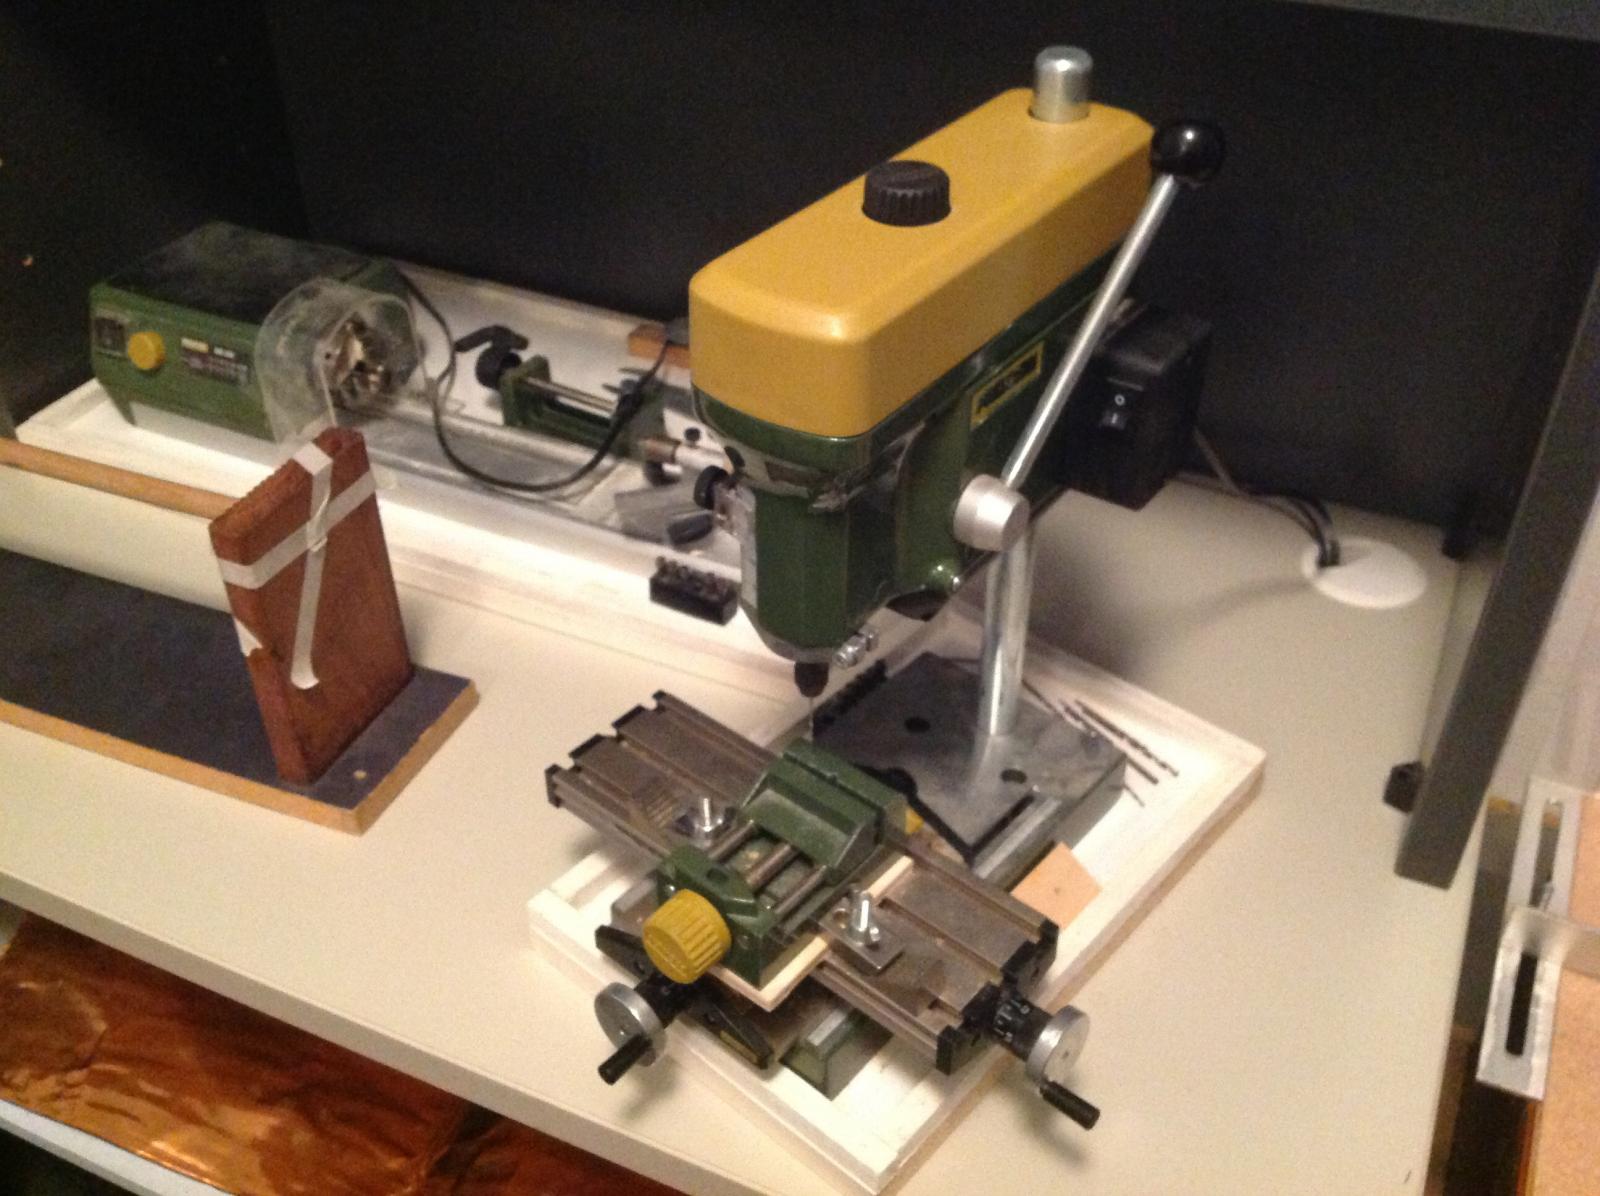
Looking for a Bench Top Drill Press
hornet replied to FlounderFillet5's topic in Modeling tools and Workshop Equipment
I'm with Grant. I too have the Proxxon drill press. Collets take very small diameter drill bits. I have teamed it up with the Proxxon XY table and it works very well.
- 31 replies
-
- 6
-

-
- Drill Press
- Microlux
- (and 1 more)
-
The Proxxon KS 230 is a bit more pricey, but still very reasonable. It is much more substantial than this 'toy' and does have safety features.
-
Daniel You are setting the 'love your ship' bar very, very high indeed. My ship is very jealous of your ship. Love the views. Steve
-
Check this thread for ideas. http://modelshipworld.com/index.php/topic/1310-making-rope-coils/?hl=%2Brope+%2Bcoiler#entry210607
-
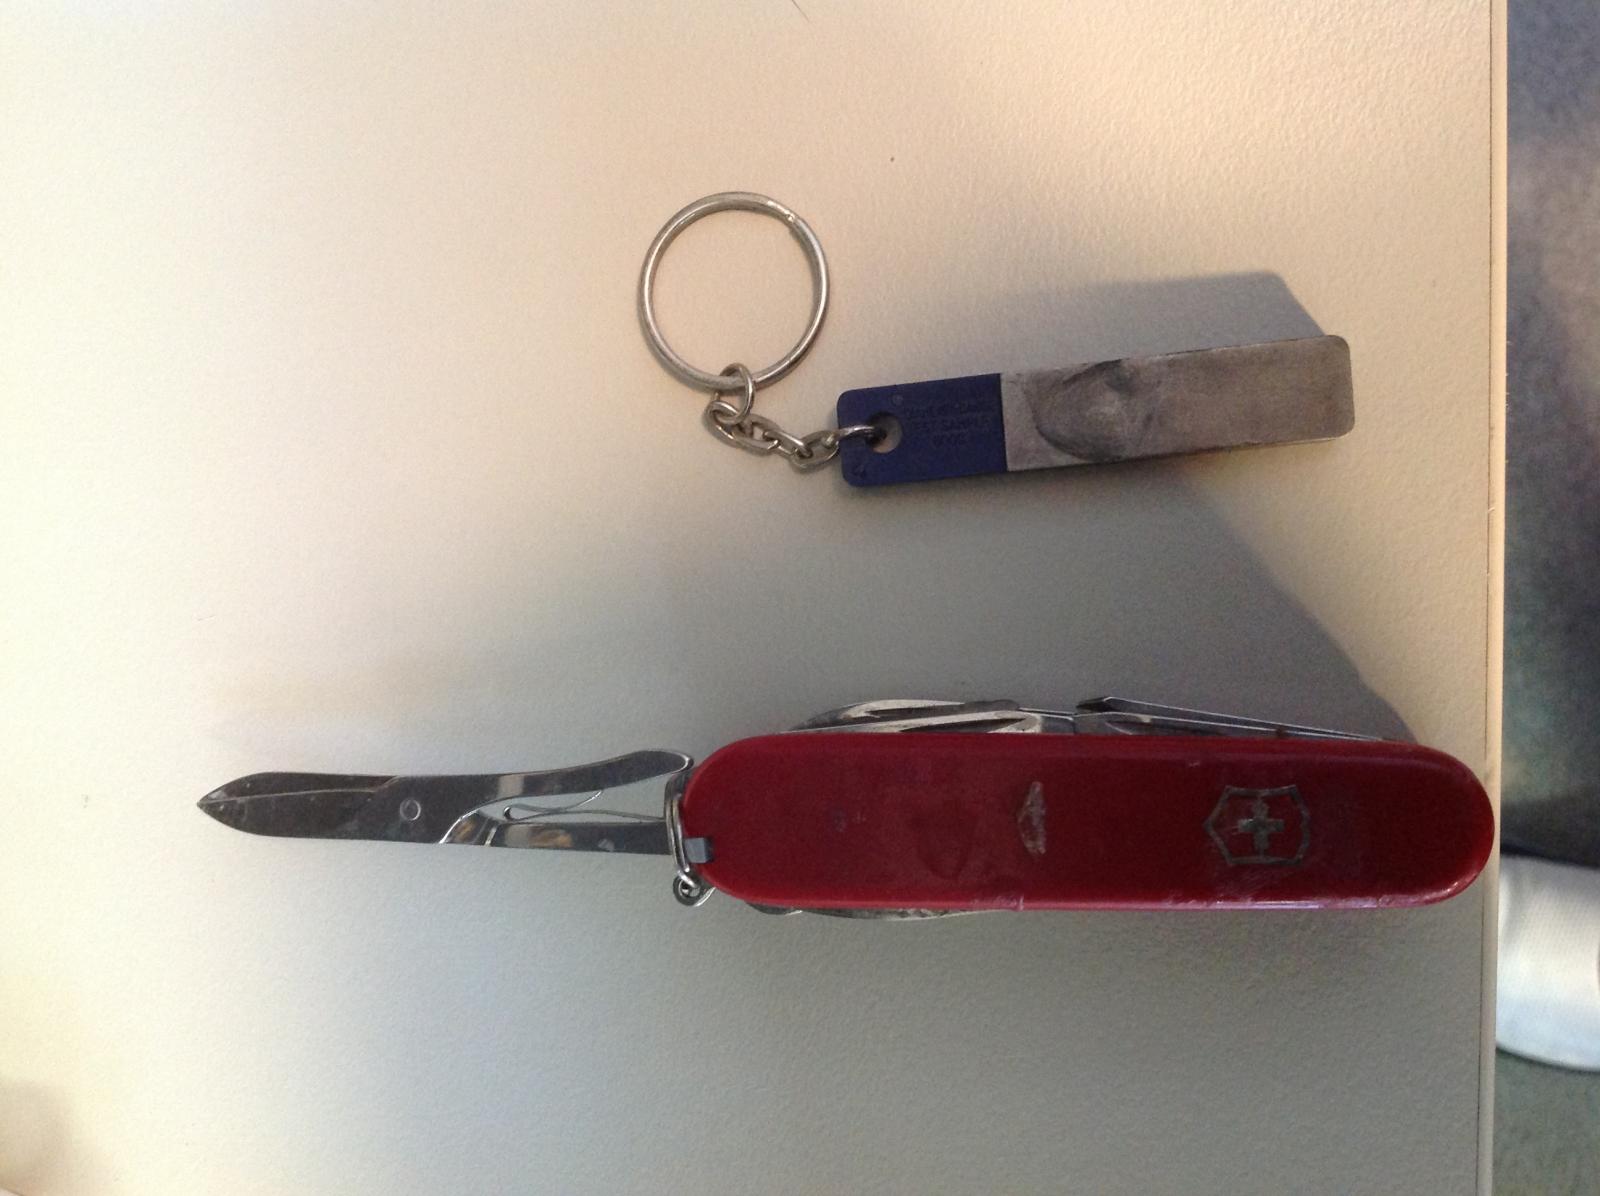
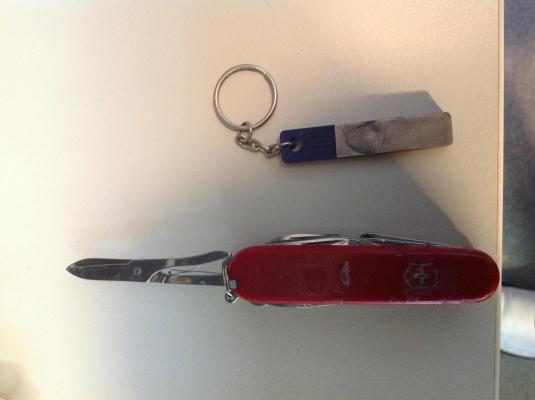
I find that the scissors from my Swiss Army knife work well. Good quality steel.I keep them sharp with a diamond sharpening stone.
-
I must say, some very, very talented people inhabit MSW! Can't wait to see this project completed!!
-
As someone who has been toying with the idea of buying a milling machine for quite a while, but being unsure if I would have enough use for it or not, I will be following this thread avidly. Keep the ideas coming.
-
This looks like a good idea, but I wonder if the rubber tubing will stand the test of time. Like most things that are rubber based, would it not start to perish or break down over time? A couple of my models are 30 years old and I am not sure this would last that long. I'll be sticking with copper or cardboard.
- 396 replies
-
- 5
-
-
- Idea
- Bright Idea
- (and 1 more)
-
Danny I remember following your restoration of an old HMS Victory model. It was a great job. I'm sure you will do this one justice as well. Cheers Steve
- 59 replies
-
- 4
-
-
- norske lowe
- billing boats
- (and 1 more)
-
Domanoff serving machine 2.0 or 2.5
hornet replied to CPT_D's topic in Modeling tools and Workshop Equipment
Another modification I made to the powered version was to replace the perspex brackets holding the spools with ones I bent up from some scrap aluminium. I found that the perspex ones flexed too much for my liking and I had difficulty getting them to hold the spool firmly enough. The aluminium ones fixed the problem.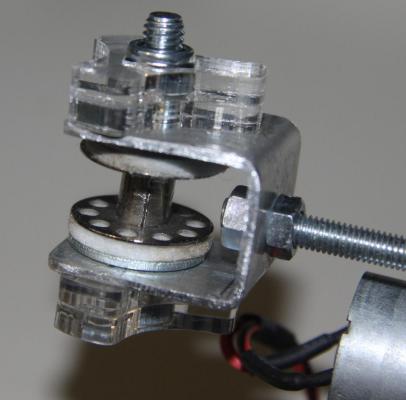
-
Domanoff serving machine 2.0 or 2.5
hornet replied to CPT_D's topic in Modeling tools and Workshop Equipment
I agree with Brian, although I did make an addition to mine. Check it out on the link below. Modification to Serving Machine -
Gluing 101
hornet replied to CPT_D's topic in Building, Framing, Planking and plating a ships hull and deck
I made up a simple but effective scraper for removing excess glue using a reversed No 11 blade. See link below. http://modelshipworld.com/index.php/topic/4679-the-kit-bashers-guide-to-the-galaxy/page-6 -
Congratulations on finishing her Brian. Glad to see you finally got those shrouds and ratlines under control. Best wishes with the Bounty. Steve.
- 75 replies
-
- 2
-
-
- Caldercraft
- Supply
- (and 1 more)
-
Gluing 101
hornet replied to CPT_D's topic in Building, Framing, Planking and plating a ships hull and deck
For white glue I usually squeeze a blob onto the lid of a Chinese take way container. When it dries it just peels off and the lid is as good as new. I apply it with a small awl. I use CA glue very sparingly but when coppering a hull I turn a glass jar ( most of which have a concave bottom) upside down and squeeze a few drops in the middle. I use the old awl to apply this as well. -
Since most work is done with things that are very sharp, often pointy and sometimes even quite hot, I tend to avoid using the groin area as a workbench. I can do more than enough damage to my extremities even when my build is mounted in a vice on a workbench.
- 14 replies
-
- 11
-
-
Hi Danny I bought flags for a couple of previous builds from this mob. I was happy with the quality and like the fact that they accept Paypal. Delivery from the UK took a couple of weeks. I intend placing an order with them for my current build as well as the Bounty and Endeavour. Cheers Steve
-
According to its blurb it is supposed to work on pewter, brass, copper, solder, tin/lead alloys, lead , nickel and bronze. Pretty comprehensive claim I would say.
-
Sounds to me like you did everything right John, at least what you did is exactly what I do with Birchwood Casey. I have used Jax Green Patina solution with good results but cannot speak for Jax pewter Black as I have away been pleased with the results from Birchwood Casey and have not seen the need to try anything else. Have you tried the Jax Pewter Black on any other of the metals it is supposed to work with?
-
I use plastic see through counters and pushpins. See method on page one of following thread. http://modelshipworld.com/index.php/topic/1310-making-rope-coils/?hl=%2Bmaking+%2Brope+%2Bcoils
-
I agree with Jim. However, if you are not yet ready to have a go at a full scratch build, do what I've done and partially scratch build a kit. On my current build the Supply I have scratch built the windlass, capstan, ship's boat & oars, rudder (including gudgeons and pintels) tiller, stern facia and windows, skylight, railings to the stern deck, as well as tree nailing the deck, copper plating, modifying the gun carriages and adding water ways. I also made new anchor ropes because the ones that came with the kit were out of scale. I intend to modify the rigging using Peterson's book as a guide. There is a lot you can do to a bog standard kit to make it more interesting, challenging and authentic.
-
Working Comfortably on Upper Rigging
hornet replied to capnharv2's topic in Masting, rigging and sails
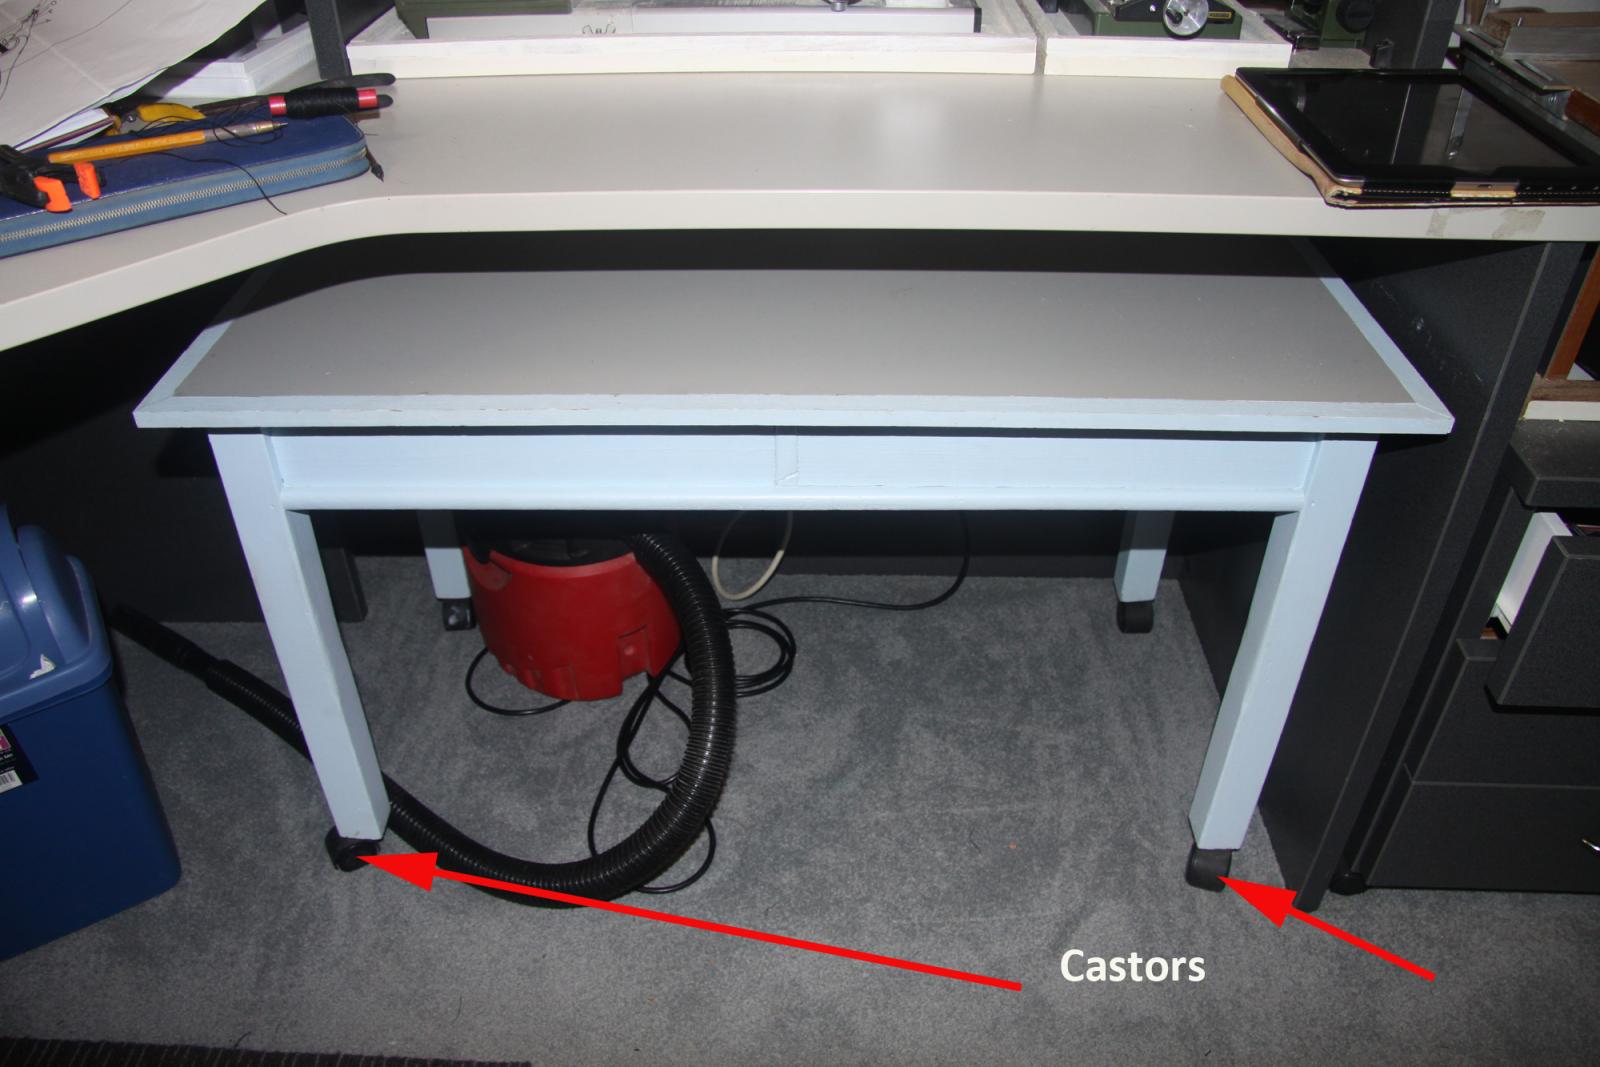
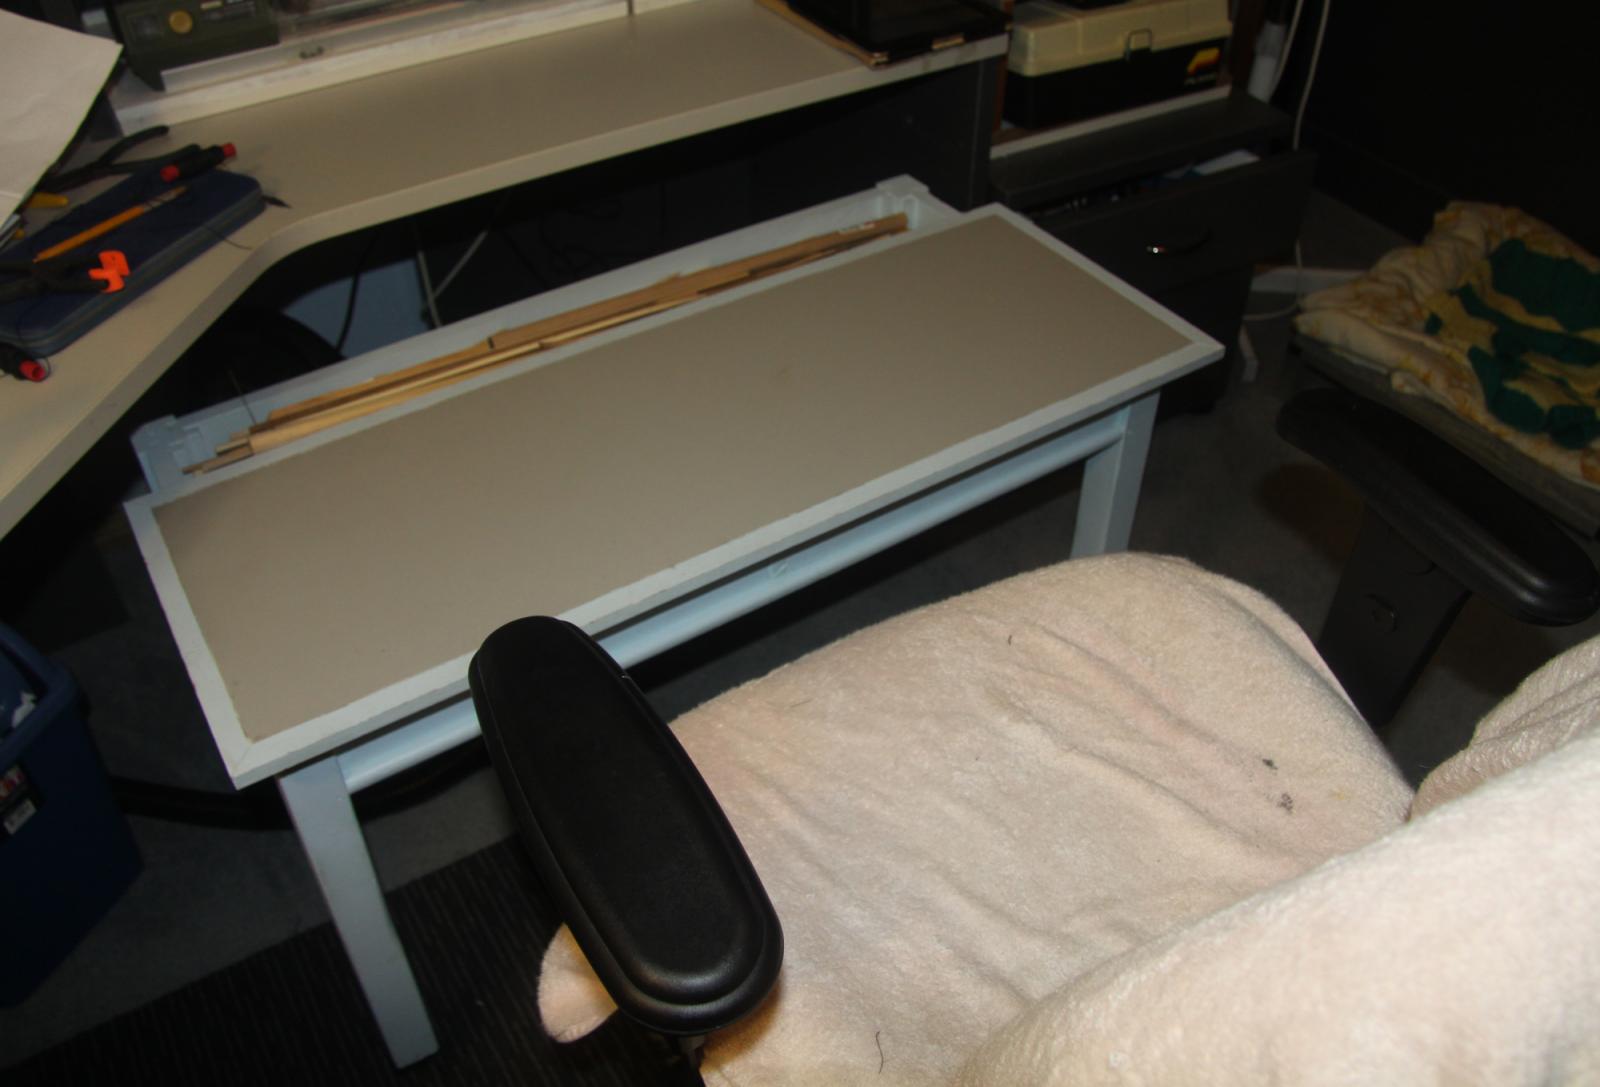
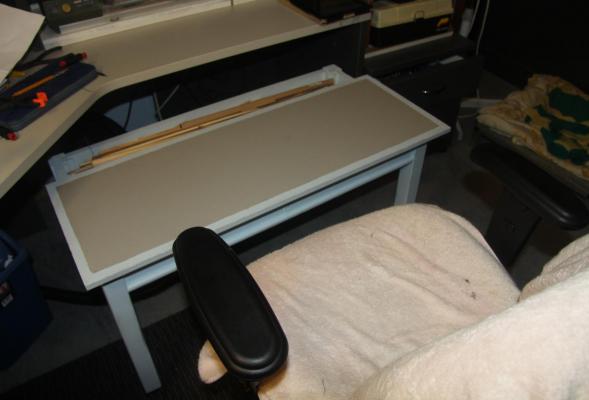
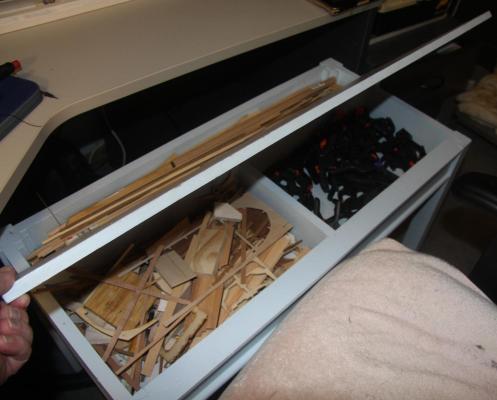
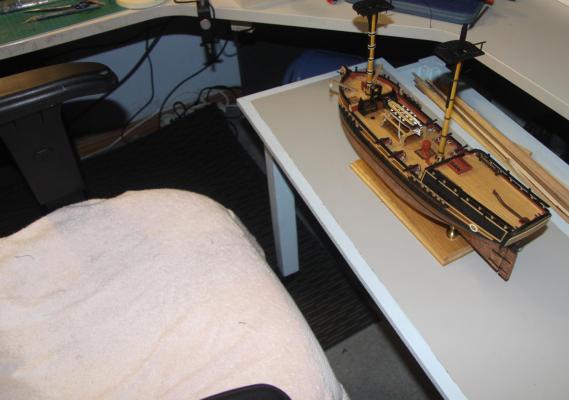
Hi Harvey I solved this problem by using an old wooden desk (a school desk in fact) I chopped the legs down to the size that I felt comfortable with and added castors. The desk lives under my main work desk, which is an L shaped office desk. When I want to work on rigging, I just roll it out. I also fitted this desk with a hinged top so I can store scrap wood and clamps in it. I left the back of the desk open and I store strips and dowel in it. Hope this may give you some ideas. Desk is stored under main desk - castors fitted Desk rolls out when needed for rigging or for extra workspace Desk lid lifts up for storing scrap timber and clamps. Rear section of desk for wood strips and dowel. For me the desk is at a comfortable height for working on upper rigging.
- 29 replies
-
- 12
-