HOLIDAY DONATION DRIVE - SUPPORT MSW - DO YOUR PART TO KEEP THIS GREAT FORUM GOING! (Only 20 donations so far - C'mon guys!)
×


Rick01
-
Posts
652 -
Joined
-
Last visited
Content Type
Profiles
Forums
Gallery
Events
Everything posted by Rick01
-
Given that we know the length of the deck and the binnacle may be seen on King's cutaway sketch, you just need a pair of dividers to obtain the height and width of the binnacle. Set the dividers at the measurement you want then walk them down the length of the deck, a quick division will give an approximation for you. As for breadth just go with something that looks proportional that will hold a compass and a light either side. Rick
- 241 replies
-
- 2
-

-
- mermaid
- modellers shipyard
- (and 1 more)
-
Any bowsprits I've seen sitting on rather than through the gunwales have sat in a shallow "fitted" scoop in the gunwales with the capping rail coming about half way up the diameter of the bowsprit. Everything appeared to be a close fit. hope this helps. Rick
- 241 replies
-
- 2
-
-
- mermaid
- modellers shipyard
- (and 1 more)
-
Sounds as if you fell foul of the same problem another couple of us did. Nowhere in the plans does it say that the bulwarks are around 1mm higher one end to the other, so if you install with the high end to the bows then you have this problem of the bowsprit sitting too high. I did have a "discussion" with Modellers Shipyard over this and they did say that this would be noted in their next print of the instructions but as far as I can tell it's never happened. Rick
- 241 replies
-
- 1
-
-
- mermaid
- modellers shipyard
- (and 1 more)
-
Ouch - I missed that completely when I looked at it. Rudder's not going to work too well that way round. Rick
-
I dropped mine down the depth of the cap rail and added my interpretation of the ring. Another point of interpretation in both sketches is the anchor cable/chain. It appears to me almost as if it's a chain rather than cable unless King was showing it as a thick cable by putting lines on it. I ended up with cable but still look at the pictures from time to time and wonder. Rick
-
Not Startrack by any chance? Around our way they throw the parcels into corners that you can't easily access! Rick
-
Not from what I've been able to see. It appears to be a complete hoop bolted to the stem with the bowsprit put through it. It's clearer on this build. https://modelshipworld.com/topic/3958-hm-colonial-cutter-mermaid-by-olliechristo-finished-modellers-shipyard/page/24/?tab=comments#comment-204180 Rick
-
Not from what I've been able to see. It appears to be a complete hoop bolted to the stem with the bowsprit put through it. Rick
- 241 replies
-
- 1
-
-
- mermaid
- modellers shipyard
- (and 1 more)
-
There's a little gizmo called (I think) a spectacle. Basically an iron hoop going round the bowsprit and bolted to the prow. You can just make it out on this contemporary model https://modelshipworld.com/gallery/image/10960-p1000982s/ Rick
- 241 replies
-
- 1
-
-
- mermaid
- modellers shipyard
- (and 1 more)
-
Should have done what I did. Threw my hands up in disgust over the use of ply, dug around in the workshop found a couple of nice off-cuts and crafted a nice solid stem, false keel and stern post. I did have two or three goes at it but I'm much happier with the result. Rick
-
Perfect example! Rick
-
That definitely needs doing. The kit plans bear little resemblance to the diagram King drew. Rick
-
I made 3 x .6mm holes in each knee, left off the belaying points in the instructions and used the pins instead - made more sense to me. I also occasionally look at it and wonder if I should have fitted a "horse" for the boom control instead of the fixed eyebolt the instructions use. There is plenty of evidence for the use of this for small vessels during this period. Check this one of mine, it's a slightly later build (1817) but a similar size vessel. https://modelshipworld.com/topic/15624-topsail-schooner-enterprize-by-rick01-scale-148-first-wooden-scratch-build-finished/page/2/ Rick
-
Suggestion - add a few holes for belaying pins in the knees, it's surprising how many belaying points are actually needed when you look at a full rigging plan. Otherwise looking good. Not the best shot but you can just make them out here (top right section). Don't forget the binnacle that you can also just make out in the original plan. Rick
- 241 replies
-
- 1
-
-
- mermaid
- modellers shipyard
- (and 1 more)
-
Looks really good Jay - nice solution to your problem and the cup burr has worked well. I've actually only had one 4 week period in my life without cats (with my surname it's not really surprising) and that was when we migrated to Aus. by ship. My latest addition is someone else's reject rescued from the local pound, his only problem is that he talks constantly if I'm not around so I'm in immediate trouble after spending any time in the workshop 1/ with my wife because of Benny; and 2/ With Benny for not being where he could find me! He's learnt pretty quickly where he shouldn't go but that doesn't stop the occasional foray just to show who's boss. 🙂 Rick
- 714 replies
-
- 2
-
-
- lady nelson
- victory models
- (and 1 more)
-
Having been bossed by 12 cats over my adult lifetime there's one thing I have learnt and that's the fact that you just have to go with the flow with these guys.They all seem to have their own ideas of fun, all with one common theme "pay attention to me NOW" 😉 Luckily my workshop is not in the house and they are banned from it for their own safety - but really I can't imagine life without one or two hanging about to boss me around. Rick
- 714 replies
-
- 2
-
-
- lady nelson
- victory models
- (and 1 more)
-
Don't start trying to clean up until you've finished the complete side. I found that going down that route I cleaned an area then planked some more then cleaned again - including the previously cleaned area!! A bir counter productive. 🙂 Rick
-
Shouldn't be a problem - you can display it one side one week, t'other side the next week. 😉 If you copper it will you also "weather" the copper plates? I feel that shiny copper plating may look a little odd . Rick
-
You may need to translate that Cabbie although I think Google will know the word. 😉 Rick
- 241 replies
-
- 1
-
-
- mermaid
- modellers shipyard
- (and 1 more)
-
You may find the walnut isn't flexible enough - it does tend to splinter easily. The decking timber however can almost be tied in knots if you soak it long enough. Rick
-
You'll need a lot of soaking in water and I'd use something like the .6 mm decking in 2 or 3 layers to handle it. Rick
- 241 replies
-
- 1
-
-
- mermaid
- modellers shipyard
- (and 1 more)
-
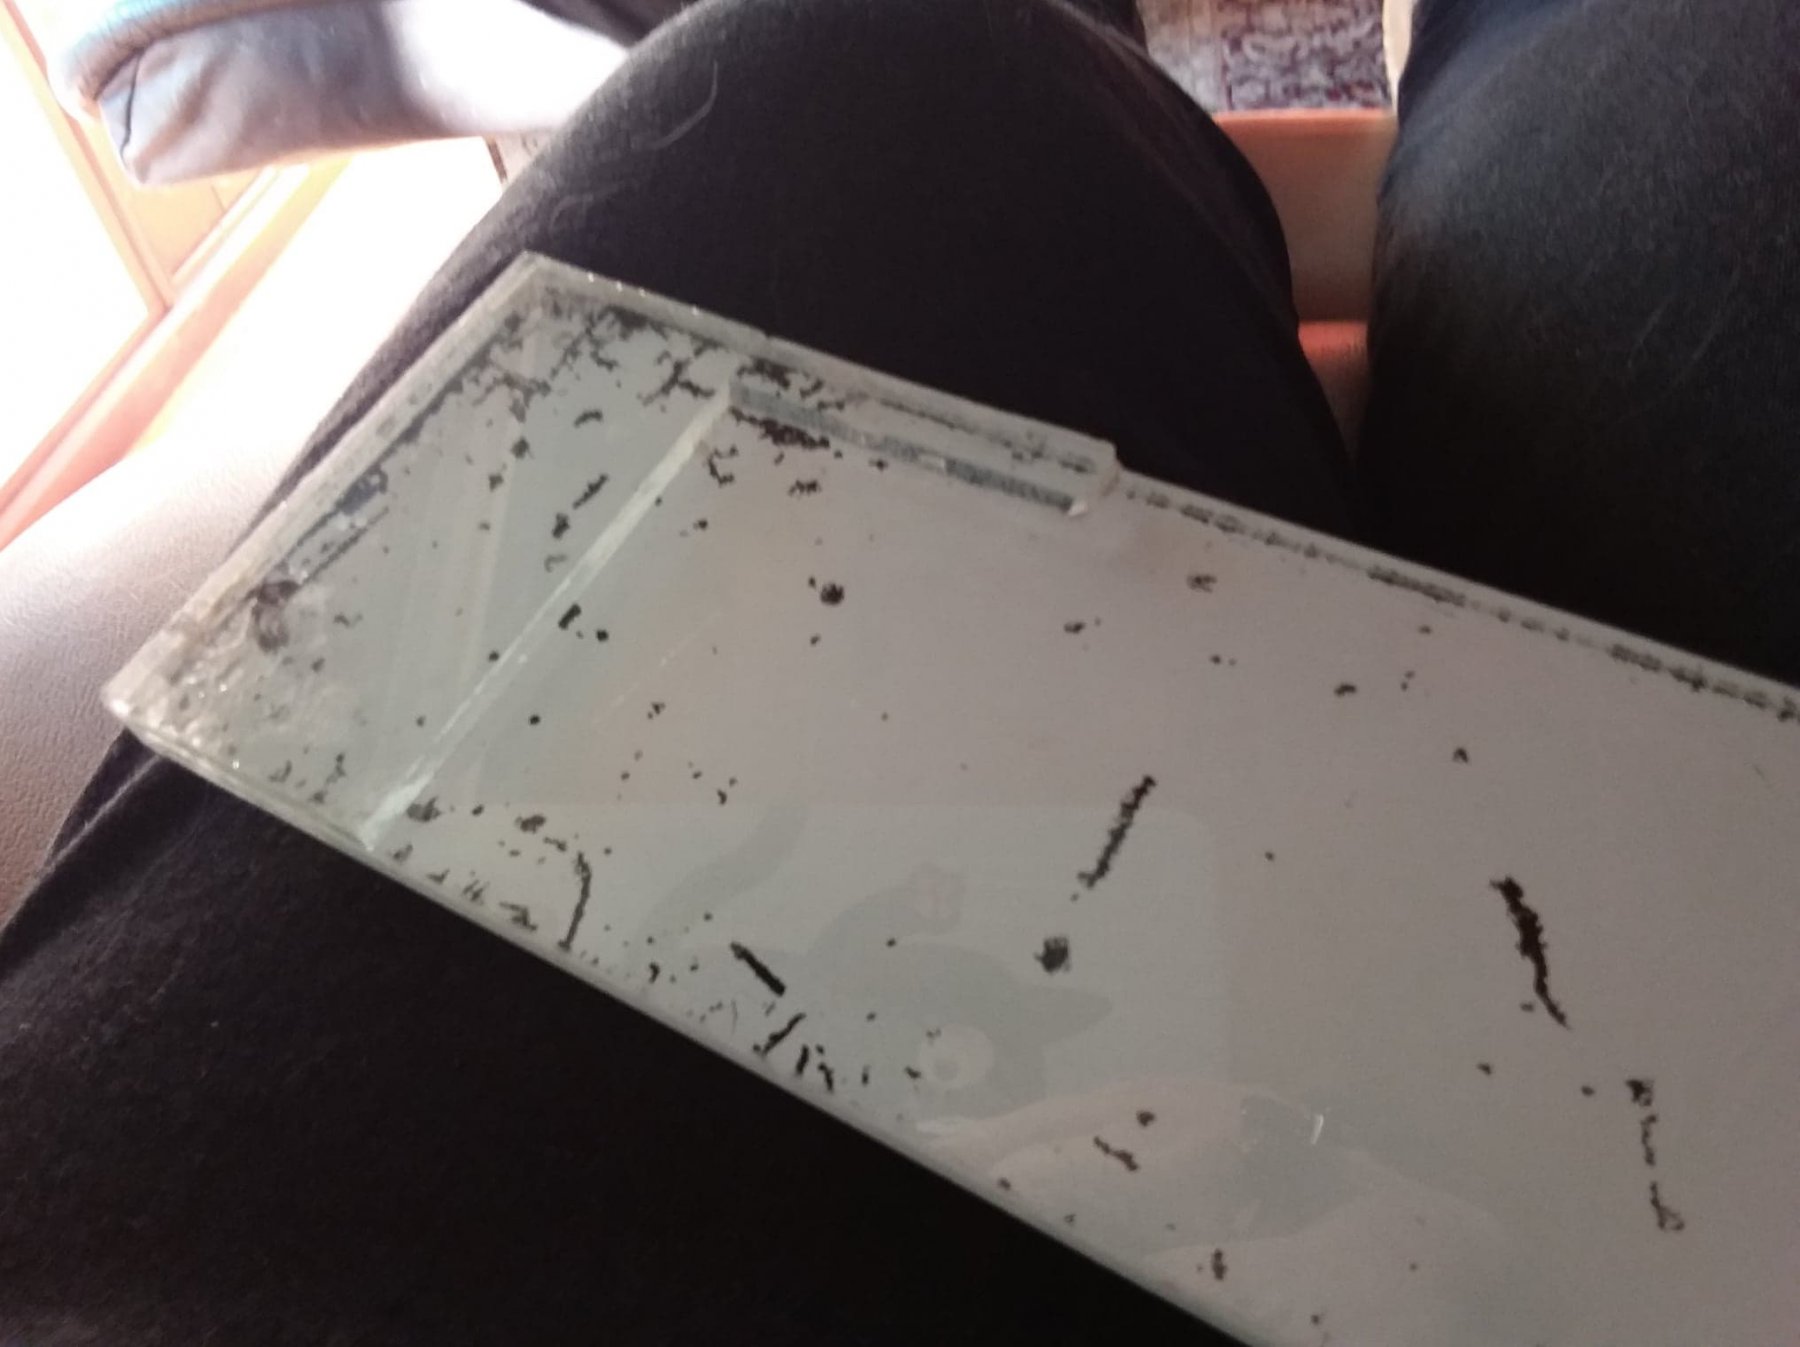
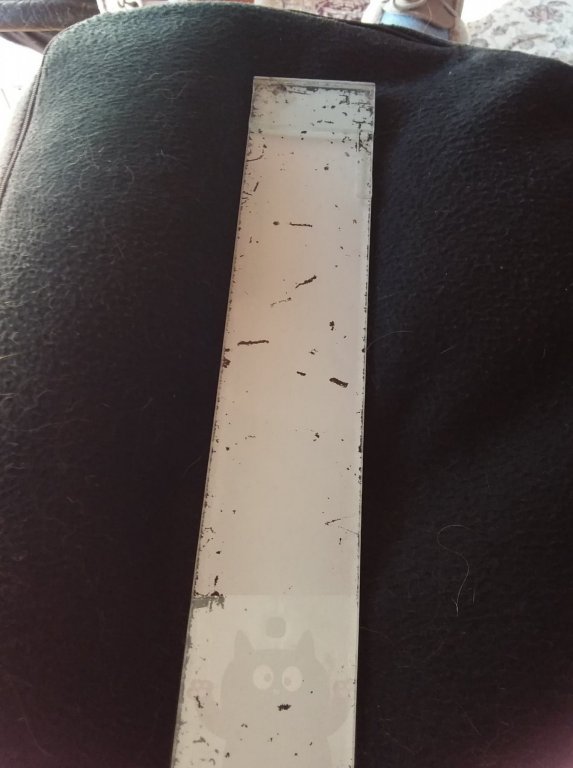
This is it. It's a bit left over from an old fish tank, 5mm glass 300 mm long and about 75mm wide. I occasionally spray the reverse white to help seeing what I'm doing on it which is why it looks a bit battered. This end has a couple of bits glued on at right angles, very useful when setting up things like hold/hatch covers. You can also use it to mix paints etc. and it cleans very easily using a razor blade as a scraper. Rick

-
I use a plate of glass when edge joining. Nice and flat and very easy to slide a razor blade along to free the planks when the glue sticks them down! You can also easily clean it up after and re-use. Rick