
John Fox III
-
Posts
118 -
Joined
-
Last visited
Content Type
Profiles
Forums
Gallery
Events
Everything posted by John Fox III
-
 Greetings, One doesn't have to use a funnel, a simple wooden plug in that shape would do. And that could be made to disassemble after the resin dries, with parts small enough to remove through the bottle neck. Anchor's A Weigh! John Fox III
- 185 replies
-
- 8
-

-
- Flying Dutchman
- Black pearl
- (and 2 more)
-
Greetings, What about using some sort of funnel inserted in the bottle, held in place while the clear water substitute is added. One could possibly then use something to create swirls and waves to the entire water surface? Anchor's A Weigh! John Fox III
- 185 replies
-
- 7
-
-
- Flying Dutchman
- Black pearl
- (and 2 more)
-
While no expert on this subject, I see one problem with covering plastic decking, and that is thickness of the deck. It could mis-align parts that are later attached to/through the deck. I routinely plank solid hull and framed miniatures with maple veneer that I sand down to just 0.010" thick, which might work. Anchor's A Weigh! John Fox III
-
Help for blocks with hoop required.
John Fox III replied to Tony28's topic in Masting, rigging and sails
Tony, If I understand it correctly, take a piece of rope thread and seize it around the block for a short length, cut off one end of the rope thread,then wrap the other end around a drill bit shank that matches the diameter of the brass rod, then seize it towards the block. Hope that is what will help you. Anchor's A Weigh! John Fox III -
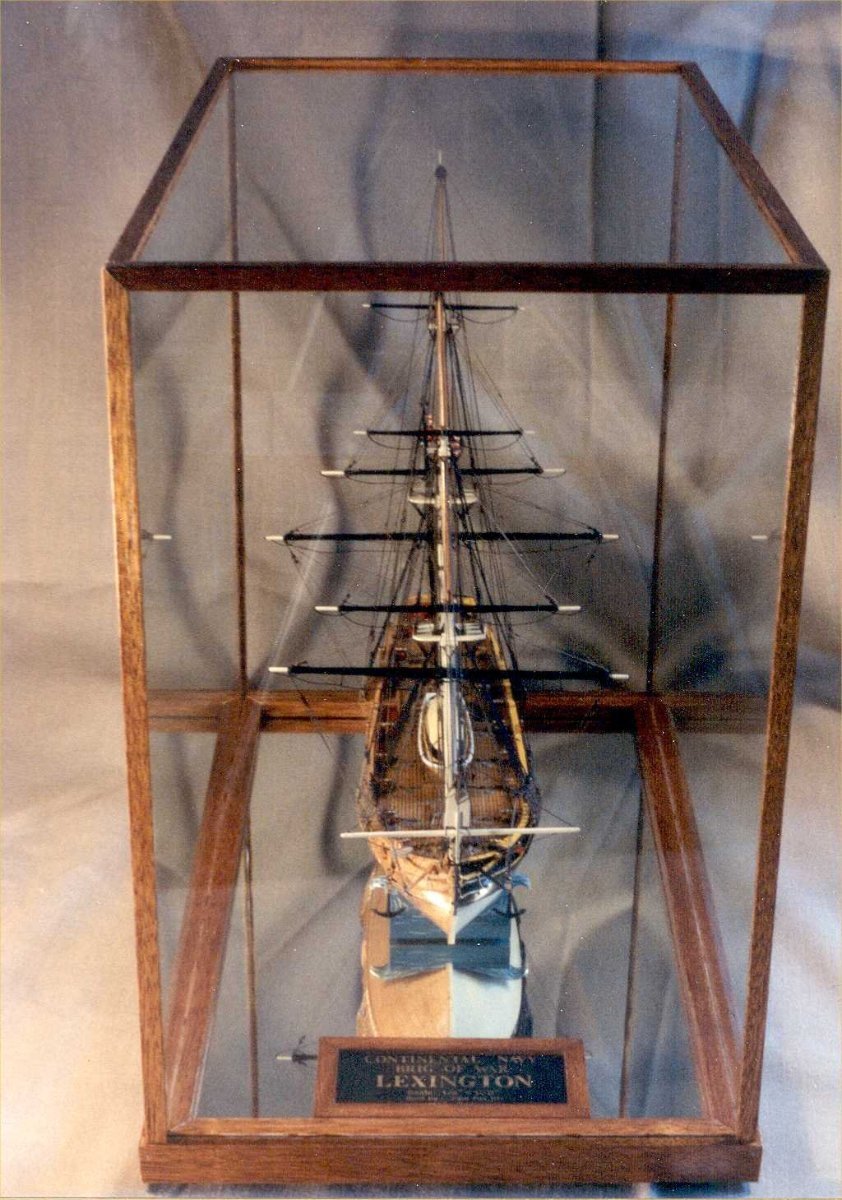
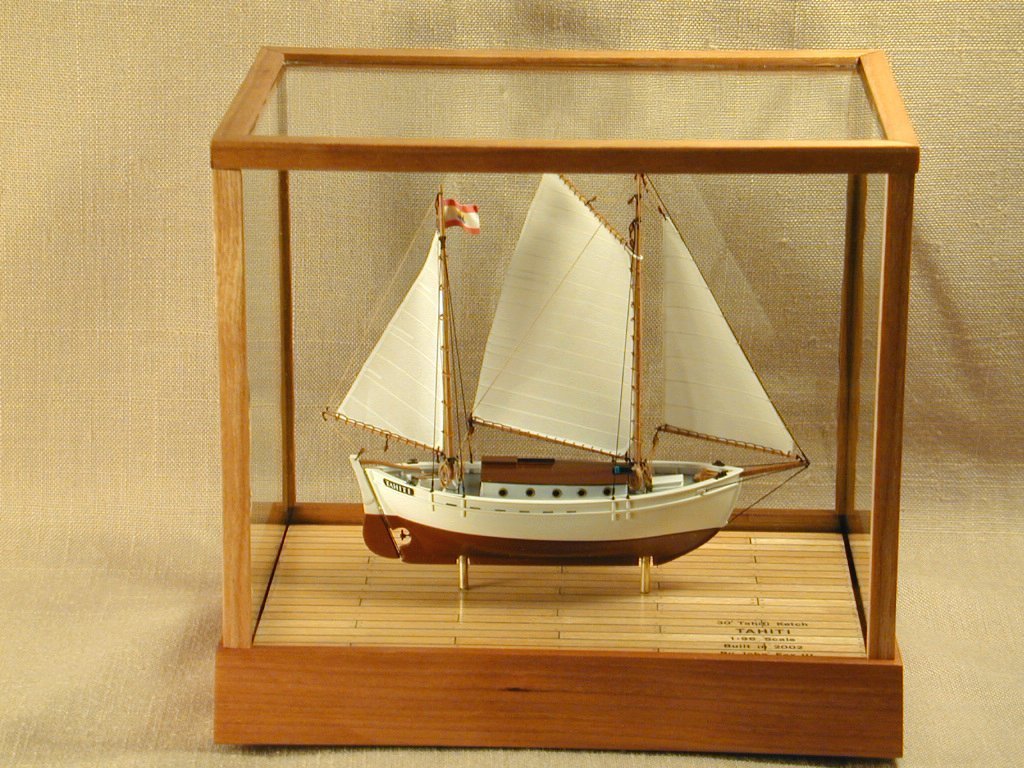
Greetings, Here are a few ideas I've used for case bases. First is a Lexington model in a glass case with a mirror for the bottom. I think it is sort of "airy" and shows the underside of the model too. The model was fastened to the base by scratching the mirror beneath the area with the wooden "waves" and then using epoxy to fasten them to the mirror. The second is a small scale model of a tahiti ketch model, with maple veneer "planking", minus any trunells, beneath the model. Anchor's A Weigh! John Fox III


-
Using a card-kit to ¨scratchbuild¨ a ship?
John Fox III replied to ubjs's topic in RC Kits & Scratch building
Greetings, Assuming the kit is a card model kit, then I would guess you could scan the pages and increase their size to meet the scale you desire. And use the results to make the various parts out of whatever material you wish. Anchor's A Weigh! John Fox III -
Greetings Glen, What a great idea and prosecution!! I had a ball following along, looked forward for each update, thanks! Anchor's A Weigh! John Fox III
- 290 replies
-
- 4
-

-
-
- Quinquereme
- Finished
- (and 1 more)
-
Greetings Glen, I enjoy your updates, often look forward to seeing them. When I've had to insert masts with rigging separate from other parts I usually wrap the mast/rigging in tissue paper. It helps keep things from getting too tangled, and is easily cut off later, though one has to be careful not to cut rigging when doing that. Anchor's A Weigh! John Fox III
- 290 replies
-
- 5
-
-
-
- Quinquereme
- Finished
- (and 1 more)
-
Greetings, Ask and ye shall see! <Grin> Here are some photos of construction and final carrnoades for my 1:200 scale model of Lawrence/Niagara. Anchor's A Weigh! John Fox III
-
Greetings Glen, All I can do is echo the others, an outstanding job with this model! Besides being extremely creative, you did an excellent job! Anchor's A Weigh! John
-
Greetings, For many years I've used an aquarium pump to air out my light bulbs and bottles, no need to refill a tank or run a major compressor. Anchor's A Weigh! John Fox III
-
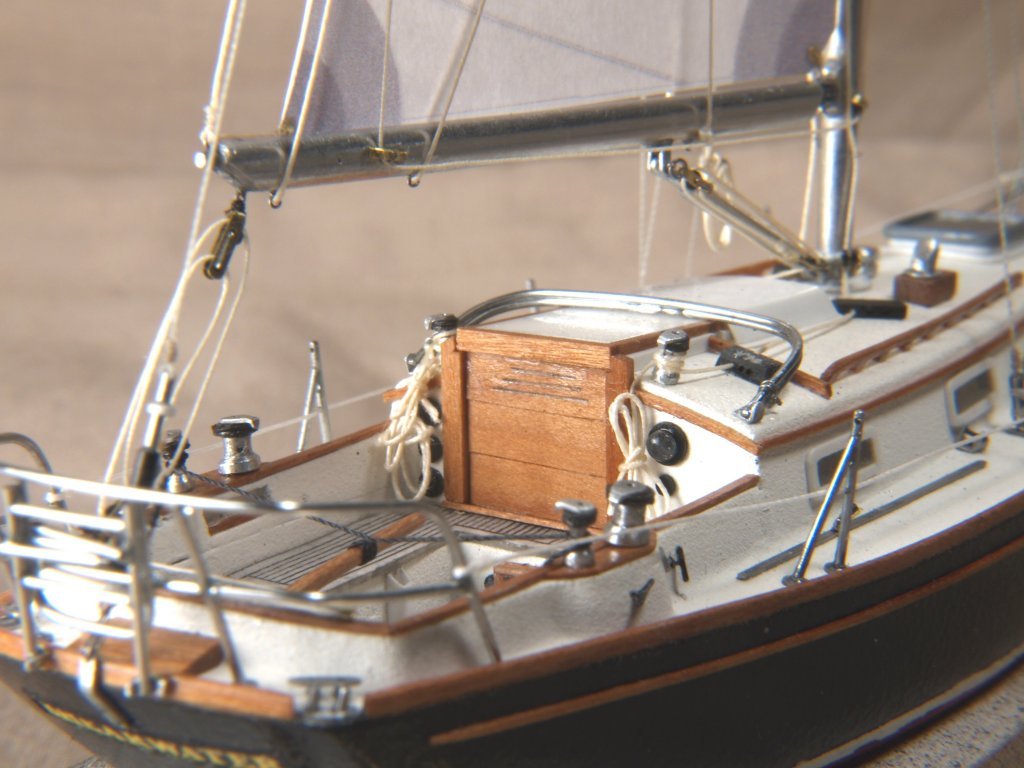
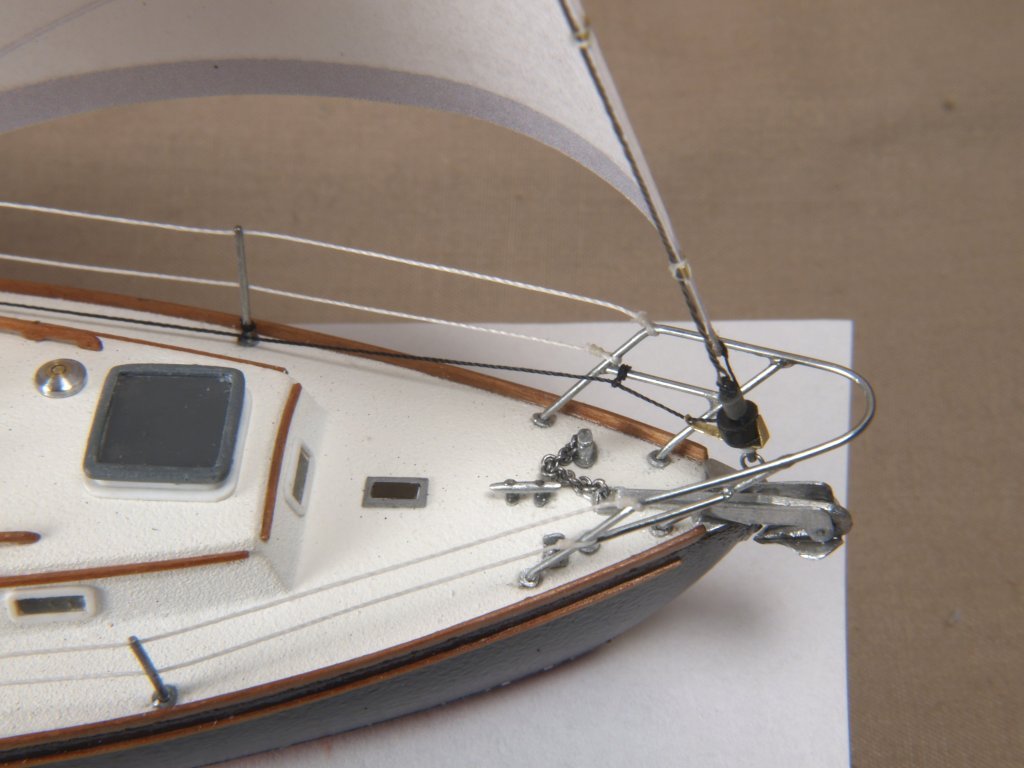
Greetings John, Depending on how much work you might want to do, I've used aluminum rod and tube to make railings, stanchions, cleats, ladders, masts and booms. One can find very small diameter tubing, and I also used both the aluminum wire and pour spouts from salt containers. The two images attached show my results using these materials. I used CA to glue the parts together. For the mast and boom I squeezed the tubing carefully, with another smaller brass tube inside it, to obtain the oval shape. Hope that helps! Anchor's A Weigh! John Fox III
-
Not to "bad mouth" Boudriot, however I purchased the ancre plans for BonHomme Richard from them of his drawings and found several errors. I later found in an NRJ article that he often made assumptions that were not correct as well. I was a draftsman for many years, before CAD, and know what Boudriot did. He re-used drawings already done for other vessels, without checking to make sure that the time periods of vessels matched, something that saves a lot of time when hand drafting. He also did not keep in mind that unlike the British, each yard building a ship was allowed to do things differently, there was no definitive plans for various ship parts that were adhered to. Not meaning to make your decisions more difficult, just pointing out facts I have learned. Anchor's A Weigh! John Fox III
-
Greetings Glen, Glad you found the info on my hidden hinges useful. That's what it's all about posting things here on MSW. It is indeed a wonderful place to find info and help. Anchor's A Weigh! John Fox III
- 194 replies
-
- 5
-
-
- Bottle
- Treasure Fleet
- (and 3 more)
-
Greetings George, Absolutely well done sir!! I make miniatures as well, and considering the materials you worked with you did an amazing job! Anchor's A Weigh! John Fox III
-
Greetings Allen. Perhaps you would find the following useful: just scroll down a bit and see how I made gratings using card stock. I've done similar gratings using maple veneer as well. Anchor's A Weigh! John Fox III
-
Greetings Rob, Welcome aboard from a fellow Wisonsinite! Anchor's A Weigh! John Fox III
-
Process for 3D printing of carronade
John Fox III replied to tkay11's topic in 3D-Printing and Laser-Cutting.
Thanks Tony! When you work on miniatures, especially ship in bottle or light bulb models, you learn to think outside the box. Anchor's A Weigh! John Fox III -
Process for 3D printing of carronade
John Fox III replied to tkay11's topic in 3D-Printing and Laser-Cutting.
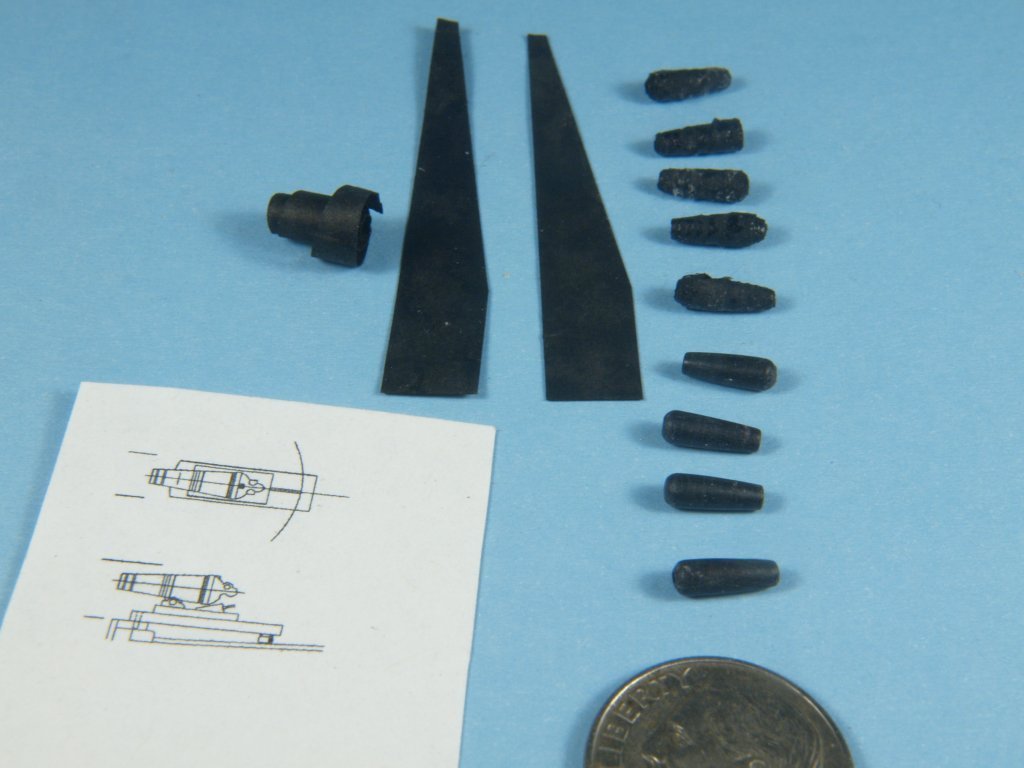
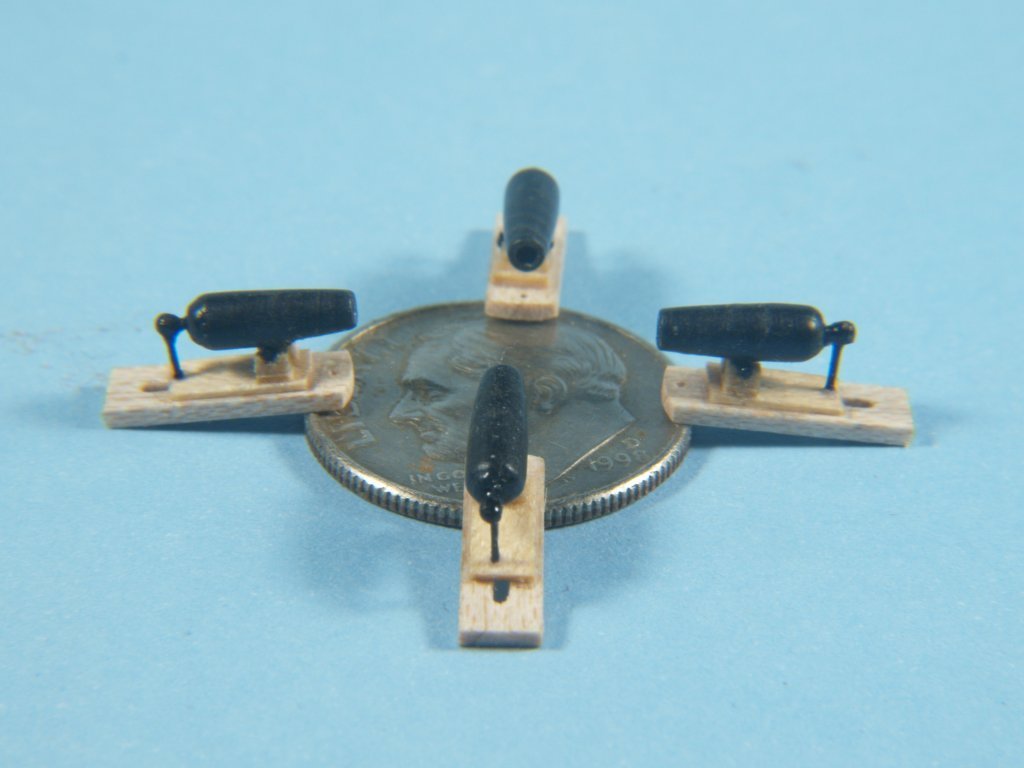
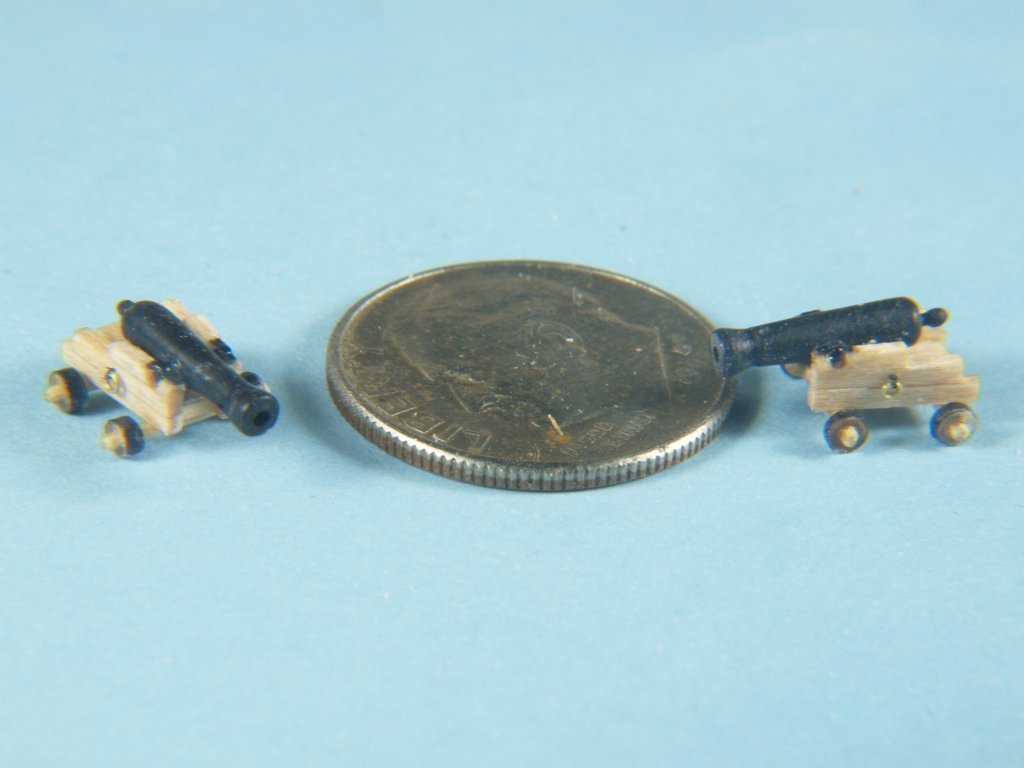
Greetings Tony & All, Thanks for the kind words about my work Tony. The photos and text below show my process. Ready to answer any questions, if necessary. The following photos show how I made the 12 pdr. cannon and 32 pdr. carronades for my 1:200 scale model of Niagara/Lawrence. Both barrels are made from paper tightly rolled around an appropriate sized drill bit shank, saturated with CA glue, then sanded to shape. Before sanding I used a fine wire to insert CA glue into the barrel, to harden the inside. After hardening the inside I used the drill to clear it out. To perform the sanding I slid the barrel onto a piece of drawn down bamboo that fit fairly tightly into it, swapping ends of the barrel to shape the whole thing. It did take multiple applications of the glue, as it could only penetrate one or two layers of the rolled paper. I used standard inkjet printer paper, soaked in ink jet ink, I had a spare cartridge for my printer so used that for the ink. The carraiges and slides were made from maple. Anchor's A Weigh! John Fox III -
Process for 3D printing of carronade
John Fox III replied to tkay11's topic in 3D-Printing and Laser-Cutting.
Greetings Tony, Are you dead set on 3D printing your carronades? I have made the 18 carronades for a 1:200 scale model out of paper and thin pieces of maple wood. The photo shows the final result, minus the trucks. If it is of interest I have a series of photos I could post showing the steps to create them. Anchor's A Weigh! John Fox III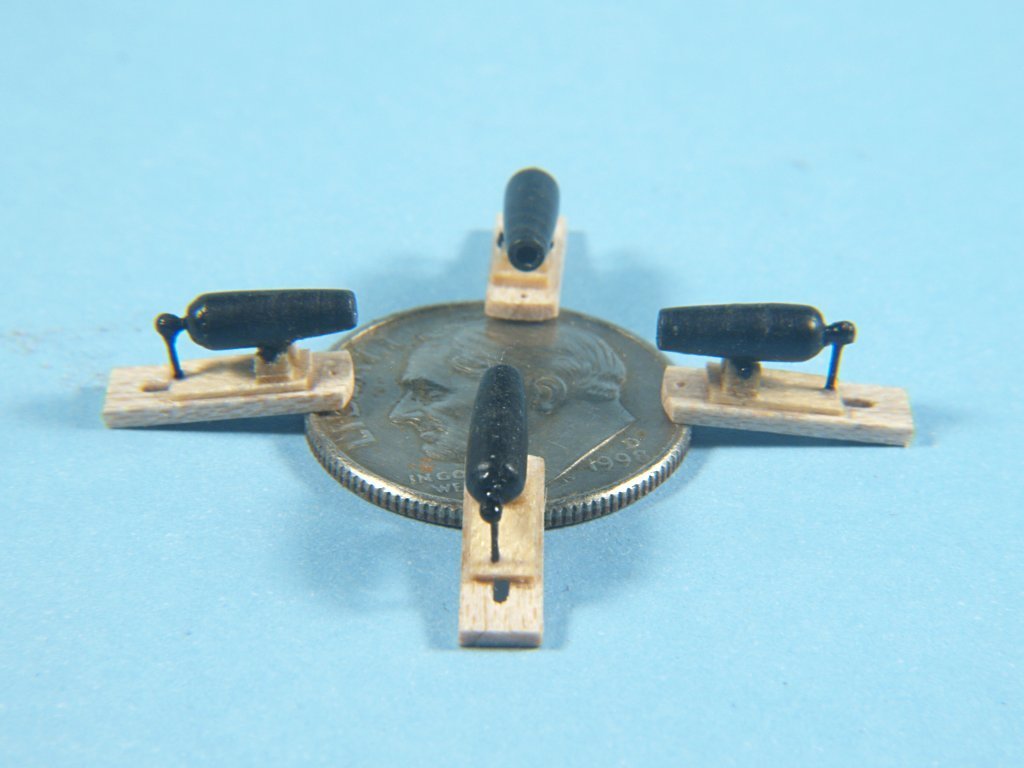
-
Wow! Very nicely done! Anchor's A Weigh! John Fox III
- 15 replies
-
- 1
-
-
- Bluejacket Shipcrafters
- J 24
- (and 1 more)
-
Greetings Glen, I agree with everyone else! Definitely a terrific ship in bottle model and the display technique is one to be admired! Anchor's A Weigh! John Fox III
- 177 replies
-
- 3
-
-
-
- Independence
- bottle
- (and 1 more)
-
Tapering of yards and yard arms
John Fox III replied to DaveBaxt's topic in Masting, rigging and sails
Greetings Dave, Not sure exactly what era you might be thinking about, or the particular vessel in mind, but, at some point there could be sheaves near the yard ends, and in some cases that small portion of the "arm" might be a bit larger and square. I don't recall the specifics, but know I have seen that type of yardarm in my vast reading and plan inspecting. Anchor's A Weigh! John Fox III -
Greetings Pat, Thanks! I almost hate to say that I am proud of my work. Anchor's A Weigh! John Fox III
-
Greetings Glen, Thanks! There's a certain level of satisfaction that is hard to beat when I get one right. Anchor's A Weigh! John Fox III